In the spirit of my more recent posts where I cut to the chase and get straight down to business aka the recipe, here we go!
Note on the recipe: the focus here was on recreating umami flavors of the bolognese sauce mixed in with Parmesan cheese. So, what you’ll see is a lot of umami ingredients: tomatoes, mushrooms, and marmite.
(Please note that I still enjoy writing and cooking, but the pandemic had imposed some restrictions on how much writing I can do. I will try to stick to sharing the recipes as they come, and I hope you don’t mind the decreased quality of phots which I don’t have time to stage these days. So, unlike the photos, food remains yummy.)
Place a large frying pan over medium–high heat. Once the pan is hot add the oil and onions. Sautéfor 5 minutes, or until onionhave softened. Note that onions, garlic and mushrooms don’t need to be finely chopped, rough chop/slicing is ok.
Add garlic, stir well, and sauté for another 1-2 minutes.
Mix in the chili powder and marmite, then add the sliced mushrooms. Toss everything to combine and sauté for another 3-5 minutes, until mushrooms are done.
While onion, garlic and mushroom mix is cooking, crumble the tempeh into rough crumbles into the large food processor (you can also use a hand held blender stick, in which case crumble into a large mixing bowl).
Add the sautéed mix into the tempeh and process until finely chopped and mixed. Please note that the mix will be hot, so handle with care.
Pour the contents of one large can of crushed tomatoes into the same frying pan you used for sautéing and place over medium heat. Add the tempeh mix, and gently fold everything in and combine. Once it starts to bubble, tomato sauce will start to spray all over so cover with the lid to minimize splatter.
Cook for 10 minutes or so with occasional stirring.
Serve immediately over pasta (my latest discovery is lentil and chickpea pasta, including the spaghetti), and sprinkle with fresh basil and/or oregano. Enjoy!
I grew up eating pâté and loving it. Some pâté, on a piece of freshly baked bread with a glass of yogurt (yes, the liquid kind you drink like they do in Middle East!) was one of my go to breakfasts. And the pâté I ate was not a fancy French kind made with duck fat. At some point I learned that it was actually made of who know what, random bits and pieces of an animal all ground up. Whether you eat meat or not, I hope we can all agree that that’s pretty unappetizing when you think about it!
But: if you don’t think about it and just go with your taste buds, pâtés are really tasty. They are full of umami, savory flavors that we all crave, they are silky and smooth, they are nicely spreadable, and they are an excellent add-on to a nice piece of bread. So, how can we re-create the perfect savoriness with just a small number of ingredients, and make a healthy and satisfying pâté that will keep you coming back for more?
Well, we start with mushrooms, the well-known source of umami. You can use white button mushrooms here or baby bella (cremini) mushrooms as well. I do not recommend some of the mushrooms that have distinct flavors, like shiitakes; however, other mild mushrooms may work. Still, white button mushrooms are readily available, affordable and work!
Another important umami component is tomato paste. Here, you can use any tomato paste you have on hand and you can adjust the amount – anywhere between a tablespoon or two will do the trick.
To make the dip smooth and rich in protein, I recommend adding canned beans. White beans work best (cannellini, great Northern or navy), but any other variety will probably be OK. If you cook your own beans, I recommend that you keep them slightly undercooked for this application, or at least squeeze some of the excesses liquid out before blending to avoid ending with a pâté that’s more of a soup than a rich and dense spread.
The main flavoring agent here is Herbes de Provence, a mixture of dried herbs that usually includes thyme, rosemary, oregano, marjoram and lavender. I use Trader Joe’s version, and they carry it only as a seasonal item in the fall, but any other mix with the same name will do. Alternatively, you can add a pinch of thyme, rosemary, oregano, and other herbs (including basil) that you may have on hand.
Finally, what also adds a lot to this pâté is sautéing and caramelizing onions, garlic and mushrooms before blending everything together. This will help the flavor deepen and develop!
Looking for serving suggestions? You can use it as a spread or a dip, as a pizza “sauce” and topping (why not?), in your quesadillas (let’s be adventurous!), for your baked potatoes, or for any other dish where you feel the need to add rich, yet smooth flavors. Enjoy!
Nut-free Mushroom Pâté, via Eat the Vegan Rainbow
Mushroom Pâté
What you’ll need:
8 oz white button mushrooms (or cremini mushrooms if you like stronger mushroom flavor), sliced
1/2 large, white onion, diced
4 cloves garlic, sliced
2 tablespoons olive oil
2 tablespoons tomato paste
2 teaspoons Herbes de Provence
1 15 oz (425 g) can white beans
Salt to taste
What you’ll do:
Place a large sauté pan over medium high heat. Heat up than add the oil and onions. Sauté for 2-3 minutes, then add the garlic. Let garlic start to release its aroma – this usually takes a minute.
Add the mushrooms and , increase the heat to high, mix well and sauté until mushrooms are browned. This will take about 4-5 minutes.
While the mushrooms are cooking, drain and rinse the can of beans. Shake access water off and place into a food processor or a large mixing bowl if you rather use a stick blender (this is an incredibly useful kitchen gadget and it’s what I used here).
Pour the sautéed mushrooms over the beans and blend until smooth and combined. Leave in the refrigerator until ready to serve.
Serve cold as a spread for sandwiches or as a dip for chips or crackers. This pâté is excellent addition to your menu and it offers a healthy and humane alternative.
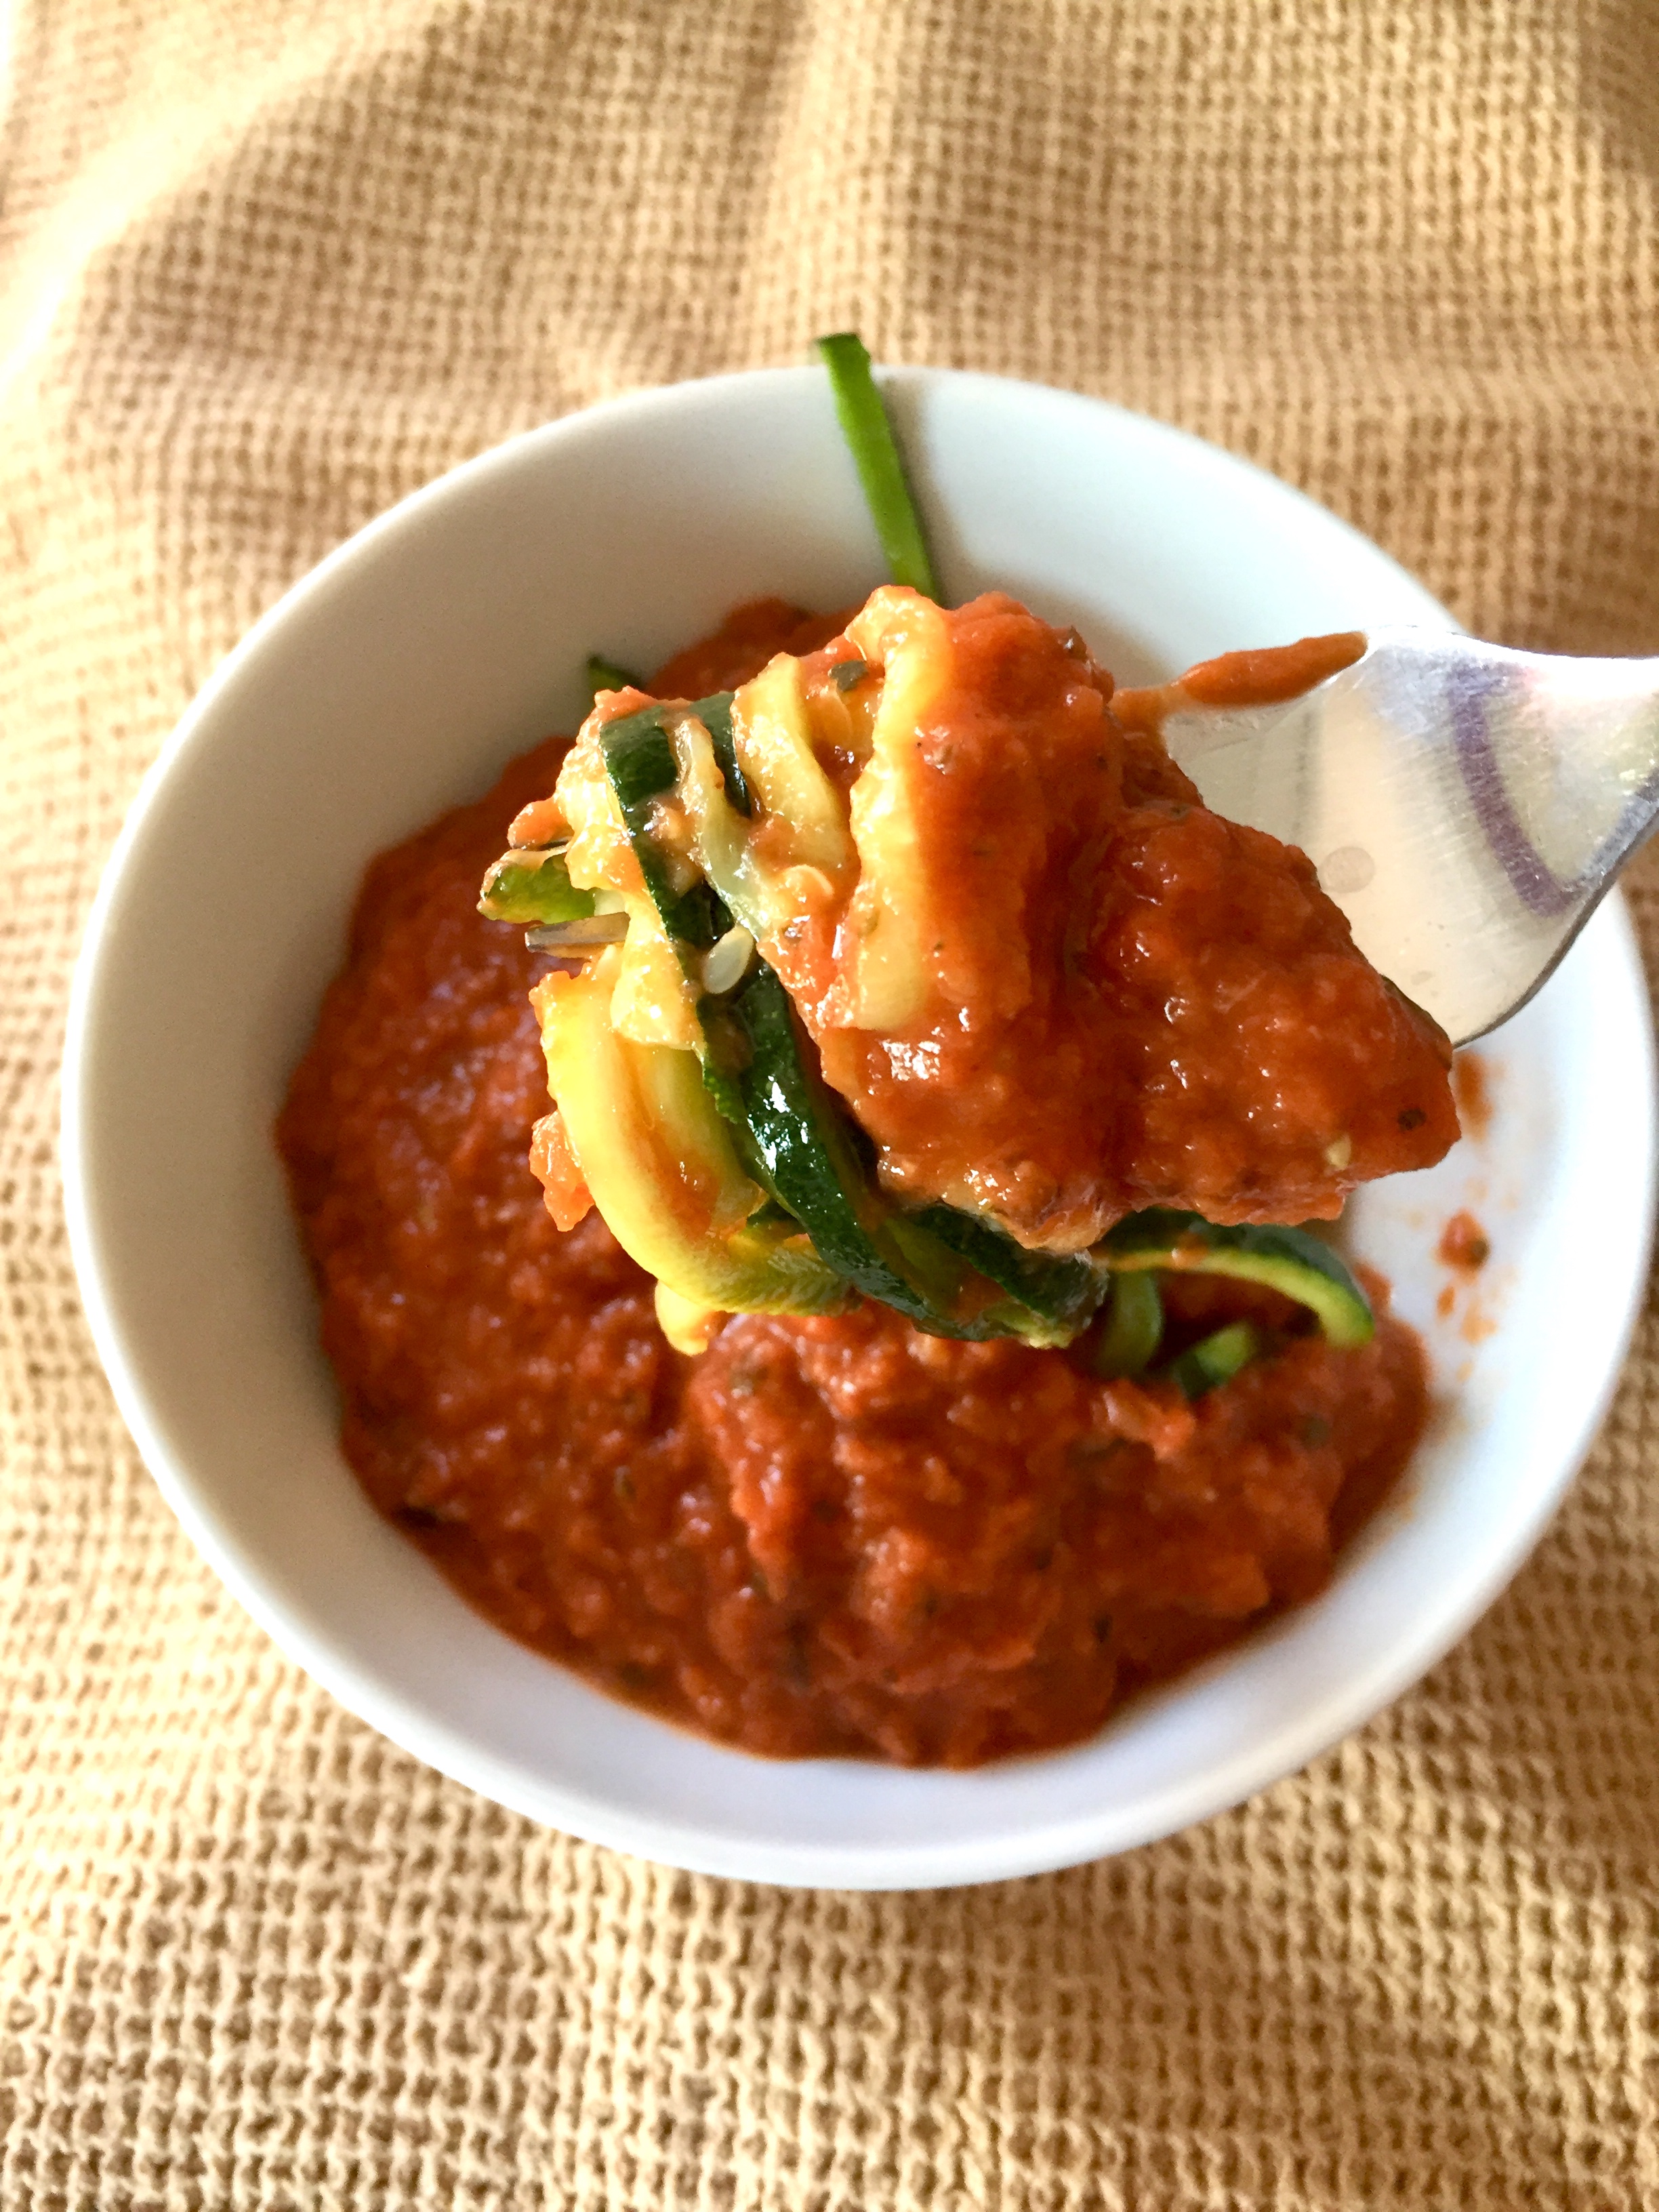
Easy Garden Vegetable Pasta Sauce, via Eat the Vegan Rainbow
It’s not quite summer yet, but it does not hurt to line up few new recipes to try when the vegetable gardens start to yield the wonderful, delicious produce. Of course, with modern day supermarkets, the produce in my Easy Garden Vegetable Pasta Sauce is on hand any time of the year!
The recipe is easy, because you only need a handful of ingredients: eggplant, zucchini, garlic, crushed tomatoes, olive oil, and a bit of salt, dried basil and dried oregano. You also need an ingredient that you may have hard time finding – pomegranate molasses. I found mine in a local Indian grocery store, and started experimenting with it recently. This molasses is thick and sticky, like the more common molasses made as a byproduct of refining sugar from sugar cane or sugar beets, but it is not sweet – actually it is quite tart. That’s why you will not find this molasses in many desserts, but you will in savory dishes.
If you are now thinking to yourself “I’n not buying yet another ingredient that I’ll never use again”, no worries – just use balsamic vinegar, especially the one that’s rich, sweet and dark. That will work just as well to add a bit of acidity and sweetness to the sauce.
Enjoy!
Easy Garden Vegetable Pasta Sauce, via Eat the Vegan Rainbow
Easy Garden Vegetable Pasta Sauce
What you’ll need:
1 eggplant, cubed
1 zucchini, cubed
3 cloves garlic, sliced
1 28 oz (800 g) can crushed tomatoes
2 tablespoons pomegranate molasses (or use balsamic vinegar)
1 teaspoon basil, dried
1/2 teaspoon oregano, dried
1/4 teaspoon salt
2 tablespoons olive oil
What you’ll do:
Place a sturdy pot (I like my Dutch oven) over a medium high heat. Add olive oil and garlic. Sauté for a minute, to allow garlic to start releasing its aroma.
Add the eggplant and zucchini, mix well and sauté for 10-15 minutes, until vegetables are fully cooked.
Mix in the molasses (or balsamic vinegar), and all the herbs (basil and oregano), then pour in the crushed tomatoes. Bring to simmer, cover with a lid, lower the heat down all the way, and let cook for another 10 minutes.
Using a stick blender or a regular kind, blend the sauce until rich and dense. Use on your favorite pasta, or spiraled vegetables, like zoodles, which are my personal favorite.
Roasted Asparagus and Spinach Dip, via Eat the Vegan Rainbow
Springtime is party time – I mean, after 6 months of winter we are finally seeing some sunshine and above freezing temperatures. And if you think I live in Alaska, think again – it’s the good ole New England and our snow just melted away two days ago!!!
Plus: since the next winter is just six months away, we are now all scrambling to have as many outdoor parties and get togethers as we can, to maximize the fun and the sun. These days, when it comes to parties good, rich dips are a necessity. Salsa and guacamole, many different types of hummus, including one of my favorites – the roasted beet hummus, and even jackfruit “crab” dip are all fantastic and versatile. All you need to do is bring couple of select dips out, and with some crackers (like these amazing seed crackers), or fresh bread, perhaps with some olives thrown in for good measure, and maybe dolmas (I have a thing for dolmas!), you will have an instant feast!
If you are looking for a dip the is a bit out of the ordinary, then look no further. This Roasted Asparagus and Spinach Dip has it all: charred roasted asparagus (you can grill them if you prefer), vibrant green spinach, loads of smoothness from the cashews, and subtle cheesiness from the nutritional yeast.
When you are using cashews to make vegan cheese, creams, sour cream or similar, it is best to use raw cashews and to soak them in cold water overnight – do this in the fridge, please! The soaking softens the tough nut and make cashews much easier to blend into smooth and silky consistency.
Depending on the type of blender you have you may want to start by adding liquids first, than thawed spinach (I find that using frozen spinach that has been thawed out and gently squeezed works well here), then asparagus, nutritional yeast, lemon juice and zest, and finally cashews that have been washed and drained. The stronger the blender, the smoother your dip can get. I like a bit of a texture in the dip, but it is up to you to decide how much blending makes sense based on your preference.
Enjoy this dip immediately, and although it can store for a day or two, you won’t need to worry about that – this dip will be long gone!!!
Roasted Asparagus and Spinach Dip
What you’ll need:
1 bunch of asparagus, trimmed (about 1 lbs (454 g))
2 cups frozen spinach
1 cup unsweetened, plain almond milk
1 cup cashews, soaked overnight, then drained and rinsed
Preheat oven to 425 F (220 C), or the grill to the same temperature.
Wash and trim the asparagus. Try to remove as much of the wooden part of stems, then spread the spears on the parchment paper lined baking sheet. Spray with cooking spray and roast for 20-30 minutes with occasional stirring. You can also grill the asparagus. Either way you are looking to cook the asparagus through while letting it caramelize and char.
Place all the ingredients into a blender. Nutritional yeast is an acquired taste and you may want to add just a bit (1 teaspoon or so) and check for taste before adding more. Blend until smooth, then serve with your favorite chips, pretzel sticks, bread… The color of this spread is fantastic, and it goes well with Easter, being green and fresh. Enjoy the spring!
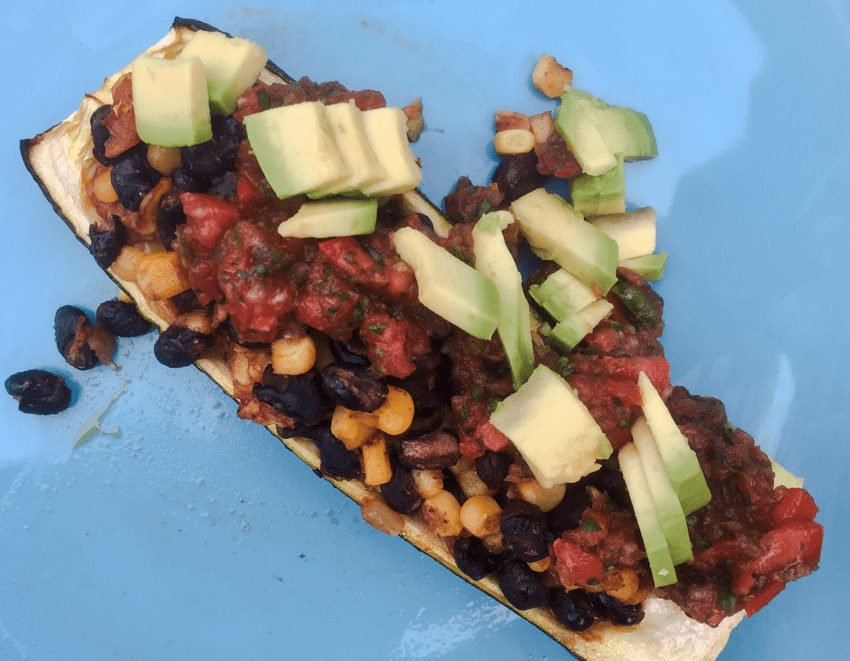
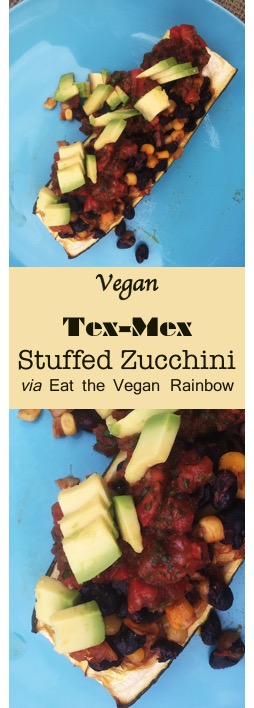
Tex-Mex Stuffed Zucchini with Homemade Salsa and Diced Avocado, via Eat the Vegan Rainbow
When life gives you zucchini, there are actually many things you can do with it, grilling and sautéing being my go-tos most of the time. But, doing same thing over over again, no matter how tasty and satisfying they are, does get old. When it comes to zucchini, I have been trying new things, like zucchini lasagna, and zucchini fruitcake – I did also give zucchini cheese a try but that one did not work for me, so I am putting my zucchini cheese making days behind me.
To me, perfect stuffing zucchini is about 8-9 in (20-25 cm) and what makes this the perfect size is the fact that it matches is the size of my 9 x 13 in (23 x 33 cm) baking dish! Plus, the zucchini in this size range is in the Goldilocks zone – not too big and not too small, yet just right for carrying a good amount of stuffing.
The best way to get the zucchini ready for stuffing is to wash them, cut the ends off (this step is actually optional, you could skip it and leave the ends on – this would give your dish a nice, rustic presentation at the end), then slice the zucchini lengthwise and scoop out the seeds. If the zucchini is old and seeds look well-formed and unappetizing, please feel free to discard them. But, if the inside looks fresh and soft, scoop it out into a bowl and put aside to use as a part of the stuffing.
Par-roasting zucchini
You may have heard about par-boiling, when you boil something only half way through before doing something else with it. Par-roasting is essentially the same thing, just using roasting as a strategy to get the nice, roasted and caramelized flavors going without too much oven time. This can come in handy during hot summer months, for example.
I use par-roasting when prepping most of my stuffed vegetables, be it mushrooms, peppers, eggplant, or zucchini. The method is simple: you turn your oven on high (425 F (220 C) or higher), line a baking sheet with some parchment paper, toss the veggies with some oil, or spray with some cooking spray, or skip the oil altogether if avoiding fat (you can also sprinkle salt on if using, I don’t because the stuffing is usually plenty salty for me), and let the veggies brown for 15 minutes or so, flipping them over once if needed to get them equally browned on both sides.
Why par-roasting?
Well, most stuffing I make is already cooked by the time all is said and done. So, the stuffing itself usually does not need any more cooking time – all it needs to do is go into the oven for 10 minutes or so to get nicely browned on top. Par-roasting is my way of brining whichever vegetable is supposed to hold the stuffing up to speed so that the vehicle is ready for the final oven ride, when the stuffing gets browned and the vehicle finishes baking while absorbing some of the flavors that seep from the stuffing. In this way everything gets harmonized and delicious.
My secret to a perfect (and easy) Tex-Mex flavor
The best way to get the tex-mix flavors going is to start with a good chili powder, then add cumin powder and smoked paprika. These three things combined make for nice smokiness with just a hint of heat, so even with the amount of chili powder I use here the heat will not be overpowering. Having said that, do adjust the chili powder to fit your preferences. Of course, having corn and black beans in this dish is also essential. Here, I used canned corn and canned beans, but you can definitely use frozen corn and cook your beans from scratch. If you are using frozen corn, 1-1/2 cups of frozen corn should be enough, and if you are cooking the beans, 1 cup dry beans will probably be plenty.
Easy homemade salsa
What also helps tex-mix flavors is topping the stuffed zucchini with some freshly made salsa. If you don’t have the time, store-bought is perfectly fine to use here, either freshly made or from a jar – you can pick your own favorite flavor and enjoy! But, if you do want a quick homemade salsa, then follow the instructions below. The main tip here is to cut the tomatoes lengthwise and scoop out the seeds. Don’t throw them out – you can mix them into the tex-mex stuffing! Here, almost everything goes into a food processor for easy chopping. I recommend leaving one cleaned out tomato aside, and dicing it finely by hand to give the final salsa a bit more texture. This salsa takes only a few minutes to make, and you will love the flavor of freshly chopped cilantro and freshly squeezed lime, so it is worth doing it from scratch.
Diced avocado for a final touch
Last but not least is the diced avocado. You actually don’t need the avocado if you can’t stomach it (I know there are some people out there that have trouble with avocado), but it does add a nice, smooth, rich and creamy flavor to the final dish. It’s like a five layer dip right there in your zucchini “boat”!
To pick the best avocado, get those that are still quite hard and then leave them next to some bananas on your kitchen counter for a day or so. The avocado will soften and then you can store it in the fridge until ready to use. In this way you will avoid getting avocados that are too bruised by all the squeezing and poking, and can buy extra avocados on sale and use them 5-7 days later.
After that PSA, back to the Tex-Mex Stuffed Zucchini – to finish the stuffed zucchini, squeeze some fresh lime juice over your avocado and sprinkle some fresh cilantro. If you are using homemade salsa you can skip the cilantro, but if you are using the store-bought then no cilantro-skipping is allowed!
Tex-Mex Stuffed Zucchini with Homemade Salsa and Diced Avocado
What you’ll need:
3 zucchini, washed but not peeled
1 15.25 oz (430 g) can yellow corn (whole kernel)
1 29 oz (820 g) can black beans
1 medium yellow onion, finely diced
4 cloves garlic, thinly sliced or crushed if you prefer
2 tablespoons vegetable oil
2 teaspoons chili powder
1 teaspoon cumin powder
1 teaspoon smoked paprika
Freshly ground black pepper and additional salt to taste!* (see Note)
1 avocado, finely diced, for garnish, optional
Fresh cilantro and freshly squeezed lime juice for topping (optional)
SIMPLE HOMEMADE SALSA
4 plum tomatoes, seeded, divided
1/4 – 1/2 jalapeño pepper, deseeded (or more, to taste)
1/4 onion or red onion
3 tablespoons tomato paste
1/2 cup fresh cilantro
1/2 lime, juice
1/4 teaspoon sat (more or less, to taste)
Cooking spray, salt, pepper
What you’ll do:
Preheat the oven to 425 F (220 C).
To make the salsa, cut the tomatoes lengthwise, the use a paring knife to take out the seeds and the middle of the tomato. Reserve the middles for the stuffing. Place all the ingredients, except one tomato into a food processor and buy until finely chopped. Dice the leftover tomato finely and mix in with the rest of pasta. Once mixed, set the pasta to the side.
Wash the zucchini, remove the ends, and cut lengthwise into two pieces (I prefer to remove the ends but you don’t need to do that). Use a teaspoon to scrape out the inside of the zucchini – if full of seeds you can discard, otherwise add to the tomato scrap pieces and put aside.
Line a large baking sheet with parchment paper. Spray with some cooking spray, then place zucchini on, spray the tops and place the zucchinis into the oven. Zucchini will be nicely browned in about 10 minutes. Take the zucchini out and set aside.
Lower the oven temperature to 375 F (190 C).
While the zucchini is par-roasting, get going on the stuffing. Add the oil to a large pan (frying or sauté) and place over the medium-high heat. Add the chopped onions and sliced garlic and let them caramelize for 2 minutes or so. Next add the spices (chili powder, cumin powder, smoked paprika) and let them “bloom” for 1-2 minutes.
Next add the scooped out zucchini and tomato scraps, and mix well. Sauté for couple of minutes, then add corn and black beans. For corn and black beans, I recommend straining them using a large colander, and rinsing them for half a minute under some cold water before using. If you are using frozen corn, or fresh corn, and the beans you cooked yourself this washing and straining step is, of course, not necessary! Mix everything well and sauté for another 8-10 minutes.
Spray a 9 x 13 in (23 x 33 cm) baking dish (or a large casserole pan) with cooking spray, then cover the bottom with a layer of stuffing. Place the par-roasted zucchini boats in and fill them with stuffing. Pile the stuffing high, and press gently in as you fill to make sure you get to all the little nooks and crannies. (You may end up with extra stuffing – if that’s the case you can serve the stuffing itself as a side for another dinner, for example this would be a grate thing to put into a taco shell and enjoy, or serve cold on your next tex-mix salad!).
Put the stuffed zucchini into the oven and bake for about 15 minutes. All you are looking for is some nice caramelization on the top and the sides. Pull the stuffed zucchini out, and let it cool for couple of minutes before serving.
When serving, top each zucchini boat with salsa and diced avocado, freshly chopped cilantro, and a squeeze of lime and you are done!
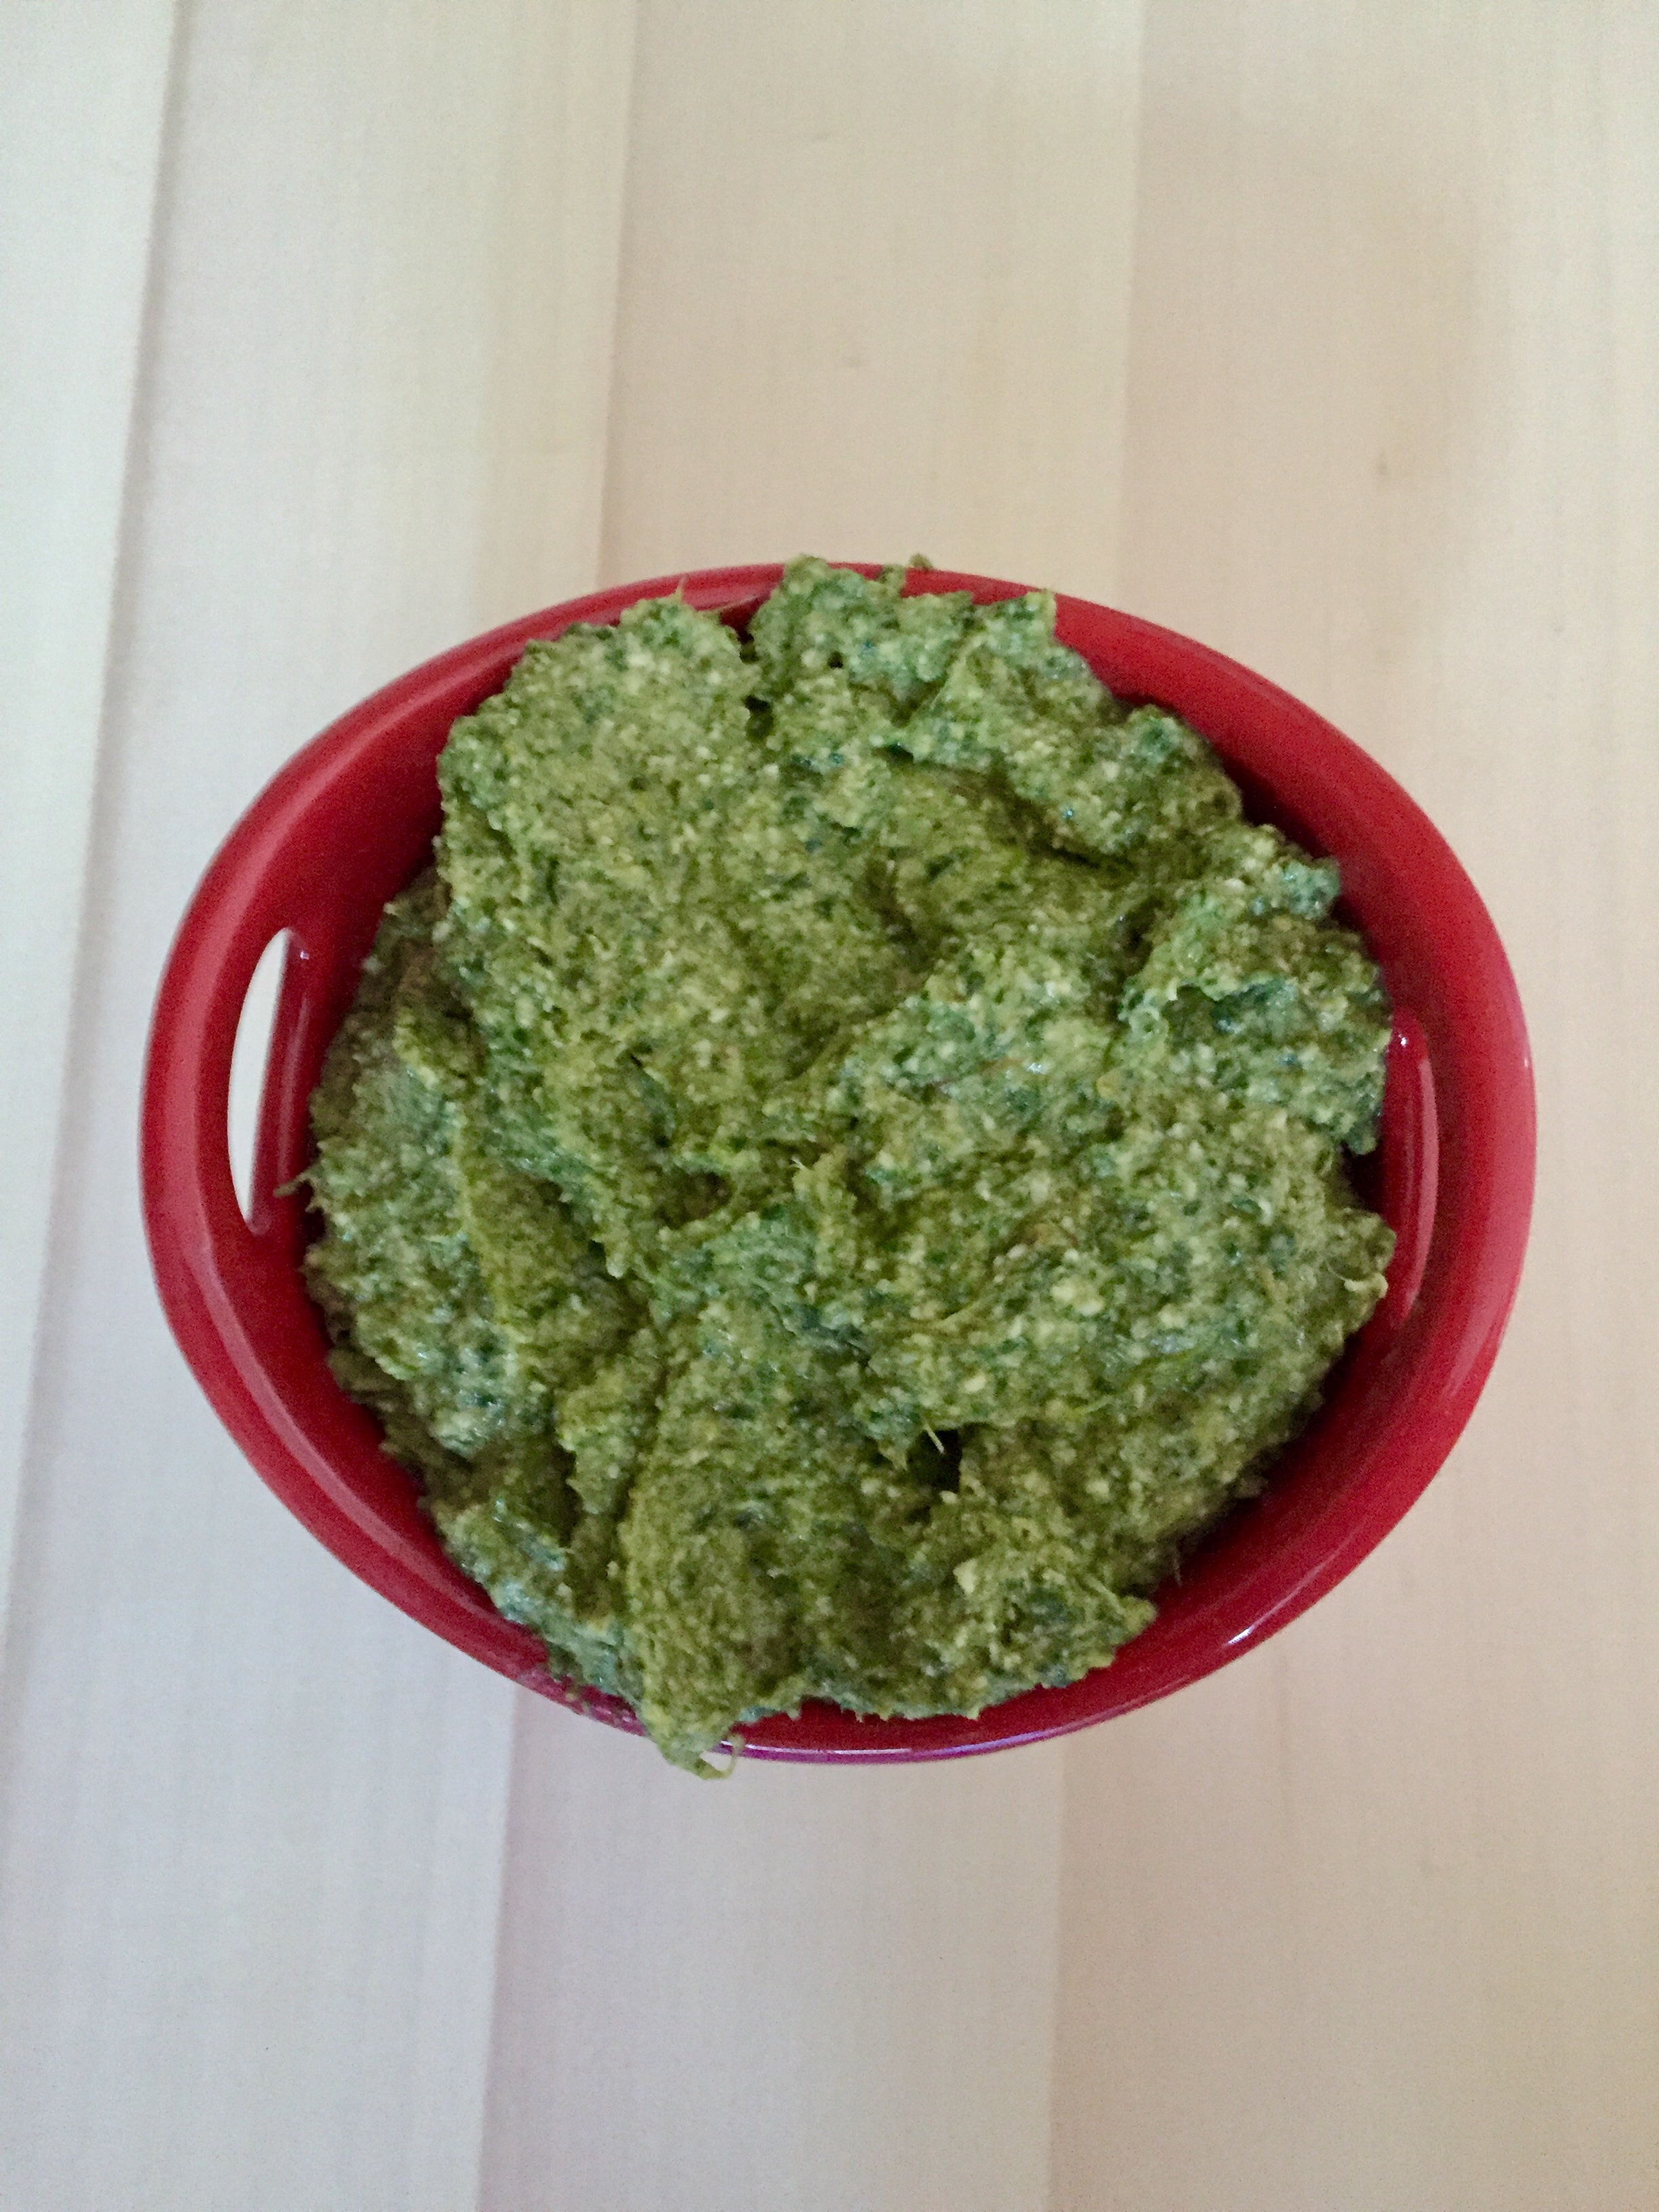
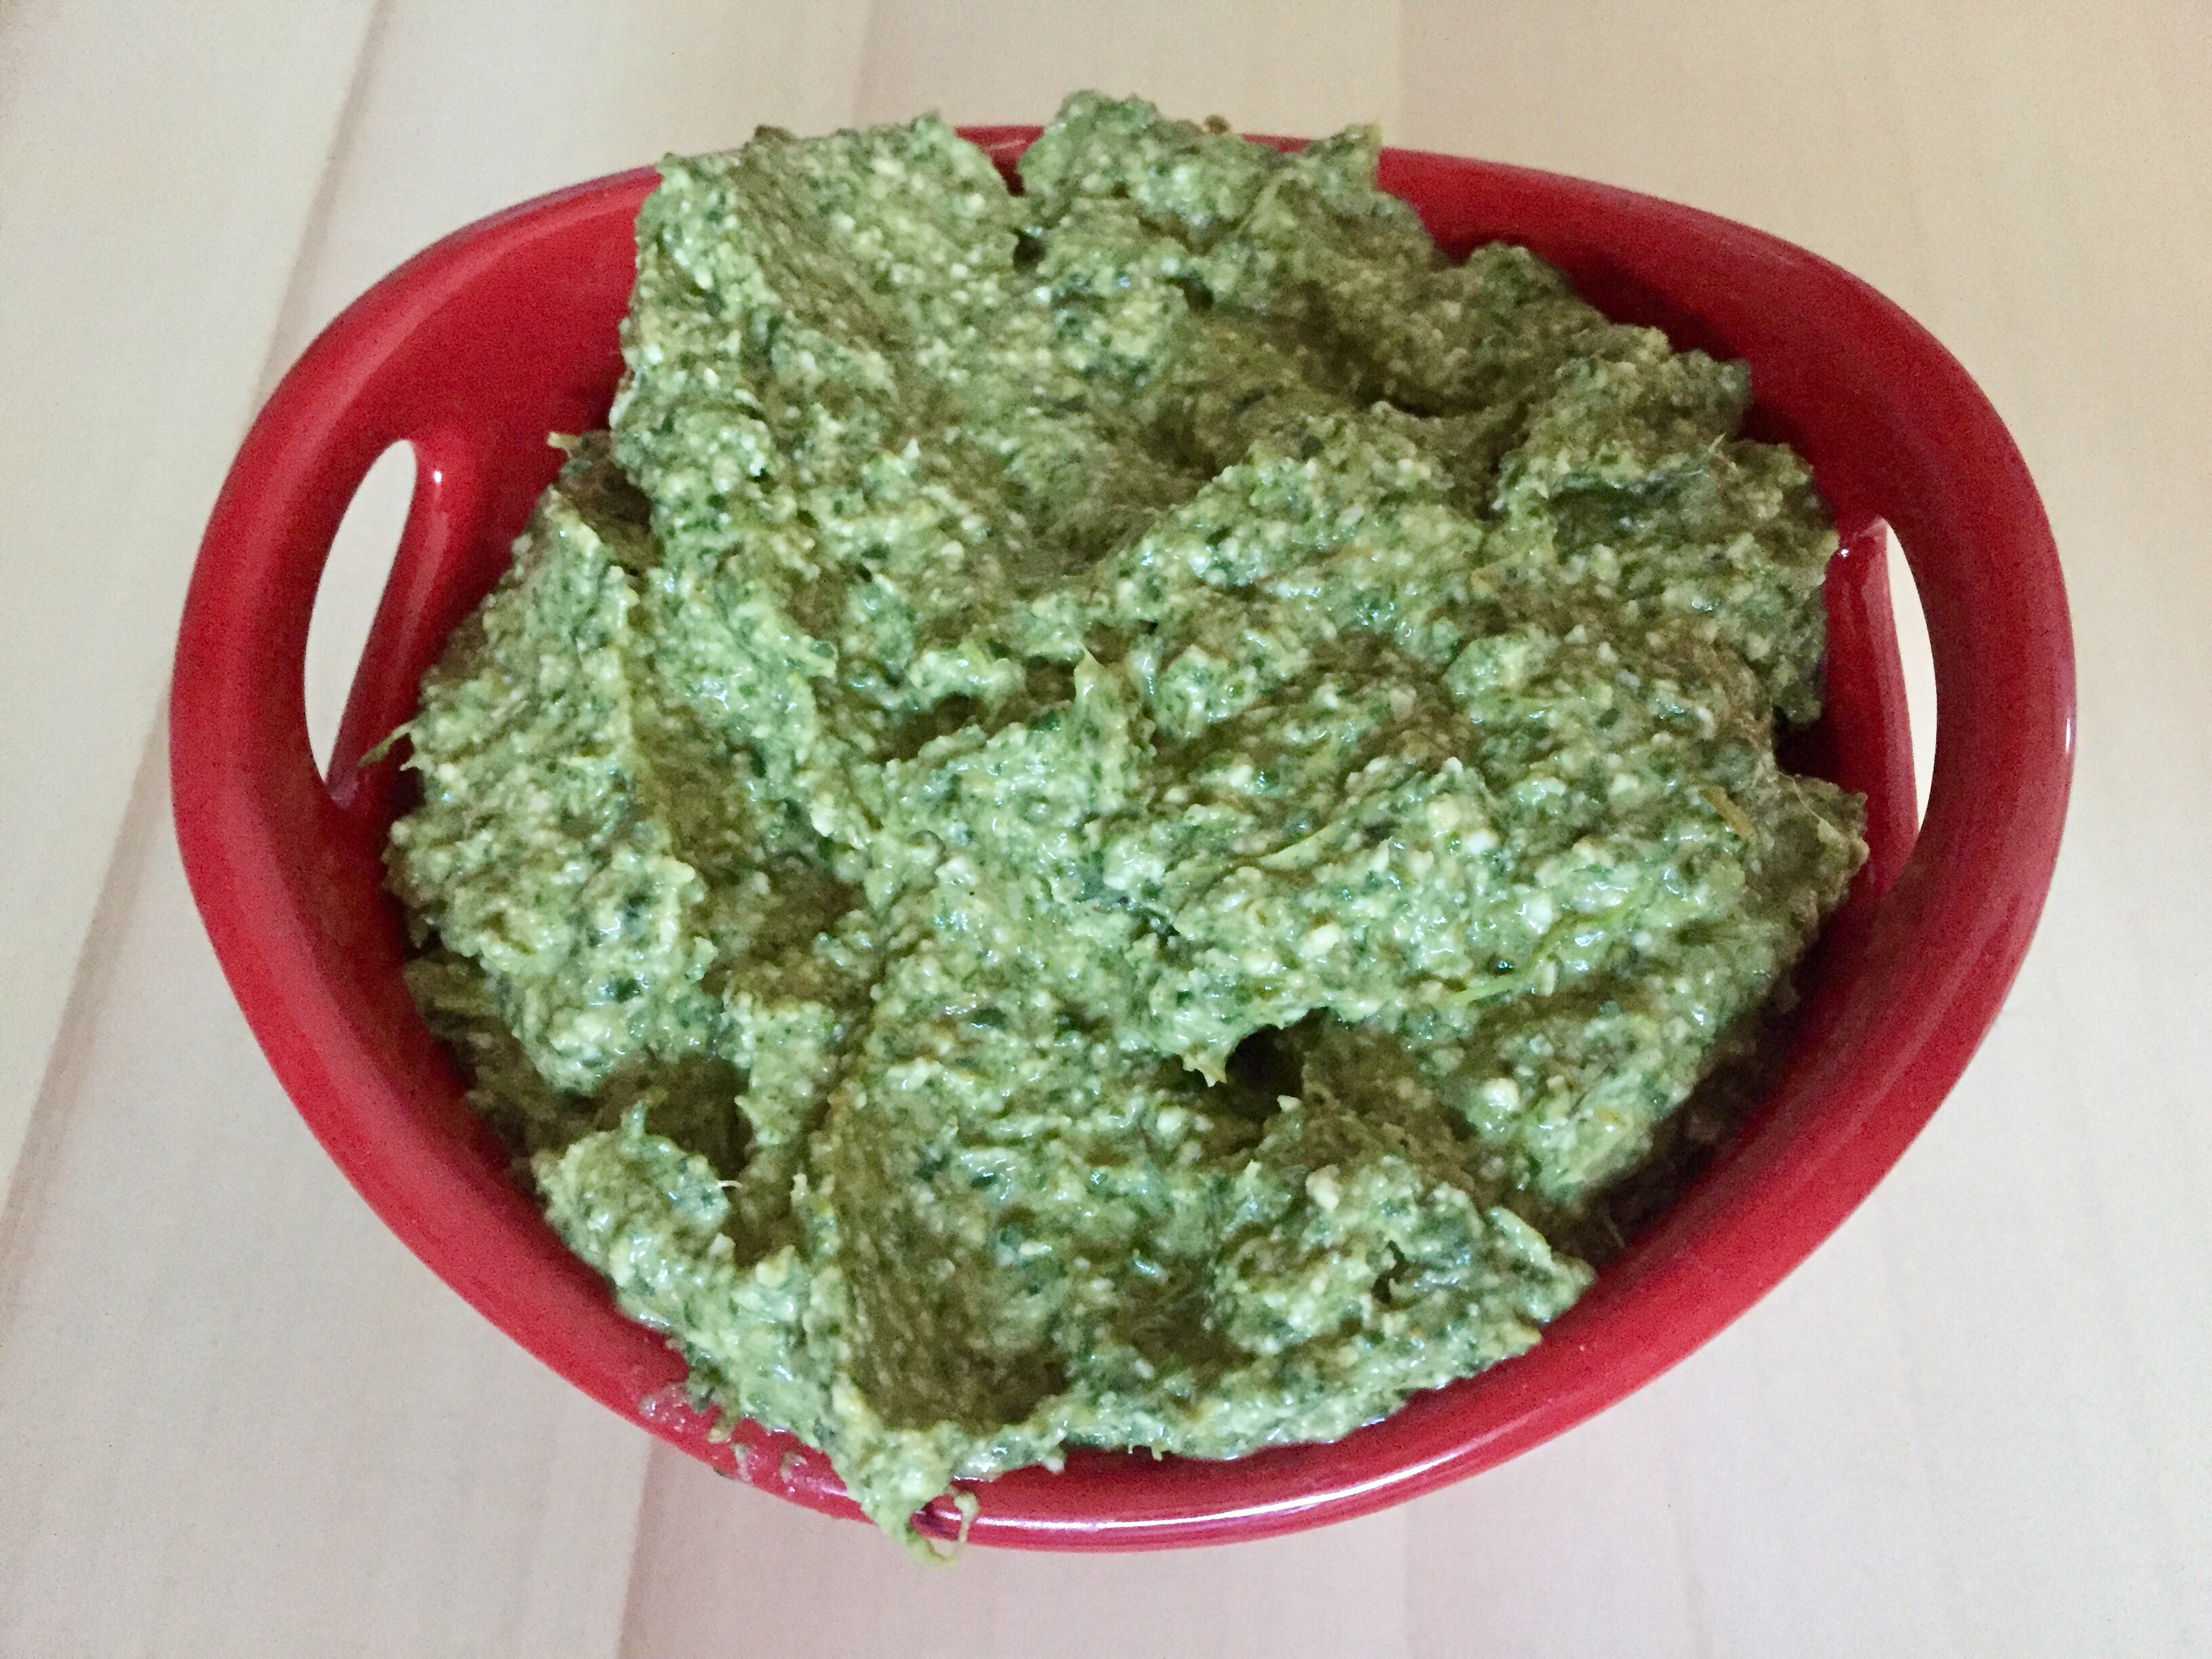
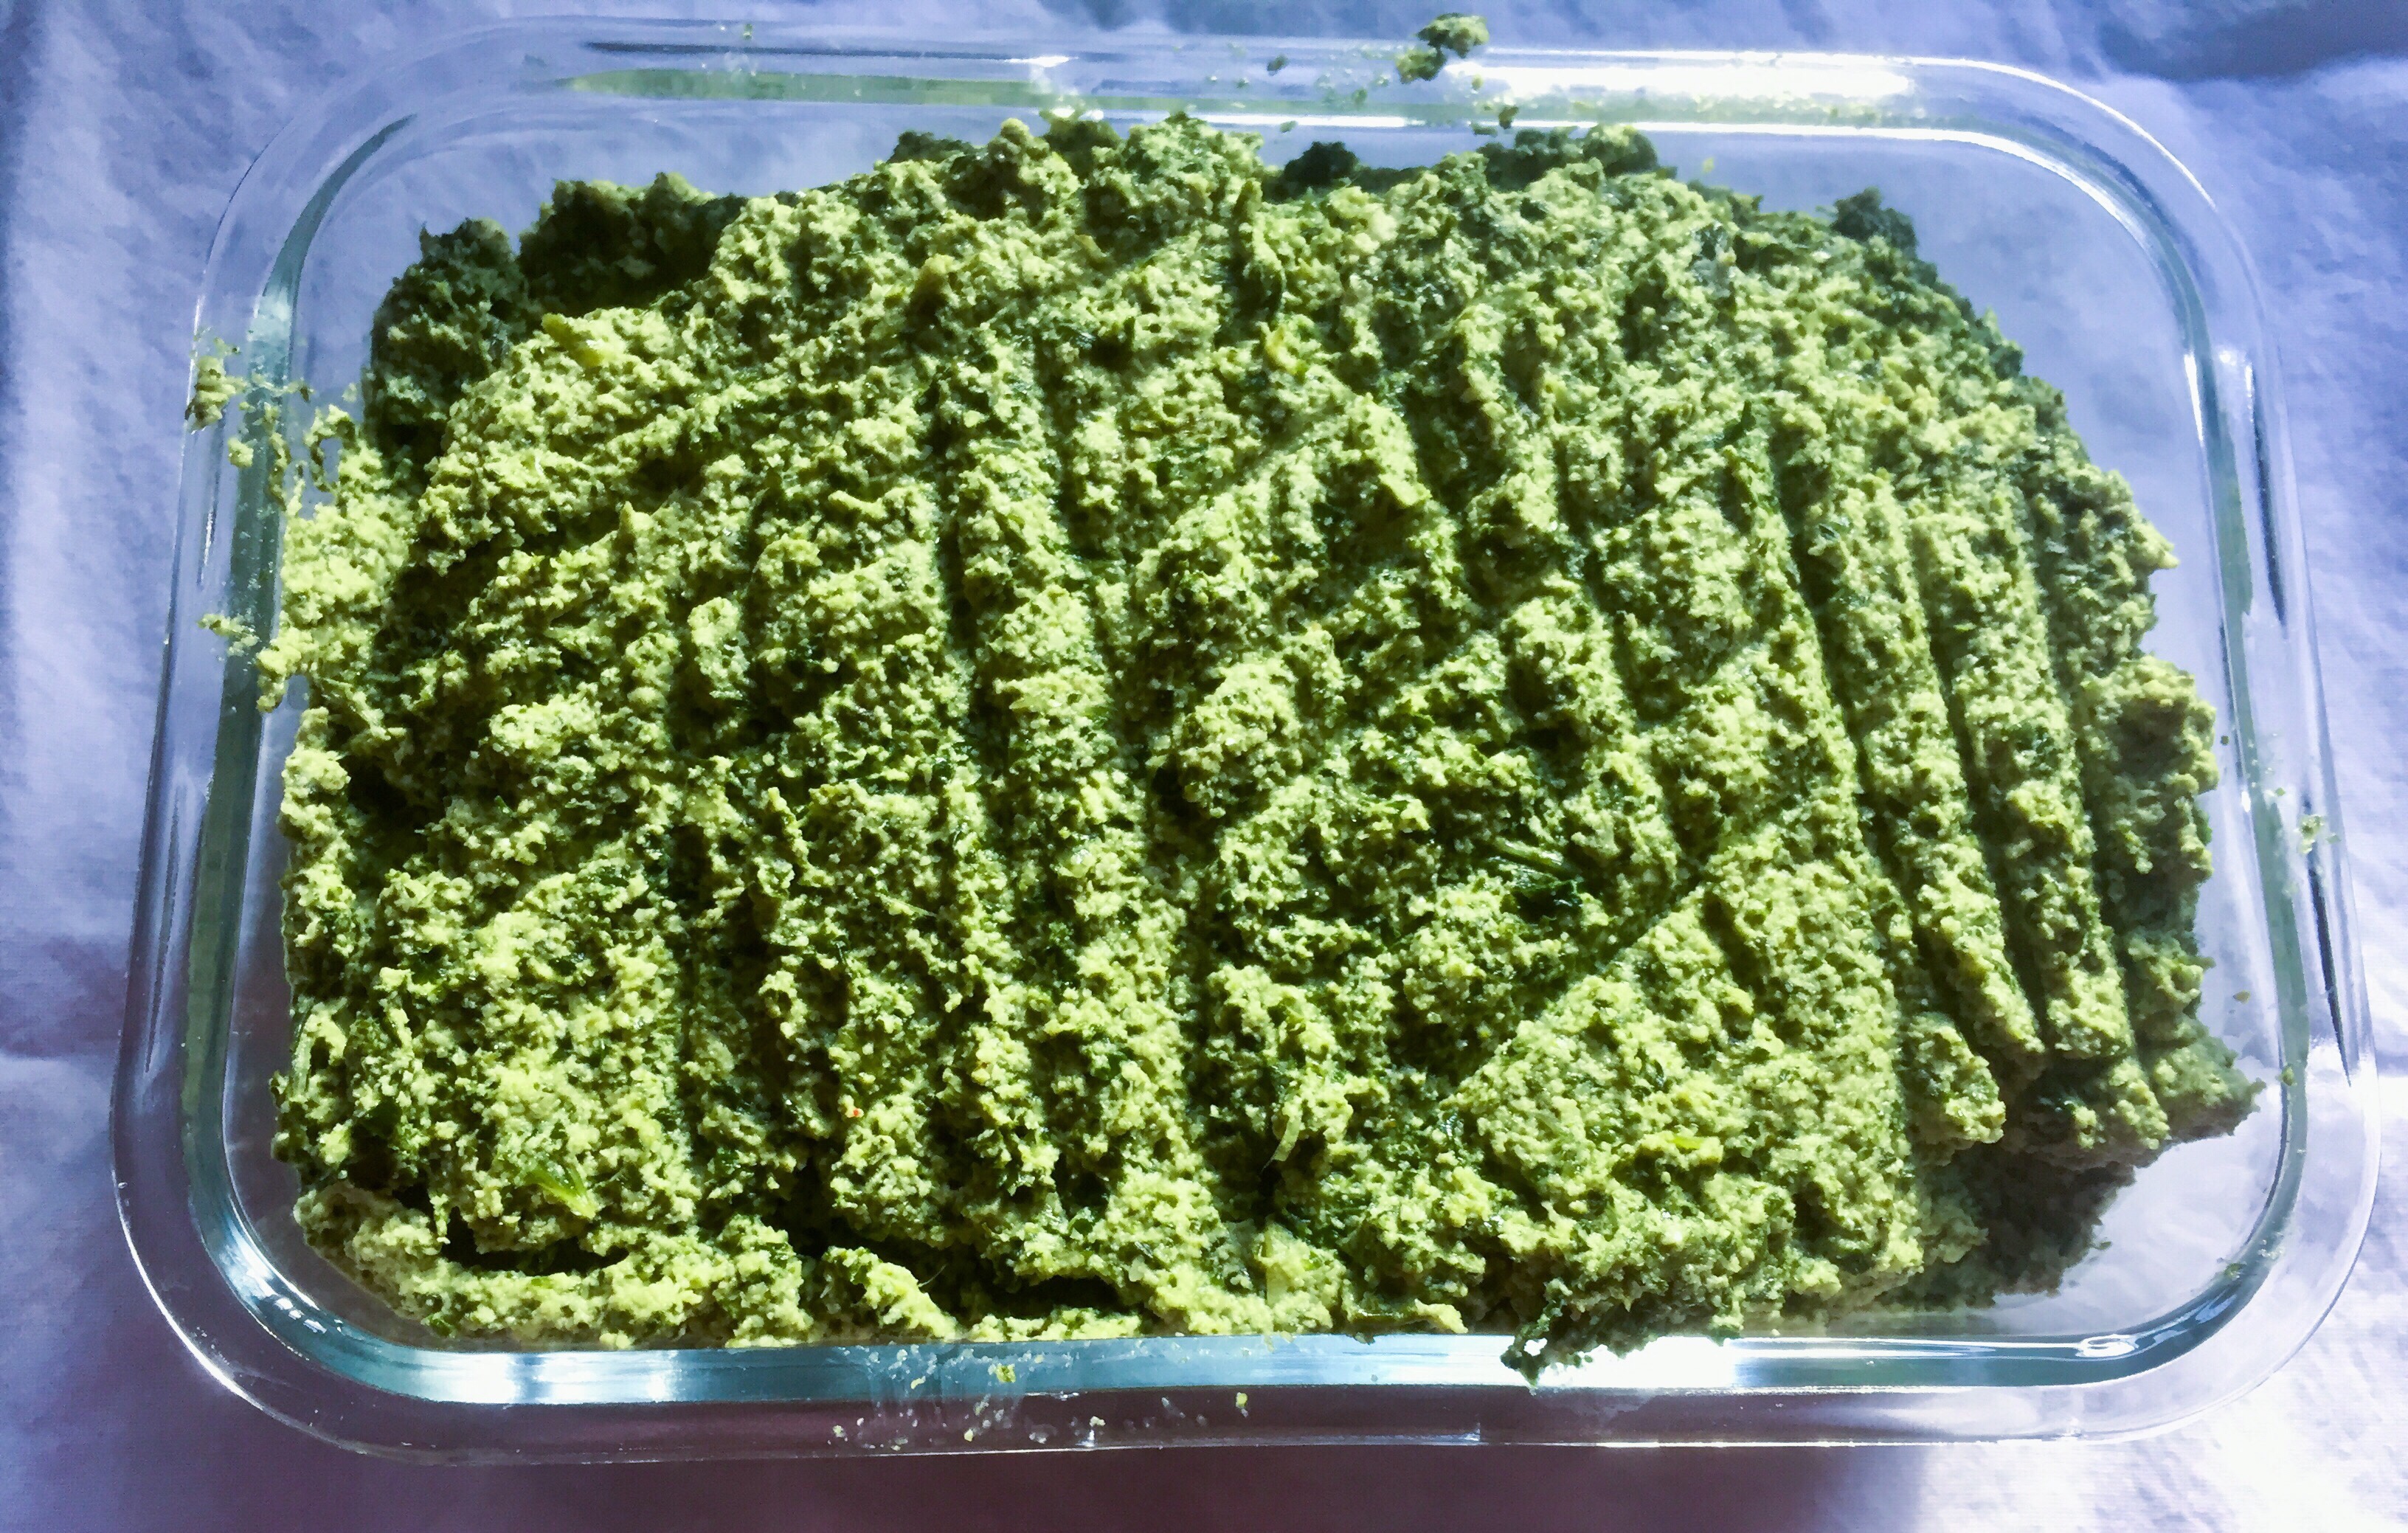
Kale Pesto with Cashews, via Eat the Vegan Rainbow
Pesto, a fragrant bright green pasty sauce made by crushing or blending basil, garlic, pine nuts and olive oil together has been around in one form or another since Ancient Rome. There are quite a few variations on the original theme, but they all boil down to combining a ground nut base with a flavor enhancer, like garlic and basil, and fortifying these with some oil and usually cheese.
My first attempt at making pesto, many, many years ago did not go that well. I am a bit foggy on detail but as far as I can remember the follow up conversation with friends had revealed that I used arugula instead of basil, and that I should have used pine nuts, which I completely skipped. Still, it was not all a waste and a horde of graduate students, who this was made for, gobbled it all down nevertheless.
These days I know the difference between basil and arugula, and appreciate that a good pesto does need something more than just greens to give it real body and bite. Yet, as you will see, it seems that I remain determined not to use basil or pine nuts to make the pesto happen.
What happened this time around is that I had two large bags of kale without much interest to use them in a soup or roast them. So, I was looking for something more exciting to do – and the rest may go down in the pesto history!
And once I had my pile of pesto, I went very traditional and used it to dress my pasta. However, pesto, be it basil based or kale based, is quite versatile and you can use it in many different ways. There are even blog posts dedicated to showing what pesto can do beyond pasta (see here for a good example).
Whatever you decided to do with this pesto, I think you’ll like it. It offers a nice kale bite, mixed wit gentle cashew nuttiness and freshness that the lemon brings. And, of course there’s garlic!!!
Kale Pesto with Cashews
What you’ll need:
4 cups kale leaves, stemmed and chopped
1 cup raw cashews, soaked in water overnight
4 cloves garlic, sliced
1 lemon, juice and zest
1/4 teaspoon salt
2 tablespoon olive oil
What you’ll do:
Clean the kale carefully and make sure that all the woody pieces of stems are fully removed. Although you will be using a food processor, which should take care of all the tough kale pieces, I recommend that you do spend some time making sure you have mostly nice, green kale leaves.
Place a large pan over medium heat. Add oil and garlic, and sauté for just a minute, until the garlic starts to release it’s aroma.
Add chopped kale leaves and let them wilt by tossing them with oil and garlic continuously. This will take anywhere between 5 and 10 minutes depending on the size of your pan. The more surface area your bottom has, the quicker it will be. Once the kale is fully wilted, turn the heat of and let the kale cool.
Rinse the soaked cashews under some cold water, drain well and place in a large food processor. Add the wilted kale, lemon juice and lemon zest, and a pinch of salt and process until fully ground and smooth.
Enjoy on pasta, in a sandwich, as a dip, on a pizza… The possibilities are endless and just remember that you are keeping it healthy and eating a whole bunch of kale!
Let me make one thing clear – if you are looking for a veggie burger recipe that looks and tastes like meat, you really should look elsewhere since this ain’t it! But, if you are looking for a different type of burger, that is unusual yet appealing, and that is amazingly nutritious then you have come to the right place.
This is my Sweet Potato Burger which is made of roasted sweet potatoes, oats, flax meal “egg”, and a dash of very spicy adobo sauce. The patties are held together by the joined action of oats and the flax meal egg, and do just fine on the outdoor grill. The flavor is nicely sweet, perfect for combining with some mustard, pickles and lettuce. In my view, tomatoes, mayo and cheese do not work well on this burger, but caramelized onions, sautéed mushrooms, or sliced avocado would add to it. Feel free to experiment and see how it goes!
Sweet Potato Burgers
What you’ll need:
2 cups roasted sweet potatoes, mashed
1 cup rolled oats
3 tablespoons flax meal
6 tablespoons water
1 tablespoon adobo sauce
1 teaspoon maple flavor
1 teaspoon coriander powder
1/4 teaspoon cinnamon
1/8 teaspoon nutmeg
What you’ll do:
Roast sweet potatoes as you would normally. I usually roast them at 425 F (220 C) without peeling for 45 minutes or so, then let them cool completely before handling. My usual batch is about 8 large potatoes and I store them roasted in the refrigerator and use them through the week.
Start soaking flax meal in hot water 15-20 minutes prior to use. You can find detailed instructions on making the flax egg here.
Peel two potatoes and mash them with a fork or a potatoe masher. This should yield 2 cups of sweet potatoes. Measure it out and adjust by adding and removing the mashed sweet potato. The final amount does not need to be absolutely precise but do keep it close to the recipe.
Place the mashed sweet potatoe into a large mixing bowl, and add all the rest of the ingredients. Mix well, and use the immersion (stick) blender to get the consistency nice and smooth, and the oats broken up. If you don’t have the stick blender you can always use your food processor. Let the mix stand for 20 minutes or so to allow the oats to begin soaking up the excess moisture and swell.
Form the burger patties, and place them on a wax paper lined platter. Place the patties in a refrigerator for up to an hour to firm up.
Prepare and preheat your outdoor or indoor grill, or your grill pan in a usual way. I recommend oiling the grill grates well and grilling the burgers at medium heat. You can also use a grill pan or a regular pan – the burger will come out as delicious albeit without the lovely, charred grill marks. Sweet Potato Burgers need about 4-5 minutes per side, and they are ready to enjoy!
Scallion Crêpes with Sesame and Ginger Dipping Sauce, via Eat the Vegan Rainbow
In Serbia, ex-Yugoslavia, where I grew up, there is only one type of pancakes people make – palačinke. They are huge in Central Europe and on the Balkans, and if you are wondering how to pronanounce their name before you munch on them, you would pronounce “č” the same way you do the digraph “ch”. They are thin, they roll and fold easily, they can handle any type of topping, and they are super easy to make. They are also pretty much the same thing as crêpes, so I am sticking with that better known name for the rest of the post. It’s probably one of the first recipes my mom taught me, and knowing how to make crêpes was a bit of a teenage rite of passage for my friends and me. If you knew how to make them you were definitely a part of the in-crowd!!!
And while crêpes are considered very much a French thing (and now you probably appreciate that they are also huge on the Balkans), scallion (or green onion) pancakes hail from a totally different culture – they are a staple of Chinese cooking. Some of the Scallion Pancake recipes use chicken fat (!), but the one by Ming Tsai, a TV chef known for his East-West fusion cuisine, is vegan-friendly, and you may want to give it a try. But, these pancakes do require kneading, and a bit more hands on than I am prepared to do.
So, channeling my inner Ming Tsai and his East-meets-West fusion style, I now give you Scallion Crêpes with Toasted Sesame Seeds and Ginger Dipping Sauce. The crêpes take about an hour to make, from start to finish, and the sauce comes together in five minutes or so.
If you have never made crêpes before, relax – they don’t take much time or much effort. All you need is a large bowl and a large whisk, or a large blender. Your goal is to mix wet and dry ingredients until a smooth and very runny batter forms. Crêpes come out best when you use a large frying pan with a very flat bottom, when you keep your pan hot, but not too hot, and when you drizzle a drop or two of fresh oil before pouring in a new batch of batter in. If you have a really fantastic non-stick pan, you may be able to skip the oil but crêpes can be sticky, so proceed with caution.
One of my mom’s tricks is to use a teaspoon of oil and a really hot pan for the first crêpe. That crêpe is too oily and is usually discarded, but cooking it seasons the pan so that you only a drop or two of oil for the rest of the crêpes that should slide right out there when done.
There’s a bit of technique to flipping the crêpes over. First of all, you will need to figure out how much batter you need to pour in to make a thin, yet not too flimsy crêpe. For a regular size frying pan (8 in; 20 cm) I’d say start with 3/4 cup of batter. Pour the batter in the middle of the pan and then move your pan around quickly to help the batter spread around all the way to the edges, making one smooth, thin layer.
Second thing that you will need to know is when to flip, and the answer to that is when the uncooked side starts to look dry, which should not take more than couple of minutes. Once you see that it’s time to take hold of the pan’s handle and give it a shake. If everything is working according to the plan your crêpe should be sliding around the pan freely. If not, you will need to use a thin spatula to slide it under the crêpe and ensure all the sticking points are unstuck. The best spatulas to use for this are the metal ones you would normally use to frost a cake.
With your crêpe’s surface looking dry and your crêpe moving freely around the pan you are ready to flip. I flip my crêpes either by tossing them in the air – that’s my signature move and a crowd pleaser, and it took quite a few mistakes to perfect – or by using my fingers. I grab the edge of a pancake with both hands and flip it over, taking good care not to touch the pan. This only works if the edges of your crêpe are curling up and away from the sides of the frying pan.
Now that you know what I typically do, let me tell you what I think you should do. The best thing to try first is to use a thin, long and wide spatula that can go under the crêpe and in one swift move flip the crêpe over.
Once the epic flipping of the crêpe has been accomplished the crêpe will need only a minute to finish cooking on the other side. Normally, you would add a spread or a filling just after you slide the crêpe out while it’s still hot. In this case I actually don’t think the spread is needed as all the scallions make the flavor pretty rich to begin with. Add to that the dipping sauce full of soy sauce, toasted sesame seeds, squeez of lime, and freshly grated ginger – mmmmm… – and you’ll get plenty of flavor.
Scallion Crêpes with Sesame and Ginger Dipping Sauce
What you’ll need:
For the Crêpes
2 cups all-purpose flour
2 tablespoon corn starch
1 3/4 cup aquafaba (liquid from a can of chickpeas)
1 cup almond milk, plain and unsweetened
1 cup scallions (spring onions), white and green parts, chopped
Oil for cooking
For the Sauce
1/2 cup soy sauce, reduced sodium
2 tablespoons lime juice, freshly squeezed
2 tablespoons sesame seeds, toasted
2 teaspoons ginger, freshly grated
1 teaspoon crushed red pepper flakes (optional; skip if you don’t enjoy spicy food)
What you’ll do:
Place all the crêpes’ ingredients except scallions in a blender and mix well. You can also mix everything up with a regular mixer or by hand. The resulting batter should be smooth and clumps-free.
Add the chopped scallions, mix them in and let the batter rest for 30 minutes.
While the batter is resting, mix together the dipping sauce. For best results use fresh ingredients, and toast the sesame seeds yourself – they need only 2-3 minutes in a toaster oven or in a frying pan on the stove top. Cool the seeds a bit before mixing with the rest of the ingredients.
Heat a large frying pan with a flat bottom until hot. Add a teaspoon of oil and 3/4 cup of batter. Spread the batter around until it covers the entire surface of the pan.
Lower the heat to medium to medium high, and cook until the upper side starts to look dry. Flip the crêpe and continue cooking on the other side for another 1-2 minutes.
Slide the crêpe out, fold twice, making a sort of triangle, and keep the crêpes warm either by covering them, or by putting them in a warm oven.
When all the crêpes are done, arrange them on a platter and enjoy with the dipping sauce (or without!).
Homemade 1-minute Peanut Butter Nutella, via Eat the Vegan Rainbow
Believe it or not, you can now make your own Nutella-like spread in less than a minute. Yes, you read that right – and it is not a question of gimmicky gadgets or anything like that. It’s really all about having three ingredients at hand and readily available. The trifecta in this case consists of peanut butter powder, cocoa powder and stevia.
Peanut butter powder is my newest discovery so let me rave about it for few minutes. I believe that you can now get peanut butter powder in any US-based grocery store. Even the peanut butter behemoth, Jif, has its own version of this product, which I have not tried yet so can’t really comment on whether that specific brand is any good and how it compares to others.
Peanut butter powder is mostly protein left over after you remove most of the fat (and thus lots of calories), so it is an ideal addition to smoothies, oatmeal, baking, even desserts like Dark Chocolate Almond Butter Cups (as a substitute for almond butter), and even Pad Thai or other dishes that ask for peanut butter. The powder adds creaminess and packs all of that peanut flavor so a little usually goes quite a long way.
Plus, as a bonus, it transforms into a peanut butter-like spread when mixed with some water!
There are couple of different peanut butter powder “formulations” out there so check the ingredients list first in order to make an informed decision. My first excursion into the peanut butter powder land involved a product that contained added sugar, and that was not what I was looking for. So, I currently use peanut butter powder that lists only one ingredient: peanuts! Needless to say, if you do have a peanut allergy, this is not for you!!!
The recipe below is my new go-to, quick fix bread spread which has less calories, is low-fat and low-sugar so completely vegan, paleo-friendly, and done in a minute. I call it Homemade Peanut Butter Nutella because it combines that rich darkness of cocoa with the peanut aromas into a creamy spread. The recipe below makes one serving – I’ve no clue whether this would store well because I make one single serving at a time, so I recommend you start off using it in this way as well.
Homemade 1-minute Peanut Butter Nutella, via Eat the Vegan Rainbow
Homemade 1-Minute Peanut Butter Nutella
What you’ll need:
2 tablespoons peanut butter powder (no sugar added)
2 tablespoons dark cocoa powder
1 packet stevia powder (or your sweetener of choice)
2-3 tablespoons hot water
What you’ll do:
Combine the dry ingredients (peanut butter powder, cocoa powder and stevia) in a mixing bowl.
Add hot water, one tablespoon at a time, and mix well with a spoon until you get the smooth and spreadable consistency.
Enjoy on toast, fruit, or in any other way you would normally use a spread like Nutella for!!!
10-Minute No-Sugar Added Blueberry Jam, via Eat the Vegan Rainbow
Let me try to make this post as short as the recipe itself. It’s probably already too long because, amazingly, you will need less than ten minutes to go from frozen blueberries to this instant blueberry jam!
The jam is sweet, spreadable and full of pure blueberry flavor. You can use it on anything you would normally put the jam on, and you can store it in the fridge for a week or so, although it will probably not last that long.
What’s the secret? Not much really. It all comes down to mixing frozen blueberries with tapioca starch in a large, microwave safe bowl and letting you microwave oven take care of the rest. You can have some warm jam on you pancakes but I recommend patience and letting the jam cool completely before enjoying!
10-Minute No-Sugar Added Blueberry Jam
What you’ll need:
3 cups blueberries, frozen
2 tablespoons tapioca starch
What you’ll do:
In a microwave safe bowl, mix together blueberries and tapioca starch. Mix well until the blueberries are well covered with starch.
Place in the microwave and microwave on full power for 5 minutes.
Take the bowl out, mix well again and put back into the microwave oven for another 5 minutes.
When the second 5 minutes are up, mix again and check that jam is starting to become dense.
You can use both the warm and the cold blueberry jam on pancakes, toast, oatmeal…
You see… I told you it was short and it is absolutely sweet!!!
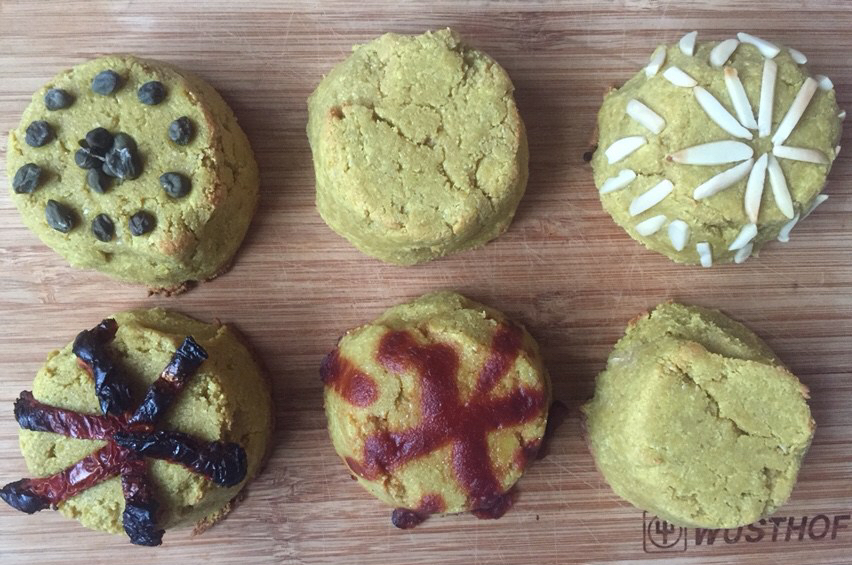
Baked Sunflower Seed Cheese – Deluxe Edition, via Eat the Vegan Rainbow
Hooray – a plant-based cheese success story!!! Believe me, the three exclamation points are not for nothing as I’ve had my fair share of plant-based cheese disasters. But, let us not dwell on failure and talk about this latest, greatest treasure I discovered. Like my vegan fresh mozzarella experiment that was out of this world delicious, this Baked Sunflower Cheese is fully based on a lovely recipe created by another person. Credit for today’s recipe goes to Sweet Potato Soul, a lovely and so bright and cheerful vegan food blog by Jenné (you can also follow her on Twitter @SweetPotatoSoul).
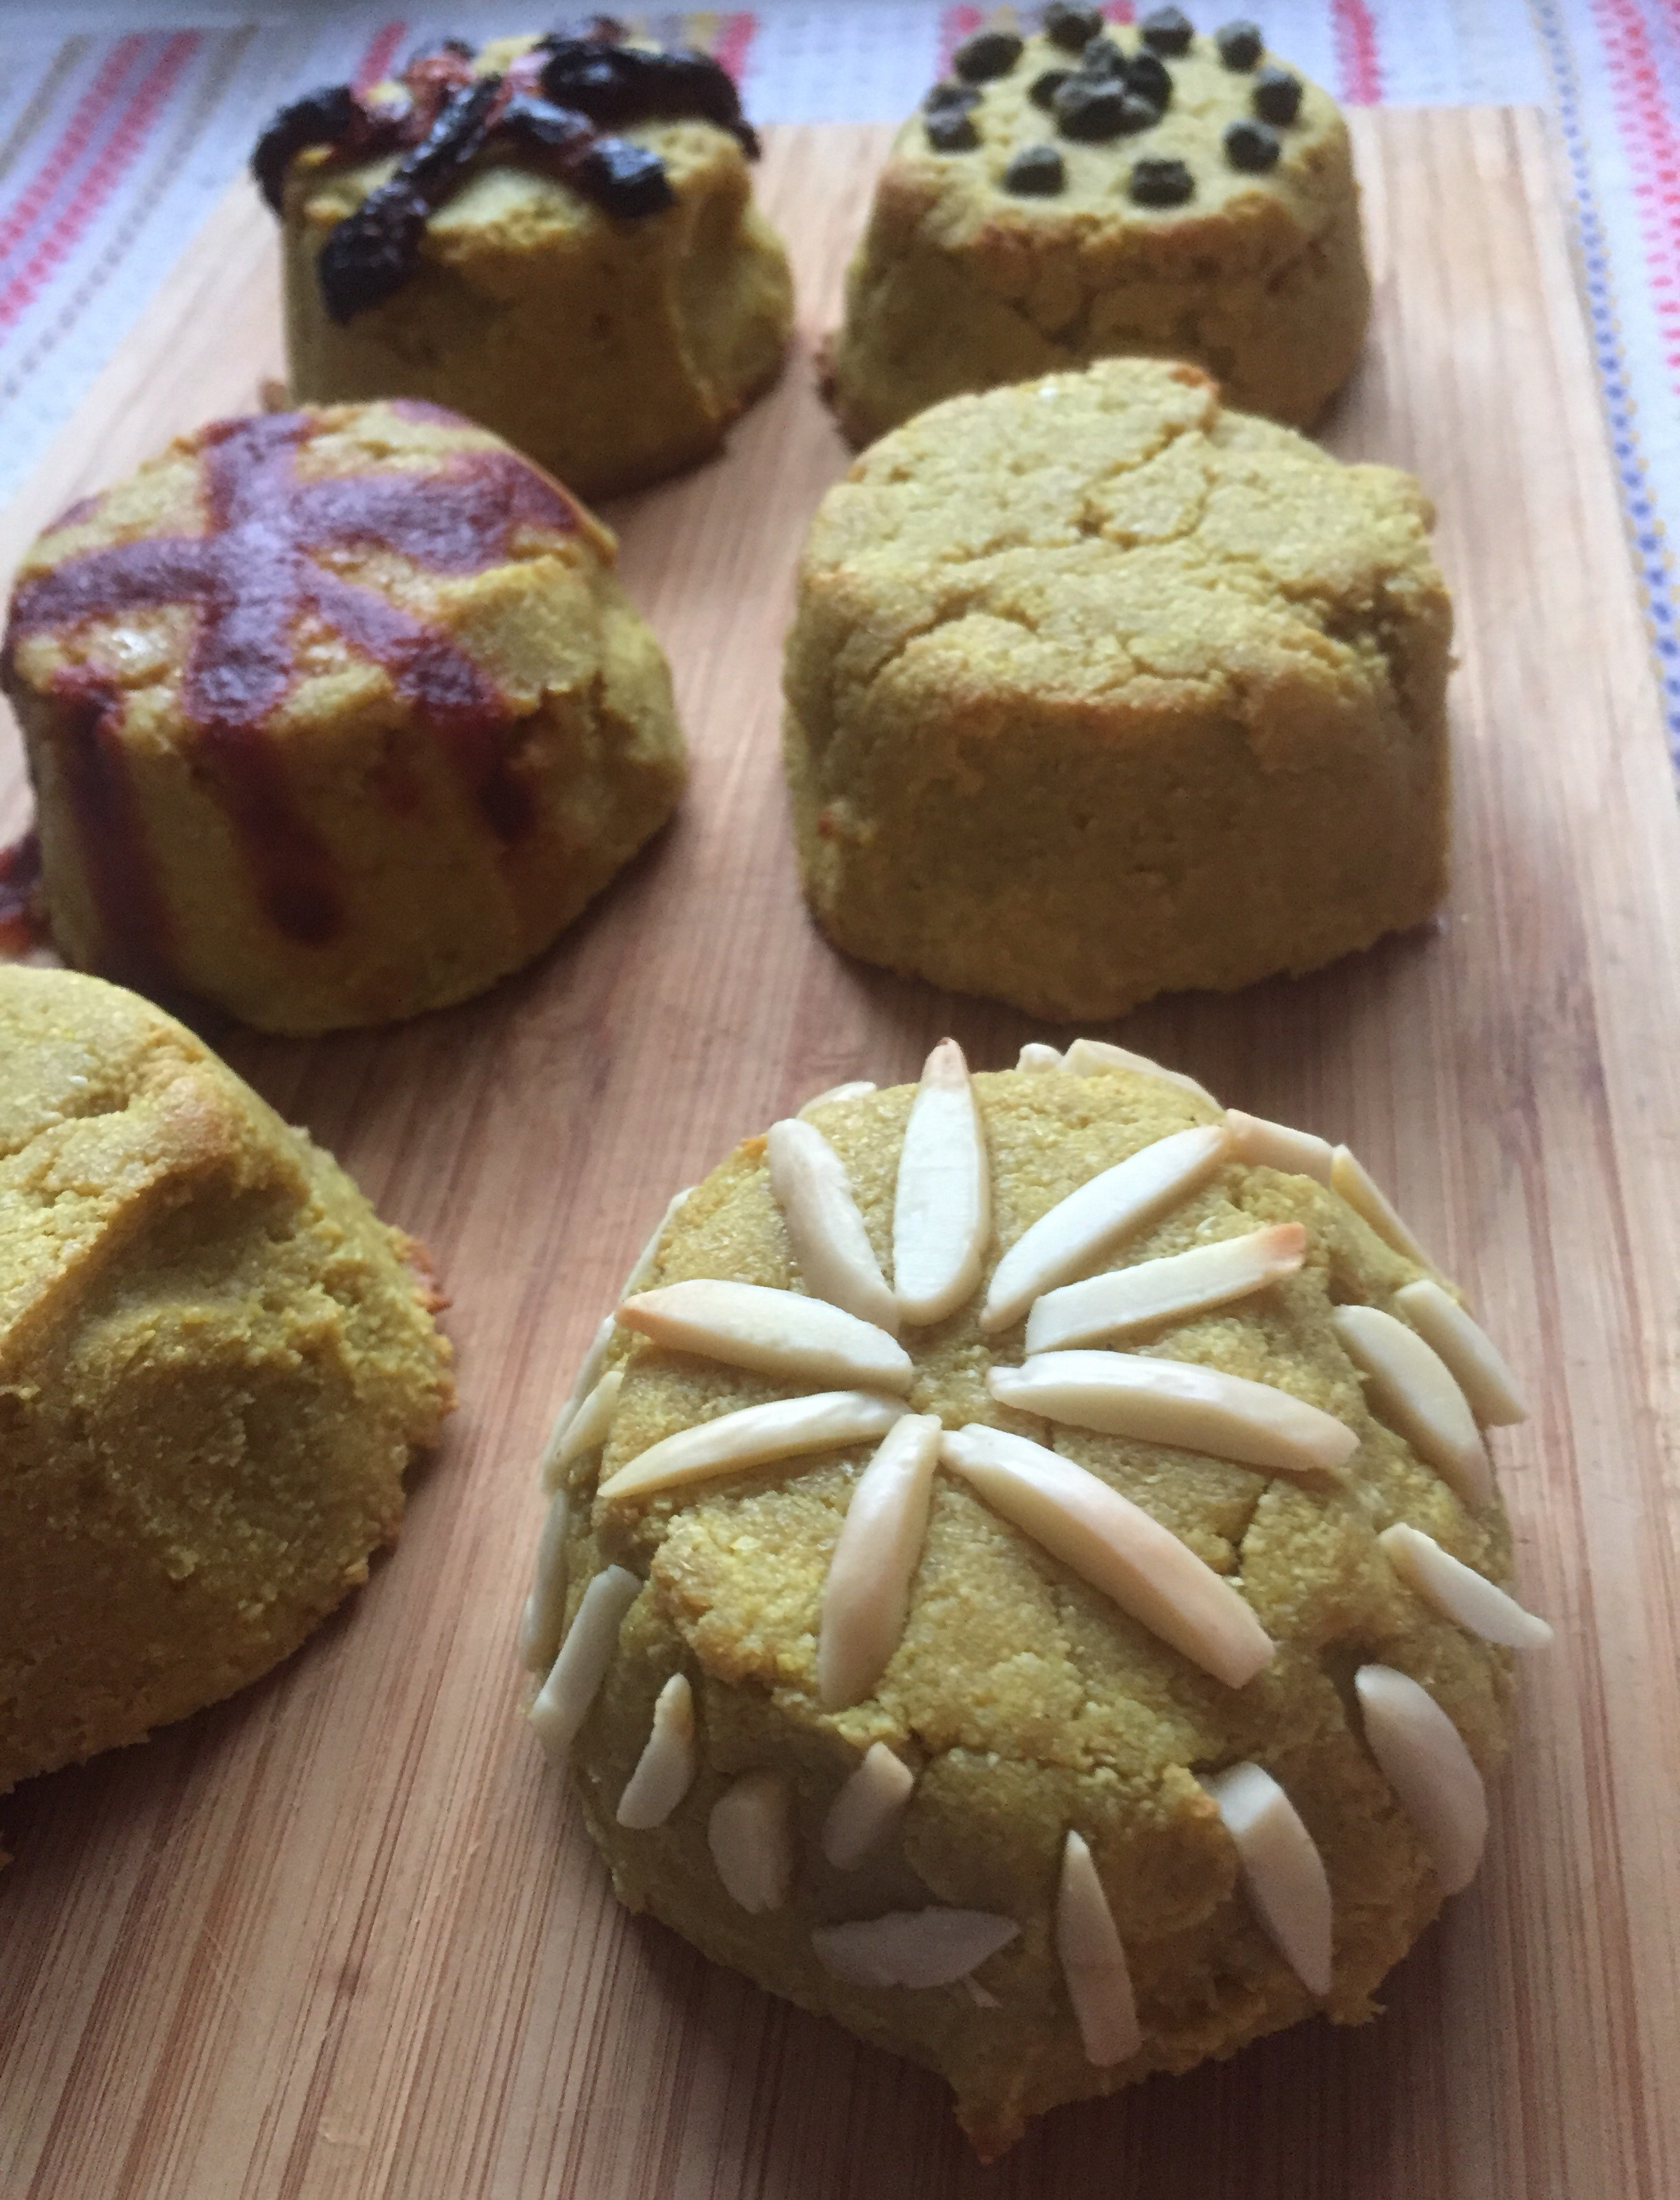
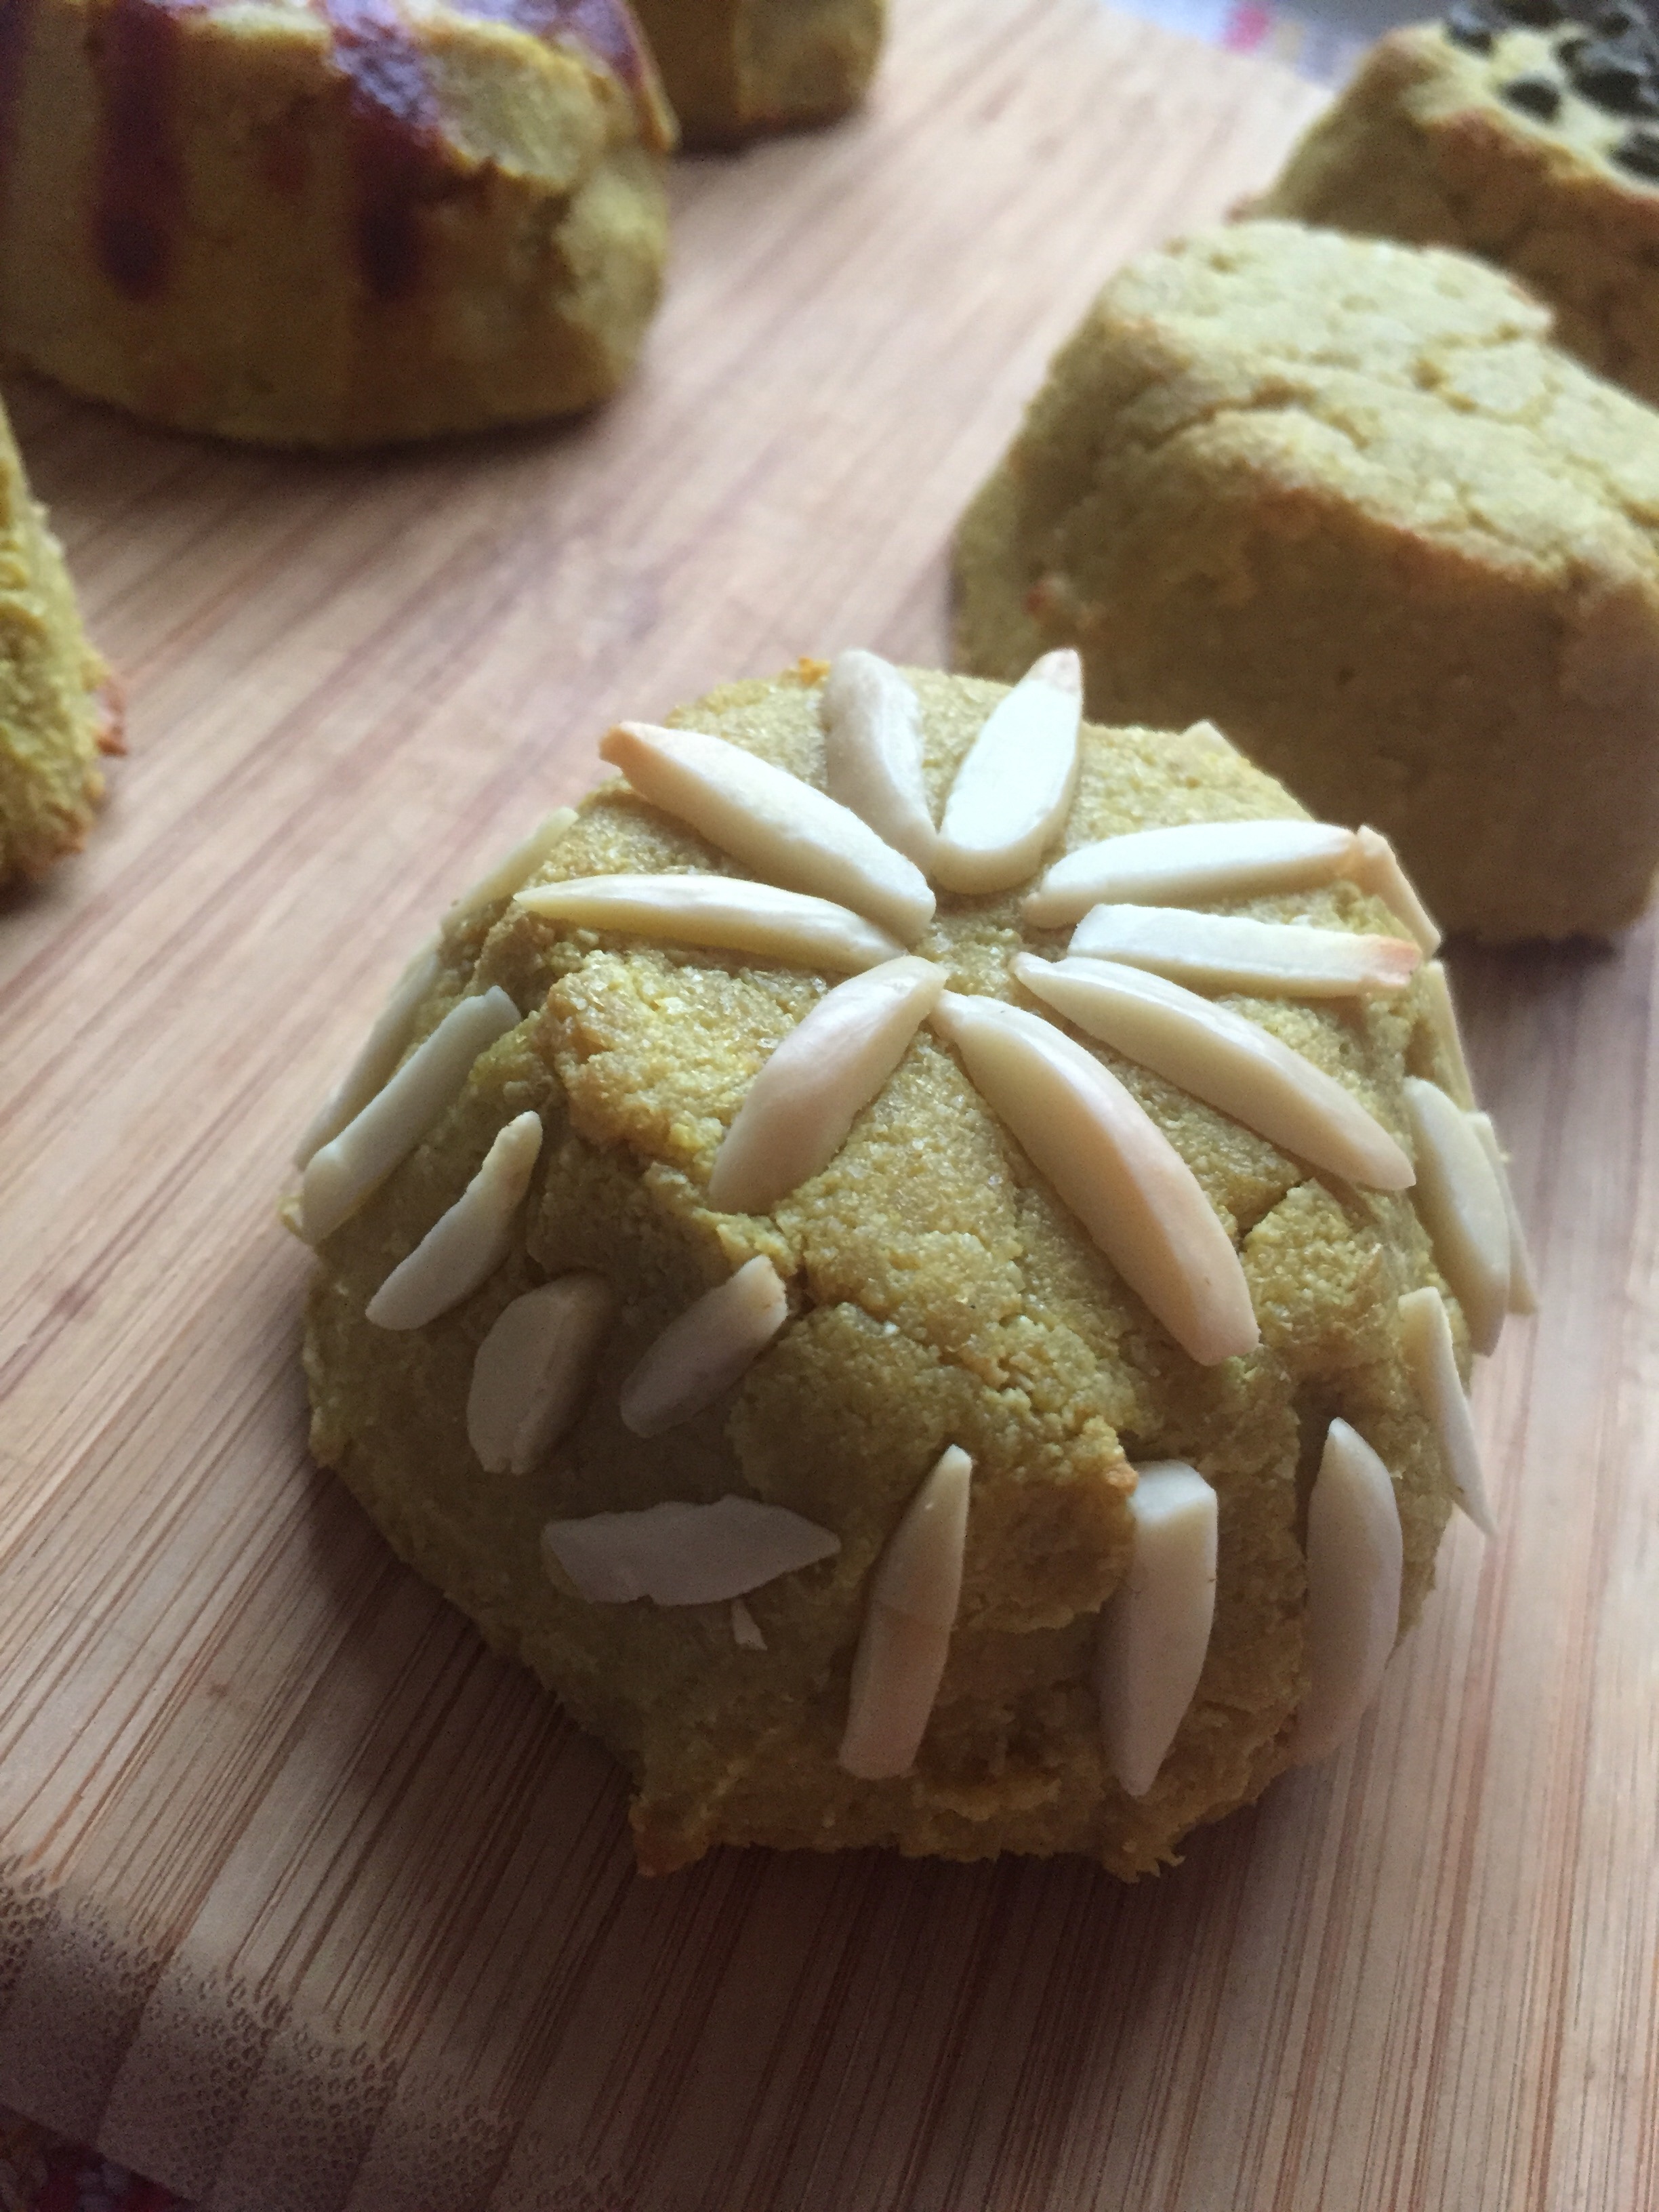
Baked Sunflower Seed Cheese topped with slivered almond, via Eat the Vegan Rainbow
I was looking for something to do with sunflower seeds and this recipe popped up. The recipe is simple and follows the same logic of plant-based cheese making – you soak in this case the seeds but more often the nuts overnight, and then you process them with flavor and umami agents of your choice. Jenné’s recipe uses a nice combination of ingredients that all play well together with the raw sunflower seeds, so other than adjusting the amount of lemon juice and miso paste, I increased both, and dialing down the nutritional yeast, I followed all the rest.
Baked Sunflower Seed Cheese on a cutting board, via Eat the Vegan Rainbow
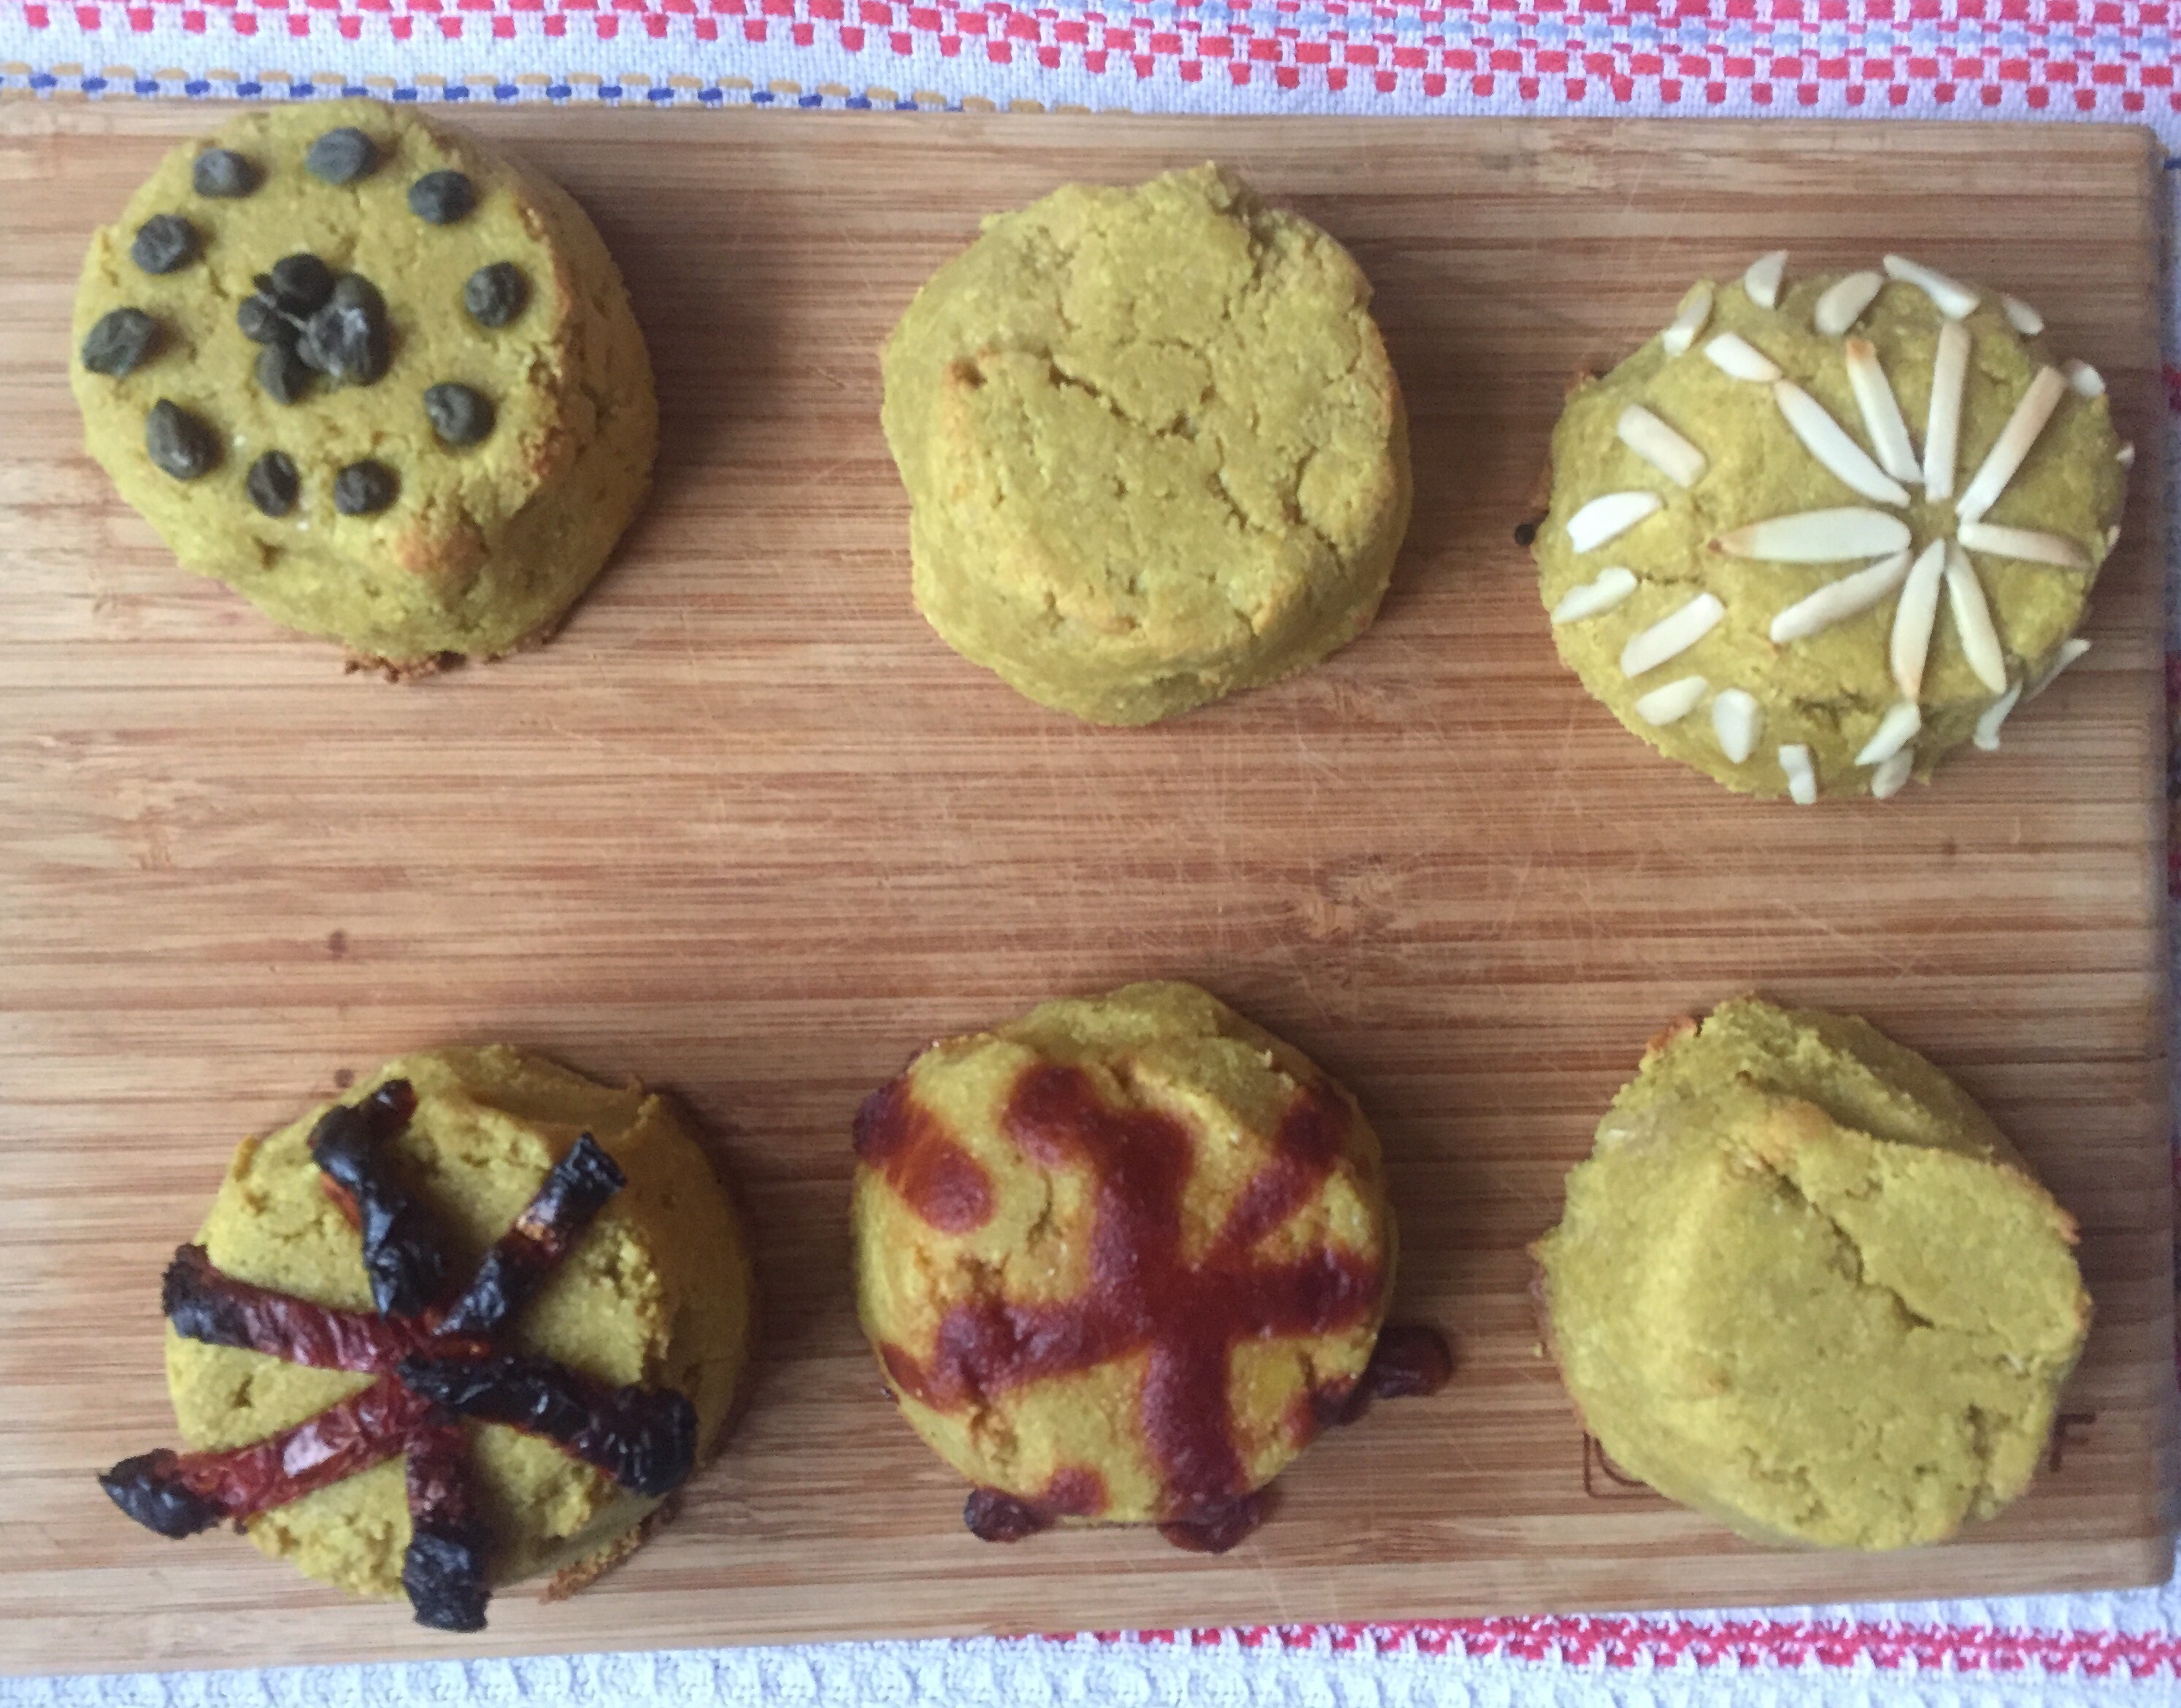
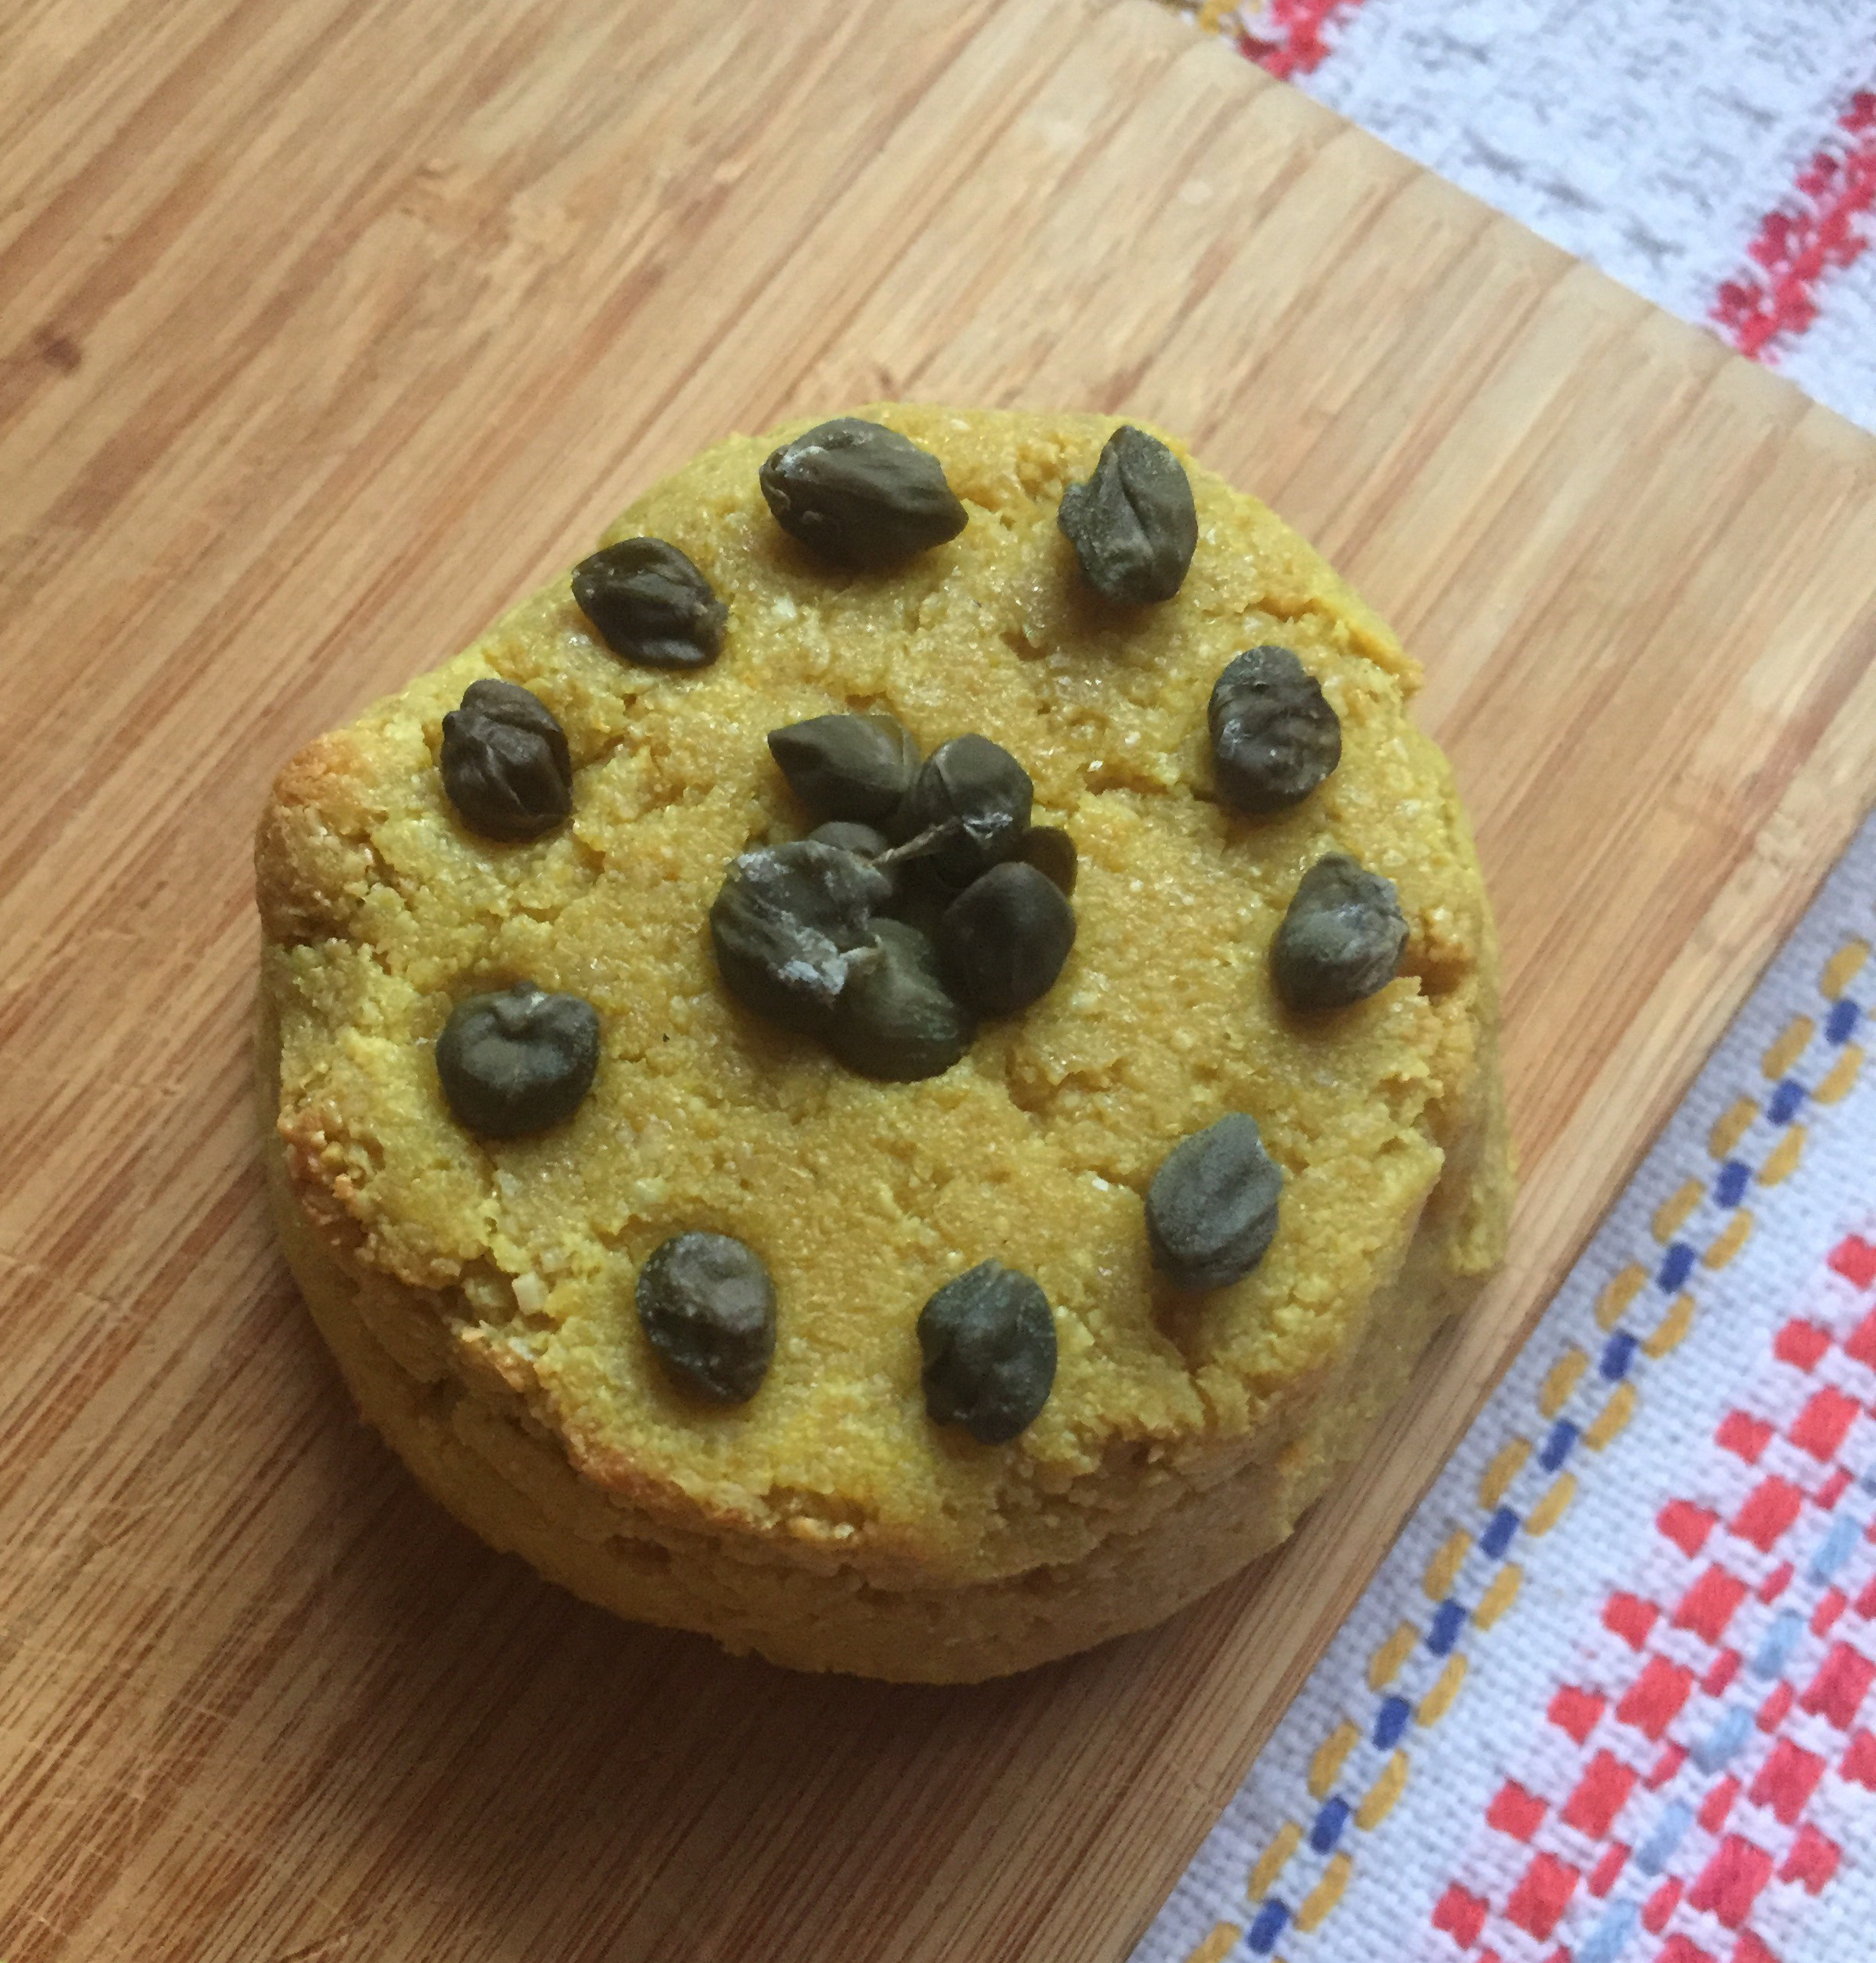
My main point of departure was at the end. Once I’ve chopped and blended everything in the food processor I used my muffin tin to form small individual cheeses. I sprayed the muffin tins with some olive oil cooking spray, and packed the cheese mix into the molds tightly. I let it firm up in the fridge overnight and the next day I inverted the individual cheeses out, topped them with couple of different toppings (capers, slivered almonds, sun dried tomatoes, and hot sauce), placed them on a parchment paper lined baking sheet, and baked them at 350 F (175 C) for 10-15 minutes, just enough for the individual cheeses to warm up and the topping to caramelize.
Slivered Almonds topped Baked Sunflower Seed Cheese, via Eat the Vegan Rainbow
I served the cheeses at a party, with some crackers (and couple of other goodies), and it was amazing!!! Pictures here tell only half a story, so make thus cheese and see for yourself how the story ends.
Baked Sunflower Seed Cheese topped with capers, via Eat the Vegan Rainbow
Note: I stored the leftover cheese in the fridge and used it the next day to make wonderful sandwiches with roasted red pepper hummus and the cold Baked Sunflower Seed Cheese. Yummy!
Baked Sunflower Seed Cheese on a cutting board, via Eat the Vegan Rainbow
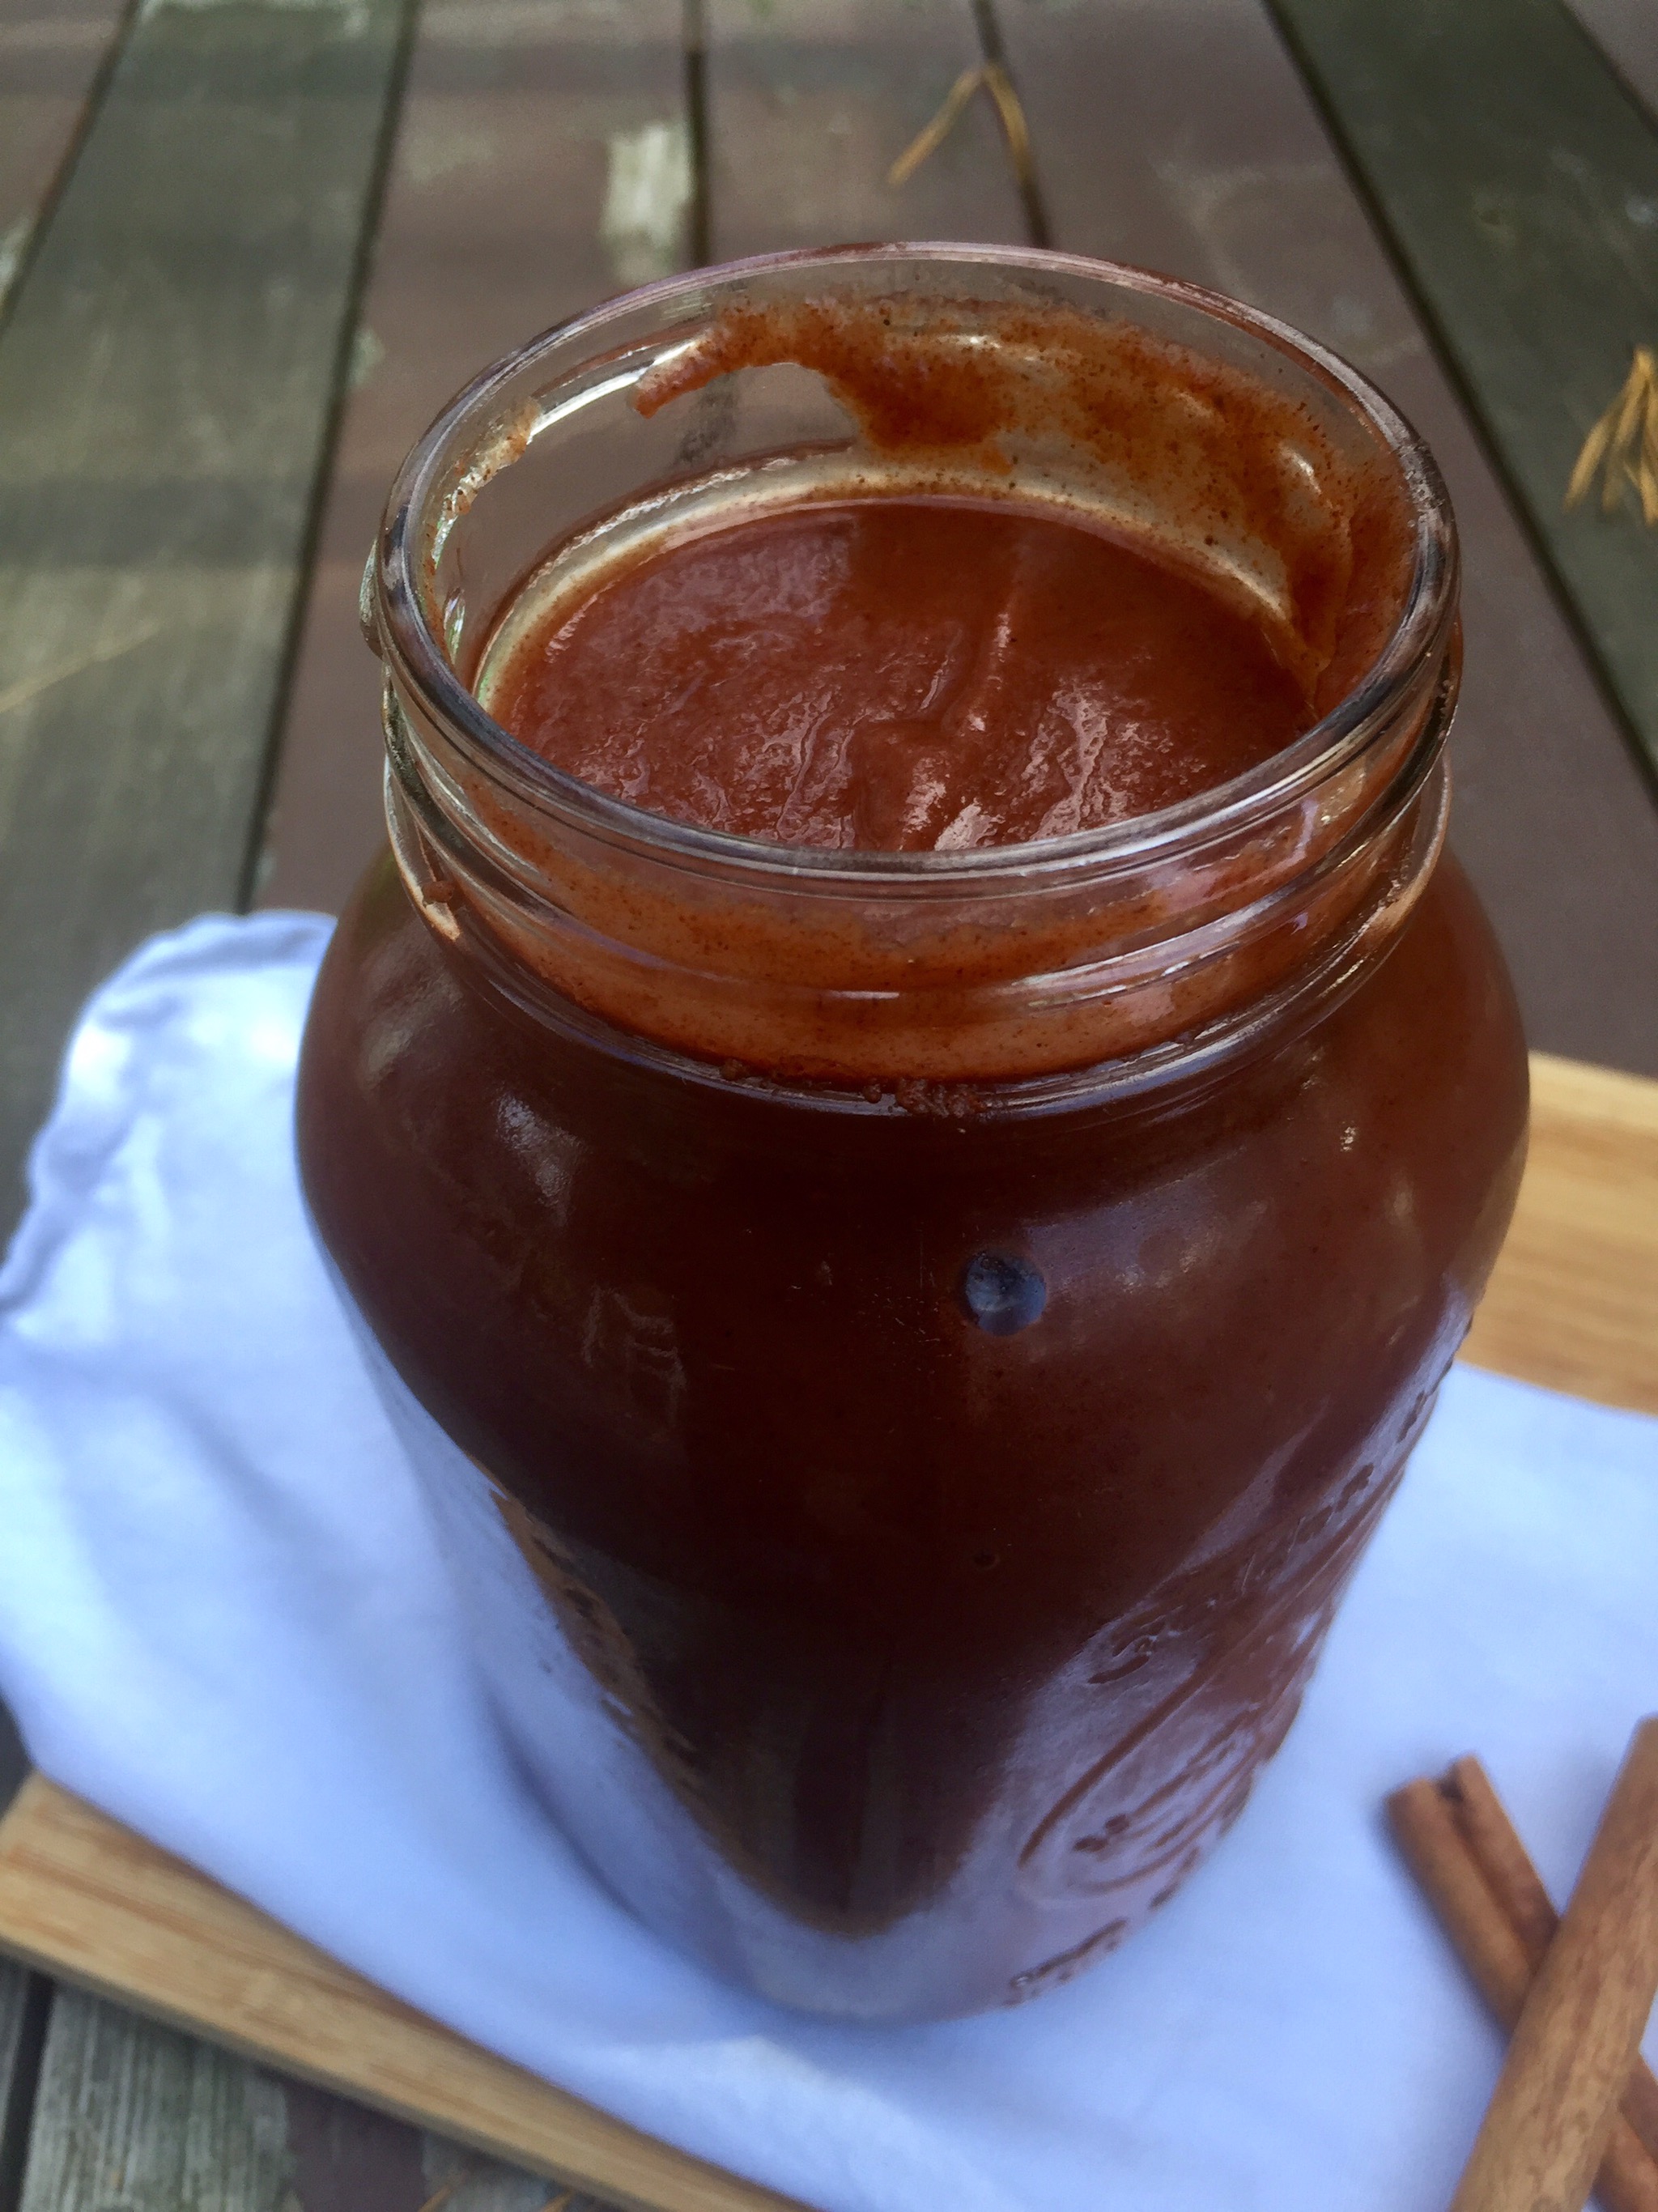
Spice Infused Apple Butter, via Eat the Vegan Rainbow
There is nothing better than freshly picked fruit. I love PYO – Pick Your Own – events at our local farms. They are a perfect activity for friends and family that gets everyone outside and into the nature. These PYO activities support local farms, and provide a cheaper access to perfectly ripe fresh fruit. I also love them for one selfish reason – I am shameless when it comes to taste tasting as I pick and can’t resist biting into an amazing piece of fruit I just picked. Honestly, who could?
The last PYO days are slowly unfolding around me, and I grabbed an opportunity to go pick some apples. The loot included six different varieties, Granny Smith, Jonagold, McIntosh, Pink Lady, Fuji and Empire, and was destined for couple of different things, including a huge batch of apple butter. For the apple butter I used couple of Granny Smith’s, Fuji’s, and Jonagolds. I used my slowcooker (crockpot) to cook the butter since it is really totally hands of – you plug it and forget it for about 10-12 hours. The best time to start cooking is the evening, because your butter can cook overnight and you will wake up to a house that is full of rich aromas.
Those aromas are mostly due to a nice mix of spices that’s make the flavor of this butter. I combined lots of ground cinnamon, some allspice and a bit of nutmeg. There are a lot of apples in this recipe so they drop need lots of spice to make the flavors rich and deep. You could change the spice makeup if you like. Alternative spices to try would be ground ginger, ground cloves, vanilla beans, and/or orange peel.
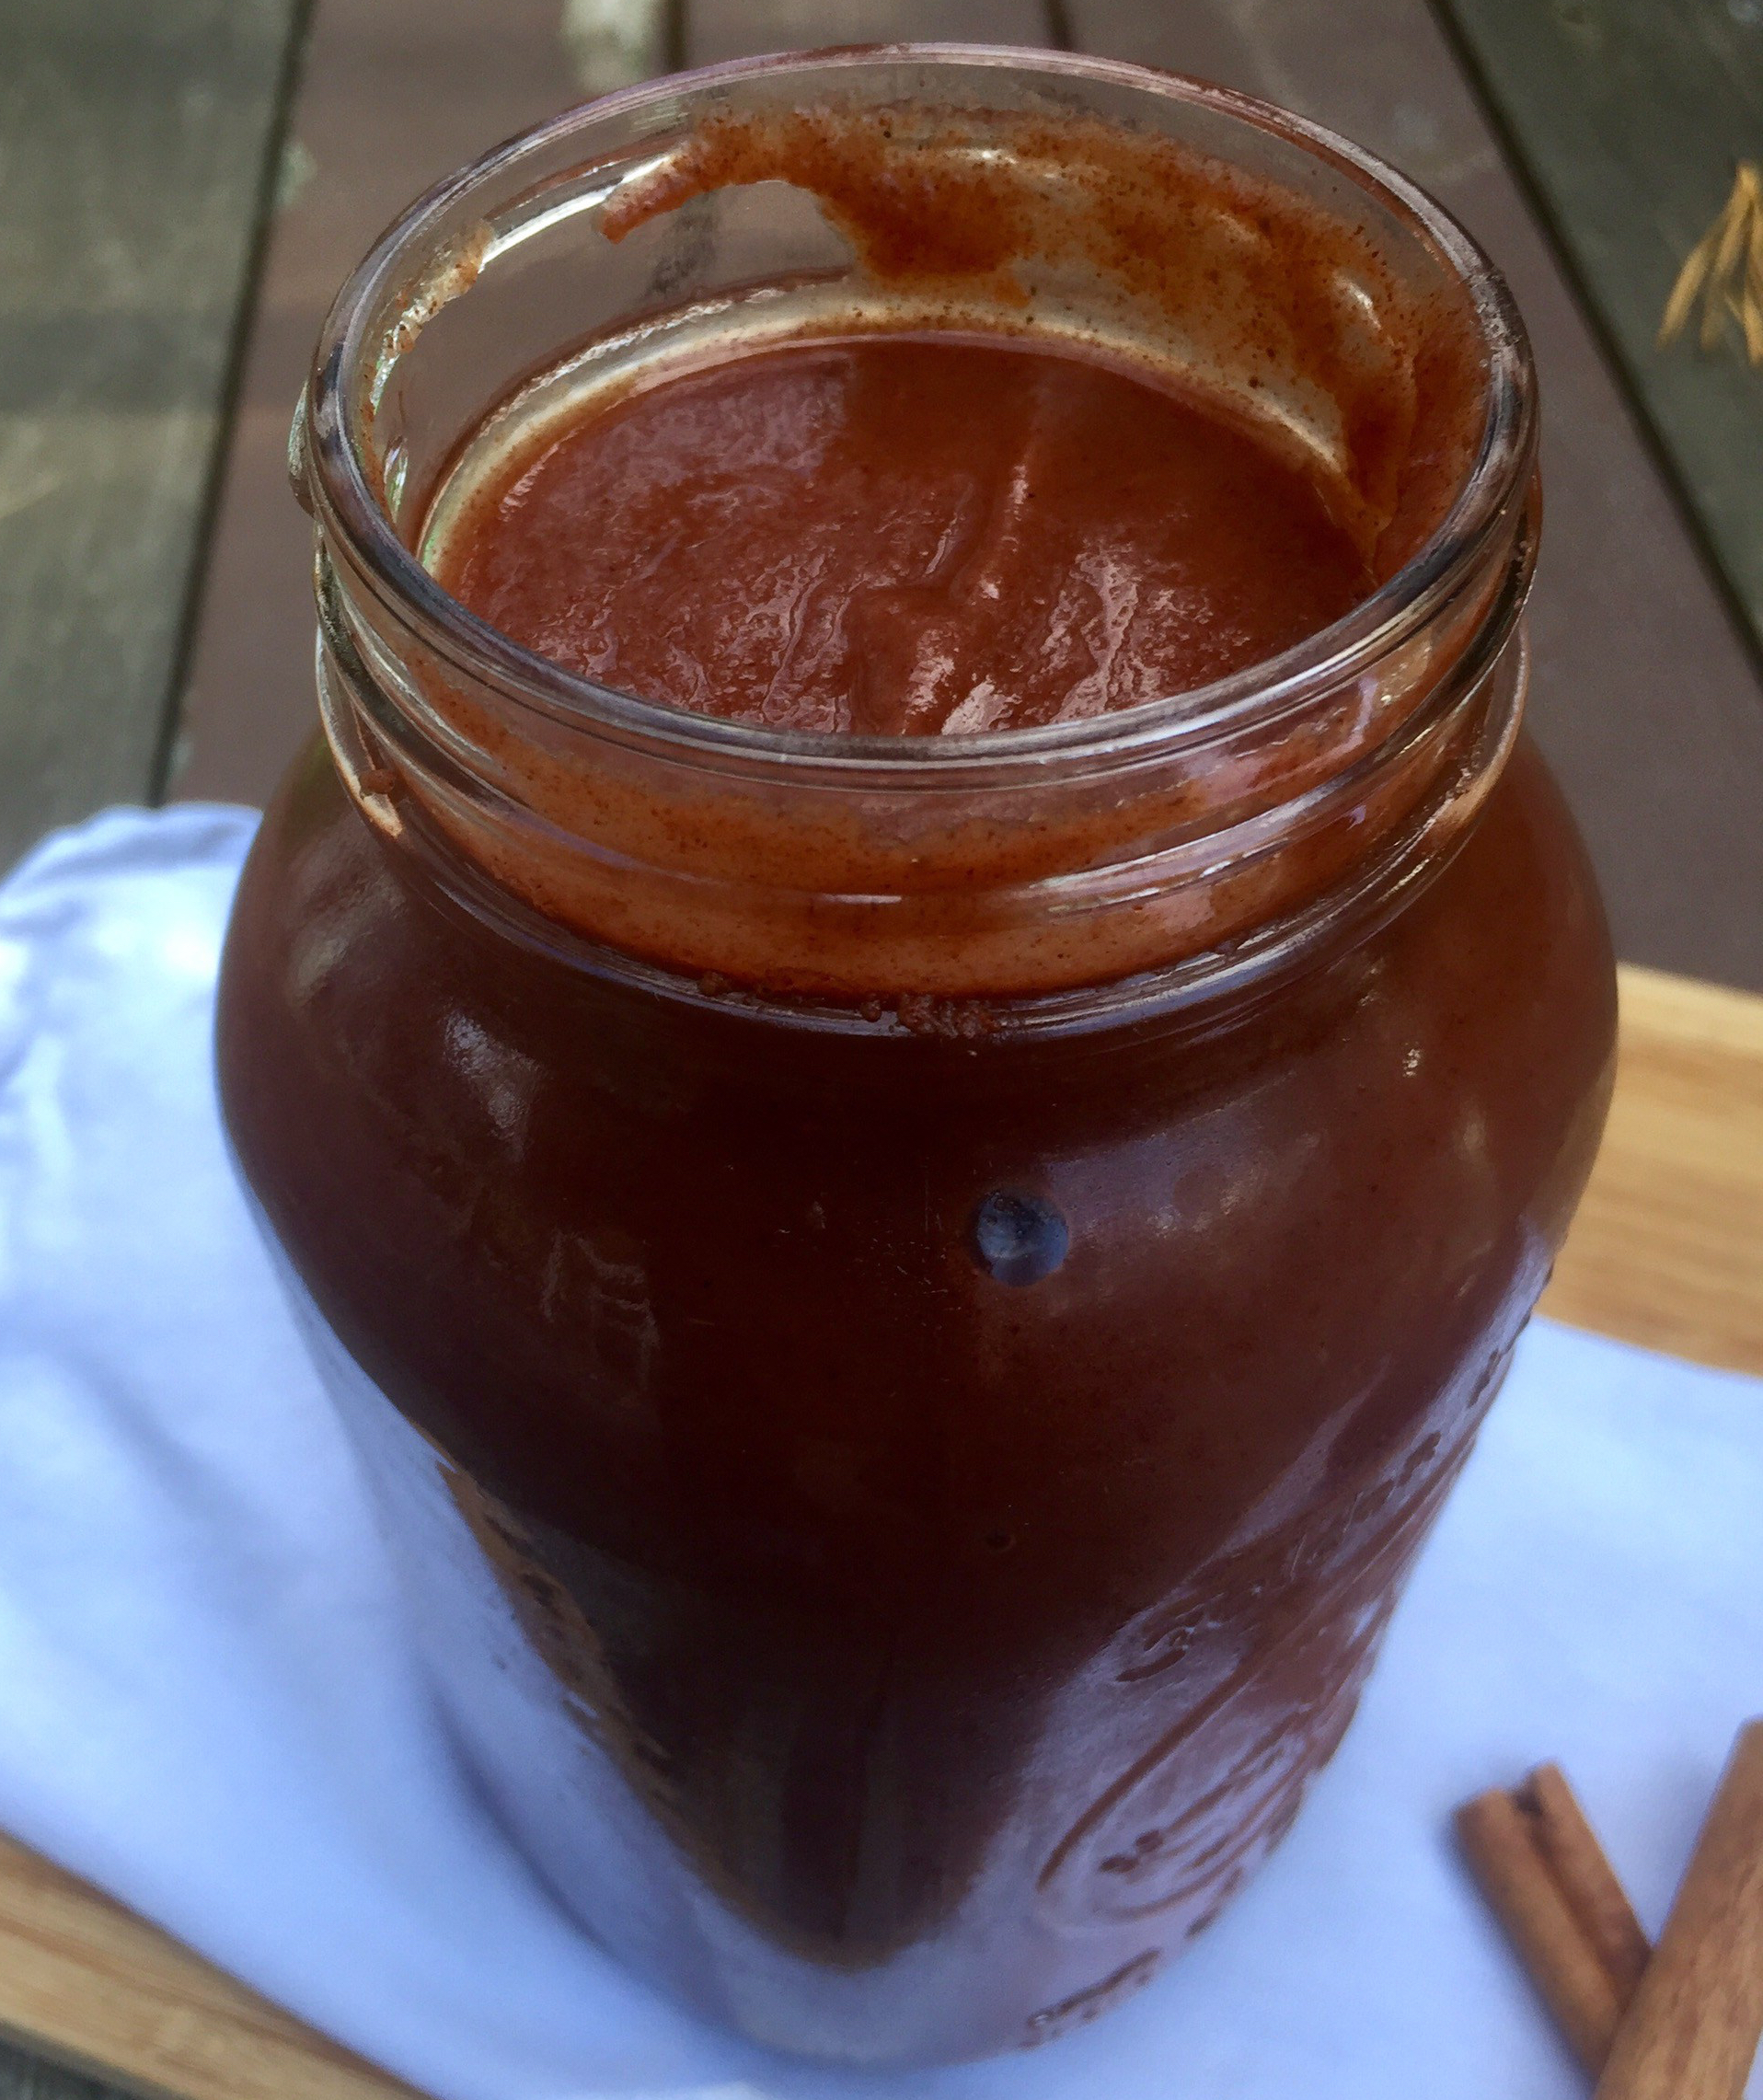
If you are reading this and wondering to yourself “What is apple butter?”, first of all thank you for being patient, and second, apple butter is sort of apple marmalade or apple jam. It’s thick – thicker than apple sauce – and smooth. It is a perfect breakfast item, for toast, pancakes or waffles, and although I have not tried it I bet it can work great as an ice cream topping! It can be made much sweeter depending on the variety of apples you use, and by adding sugar to it. This recipe does not use any sugar and adding Granny Smith to the mix of apples I used makes the final product just slightly tart.
Spice Infused Apple Butter
What you’ll need:
(If using a 6 QT (5.7 L) crockpot – adjust the amount depending on the size of your crock!!!)
6 lbs (2.5-3 kg) apples
2 tablespoons ground cinnamon
2 teaspoon allspice
1 teaspoon ground nutmeg
What you’ll do:
Wash, dry, peel and core your apples. This will be quite a project so arm yourself with patience, enlist help of your friends and family, or get a peeler/corer/slicer device. I can recommend the KitchenAid standing mixer attachment that does all this for you, but it comes with a high price tag. It’s not essential, but it does help a great deal. Whether you peel the apples it is actually up to you. I wanted a really smooth butter texture so decided to peel them this time around.
Slice the apples and put them a really large mixing bowl. Add the spices and mix well, so that the spices are evenly distributed all over your apples.
Line the crockpot with the crockpot liner (if using – I use it becasue it make cleanup a breeze, but it is not essential). Arrange the apples, put the lid on and turn your slow cooker to 10 to 12 hours. If you have a slow cooker that allows you to select the level of heat, I recommend cooking the apple butter on high.
Let the apples cool before handling further. Transfer the cooked apples into a large bowl and use a stick (immersion) blender to purée the apples into a smooth apple butter. If you don’t have an immersion blender, your regular blender will work but you will have to blend in batches.
Since I am not an expert in canning, I packed my apple butter in two nice big jars, one to give away one to keep. I store my apple butter in the fridge but if you do know how to can things I bet you can make the apple butter, can it and keep it for months.


")


