Gluten-free Pumpkin Cookies, via Eat the Vegan Rainbow
Looking for something easy and healthy to make for the holidays? Look no further than these super simple and super healthy cookies. They are full of pumpkin – and we all know that this is the pumpkin season – and are completely and naturally gluten-free. The combination of oats, coconut flour and almond flour does not really need backing and you could mix them all together, let the mix stand, and form the cookies as is. So, if you are into raw food, or minimally processed food this could be a path you take.
Baking the cookies does enhance the flavors, and that’s worth keeping this in mind. Baking also makes all the spices develop and merge. A combination of cinnamon, ginger and cardamom really blooms when heated up! At the end, baking the cookies will give you a more aromatic kitchen and platter.
What will also enhance the flavors is roasting your own pumpkin. (So, I guess not everything will be as a raw as possible since I am not sure you can use raw pumpkin – I have never tried and I am not even sure that it can be done!). Roasting the pumpkin is super easy – you don’t even need to peel it, just slice it in half, scoop out the seeds and place the pumpkin halves on a baking sheet, cut side down and roast at 425 F (220 C) for 45 minutes or so. It also helps to line the baking sheet with some foil or parchment paper – this helps the roasting and the clean up!
After the pumpkin is roasted, all you need to do is scoop the flash and purée, either in a food processor or using a masher. Food processor will make everything much smoother, but if you prefer your a more rustic pumpkin hands or a masher will do.
Enjoy!
Gluten-free Pumpkin Cookies, via Eat the Vegan Rainbow
Gluten-free Pumpkin Cookies – Yummy!
Gluten-free and Oil-free Pumpkin Cookies
What you’ll need:
1 15 oz (425 g) can pure pumpkin (not pumpkin pie filling) or 15 oz (425 g) roasted sugar pumpkin, puréed
1 cup old fashioned oats
1/2 cup coconut flour
1/2 cup almond flour
1/4 cup sugar (or solid sweetener of your choice)
2 teaspoons cinnamon
1 teaspoon cardamom
1/2 teaspoon ginger
Optional: 1/4 cup maple syrup, for brushing
What you’ll do:
Preheat the oven to 350 F (175 C).
Combine all the ingredients in a large food processor. If you don’t have a food processor that’s large enough, you can either process in batches or process pumpkin and oats well and then just mix in the rest of the ingredients (except the optional maple syrup) by hand.
Line a large cookie sheet with parchment paper.
Use an ice cream scoop to measure out the amount for each cookie, than form a round and flat shape and place on the parchment paper. This amount of batter should yield about 12-14 cookies.
Cross-hatch the surface of each cookie.
Bake for 18-23 minutes. Cookies will be lightly browned but stay soft.
Let the cookies cool for 15-20 minutes before brushing with maple syrup. You could skip this step, but why would you want to do that? Enjoy!
I grew up eating pâté and loving it. Some pâté, on a piece of freshly baked bread with a glass of yogurt (yes, the liquid kind you drink like they do in Middle East!) was one of my go to breakfasts. And the pâté I ate was not a fancy French kind made with duck fat. At some point I learned that it was actually made of who know what, random bits and pieces of an animal all ground up. Whether you eat meat or not, I hope we can all agree that that’s pretty unappetizing when you think about it!
But: if you don’t think about it and just go with your taste buds, pâtés are really tasty. They are full of umami, savory flavors that we all crave, they are silky and smooth, they are nicely spreadable, and they are an excellent add-on to a nice piece of bread. So, how can we re-create the perfect savoriness with just a small number of ingredients, and make a healthy and satisfying pâté that will keep you coming back for more?
Well, we start with mushrooms, the well-known source of umami. You can use white button mushrooms here or baby bella (cremini) mushrooms as well. I do not recommend some of the mushrooms that have distinct flavors, like shiitakes; however, other mild mushrooms may work. Still, white button mushrooms are readily available, affordable and work!
Another important umami component is tomato paste. Here, you can use any tomato paste you have on hand and you can adjust the amount – anywhere between a tablespoon or two will do the trick.
To make the dip smooth and rich in protein, I recommend adding canned beans. White beans work best (cannellini, great Northern or navy), but any other variety will probably be OK. If you cook your own beans, I recommend that you keep them slightly undercooked for this application, or at least squeeze some of the excesses liquid out before blending to avoid ending with a pâté that’s more of a soup than a rich and dense spread.
The main flavoring agent here is Herbes de Provence, a mixture of dried herbs that usually includes thyme, rosemary, oregano, marjoram and lavender. I use Trader Joe’s version, and they carry it only as a seasonal item in the fall, but any other mix with the same name will do. Alternatively, you can add a pinch of thyme, rosemary, oregano, and other herbs (including basil) that you may have on hand.
Finally, what also adds a lot to this pâté is sautéing and caramelizing onions, garlic and mushrooms before blending everything together. This will help the flavor deepen and develop!
Looking for serving suggestions? You can use it as a spread or a dip, as a pizza “sauce” and topping (why not?), in your quesadillas (let’s be adventurous!), for your baked potatoes, or for any other dish where you feel the need to add rich, yet smooth flavors. Enjoy!
Nut-free Mushroom Pâté, via Eat the Vegan Rainbow
Mushroom Pâté
What you’ll need:
8 oz white button mushrooms (or cremini mushrooms if you like stronger mushroom flavor), sliced
1/2 large, white onion, diced
4 cloves garlic, sliced
2 tablespoons olive oil
2 tablespoons tomato paste
2 teaspoons Herbes de Provence
1 15 oz (425 g) can white beans
Salt to taste
What you’ll do:
Place a large sauté pan over medium high heat. Heat up than add the oil and onions. Sauté for 2-3 minutes, then add the garlic. Let garlic start to release its aroma – this usually takes a minute.
Add the mushrooms and , increase the heat to high, mix well and sauté until mushrooms are browned. This will take about 4-5 minutes.
While the mushrooms are cooking, drain and rinse the can of beans. Shake access water off and place into a food processor or a large mixing bowl if you rather use a stick blender (this is an incredibly useful kitchen gadget and it’s what I used here).
Pour the sautéed mushrooms over the beans and blend until smooth and combined. Leave in the refrigerator until ready to serve.
Serve cold as a spread for sandwiches or as a dip for chips or crackers. This pâté is excellent addition to your menu and it offers a healthy and humane alternative.
Plantain Lasagna with Pinto Beans, via Eat the Vegan Rainbow
The first time I tasted plantains, those longer, bigger bananas you sometimes see in your grocery store among other exotic fruits and vegetables, I did not like them. They were fried yet sort of mushy, and tasted very sweet although they were served as a savory side dish. So, for the next fifteen years I stayed away from them.
Few months ago I was watching a cooking show, and they talked about Puerto Rican lasagna – Pastelón – that looked delicious, with layers made of plantains rather than noodles. So I decided to give this lasagna a try. Please note that if you expect to see a traditional Pastelón recipe here, stop reading now and go elsewhere. I took a great deal of liberty here, so you will not find any meat or cheese here. What you will find is lots of beans and salsa. And lots, and lots of plantains.
The plantains you want to use here are very ripe. Some stores sell them ripe, but some carry only green looking plantains. You could get those and keep them in a paper bag until they get ripe – I tried this but it did not work really well. So now I go for off the shelf half-ripe plantains that, by the way, are very yellow with a bit of black. This article will help you navigate the plantains and different stages of their ripeness. For me the green plantains were too tough and the very ripe ones were too sweet so I settled on 75%-ripe.
Instead of frying the plantains, which is the most common way people make them edible, I roasted them. You will need to cut through the skin lengthwise and roast them for about half an hour. Their skin should turn totally black and once cooled they should be easy to peel and slice lengthwise into thin slices.
While your plantains are roasting, prepare your lasagna filling, which in this case is a batch of pinto beans, simmered with onions, roasted green chili peppers and spices.
The base for your lasagna will be salsa, and I just use store bought kind, and what will give this lasagna a slightly meaty feel is a layer of TVP – textured vegetable protein. Although the bag TVP comes in may recommend soaking, please don’t do it. This lasagna is juicy enough and the TVP will soften and cook as the lasagna is baking. After the TVP layer, come the plantain slices, and then the beans. Cover everything with foil, but it in the oven for forty five minutes or so, and that will be that. You will have an out of the ordinary lasagna on your hands to enjoy.
Plantains Lasagna with Pinto Beans
What you’ll need:
4 plantains, almost ripe
2 cups salsa, homemade or store bought
2 cups TVP (textured vegetable protein)
1 onion, diced
2 15.5 oz (440 g) cans pinto beans
1 4 oz (113 g) can fire roasted green chili peppers
1 teaspoon cumin
1 teaspoon chili powder
1 teaspoon smoked paprika
Cooking spray
What you’ll do:
Preheat the oven to 425 F (220 C).
Wash the plantains, cut their end off and cut a slit in their skin lengthways. Arrange on the foil or parchment paper lined baking sheet and put in the oven for 35-45 minutes.
While plantains are roasting, prepare the beans. Spray the bottom of a large pan, I used my cast iron pan but you can use any pan you like, and place over medium heat.
Add the onions and cook until golden, which will take about 5 minutes.
Add the spices, and let the spices toast for a minute or so.
Add the can of fire roasted green chili peppers and stir again.
Finally add the beans and using a potato masher mash the beans while they cook. Don’t mash them all the way through – leave some of the beans whole. Let the beans simmer for 15 minutes or so.
By the time the beans are done, plantains will be too. The roasted plantains should be soft but not mushy. Let the plantains cool before handling.
Decrease the oven temperature to 350 F (175 C).
Once cool enough to handle, peel the plantains and cut lengthwise into sheets. Adjust the thickness to your preference.
Spray the bottom and the sides of a deep 9 x 13 in (23 x 33 cm) baking dish with cooking spray. Pour the salsa in and spread to cover the bottom. Distribute the TVP over the salsa to make one even layer. Place the roasted plantain slices over the TVP. Pour the beans over the plantains, cover the dish with some foil and put it in the oven for 30 minutes covered, then uncover and let the top brown for another 10 minutes.
Take the lasagna out of the oven and let it rest for 10 minutes before serving. Serve with plain rice or enjoy as is, perhaps with a sprinkle of cheese alternative or a spoonful of macadamia nut queso fresco. Yum!!!
Reprinted with permission from “From the Kitchen of YamChops” by Michael Abramson, Page Street Publishing Co. 2018. Photo credit: Vincenzo Pistritto
Many of you transitioning into plant-based eating and/or vegan lifestyle may feel overwhelmed. Overwhelmed with all the details, discouraged with too many restrictions, and crushed by the broader society that has not adjusted to support our growing plant-based eating habits. I get it – I’ve been there!
What helped me are some excellent cookbooks that provided initial inspiration, especially the America’s Test Kitchen “Vegan for Everybody“, and an entire community of vegan blogs and bloggers that I discovered – Finding Vegan. Over time, plant-based cooking and eating stopped being about the restrictions and things you can’t eat, and became about the abundance of ingredients and flavors.
Trying new recipes and ideas remains one of my favorite things to do, and I am always on a lookout for the latests cookbooks. The “From the Kitchen of YamChops” by Michael Abramson is the newest of my acquisitions. If you don’t know about YamChops, let me give some background. YamChops is a plant-based butcher shop, and when it opened in 2014 it was the first of its kind in Canada, and at that time one of only a handful vegetarian butcher shops in North America. Since then, YamChops has become well-known in Toronto, where it is located, and beyond, even earning a spot in USA Today’s list of 10 Best Gourmet Stores. They now offer lots of their products for sale on their website for those of you who live in Canada.
For the rest of us outside Canada, we now have the “From the Kitchen of YamChops” to fall back to and re-create the tastes at home. As could have been expected for a cookbook celebrating the vegan butchers in all of us, the opening chapter is all about meatless main dishes, with a range of burgers, meatballs, steaks, and even a schnitzel! There’s lots of comfort food recipes in there, and I highly recommend giving their Butternut Squash Cheeze ‘n’ Mac Casserole a try – it was delicious!!!
The story does not end at main dishes, and you will find a lot of great recipes for appetizers (including four different “ba-con” recipes – my favorite is coconut flakes ba-con, but that may change as I am looking forward to trying shiitake mushroom ba-con next), soups, salads, sauces, chutneys, dips and dressings. The final chapter is one big homage to chocolate, so your sweet tooth will not remain unsatisfied!
Out of many options, I decided to test a simple meatball recipe. My cooking is not only plant-based, but as gluten-free as possible, so recipes with gluten are a bit of a no-go for me. So, Black Bean Meatless Meatball recipe was definitely appealing because it is naturally gluten-free (if you get the right oats, so do read your labels carefully), and uses common ingredients that I always keep on hand. This made the prep easy and convenient, and these meatballs came together in a snap. You can see the full recipe below, courtesy of “From the Kitchen of YamChops” by Michael Abramson, Page Street Publishing Co. 2018.
Basically, I followed the recipe as provided, and everything came together really well. The meatballs were the right consistency, not too sticky, and not too loose, and came out moist and flavorful. The recipe is also perfect for those who are trying to cut down on their oil and fat consumption because it does not use any!
Having said that, there is one adjustment that I plan to incorporate next time I make these and that’s to sauté the green onions, red pepper and garlic for couple of minutes before mixing them in with the rest of ingredients. I found that these three components were a bit undercooked for my taste and the baking was not able to get the nice caramelized onion/garlic/pepper flavor that I prefer.
But, even without this minor change, these meatballs get a thumbs up! They were easy to make, the recipe yielded quite a good amount, and overall it is very budget friendly. So, definitely worth keeping on hand especially on busy evenings. I look forward to trying some of the other recipes included in “From the Kitchen of YamChops” by Michael Abramson, and if I am ever in Toronto again, I will definitely stop by and feast on what YamChops has to offer!!!
With permission from “From the Kitchen of YamChops” by Michael Abramson, Page Street Publishing Co. 2018. Photo credit: Vincenzo Pistritto
Black Bean Meatless Meatballs
(Makes 2 Dozen (2 ounce) Meatballs)
What you’ll need:
½ cup rolled oats
1 ½ cups canned black beans, rinsed and drained
1 tbsp egg replacer mixed with 3 tbsp (45 ml) water
1/3 cup fresh or frozen corn kernels, thawed if using frozen
¼ cup chopped green onion
¼ cup diced red pepper
3 tbsp salsa, homemade or store-bought
3 small cloves garlic, minced
2 tsp ground cumin
½ tsp dried oregano
½ tsp dried basil
½ tsp smoked paprika
¼ tsp cayenne pepper
1/8 tsp sea salt
Large pinch cinnamon
Large pinch black pepper
What you’ll do:
Preheat the oven to 350F
Pulse the rolled oats 3 or 4 times in a food processor. Add the rinsed beans and continue to pulse until the beans are roughly chopped. You want to keep some texture in the beans, so be sure not to over-process them.
Whisk the egg replacer and water together until smooth and set it aside to rest for a couple of minutes.
Empty the contents of the processor into a large bowl and add the corn, onion, red pepper, salsa, garlic, cumin, oregano, basil, paprika, cayenne, salt, cinnamon and pepper. Mix together until all ingredients are evenly distributed. Your hands are the best tool for this job.
Add the egg replacer mixture, and mix everything together until the egg replacer mixture is fully incorporated.
Take a small handful of the mixture, a little bigger than a golf ball, and form it into a fairly tight-packed ball. If the mixture holds together, you’re good to go. If the mixture is too wet, add 1 to 2 teaspoons of pulsed rolled oats. If the mixture is too dry, add 1 to 2 teaspoons of water. At YamChops, we use a 2 ounce scoop to measure these meatballs.
Place the formed meatballs on a parchment paper lined baking sheet and place in your preheated oven for approximately 20 minutes or until firm to the touch. Gently turn the meatballs every 5 minutes to ensure even browning.
Recipe reprinted with permission from “From the Kitchen of YamChops” by Michael Abramson, Page Street Publishing Co. 2018. No further re-publishing allowed without explicit permission of the original content creators.
Disclosure: I received a free copy of this cookbook through a community of vegan bloggers. This did not influence my views about the recipes I tried thus far and mentioned above.
By now you probably figured out that I am a huge fan of Indian cuisine. Perhaps it’s the spices, perhaps it’s the long and slow simmering, perhaps is the whole culture of not eating meat that produced an abundance of vegan-friendly recipes and ingredient combinations [EDIT: I was alerted that current facts suggest that India may not be as vegetarian as previously thought; it seems that it’s a myth that India is mostly vegetarian]. Whatever it is, Indian cuisine has always been a huge inspiration for me, and I’ve been sharing some of the results on this blog. Past successes include Jackfruit Tikka Masala, as well as Chicken-less Tikka Masala made with soya chunks, and my version of Sabudana Khichdi.
This recipe is a vegan version of a minced lamb dish called Keema Matar. The recipe uses minced soya chunks that give the final dish the same consistency and appearance as the original recipe. You could use TVP (textured vegetable protein) but note that the food will probably have a softer, less chewy bite to it.
What makes this recipe work are, of course, the spices. I use some pretty standard spices like garlic powder, freshly grated ginger, chili powder, a cinnamon stick, some more specialized spices like turmeric, coriander powder and coriander pods, and some spices that you can only find in an Indian grocery store, like Indian bay leaves and matar masala. Fear not if you don’t have easy access to these last two spices because you can use regular bay leaves and some cumin powder instead.
The best way to ensure that your soya chunks absorb all the flavors is to cook them according to instructions, which usually say “boil in water for 5 minutes”, rinse, drain, gently squeeze to remove some of the excess water, and mince them – I use a food processor for mincing – and then mix the minced chunks with spices and let them marinate for a while. (Note: if you are using TVP, you will not need to mince since the TVP flakes are already about the right size once they are fully soaked. Although hard to remove access water from TVP once it’s fully soaked, I do suggest you give it a gentle squeeze before marinating!)
Another ingredient that is needed for this dish are green peas. I use frozen peas, and I don’t bother with defrosting – just mix them into the simmering minced soya chunks and they’ll be fine. Once done, serve over some Basmati Rice, sprinkle with some fresh cilantro and add a side of raita (yogurt sauce with chopped cucumbers and mint – I make mine with cashew yogurt and it comes out great!) or even a piece of naan and you will have an unbelievable restaurant-style dinner right in the comfort of your home.
Meatless Keema Matar
What you’ll need:
200 g soya chunks
2 teaspoon coriander powder
2 teaspoon chili powder
2 teaspoon mattar masala
1 tablespoon grated ginger, fresh
1 teaspoon garlic powder
1 teaspoon turmeric
2-3 tablespoon oil
3-4 Indian bay leaves
1 cinnamon stick
10-15 cardamom pods
4 cloves garlic, sliced
1 onion, diced
1 tablespoon tomato paste
1 15 oz can petit diced tomatoes
1 1/2 cup green peas, frozen
Fresh cilantro for garnish
What you’ll do:
Place soya chunks in a large pot, cover with water, bring to boil, and cook for 5 minutes, or according to the instructions on the box. Drain and rinse with cold water. Squeeze the soya chunks gently to remove some of the excess water, them place in the food processor.
Add all the spices up to the oil and bay leaves, and process until soya chunks get a consistency of minced meat. Let the minced soya chunks and spices marinate for an hour or so on the kitchen counter at room temperature.
In a heavy pot, like a Dutch oven, heat the oil over medium high heat then add the Indian bay leaves, cinnamon stick and the cardamom pods and let the aromas bloom for a minute.
Add the onions and garlic, and sauté them for 5-6 minutes.
Add the tomato paste, mix well and continue sautéing for another minute to brown the tomato paste just slightly.
Add the minced soya chunks with all the spices they have been combined with as well as the diced tomatoes and simmer for 10-15 minutes.
Add the peas, mix well and simmer for another 10 minutes. By this point, your food will be ready and your kitchen will smell fantastic. Serve and enjoy with Basmati Rice, and/or naan, and/or raita.
Chickpea Burgers with Sun Dried Tomatoes and Walnut Meat, via Eat the Vegan Rainbow
You should get to know walnuts. They are super nutritious because they have a large amounts of polyunsaturated fats, and surprisingly high amounts of protein, fiber, even vitamins B-6.
Walnuts are also fun and funky. They look like large, green balls when young, and their pretty green skin shrivels into dark brown to black husk as they ripen. This husk eventually falls off, revealing the nut. If you do find yourself with a pile of walnuts still wearing their husks on your hands, do use gloves when peeling them. The walnut husks will release dark brown pigments that will color your skin, and the stuff does not come off easily. It’s actually still used as a natural hair dye in some places, and if you ever get a pile of green walnuts stick them into some brandy and make some dark liquor called nocino.
If you are like me, chances are the walnuts you can easily find come nicely cleaned and sometimes even chopped. These days I prefer to get chopped walnuts as that speeds things up in the kitchen. I use walnuts in my desserts, as a quick snack, and as a meat substitute. This recipe here falls into the “walnuts as a meat replacement” category and to boost their meaty flavor I combine them with sun dried tomatoes, caramelized onions, cumin, smoked paprika, and chili powder. This serves as a fantastic flavor add-on to chickpeas, which are the main ingredients in this burger. Having said that, I think chunks chickpeas here are more of a filler and that walnuts and the sundried tomatoes are the stars.
The main binding agents here are flax meal and bread crumbs. Flax meal has to be soaked in hot water for about fifteen minutes, which should be enough to transform it into sticky goo that you can use instead of eggs as a binding agent.
Chickpea Burgers with Sun Dried Tomatoes and Walnut Meat
What you’ll need:
1 onion, diced
1 cup walnuts, chopped
3 oz. (85 g) sun dried tomatoes, sliced
3 tablespoons flax meal
6 tablespoons water, boiling
2 15.5 oz. (439g) cans chickpeas, rinsed and drained
3 tablespoons olive oil
2/3 cup plain bread crumbs
1 teaspoon smoked paprika
1 teaspoon cumin
1 teaspoon chili
Cooking spray
What you’ll do:
In a large cup or a measuring cup mix flax meal and the boiling water. Let the mixture stand for 15-20 minutes.
Spray the bottom of a large frying or sauté pan with cooking spray and place over medium heat. Add the diced onions and sauté for 8-10 minutes until the onions are nicely caramelized.
Add chopped walnuts and let them toast slightly. This will take 3-5 minutes.
Add the sun dried tomatoes, mix well and sauté for another couple of minutes.
Transfer the sautéed mixture into a large mixing bowl. Add the chickpeas that have been carefully washed, drained and half-mashed with either a hand or a fork. Add the soaked flax meal, spices, oil, and bread crumbs and mix well.
Form the burger patties, and place them on the wax paper lined platter. Put the patties in the fridge for at least 30 minutes to firm up.
Grill the burgers using an outside or an inside grill, or a grill pan. These burgers are sturdy and should not fall apart while grilling. They need 3-5 minutes per side to get nice grill marks.
Serve them on a ham burger bun with your choice of toppings and condiments!!!
Spicy and Smokey Pulled “Pork” Jackfruit, via Eat the Vegan Rainbow
For many transitioning to plant-based, vegan or vegetarian diets giving up meat could be very difficult, especially during the summer months of outdoor grilling and the good ol’ BBQ. So, it’s no wonder that many recipe developers have been interested in capturing some of the BBQ flavors and channeling them into plant-based dishes.
Few weeks ago I reviewed one of the newest cookbooks dedicated entirely to vegan grilling, and I am currently going over the vegan butcher’s cookbook. Almost every one of these cookbooks as well as many vegan blogs and recipe aggregators include at least one vegan pulled “pork” recipe that uses green young jackfruit to recreate the look and feel of pulled pork. Jackfruit BBQ pulled pork recipe was even featured on TODAY.com as one of the biggest food trends of 2017!
I’ve been using jackfruit for over a year now, and have tried couple of different pulled pork recipes. They left me a bit underwhelmed, and I put the idea of BBQ pulled jackfruit on a side burner. And that’s where it stayed until very recently when I decided that it’s time to tackle this challenge again.
The recipe I came up with is slow cooker based and it takes about six hours to make. First, I combined lots of finely chopped onions and finely grated carrots to give the BBQ lots of natural sweetness. To help the aromas develop, I mixed the onions and carrots with oil and tomato paste and cooked them in the microwave oven for six minutes or so, until almost fully softened and slightly caramelized.
Next, I pulled the drained and rinsed jackfruit before cooking. I discarded all the very tough bits and pulled the rest apart with my fingers.
For smokiness and flavor, I added molasses, mesquite powder, and some sauce from chipotle peppers in adobo sauce. This sauce is super spicy so go easy with it, or replace it with some smoked paprika, or liquid smoke. I like a bit of a kick so this sauce (in moderation) works for me. The mesquite powder is something that you may need to order online (I got this brand from Amazon), but it is worth having on hand. It’s a powder that adds nice nutty and subtly smokey flavor to baked goods, desserts, and now “pulled” pork.
The slow cooker did all the work once I mixed everything together. The main pro tip when using a slow cooker (crock pot) is to use a liner to help with clean up. Other than that – you mix all the ingredients, put the lid on, turn on high for several hours, and you are done!
The pulled jackfruit really delivered! The sweetness and the heat from the adobo sauce combined to give this all sort of happy balance. Jackfruit turned out soft and very much like pulled pork in texture, while onions and carrots have almost melted into the final sauce, which is exactly what I wanted.
Spicy and Smokey BBQ Pulled “Pork” Jackfruit
What you’ll need:
1-2 yellow onions, finely diced
3 large carrots, finely grated
3 tablespoons tomato paste
2 tablespoons canola (or other neutral taste) oil
3 10 oz (280 g) cans green, young jackfruit in brine (drained, rinsed and pulled apart)
1/4 cup dark molasses
1 tablespoon adobo sauce
2 tablespoons mesquite powder
What you’ll do:
Mix diced onion, finely grated carrots, oil and tomato paste in a microwave safe bowl. Put in the microwave for 6-8 minutes until onions start to caramelize.
While the onion and carrot mix is caramelizing and softening, drain and rinse the jackfruit then use your fingers to pull apart all the soft bits while discarding the tough pieces of core.
Line the slow cooker with a liner, add the pulled jackfruit, onion and carrot mix, and the rest of the ingredients. Please note that adobo sauce from a can of chipotle chilis in adobo sauce is very smokey and very spicy, so you may want to dial down or dial up (if you are really adventures!) according to taste. If you rather not have the heat, you could use some smoked paprika and/or a teaspoon of liquid smoke.
Cover the slow cooker, and turn it on to high heat for 5-6 hours.
Serve the BBQ pulled “pork” in a hamburger bun, with some mashed potatoes, coleslaw, grilled corn, or any of other of your favorite sides. The BBQ pulled “pork” would also go really well with some freshly made cornbread, and you can always pour on some of your favorite BBQ sauce for that “finger lickin’ good” feel!
Vegan, fully plant-based meatballs are one of the easiest thing in the world to make. I like putting meat-free “meatballs” together because they are fun – fun always comes first of course – and they are versatile, you can stick them into a sandwich, over pasta, serve with mashed potatoes, with rice and beans, and the list goes on and on…
Plus: unlike dealing with meat, especially poultry, all the ingredients in these meatballs are safe to eat as is, which means that even young kids can get involved and roll some meatballs. I told you – these can be fun for everyone!
What makes these meatballs Asian is the combination of scallions (green onions), Sriracha (hot red chili sauce), fresh ginger, panko (Japanese breadcrumbs), and peanut butter that get mixed with chopped, not ground, soya chunks. The idea is to retain some of the soya chunks structure rather than grind them to the consistency of ground beef. Think chicken salad, rather than taco meat.
To complete the meal you will need to do some spiralizing, which is one of my favorite things to do with zucchini, summer squash, and even potatoes. Here, I combined carrots and zucchini which gives the salad a nice contrast of crunch versus softness, plus a colorful appearance. The spiralized vegetables are mixed with some slivered almonds, lime juice and zest, and tossed to combine. Top them with a meatball or three, and you got yourself a dinner!
Asian Meatballs with Spiralized Zucchini and Carrot Salad
What you’ll need:
FOR THE SALAD
3 zucchinis, spiralized
3 fat carrots, spiralized
1/2 cup slivered almonds
1 lime, juice and zest
FOR THE MEATBALLS
200 g soya chunks
1 1/2 cup panko, Japanese breadcrumbs, regular or gluten-free
3 scallions, white and green parts, finely chopped
1 tablespoon ginger, freshly grated
1 tablespoon peanut butter, natural and unsalted
3 tablespoons soy sauce, reduced sodium
1/2 teaspoon hot chili sauce (sriracha)
Cooking spray
What you’ll do:
Prepare soya chunks according to the instructions on the box. They usually need about 3-5 minutes in a pot of boiling water.
Drain and rinse your soya chunks under some cold water, then chop or grind them into small chunks, similar to chicken chunks commonly used in Asian Dumplings recipes. Place them in a large bowl, and add all the rest of the ingredients. Mix everything well and let stand for 5-10 minutes before making the meatballs.
Heat a large skillet or a cast iron pan over the medium high heat. Spray with some cooking spray and brown the meatballs on all sides until golden brown. Brown the meatballs in batches and make sure you don’t overcrowd the pan.
While the meatballs are browning, prepare the salad. You can either buy a box of spiralized carrots and spiralized zucchini and toss them with some lime juice, lime zest, and toasted slivered almonds, or you can spiralize your own if you have the spiralizer. Let the salad rest while the meatballs finish browning.
To plate, place a good amount of salad in the middle of the plate, and top with 2-3 meatballs. Enjoy!
Saffron Cauliflower Rice, via Eat the Vegan Rainbow
Is there a more gorgeous looking vegetable than cauliflower? This is, of course, a rhetorical question because the answer to anyone who has ever held a perfect head of cauliflower in their hands should be an obvious “No!”.
Cauliflower florets are a perfect ingredient for things like vegan Buffalo wings – if you haven’t tried those yet drop whatever you are planning to make, and prepare the Buffalo wing right now! Cauliflower is also great for soups, pickled, and in curries.
In addition to all that, cauliflower can also be made into rice. Yes, you read that right – cauliflower = rice. It may strike you as strange but do follow along and you’ll thank me later. The cauliflower rice is something that was invented to fit the whole paleo eating craze – an alternative to rice that’s carb-friendly. I had it as a sort of cauliflower “risotto” and that was OK. I’ll make it again one day, and share here once I work out the ways to improve it.
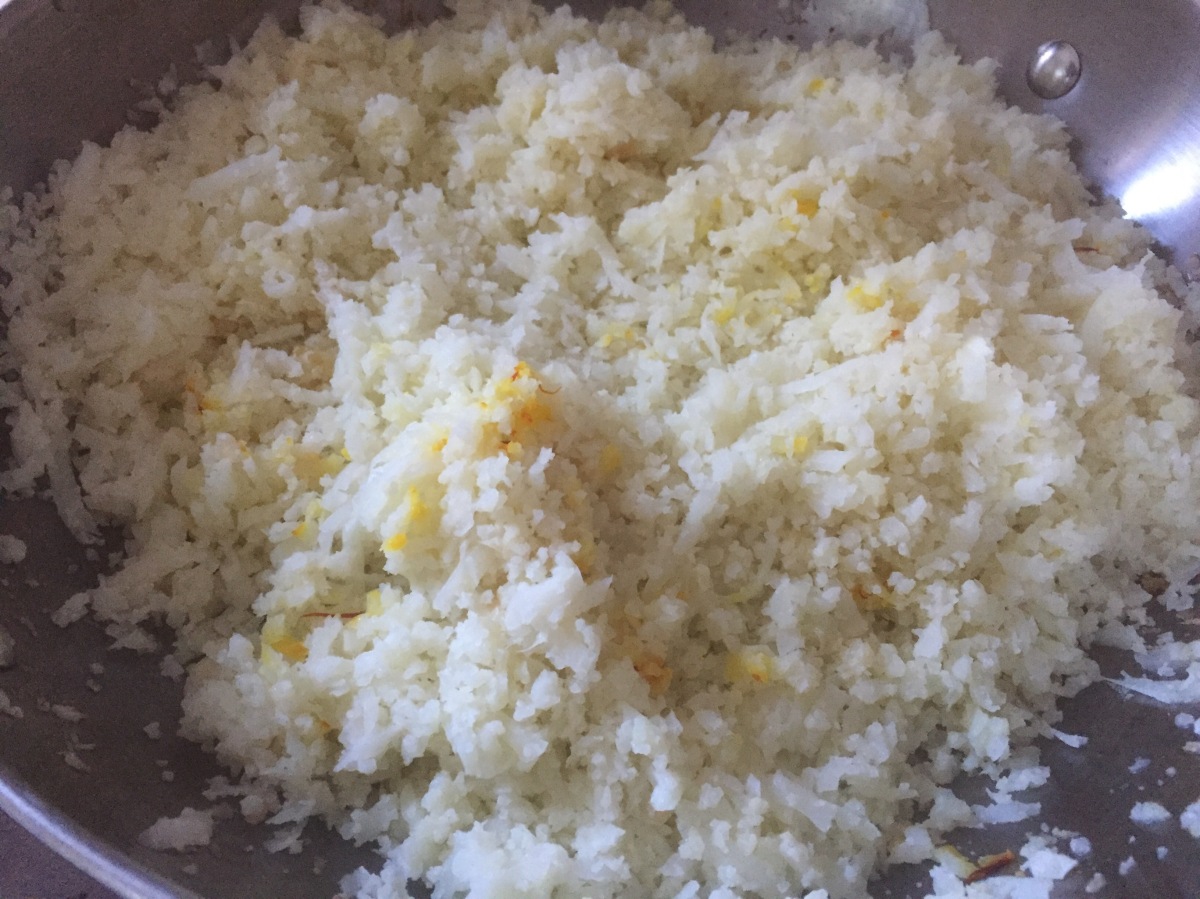
I was looking for something to serve with my meatless Koftas, and since I had a lovely head of cauliflower on my hands I went for it. All you need to do to make the rice is to run your cauliflower through a food processor. I used relatively closely chopped florets but you can use as much of the stems as you like. Depending on the size of your food processor you may need to do the zapping in batches. The ricing itself takes only a couple of 2-5 second pulses. At the end your cauliflower should be the size of rice grains. For basmati rice texture, the grains should be a bit larger than for risotto. But, the size of cauliflower rice “grains” will have no impact on cooking, it’s for esthetic quality only, so use your judgment to decide whether you need to be that nit picky.
Making of cauliflower rice takes less time and is more hands off then making rice, so all in all once you are done grating, using a food processor or a grater, the cauliflower rice will be ready in about ten minutes. You can serve this saffron as a side with any Indian, North African or Middle Eastern recipe, like the lovely koftas I already mentioned!
Saffron Cauliflower Rice
What you’ll need:
1 large head of cauliflower
1/4 cup water (if needed)
3-5 springs of saffron
Cooking spray or olive oil
What you’ll do:
Wash the cauliflower, cut the florets and place them into a food processor. Process the cauliflower into rice grain size pieces.
Spray the bottom of a large pan with cooking spray, or use a tablespoon of oil. Place over the medium heat and add the cauliflower rice. Let the cauliflower sauté for 10 minutes, stirring occasionally.
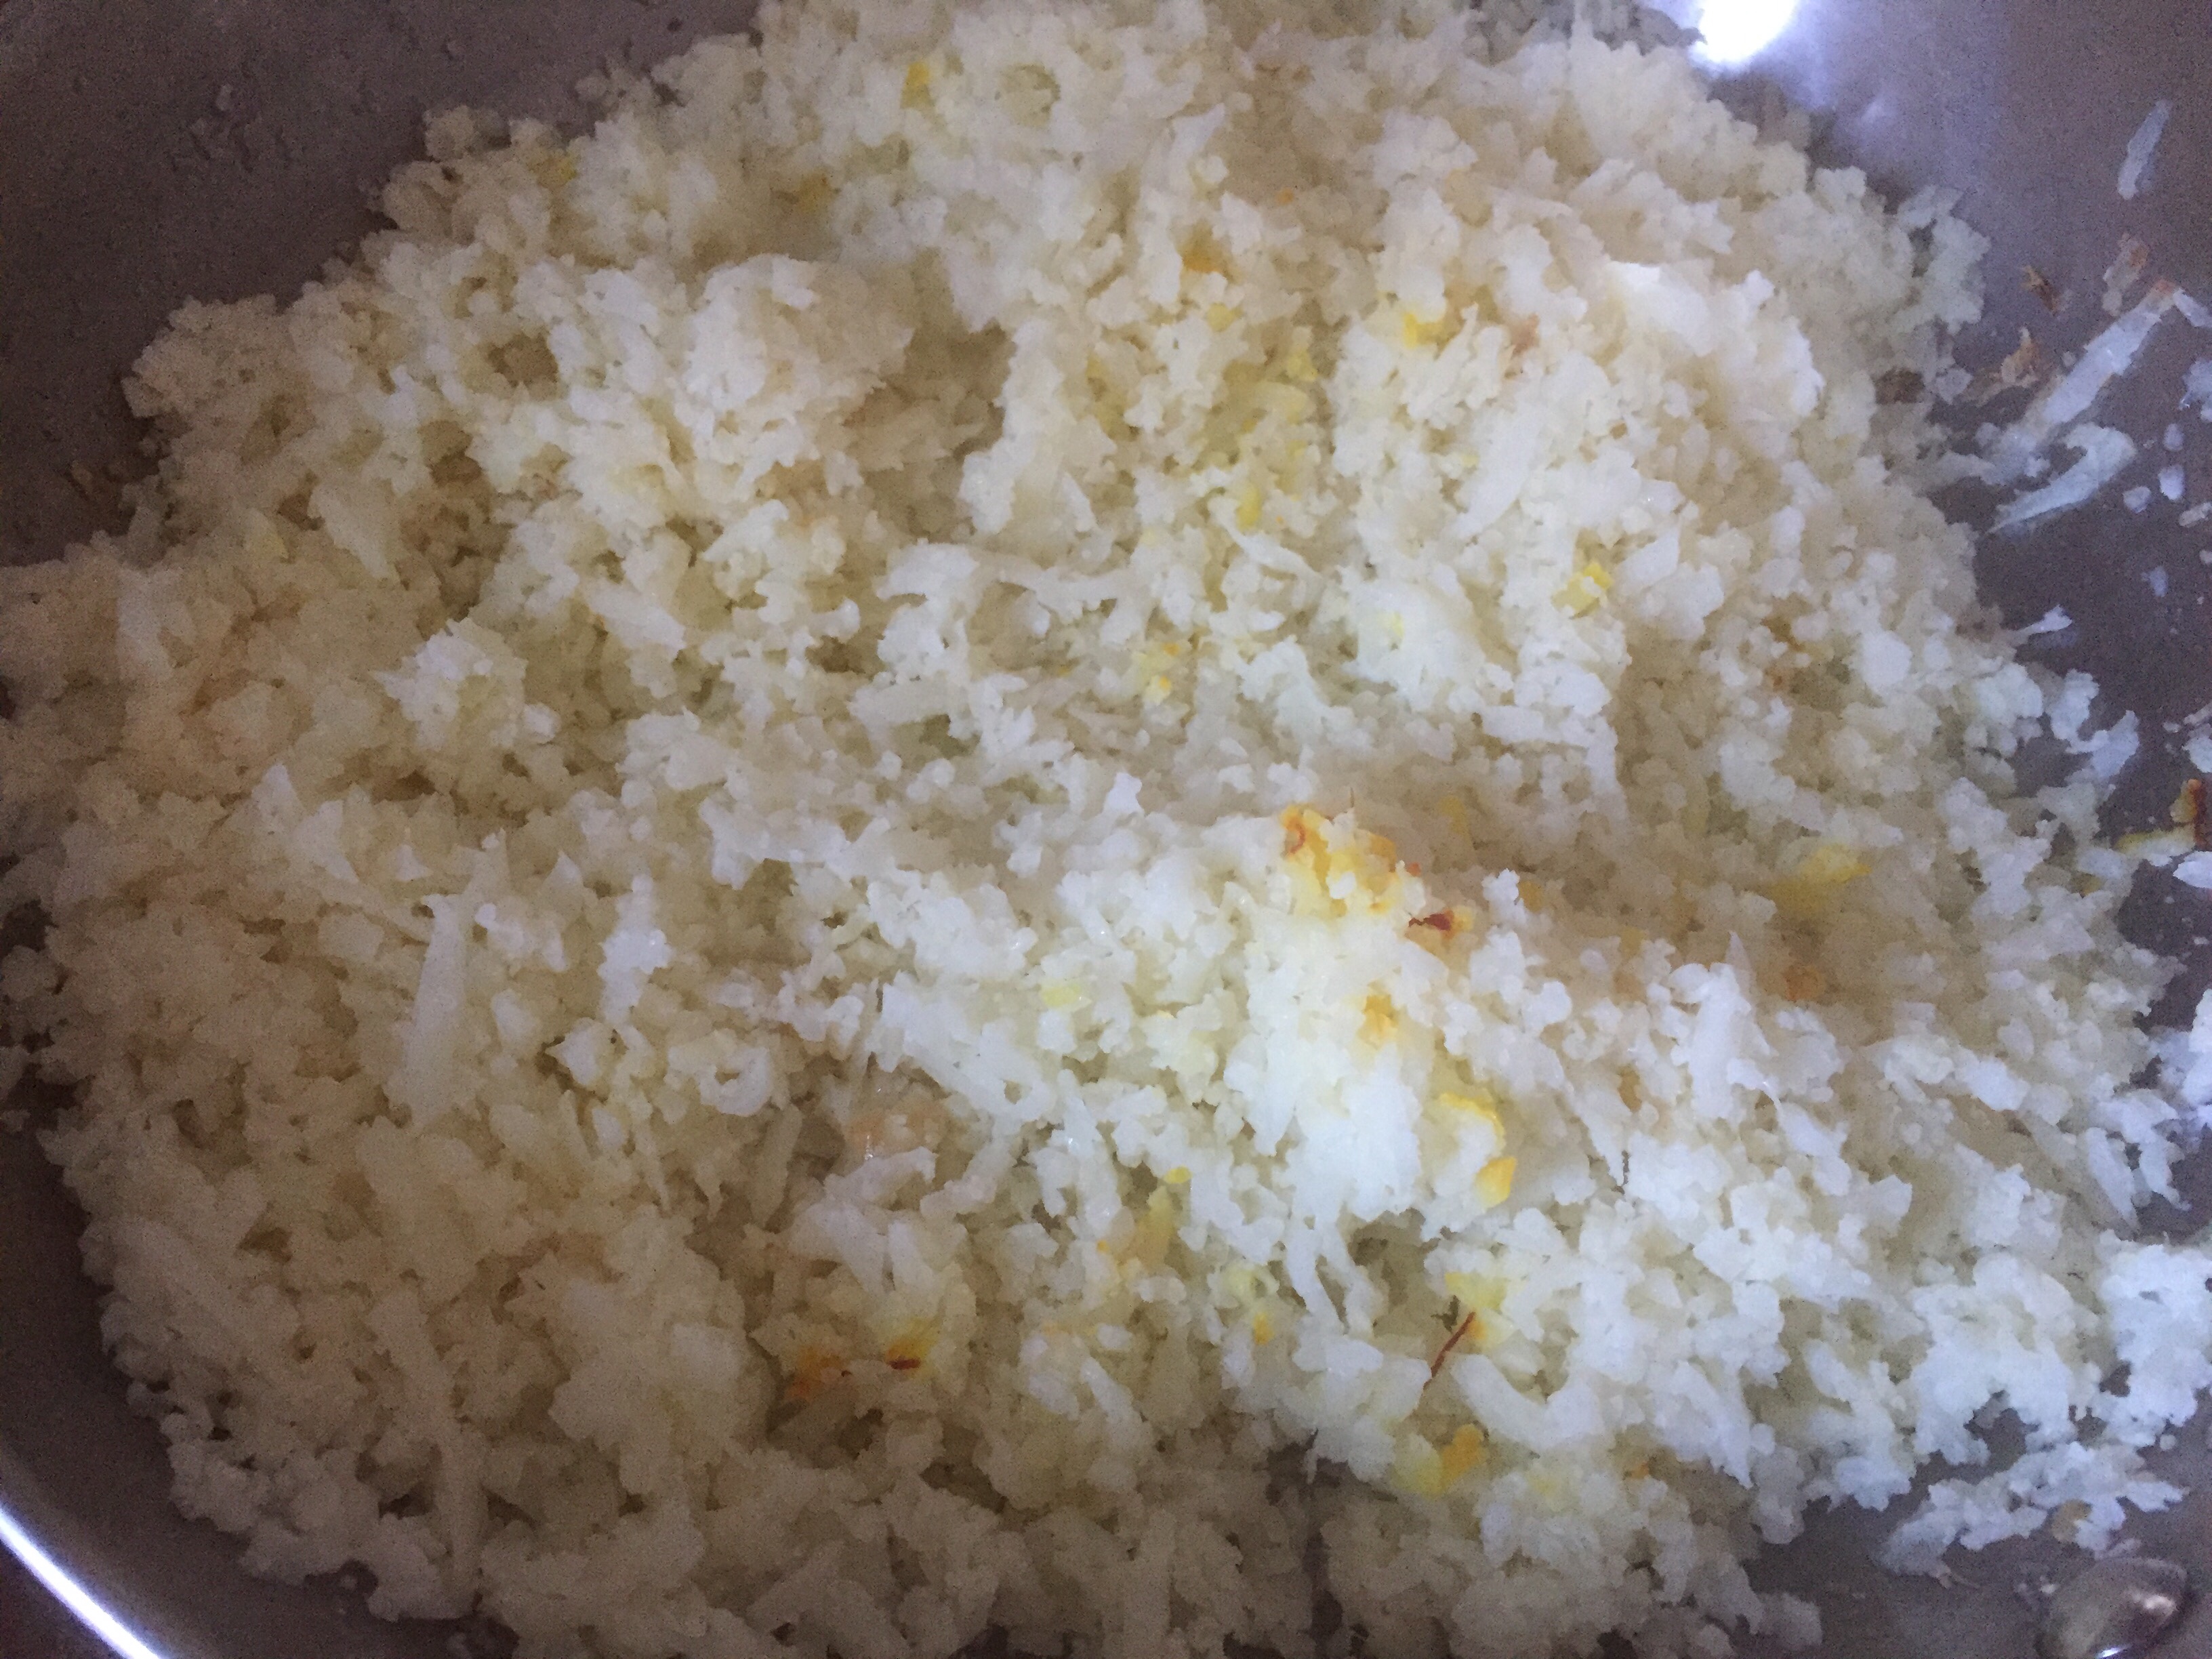
Add the water to help scrape any cauliflower rice that’s stuck to the bottom off, stir well, than place saffron on top, put the lid on the pan, lower the heat and let the cauliflower rice simmer for another 5 minutes. The saffron will release its magic yellow-orange color and the cauliflower rice will be done. Don’t stir it too much – I like the non-uniform color and it makes for a striking plate presentation!
Kamut and Chickpea Fluor Vegan Loaf, via Eat the Vegan Rainbow
Imagine the smell of freshly baked bread spreading throughout your kitchen, and beyond… Cozy, sweet, homey, friendly and welcoming – the smell of freshly baked bread sends all those signals to our senses and more.
But, bread making and baking has always seemed too complicated and too impractical to me, especially since you can get an almost-freshly-baked loaf at any large supermarket these days. And if you live in Europe, small, local bakeries are likely on every street corner, offering really delightful breads made in small batches and very often available right out the oven.
Now, freshly baked gluten-free breads are far less widely available. And if you are looking for gluten-free and vegan breads, freshly baked or otherwise, you may be completely out of store-bought options because almost all gluten-free breads use either eggs or egg whites to give the bread structure in absence of gluten.
I’ve been tinkering with gluten-free baking a bit, and it’s generally forgiving if you are going for cookies, muffins, brownies, or pizza. But, making anything that needs to rise, and stay up, has been a challenge.
Enter bread machine! I recently purchased a basic bread machine model that offers couple of bread settings and loaf size and crust options, and have now used it to get very close to achieving the impossible, a loaf of 100% gluten-free vegan bread.
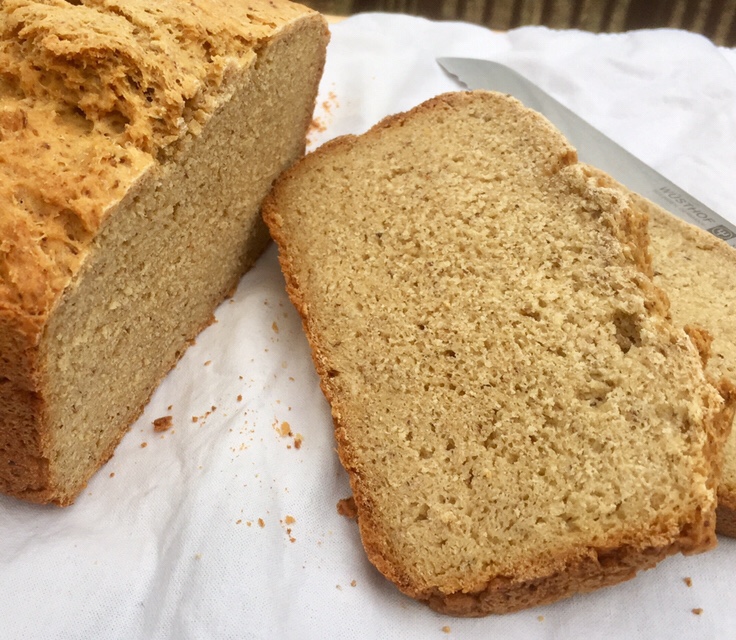
I’m not there yet but I think I’m getting closer. My most recent experiment used sprouted kamut (khorasan) flour, which is a wheat variety and therefore not gluten-free. But, khorasan flour seems to be easier to digest, especially when sprouted, and therefore better for people who are trying to avoid and/or minimize gluten for reasons other than allergy, celiac or intolerance. I’ve combined khorasan flour with chickpea flour, which is a gluten-free option, a mix of starches (corn and tapioca), and some flax meal. I also added some xantham gum into my dry ingredients as well as some baking powder. This baking powder is in addition to yeast and it helps the bread rise – gluten-free and low-gluten breads need all the help they can get! I meant mixed all the dry ingredients together before adding them to the bread machine.
Regarding the order of the ingredients, you must follow your bread machine instructions. Mine start with the liquids and end with instant rise yeast that is not supposed to touch the liquids directly, so it always added last into the dry ingredients.
If you have an option to select gluten-free setting, I recommend you use it. If not, you may want to play around with the timing a bit. Gluten-free breads tend to work best when they are allowed to rise only once, so you may want pick an express cycle or do a more manual prep if your machine does not have a gluten-free program. Here, I used French bread setting, 2 lbs (1 kg) loaf size, and medium crust on the basic Oster model.
The result is a very hearty loaf, with a good amount of chew, and a very nice nutty earthiness to it. You can enjoy it as is, with a salad, or with a quick jam, or homemade Nutella. The crunch and the aroma of freshly baked bread can’t be beat!!!
Vegan Kamut and Chickpea Flour Bread Loaf
What you’ll need:
1/4 cup oil, canola
1 3/8 cup (300 ml) water
2 cups khorasan flour, sprouted
3/4 cup chickpea flour
1/2 cup corn starch
1/2 cup tapioca starch
1 tablespoon sugar
1 1/2 teaspoon salt
2 tablespoons flax meal
1 1/2 teaspoon xantham gum
1 teaspoon baking powder
2 teaspoons quick-rise active yeast
What you’ll do:
Add water and oil into your bread machine pan.
In a separate mixing bowl mix all dry ingredients except the yeast. Add the dry ingredients to the wet.
Using your finger make a small hole in your dry ingredients and add yeast to it.
Close your bread machine, pick the appropriate cycle keeping in mind that this amount of ingredients is supposed to yield a 2 lbs (1 kg) loaf, and that you should preferably go with a gluten-free bread setting. If unavailable, you can use Express setting if the baking step is at least 40-50 minutes long. If none of this is what your bread machine offers in terms of options, go with the most basic program. You may need to re-adjust so approach this with an open and experimental mind. Remember: your perfect loaf is within your reach!
Plantains and Beans Chili, via Eat the Vegan Rainbow
Plantains are those weird looking, giant bananas that look either too green or way past their prime, and usually not very appetizing. But, they are a staple of certain cuisines and I’ve had them while I lived in Ghana, almost exclusively deep fried. Unfortunately, deep fried plantains were not quite to my taste and I stayed away from them until very recently.
I was inspired by a Puerto Rican “lasagna” recipe that used plantains instead of noodles and was happy with the results. Here, I wanted to do something slightly different. I started from really ripe plantains and roasted them without peeling. Then, I made mashed plantains and combined them with plain, white beans (navy beans), and a handful of spices to create a rich and dense chili. Why does this chili work? First of all, plantains are full of starch and relatively sweet, adding lots of great flavor almost as if you were adding molasses. The spices and flavor agents, tomato paste, Chile Lime seasoning bland, and paprika helped the taste along. Lastly, the navy beans worked well here because they added smoothness and creaminess. Sprinkling some fresh cilantro complements the ensemble, and you could also spoon some dairy-free sour cream on top or some plant-based yogurt.
Plantains and Beans Chili, via Eat the Vegan Rainbow
Plantain and Bean Chili
What you’ll need:
4 very ripe plantains, roasted
1/2 lbs (225 g) white beans, cooked or from the can
1 onion, diced
2 tablespoons tomato paste
1 teaspoon ground cumin
1 teaspoon Chile Lime seasoning bland (this is a product from Trader Joe’s but you can make your own with some chili powder, salt, and lime zest)
1/2 teaspoon paprika
Cooking spray
1/4 cups fresh cilantro, roughly chopped
What you’ll do:
Get ripe plantains – those that have quite a few black areas on them – wash them and place them on a baking sheet without peeling. Roast the plantains at 425 F (220 C) for an hour. Their skins will turn black and they should soften inside.
Let the plantains cool then peel them and mash with a potato masher. You could also put them into a food processor and pulse until fine.
Heat a cast iron pan over the medium high heat. Add the cooking spray, spices, tomato paste, and the diced onion and let everything caramelize well, which could take up to 15 minutes.
Add the plantains and let the bottom start to brown. Mix well and cook for 5 to 8 minutes.
Add the cooked beans – I cook mine in a pressure cooker after soaking them overnight – and let the dish simmer for 10 minutes or so.
Serve with a dash of fresh cilantro, or other types of topping you prefer to use on your chili.
Cauliflower Ricotta and Spinach Stuffed Shells, via Eat the Vegan Rainbow
Ever since I’ve decided to transition into 100% plant-based eating, I’ve been going easy on pasta mostly because it is yummy and enjoyable, yet not really all that great for you given the calories and starch. I’ve tried some replacements, like spaghetti squash, which made a great Pad Thai, and black bean pasta, which made an awful base for my “Clam” Sauce.
Of all the things I’ve tried, zucchini noodles are simply the best! They work really well with meatballs or even lighter veggie toppings that I’m thinking of ditching spaghetti all together.
But, there are some dishes that are hard to imagine without pasta, like a very simple yet incredibly delicious pasta salad I made at the height of summer season, and these stuffed jumbo shells right here.
The shells are stuffed with cauliflower “ricotta” and spinach mirroring a very traditional ricotta cheese and spinach stuffed shell recipe. The shells I use here are the “jumbo” kind, and their name is well-deserved. Two or three of these makes a solid serving size, so the recipe below ought to serve four people easy.
The main departure I took from the traditional recipe, which is vegetarian, is to skip the tomato sauce, usually a simple marinara, and to use my own creation, a cauliflower “ricotta” cheese, which makes this recipe dairy-free, vegan, and plant-based.
The cauliflower “ricotta” is inspired by cashew ricotta that I’ve made in the past. I was very curious about whether cauliflower can help the basic cashew ricotta recipe (some great examples here and here), and retain all the creaminess while cutting down the cost (frozen cauliflower is cheaper than raw cashews), and the calories and fat (cauliflower has far less calories than cashews and no fat!).
The cauliflower “ricotta” works well here, and it’s a useful cheese alternative to have for other pasta dishes, or a lasagna. Amazingly, what puts this entire dish over the edge is actually a tiny bit of nutmeg. Just a pinch goes a long way, so be careful not to overdo it.
Cauliflower Ricotta and Spinach Stuffed Shells
What you’ll need:
16 jumbo shells, boiled
1 bag (1 lbs; 454 g) frozen chopped spinach
1 bag (1 lbs; 454 g) frozen cauliflower
1 cup cashews, soaked overnight
1 tablespoon white miso paste
1 teaspoon yellow mustard
1 teaspoon onion powder
1 teaspoon garlic
1/2 teaspoon ground nutmeg
Cooking spray
What you’ll do:
Bring a large pot of water to boil, add the shells and let them boil for 8-10 minutes. Take the shells out, rinse with cold water, and place them aside.
Preheat the oven to 350 F (175 C).
Cook the cauliflower and spinach according to the instructions on the bag. You can use a microwave or a stove top method and you don’t need to thaw the vegetables but I recommend that you squeeze the access water out before using. Keep the cauliflower and the spinach in separate bowls. Cauliflower should take about 10-15 minutes to cook, and spinach about 5 minutes.
Place the cooked cauliflower, soaked cashews, and the rest of the ingredients into a food processor and process until you reach the consistency of ricotta cheese.
Spray the bottom of 8 x 8 in (20 x 20 cm) with cooking spray and pour in 1/2 cup of cauliflower “ricotta” and spread around to cover the bottom.
Using a tablespoon, spoon some cauliflower cheese into a shell, then some spinach, and place into the baking dish. Continue with the rest of the ingredients until all the shells have been filled.
Spread any leftover spinach and/or cauliflower ricotta over the top, spray with a bit more cooking spray, cover with foil and bake for 20 minutes. Uncover and bake for 10-15 minutes more until the top is golden and sides are slightly browned.
Let the stuffed shells rest for 5 minutes before serving then enjoy!