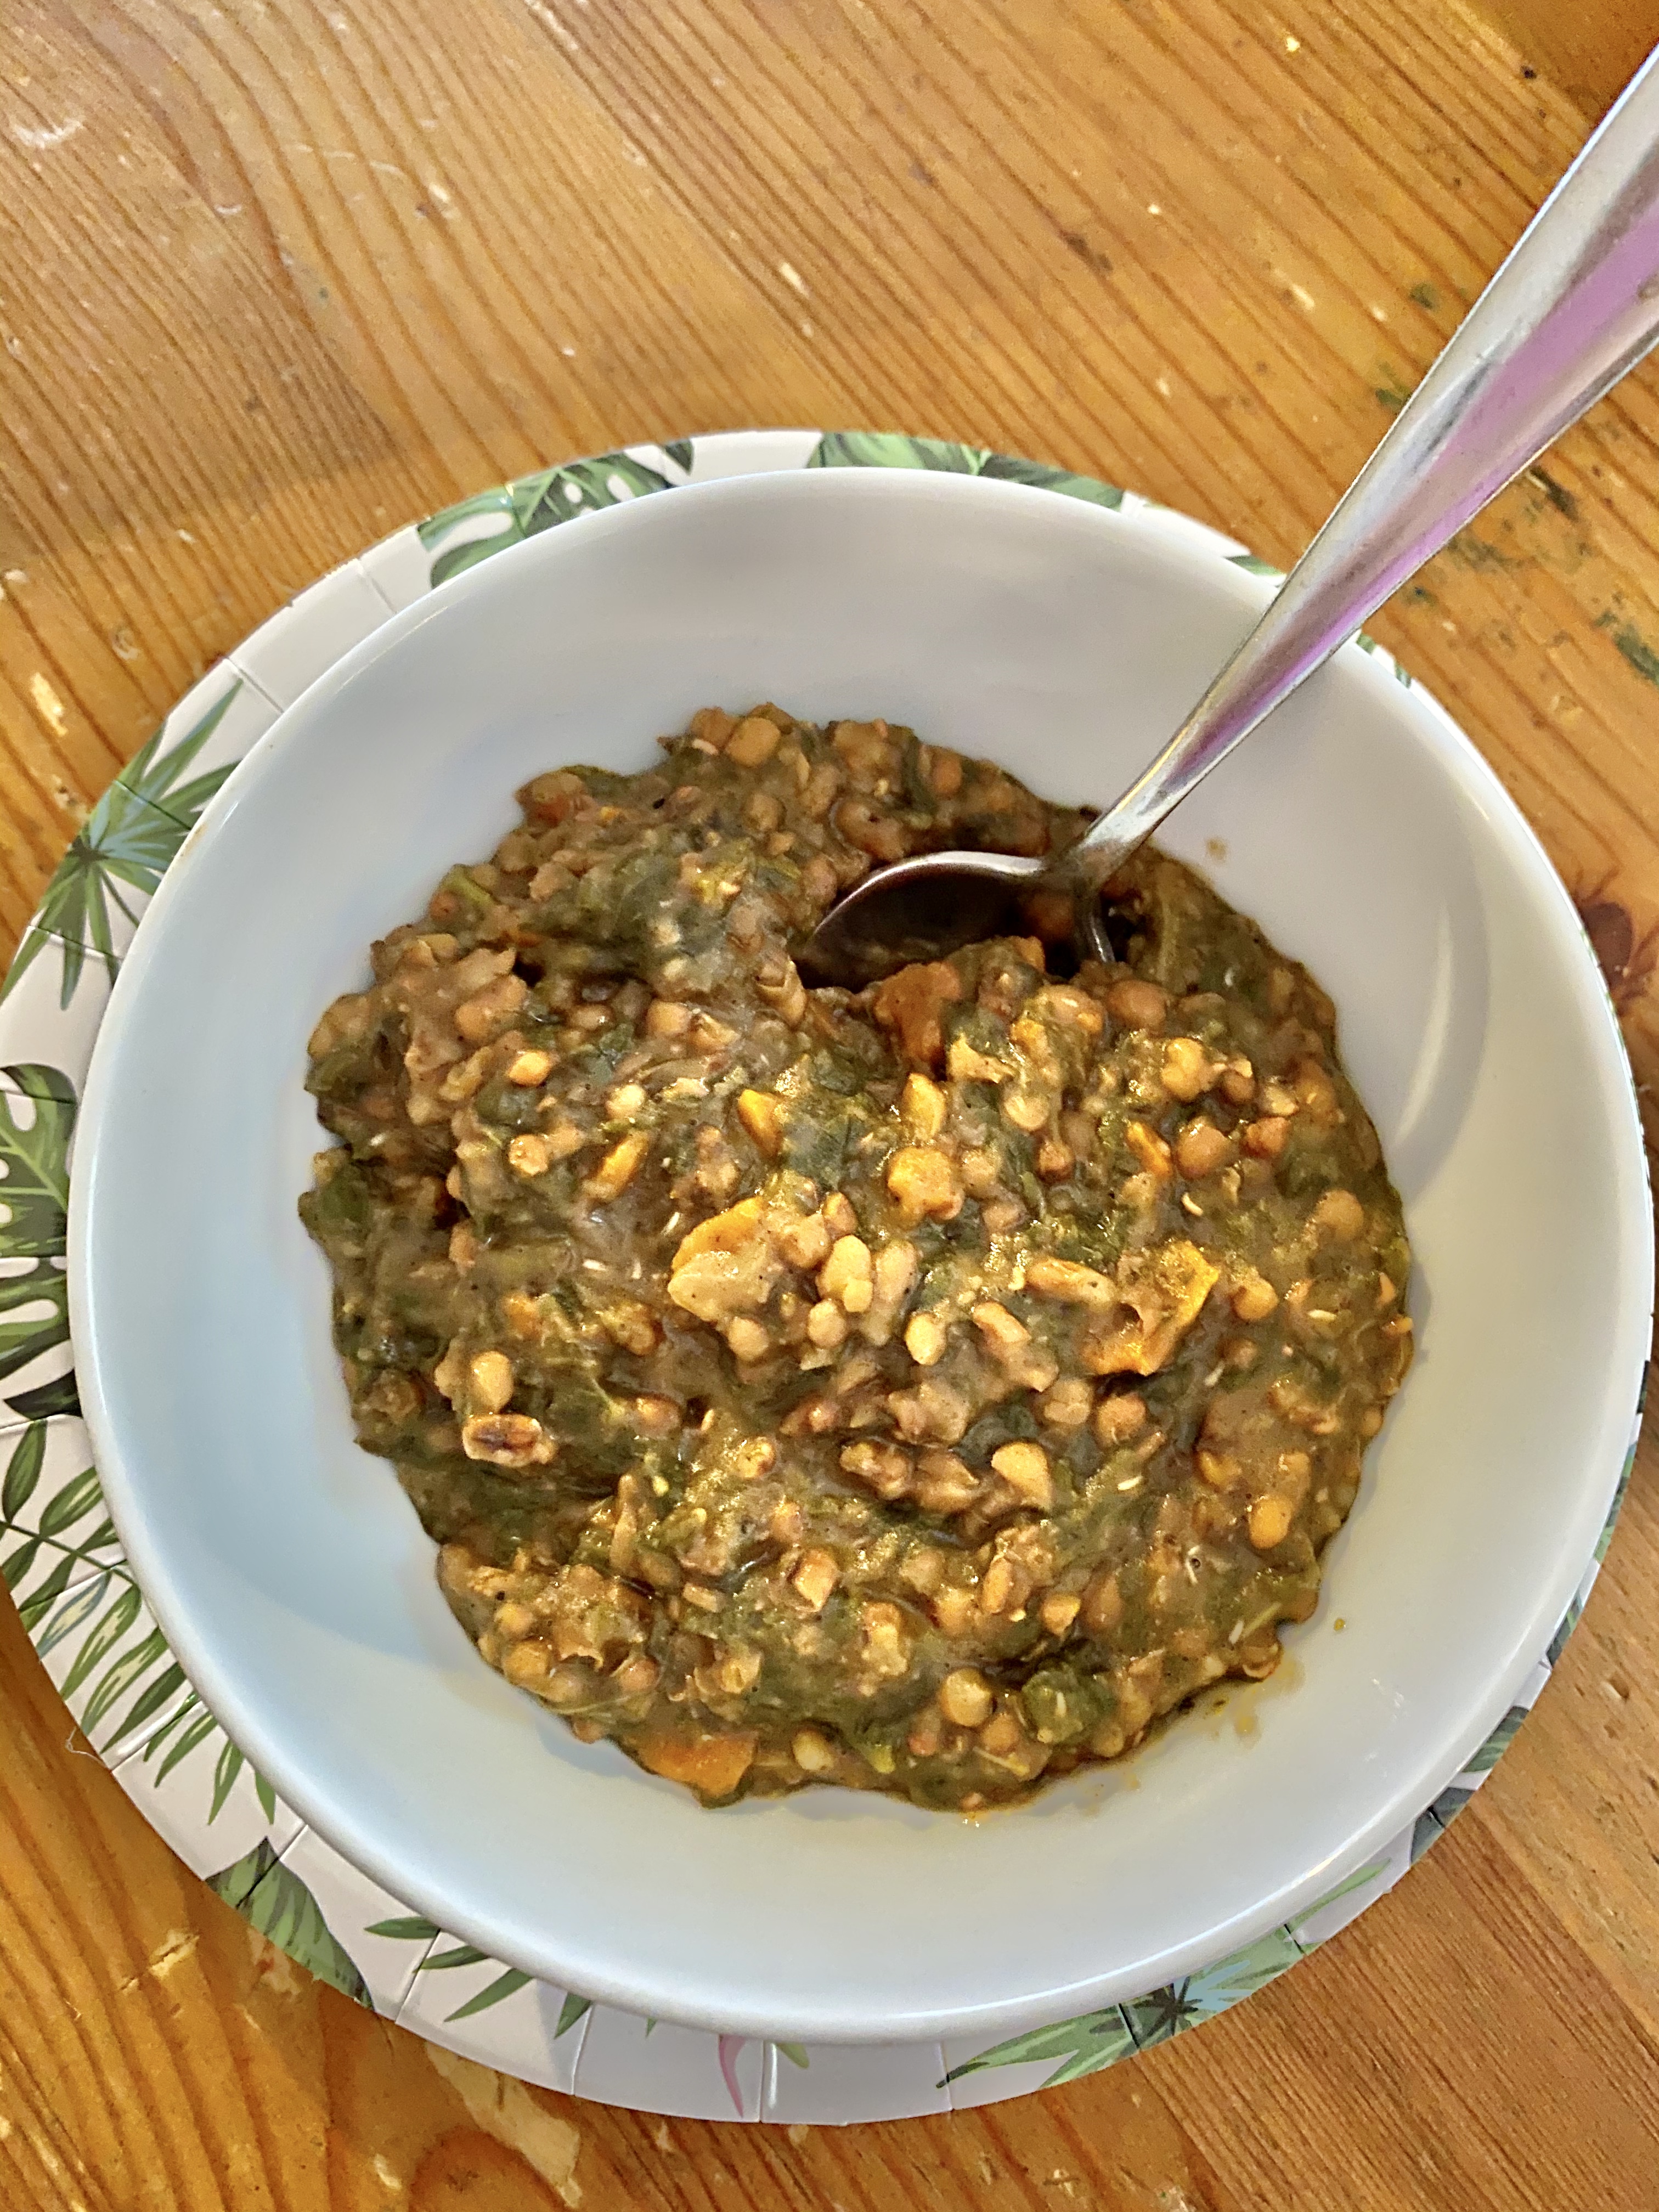
Moth Beans with Spinach, via Eat the Vegan Rainbow
Beans come in many different shapes and sizes. Moth beans are probably the smallest bean variety I ever dealt with. But, their nutritional value and taste run large, so I hope you give them a try.
Enjoy!
Moth Bean Stew with Spinach – Pressure Cooker Recipe
What you’ll need:
1/2 yellow onion, diced
3 large carrots, washed, peeled and finely sliced
3 stalks celery, washed and finely sliced
2 cups moth beans, dry, rinsed (if you are using a pressure cooker you can skip pre-soaking; otherwise pre-soak for at least 6 hours, then drain and rinse before cooking)
1 lbs (454 g) spinach, fresh or frozen
4 cups water
1 tablespoon oil (canola, sunflower or similar)
1 tablespoon garlic powder
1 tablespoon dry mango powder, usually found in speciality stores or international food isle (or replace with a tablespoon of lime or lemon juice)
2 tablespoons garam masala (or cumin powder)
1/2 teaspoon of salt (or salt to taste)
What you’ll do:
Turn your electric pressure cooker to Sauté option. If you don’t have a pressure cooker or if your pressure cooker does not have this option, place a pan over medium high heat and sauté onions, celery and carrots for 5-10 minutes, until softened and slightly browned. If you are following oil-free diet, sauté on water. Otherwise, you can use a tablespoon of oil for this.
Next, add the beans, spinach and water. Close the pressure cooker and select Bean/Chili option. If you presoaked the beans, the cooking time will be about 15-20 minutes, if you skipped presoaking the cooking time will be about 30 minutes. If you don’t have a pressure cooker, you can continue to cook the beans on the stove top. It will take 1 hour or so, if working with presoaked bean.
After the pressure cooker cycle is done, let the pot depressurize, them open the lid and mix the beans. To the beans add the toasted spice mix.
To toast the spice mix, bring a frying pan over the high heat. Add the oil, then the spices (garam masala, dry mango powder, and garlic powder). Toast for 1-2 minutes, then add to the bean stew. Add the salt and mix well, to incorporate. Let the beans cool just slightly before serving. These beans are delicious with some rice or quinoa!
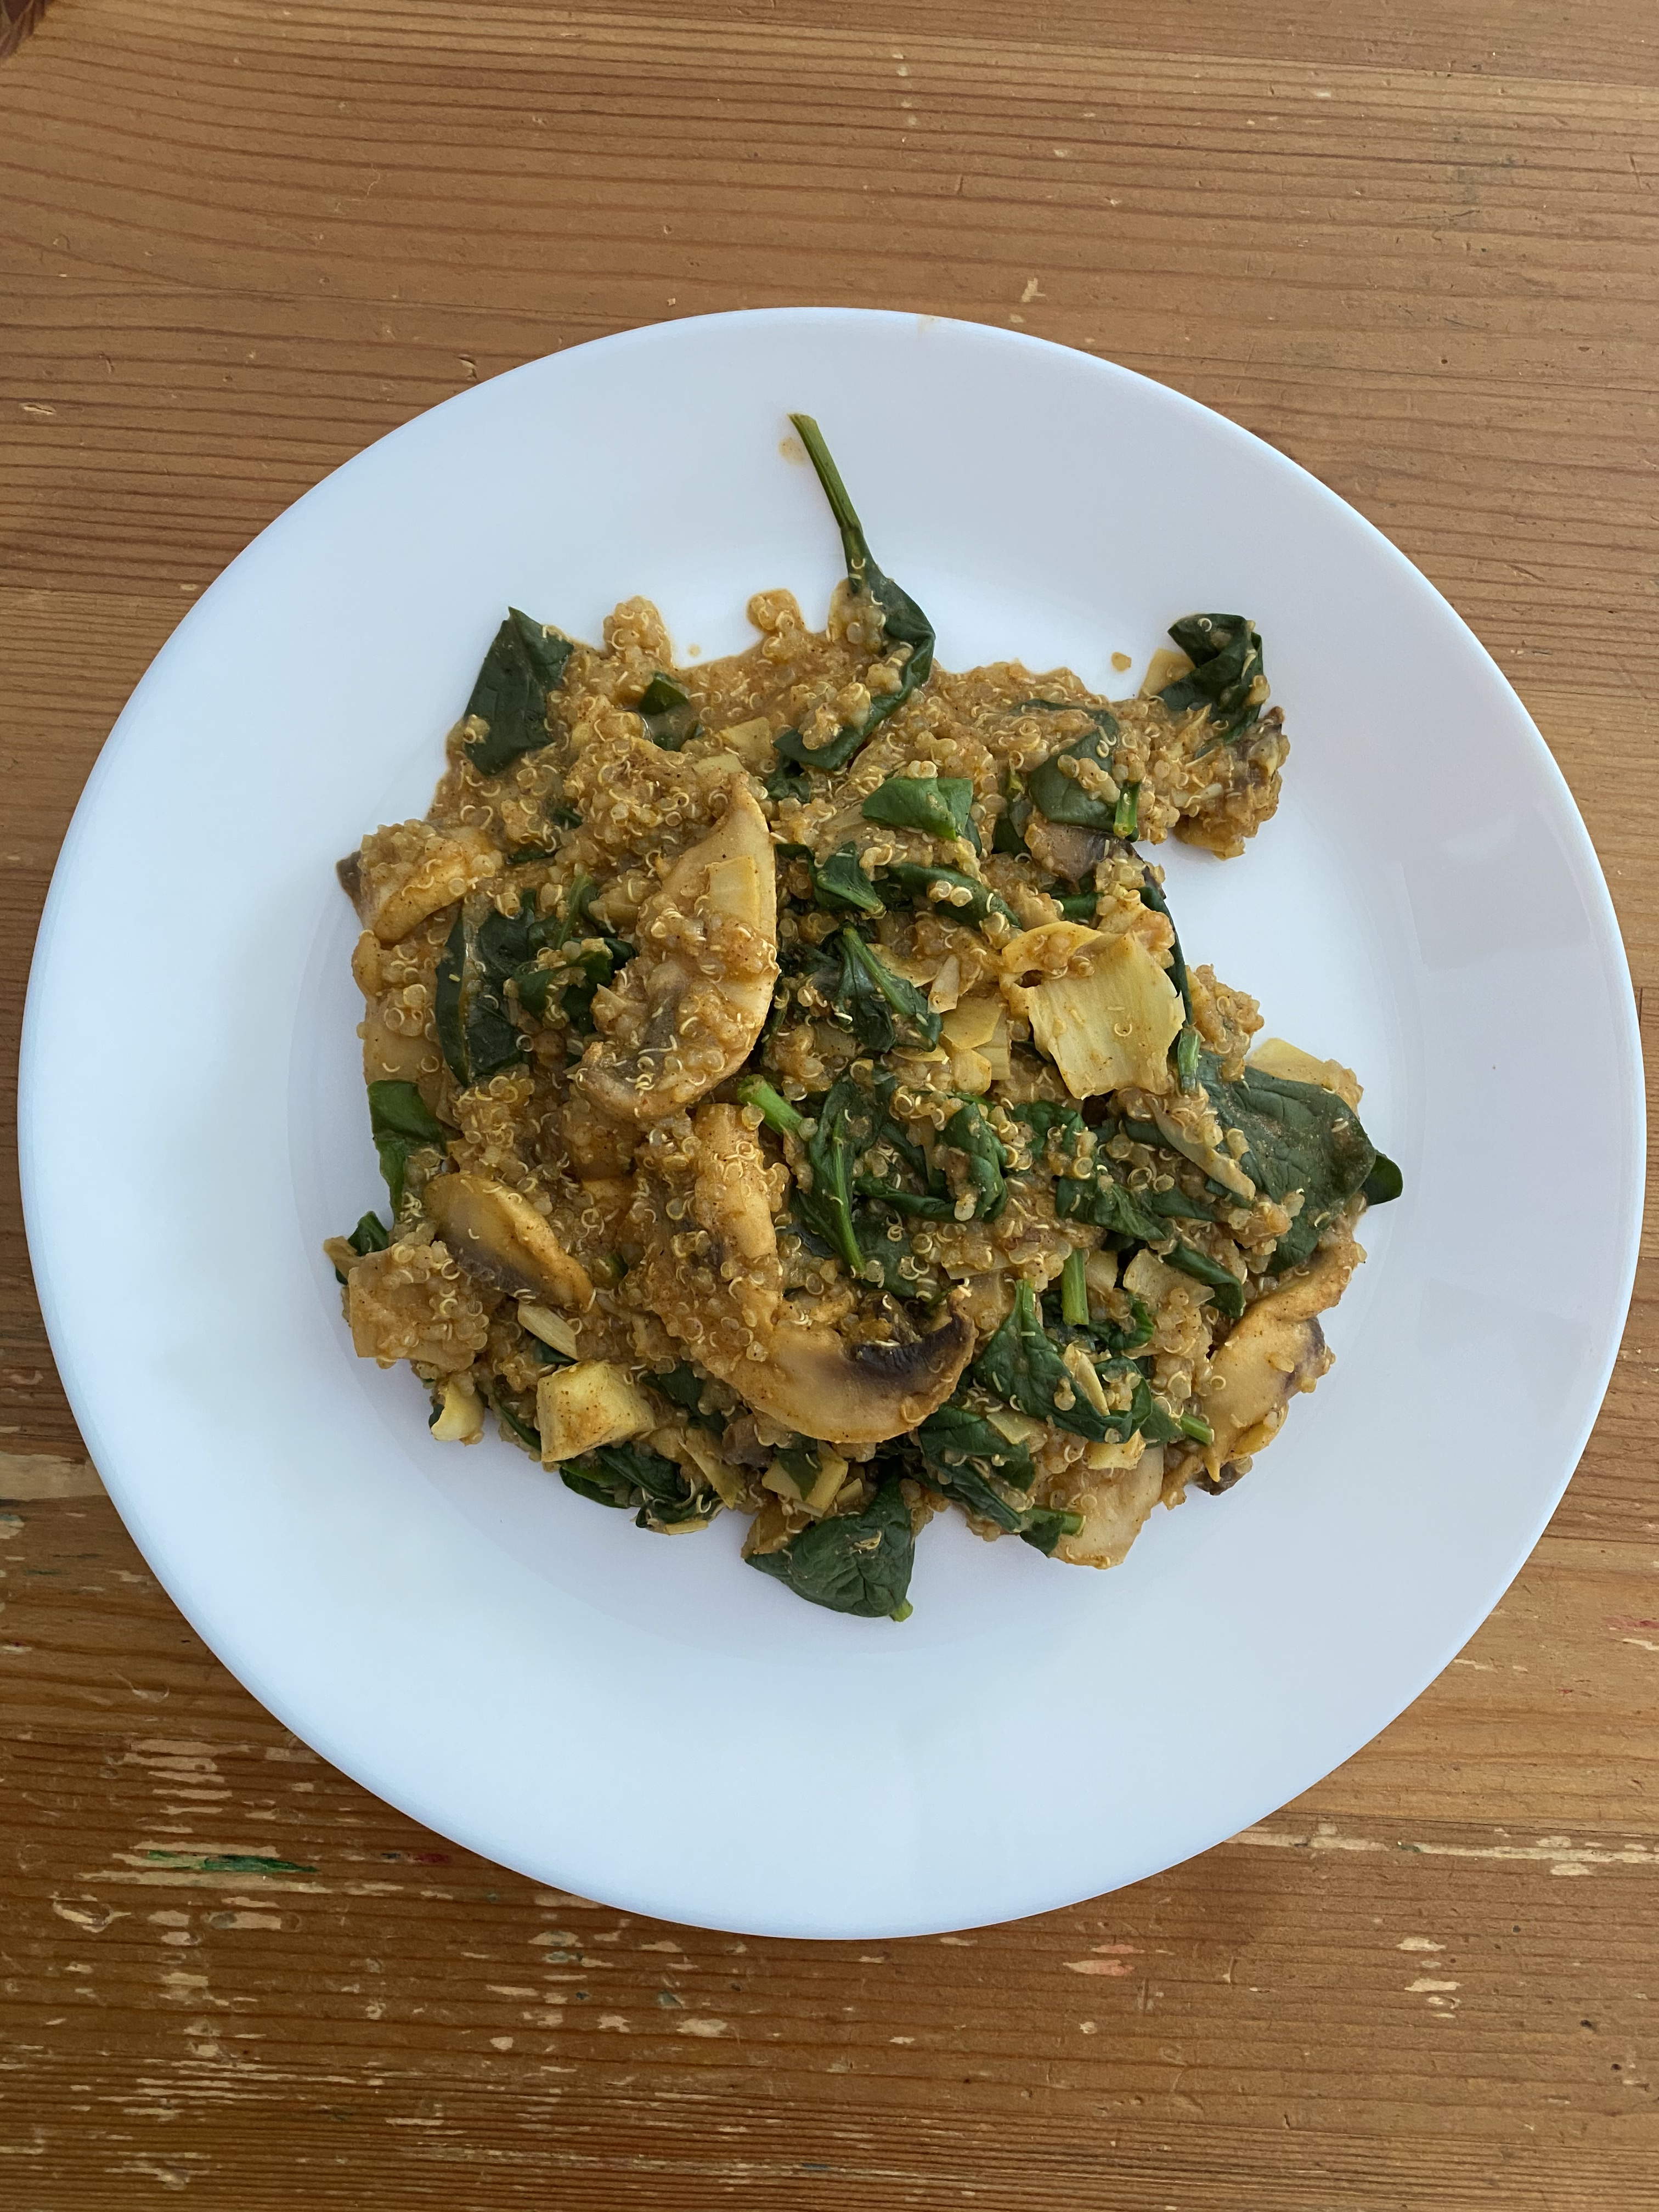
Quinoa Breakfast Scramble, via Eat the Vegan Rainbow
What’s for breakfast? This question takes a whole new meaning on weekends (I luckily have those off), when I am around to spend time experimenting and entertaining. I love making waffles, pancakes, and muffins. Lately, I started getting myself into eating more protein for breakfast, so I’ve been gravitating towards tofu scrambles (see recipes here and here). They are yummy and delicious, and I love them!
But: I also like some variety, and that led me to looking for other high-protein plant-based alternatives. Quinoa is the queen of plant protein – it is a fantastic substitute for rice, and I use it in many different recipes, from those that are supposed to be complete meals (like stuffed eggplant (the same recipe can be used to stuff peppers) and gumbolaya), to side dishes (see here for a very festive side dish with quinoa, roasted cranberries and pistachios – yummy!). Because quinoa is such a great source of plant-based protein, I have also developed a recipe for a ground beef substitute featuring quinoa. In this way quinoa can me your go to for tacos, pizza topping and similar.
With all that said, I wanted to see whether quinoa makes a good breakfast – and it does! The recipe below is just one illustration of how great a quinoa-based breakfast can be. You can also eat quinoa the same way you would oat meal – topped with fruit, syrup, even granola and yogurt. However, quinoa is not as quick to make as oats, so I recommend that you prepare a batch of quinoa and then store it in fridge for 3-5 days and use as needed.
There are a few tips for preparing quinoa. First of all, I recommend soaking for few hours (on the kitchen countertop) to overnight (in the fridge). Quinoa is covered with bitter compounds called saponins. These are totally natural compounds produced by the plant as it grows, and used a sort of protection from pests (not even pests like bitter things!!!). Soaking and extensive rinsing will help wash these chemical compounds away, and you can tell they are there if foam forms as you are rinsing. One thing to note is that a lot of quinoa on the market has been treated to remove saponins – on one hand that is good because you don’t need to worry about the bitter taste, on the other hand depending on the process used some of the nutritional value of quinoa may have been removed as well. By the way, eating saponins at the amount present on quinoa will not hurt, just in case you are wondering, but the flavor is likely going to be affected. Bottomline: I soak and rinse my quinoa very well before cooking.
And because the quinoa is already wet and soaked, I cook it in less water, usually 1.5 cups of water to 1 cup quinoa. The easiest way to cook quinoa is to use a pressure cooker (it takes 8-10 min on rice cycle, if you have instant (electric) pressure cookers with preset menu to choose from), or about 20 min on the stove top.
Once quinoa is cooked and cooled, you can store it for 3-5 days in the fridge and use as needed, for a scramble recipe below, for salads, as a porridge-type breakfast, as a side for your dinner, or to make any one of your favorite recipes that call for rice or any other type of grain. Enjoy!
Quinoa Breakfast Scramble, via Eat the Vegan Rainbow
Quinoa Breakfast Scramble (oil-free)
What you’ll need:
1 1/2 cups cooked quinoa
8 oz mushrooms, sliced
3-4 artichoke hearts, sliced
8 oz baby spinach leaves
1/4 cup nutritional yeast
1 teaspoon garlic powder
1 teaspoon onion powder
1 teaspoon paprika
1/2 teaspoon smoked paprika
(Optional): oil or cooking spray. Omit for oil-free version.
What you’ll do:
Add mushrooms to a large non-stick pan and place over medium-high heat. If using oil or cooking spray, add to pan and bring to heat before adding the mushrooms. Cook with stirring until mushrooms are soft and browned. This takes about 4-5 minutes.
Add the artichoke hearts, mix well and sauté for another 2-3 minutes.
Add the cooked quinoa, and all the other ingredients except the spinach. Mix well and cook for 4-5 minutes more.
Last: add the spinach – it will be bulky and take up a lot of space. But don’t panic: slowly incorporate the spinach. It will start to wilt and reduce in size as it heats up and mixes in. Baby spinach leaves take about 2-3 minutes to wilt and soften, so keep stirring until incorporated, reduce the heat to low, cover with a lid, and leave for couple of minutes.
Serve as breakfast, lunch or dinner. If serving as a breakfast, complement with a bowl of fruit and perhaps a piece of toast. Enjoy!
Red Lentil Pasta with No-Cook Spinach Sauce, via Eat the Vegan Rainbow
Sometimes you may find yourself in a need of a really, really quick meal. In those cases pasta is always your friend, and no-cook pasta sauces make things even quicker. I know, you can always reach for a jar – and I don’t have anything against jars and pasta sauces. But, pesto and similar type of sauces, or perhaps I should them dressings?, come together in a snap and can help you get out of the tomato-based pasta sauces rut.
Traditionally, pesto is made with basil, pine nuts, garlic, olive oil and parmesan cheese. It can be well balanced, but it is often too oily, and the cheese, for those who eat dairy, and olive oil can often overpower the delicate basil flavor.
I prescribe to a very broad definition of what pesto is. To me it usually means a sauce (spread, dressing) made with some green leafy vegetables and/or herbs and nuts – and that’s it! Any combination that gets you there counts as a sort of pesto in my book. You can think of combining green things like basil, spinach, arugula, parsley, mint, kale, on one hand, with pine nuts, almonds, pistachios or seeds of different kind (like pumpkin, sesame or sunflower) on the other hand, and you will end up with a flavorful “pesto”. My examples here include Pumpkin Seed and Parsley Pesto and Kale Pesto with Cashews.
Given that most seeds and nuts have plenty of fat in them, I usually don’t add any additional oil, although drop or two of good quality olive oil can certain enhance the flavors. The recipe below does not use any oil, and I don’t think you will miss it!
Pomegranate molasses is perhaps the only unusual ingredient included in the recipe for this snapy pasta dish. If you’ve never tasted this molasses prepare yourself for something tangy and tart, while at the same time sweet. I like to use it in my pasta sauces as it works as a sort of mix between a bit of balsamic vinegar and a bit of sugar, which some pasta sauces may need. If you don’t have pomegranate molasses on hand (I got mine for a very reasonable price at my local Indian store and I bet Middle Eastern stores would carry it), you can always use some balsamic vinegar. Or, if you are really adventurous, you can mix some balsamic vinegar with some regular molasses or maple syrup in equal parts, and use that instead. You only need a tiny bit to drizzle over the pasta just before serving!
Final note: the recipe below lists red lentil pasta as a ingredient. I like this variety because it has a deeper and nuttier flavor. But: you can of course use any pasta you have on hand. In my view, tubular (think macaroni) or short flat (think bow tie pasta) types of pasta work better with pestos than long ones (think spaghetti) – but this I leave up to you and your pantry!
Red Lentil Pasta with No-Cook Spinach Sauce
What you’ll need:
1 box (12 oz, 340 g) red lentil pasta macaroni
1 lbs (450 g) baby spinach (or chopped frozen spinach that has been fully thawed)
Optional: more molasses (balsamic vinegar) for drizzling on each serving
What you’ll do:
Prepare the pasta according to the directions on the box.
While pasta is cooking, place the rest of the ingredients into a food processor equipped with an S-blade and process until smooth.
When pasta is done, drain and rinse with cold water to cool just slightly, then toss with the rich, cream sauce. Serve immediately, or store in the fridge overnight to serve the next day – this dish is definitely a make-ahead friendly!
Serve room temperature and drizzle some pomegranate molasses (or balsamic vinegar) right before serving.
White Bean and Spinach Soup, via Eat the Vegan Rainbow
From the very first time I tried a bite of this soup I was hooked! The texture is incredibly smooth and creamy, and the taste is amazing – this is real comfort food right there!!!
Plus: this soup is super easy and super affordable – and it is a perfect make-ahead or meal prep option since the flavor is even better the next day, or the day after, or the day after. The soup will hold well for 5-6 days if stored in a container with a tight lid in the fridge.
And if you are looking to throw an Italian-inspired party, this soup served with a tossed salad and fresh bread will do the trick! Vegan and non-vegan friends and family will just love it, especially those among them who seem alarmed by some of the less common vegan ingredients, like nutritional yeast, or unfamiliar add-ons. This soup is plain and simple – white beans (homemade or canned), tomatoes, baby spinach, olive oil, onion, garlic, oh and some pasta – THAT’S IT!
If you are wondering whether you have to use cannellini beans, the answer is no. Any small white bean will do – and you can definitely cook the beans yourself. About half a pound (225-250 g) of dried beans will probably be just about right for this soup. Quite frankly, the convenience of canned beans can’t be beat, ad that’s a fact – with a snap of a lid you are already there. And these days you can find most beans in “no salt added” version, in case you are monitoring your sodium intake. The same is true for crushed and diced tomatoes – in my grocery store you can find both in “no salt added” variety. Whether you prefer to skip salt or not, I should note that a little bit of salt goes a long way towards making this soup have a really exquisite flavor.
The pasta that I recommend for this soup is ditalini, small pasta that looks like very small and short macaroni. This type of pasta is commonly used in traditional Italian bean soup, Pasta e fagioli, which is really pasta and beans. Ditalini works well in bean dishes because it’s size is well matched to the size of the beans, so it harmonizes with the rest of the dish. If you can’t find ditalini, you can use any other short and tubular pasta, or even something like rotelle – the wheel shaped pasta which is kinda fun.
One huge trick for making this soup is to blend half of it and then add more chunkiness to it as it simmers. Blending part of the beans, sautéd onions and garlic, and crushed tomatoes makes for a perfect creamy base. You will think you are eating a soup made with a pile of butter and cream, or a heavy roux, or both – and none of this is true! one thing to be careful about is blending the hot mix – you can get burned so pay attention!!!
White Bean and Spinach Soup
What you’ll need:
1/2 onion, diced
6 cloves garlic, sliced
3 15.5 oz (440 g) cans cannellini bean, divided
1 28 oz (800 g) can crushed tomatoes
1 14.5 oz (411 g) can diced tomatoes
1 cup ditalini pasta (or other smaller pasta, like short macaroni
1 lbs (454 g) baby spinach
2 tablespoons olive oil
What you’ll do:
Place the oil into a large pot and place it over the medium high heat. Add the onions and garlic. Sauté for 5 minutes, then add 1 1/2 can of cannellini beans and mix well. Cook for another 5 minutes, then turn the heat off. Add the crushed tomatoes and mix well.
(TAKE EXTRA CARE) Pour the mix into a blender – take care as the soup will be very hot. Don’t use the blender unless the instructions state explicitly that it can be used with hot liquids. Make sure to use precaution to prevent burns. Blend the mix until smooth and silky. (You can also use a stick blender if you have one and blend the soup directly in the pot!)
Pour the blended soup back into the pot, and use 1 to 2 cups of water to rinse out the blender. If you used a stick blender, do add 1-2 cups of water. Add diced tomatoes, and the rest of the beans. Bring to boil.
Once the soup is boiling, add the spinach and wilt for 2 minutes or so. Finally, add the pasta (detalini), mix well and simmer for 5 minutes, then turn the heat off and let the pasta finish cooking. Serve with fresh salad, a piece of bread, and some vegan parmesan.
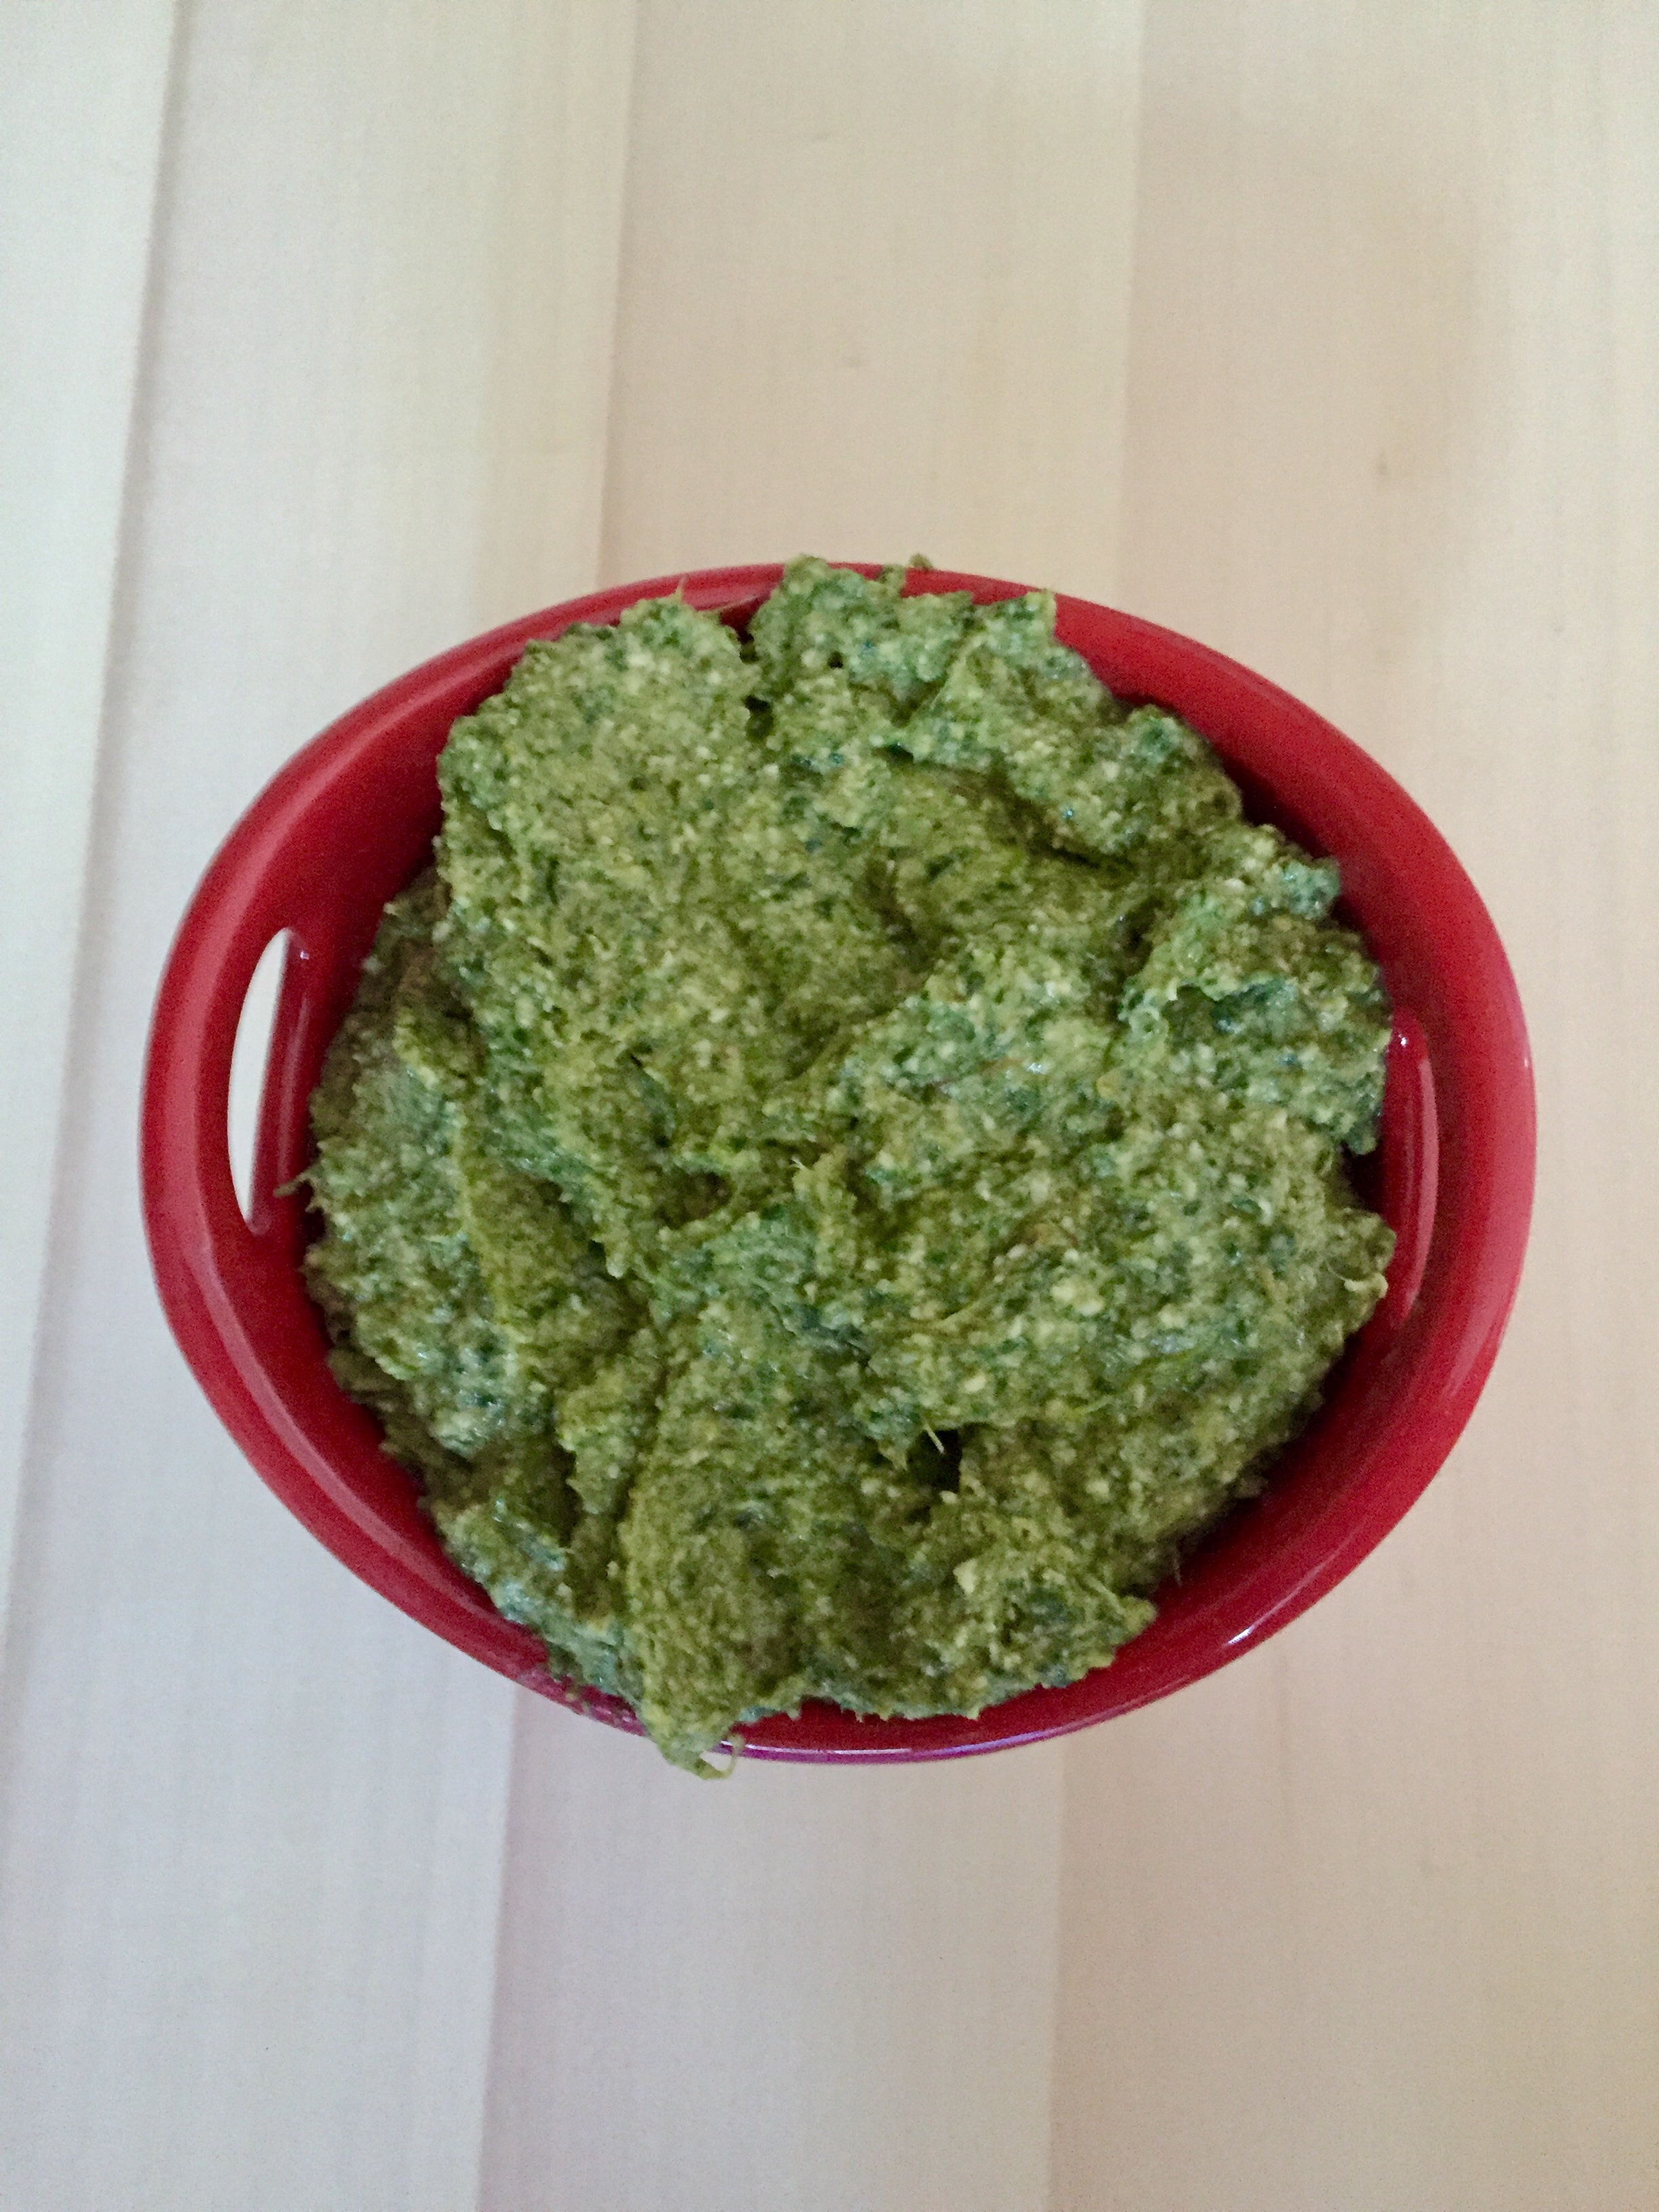
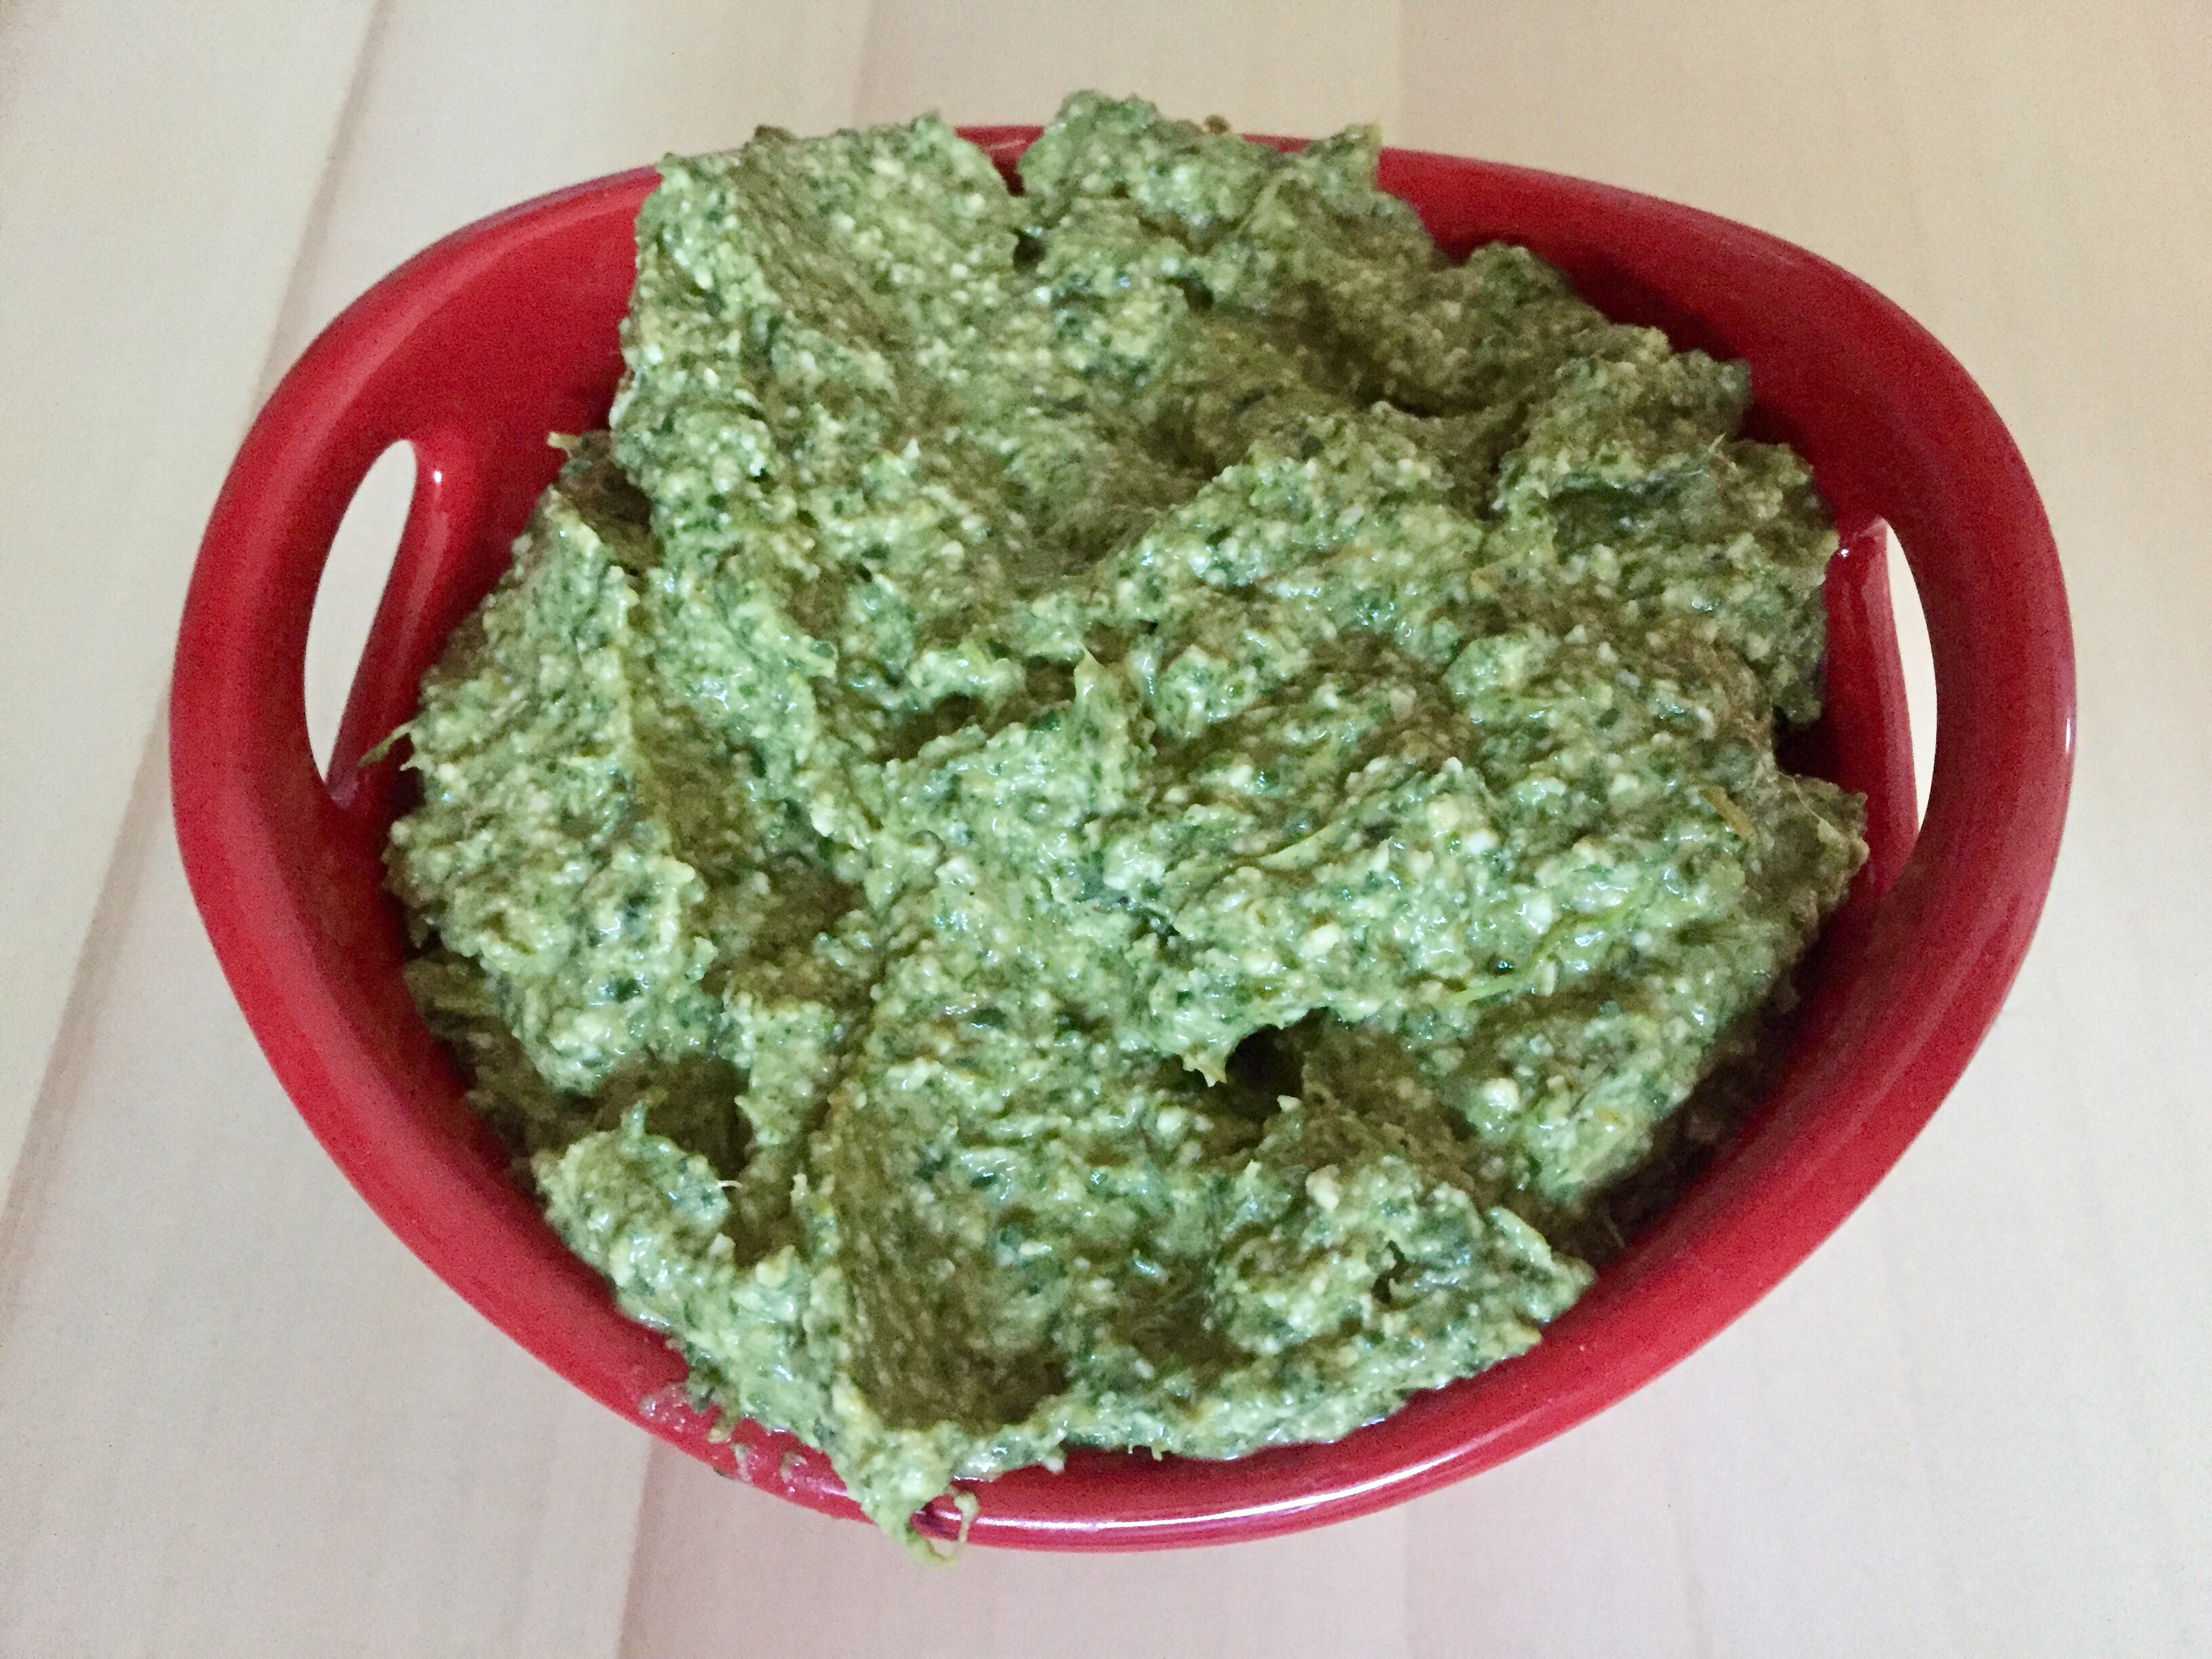
Roasted Asparagus and Spinach Dip, via Eat the Vegan Rainbow
Springtime is party time – I mean, after 6 months of winter we are finally seeing some sunshine and above freezing temperatures. And if you think I live in Alaska, think again – it’s the good ole New England and our snow just melted away two days ago!!!
Plus: since the next winter is just six months away, we are now all scrambling to have as many outdoor parties and get togethers as we can, to maximize the fun and the sun. These days, when it comes to parties good, rich dips are a necessity. Salsa and guacamole, many different types of hummus, including one of my favorites – the roasted beet hummus, and even jackfruit “crab” dip are all fantastic and versatile. All you need to do is bring couple of select dips out, and with some crackers (like these amazing seed crackers), or fresh bread, perhaps with some olives thrown in for good measure, and maybe dolmas (I have a thing for dolmas!), you will have an instant feast!
If you are looking for a dip the is a bit out of the ordinary, then look no further. This Roasted Asparagus and Spinach Dip has it all: charred roasted asparagus (you can grill them if you prefer), vibrant green spinach, loads of smoothness from the cashews, and subtle cheesiness from the nutritional yeast.
When you are using cashews to make vegan cheese, creams, sour cream or similar, it is best to use raw cashews and to soak them in cold water overnight – do this in the fridge, please! The soaking softens the tough nut and make cashews much easier to blend into smooth and silky consistency.
Depending on the type of blender you have you may want to start by adding liquids first, than thawed spinach (I find that using frozen spinach that has been thawed out and gently squeezed works well here), then asparagus, nutritional yeast, lemon juice and zest, and finally cashews that have been washed and drained. The stronger the blender, the smoother your dip can get. I like a bit of a texture in the dip, but it is up to you to decide how much blending makes sense based on your preference.
Enjoy this dip immediately, and although it can store for a day or two, you won’t need to worry about that – this dip will be long gone!!!
Roasted Asparagus and Spinach Dip
What you’ll need:
1 bunch of asparagus, trimmed (about 1 lbs (454 g))
2 cups frozen spinach
1 cup unsweetened, plain almond milk
1 cup cashews, soaked overnight, then drained and rinsed
Preheat oven to 425 F (220 C), or the grill to the same temperature.
Wash and trim the asparagus. Try to remove as much of the wooden part of stems, then spread the spears on the parchment paper lined baking sheet. Spray with cooking spray and roast for 20-30 minutes with occasional stirring. You can also grill the asparagus. Either way you are looking to cook the asparagus through while letting it caramelize and char.
Place all the ingredients into a blender. Nutritional yeast is an acquired taste and you may want to add just a bit (1 teaspoon or so) and check for taste before adding more. Blend until smooth, then serve with your favorite chips, pretzel sticks, bread… The color of this spread is fantastic, and it goes well with Easter, being green and fresh. Enjoy the spring!
Cauliflower Ricotta and Spinach Stuffed Shells, via Eat the Vegan Rainbow
Ever since I’ve decided to transition into 100% plant-based eating, I’ve been going easy on pasta mostly because it is yummy and enjoyable, yet not really all that great for you given the calories and starch. I’ve tried some replacements, like spaghetti squash, which made a great Pad Thai, and black bean pasta, which made an awful base for my “Clam” Sauce.
Of all the things I’ve tried, zucchini noodles are simply the best! They work really well with meatballs or even lighter veggie toppings that I’m thinking of ditching spaghetti all together.
But, there are some dishes that are hard to imagine without pasta, like a very simple yet incredibly delicious pasta salad I made at the height of summer season, and these stuffed jumbo shells right here.
The shells are stuffed with cauliflower “ricotta” and spinach mirroring a very traditional ricotta cheese and spinach stuffed shell recipe. The shells I use here are the “jumbo” kind, and their name is well-deserved. Two or three of these makes a solid serving size, so the recipe below ought to serve four people easy.
The main departure I took from the traditional recipe, which is vegetarian, is to skip the tomato sauce, usually a simple marinara, and to use my own creation, a cauliflower “ricotta” cheese, which makes this recipe dairy-free, vegan, and plant-based.
The cauliflower “ricotta” is inspired by cashew ricotta that I’ve made in the past. I was very curious about whether cauliflower can help the basic cashew ricotta recipe (some great examples here and here), and retain all the creaminess while cutting down the cost (frozen cauliflower is cheaper than raw cashews), and the calories and fat (cauliflower has far less calories than cashews and no fat!).
The cauliflower “ricotta” works well here, and it’s a useful cheese alternative to have for other pasta dishes, or a lasagna. Amazingly, what puts this entire dish over the edge is actually a tiny bit of nutmeg. Just a pinch goes a long way, so be careful not to overdo it.
Cauliflower Ricotta and Spinach Stuffed Shells
What you’ll need:
16 jumbo shells, boiled
1 bag (1 lbs; 454 g) frozen chopped spinach
1 bag (1 lbs; 454 g) frozen cauliflower
1 cup cashews, soaked overnight
1 tablespoon white miso paste
1 teaspoon yellow mustard
1 teaspoon onion powder
1 teaspoon garlic
1/2 teaspoon ground nutmeg
Cooking spray
What you’ll do:
Bring a large pot of water to boil, add the shells and let them boil for 8-10 minutes. Take the shells out, rinse with cold water, and place them aside.
Preheat the oven to 350 F (175 C).
Cook the cauliflower and spinach according to the instructions on the bag. You can use a microwave or a stove top method and you don’t need to thaw the vegetables but I recommend that you squeeze the access water out before using. Keep the cauliflower and the spinach in separate bowls. Cauliflower should take about 10-15 minutes to cook, and spinach about 5 minutes.
Place the cooked cauliflower, soaked cashews, and the rest of the ingredients into a food processor and process until you reach the consistency of ricotta cheese.
Spray the bottom of 8 x 8 in (20 x 20 cm) with cooking spray and pour in 1/2 cup of cauliflower “ricotta” and spread around to cover the bottom.
Using a tablespoon, spoon some cauliflower cheese into a shell, then some spinach, and place into the baking dish. Continue with the rest of the ingredients until all the shells have been filled.
Spread any leftover spinach and/or cauliflower ricotta over the top, spray with a bit more cooking spray, cover with foil and bake for 20 minutes. Uncover and bake for 10-15 minutes more until the top is golden and sides are slightly browned.
Let the stuffed shells rest for 5 minutes before serving then enjoy!
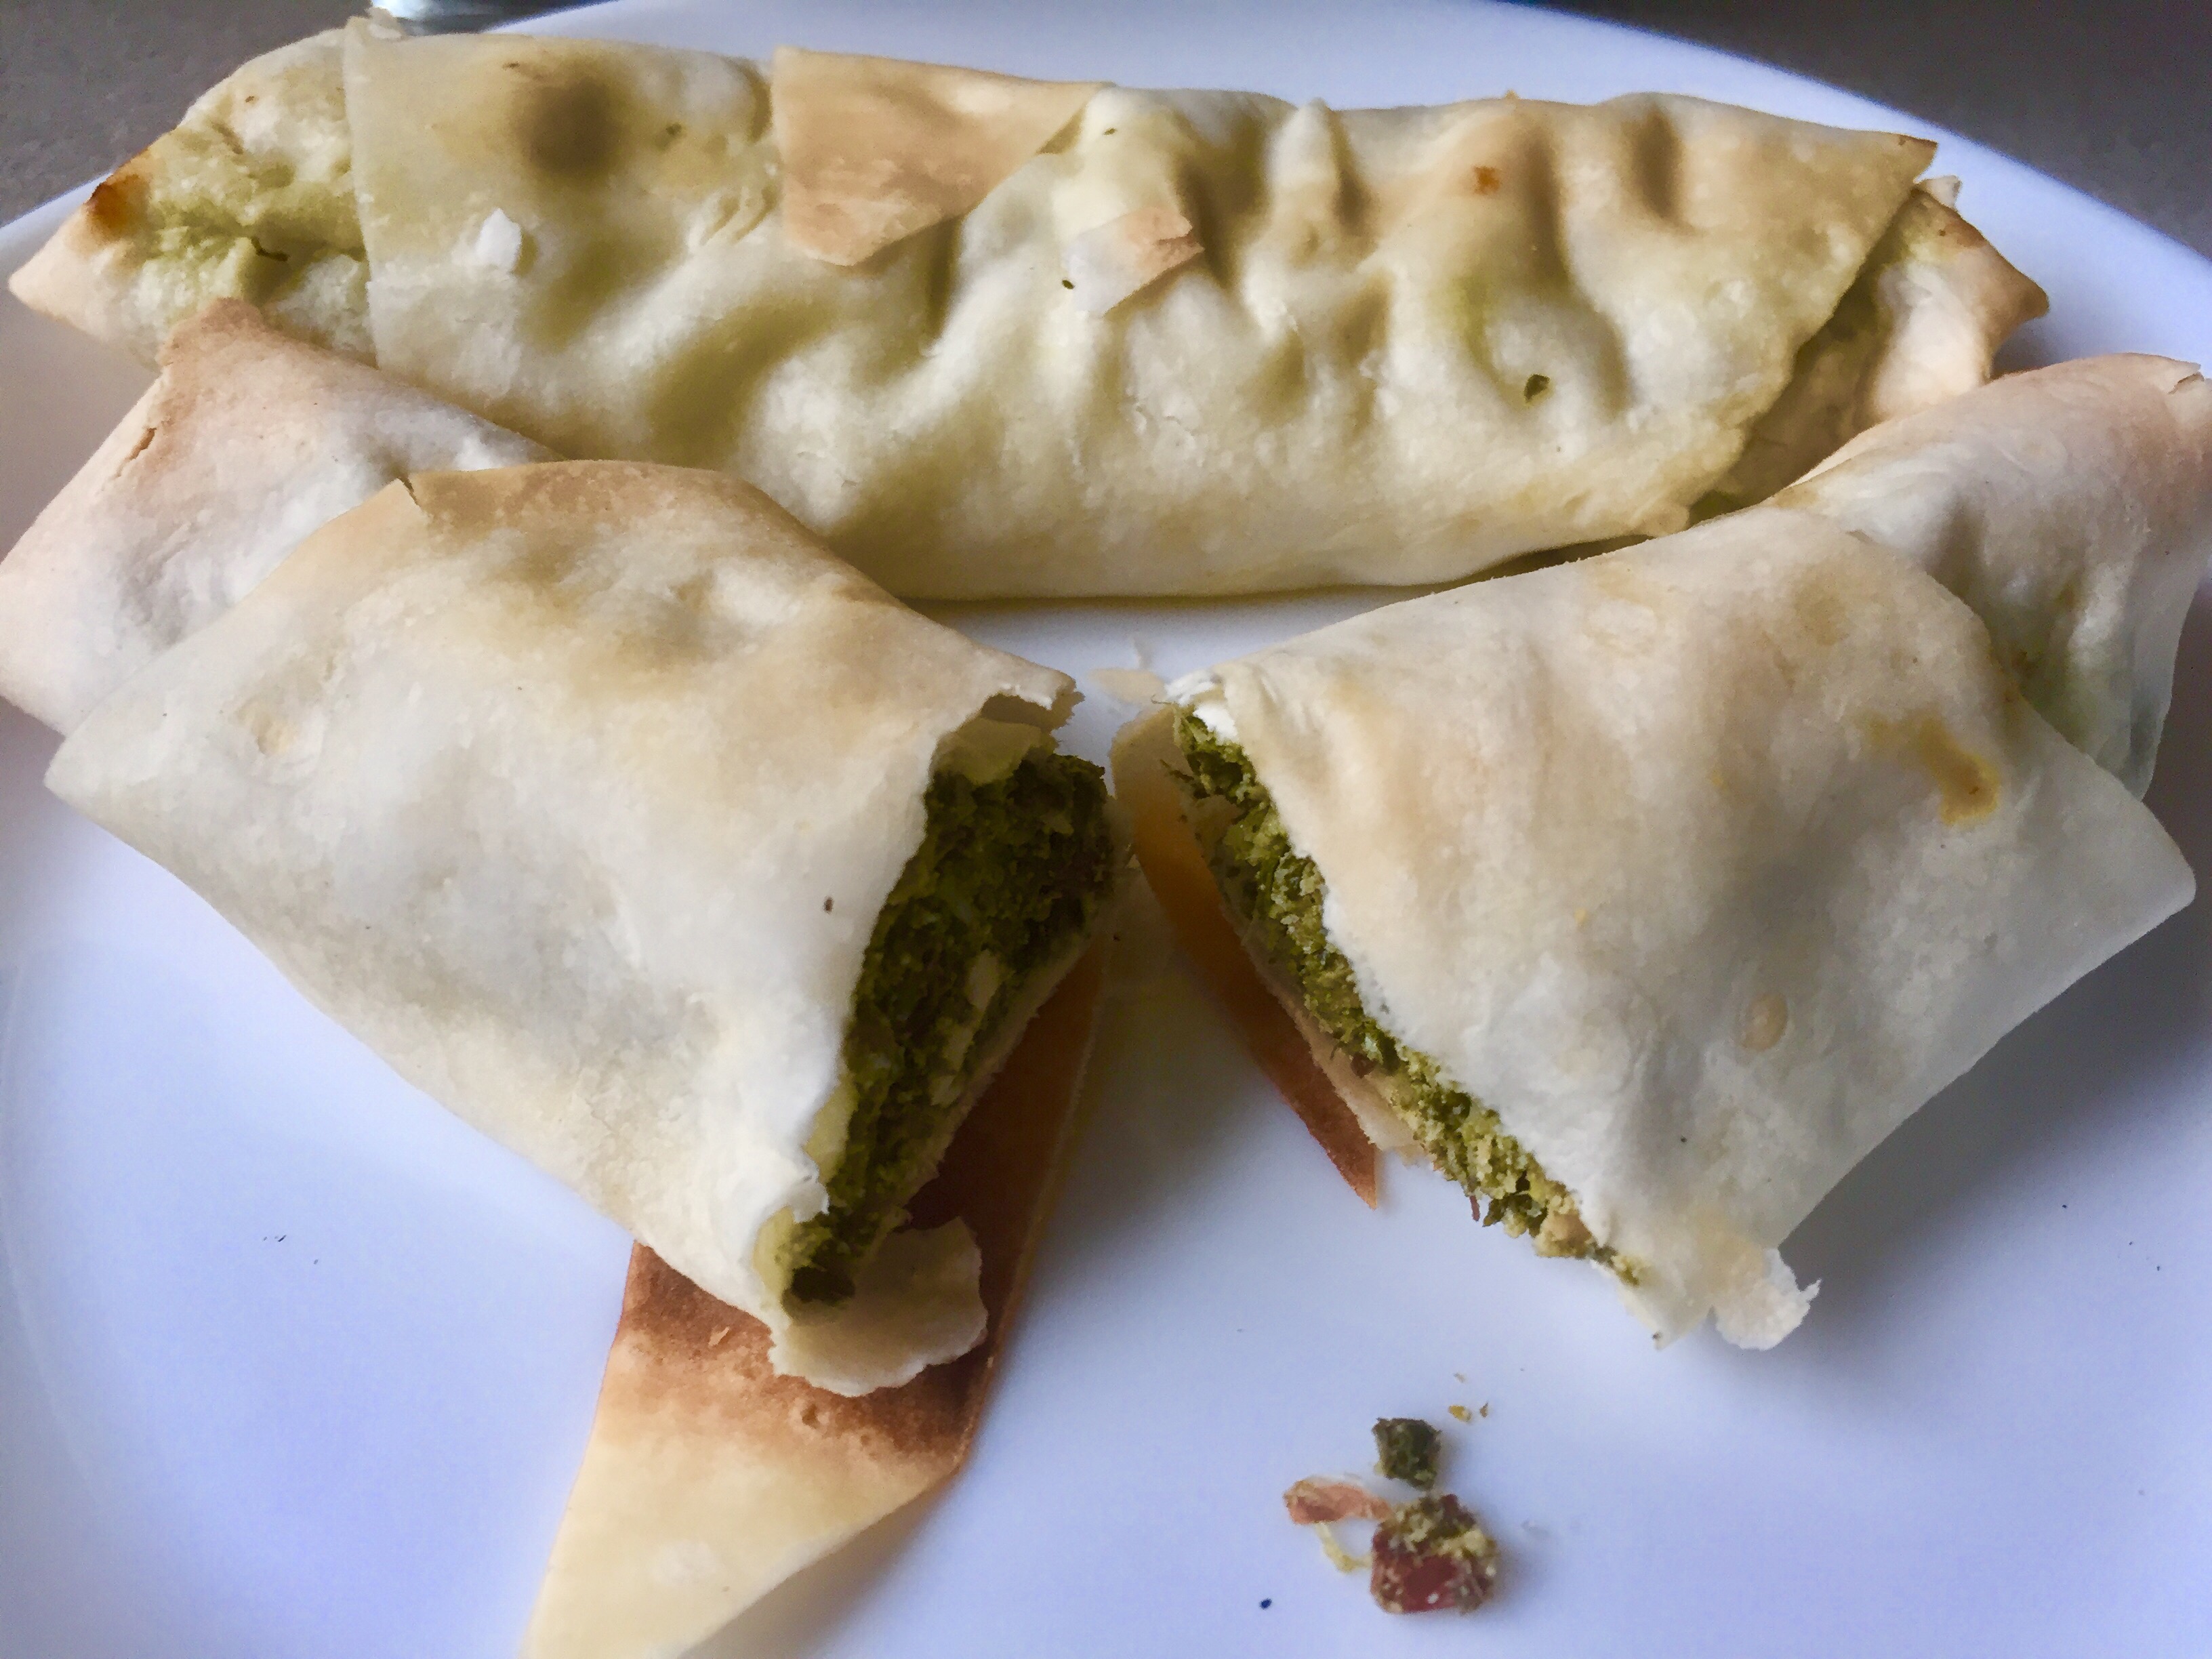
Easy Spanakopita Rolls, via Eat the Vegan RainbowLet me describe Greek and Middle Eastern pies. They are made using very thin sheets of dough, called phyllo dough, and than build by either interleaving layers of phyllo dough with a filling or by rolling/holding the filling in phyllo pockets or rolls. As you can imagine, these pies are diverse and varied, as many different ingredients can be made into an amazing pie filling. If you still have trouble picturing what one of these pies may look like just think of baklava, probably the most famous of phyllo based pies.
Some of my favorite phyllo pies are cheese pie, mushroom pie and spinach pie. This last one has been brought to the frozen sections of most grocery store chain in US and known as spanakopita.
Traditionally, spanakopita recipe uses spinach as a central ingredient and combines it with cheese, eggs and onions to create either a rolled or layered pie that is served both warm and cold, usually accompanied by a yogurt drink.
Now I offer you a vegan version of this pastry that uses almonds and nutritional yeast as a substitute for cheese and eggs. Here I used store bought phyllo dough sheets precut into triangles that I picked up in an Indian store. You can use any phyllo dough you like, or make your own.
The spanakopita rolls come together quickly and bake to a lovely, crispy appetizers that are easy to pass around. They are also a great breakfast item, a quick snack or a dinner add-on. As I mentioned, you can eat them hot or cold, but they are really the best served fresh from the oven as while their phyllo dough exterior is crunchy. They will get soft as they sit for few hours or overnight so if you plan to serve them the next day you’ll need to reheat them in a toaster oven.
Steps of making spanakopita rolls, via Eat the Vegan Rainbow
Spanakopita rolls filling, Eat the Vegan Rainbow
Phyllo rolls, via Eat the Vegan Rainbow
Spanakopita rolls, Eat the Vegan Rainbow
Spanakopita Rolls
(Makes 24 rolls)
What you’ll need:
24 triangle-shaped thick phyllo dough sheets (or thinner phyllo dough sheets stacked 2-3 together and cut to triangle pieces)
4 cups frozen spinach
1 cup almonds, dry roasted
1/4 cup almond milk
1 tablespoon nutritional yeast
1 tablespoon lemon juice
1 teaspoon garlic powder
1 teaspoon onion powder
1/2 teaspoon ground nutmeg
Olive oil, or olive oil cooking spray
What you’ll do:
Preheat the 400 F (200 C).
Soak the almonds in cold water for 1-2 hours at room temperature or in the fridge overnight. Drain to remove excess water, add nutritional yeast and lemon juice, and start grinding to a fine paste, adding the almond milk slowly. You may not need the whole 1/4 cup or you may need a bit more – you be the judge because what you are looking for is a nice smooth consistency of a paste, not a sauce.
Place frozen spinach in a large mixing bowl and purée using a hand held immersion (stick) blender. You can also purée the spinach in a food processor.
Combine spinach with the almond paste and mix well. Add the spices and mix again.
Lay out the piece of phyllo on a flat surface, spray with cooking spray, or drizzle a drop or two off olive oil, and spoon 2-3 tablespoons of spinach pie filling onto the long end of the pastry then roll towards the tip. Tuck the ends in and place on a baking sheet. I like to line my baking sheet with parchment paper for easy clean up, but that’s not really needed.
Once all your rolls are ready, spray the tops with cooking spray or drizzle oil, and put in the oven for 25-30 minutes. You want the tops golden brown.
Let the spanakopita rolls cool for 10-15 minutes and serve.
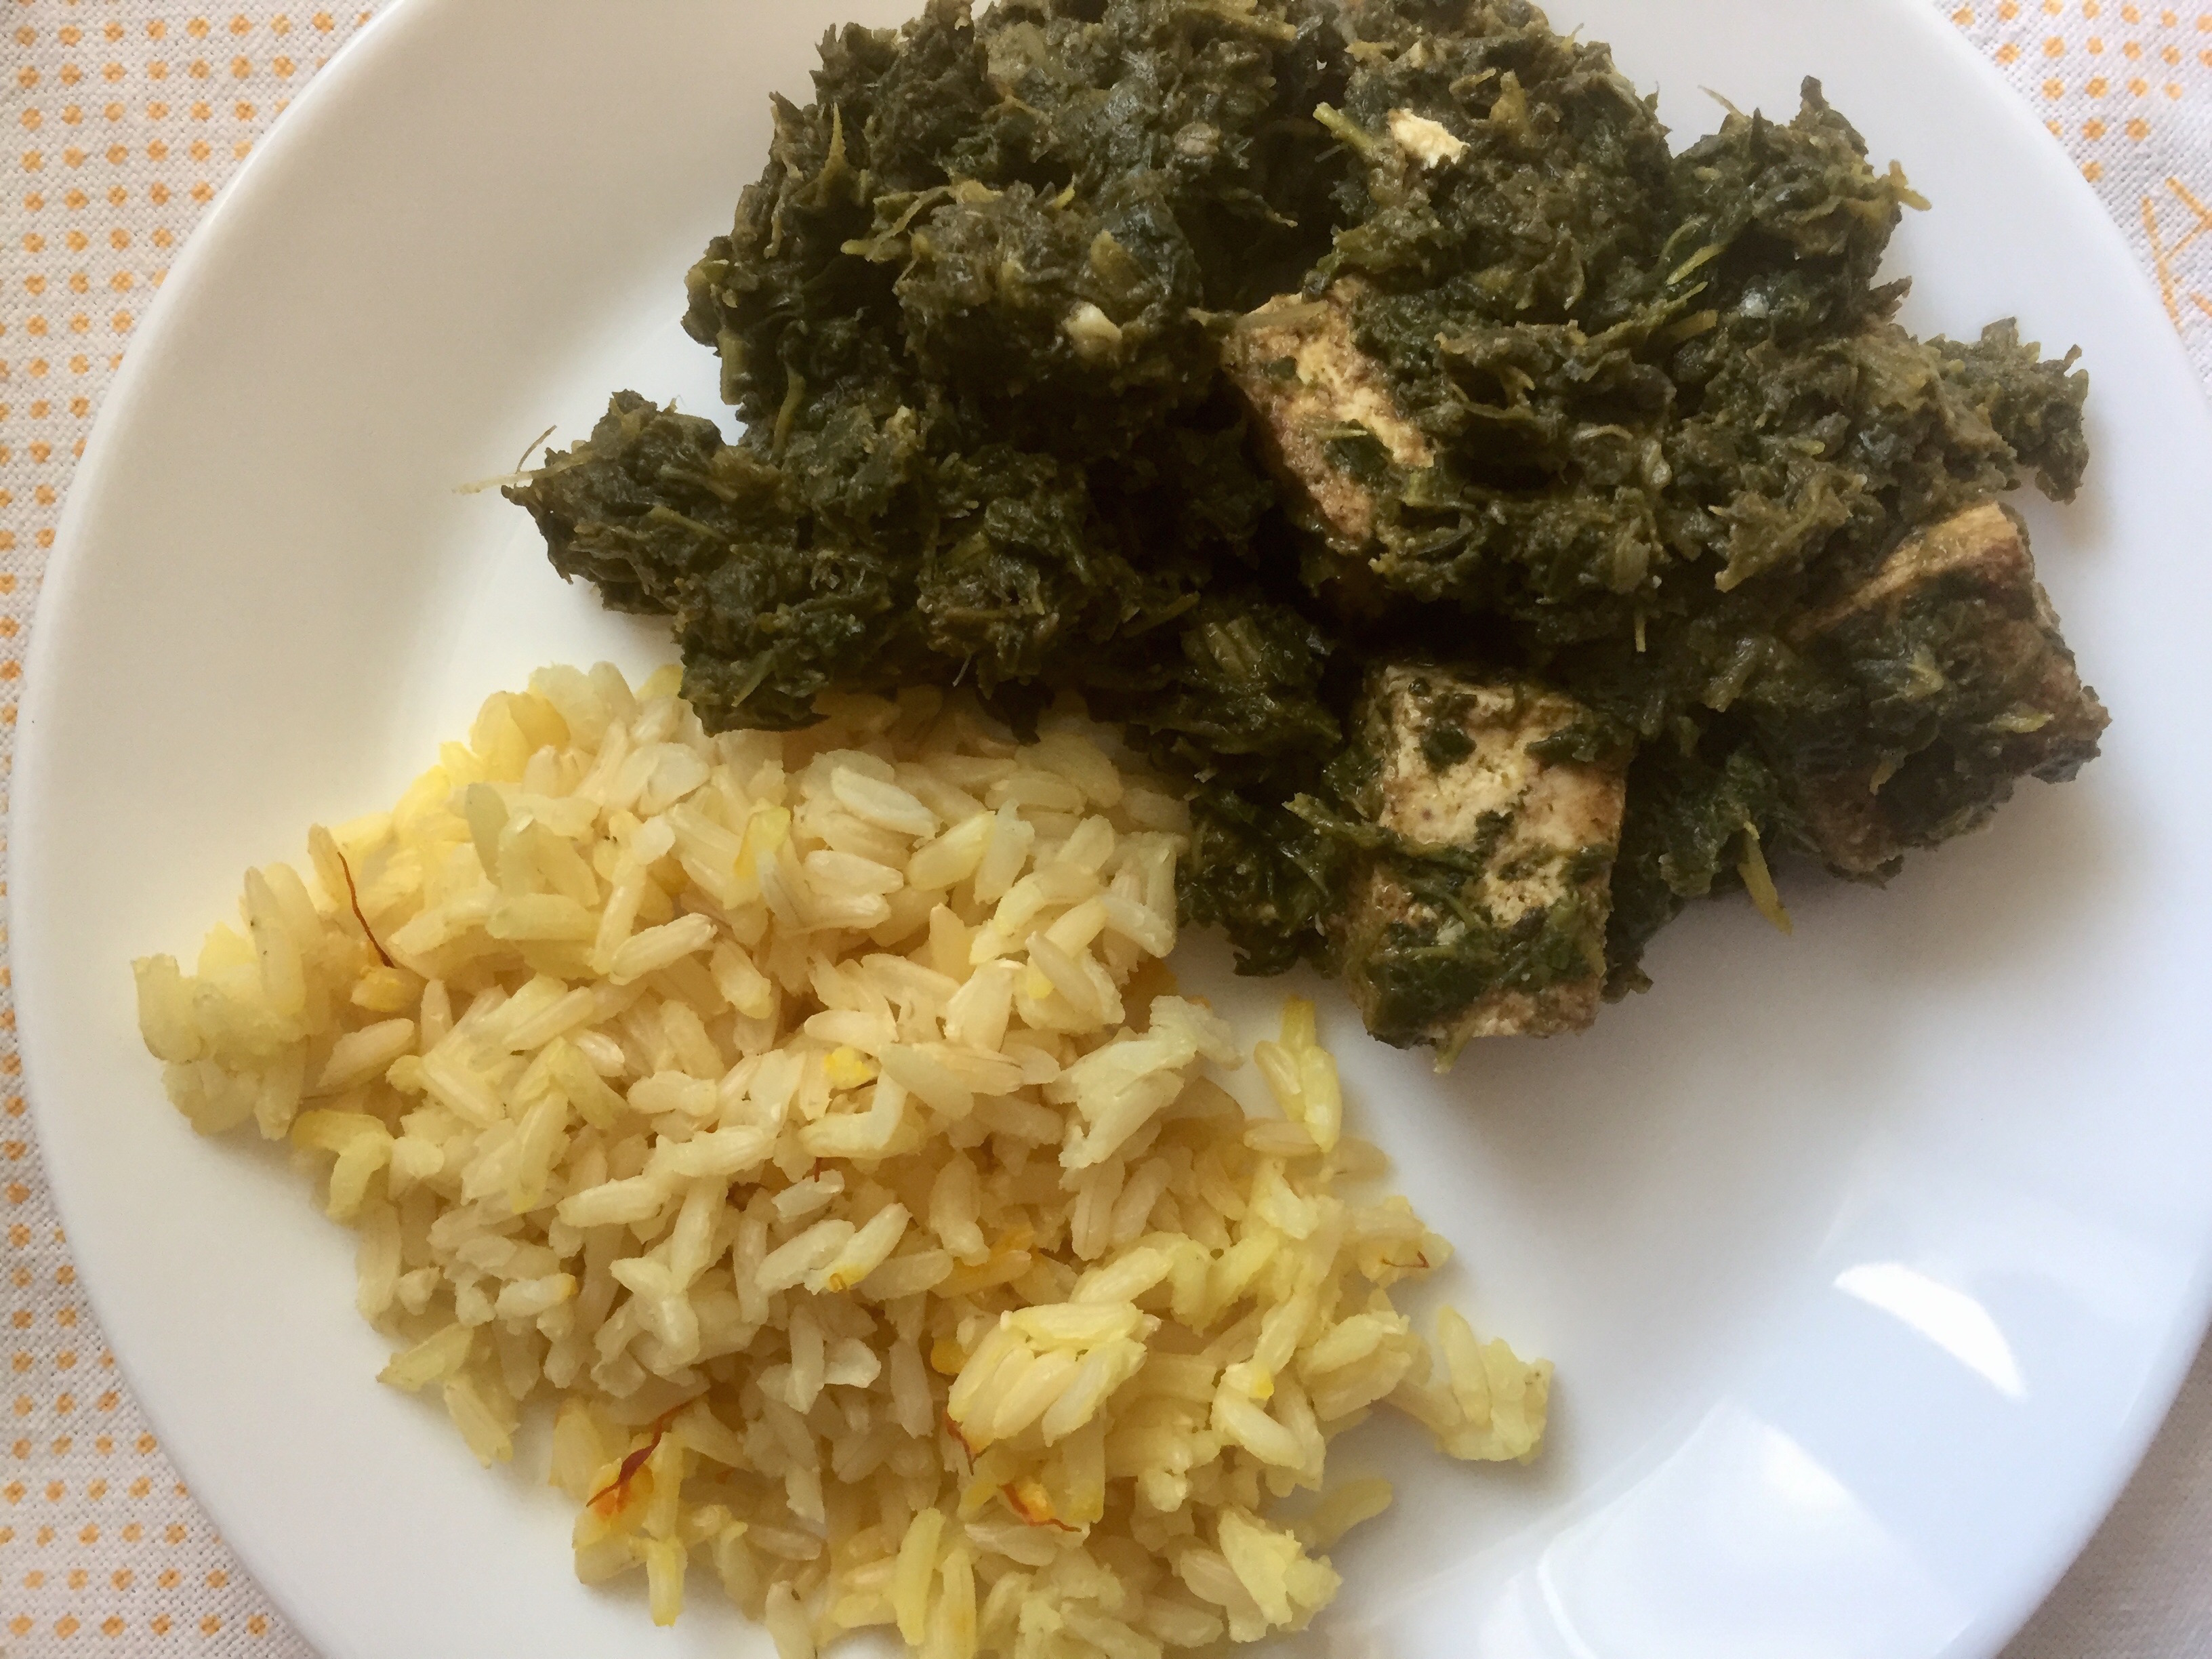
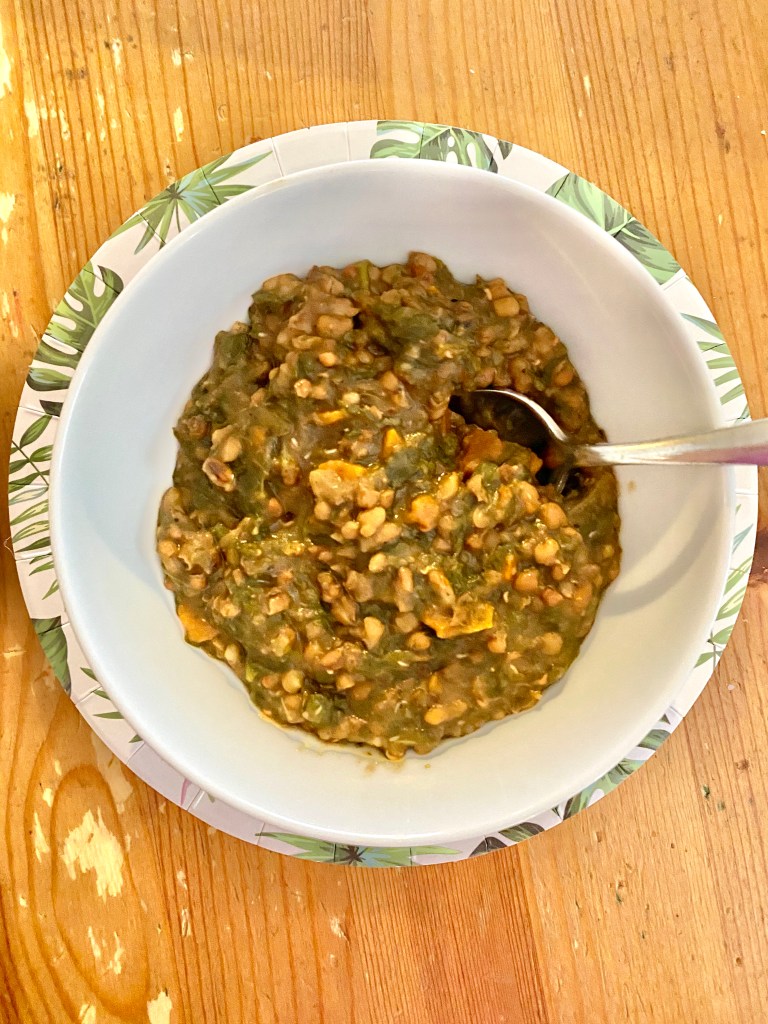
Vegan Saag Paneer with Saffron Brown Basmati Rice, via Eat the Vegan Rainbow
Few days ago, I shared my recipe for Vegan Chicken Tikka Masala that uses young jackfruit as a substitute for chicken, and slow cooker as a substitute for using ghee to enhance the flavor, as well as huge time and effort saver. Since then I decided to tackle another jewel of Indian cuisine, Saag Paneer. Saag is a traditional Indian dish made of leafy green vegetables, which is a vegan friendly part of this equation, and paneer is soft, white cheese very common in South Asia, a vegan less friendly ingredient. Putting green leafy vegetables, like spinach, together with cheese, spices and cream is a no-brainer, so it is no surprise that Saag Paneer is very popular.
In order to build a vegan version of Saag Paneer, I focused on transforming extra firm tofu into paneer. This turned out to be easier than I expected. First of all, texture of extra firm tofu and your average paneer are very similar. Additionally, they both have mild flavors and creamy consistency. So far so good!
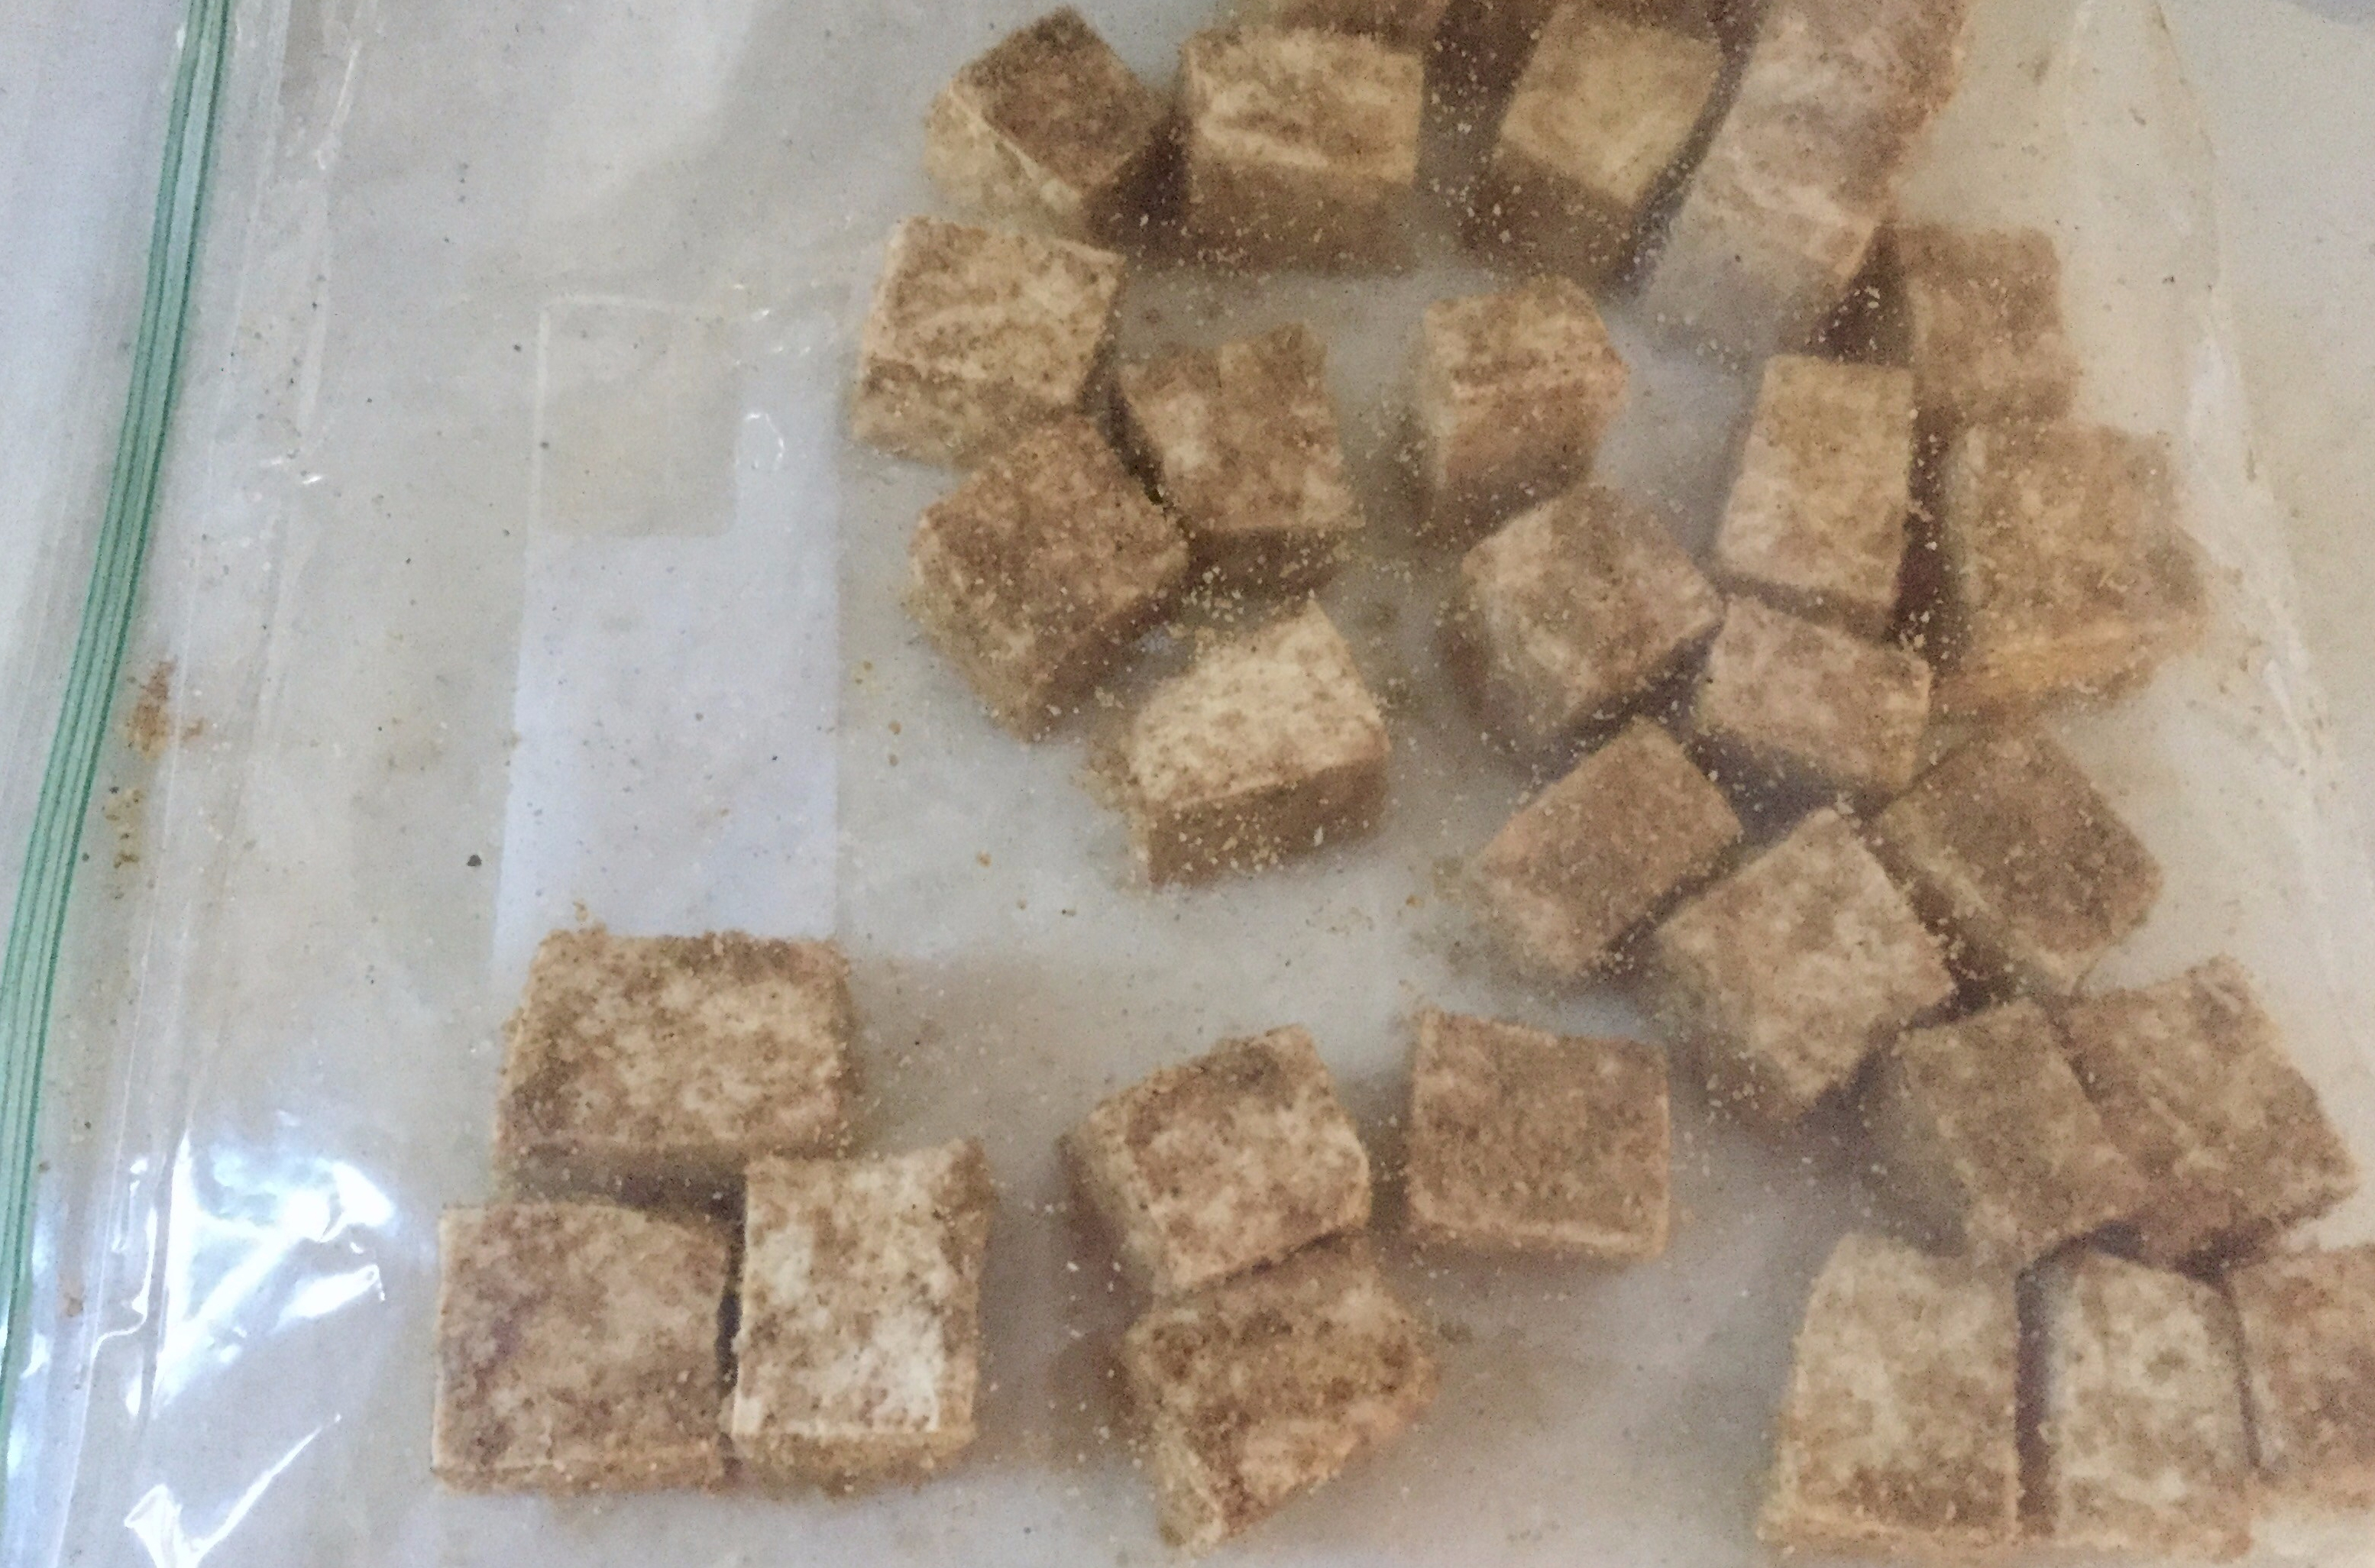
You do need some time and patience with this one though. I prepped tofu the way I usually do by leaving it in the sieve in the fridge overnight. You can use any other method of getting rid of the excess moisture – I prefer the sieve because it requires no work, cans and paper towels are tedious and a bit wasteful, and I am yet to invest in the tofu press. The next morning I cubed the tofu, and let it “marinate” in the dry spice mix for 4-6 hours.
Vegan Paneer, via Eat the Vegan Rainbow
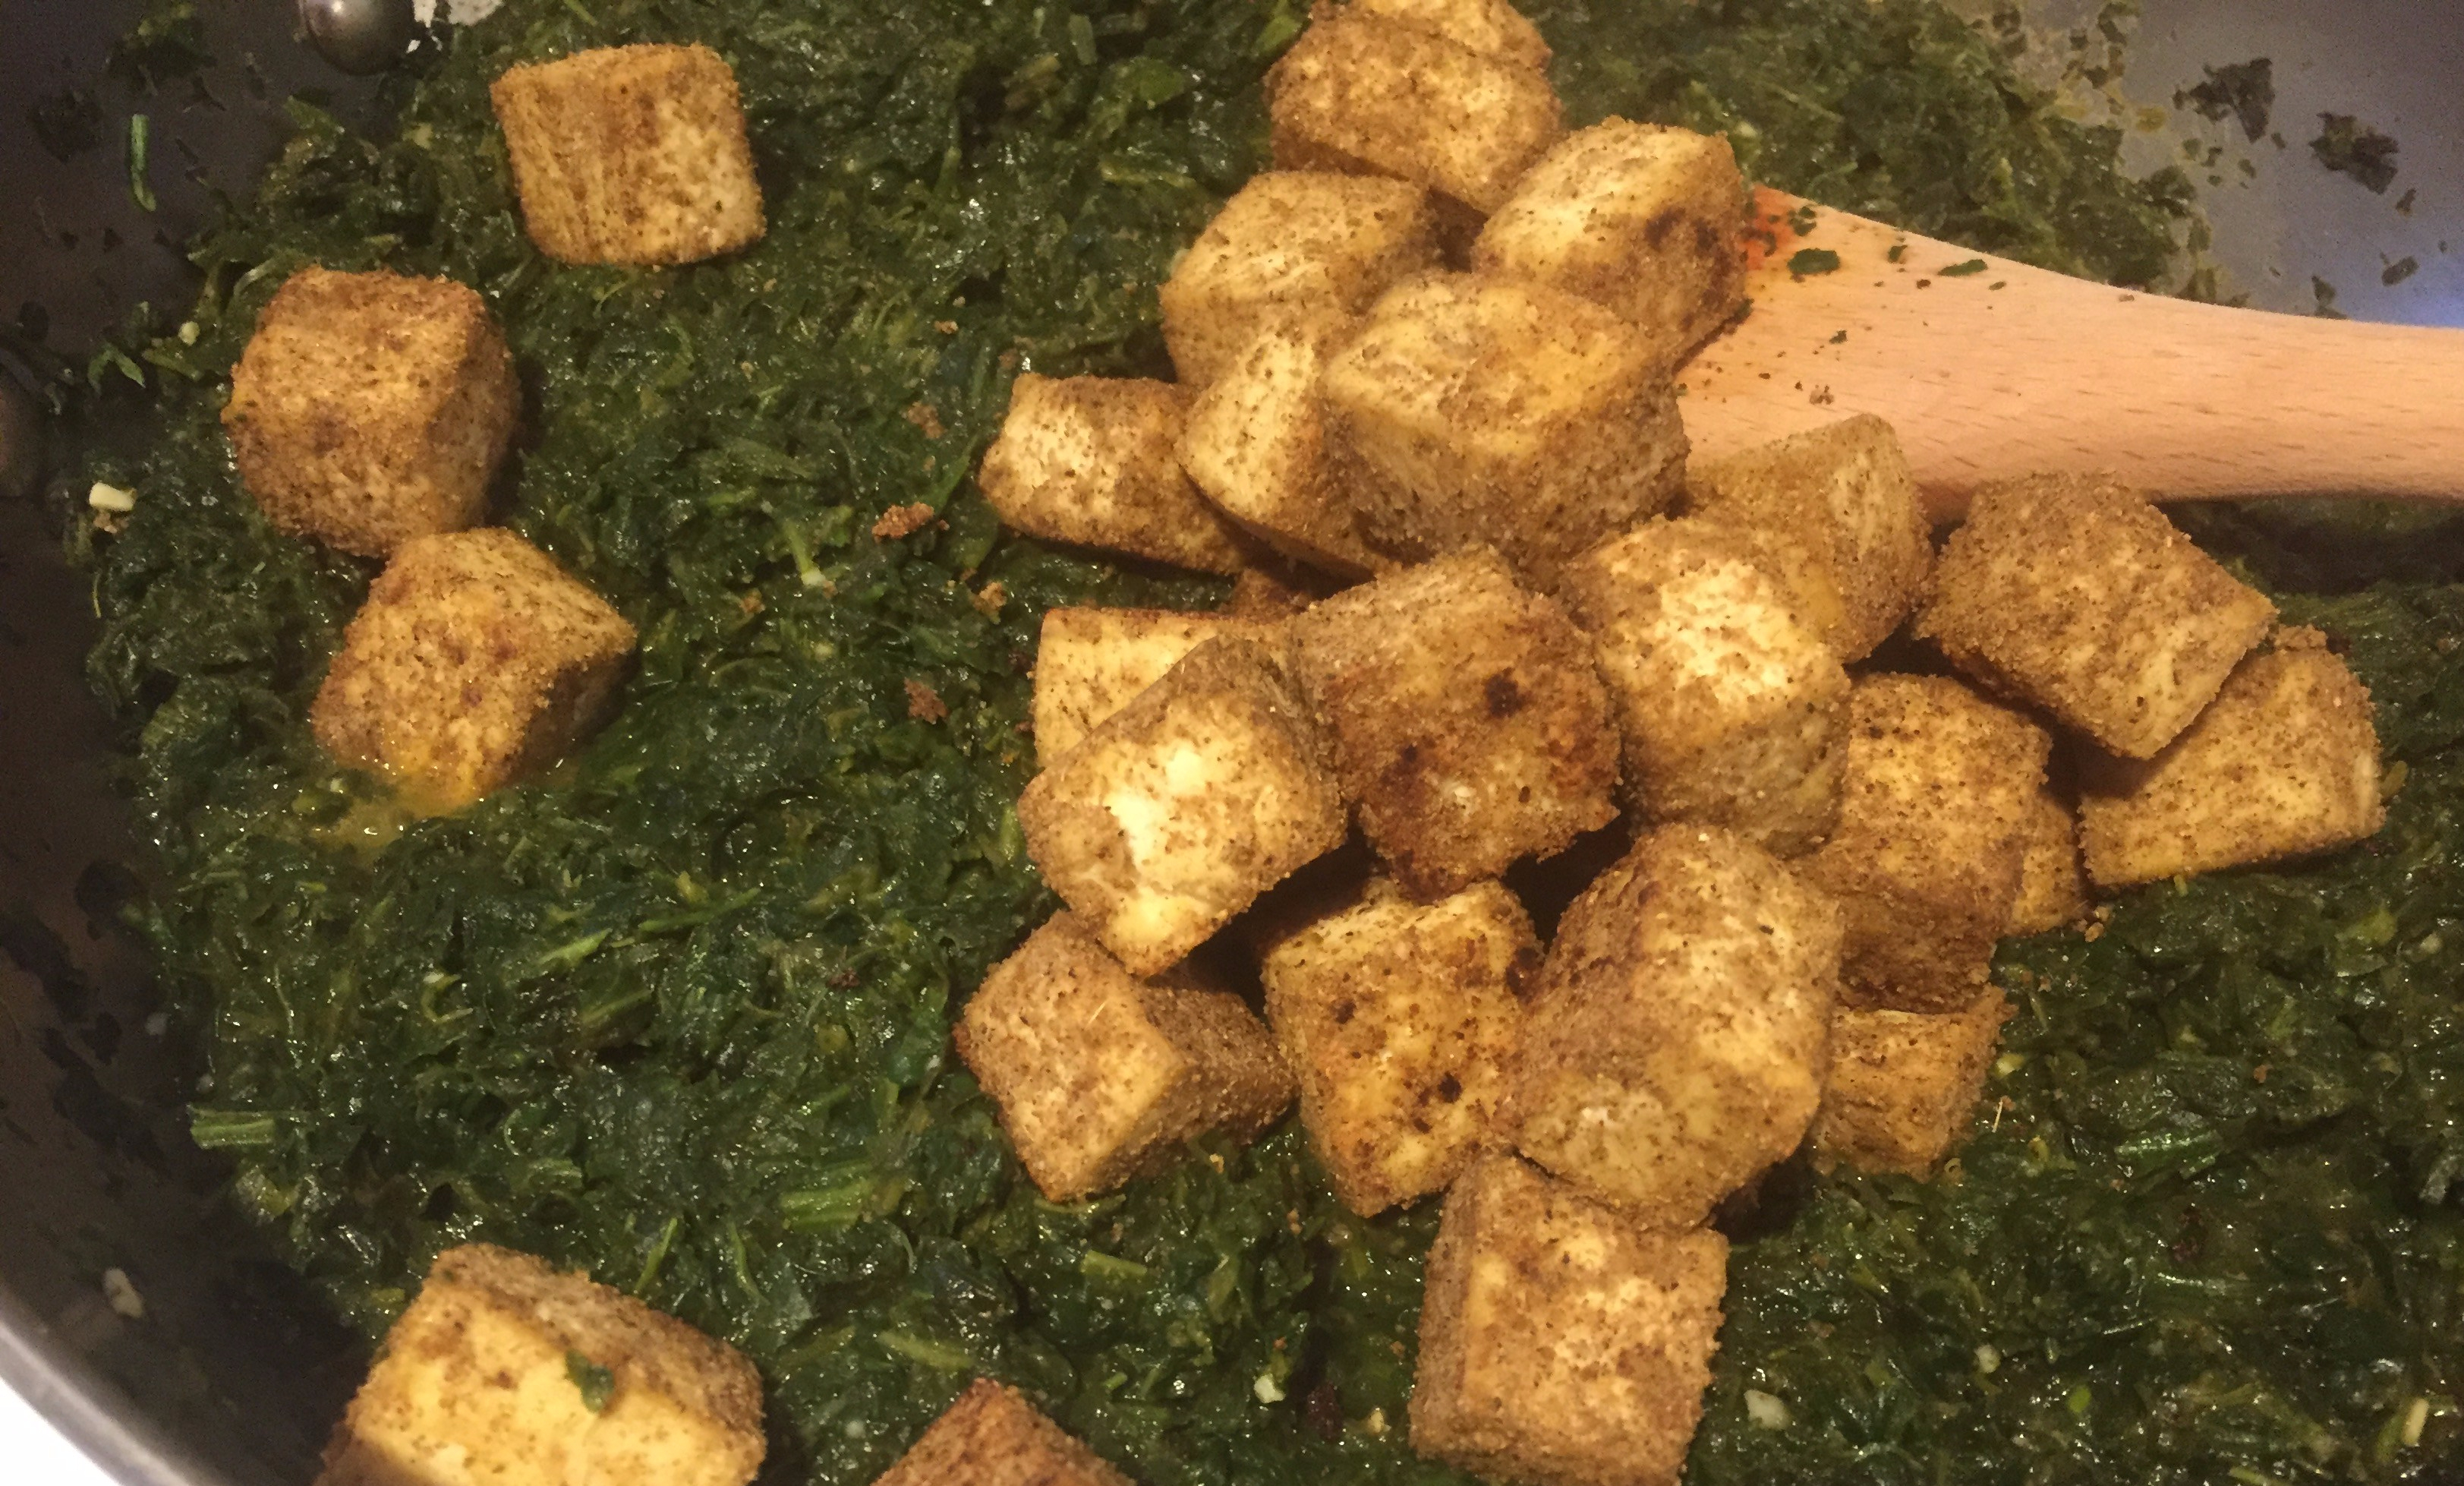
Even after sitting in the spice mix, the tofu paneer is not quite ready. Although you can use it, I strongly recommend that you first roast the tofu for 20-30 minutes. This roasting step locks in the spices and adds slight crunchiness that makes every bite a treat.
Few additional tips that will help you put this dish together are to do with spinach. I use frozen chopped spinach, as it is ready to go. The traditional Saag Paneer recipe uses quite a bit of cream to make the spinach nice and creamy. I use coconut milk to add a bit of creaminess to it, and the coconut milk adds a bit of its own nutty flavor that I enjoy. But, I don’t rely on coconut milk alone and have discovered some time ago that stick (also known as hand or immersion) blender is indispensable for creating spinach that’s beyond creamy! If you don’t have a stick blender, you can use a blender or a food processor to purée your spinach.
Once the spinach is puréed, it is ready to meet the tofu paneer, and after about 15 minutes of simmering the Vegan Saag Paneer will be ready to meet your taste buds!
Vegan Saag Paneer, before the final mix. Via Eat the Vegan Rainbow
Vegan Saag Paneer
What you’ll need:
For tofu paneer
14 oz. (400 g) extra firm tofu
1 tablespoon garam masala
1 tablespoon ground cumin
1 teaspoon garlic powder
For creamed spinach
2 lbs (1 kg) frozen, chopped spinach
1 tablespoon garlic, minced
2 tablespoons tomato paste
7 fl. oz. (200 mL) coconut milk, reduced fat
Cooking spray
What you’ll do:
Place tofu into a strainer and leave in the refrigerator to drain overnight. Then pat dry with a towel and cut into 1 in/2.5 cm cubes.
In a ziplock bag mix dry spices (garam masala, ground cumin and garlic powder) and add tofu cubes to it. Zip the bag and toss gently to coat the tofu pieces evenly. Leave in refrigerator for 4-6 hours.
Heat the oven to 425 F (220 C). Line a baking sheet with parchment paper and space tofu cubes evenly with some room between the cubes. Don’t brush the spice mix off, just roast the tofu pieces as is for 10-12 min, then go in and flip them over and put them back for another 10-12 min, so that they roast on all sides and get golden brown.
On the stove top, spray the bottom of your pan with cooking spray and heat to medium high. Add minced garlic (I prefer the jar variety that taste great in a dish like this and requires no work), and let it start to develop the aroma for about 1-2 minutes. Next add the tomato paste, and let it mature for 1-2 minutes.
Add frozen spinach. Cook with occasional stirring for 15-20 minutes. Let cool for 15-20 minutes, add coconut milk, and then purée with a stick blender until smooth.
Add roasted tofu and mix gently until tofu is well incorporated. Simmer for 15 minutes. Enjoy with a piece of naan bread, or with Saffron Brown Basmati Rice.
Note: please note that unlike most Saag Paneer recipes I do not add spices to spinach. The flavor intensity comes from tofu paneer, so it is important that your tofu is well coated with the spice mix and nicely roasted until golden brown.


")
")