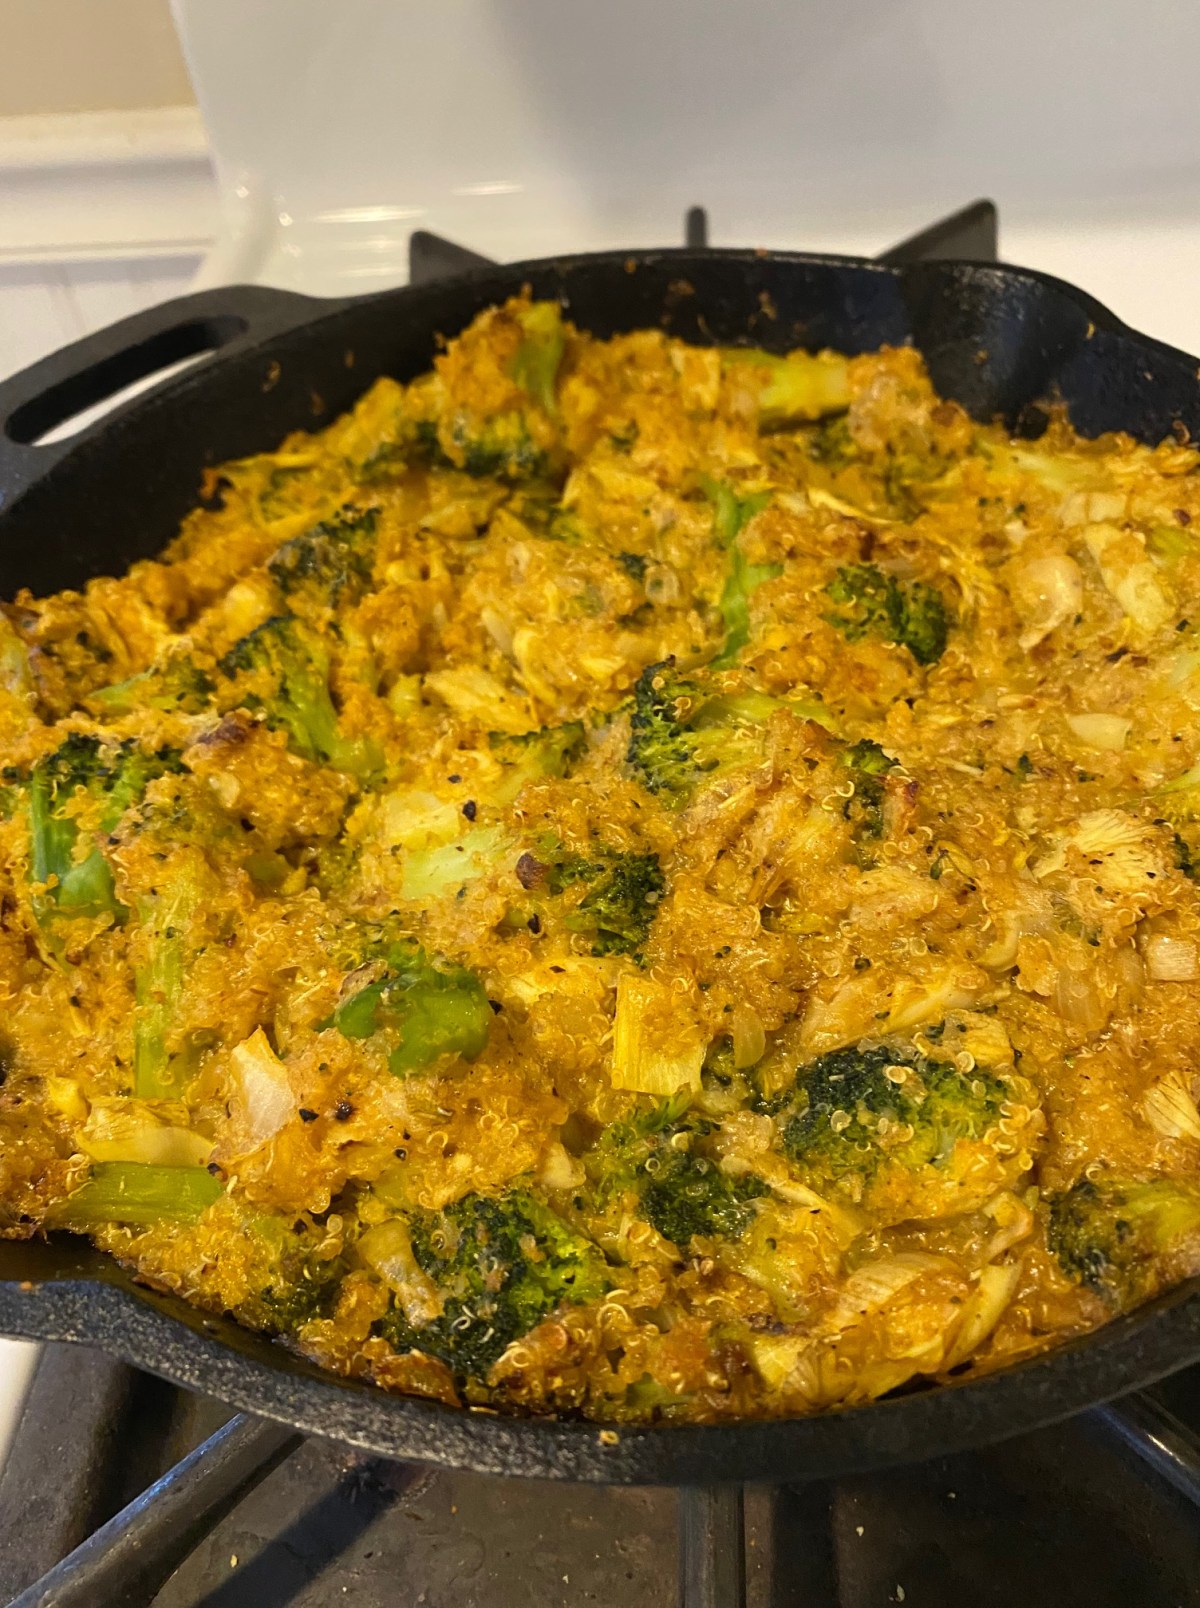
Quinoa Broccoli Casserole, via Eat the Vegan Rainbow
Casseroles are pretty dull, right? I mean: nobody every looks forward to a casserole. Plus: they come in some very weird combinations – tuna casserole, anyone?
Ok, all joking and jabbing aside, casseroles are not my favorite. But: they are super-convenient, one-pot recipes that come together with ease and feed the family. So, they definitely deserve their place on the table, and in busy home cook kitchen and recipe collection.
Usually, casseroles need a lot of eggs, cheese and similar to keep them together. This recipe, on the other hand, uses quinoa – a wonderful grain-like, protein rich ingredient. If quinoa you are using is not processed in any way, you will need to rinse it really well to remove bitter compounds called saponins that cover its surface. As their name suggests, saponins are soap-like compounds, so you need to rinse quinoa out until it stops foaming. Once quinoa is rinsed, cook it using 1 1/2 cups of water per 1 cup of quinoa. You can also use stock, but water works just as well!
The casserole recipe below was inspired by Alton Brown and his Quinoa and Broccoli Casserole – but I took a lot of liberties to adjust for my current pantry and vegan style of cooking. Those of you who are not vegan, you may want to check Mr. Brown’s recipe!
Quinoa Broccoli Casserole, via Eat the Vegan Rainbow
Place a heavy, oven-safe pan (I prefer cast iron pan) over the medium-high heat. Add the oil and onion, and sauté until onions are lightly browned. This will take about 5 minutes
Add the garlic and sauté for about a minute.
Mix in the mustard and the spices. Stir well, and continue to sauté for 2-3 minutes.
In a large mixing bowl, mix the cooked quinoa, sliced artichoke hearts, steamed or defrosted broccoli florets, nutritional yeast and tapioca starch. Add the sautéd onion, garlic and spice mix, and stir everything together. Pour back into the cast iron pan, spread around to even the mixture, and spray the top with some cooking spray if using.
Place in the oven, and bake for 30-40 minutes.
Take the casserole out of the oven, and let rest for 15 minutes before serving. Enjoy!
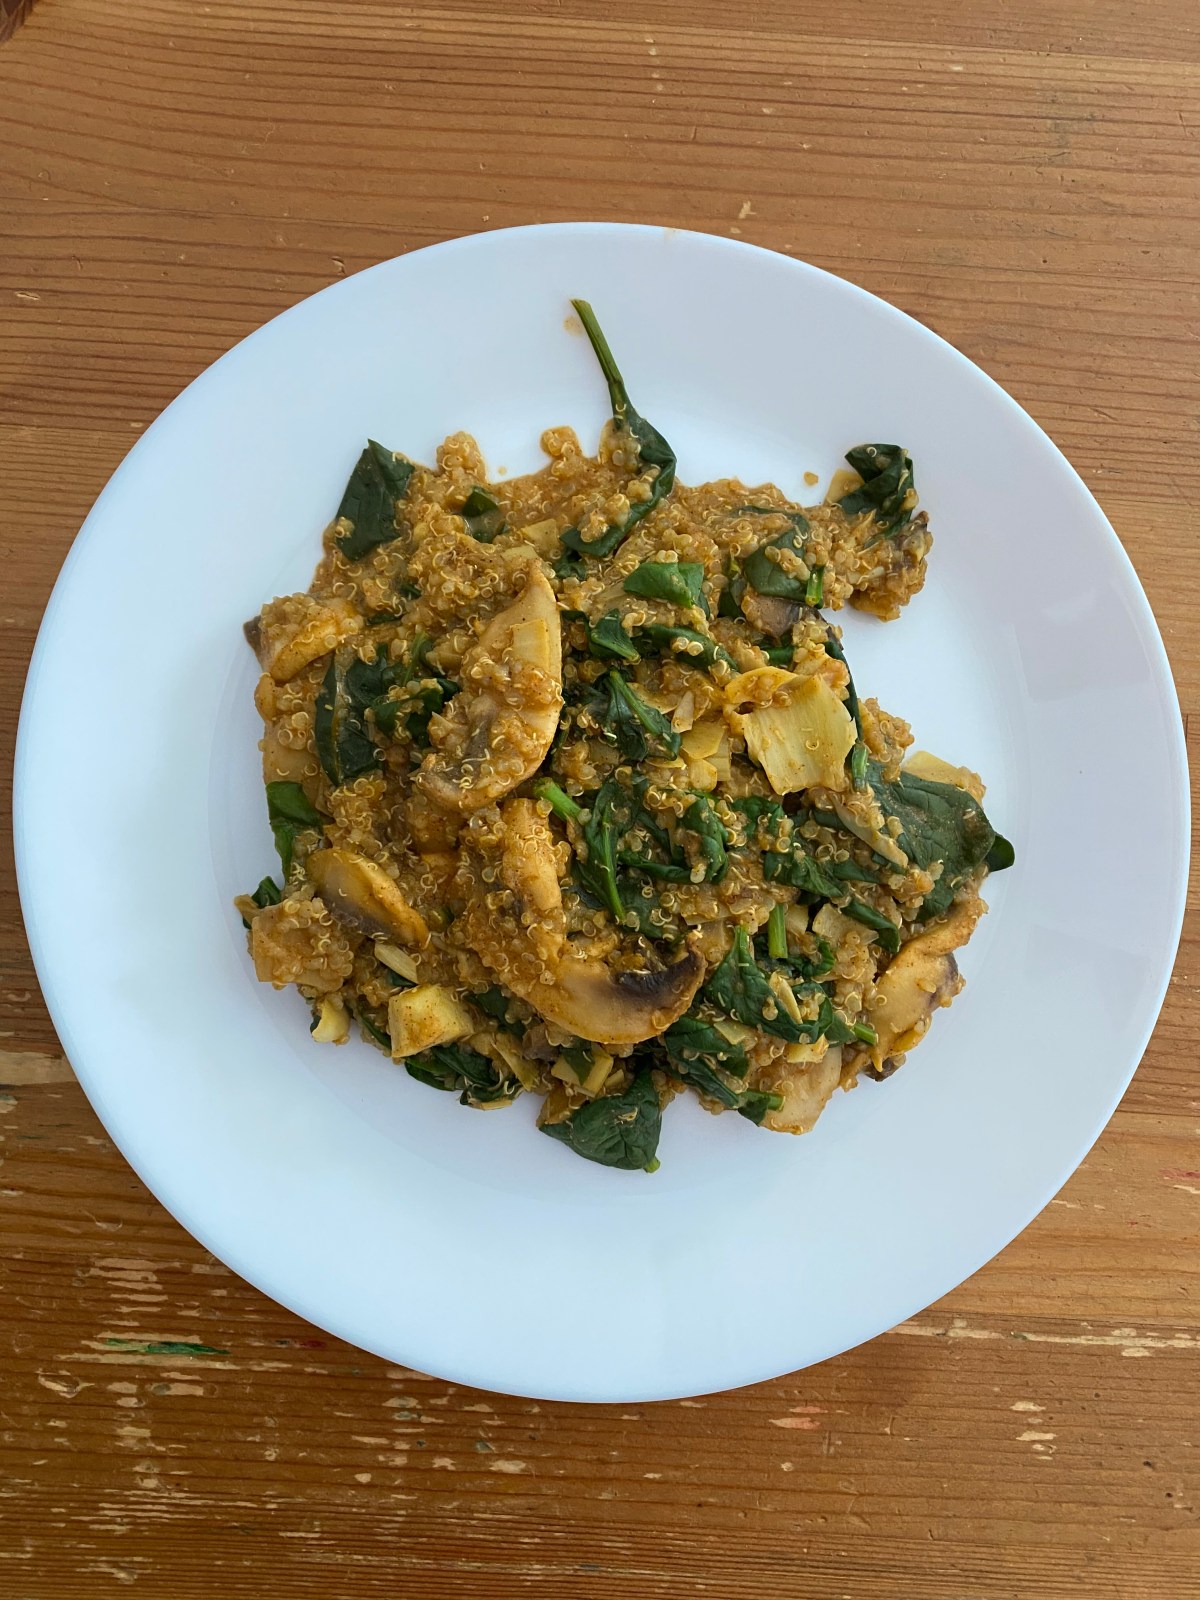
Quinoa Breakfast Scramble, via Eat the Vegan Rainbow
What’s for breakfast? This question takes a whole new meaning on weekends (I luckily have those off), when I am around to spend time experimenting and entertaining. I love making waffles, pancakes, and muffins. Lately, I started getting myself into eating more protein for breakfast, so I’ve been gravitating towards tofu scrambles (see recipes here and here). They are yummy and delicious, and I love them!
But: I also like some variety, and that led me to looking for other high-protein plant-based alternatives. Quinoa is the queen of plant protein – it is a fantastic substitute for rice, and I use it in many different recipes, from those that are supposed to be complete meals (like stuffed eggplant (the same recipe can be used to stuff peppers) and gumbolaya), to side dishes (see here for a very festive side dish with quinoa, roasted cranberries and pistachios – yummy!). Because quinoa is such a great source of plant-based protein, I have also developed a recipe for a ground beef substitute featuring quinoa. In this way quinoa can me your go to for tacos, pizza topping and similar.
With all that said, I wanted to see whether quinoa makes a good breakfast – and it does! The recipe below is just one illustration of how great a quinoa-based breakfast can be. You can also eat quinoa the same way you would oat meal – topped with fruit, syrup, even granola and yogurt. However, quinoa is not as quick to make as oats, so I recommend that you prepare a batch of quinoa and then store it in fridge for 3-5 days and use as needed.
There are a few tips for preparing quinoa. First of all, I recommend soaking for few hours (on the kitchen countertop) to overnight (in the fridge). Quinoa is covered with bitter compounds called saponins. These are totally natural compounds produced by the plant as it grows, and used a sort of protection from pests (not even pests like bitter things!!!). Soaking and extensive rinsing will help wash these chemical compounds away, and you can tell they are there if foam forms as you are rinsing. One thing to note is that a lot of quinoa on the market has been treated to remove saponins – on one hand that is good because you don’t need to worry about the bitter taste, on the other hand depending on the process used some of the nutritional value of quinoa may have been removed as well. By the way, eating saponins at the amount present on quinoa will not hurt, just in case you are wondering, but the flavor is likely going to be affected. Bottomline: I soak and rinse my quinoa very well before cooking.
And because the quinoa is already wet and soaked, I cook it in less water, usually 1.5 cups of water to 1 cup quinoa. The easiest way to cook quinoa is to use a pressure cooker (it takes 8-10 min on rice cycle, if you have instant (electric) pressure cookers with preset menu to choose from), or about 20 min on the stove top.
Once quinoa is cooked and cooled, you can store it for 3-5 days in the fridge and use as needed, for a scramble recipe below, for salads, as a porridge-type breakfast, as a side for your dinner, or to make any one of your favorite recipes that call for rice or any other type of grain. Enjoy!
Quinoa Breakfast Scramble, via Eat the Vegan Rainbow
Quinoa Breakfast Scramble (oil-free)
What you’ll need:
1 1/2 cups cooked quinoa
8 oz mushrooms, sliced
3-4 artichoke hearts, sliced
8 oz baby spinach leaves
1/4 cup nutritional yeast
1 teaspoon garlic powder
1 teaspoon onion powder
1 teaspoon paprika
1/2 teaspoon smoked paprika
(Optional): oil or cooking spray. Omit for oil-free version.
What you’ll do:
Add mushrooms to a large non-stick pan and place over medium-high heat. If using oil or cooking spray, add to pan and bring to heat before adding the mushrooms. Cook with stirring until mushrooms are soft and browned. This takes about 4-5 minutes.
Add the artichoke hearts, mix well and sauté for another 2-3 minutes.
Add the cooked quinoa, and all the other ingredients except the spinach. Mix well and cook for 4-5 minutes more.
Last: add the spinach – it will be bulky and take up a lot of space. But don’t panic: slowly incorporate the spinach. It will start to wilt and reduce in size as it heats up and mixes in. Baby spinach leaves take about 2-3 minutes to wilt and soften, so keep stirring until incorporated, reduce the heat to low, cover with a lid, and leave for couple of minutes.
Serve as breakfast, lunch or dinner. If serving as a breakfast, complement with a bowl of fruit and perhaps a piece of toast. Enjoy!
Quinoa-Based Ground Beef Substitute, via Eat the Vegan Rainbow
Many people who transition or attempt to transition to a plant-based diet find access to meat replacement products to be helpful. This makes sense – most of us were raised eating meeting, enjoying hamburgers, hotdogs, ground beef tacos and many other things. So, I think it is only reasonable that we would be looking for familiar textures and flavors. Plus: given that meatless and vegan meat replacement products are now easily accessible at least in major grocery store chains in US, many of us with busy lives default to grabbing a bag of meatless crumbles. It’s easy and in many cases quite delicious!
However, if you want to maximize the health benefits, or don’t live near a grocery store stocked with meat replacement products, you should learn how to make some of them yourself. One of the easiest thing to make is ground beef substitute, and my previous version made with mushrooms and TVP (textured vegetable protein) is one of my most popular posts. Here, I wanted to share a super easy recipe for a ground beef substitute that is ideal for tacos, enchiladas, fully-loaded nachos or any other dish that usually uses well cooked and fully caramelized ground beef.
The recipe is very simple, but it does take a bit of time. It used quinoa as the protein source and practically the only ingredient. This grain is rich in protein, vitamins, fiber and minerals, and if you have not tried it yet I strongly recommend it. You can use quinoa almost anywhere you use rice, like in stuffed eggplant or gumbo. Given the high protein content, quinoa can be a great alternative to using gluten when making things like gluten-free vegan BBQ ribs. And, of course, quinoa tastes great by itself more or less, in simple side dishes like this one.
I hope you give this new take on ground beef substitute a try!
Quinoa-Based Ground Beef Substitute, via Eat the Vegan Rainbow
Quinoa-based Ground Beef Substitute
What you’ll need:
1 cup quinoa
1 1/2 cup to 2 cups water
2 tablespoons nutritional yeast
2 tablespoons vegetable oil
1 tablespoon chili powder
1 tablespoon tamari sauce
What you’ll do:
Bring 1 1/2 cup water to boil, then add quinoa, lower the heat and simmer for 20-25 minutes. Check quinoa half way through and add more water if needed. Let the cooked quinoa cool completely before moving to the next step.
Place cooked quinoa into a large mixing bowl, add nutritional yeast, oil, chili powder and tamari or soy sauce (tamari sauce is a gluten-free alternative to soy sauce). Mix well. If you are busy or planing ahead you can prepare this mixture a day ahead and store in the fridge until ready for the next set.
Preheat the oven to 425 F (220 C).
Line a large baking sheet with some parchment paper and spread the quinoa mix, forming an even thin layer.
Roast for 20 minutes, then take the quinoa-based ground beef substitute our the oven, mix well, and return for another 15 minutes. Check again to make sure that quinoa is nicely roasted, crunchy and well-browned. If so, you are done, if not place it back in the oven for another 5 minutes or so. Let the mixture cool then use as a taco filling, a pizza topping or to make some delicious enchiladas!
Stuffed Portobello Mushrooms with Red Quinoa, Sun Flower Seeds and Sun Dried Tomatoes, via Eat the Vegan Rainbow
Let’s talk about umami. You know, that special kind of taste that tells you something is savory. Not bitter, not salty, not spicy, not sour, but simply and enjoyably savory.
What is behind umami?
We perceive the taste of our food thanks to different kinds of taste receptors, very specialized types of proteins decorating our tongue cells. These receptors recognize molecules in our food, relay what’s in our mouths to the brain, and the result is our perception of different tastes. Although salty, sour, sweet and bitter have been recognized for a very long time (thousands of years), umami has been known for just over a century, and known to western cultures and science for less than two decades being originally discovered by a Japanese scientist, Kikunae Ikeda. The main thing behind umami is glutamate, an amino acid that occurs quite naturally in many food sources.
What are vegan sources of umami?
Although naturally occurring and therefore easily found on many plates, the umami flavors are usually tightly associated with meat. So, it is critical for anyone who is embarking on a vegan culinary voyage to learn about plant-based sources of umami. Here, tomatoes, mushrooms, potatoes, toasted nuts, and soy sauce reign supreme. This means that including one or all of these ingredients into your next savory concoction is a must and the recipe below fully embraces this suggestion!!!
Maximizing vegan umami flavors
Some of my favorite sources of savory deliciousness are portobello mushrooms and sun dried tomatoes. I use these ingredients in many different ways, either by themselves, or when building things like burgers. In the recipe below, large portobello mushrooms become a perfect vessel for a stuffing made of red quinoa, sun dried tomatoes and sunflower seeds. The result is a hearty dinner fare, that when paired with a light salad goes a long way. And did I mention how healthy this food is? With mushrooms, quinoa and seeds, you really can’t go wrong!
Stuffed Portobello Mushrooms with Red Quinoa, Sunflower Seeds, and Sun Dried Tomatoes
What you’ll need:
4 large portobello mushrooms, stems removed
1/2 cup red quinoa
3/4 to 1 cup water
2-3 scallions, trimmed
3 oz. sun dried tomatoes, thinly sliced
1/2 cup sunflower seeds, raw and unsalted, roughly chopped
1 teaspoon dried basil
1 tablespoon olive oil
2 tablespoons fresh flat leaf parsley, chopped
What you’ll do:
Place 3/4 cup of water into a small pot and bring to boil. Add quinoa, stir well, bring back to boil then reduce heat to a gentle simmer. Let quinoa cook for 20 minutes or so. Check for doneness, and add more water, 1/8 cup at a time, letting quinoa soak it up as it simmers. This amount of quinoa should not require more than 1 cup of water and more than 30 minutes of simmering. Let quinoa cool as you prepare the rest of the ingredients.
Turn your oven to broil. Line a baking sheet with parchment paper and arrange the portobello caps, their opening facing down. Broil the mushrooms for 5 minutes, then turn them over and broil for another 3 minutes. By this time, portobello mushrooms should be cooked through. Invert the caps to remove excess liquid, then let the mushrooms cool while you finish making the stuffing.
While mushrooms are broiling, place a large pan over the medium high heat. Add the oil, and finely sliced scallions. When slicing the scallions trim the ends then use both green and white parts.
Let scallions brown for 1-2 minutes then add the finely sliced sun dried tomatoes and dried basil. Mix well and sauté for 2-3 minutes.
Add sunflower seeds that have been roughly chopped and mix well. Let the seeds toast for 2 minutes or so with constant stirring.
Add quinoa, and turn the heat off. Once the heat is off, mix in the parsley and make sure everything is well combined.
Place the portobello mushrooms in a deeper baking dish, spoon the stuffing in, then place the mushrooms back under the broiler to char the tops. This will take 1 minute or so – and you need to pay attention here to prevent burning! If you end up with more staffing than you can fit into your mushrooms, you can serve it separately as a side dish or you can use it as a base for your stuffed mushrooms.
Enjoy these stuffed mushrooms hot, with a side salad and perhaps a slice of fresh bread!
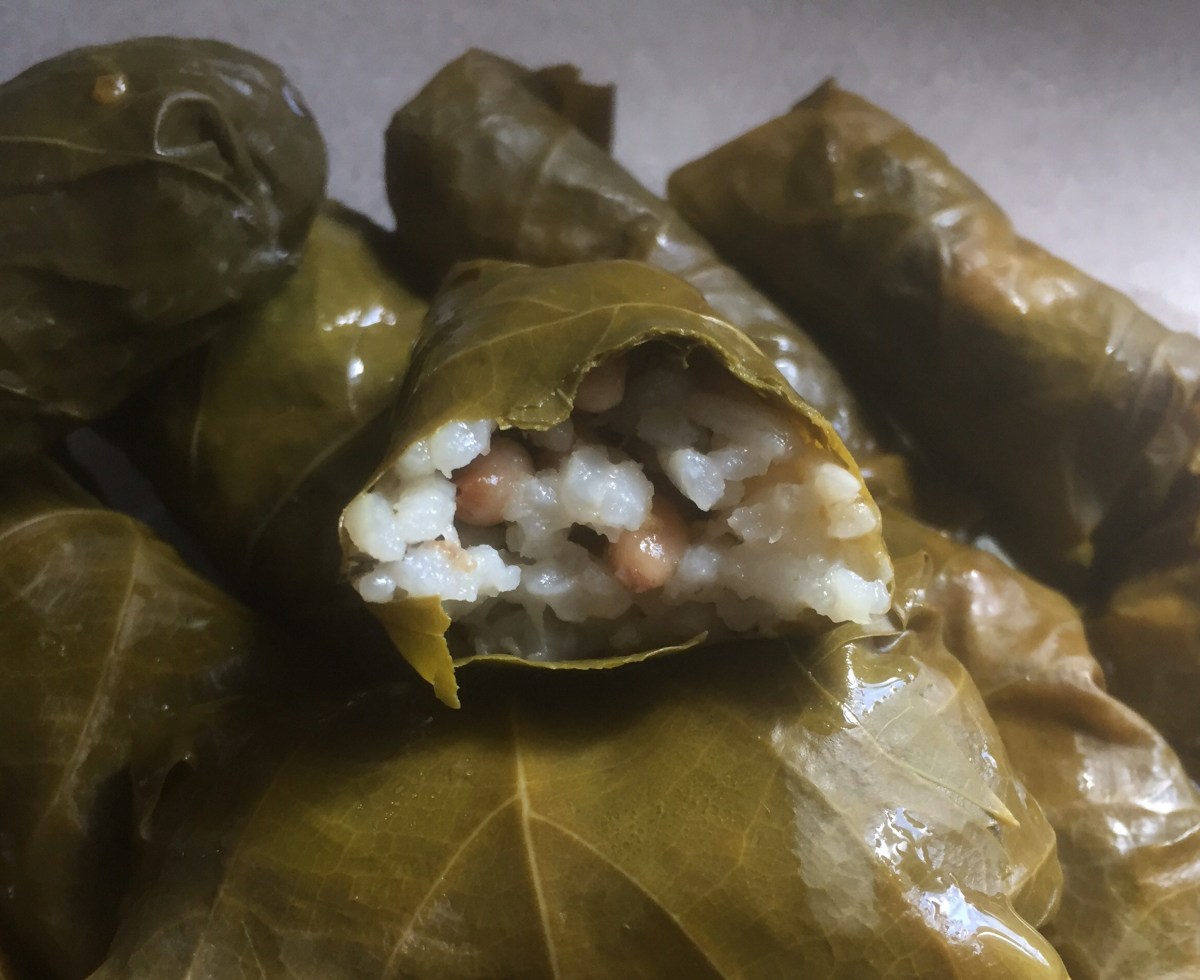
Dolmas, Stuffed Grape Leaves via Eat the Vegan Rainbow
Dolmas, stuffed grape leaves, are these delicious savory morsels that you can often find at salad bars, as well as many Greek and Middle Eastern restaurants.
They are one of my favorite appetizers, and although I enjoy them enormously I have not been brave enough to actually make them myself. But, last time I was browsing through my local Indian store I noticed a jar of grape leaves and went for it!
Believe it or not, dolmas are not all that hard to make. They do take time, and lots of hands-on but you end up with a huge batch that can serve a large party so it’s definitely worth the effort. Making dolmas at home will allow you to customize the recipe – in my case that meant less oil, more lemon juice, and adding some pine nuts to diversify the texture.
These dolmas are phenomenal, and will impress your guests to no end! You can eat them warm, you can eat them cold, you can serve them with some hummus or with a dollop of sour cream or yogurt. You can make them into a sandwich with some pita bread or enjoy in your salad the next day if you happen to have leftovers.
If you want to learn the basic “stuffing the leaves” technique, please check my Stuffed Cabbage Rolls post for step-by-step guide!
Stuffed Grape Leaves
What you’ll need:
1 cup rice, medium grain
1 3/4 cup water
6 scallions, finely chopped (green and white parts)
4 cloves garlic, finely sliced
1 cup pine nuts
1/4 cup flat leaf parsley, finely chopped
3 tablespoons fresh mint leaves, finely chopped
1 lemon, zest and juice
1 large jar of grape leaves (2 lbs (1 kg) or similar)
2 tablespoons olive oil
What you’ll do:
Combine medium grain rice with water in a large pot and place over the medium high heat. Bring to boil then turn the heat down to simmer. Cook the rice until fully cooked which takes 15 to 20 minutes. The rice should be soft and sticky.
When the rice is ready, place a large frying pan (or similar) over the medium heat, add oil, scallions, garlic and pine nuts, and let brown for 1-2 minutes. The pine nuts should be well toasted but not burned so keep mixing and keep your eye on the pan.
Add the rice, parsley and mint, and mix well. Let everything cook for another 5 minutes or so.
Turn the heat off, and add lemon juice and lemon zest. Mix everything together and let cool for 1-2 hours.
Open the jar of grape leaves and gently unfold each of the stacks. These will be tightly packed, and you will need to gently peel each grape leaf off. Keep all the leaves, big, small, regular, wacky, ripped and whole because you will use the best ones to make dolmas and the not so great ones to line the pan and create a cozy cooking environment for your stuffed grape leaves.
Use the not so great leaves to completely cover the bottom os a large pot (like a Dutch oven) with grape leaves. I recommend doubling the leaves, so that you have a nice, thick layer at the bottom.
Take bigger leaves, and stuff them. This is actually not that hard – place a leaf on a flat surface and put a tablespoon of stuffing at the bottom of the leaf, where the stem used to be. Use your fingers to form the stuffing into a tight ball – this will help hold everything together. Put the stuffed grape leaf into the pot and continue rolling the dolmas until you run out of the stuffing. If you need to make multiple layers of dolmas in your pot, remember to cover each layer with lots of grape leaves.
Turn the heat to medium high, and simmer dolmas for about 15-20 minutes. Serve cool, at room temperature, and drizzle with some olive oil and freshly squeezed lemon juice just before serving. Enjoy!
Gluten-free, Vegan BBQ Ribs, via Eat the Vegan Rainbow
For all of you out there who’s mouths have been watering when you see people share their vegan BBQ ribs recipes but don’t eat gluten, this one is for you! Of course, all of you who are gluten-lovers, I hope you check this recipe out as well – you will not be disappointed!
Big credit for these ribs goes to Linda and Alex Meyerson and their amazing new cookbook “Great Vegan BBQ without a Grill” (read my review here). Their recipe for BBQ ribs (or RIBZ, as they call them!) is amazing and I love it, but my husband has been avoiding gluten so I had to come up with an alternative.
After few trials and errors, I came across couple of recipes that use quinoa as a replacement for gluten. I have been trying to include quinoa into my cooking more often (in a gumbo-jambalaya fusion, as a stuffing for roasted eggplant, and as a perfect side dish for winter holidays), because, although almost impossible for me to pronounce it properly (is it keen-wah or kee-noah or something else?), it is super nutritious. Loads and loads of plant-based protein, fiber, minerals and vitamins!
It also has a subtle flavor which makes many people think of quinoa as bland, while I view it as versatile. This absence of strong flavor means that I can dress quinoa any way I like, and make it come out flavorful and different every time. These BBQ ribs are the proof!
As I said, the real credit goes to Alex and Linda because their idea to bake the rib meat before grilling it further is a real breakthrough. This lets your meat come together, and makes grilling a breeze. These ribs will withstand the indoor and the outdoor grilling so go crazy – and remember that you can prep your “meat” a day or two in advance and store it in the fridge, which can be a real lifesaver if you are having a large party over. All you will need to do is get your “meat” out, cut into the ribs, and grill before serving. This recipe is so fantastic that you can easily serve it to your omni friends and family, and they will not know the difference. Happy grilling!!!
Tip: this is definitely a recipe that you make in stages. You need to cook quinoa, roast some beets, sauté mushrooms, cook the beans (if not using store bought) – all before everything goes into the food processor, so be patient and plan ahead. It will be worth it!
Gluten-free Vegan BBQ Ribs
What you’ll need:
1 cup quinoa
1 1/2 cup vegetable broth
10 oz mushrooms, sautéed
2 tablespoons olive oil
1/2 beet, roasted
2 cups dark red beans (canned or homemade)
2 tablespoons tapioca starch
1 tablespoon tamari
1 tablespoon Worcestershire sauce
1 tablespoon liquid smoke (or less, depending on your taste)
2 teaspoons onion powder
2 teaspoons smoked paprika
1 teaspoon garlic powder
1/4 cup BBQ sauce (homemade or store bought, I love Stubb’s Original)
Oil or cooking spray for preparing the grill or a grill pan
Extra BBQ sauce for serving!
What you’ll do:
Roast the beet – actually, instead of roasting one lonely beet, I recommend roasting a whole bunch of beets at the same time, at 425 F (220 C) for 45 minutes or so, and then using them to make these ribs, as well as eat them in a salad or make them into a hummus. This can be done on the grill too – wrap the beets in some foil and let them hang on the grill for about 45 minutes as you grill other things! You can make the beets in advance and store in the fridge for up to a week, and use in this, and many other recipes as needed. If you are in a tight time crunch you can use canned beets as well, but the roasted ones do add a bit of nice, earthy aroma that the canned ones simply don’t have.
Combine quinoa and vegetable broth into a pot large enough to hold it all, place over high heat, bring to boil, then reduce the heat and simmer for 10-15 minutes until all liquid is absorbed. Set aside.
Preheat the oven to 375 F (190 C).
Place a large frying pan over medium high heat, add the oil then sliced mushrooms, and sauté the mushrooms until nicely browned.
If you have a large food processor, you can combine cooked quinoa, sautéd mushrooms, beans, 1/2 beet, and all the rest of the ingredients – except the BBQ sauce! – in the food processor and process until smooth and homogenous. If you don’t have a large food processor, but have a stick blender you can place everything into a large mixing bowl and then use the stick blender to blend it all together. This is your rib “meat” mix.
Line a 9 x 13 in (23 x 33 cm) baking dish with parchment paper and spray the bottom and the sides with some cooking spray. Pour your rib “meat” mix into the pan, even out and bake for 30 minutes, or until baked through, and browned at the edges. Let the baked rib “meat” cool. This is also a good stopping point, as the “meat” can stay in the fridge overnight and be used the next day.
When you are ready to grill, slice the rib “meat” into strips – they should be roughly the same size as the real ribs, which is about 1 inch or 2-3 cm.
Prepare your grill pan or your outdoor grill as you normally do. For me, this means turning on the heat to high and letting the pan heat up nice and good before brushing with a little bit of oil or spraying with some cooking spray. For the outdoor grill, I turn the burners on to the max (I have a gas grill) and leave the grill covered for 10 minutes, then I use the brush to scrape the grates, oil them with a paper towel dipped into some oil (use your heat proof tongs to handle the towel paper and stay safe), and they are ready (note that the type of a brush you use depends on the kind of the grill grates you have, so follow the manufacturer instruction closely otherwise you may permanently damage your grill!).
Place the ribs on the grill or the grill pan and brush the top with some BBQ sauce. Let them grill for 3-4 minutes on one side then flip over, brush with some BBQ sauce and repeat. I usually flip the ribs three times so that each side has 2 brushes of BBQ sauce and two grilling periods, for a total of about 6 – 8 minutes per side.
Serve hot with the side of your favorite BBQ sauce (I recommend warming the sauce just slightly), and enjoy with your favorite sides, such as grilled corn, spicy cole slaw, or this fantastic arugula and watermelon salad that I just discovered!
Gumbolaya- Part Gumbo, Part Jambalaya via Eat the Vegan Rainbow
To be quite honest, I think I may have had gumbo once in my life, and jambalaya only a handful of times. But, I’ve been making something in between the two for some time now. Again, my concoction is not quite paella nor risotto, not a gumbo nor a jambalaya and yet under a slightly different light it could be any of these four. In a nutshell, what I’ve been making is a rice dish with some sautéed onions, celery, and carrots as a base, and with some sausage or seafood added in for good measure.
This version still includes some vegan andouille sausage, and it does start with onions, celery and some orange and yellow pepper (color does not matter really, any sweet pepper would do!), as well as a good amount of okra, but it uses quinoa instead of rice. Quinoa is a protein rich grain, that has delicious nutty flavor. You can use it in any recipe that uses rice, like in these stuffed eggplants, or this gumbolaya!
If you are looking to incorporate more quinoa in your cooking, here’s a flavorful side dish for your late fall and winter holidays – Quinoa with Roasted Cranberries.
Gumbolaya
What you’ll need:
1 yellow onion, diced
6 stalks celery, diced
1/2 yellow pepper, diced
1/2 orange pepper, diced
14 oz. (400 g) andouille sausage, vegan (for example Tofurky), sliced
2 cups quinoa
3-4 cups vegetable broth (or water)
2 teaspoons Creole seasoning
16 oz. (454 g) cut okra, frozen
Cooking spray
What you’ll do:
Spray the bottom of a large sauté pan with cooking spray. You can also use a wok, or a paella pan. Place it over medium high heat and add onions, celery and peppers. Sauté for 5-8 minutes, until softened and caramelized.
Add the sliced sausage and let it brown for 3-5 minutes.
Add quinoa, and 2 cups of stock or water, depending on what you are using. Mix well and bring to a gentle simmer.
Simmer for 10 minutes or so, stirring occasionally until all liquid is absorbed. Add 1 more cup, mix well and continue to simmer. Keep adding the liquid until quinoa is done. This should take no more than 4 cups and no longer than 20 minutes. It’s best to add the last cup in 1/4 cup increments to avoid overuse.
Add the Creole seasoning and mix well.
Add frozen okra, mix everything together and let the okra cook for another 8-10 minutes. Enjoy as is or with a drop or two of hot sauce, like the Louisiana hot.
Quinoa with Roasted Cranberries and Pistachios, via Eat the Vegan Rainbow
Like a fabulous supporting actor in a movie, the perfect side dish for a rich, holiday meal is subtle and complementary to the lead actors laid out on the festive table, yet able to make a lasting impression of its own.
This Holiday Quinoa with Cranberries and Pistachios is just that – visually pleasing, with layers of complexity in terms of texture and flavors, yet not overwhelming. Additionally, for anyone putting together a vegan, fully plant-based feast this side dish will add lots of protein to your plate.
Quinoa, just in case you are not familiar with it, is a grain, not a cereal, like wheat, but more like rice, and you would cook it like rice as well. When cooked it actually looks like couscous, and you will need to fork it up the same way. Although quinoa is fine served by itself, given that we are in the midst of fall/winter holiday season I decided to add just a bit to it, by adding some chopped pistachios and some oven-roasted cranberries.
One note on cranberries: fresh cranberries are very tart, and almost impossible to eat without adding a huge amount of sugar to them. I decided to try roasting and that worked to a point. Roasted cranberries are still tart, but a bit of tartness in this dish is actually a nice thing. If you prefer something with less bite, toss your cranberries with some sugar or a sweetener of choice, or simply chop some dried cranberries up – those are most certainly sweet.
Quinoa with Roasted Cranberries and Pistachios, via Eat the Vegan Rainbow
Quinoa with Roasted Cranberries and Pistachios
What you’ll need:
1 cup quinoa
1 1/2 cup water or vegetable stock
1 shallot, finely diced
1 cup pistachios, chopped
1 1/2 cup fresh cranberries – this will yield about 3/4 cup roasted
Cooking spray
What you’ll do:
Preheat the oven to 425 F (220 C).
Wash and sort the cranberries. Place them on a baking sheet lined with foil and roast them for 20-25 minutes. Once soft and slightly browned, take the cranberries out the oven and set aside to cool for a bit.
While cranberries are roasting, cook your quinoa. Mix 1 cup quinoa with 1 1/2 cups water, bring to boil, decrease the heat to a gentle simmer and let quinoa cook for about 20 minutes. Turn the heat off and let quinoa stand for another 10 minutes. Use the fork to fluff up quinoa before using in the next step.
Spray the bottom of a skillet with some cooking spray and place over medium heat. Add finely chopped shallots and let them sauté for 5-8 minutes.
Once shallots are done, add chopped pistachios and let them toast just slightly, for 2-3 minutes.
Add the fluffed up quinoa, mix well, and sauté for 5 more minutes or so.
Turn the heat off and mix in the roasted cranberries. Go gently as they will be very soft and falling apart.
Stuffed Eggplant with Quinoa and Cherry Tomatoes, via Eat the Vegan RainbowOne could say that I am on the stuffing kick: I stuffed some peppers, made a Mexican lasagna, which is almost like stuffing corn tortillas, and played around a zucchini moussaka. Perhaps it is time to say enough is enough and move away from stuffing, but I just can’t. Stuffed things are simply too much fun to eat and so simple to make that I can’t let go. Plus, although you may think you’ve reached the point where there’s nothing new to try, a new idea pops into your mind and you simply have to pursue it.
This happened to me the other day when I returned home from grocery shopping with two nice and plump pieces of eggplant in my bag. For me eggplant is one of those vegetables that’s neither here nor there. It’s a bit complicated to make into something great and delicious, especially if you decide not to bread it, fry it, or stuff it with a ton of cheese – Eggplant Parmesan I am looking at you!
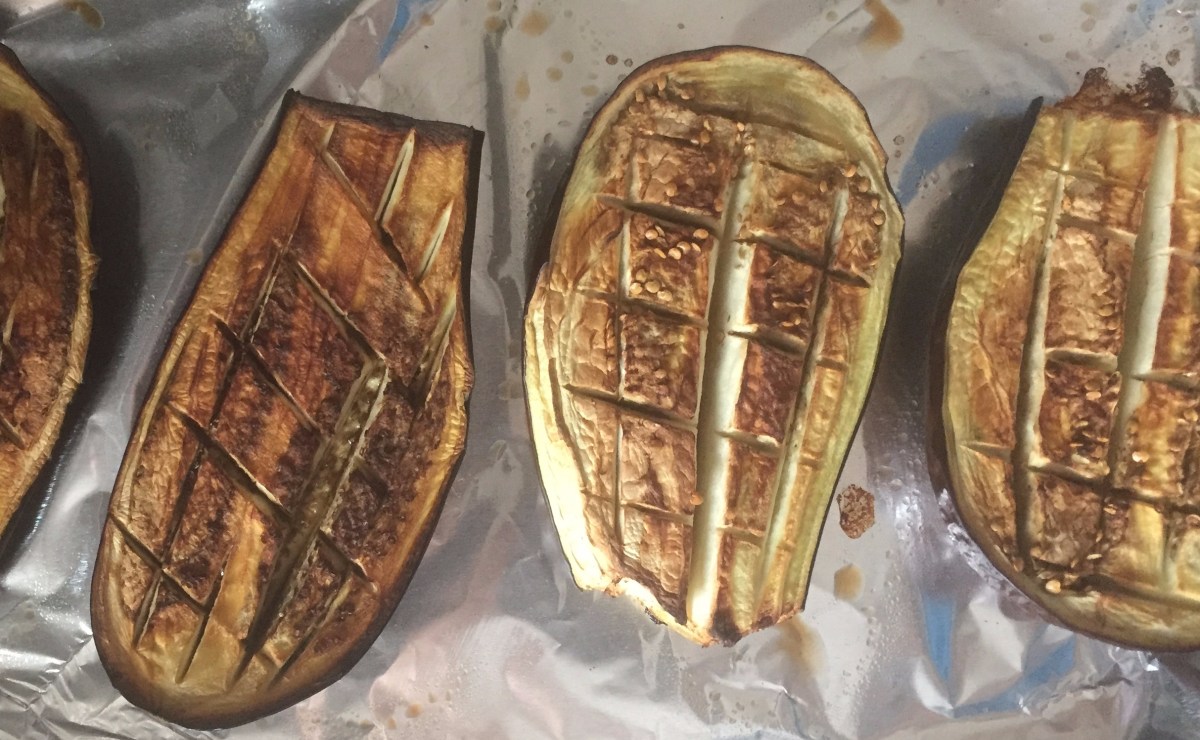
To make eggplant ready for stuffing and minimize the amount of oil needed to almost zilch, I decided to roast it first and then stuff it. Roasting does take a bit of time, although not too much as 20-30 minutes at 425 F (220 C) usually does the trick.
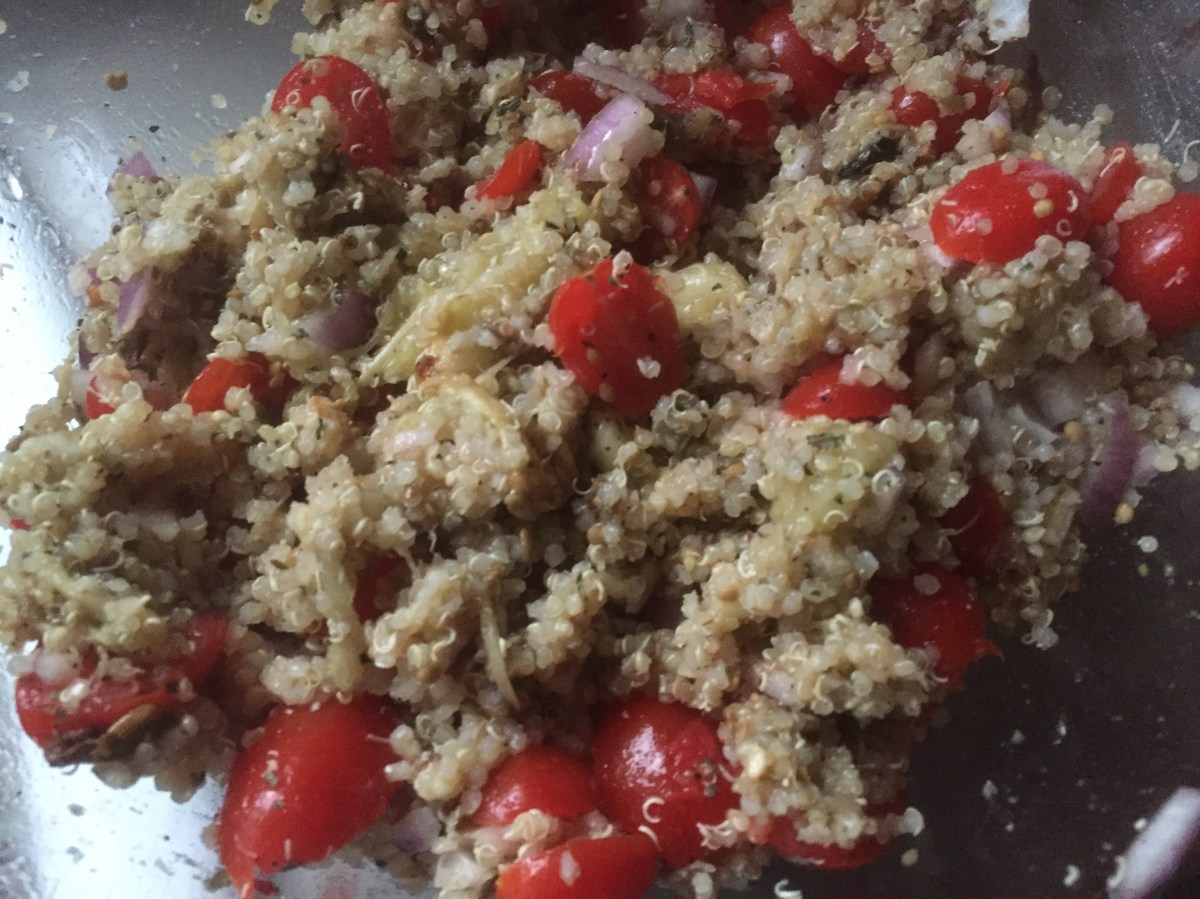
Roasting the Eggplant is the First Step En Route to Stuffing, via Eat the Vegan RainbowOnce the eggplant is out of the oven leave it to cool for 10-15 minutes. This makes it much easier to handle as you will need to scoop out the roasted eggplant flash and mix it with the rest of the stuffing. One time saving tip is to cook your quinoa while the eggplant is roasting and cooling. That way both of your key stuffing ingredients will be ready to go. The rest is easy. You need to wash and half some cherry tomatoes, and dice one red onion. Mix everything together with a bit of dried or fresh basil or oregano, freshly ground black pepper, and even some lemon or lime zest to the stuffing. Any, or all, of these work well together!
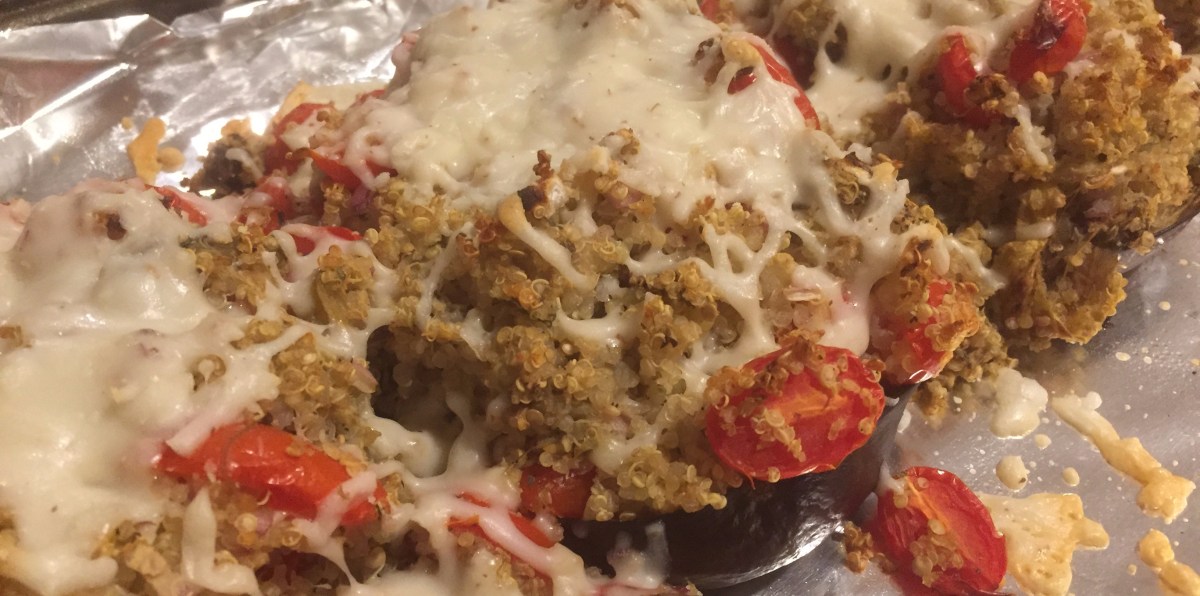
Stuffed Eggplant with Quinoa and Cherry Tomatoes stuffing, via Eat the Vegan RainbowOnce the stuffing is back in the eggplant shells, and the cheese is sprinkled lightly over the top, the dish goes back to the 350 F (175 C) oven for another 15 minutes or so.
Bon appétite!
Quinoa and Cherry Tomatoes Stuffed Eggplant
What you’ll need:
2 eggplants, large
1 red onion, diced
1 cup quinoa
2 cups water (or vegetable stock)
1 pint (300 g) cherry tomatoes
1/2 cup vegan cheese, shredded
1 teaspoon dry basil
Black pepper, freshly ground
Cooking spray
What you’ll do:
Pre-heat oven to 425 F (220 C).
Wash the two pieces of eggplant and cut in half lengthwise. Place on the aluminum foil covered baking sheet, crosshatch the surface and spray with a cooking spray. Roast in the oven for 20 minutes or until the top is nicely browned. once the eggplant is out, lower the oven temperature to 350 F (180 C).
While the eggplant is roasting, prepare quinoa according to the instructions on the box. I usually cook quinoa in water, but you can definitely use vegetable (vegan) stock if you’d like to add a bit extra flavor.
Once quinoa is fully cooked, transfer into a large mixing bowl. Mix with diced onion and cherry tomatoes that you’ve cut in half lengthwise. Next, scoop out eggplant flash and add to the quinoa stuffing. Lastly, add basil and freshly ground black pepper and mix well.
Spoon a generous amount of stuffing into each eggplant half, spray the top with some cooking spray, and top with shredded cheese. Put the stuffed eggplant back into the oven until the stuffing is heated through, tomatoes cooked, and the cheese melted. This should not take more than 15-20 minutes.


")
")