Stuffed Cornbread with Kale, Artichoke Hearts, and Sun Dried Tomatoes

Stuffed Cornbread with Kale, Artichoke Hearts, and Sun Dried Tomatoes, via Eat the Vegan Rainbow

I love cornbread – not the sweet stuff from the southern states of US of A, but the rustic savory kind of the Southern Europe. And I think you will love it too!

I recently shared a recipe for basic gluten-free cornbread, which I hope you tried, especially as a side for a nice pot of bean chili. This, on the other hand, is not your basic cornbread and it’s not gluten free, so make a note of that if you need to (I offer advice on how to make it gluten-free if you need to below).

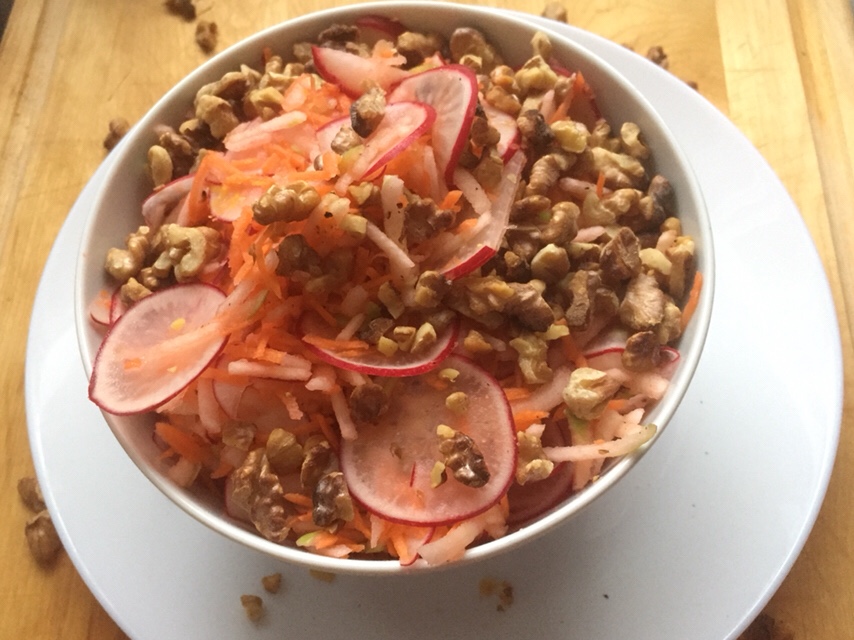
This cornbread is a bit inspired by lasagna, and a bit inspired by lovely summer produce and flavors. With a bit of freshly grated vegan Parmesan or a dollop of vegan sour cream, and a side salad this can be your lunch or a light dinner! Or: you can serve this as appetizer bites at your next party when freshly baked and warm!!!

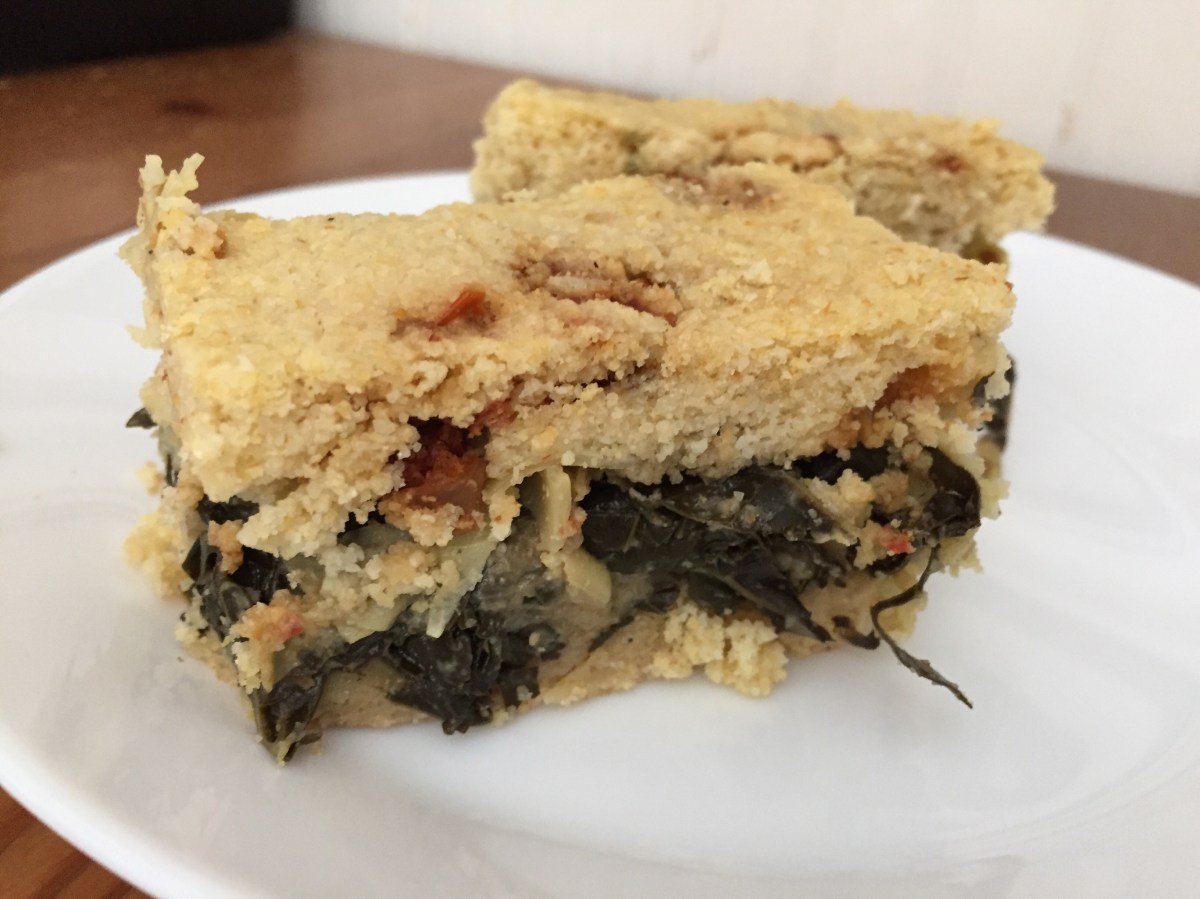
The key to this recipe are three layers that make the stuffing: sautéd kale layer, topped with sliced artichoke hearts layer, topped with sun dried tomatoes layer! Doesn’t this just make your mouth water?

The cornbread better is a mix of three flours: semolina (wheat flour; you can use all purpose white flour or all purpose gluten-free flour as well), fine corn meal and chickpea flour (or other bean-based flour like mung bean flour, or soy bean flour, for extra protein). What helps the bread rise is a mix of baking powder, baking soda and lemon juice, with added acidity giving an extra leavening boost.

The recipe is a bit labor intensive as I don’t recommend using raw kale, and advise getting your kale cooked all the way beforehand. Depending on how “mature” your kale is, this could take anywhere between 10 minutes if working with baby kale to 20 minutes if working with really old kale.

Additionally, I recommend that you soak the sun dried tomatoes in some hot water, to spruce them up a bit. If you are using sun dried tomatoes stored in olive oil, please skip this step and make sure the tomatoes have been well drained to remove excess oil. Better still, use the excess oil to sauté the kale and infuse it with more of that great tomato flavor!

Enjoy!!!

Stuffed Cornbread with Kale, Artichoke Hearts and Sun Dried Tomatoes

What you’ll need:

  • 1 bunch kale (about 1 lbs or 450g), de-stemmed, and finely chopped
  • 1 yellow onion, finely diced
  • 3-4 cloves garlic, thinly sliced
  • 6 oz sun dried tomatoes
  • 1 15 oz can artichoke hearts
  • 1 cup fine corn meal
  • 1 cup semolina flour (or all purpose flour, or all purpose gluten-free flour for a gluten-free version)
  • 1 cup chickpea flour (or other bean flour)
  • 2 teaspoons baking powder
  • 1 teaspoon baking soda
  • Juice of 1 lemon
  • 2 tablespoons olive oil, plus some for greasing the baking dish
  • 2 to 2 1/2 cups water

What you’ll do:

  1. Preheat the oven to 350 F (175 C).
  2. If using sun dried tomatoes that are dry, I recommend that you reconstitute them by soaking them in boiling water for 10-15 minutes. If you are using sub dried tomatoes in olive oil, please skip this step.
  3. Heat the olive oil over medium heat in a very large frying pan, or a wok. This will take 30 seconds or so. Add diced onion and sauté for 4-5 minutes, until soft and golden. Add the garlic and sauté for another minute.
  4. When garlic begins to bloom and develop the aroma, add chopped kale. The volume of a bunch of kale may seem like a lot, but it will cook down. If you are having difficulty fitting all the kale in at once, add in batches. Sauté kale until fully cooked, which will take about 10-15 minutes. You may need to add a tablespoon of water to keep kale from sticking to the pan, so stir frequently and keep an eye to prevent burning.
  5. While the kale is cooking, drain and rinse the artichoke hearts. Shake off the excess water, and slice thinly. Set aside.
  6. Drain the sun dried tomatoes either from the water they were soaking in or from the oil they are stored under. Slice them thinly and set aside.
  7. In a large mixing bowl combine cornmeal, the flours, baking soda and baking powder. In a separate container mix two cups of water with lemon juice then pour into the flour mix. Use a spatula or a wooden spoon to mix well. Add more water if needed. Depending on how fine your corn meal is (there is some variability between brands) you may need more than 2 cups of water to make a smooth, yet thick batter. Your batter should be pourable but not runny. If you run a spoon through it, it should come apart with ease.
  8. Grease the bottom and sides of a 9 x 13 in (23 x 33 cm) baking dish with some oil. Pour in half of your batter and spread evenly. Top with sautéd kale that you drained from access liquid, then top with sliced artichoke hearts, then with sliced sun dried tomatoes. Finally, pour over the rest of the batter, smooth the top and place in the oven for 30 minutes.
  9. Increase the temperature to 425 F (220 C), and bake for another 10 minutes.
  10. Take the stuffed corn bread out and let it rest for 10-15 minutes before serving. Serve as an appetizer or as a really wonderful side dish with your main course. I also enjoy it for breakfast, with some grated cheese, or as lunch with a side salad and some yogurt. Yummy!
Copyright © Eat the Vegan Rainbow, 2019

Mushroom Pâté

Nut-free Mushroom Pâté, via Eat the Vegan Rainbow
Mushroom Pâté, via Eat the Vegan Rainbow

I grew up eating pâté and loving it. Some pâté, on a piece of freshly baked bread with a glass of yogurt (yes, the liquid kind you drink like they do in Middle East!) was one of my go to breakfasts. And the pâté I ate was not a fancy French kind made with duck fat. At some point I learned that it was actually made of who know what, random bits and pieces of an animal all ground up. Whether you eat meat or not, I hope we can all agree that that’s pretty unappetizing when you think about it!

But: if you don’t think about it and just go with your taste buds, pâtés are really tasty. They are full of umami, savory flavors that we all crave, they are silky and smooth, they are nicely spreadable, and they are an excellent add-on to a nice piece of bread. So, how can we re-create the perfect savoriness with just a small number of ingredients, and make a healthy and satisfying pâté that will keep you coming back for more?

Well, we start with mushrooms, the well-known source of umami. You can use white button mushrooms here or baby bella (cremini) mushrooms as well. I do not recommend some of the mushrooms that have distinct flavors, like shiitakes; however, other mild mushrooms may work. Still, white button mushrooms are readily available, affordable and work!

Another important umami component is tomato paste. Here, you can use any tomato paste you have on hand and you can adjust the amount – anywhere between a tablespoon or two will do the trick.

To make the dip smooth and rich in protein, I recommend adding canned beans. White beans work best (cannellini, great Northern or navy), but any other variety will probably be OK. If you cook your own beans, I recommend that you keep them slightly undercooked for this application, or at least squeeze some of the excesses liquid out before blending to avoid ending with a pâté that’s more of a soup than a rich and dense spread.

The main flavoring agent here is Herbes de Provence, a mixture of dried herbs that usually includes thyme, rosemary, oregano, marjoram and lavender. I use Trader Joe’s version, and they carry it only as a seasonal item in the fall, but any other mix with the same name will do. Alternatively, you can add a pinch of thyme, rosemary, oregano, and other herbs (including basil) that you may have on hand.

Finally, what also adds a lot to this pâté is sautéing and caramelizing onions, garlic and mushrooms before blending everything together. This will help the flavor deepen and develop!

Looking for serving suggestions? You can use it as a spread or a dip, as a pizza “sauce” and topping (why not?), in your quesadillas (let’s be adventurous!), for your baked potatoes, or for any other dish where you feel the need to add rich, yet smooth flavors. Enjoy!

Mushroom Pâté

What you’ll need:

8 oz white button mushrooms (or cremini mushrooms if you like stronger mushroom flavor), sliced

1/2 large, white onion, diced

4 cloves garlic, sliced

2 tablespoons olive oil

2 tablespoons tomato paste

2 teaspoons Herbes de Provence

1 15 oz (425 g) can white beans

Salt to taste


What you’ll do:

  1. Place a large sauté pan over medium high heat. Heat up than add the oil and onions. Sauté for 2-3 minutes, then add the garlic. Let garlic start to release its aroma – this usually takes a minute.
  2. Add the mushrooms and , increase the heat to high, mix well and sauté until mushrooms are browned. This will take about 4-5 minutes.
  3. While the mushrooms are cooking, drain and rinse the can of beans. Shake access water off and place into a food processor or a large mixing bowl if you rather use a stick blender (this is an incredibly useful kitchen gadget and it’s what I used here).
  4. Pour the sautéed mushrooms over the beans and blend until smooth and combined. Leave in the refrigerator until ready to serve.
  5. Serve cold as a spread for sandwiches or as a dip for chips or crackers. This pâté is excellent addition to your menu and it offers a healthy and humane alternative.


Copyright © Eat the Vegan Rainbow, 2019

Roasted Asparagus and Spinach Dip

Roasted Asparagus and Spinach Dip, via Eat the Vegan Rainbow

Springtime is party time – I mean, after 6 months of winter we are finally seeing some sunshine and above freezing temperatures. And if you think I live in Alaska, think again – it’s the good ole New England and our snow just melted away two days ago!!!

Plus: since the next winter is just six months away, we are now all scrambling to have as many outdoor parties and get togethers as we can, to maximize the fun and the sun. These days, when it comes to parties good, rich dips are a necessity. Salsa and guacamole, many different types of hummus, including one of my favorites – the roasted beet hummus, and even jackfruit “crab” dip are all fantastic and versatile. All you need to do is bring couple of select dips out, and with some crackers (like these amazing seed crackers), or fresh bread, perhaps with some olives thrown in for good measure, and maybe dolmas (I have a thing for dolmas!), you will have an instant feast!

If you are looking for a dip the is a bit out of the ordinary, then look no further. This Roasted Asparagus and Spinach Dip has it all: charred roasted asparagus (you can grill them if you prefer), vibrant green spinach, loads of smoothness from the cashews, and subtle cheesiness from the nutritional yeast.

When you are using cashews to make vegan cheese, creams, sour cream or similar, it is best to use raw cashews and to soak them in cold water overnight – do this in the fridge, please! The soaking softens the tough nut and make cashews much easier to blend into smooth and silky consistency.

Depending on the type of blender you have you may want to start by adding liquids first, than thawed spinach (I find that using frozen spinach that has been thawed out and gently squeezed works well here), then asparagus, nutritional yeast, lemon juice and zest, and finally cashews that have been washed and drained. The stronger the blender, the smoother your dip can get. I like a bit of a texture in the dip, but it is up to you to decide how much blending makes sense based on your preference.

Enjoy this dip immediately, and although it can store for a day or two, you won’t need to worry about that – this dip will be long gone!!!

img_6229


Roasted Asparagus and Spinach Dip

What you’ll need:

  • 1 bunch of asparagus, trimmed (about 1 lbs (454 g))
  • 2 cups frozen spinach
  • 1 cup unsweetened, plain almond milk
  • 1 cup cashews, soaked overnight, then drained and rinsed
  • 1-2 tablespoons nutritional yeast (adjust to taste)
  • 1/2 lemon, juice and zest
  • 1/4 teaspoon salt
  • Cooking spray


What you’ll do:

  1. Preheat oven to 425 F (220 C), or the grill to the same temperature.
  2. Wash and trim the asparagus. Try to remove as much of the wooden part of stems, then spread the spears on the parchment paper lined baking sheet. Spray with cooking spray and roast for 20-30 minutes with occasional stirring. You can also grill the asparagus. Either way you are looking to cook the asparagus through while letting it caramelize and char.
  3. Place all the ingredients into a blender. Nutritional yeast is an acquired taste and you may want to add just a bit (1 teaspoon or so) and check for taste before adding more. Blend until smooth, then serve with your favorite chips, pretzel sticks, bread… The color of this spread is fantastic, and it goes well with Easter, being green and fresh. Enjoy the spring!

Copyright © Eat the Vegan Rainbow, 2018

Grilled Corn with Cilantro and Lime

Cilantro and Lime Grilled Corn, via Eat the Vegan Rainbow

Corn is amazing for many reasons. It’s incredibly sweet and delicious, it is easy to make, and it is super cheep during summer months while in season. Outside that window, fresh corn is still really affordable and you can enjoy it year round.

Corn requires minimal preparation, can be ready in no time and it’s naturally gluten-free. Moreover, if you can’t get fresh corn you can always youse frozen corn because it will work almost as good as fresh one.

Let me illustrate some of what I just said with a very simple corn side dish. I developed this recipe as a side for summer cook-outs and burgers (some of my favorite burgers that this corn goes really well with are Chickpea Burgers with Sun Dried Tomatoes and Walnut Meat – YUM!), but it can definitely be made year-round. Although you could steam your corn and then follow the steps below, for best results I recommend grilling. You can grill the corn on your outdoor grill, or using a grill pan – exact method does not matter. What matter are those lovely grill marks and getting some charring on the corn, which really adds a lot of flavor.

Other than getting those lovely grill marks, the rest of this recipe is super quick and easy. All you need to do is toss the chopped corn with couple of flavoring agents, lime juice for a bit of acidity, lime zest for a bit of crispness, some fresh cilantro for a bit of freshness, some fire roasted green chiles for some spiciness, and a bit of oil that helps all these flavors stick to the corn and each other better.

You can serve the corn immediately after tossing it with the rest of the ingredients, but I recommend that you stay patient and wait for 10-15 minutes for all the flavors to come together and infuse the corn. Then you can dig in!

img_5664

Grilled Corn with Cilantro and Lime

What you’ll need:

4 ears of corn, grilled

1 lime, juice and zest

2 tablespoons olive oil

1 tablespoon fire roasted chile peppers (from the can)

¼ fresh cilantro, finely chopped

Salt, to taste (optional)

What you’ll do:

  1. Grill the corn using an outdoor grill. If none is available, you can cook your corn in the microwave oven, then add grill marks using a grill pan, or go directly to the grill pan. Usually, it takes 3-5 minutes per side, and you do need to stay close and keep an eye on the corn so that it doesn’t burn. Let the corn cool just slightly, so that you can handle it, then chop each ear of the grilled corn into 4 pieces.
  2. In a large bowl, combine the rest of ingredients (lime juice and zest, jalapeños, olive oil, and cilantro; you can also add salt to taste – I don’t use much salt, and I don’t think this corn needs any, but you can decide for yourself). Toss the corn with the mix and set aside for 10-15 minutes to allow the flavors to mix and mingle. Serve with burgers, salads (like this Coleslaw), ribs, beans, or other goodies!

Copyright © Eat the Vegan Rainbow, 2019

SaveSave

Stuffed Portobello Mushrooms with Red Quinoa, Sunflower Seeds, and Sun Dried Tomatoes

ca3f7cb0-2cf1-4415-8293-c08cb1f5def2
Stuffed Portobello Mushrooms with Red Quinoa, Sun Flower Seeds and Sun Dried Tomatoes, via Eat the Vegan Rainbow

Let’s talk about umami. You know, that special kind of taste that tells you something is savory. Not bitter, not salty, not spicy, not sour, but simply and enjoyably savory.

What is behind umami?

We perceive the taste of our food thanks to different kinds of taste receptors, very specialized types of proteins decorating our tongue cells. These receptors recognize molecules in our food, relay what’s in our mouths to the brain, and the result is our perception of different tastes. Although salty, sour, sweet and bitter have been recognized for a very long time (thousands of years), umami has been known for just over a century, and known to western cultures and science for less than two decades being originally discovered by a Japanese scientist, Kikunae Ikeda. The main thing behind umami is glutamate, an amino acid that occurs quite naturally in many food sources.

What are vegan sources of umami?

Although naturally occurring and therefore easily found on many plates, the umami flavors are usually tightly associated with meat. So, it is critical for anyone who is embarking on a vegan culinary voyage to learn about plant-based sources of umami. Here, tomatoes, mushrooms, potatoes, toasted nuts, and soy sauce reign supreme. This means that including one or all of these ingredients into your next savory concoction is a must and the recipe below fully embraces this suggestion!!!

Maximizing vegan umami flavors

Some of my favorite sources of savory deliciousness are portobello mushrooms and sun dried tomatoes. I use these ingredients in many different ways, either by themselves, or when building things like burgers. In the recipe below, large portobello mushrooms become a perfect vessel for a stuffing made of red quinoa, sun dried tomatoes and sunflower seeds. The result is a hearty dinner fare, that when paired with a light salad goes a long way. And did I mention how healthy this food is? With mushrooms, quinoa and seeds, you really can’t go wrong!

Stuffed Portobello Mushrooms with Red Quinoa, Sunflower Seeds, and Sun Dried Tomatoes

What you’ll need:

4 large portobello mushrooms, stems removed

1/2 cup red quinoa

3/4 to 1 cup water

2-3 scallions, trimmed

3 oz. sun dried tomatoes, thinly sliced

1/2 cup sunflower seeds, raw and unsalted, roughly chopped

1 teaspoon dried basil

1 tablespoon olive oil

2 tablespoons fresh flat leaf parsley, chopped

What you’ll do:

  1. Place 3/4 cup of water into a small pot and bring to boil. Add quinoa, stir well, bring back to boil then reduce heat to a gentle simmer. Let quinoa cook for 20 minutes or so. Check for doneness, and add more water, 1/8 cup at a time, letting quinoa soak it up as it simmers. This amount of quinoa should not require more than 1 cup of water and more than 30 minutes of simmering. Let quinoa cool as you prepare the rest of the ingredients.
  2. Turn your oven to broil. Line a baking sheet with parchment paper and arrange the portobello caps, their opening facing down. Broil the mushrooms for 5 minutes, then turn them over and broil for another 3 minutes. By this time, portobello mushrooms should be cooked through. Invert the caps to remove excess liquid, then let the mushrooms cool while you finish making the stuffing.
  3. While mushrooms are broiling, place a large pan over the medium high heat. Add the oil, and finely sliced scallions. When slicing the scallions trim the ends then use both green and white parts.
  4. Let scallions brown for 1-2 minutes then add the finely sliced sun dried tomatoes and dried basil. Mix well and sauté for 2-3 minutes.
  5. Add sunflower seeds that have been roughly chopped and mix well. Let the seeds toast for 2 minutes or so with constant stirring.
  6. Add quinoa, and turn the heat off. Once the heat is off, mix in the parsley and make sure everything is well combined.
  7. Place the portobello mushrooms in a deeper baking dish, spoon the stuffing in, then place the mushrooms back under the broiler to char the tops. This will take 1 minute or so – and you need to pay attention here to prevent burning! If you end up with more staffing than you can fit into your mushrooms, you can serve it separately as a side dish or you can use it as a base for your stuffed mushrooms.
  8. Enjoy these stuffed mushrooms hot, with a side salad and perhaps a slice of fresh bread!

Copyright © Eat the Vegan Rainbow, 2018

SaveSave

Dolmas – Stuffed Grape Leaves

img_4840
Dolmas, Stuffed Grape Leaves via Eat the Vegan Rainbow

Dolmas, stuffed grape leaves, are these delicious savory morsels that you can often find at salad bars, as well as many Greek and Middle Eastern restaurants.

They are one of my favorite appetizers, and although I enjoy them enormously I have not been brave enough to actually make them myself. But, last time I was browsing through my local Indian store I noticed a jar of grape leaves and went for it!

Believe it or not, dolmas are not all that hard to make. They do take time, and lots of hands-on but you end up with a huge batch that can serve a large party so it’s definitely worth the effort. Making dolmas at home will allow you to customize the recipe – in my case that meant less oil, more lemon juice, and adding some pine nuts to diversify the texture.

These dolmas are phenomenal, and will impress your guests to no end! You can eat them warm, you can eat them cold, you can serve them with some hummus or with a dollop of sour cream or yogurt. You can make them into a sandwich with some pita bread or enjoy in your salad the next day if you happen to have leftovers.

If you want to learn the basic “stuffing the leaves” technique, please check my Stuffed Cabbage Rolls post for step-by-step guide!

Stuffed Grape Leaves

What you’ll need:

1 cup rice, medium grain

1 3/4 cup water

6 scallions, finely chopped (green and white parts)

4 cloves garlic, finely sliced

1 cup pine nuts

1/4 cup flat leaf parsley, finely chopped

3 tablespoons fresh mint leaves, finely chopped

1 lemon, zest and juice

1 large jar of grape leaves (2 lbs (1 kg) or similar)

2 tablespoons olive oil

What you’ll do:

  1. Combine medium grain rice with water in a large pot and place over the medium high heat. Bring to boil then turn the heat down to simmer. Cook the rice until fully cooked which takes 15 to 20 minutes. The rice should be soft and sticky.
  2. When the rice is ready, place a large frying pan (or similar) over the medium heat, add oil, scallions, garlic and pine nuts, and let brown for 1-2 minutes. The pine nuts should be well toasted but not burned so keep mixing and keep your eye on the pan.
  3. Add the rice, parsley and mint, and mix well. Let everything cook for another 5 minutes or so.
  4. Turn the heat off, and add lemon juice and lemon zest. Mix everything together and let cool for 1-2 hours.
  5. Open the jar of grape leaves and gently unfold each of the stacks. These will be tightly packed, and you will need to gently peel each grape leaf off. Keep all the leaves, big, small, regular, wacky, ripped and whole because you will use the best ones to make dolmas and the not so great ones to line the pan and create a cozy cooking environment for your stuffed grape leaves.
  6. Use the not so great leaves to completely cover the bottom os a large pot (like a Dutch oven) with grape leaves. I recommend doubling the leaves, so that you have a nice, thick layer at the bottom.
  7. Take bigger leaves, and stuff them. This is actually not that hard – place a leaf on a flat surface and put a tablespoon of stuffing at the bottom of the leaf, where the stem used to be. Use your fingers to form the stuffing into a tight ball – this will help hold everything together. Put the stuffed grape leaf into the pot and continue rolling the dolmas until you run out of the stuffing. If you need to make multiple layers of dolmas in your pot, remember to cover each layer with lots of grape leaves.
  8. Turn the heat to medium high, and simmer dolmas for about 15-20 minutes. Serve cool, at room temperature, and drizzle with some olive oil and freshly squeezed lemon juice just before serving. Enjoy!

Copyright © Eat the Vegan Rainbow, 2018

Beet, Carrot and Apple Fritters – CSA Week 4

315c00f7-53f9-450a-b294-9b9cbd514d7a
Beets, Carrots and Apple Latkes, via Eat the Vegan Rainbow

It’s early July, and here in New England (which is, for those of you who hail from across the globe, a name for the Northeastern-most part of the United States that includes six states: Rhode Island, Connecticut, Massachusetts, New Hampshire, Maine, and Vermont) the farm activities are in full swing. The greater Boston area is brimming with farms of different size and produce selection. For example, we went cherry picking on July 4th, and ended up with an amazing selection of cherries. We ate a lot, shared some with neighbors, and washed, pitted  and froze the rest. In this way, the frozen cherries are ready for smoothies, sauces or pies later in the year.

What’s in this week’s CSA basket?

At our local farm where we get our CSA (Community Supported Agriculture) share  the Upswing Farm, the vegetables this week included beets, like it did last week (and I shared  about how to pan roast beets and sauté the beet greens few days ago), carrots, zucchini, squash, cucumbers, yellow and green, cilantro, fennel, and so on and so forth. It was a really great week!

Beets are versatile!

If you are skeptical about beets, don’t be – they are versatile! Yes, you may think that I am saying that because I an Eastern European and there is a bit of a beet culture on the Balkans, but beets really can work in many different ways. In addition to the two recipes I shared last week, beets can be made into a hummus (yummy), used as a salad, sandwich or a veggie burger topping, and also made into tasty burgers (see here, and here for some great beet burger recipes to try). And they are an essential, as in not-to-be-skipped-under-any-circumstance, ingredient for fabulous BBQ ribs, either those made with wheat gluten or gluten-free.

So, how about beet fritters?

And this brings us to these fritters. Without a doubt, vegetable, and in some cases fruit, fritters are ubiquitous. Every cuisine has a recipe or two that fall into this category and take advantage of ingredients in season, often times potatoes, zucchini, squash, carrots, a grater, a bit of flour and usually some eggs, to make a quick meal. So, how about beet fritters? And how about vegan and gluten-free? Well, the recipe here answers these question in affirmative.

Chia seeds and flaxseed meal as binding agents

Grated beets, carrots and the apple make the body of these fritters. The easiest way to grate them is using a large grating attachment on your food processors, although, of course, grating by hand will work too! You don’t need to cooked the beets first, but do peel and wash them, as well as the carrots – apple is the only ingredient that does not require peeling. Just before you start grating you should start soaking your flaxseed meal by combining flaxseed meal with hot water in 1 to 3 ratio. Because the grated fruits and veggies have high moisture content, they do need extra binding agents and that’s why I recommend using quite a bit of flaxseed meal as well as chia seeds. Together, flaxseed meal and chia seeds work together to created fritters that hold their shape well without any eggs or flour.

Don’t forget the spices

I recommend using lime juice and zest, as well as freshly grated ginger and finely chopped fresh cilantro to enhance the flavors. The result are light fritters with interesting texture and


Beet, Carrot and Apple Fritters

What you’ll need:

1/4 cup golden flaxseed meal (you can use other types of flaxseed meal as well)

3/4 cup hot water

2 cups shredded carrots (4-6 carrots depending on size)

2 cups shredded beets (3-4 beets or so)

1 shredded Granny Smith apple

1 teaspoon baking soda

1 teaspoon onion powder

1 teaspoon garlic powder

1/2 lime, zest an juice

1/2 inch ginger root, grated

1/2 cup chia seeds

1/4 cup chopped fresh cilantro

Oil or cooking spray for the pan

Extra lime slices, coarsely ground black pepper and/or apple sauce for serving

What you’ll do:

  1. Place the flaxseed meal and hot water into a bowl and mix well. Let the “flax egg” rest for at least 10 minutes. The final result will be a very gooey mix that will work together with chia seeds to bind the fritters together.
  2. While the “flax egg” is resting, grate beets, carrots and an apple by hand or using a food processor equipped with a grating attachment, then transfer into a large mixing bowl. Add all the rest of ingredients, including the “flax egg”, mix well and let stand for 20-30 minutes. This resting time is needed for chia seeds to soak the extra liquid released by the grated beets, carrots and apple, and transform into a gel-like substance.
  3. Place a large pan over high heat and let it get nice and hot. Add oil or some cooking spray – if you do have a great non-stick pan you can omit the oil – and place small firm patties in. To form a patty, take about 1/4 cup worth of your mix, and using your hands form a 1/2 inch thick patty. Brown over high heat for 2 minutes then lower the heat down to medium and continue browning for 3 more minutes.
  4. Flip the patties over and brown on the other side for 3-4 minutes.
  5. Serve warm as a side dish, or even as an alternative to breakfast pancakes. These fritters go well with yogurt, as well as maple sauce, and I bet they would be delicious cold as well!
BeetCarrotApple_Fritters
Beet, Carrot and Apple Fritters, via Eat the Vegan Rainbow on Pinterest

Copyright © Eat the Vegan Rainbow, 2018

Oven-fried Jalapeño Tapioca Pearl Fritters with Yogurt Sauce

img_3423
Oven-fried Jalapeño Tapioca Pearls Fritters with Yogurt Sauce, via Eat the Vegan Rainbow

You are probably thinking to yourself “Baked Jalapeño Tapioca Pearl Fritters!? What on Earth is that? And why would anyone want to try it?”. Well, I can’t blame you for feeling that way. I would not have made these ever has it not been for a huge kitchen mistake. What I wanted to do was make a batch of Sabudana Khichdi, but my mind was on autopilot and instead of using cold water, I soaked the tapioca pearls in hot water. Unfortunately, this resulted in a pile of messy and sticky tapioca pearls, definitely not fit for Sabudana Khichdi.

It seemed such a waste to just dump everything out, so I threw in some roasted jalapeño peppers, roasted green chilis, coarse corn meal and some nutritional yeast, with a dash of oregano and garlic, and created little fritters. These went into the oven – no deep frying in my house – and came out fragrant, crunchy and delicious.

They had quite a bit of heat and punch, so I paired them with a yogurt sauce to take the edge off. If you prefer less heat in your food, dial back on the amount of jalapeños you use, or just use more yogurt sauce which has a gentle, soothing effect on the overheated taste buds. Enjoy with the side of a salad for a light meal, or serve as an appetizer with a punch.

66DBC493-49E1-4E11-A444-8BA5EB327C2E

Oven-fried Jalapeño Tapioca Pearl Fritters with Yogurt Sauce

What you’ll need:

2 cups tapioca pearls

4 cups hot water

3 tablespoon nutritional yeast

1 can chilies

1 can jalapeño

1 tablespoon oregano

2 teaspoon garlic

1 cup coarse corn meal

1 cup almond or cashew yogurt

1 tablespoon chopped cilantro

1 tablespoon lime juice

Cooking spray

What you’ll do:

  1. Start by soaking tapioca pearls in hot water for 2-3 hours. The pearls should absorb all the water and be very sticky.
  2. Add all the rest of the ingredients except yogurt, cilantro and lime juice and mix everything well together.
  3. Using your hands, form tapioca pearl balls that are about 2 in (4-5 cm) in diameter and arrange them on a baking sheet lined up with parchment paper. Spray the fritters with some cooking spray and place in the oven that has been preheated to 350 F (175 F). Bake for 20 minutes or so, until the fritters get that nice golden-brown look.
  4. Let the fritters cool before serving, and while they are cooling whisk together the yogurt sauce by mixing yogurt, cilantro and lime juice together. Serve drizzelded over the fritters or as a dipping sauce.

Copyright ©Eat the Vegan Rainbow, 2018

Scallion Crêpes with Sesame and Ginger Dipping Sauce

img_3004
Scallion Crêpes with Sesame and Ginger Dipping Sauce, via Eat the Vegan Rainbow

In Serbia, ex-Yugoslavia, where I grew up, there is only one type of pancakes people make – palačinke. They are huge in Central Europe and on the Balkans, and if you are wondering how to pronanounce their name before you munch on them, you would pronounce “č” the same way you do the digraph “ch”. They are thin, they roll and fold easily, they can handle any type of topping, and they are super easy to make. They are also pretty much the same thing as crêpes, so I am sticking with that better known name for the rest of the post. It’s probably one of the first recipes my mom taught me, and knowing how to make crêpes was a bit of a teenage rite of passage for my friends and me. If you knew how to make them you were definitely a part of the in-crowd!!!

And while crêpes are considered very much a French thing (and now you probably appreciate that they are also huge on the Balkans), scallion (or green onion) pancakes hail from a totally different culture – they are a staple of Chinese cooking. Some of the Scallion Pancake recipes use chicken fat (!), but the one by Ming Tsai, a TV chef known for his East-West fusion cuisine, is vegan-friendly, and you may want to give it a try. But, these pancakes do require kneading, and a bit more hands on than I am prepared to do.

So, channeling my inner Ming Tsai and his East-meets-West fusion style, I now give you Scallion Crêpes with Toasted Sesame Seeds and Ginger Dipping Sauce. The crêpes take about an hour to make, from start to finish, and the sauce comes together in five minutes or so.

If you have never made crêpes before, relax – they don’t take much time or much effort. All you need is a large bowl and a large whisk, or a large blender. Your goal is to mix wet and dry ingredients until a smooth and very runny batter forms. Crêpes come out best when you use a large frying pan with a very flat bottom, when you keep your pan hot, but not too hot, and when you drizzle a drop or two of fresh oil before pouring in a new batch of batter in. If you have a really fantastic non-stick pan, you may be able to skip the oil but crêpes can be sticky, so proceed with caution.

One of my mom’s tricks is to use a teaspoon of oil and a really hot pan for the first crêpe. That crêpe is too oily and is usually discarded, but cooking it seasons the pan so that you only a drop or two of oil for the rest of the crêpes that should slide right out there when done.

There’s a bit of technique to flipping the crêpes over. First of all, you will need to figure out how much batter you need to pour in to make a thin, yet not too flimsy crêpe. For a regular size frying pan (8 in; 20 cm) I’d say start with 3/4 cup of batter. Pour the batter in the middle of the pan and then move your pan around quickly to help the batter spread around all the way to the edges, making one smooth, thin layer.

Second thing that you will need to know is when to flip, and the answer to that is when the uncooked side starts to look dry, which should not take more than couple of minutes. Once you see that it’s time to take hold of the pan’s handle and give it a shake. If everything is working according to the plan your crêpe should be sliding around the pan freely. If not, you will need to use a thin spatula to slide it under the crêpe and ensure all the sticking points are unstuck. The best spatulas to use for this are the metal ones you would normally use to frost a cake.

With your crêpe’s surface looking dry and your crêpe moving freely around the pan you are ready to flip. I flip my crêpes either by tossing them in the air – that’s my signature move and a crowd pleaser, and it took quite a few mistakes to perfect – or by using my fingers.  I grab the edge of a pancake with both hands and flip it over, taking good care not to touch the pan. This only works if the edges of your crêpe are curling up and away from the sides of the frying pan.

Now that you know what I typically do, let me tell you what I think you should do. The best thing to try first is to use a thin, long and wide spatula that can go under the crêpe and in one swift move flip the crêpe over.

Once the epic flipping of the crêpe has been accomplished the crêpe will need only a minute to finish cooking on the other side. Normally, you would add a spread or a filling just after you slide the crêpe out while it’s still hot. In this case I actually don’t think the spread is needed as all the scallions make the flavor pretty rich to begin with. Add to that the dipping sauce full of soy sauce, toasted sesame seeds, squeez of lime, and freshly grated ginger – mmmmm… – and you’ll get plenty of flavor.

Scallion Crêpes with Sesame and Ginger Dipping Sauce

What you’ll need:

  • For the Crêpes

2 cups all-purpose flour

2 tablespoon corn starch

1 3/4 cup aquafaba (liquid from a can of chickpeas)

1 cup almond milk, plain and unsweetened

1 cup scallions (spring onions), white and green parts, chopped

Oil for cooking

  • For the Sauce

1/2 cup soy sauce, reduced sodium

2 tablespoons lime juice, freshly squeezed

2 tablespoons sesame seeds, toasted

2 teaspoons ginger, freshly grated

1 teaspoon crushed red pepper flakes (optional; skip if you don’t enjoy spicy food)


What you’ll do:

  1. Place all the crêpes’ ingredients except scallions in a blender and mix well. You can also mix everything up with a regular mixer or by hand. The resulting batter should be smooth and clumps-free.
  2. Add the chopped scallions, mix them in and let the batter rest for 30 minutes.
  3. While the batter is resting, mix together the dipping sauce. For best results use fresh ingredients, and toast the sesame seeds yourself – they need only 2-3 minutes in a toaster oven or in a frying pan on the stove top. Cool the seeds a bit before mixing with the rest of the ingredients.
  4. Heat a large frying pan with a flat bottom until hot. Add a teaspoon of oil and 3/4 cup of batter. Spread the batter around until it covers the entire surface of the pan.
  5. Lower the heat to medium to medium high, and cook until the upper side starts to look dry. Flip the crêpe and continue cooking on the other side for another 1-2 minutes.
  6. Slide the crêpe out, fold twice, making a sort of triangle, and keep the crêpes warm either by covering them, or by putting them in a warm oven.
  7. When all the crêpes are done, arrange them on a platter and enjoy with the dipping sauce (or without!).

Copyright © Eat the Vegan Rainbow, 2018

Unbelievably Easy Baked Polenta Sticks

img_3352
Baked Polenta Sticks, via Eat the Vegan Rainbow

I was raised eating polenta with milk and sugar for breakfast. As I grew up and started experimenting with my food, I would add sour cream and even ajvar, the roasted red pepper and eggplant spread many associated with Bulgaria and the South East Balkans. But even with these add-ons, polenta remained a breakfast food.

So, I was quite surprised to discover that fancy Italian restaurants include polenta on their dinner menus. Of course I had to try it, and I liked it! I actually never met a polenta I did not like. And as a cook it’s something that you can whip together in minutes!

Polenta is basically boiled coarse corn meal, so it is in the same food family as grits. And, practically speaking it is as easy as it sounds – you bring a pot of water to boil and you add some corn meal to it while stirring constantly and furiously to prevent clumping. You let the pot boil for five minutes with constant stirring and the polenta is done.

The recipe here is two steps removed from the basic polenta. First, after you make the polenta according to the instructions on the box, you will need to pour it into a deep baking dish which is either lined with some parchment paper or well sprayed with the cooking spray. Spread the polenta into one even and smooth layer and let it set for at least an hour.

Once the polenta has set and hardened you will be able to slide it out of the dish and onto the cutting board. Slice polenta into 1 x 2 in (2.5 x 5 cm) sticks and arrange them on a baking sheet. Spray the tops with a cooking spray.

From here you can take your polenta in any direction you like. You can add fresh or dry spices, nutritional yeast, small bits of cheese or vegan butter that melt well, or sprinkle sugar and cinnamon if you want to make the baked polenta sticks into a dessert. Here, I decided to go two ways and top one set of polenta sticks with some cumin powder, dry basil and oregano. The second batch I spiced up a bit with freshly ground black pepper as well as smokey red pepper flakes. The topped polenta stick are then baked until their surface is nicely browned.

I served the Baked Polenta Sticks with vegan bolognese sauce but you can eat them as is, or serve them with a wide range of dishes. The flavor of polenta sticks is mild, slightly nutty, and depends on the spice combination you used. In general, Baked Polenta Sticks are great with any dish you would serve with corn bread, like chili, Jackfruit Barbacoa, or Bean and Leek Soup. They can also be used as an appetizer, served along side simple marinara dipping sauce and some olives.


Baked Polenta Sticks

What you’ll need:

2 cups polenta (or corn meal)

4 cups water

1/4 teaspoon salt (adjust salt to taste)

Cooking spray

Dried basil

Dried oregano

Cumin powder

Crushed red pepper flakes

(Onion powder, garlic powder, nutritional yeast, freshly ground black pepper, lemon zest,… quite a few toppings will work so feel free to experiment)


What you’ll do:

  1. In a large pot, bring water to boil.
  2. Add the salt and polenta to the boiling water while stirring rapidly to prevent clumps from forming. Decrease the heat to medium/medium low, and keep stirring the polenta for about 5 minutes.
  3. Pour the polenta out into a baking dish that you previously sprayed with cooking spray. I recommend using 9 x 13 in (22 x 33 cm) dish for this amount of polenta – this will give you 1/2 in (1 cm or so) thick sticks – but you can use any other flat bottom container you have on hand. Just note that the thickness of the sticks will vary depending on what you use.
  4. Let the polenta cool and set for at least an hour. The thicker your polenta layer, the longer it will take.
  5. Slide the polenta slab out onto a cutting board. Cut into sticks of regular size.
  6. Arrange your polenta sticks on a parchment paper lined baking sheet. Do leave some space between the stick so they can bake evenly, which means you may need to use two baking sheets or bake in two batches.
  7. Spray the top with some cooking spray and sprinkle the toppings/spices of your choice liberally.
  8. Place into the oven that was preheated to 400 F (205 C). Bake for 15 minutes or until the sticks are golden brown.
  9. Serve as a side dish with a soup, or as an appetizer with marinara sauce, or simply munch on these any time. They are best served fresh from the proven, but couple of minutes in a toaster oven will help the next day!

Copyright © Eat the Vegan Rainbow, 2018

Radish Salad with Apples, Carrots and Toasted Walnuts

img_3783
Radish salad with Carrots, Apples and Toasted Walnuts, via Eat the Vegan Rainbow

Who said salads have to be green? Or soaked in heavy dressing? Salads come in many different shapes and forms, and this is my contribution to the pantheons of salads – a mix of sliced radishes, shredded carrots and apples, toasted walnuts and freshly squeezed lemon juice. I used lemon zest and some cracked black pepper for garnish, and that’s that. With a little help from a food processor with couple of different blades everything came together in less than ten minutes!

img_3780

There isn’t much more to this Salad story. Perhaps a slice of hearty bread, some of the lovely Baked Sunflower Seed Cheese, and you’re done. This salad is so fragrant, full of colors, different shapes and textures with a nice crunch that it is absolutely fit for any winter holiday table. Enjoy!!!

img_3782

Radish Salad with Apples, Carrots and Toasted Walnuts

What you’ll need (for 2-4 servings)

1 bunch red radishes (7-8 large ones), washed

1 Granny Smith or another tart apple, washed

4 carrots, washed and peeled

1/2 cup chopped walnuts, toasted

1 lemon, juice and zest

1/4 teaspoon cracked black pepper (or to taste)


What you’ll do:

  1. Wash the radishes and slice them into thin discs. You can do this by hand by I recommend using a food processor if it has a slicing blade. My food processor has an adjustable slicing blade and I dialed the thickness way down.
  2. Without taking the sliced radishes out, replace the slicing blade with the fine grating blade and grate the carrots.
  3. Using a coarser grating blade, grate the apple. Transfer everything into a large mixing bowl.
  4. Add the juice of one lemon, lemon zest, cracked black pepper, and toasted walnuts and toss to combine.
  5. Serve immediately with a slice of hearty bread, and a side of cheese as a light lunch, a salad course, or as a part of a more elaborate appetizer spread.

Copyright © Eat the Vegan Rainbow, 2017

Chestnut and Mushroom Stuffing for the Best Thanksgiving Dinner Ever

img_3602
Chestnut and Mushroom Stuffing, via Eat the Vegan Rainbow

If you think you can’t live without the traditional Thanksgiving dinner with the roasted turkey, mashed potatoes full of butter, the stuffing made with rich sausage, gravy made from turkey fat, sweet potato casserole topped with marshmallows, corn bread with cheese, pumpkin pie with vanilla ice cream, and so on and so forth, let me reassure you – you can give this all up, and replace it with an amazing and creative plant-based feast that celebrates the season and gives thanks for the bountiful harvest, our friends and families, and our beautiful and extraordinary planet.

I put together this menu as a testament that food can be colorful, flavorful, aromatic, and delicious without major time and money investment. This entire menu will cost you far less than the regular Thanksgiving feast, and instead of leaving you tired and sluggish, it will leave you filling energized and elevated… and ready for whatever Black Friday may bring!

Joking aside, this menu is meant for entertaining and for making a huge impression. As any well-structure feast, my Thanksgiving offerings begin with appetizers. And since the meal is supposed to go on for an hour or more, and includes two dessert options, I am going light with the appetizer spread. My tray includes couple of different types of olives, Roasted Beets Hummus, Baked Almond Feta Cheese, and pita chips. You can make the pita chips by slicing some pita bread into wedges, spraying them with some oil or cooking spray and letting them toast for couple of minutes until golden-brown. Or you can get them at a supermarket, like I did on this occasion.

Do remind your guests to take it easy with the appetizers, because what’s coming next is the most amazing soup ever, the Creamy Cauliflower Winter Soup that owes it’s creaminess entirely to puréed cauliflower. The soup is white with slight gold overtones, which in my view frames the season perfectly. Plus corn and peas give this soup some substance and fresh thyme sets the stage for herbs to come.

img_3507
Creamy Cauliflower Winter Soup, via Eat the Vegan Rainbow

Main course is a real harvest celebration, with fireworks of flavors and all the trimmings working together to feed the bodies and the souls. The main dish is a lovely Harvest Roast with cubed sweet potatoes, turnips, carrots, parsnips, apples and squash, lightly oiled and flavored with herbs of the season. Complementing the Harvest Roast is the Chesnut and Mushroom Stuffing (recipe below). Add to that a protein rich Quinoa with Roasted Cranberries and Pistachios and you have your self an amazing feast!

img_3592
Quinoa with Roasted Cranberries and Pistachios, via Eat the Vegan Rainbow

Last but not the least, the meal ends with a glass of Fizzy Cranberry Mocktail, and two desserts that pay homage to the traditionally served pies, pumpkin and apple. The desserts I feature are Pumpkin Truffles, inspired by the traditional pumpkin pie recipe and spices that go into it, and Pecan Apple Baklava with Orange Maple Syrup, which combines the best of pecan and apple pies into one ultra scrumptious dessert.

Have a thankful, wonderful, healthy and delicious Thanksgiving feast!!!


Chestnut and Mushroom Stuffing

What you’ll need:

1 yellow onion, finely diced

6 stalks celery, finely diced

2 Granny Smith (or another variety of tart) apples, diced

10 oz. (285 g) mushrooms, finely chopped (white, oyster, shiitake, baby bella – any combination of these will work)

10 oz. (285 g) chestnuts, boiled and chopped

4-6 slices of hearty sourdough bread (depending on the size of the slices)

Fresh sage, 4 leaves, chopped

Fresh thyme, 8 springs, pulled

Fresh rosemary, 2 springs, whole

Cooking spray

What you’ll do:

  1. One day prior to making the stuffing cut the bread into medium sized cubes, and leave them uncovered to dry. If you forget to do this a day ahead, don’t worry – you can cube the bread and put it in the oven to roast/toast. 10 minutes at 350 F (175 C) should be enough.
  2. Next day, place a large skillet over the medium-high heat. Add the olive oil, onions, celery and apple. Mix well and let it sauté with occasional stirring for 15 minutes.
  3. Add the mushrooms and two whole springs of rosemary (no need to chop, you’ll pull them out at the end), and continue sautéing for another 5 minutes.
  4. Add the chopped chestnuts, mix well to incorporate, and cook for another 10 minutes.
  5. Add chopped sage and thyme, mix in the bread cubes, and once everything is incorporated well transfer the stuffing to a large baking dish.
  6. Cover the stuffing with foil and bake for 20 minutes at 350 F (175 C), then remove the foil, bring the temperature to 400 F (190 C) and bake for another 10 minutes.
  7. Let the stuffing cool for 5-10 minutes before serving. The leftover stuffing, if you have any, can be an easy lunch on its own!!!

Copyright © Eat the Vegan Rainbow, 2017