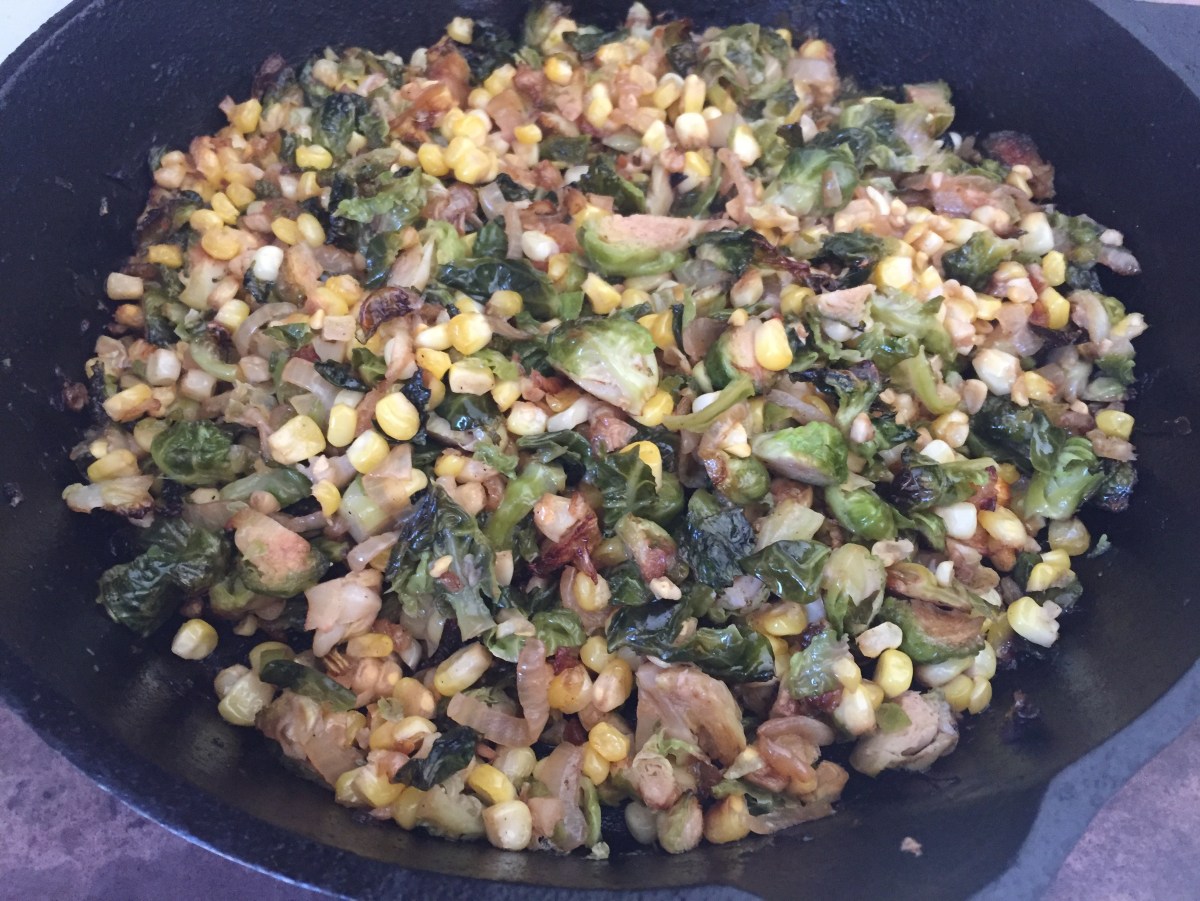
Caramelized Brussels sprouts with corn, via Eat the Vegan Rainbow
So you hate Brussels sprouts, do you? And you really think that there is no way you will ever change your mind on that account?
Well, I have a recipe for you to try. First of all, you will have to find some fresh Brussels sprouts – I don’t think frozen will work. But, on the other hand, although I do think that fresh corn works best, you can cut yourself some slack and use frozen corn kernels or whole corn kernels from a can.
The recipe is super simple – so there’s not much to add really. I made this recipe with adding some dried cranberries and it is delicious! But, I made it without cranberries and it works just as well. This can be a yummy side dish to add to your Thanksgiving and/or Holiday (Christmas) feast, and in that case cranberries (especially for those of you in North America) are a must!
Note: using a cast iron pan is recommended but not required. I like using a cast iron pan for a recipe like this because it does help things caramelize nicely. And it also allows you to pop the pan under a broiler if you like your top to get extra crunchy, which can be a nice touch especially if you have guests that you are trying to impress. But you can achieve similar level or caramelization in almost any other type of a pan. CAUTION: you should not attempt placing just any pan under the broiler as most of them are not oven safe!!!
Caramelized Brussels Sprouts with Corn, via Eat the Vegan Rainbow
Caramelized Brussels Sprouts with Corn
What you’ll need:
1-1.5 lbs (400-600 g) Brussels sprouts, cleaned and quartered
1 yellow onion, diced
2 ears of corn, just the kernels (frozen or canned corn is OK, but fresh is the best)
1/2 cup sliced dried cranberries (optional)
1/4-1/2 teaspoon salt
2 tablespoons olive oil
What you’ll do:
Place a heavy cast iron pan over the medium high heat. Add the oil and onion. Let the onion brown for 5-8 minutes.
Add the Brussels sprouts and let them brown for another 5 minutes or so.
Add the corn, sliced dried cranberries if using, add salt to taste, mix well and cook for another 10 minutes, with occasional stirring.
Citrus Infused Pan-Seared Eggplant with Black Olives, via Eat the Vegan Rainbow
Simple may not always be better, but it is absolutely true that when it comes to vegetable side dishes keeping things simple and letting the vegetables speak for themselves goes a very long way. For example, grilling is one of the best ways to add a lot of flavor without any extra ingredients of complicated prep procedures. And eggplant is probably one of the most grill-friendly vegetables out there!
But, before the eggplant hits the grill (or a pan) it is important to soften it and let some of the bitterness drain out. Very often that means salting the sliced eggplant and letting it sit in between paper towels to absorb the moister that the salted eggplant will release. Doing this removes some of the bitterness that eggplant can sometimes have as well as make the eggplant less like a sponge.
This recipe does have one important trick that really elevates the flavors – rubbing the grilled eggplant slices with a clove or garlic to add that great garlic flavor! This is a trick that you often see used for making garlic bread to infuse garlic aroma into toasted bread – it avoids having to deal with raw garlic pieces, and it is very effective.
Finally, what makes this simple side dish come together is the lemon juice and lemon zest. This small amount of acidity and the freshness that lemon zest contributes really bring the simplicity to a new level. You can serve this elegant vegetable dish warm, as a side, or cold as a salad. Either way, give this a try and see whether you are with me when I say that simple is the way to go!!!
Citrus Infused Pan-Seared Eggplant with Black Olives
What you’ll need:
2 large Italian eggplants, sliced into rounds
1 clove of garlic, peeled
1 lemon, juice and zest
1 cup black olives, sliced
2-3 teaspoons coarse salt
Cooking spray (or olive oil)
What you’ll do:
Wash the eggplant, and slice into round slices (about 1/4 in (5 mm) in thickness). Place on the two layers of paper or kitchen towel, sprinkle with salt, then cover with another layer of towels, and let stand for 20-30 minutes. The salt will draw out some of the extra moisture out of the eggplant, and with it some of natural bitterness that eggplant sometimes has. Remove the paper towels, and pat dry the eggplant slices.
Put a large grill pan over the high heat to make the pan really hot. Reduce the heat to medium, then spray with some cooking spray or brush with some olive oil. Place eggplant slices on and grill on both sides in batches until all the eggplant is grilled. You can also use an outdoor grill or a regular pan. The point is to blacken and cook the eggplant through, which will take 3-5 minutes per side.
Use the garlic clove and rub the eggplant slices, so that they are infused with garlic aroma. Place the garlic rubbed eggplant into a large mixing bowl, add lemon juice, lemon zest, and sliced black olives. Mix well and you are done! If you like to add a bit more flavors to this simple side dish, you can drizzle some olive oil, sprinkle fresh parsley, or add a dash of crushed red pepper flakes if you are open to turning on the heat!
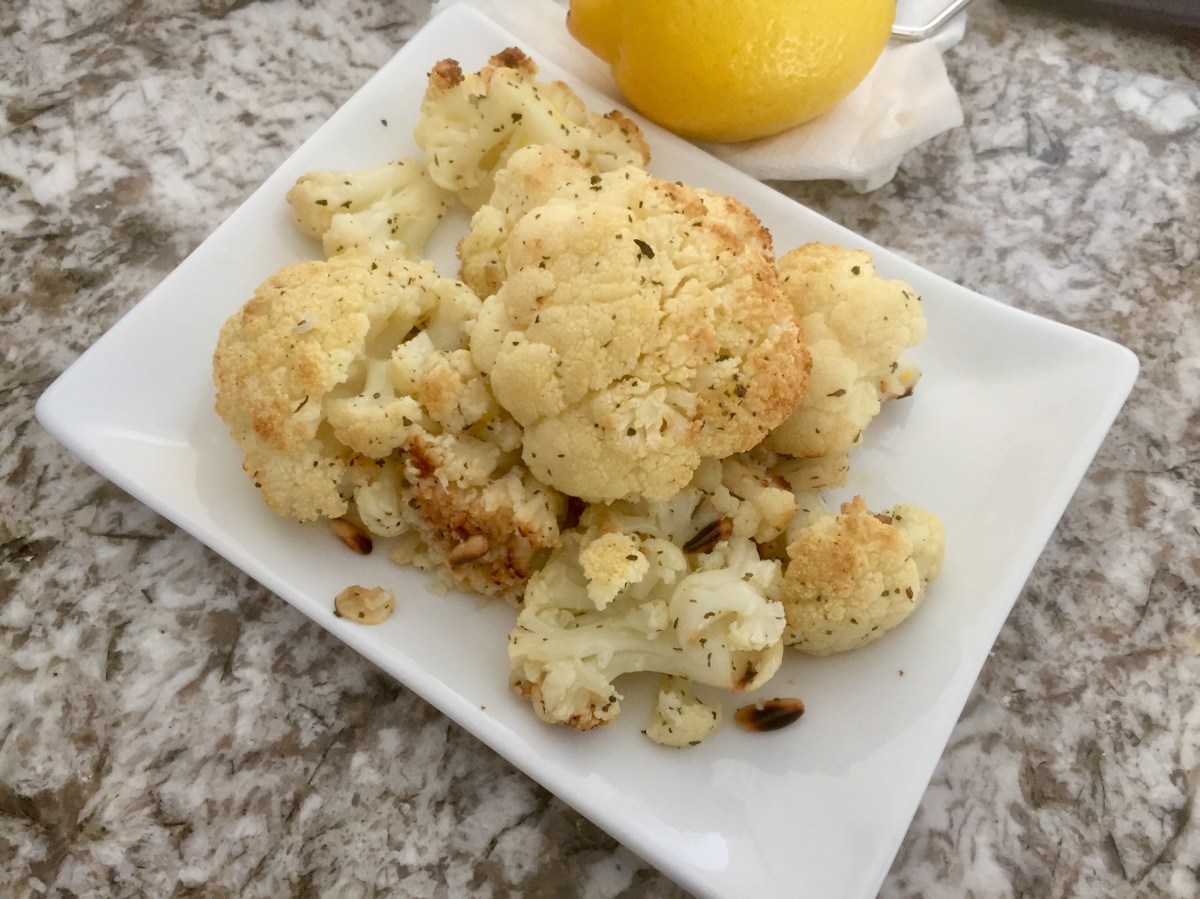
Lemony Roasted Cauliflower, via Eat the Vegan Rainbow
Cauliflower is the king of the vegetable world, and beloved by millions who follow the plant-based or vegan diet. It’s also loved by paleo diet eaters, and of course many, many others. What makes cauliflower versatile is the fact that it is mild enough on its own, which allows it to carry many different flavors. For example, you can make a lovely Cauliflower Buffalo Wings and Cauliflower Pizza Crust, as well as a great Cauliflower Basmati Rice or pasta shells stuffed with cauliflower ricotta. You must agree that this is quite a range for a single ingredient!
This dish is a simple yet delicious side dish or a quick lunch. It tastes great warm as well as cold, so you will be able to make the most out of your leftovers. The dish does take some time to make – roasting cauliflower can take up to 45 minutes. But, trust me: roasting is the way to go. Although you could boil the cauliflower the flavor will not be the same, so just don’t go there.
The rest of the ingredient list is simple and straightforward. Pine nuts add nice toastiness and crunch to the dish, garlic give it the aroma, and lemon juice and zest make this dish light and full of sunshine. Of course, a dash of basil never hurts!!!
Wash the cauliflower, and cut out the florets only (you can use the leftover cauliflower to make rice, or a creamy soup, so don’t throw it away!). Pat dry the cauliflower florets and set aside.
Line a large baking sheet with some parchment paper, arrange the cauliflower florets so that there is some space around each one, and place in the oven. Roast for 30-40 minutes. The florets should be soft and nicely browned.
Place the roasted florets into a large mixing bowl and let them cool slightly.
Bring a large frying pan up to temperature over medium-high heat. Add the pine nuts and toast on high for 2-3 minutes. Stay with your pine nuts as they toast and stir frequently as they can quickly go from nicely toasted and fragrant to burnt! Add the toasted pine nuts to the roasted cauliflower.
Add the oil to the pan and decrease the heat to medium low. Add the sliced garlic and cook it for 1-2 minutes. Pour the garlic and oil over the cauliflower and pine nuts mix.
Next, add lemon juice, lemon rind, and basil and mix everything well. Let the cauliflower rest for 10 minutes or so, then serve and enjoy!
I was raised eating polenta with milk and sugar for breakfast. As I grew up and started experimenting with my food, I would add sour cream and even ajvar, the roasted red pepper and eggplant spread many associated with Bulgaria and the South East Balkans. But even with these add-ons, polenta remained a breakfast food.
So, I was quite surprised to discover that fancy Italian restaurants include polenta on their dinner menus. Of course I had to try it, and I liked it! I actually never met a polenta I did not like. And as a cook it’s something that you can whip together in minutes!
Polenta is basically boiled coarse corn meal, so it is in the same food family as grits. And, practically speaking it is as easy as it sounds – you bring a pot of water to boil and you add some corn meal to it while stirring constantly and furiously to prevent clumping. You let the pot boil for five minutes with constant stirring and the polenta is done.
The recipe here is two steps removed from the basic polenta. First, after you make the polenta according to the instructions on the box, you will need to pour it into a deep baking dish which is either lined with some parchment paper or well sprayed with the cooking spray. Spread the polenta into one even and smooth layer and let it set for at least an hour.
Once the polenta has set and hardened you will be able to slide it out of the dish and onto the cutting board. Slice polenta into 1 x 2 in (2.5 x 5 cm) sticks and arrange them on a baking sheet. Spray the tops with a cooking spray.
From here you can take your polenta in any direction you like. You can add fresh or dry spices, nutritional yeast, small bits of cheese or vegan butter that melt well, or sprinkle sugar and cinnamon if you want to make the baked polenta sticks into a dessert. Here, I decided to go two ways and top one set of polenta sticks with some cumin powder, dry basil and oregano. The second batch I spiced up a bit with freshly ground black pepper as well as smokey red pepper flakes. The topped polenta stick are then baked until their surface is nicely browned.
I served the Baked Polenta Sticks with vegan bolognese sauce but you can eat them as is, or serve them with a wide range of dishes. The flavor of polenta sticks is mild, slightly nutty, and depends on the spice combination you used. In general, Baked Polenta Sticks are great with any dish you would serve with corn bread, like chili, Jackfruit Barbacoa, or Bean and Leek Soup. They can also be used as an appetizer, served along side simple marinara dipping sauce and some olives.
Baked Polenta Sticks
What you’ll need:
2 cups polenta (or corn meal)
4 cups water
1/4 teaspoon salt (adjust salt to taste)
Cooking spray
Dried basil
Dried oregano
Cumin powder
Crushed red pepper flakes
(Onion powder, garlic powder, nutritional yeast, freshly ground black pepper, lemon zest,… quite a few toppings will work so feel free to experiment)
What you’ll do:
In a large pot, bring water to boil.
Add the salt and polenta to the boiling water while stirring rapidly to prevent clumps from forming. Decrease the heat to medium/medium low, and keep stirring the polenta for about 5 minutes.
Pour the polenta out into a baking dish that you previously sprayed with cooking spray. I recommend using 9 x 13 in (22 x 33 cm) dish for this amount of polenta – this will give you 1/2 in (1 cm or so) thick sticks – but you can use any other flat bottom container you have on hand. Just note that the thickness of the sticks will vary depending on what you use.
Let the polenta cool and set for at least an hour. The thicker your polenta layer, the longer it will take.
Slide the polenta slab out onto a cutting board. Cut into sticks of regular size.
Arrange your polenta sticks on a parchment paper lined baking sheet. Do leave some space between the stick so they can bake evenly, which means you may need to use two baking sheets or bake in two batches.
Spray the top with some cooking spray and sprinkle the toppings/spices of your choice liberally.
Place into the oven that was preheated to 400 F (205 C). Bake for 15 minutes or until the sticks are golden brown.
Serve as a side dish with a soup, or as an appetizer with marinara sauce, or simply munch on these any time. They are best served fresh from the proven, but couple of minutes in a toaster oven will help the next day!
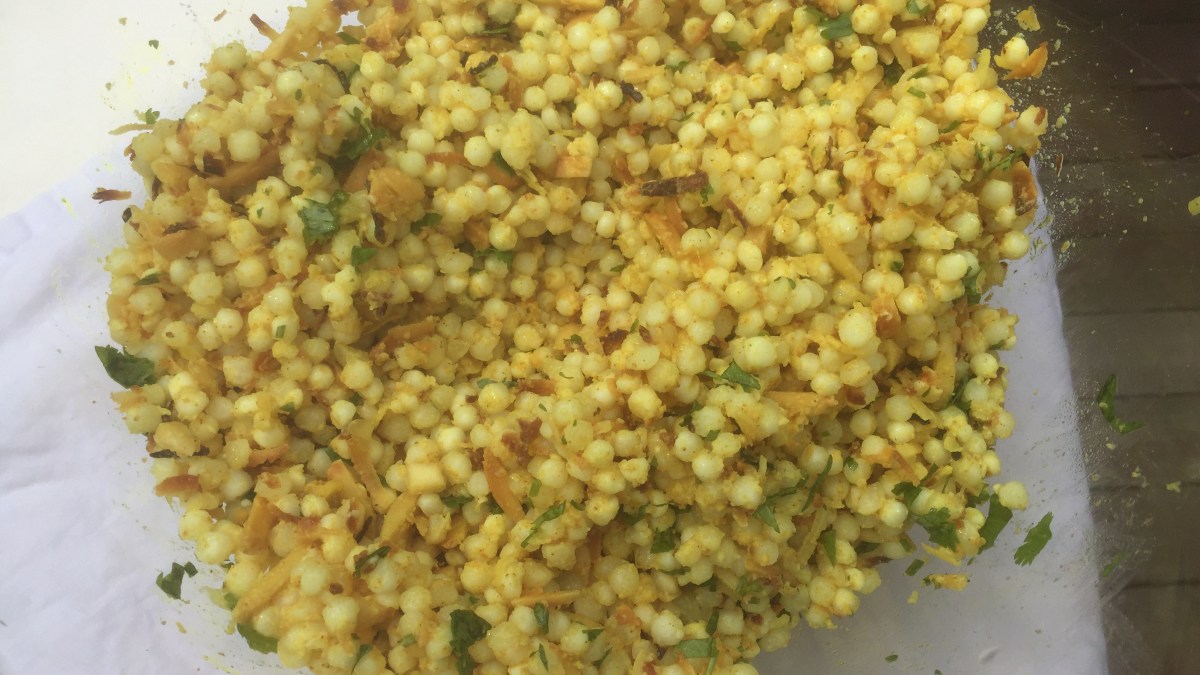
Tapioca Pearls (Sabudana) with Spicy Almonds and Toasted Coconut, via Eat the Vegan Rainbow
Most people probably think “bubble tea” when they hear “tapioca pearls”. But these delicious little pearls are definitely worth getting to know more intimately, especially in the context of gluten free cooking. They are inexpensive and very simple to make. They actually require no cooking – just soaking – so although no cooking skills are required, some level of patience (and a good amount of time) is.
Before we go any further lets try to answer this questions first: “What are tapioca pearls?”. They can come in different sizes and colors. The ones I will focus here are white and small, close to the size of Israeli couscous. But unlike the couscous, which is made with wheat and thus off limits for those watching their gluten intake, tapioca pearls are made from starch extracted from cassava root. So, they are little starch balls when all is said and done. Think micro potatoes that don’t need peeling!
If you are into Indian food, you have likely already had some tapioca pearls because they are often used to make desserts, like kheer pudding. Earlier this summer I had some homemade Sabudana Khichdi and I loved it. Sabudana Khichdi is a traditional dish and usually consumed during Hindu fast days. The dish includes tapioca pearls, finely chopped, cooked potatoes, finely chopped peanuts, finely grated coconut flakes, and a nice combination of spices (curry leaf, cumin seeds and green chilis). There are some variations on the recipe and the ingredients may vary depending on whethe Sabudana Khichdi is served during the fast or outside the fasting days, and my friend who made the dish for us also mentioned that a more protein-rich version of Sabudana Khichdi can be made using quinoa, and she suggested I check a blog by another friend of hers called Indfused, which I did and so should you, especially if you are interested in creative Indian/American fusion cooking (FYI: Infused is not a vegan blog, so keep that in mind).
Back to the the version of Sabudana Khichdi I had – it was a delicious addition to our summer cook out and prompted me to get some tapioca pearls of my own and start experimenting. The recipe below is the second iteration and deviates from the original recipe quite a bit. I took some liberties so my Tapioca Pearl Salad is Sabudana Khichdi inspired, but not meant to be “traditional” in any way. First point of difference is that I left the potatoes out. In my view, leaving potatoes out does not affect the taste nor the nutritional profile of the dish, yet saves some time and effort. I also left the peanuts out and replaces them with slivered almonds. I used slightly different spice mix, to make the dish a bit more fragrant. Finally, I toasted my coconut flakes, because in my mind coconut is just better toasted!
The key to making tapioca pearls is patience. All you need to do is rinse the pearls in cold water, then soak them in enough cold water, usually in 1:2 ratio (for example 1 cup pearls and 2 cups water), for 2-3 hours. How do you know they are ready? They should feel loose, not stuck together, and soft, yet slightly chewy, to bite – think pasta al dente. You can go a bit further if you prefer softer texture, but you do want your pearls to remain pearly, not mushy, so don’t overdo it.
Now a key to make the dish really flavorful and spices vibrant, is toasting the spices. I use a frying pan here, and, although you can dry toast the spices, I do add a bit of oil in this case and let the spices toast for one to two minutes before adding the almonds to finish it off. I pour the toasted spice and almond mix over the drained tapioca pearls, instead the other way round, but that’s more of a personal preference I suppose. The toasted coconut flakes come next, and the chopped fresh cilantro is the final touch. You can serve this dish immediately, you can heat it up more and serve hot, or you can leave it in the refrigerator overnight and serve it cold. It actually works across the range of temperatures so it could work as a surprising pasta salad at your next picnic. It is a great, easy and inexpensive dish to make for your next pot luck or any other get together!
Tapioca Pearls with Spicy Almonds and Toasted Coconut, via Eat the Vegan Rainbow
Tapioca Pearls with Almonds and Toasted Coconut Flakes
What you’ll need:
2 cups tapioca pearl
4 cups water
1 cup slivered almonds
1/2 cup coconut flakes or shreds, unsweetened
2 tablespoon vegetable (or canola) oil
1 teaspoon cumin powder
1 teaspoon curry powder
1/2 teaspoon turmeric
2 tablespoon fresh cilantro, chopped
What you’ll do:
Rinse the tapioca pearls under cold water and place into a large bowl. Cover with water and let stand for 2 to 3 hours. The pearls will absorb water and they should become soft and al dente.
Drain the pearls well, pat dry with a paper towel and put into a large mixing bowl that you will use for serving as well. You can use the same bowl you used for soaking just remember to dry it well in the meantime.
Heat the oil over medium high in a large frying pan. Add the dry spices (cumin, curry and turmeric powder) and toast in oil for 1 minute.
Add slivered almonds and toast for another 2 to 3 minutes, until almonds start to brown.
Pour the hot almond and spice mix over tapioca pearls and mix well.
Toast coconut flakes in a toaster oven or a frying pan for 2-3 minutes. You need to keep an eye on your coconut flakes as they go from beautifully toasted to inedible in a blink of an eye! If you are using the frying pan, you can use the same pan you just used for almonds and spices, just don’t add extra oil as coconut flakes should be fatty enough.
Add hot, toasted coconut flakes to your tapioca pearls and mix well.
Let the mix stand for couple minutes and while those flavors are combining, wash and chop fresh cilantro.
Sprinkle the cilantro over your tapioca pearls, mix again and serve!
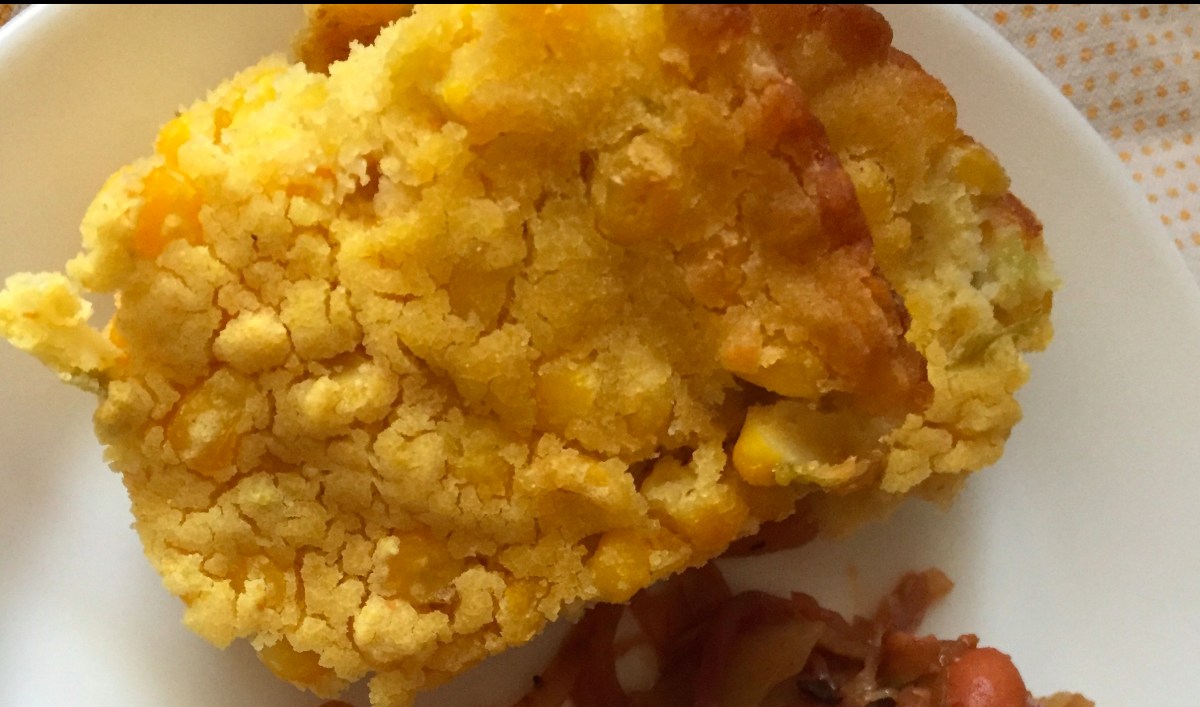
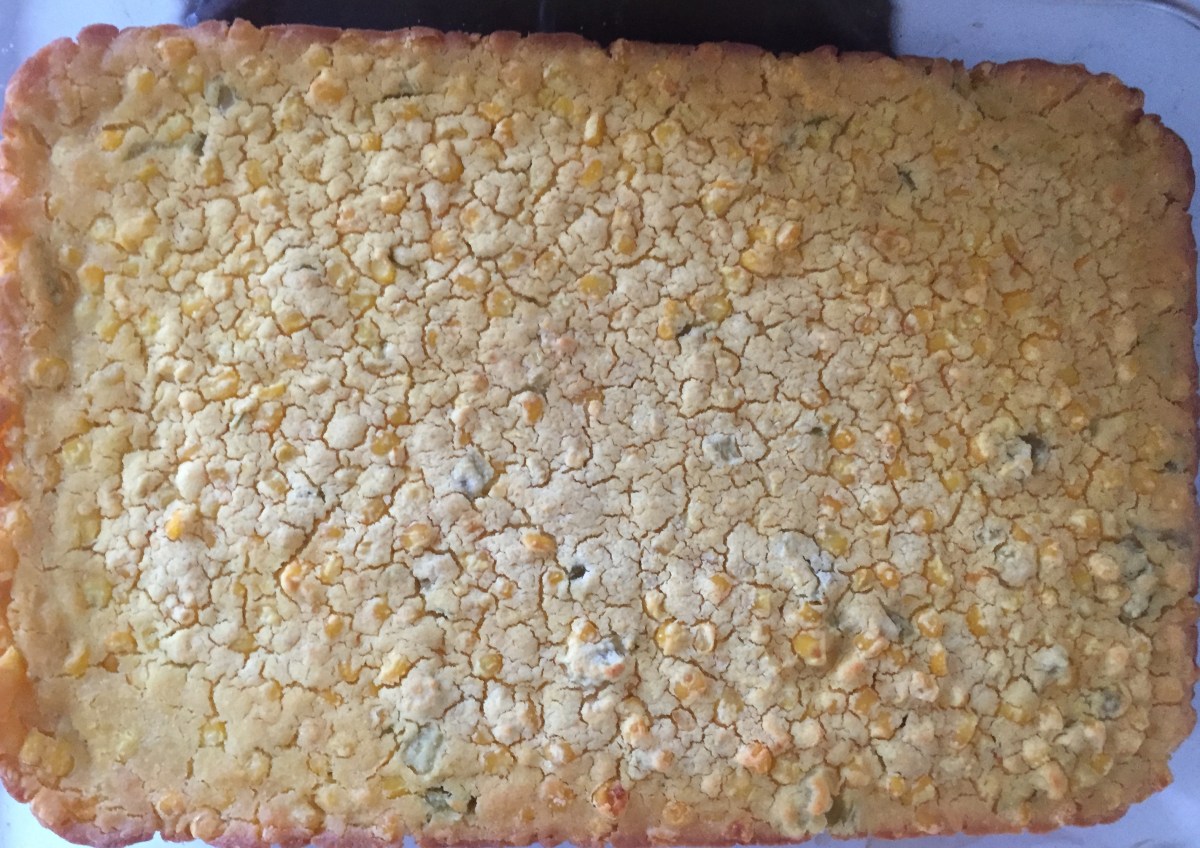
Balkan Style Cornbread, via Eat the Vegan RainbowYesterday I shared the recipe for Balkan Cabbage and Bean Stew that I developed as a way of keeping my grandmother’s culinary traditions going in the 21st century. The very best, and also very traditional, side food for a sturdy Balkan dish featuring a pile of cabbage and beans is proja (pronounced pro-ya), a savory cornbread that is, in its pure form simple and subtle. Think polenta but in sold form!
Over the years, recipes for proja have diversified away from using just corn flour, water, oil and baking soda, into more elaborate recipes that include eggs, cheese, yogurt, ham, and even pickles. I tried and enjoyed many of them, and they are delicious. But when it comes to pairing with a rich main dish, simpler is better. The recipe below is a relatively pared down but not-your-grandma’s Balkan style cornbread that is gluten-free and vegan.
I decided to add actual corn kernels to this recipe for a slightly more interesting texture. The corn I use is frozen corn that I defrosted on my kitchen counter top (you can always do it overnight in the fridge or quickly in the microwave). To jazz things up a bit I did add a can of fire roasted diced green chiles. You can totally skip this or add any other pepper you like if you are into a spicier version of the corn bread with a bit of kick!
Balkan Style Cornbread, Gluten-free and Vegan, via Eat the Vegan Rainbow
Balkan Style Cornbread, Gluten-free and Vegan
What you’ll need:
1 1/2 cup corn meal, fine
1 1/2 cup rice flour
1/2 cup corn starch
2 cups kernel corn
1 can chili peppers
2 teaspoon baking powder
1 teaspoon baking soda
3 tablespoons vegetable oil
2 cups water
Cooking spray
What you’ll do:
Preheat the oven to 425 F (220 C).
In a large mixing bowl combine all the ingredients except water. Add 1 cup of water and mix well. The cornbread batter should be wet but not too fluid, so I recommend adding the second cup of water in stages to make sure you don’t end up with a corn bread soup.
Spray the bottom and the sides of a 13 x 9 in (33 x 23 cm) baking dish with the cooking spray.
Pour the cornbread batter in, even it out and put it in the oven.
Bake at 425 F (220 C) for 20 min then lower the temperature to 350 F (175 C) for another 20 minutes.
Leave on the counter top for 10-15 minutes to cool, then cut and enjoy!
Note: This corn bread tastes great warm but if you don’t finish the entire cornbread immediately I recommend taking it out of the baking dish and storing in an air tight container in the refrigerator for up to 5 days. You can reheat it in the toaster oven or zap it for 30 sec in the microwave oven.