Casserole can be everything and anything. To me, a casserole is a baked dish with a lot of creaminess and goodness, although if one would go by looks only, most casserole could seem quite unexciting and homely.
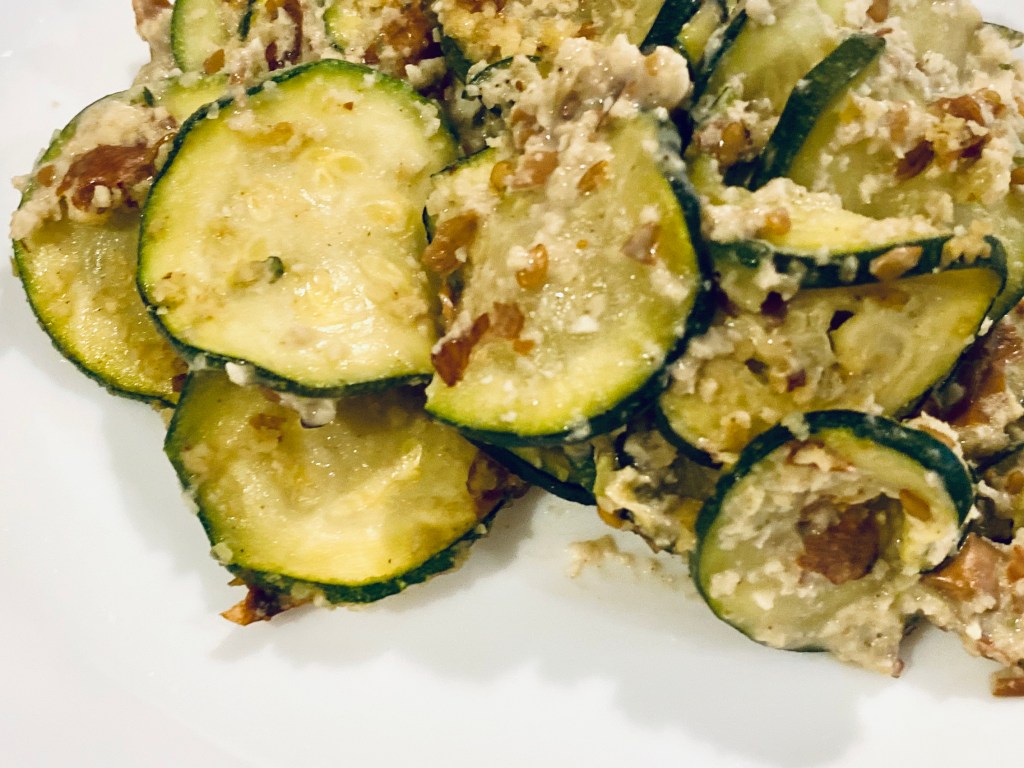
One of my recent posts described a recipe for quinoa and broccoli casserole, and now it’s time for zucchini to shine. Zucchini is a super versatile vegetable and it’s usually very cheap during the summer months. It’s also easy to grow if you have a plot of land handy, and can yield quite a lot.
Mix raw almonds and flax seeds together in a large bowl, cover with hot (boiling) water and soak for at least one hour. If soaking overnight, store it in the fridge. For soaking that’s less than 2-4 hours, leaving on the kitchen counter will be fine.
Preheat over to 350F (175C).
Slice the zucchini into discs, either by hand or using a food processor. Ideally, you want your slices to be about 3-4 mm, which is about 1/8 of an inch.
Place the sliced zucchini into a large mixing bowl.
Add the rest of the ingredients into a food processor or a blender, and blend until combined and relatively smooth.
Pour the mixture over the zucchini and mix well, then place everything into a 9 x 13 in (33 x 23 cm).
Place the baking dish into the oven and bake for 40-45 minutes.
Let rest for 10 minutes before serving. Enjoy with a side salad!
Summer is great time for adding more vegetables to your daily cooking. This is an easy recipe that may remind you of risottos, but it is really a dish on it’s own as it is made with cauliflower “rice”. Although you could use rice to this dish, I do recommend you give riced cauliflower a try. Enjoy!
Cauliflower Rice with Cherry Tomatoes, via Eat the Vegan Rainbow
Cauliflower “Rice” with Cherry Tomatoes
What you’ll need:
1 head cauliflower, riced
2 cups cherry tomatoes, washed
1/2 yellow onion, diced
1/2 green pepper, diced
2 teaspoons umami seasoning (this is a mix of salt, mushroom powder, some crushed red pepper and paprika; I get a store-bought seasoning blend, but you can make it yourself)
2 tablespoons olive oil
What you’ll do:
Preheat the oven to 425F (220C).
Add the olive oil to a cast iron pan and place over medium high heat.
When the oil is heated up, add the onions and cook for 2-3 minutes until softened.
Add the diced peppers, stir well and cook for another 5 minutes.
When onions and peppers are soft and browned, add the tomatoes, Mix well, increase the heat and let cook for 8-10 minutes with frequent stirring.
While tomatoes are cooking, prepare the cauliflower. Break the head into smaller pieces and then rice in batches in a food processor. Make sure not to overcrowd the food processor to help the ricing processes. In my food processor, it takes 4-5 pulses of 3-5 seconds each to rice the cauliflower to the size I like.
Add the riced cauliflower to the pan and mix well. Next, add the umami seasoning, and mix to incorporate.
Decrease the heat to medium and let the cauliflower “wilt”. This may take 8-10 minutes. Mix everything from time to time.
Place the cast iron pan into the oven and roast until the top is golden brown. This will take about 15 minutes. Let cool for 10 minutes or so before serving. Enjoy!
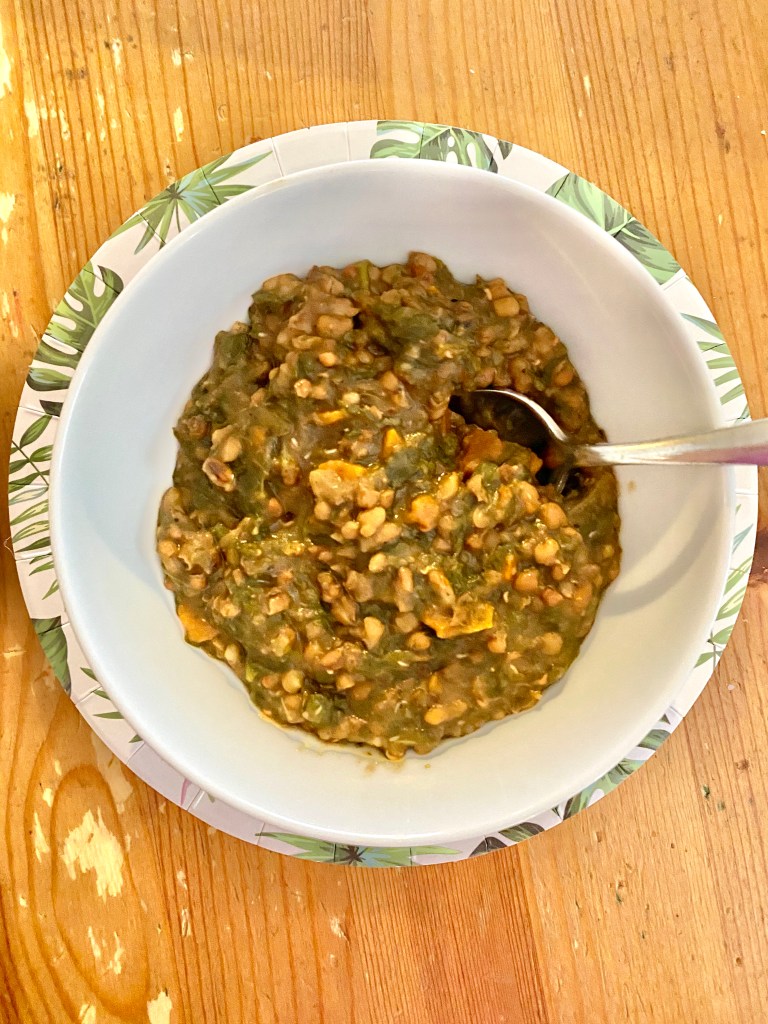
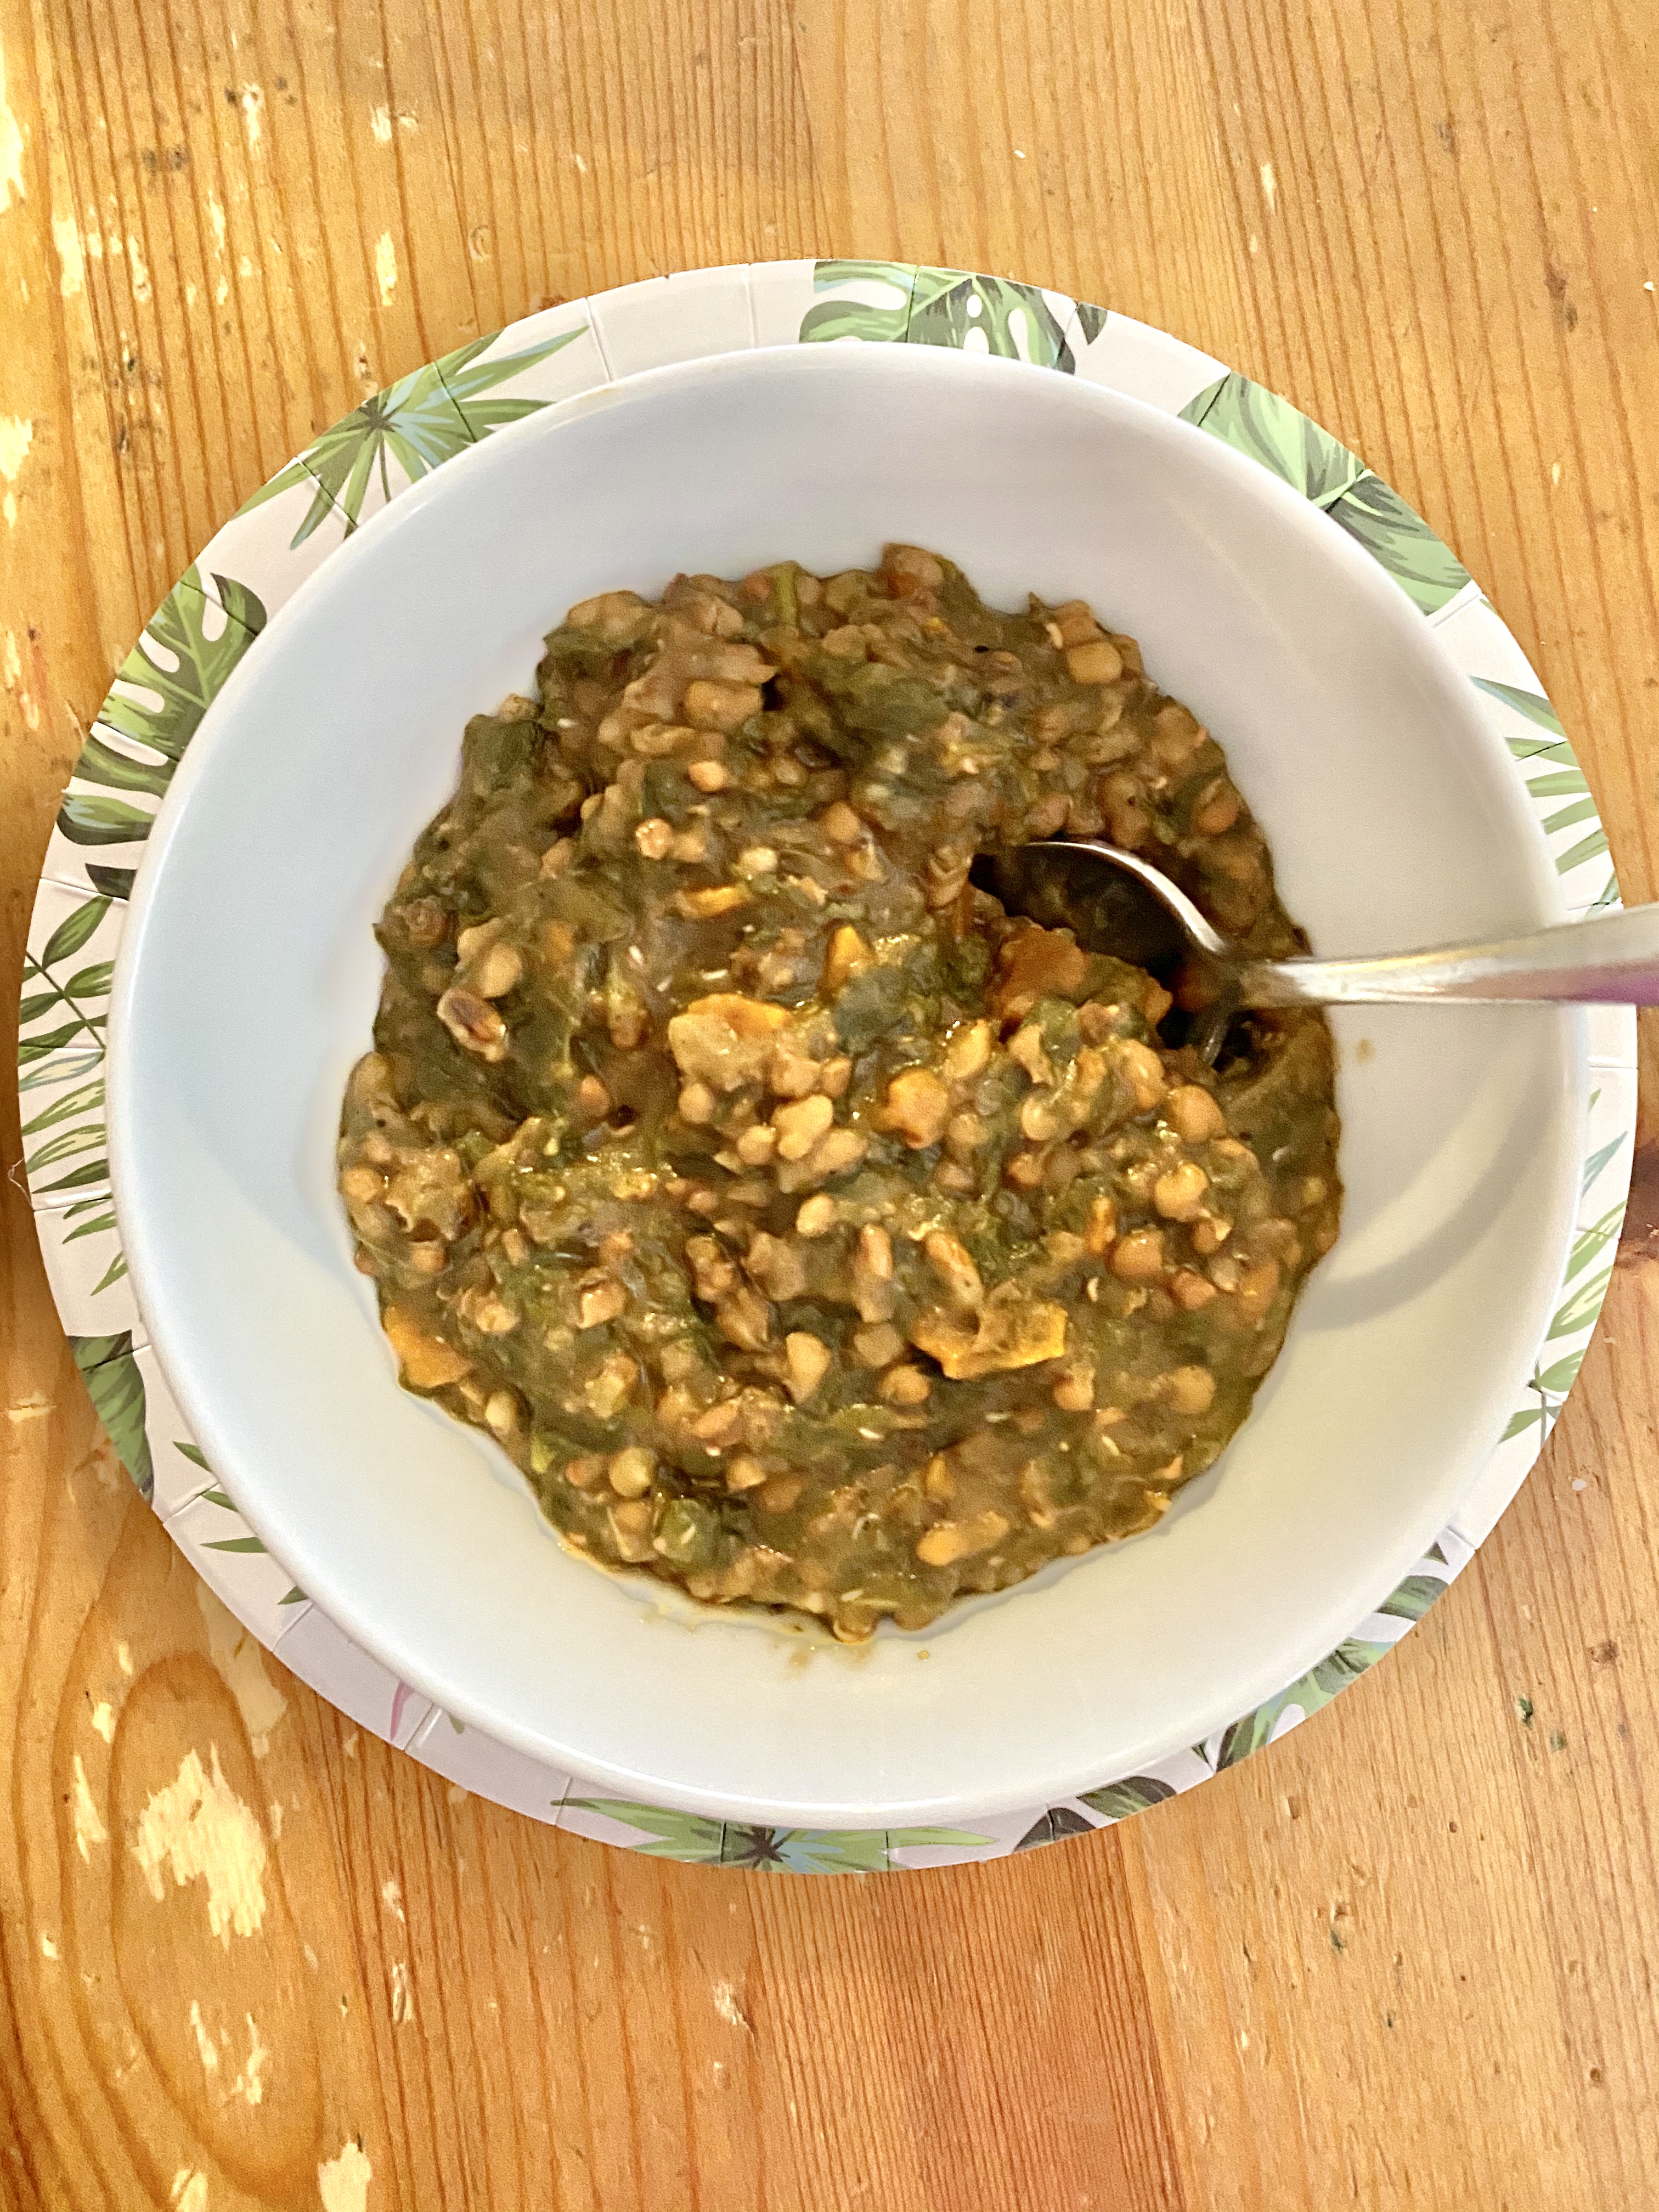
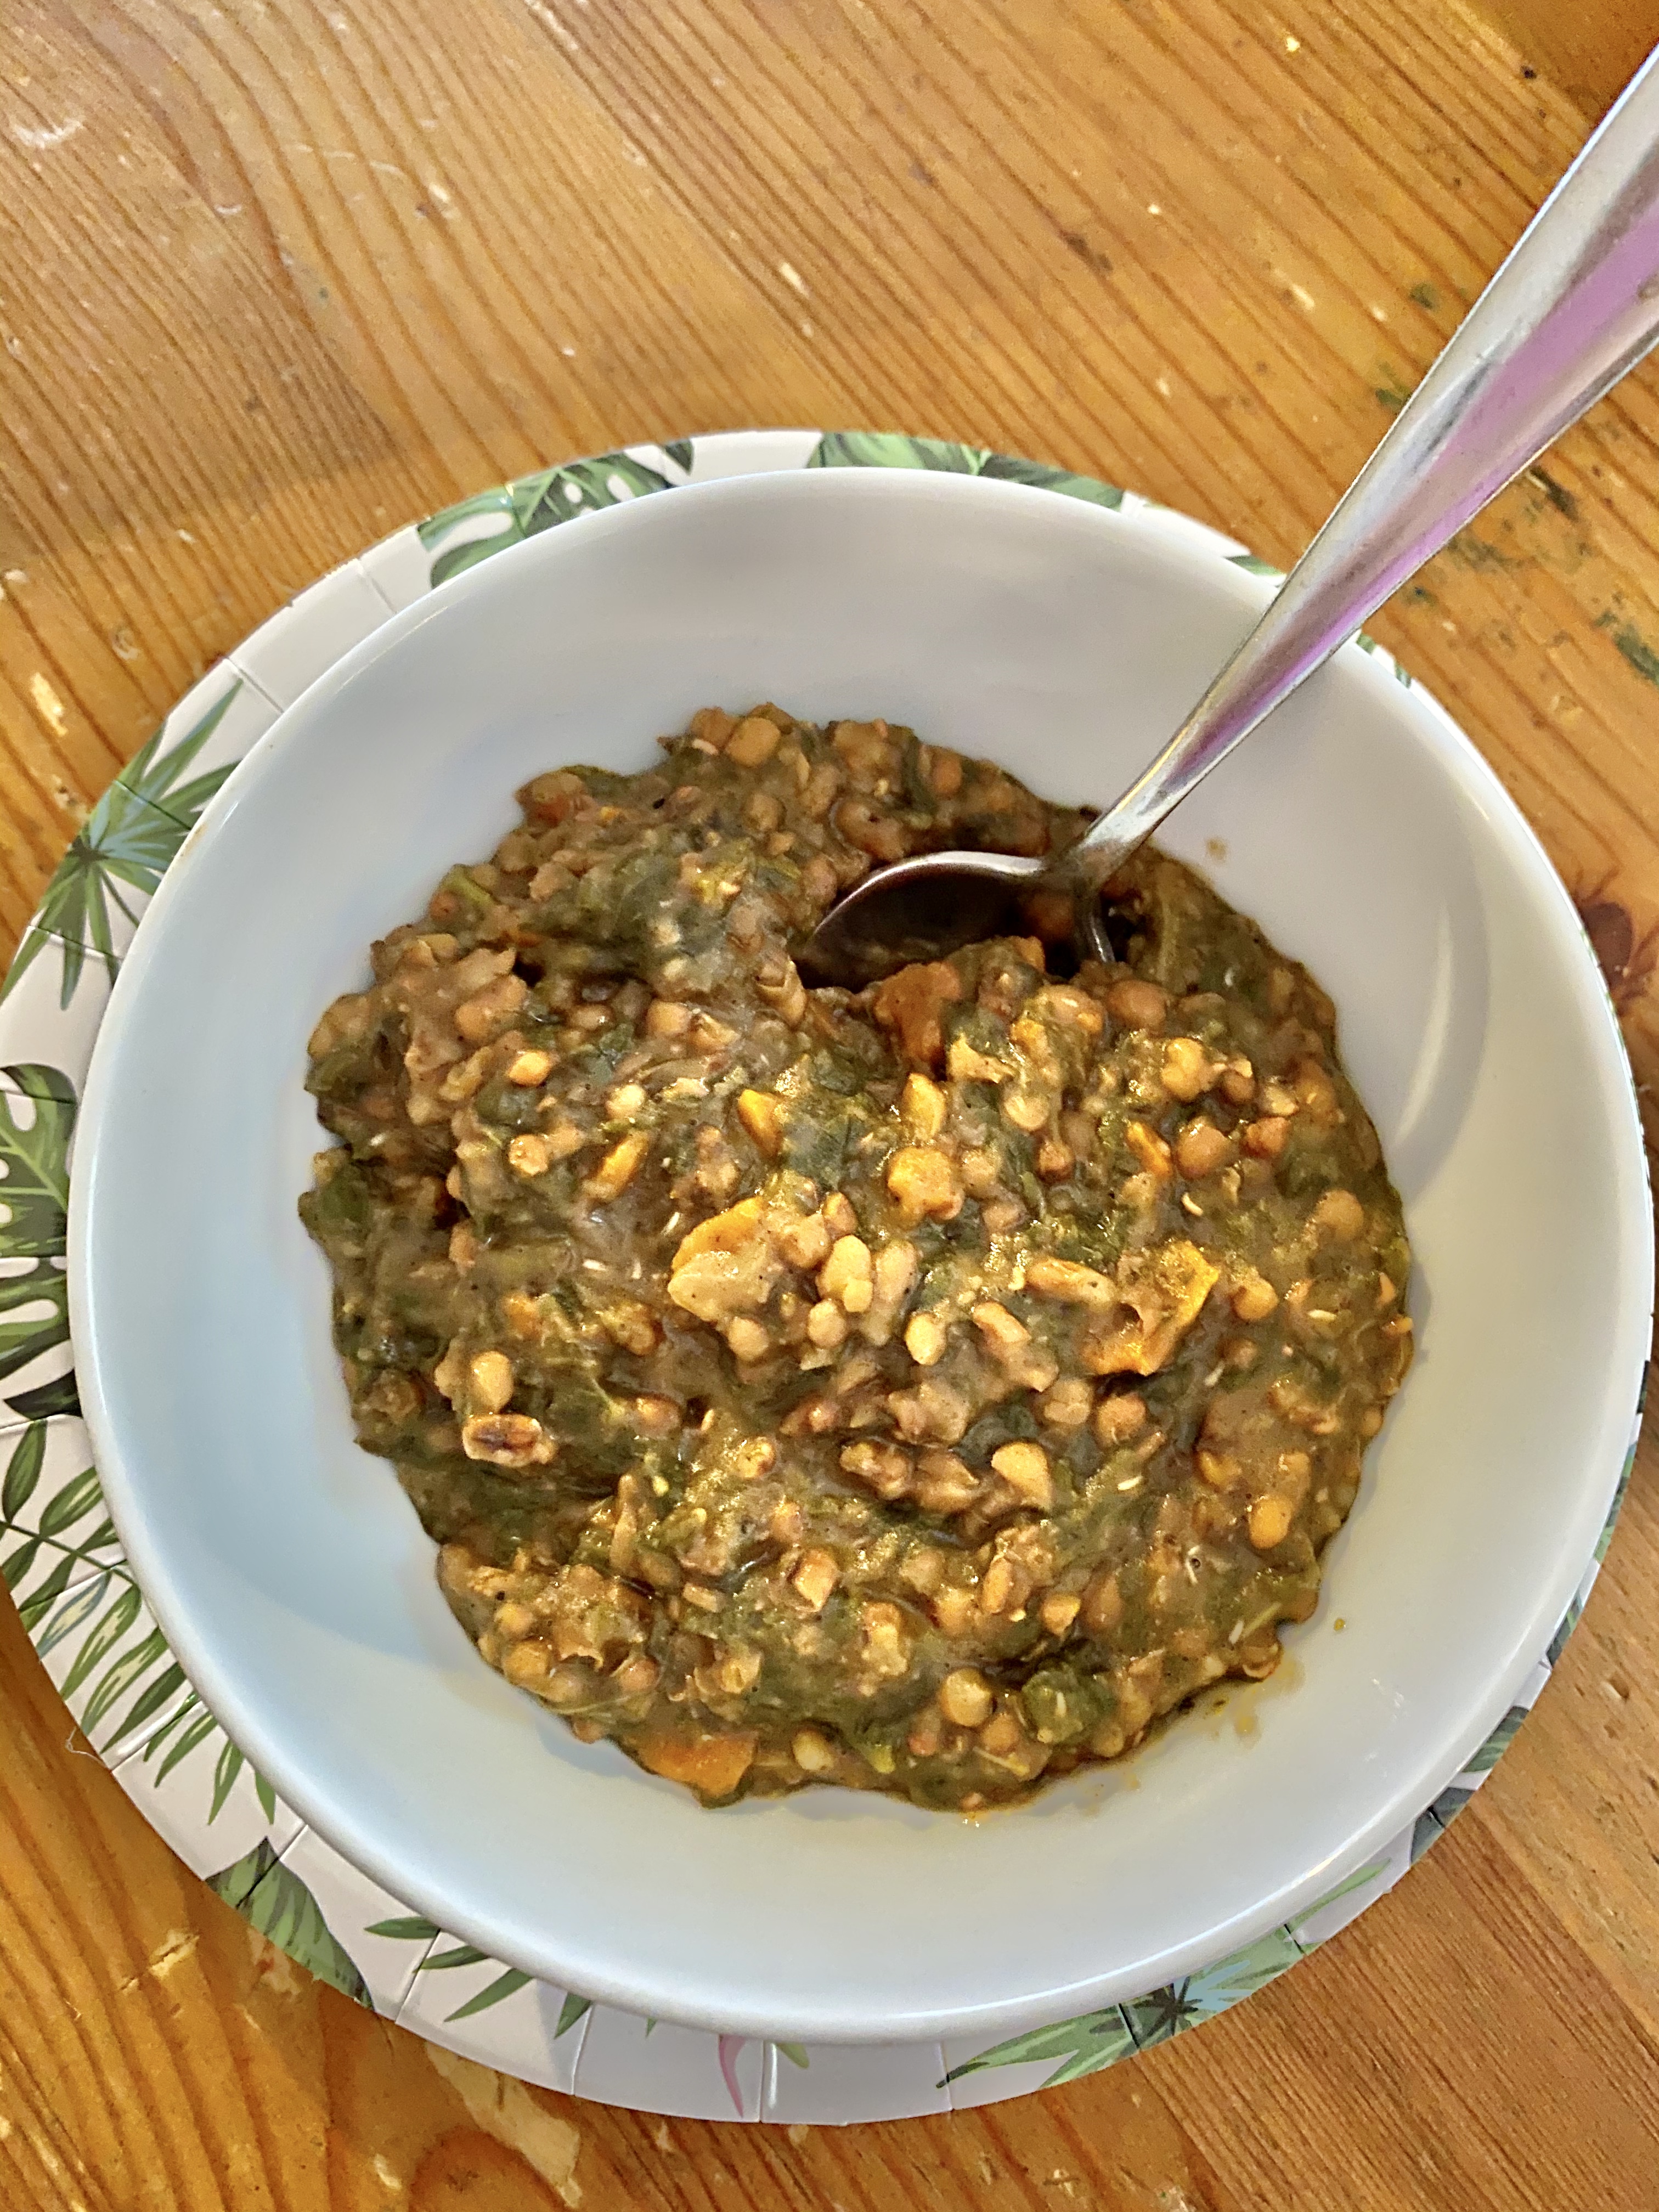
Moth Beans with Spinach, via Eat the Vegan Rainbow
Beans come in many different shapes and sizes. Moth beans are probably the smallest bean variety I ever dealt with. But, their nutritional value and taste run large, so I hope you give them a try.
Enjoy!
Moth Bean Stew with Spinach – Pressure Cooker Recipe
What you’ll need:
1/2 yellow onion, diced
3 large carrots, washed, peeled and finely sliced
3 stalks celery, washed and finely sliced
2 cups moth beans, dry, rinsed (if you are using a pressure cooker you can skip pre-soaking; otherwise pre-soak for at least 6 hours, then drain and rinse before cooking)
1 lbs (454 g) spinach, fresh or frozen
4 cups water
1 tablespoon oil (canola, sunflower or similar)
1 tablespoon garlic powder
1 tablespoon dry mango powder, usually found in speciality stores or international food isle (or replace with a tablespoon of lime or lemon juice)
2 tablespoons garam masala (or cumin powder)
1/2 teaspoon of salt (or salt to taste)
What you’ll do:
Turn your electric pressure cooker to Sauté option. If you don’t have a pressure cooker or if your pressure cooker does not have this option, place a pan over medium high heat and sauté onions, celery and carrots for 5-10 minutes, until softened and slightly browned. If you are following oil-free diet, sauté on water. Otherwise, you can use a tablespoon of oil for this.
Next, add the beans, spinach and water. Close the pressure cooker and select Bean/Chili option. If you presoaked the beans, the cooking time will be about 15-20 minutes, if you skipped presoaking the cooking time will be about 30 minutes. If you don’t have a pressure cooker, you can continue to cook the beans on the stove top. It will take 1 hour or so, if working with presoaked bean.
After the pressure cooker cycle is done, let the pot depressurize, them open the lid and mix the beans. To the beans add the toasted spice mix.
To toast the spice mix, bring a frying pan over the high heat. Add the oil, then the spices (garam masala, dry mango powder, and garlic powder). Toast for 1-2 minutes, then add to the bean stew. Add the salt and mix well, to incorporate. Let the beans cool just slightly before serving. These beans are delicious with some rice or quinoa!
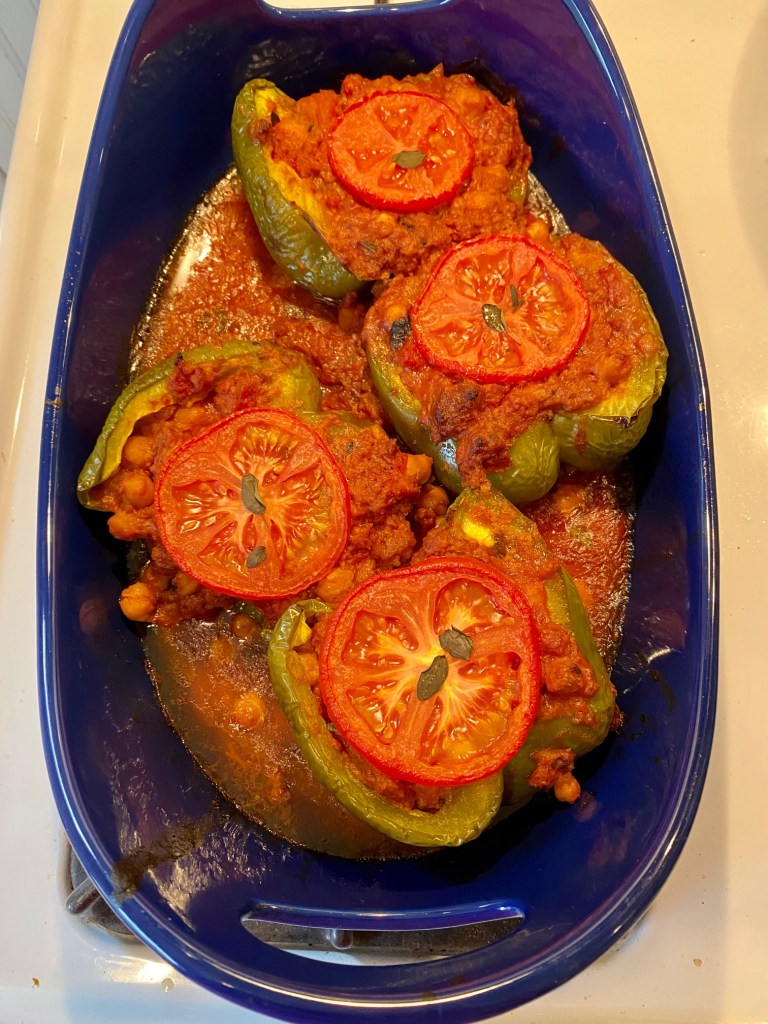
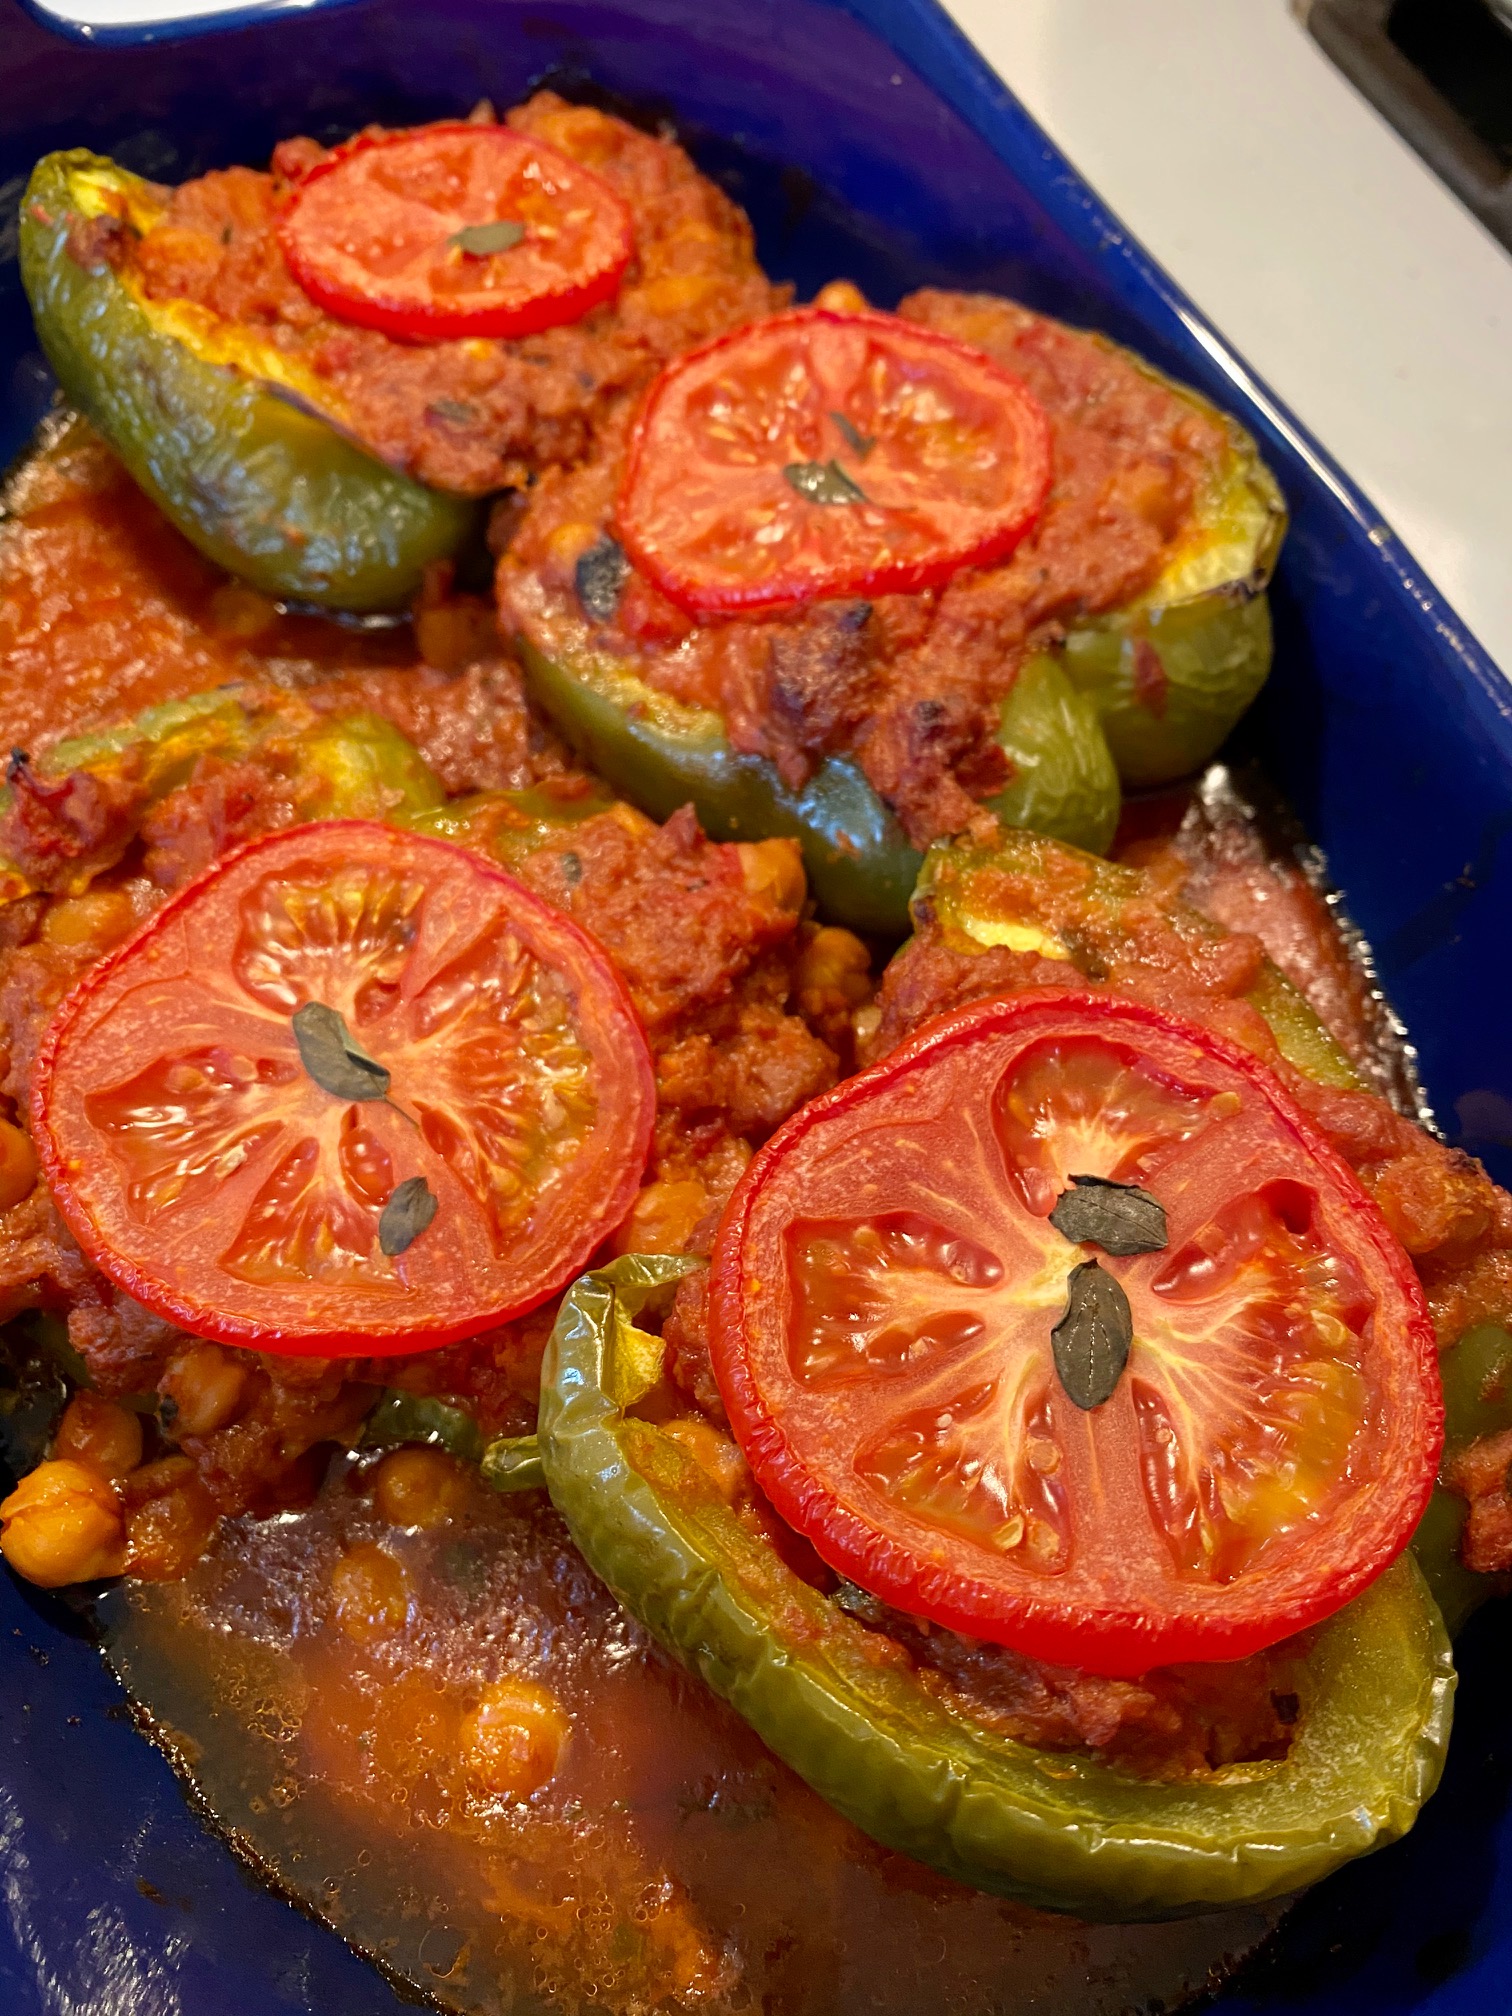
Ground “Beef” and Chickpea Stuffed Peppers, via Eat the Vegan Rainbow
Give these stuffed peppers a try – they are easy and simple to make, and very satisfying. I can’t promise that the youngsters in your live will will be thrilled with them, but I hope you’
Ground “Beef” and Chickpea Stuffed Peppers
(serves 2-4)
What you’ll need:
2 large stuffing peppers, split lengthwise, seeds removed
1/2 lbs (225 g) ground beef substitute (store bought or home made)
2 tablespoons tomato paste
1 14.5 oz (411 g) can stewed tomatoes (or diced tomatoes)
Wash the peppers and split them lengthwise. Remove the seeds and devein the halves, then place in the oven safe baking dish, cut side down. Roast for 10-15 minutes until soft. Edges will be slightly browned. Take out of the oven and let cool just slightly to allow you to handle them.
Lower the heat in the oven to 375 F (190 C).
While the peppers are roasting, place a large pan (cast iron pan preferred but not required) over the medium high heat. Add the oil and the ground beef substitute. Brown the “beef” for 8-10 minutes.
When the “beef” is browned, add the tomato paste, stewed tomatoes, and the chickpeas. Mix well, lower the heat to medium-low and sauté for another 5-10 minutes.
Turn the heat off, then add the chopped oregano and basil, and mix well.
Flip the roasted peppers over, and fill them generously with the ground “beef” and chickpea stuffing. Add any leftover stuffing and the water to the bottom of the baking dish.
Optional: top each pepper with a slice of fresh tomato and perhaps a fresh oregano and/or basil.
Optional: drizzle olive oil on top.
Place the peppers back into a 375 F (190 C) oven and bake for 30-40 minutes, or until the peppers are softened and the top of the stuffing is nice and deeply browned.
Take the stuffed peppers out, let them rest for 10 minutes before serving with your favorite salad, maybe some freshly baked bread, a dollop of sour cream or yogurt… Enjoy!
Quinoa Broccoli Casserole, via Eat the Vegan Rainbow
Casseroles are pretty dull, right? I mean: nobody every looks forward to a casserole. Plus: they come in some very weird combinations – tuna casserole, anyone?
Ok, all joking and jabbing aside, casseroles are not my favorite. But: they are super-convenient, one-pot recipes that come together with ease and feed the family. So, they definitely deserve their place on the table, and in busy home cook kitchen and recipe collection.
Usually, casseroles need a lot of eggs, cheese and similar to keep them together. This recipe, on the other hand, uses quinoa – a wonderful grain-like, protein rich ingredient. If quinoa you are using is not processed in any way, you will need to rinse it really well to remove bitter compounds called saponins that cover its surface. As their name suggests, saponins are soap-like compounds, so you need to rinse quinoa out until it stops foaming. Once quinoa is rinsed, cook it using 1 1/2 cups of water per 1 cup of quinoa. You can also use stock, but water works just as well!
The casserole recipe below was inspired by Alton Brown and his Quinoa and Broccoli Casserole – but I took a lot of liberties to adjust for my current pantry and vegan style of cooking. Those of you who are not vegan, you may want to check Mr. Brown’s recipe!
Quinoa Broccoli Casserole, via Eat the Vegan Rainbow
Place a heavy, oven-safe pan (I prefer cast iron pan) over the medium-high heat. Add the oil and onion, and sauté until onions are lightly browned. This will take about 5 minutes
Add the garlic and sauté for about a minute.
Mix in the mustard and the spices. Stir well, and continue to sauté for 2-3 minutes.
In a large mixing bowl, mix the cooked quinoa, sliced artichoke hearts, steamed or defrosted broccoli florets, nutritional yeast and tapioca starch. Add the sautéd onion, garlic and spice mix, and stir everything together. Pour back into the cast iron pan, spread around to even the mixture, and spray the top with some cooking spray if using.
Place in the oven, and bake for 30-40 minutes.
Take the casserole out of the oven, and let rest for 15 minutes before serving. Enjoy!
This is it, I suppose! At this time of social distancing (and, yes, there is a pandemic going on and yes, if you are not social distancing as much as you can and making light of all this you are in self-denial; and yes, if you think that COVID-19 cases will magically disappear by Easter you are in double self-denial) it is time to get creative with things you may have in your pantry and things you may be able to get from your grocery store.
So, for the next few months what you’ll get here are recipes that are super simple, mostly one pot, and include ingredients like rice, beans, potatoes, carrots, corn, onions… We are back to basics here, like this Italian cuisine inspired Rice and Beans I shared last week!
I will also keep thing brief and to the point. More cooking, less talking! So, here we go: this week I am sharing a wonderful dish that is really all about potatoes. All you need is some onion, garlic, carrots, potatoes and coconut milk or cream. And if you don’t have coconut milk on hand, your can use coconut oil, or a bit of butter (vegan, if you are vegan, or any other kind if you are not – I am totally non-judgmental of people and their food choices and I hope all can just enjoy the meal) and some milk or cream (again: which kind is up to you). The main point of adding coconut milk is to create a rich stew that’s smooth, silky and dense – something that will fill you up and provide some good old comfort in a bowl.
What makes this dish pop are spices! In this case we will be using curry powder and garam masala, two spices I recommend having on hand at all times! (I’m fresh out of curry powder, so that may be a spot of bother to be honest). If you don’t have these, you may want to add a bit of cumin powder and a bit of paprika, or just a bit of nutmeg, a hint of cinnamon, or a dash of allspice. Any combination of these may work depending on your individual preferences, so if you are improvising the best advice I can give you is to follow your nose!
Lastly, I recommend using a heavy pot for this. My go-to is a Dutch oven, but any heavy pot will do. Take care, eat well, pamper yourself and stay well!
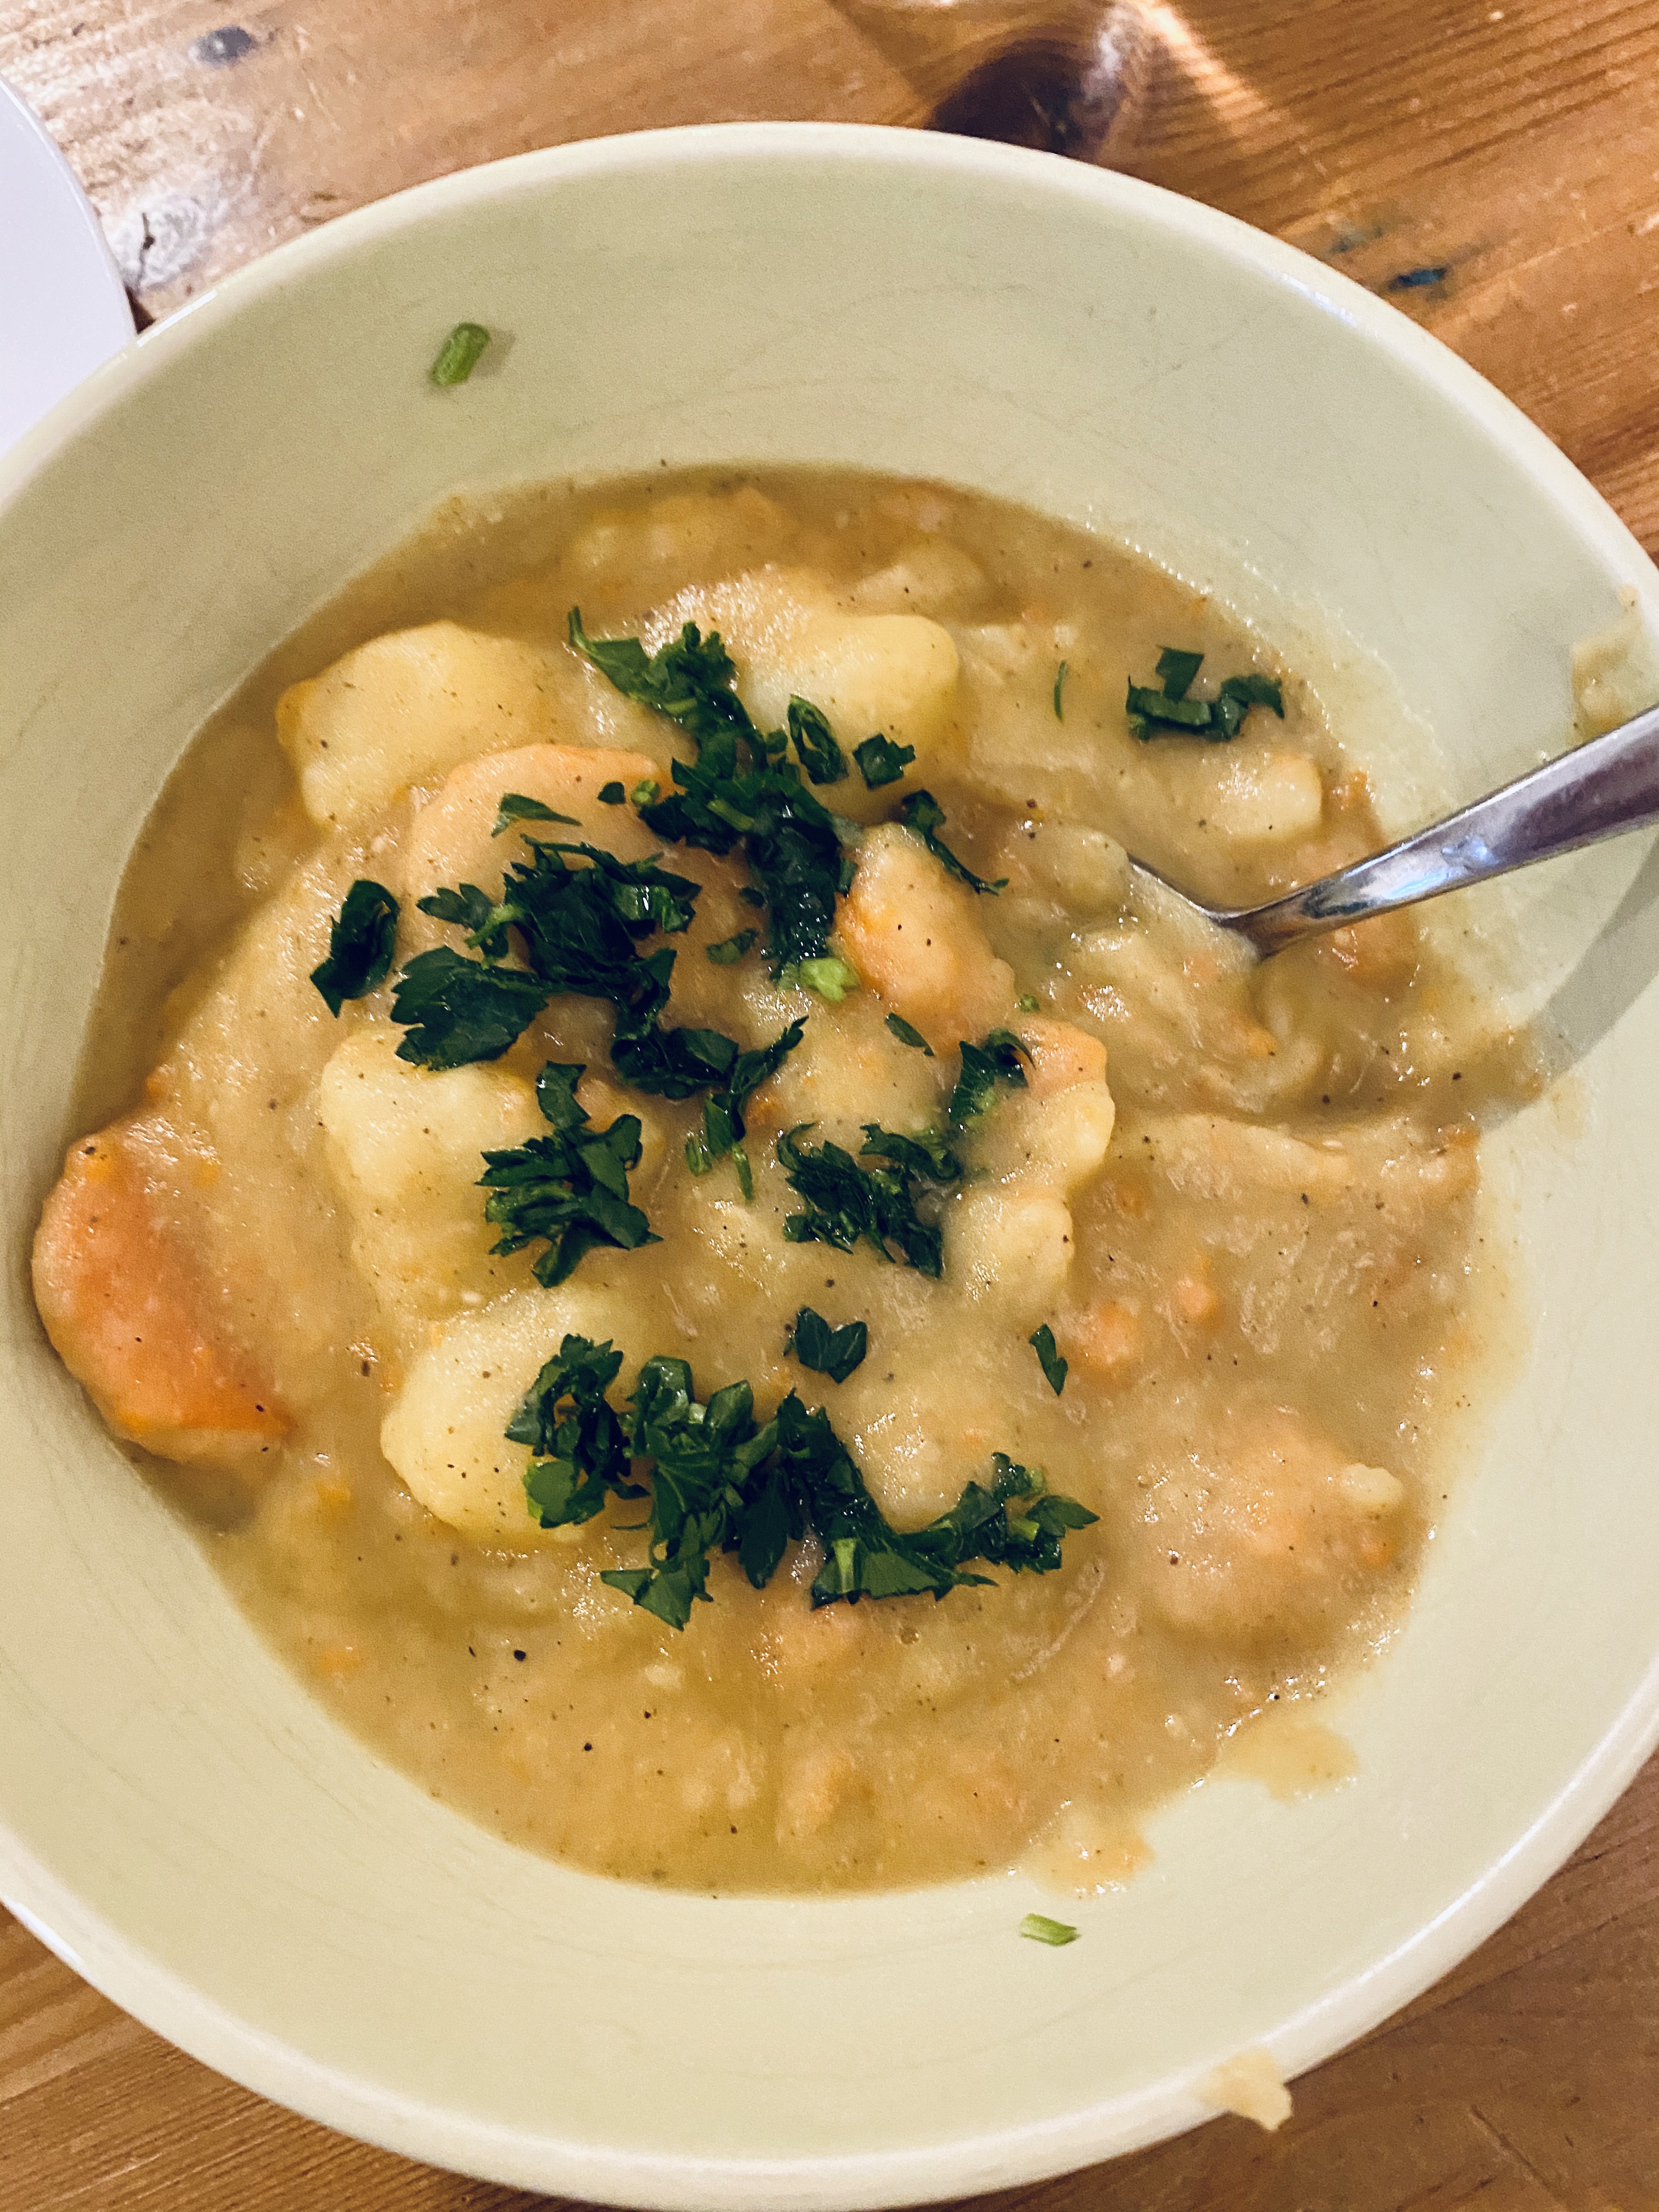
Curried Potato Stew, via Eat the Vegan Rainbow
Curried Potato Stew
What you’ll need:
4-5 large potatoes (I prefer Russet, but any more starchy variety will do), washed, peeled and cut into 1 inch (2.5 cm) cubes
4 large carrots, washed and sliced into carrots rings (if you have a 8+ year old kid who needs something to do during this period of no school they can help chop potatoes and carrots)
1 yellow onion, diced
3-4 cloves garlic, minced
1 13.5 – 14 oz (about 400 ml) can coconut milk or cream (alternatively, 1 cup of cream, or 1 cup of milk plus 2 tablespoons of butter will work)
1 tablespoon curry powder
2 teaspoons garam masala powder
water – enough to deglaze the pan (see step one below) and cover your vegetables (step 3)
optional toppings – freshly chopped cilantro or parsley, freshly squeezed lemon or lime juice (or if lemons or limes are not within an easy reach you may want to add a small amount of clear vinegar (red wine, apple cider, white or rice will all work here, not sure about balsamic), and a drop or two of hot sauce
What you’ll do:
Place your heavy pot over the high heat and add your onions, carrots and garlic to the pot. You may use some oil if you are using, but you don’t really need to. You will be adding lots of fat later (with all that coconut milk/cream or milk/cream/butter alternatives). Stir frequently to prevent veggies from sticking to the bottom of the pan. Add some water (in 1/4 cup increments or so) to deglaze the bottom from time to time. Brown the vegetables for about 5 minutes.
Add the potatoes, coconut milk (or alternatives) and spices. Mix well and let cook like this with frequent stirring for 2-3 minutes.
Add enough water to cover the vegetables well, bring to boil, then lower the heat to a simmer, cover with a lid and let simmer for 20-30 minutes until all the vegetables are cooked through. The exact time will depend on how finely you’ve chopped your vegetables!
Once the veggies are cooked, use a stick blender to blend approximately half of the pot into a smooth, silky mix (you can also use a blender to do this, or even your potato masher).
Serve hot in a bowl, topped with any, all or none of the topping listed above. Enjoy!
Here where I live, and I imagine where you live too, schools have been closing, events are being cancelled, and most people are advised to work from home and stay away from large gatherings (where I work, we are down to less than 25 people). It’s called social distancing and it is one of the strategies that can help reduce the impact of COVID-19.
In these times of uncertainty and anxiety many will turn to comfort food (I’ve already seen posts about people getting into their Nutella reserves!). And: many will turn to their pantry for the ingredients. So, this recipe is made for such a day, when you want to make something really comforting and filling with things you likely already have on hand: rice and beans.
The recipe here was inspired by an old Italian favorite called Pasta e Fagioli – a pasta and bean soup/stew that is absolutely delicious. This time around I wanted to replace pasta with rice, and see where we end up. Where things ended up was a really rich, and dense stew/casserole dish, with a lot of rich flavors working in harmony!
I took one shortcut to make putting everything together easier and used canned white beans, also known as cannellini beans. Beans are a great source of plant protein and I always have a good supply of canned beans in my pantry. White (cannellini) beans are a fantastic basic bean, and I use them in many different ways, for example in burgers, pasta sauces, or soups. I also used them to make a marvelous mushroom pâté!
If you have dry beans, please remember to soak them overnight before cooking. I recommend that you cook beans first before using them in this stew. The amount of dry beans you need for this recipe is about 1 to 1 1/2 cup, however I recommend that you soak and cook a full batch (in my house that’s usually 1 lbs (about 500 g)), and use the leftover beans for something else, perhaps one of the recipes I listed above. This will save you some time and help with meal prep and batch cooking.
The dish itself is one-pot – all the ingredients go into a single pot, and the lovely meal comes out. Please note that the pot needs to be oven safe, as you will move the dish from the stove top into the oven. I recommend using a Dutch oven or another heavy and sturdy type of pot. If you don’t have such a thing, you can transfer your stew into an oven safe dish and proceed from there. Please note that the food will be very hot, and you can burn yourself badly if you are not careful!!!
Finally, you have options when it comes to rice. To keep things authentic, you may want to choose a short grain rice, like Arborio, as this will give you a creamier texture. However, you don’t need to lose any sleep over the rice choice here and use whatever you have on hand. As you can tell from my pictures, I used a very long grain rice known as Basmati rice, which is the staple I have in my pantry.
Note: When combined with rice, beans make a complete protein (meaning includes all the essential amino acids that we need), just in case you were wondering. In general, if you eat a varied plant-based diet, you really don’t need to stress over whether you are getting enough protein and whether it is complete, because the quick answer to this is: Yes, you are! Plants have plenty of protein, and people eating fruits, vegetables, nuts, legumes, and whole grains are all set.
Italian Rice and Beans, via Eat the Vegan Rainbow
Italian Rice and Beans – Riso e Fagioli (Oil Free)
What you’ll need:
1 cup rice, washed and rinsed
1/2 yellow onion, diced
1 sweet pepper, diced (any color or type provided it’s not hot; you can also used frozen)
2/3 cup tomato paste
1 14.5 oz (400 g) can diced tomatoes
2 15.5 oz (440 g) can white (cannellini) beans, drained and rinsed
Place the Dutch oven over medium high heat. Add the diced onions and dry sauté until soft and slightly browned. You may need to add some water to prevent onions from sticking to the bottom of the pot and burning. Keep stirring! (Note: If you are OK with using oil in your cooking, you can sauté the onion in some olive oil – 1 tablespoon should be sufficient).
Add the diced peppers, and continue sautéing for another 5 minutes, with frequent stirring, until peppers soften.
Once the peppers are softened, add the tomato paste and mix well. Let the tomato paste bloom for 1-2 minutes with frequent stirring.
Add the rice, beans, herbs, water, and diced tomatoes. Stir well and let come to boil, then transfer into the oven and leave in there for 30 minutes.
Take rice and beans out of the oven and enjoy! I recommend topping each plate with some fresh basil, and if you are not entirely oil-free with a drizzle of good olive oil and/or some parmesan (vegan, for those who are vegan or regular if you are a vegetarian or transitioning to plant-based diet), or some nutritional yeast (that’s my guilt-free favorite!!!). A simple side salad will complete this nicely, but if you are out of fresh produce due to social distancing, a pickle may work just as well!
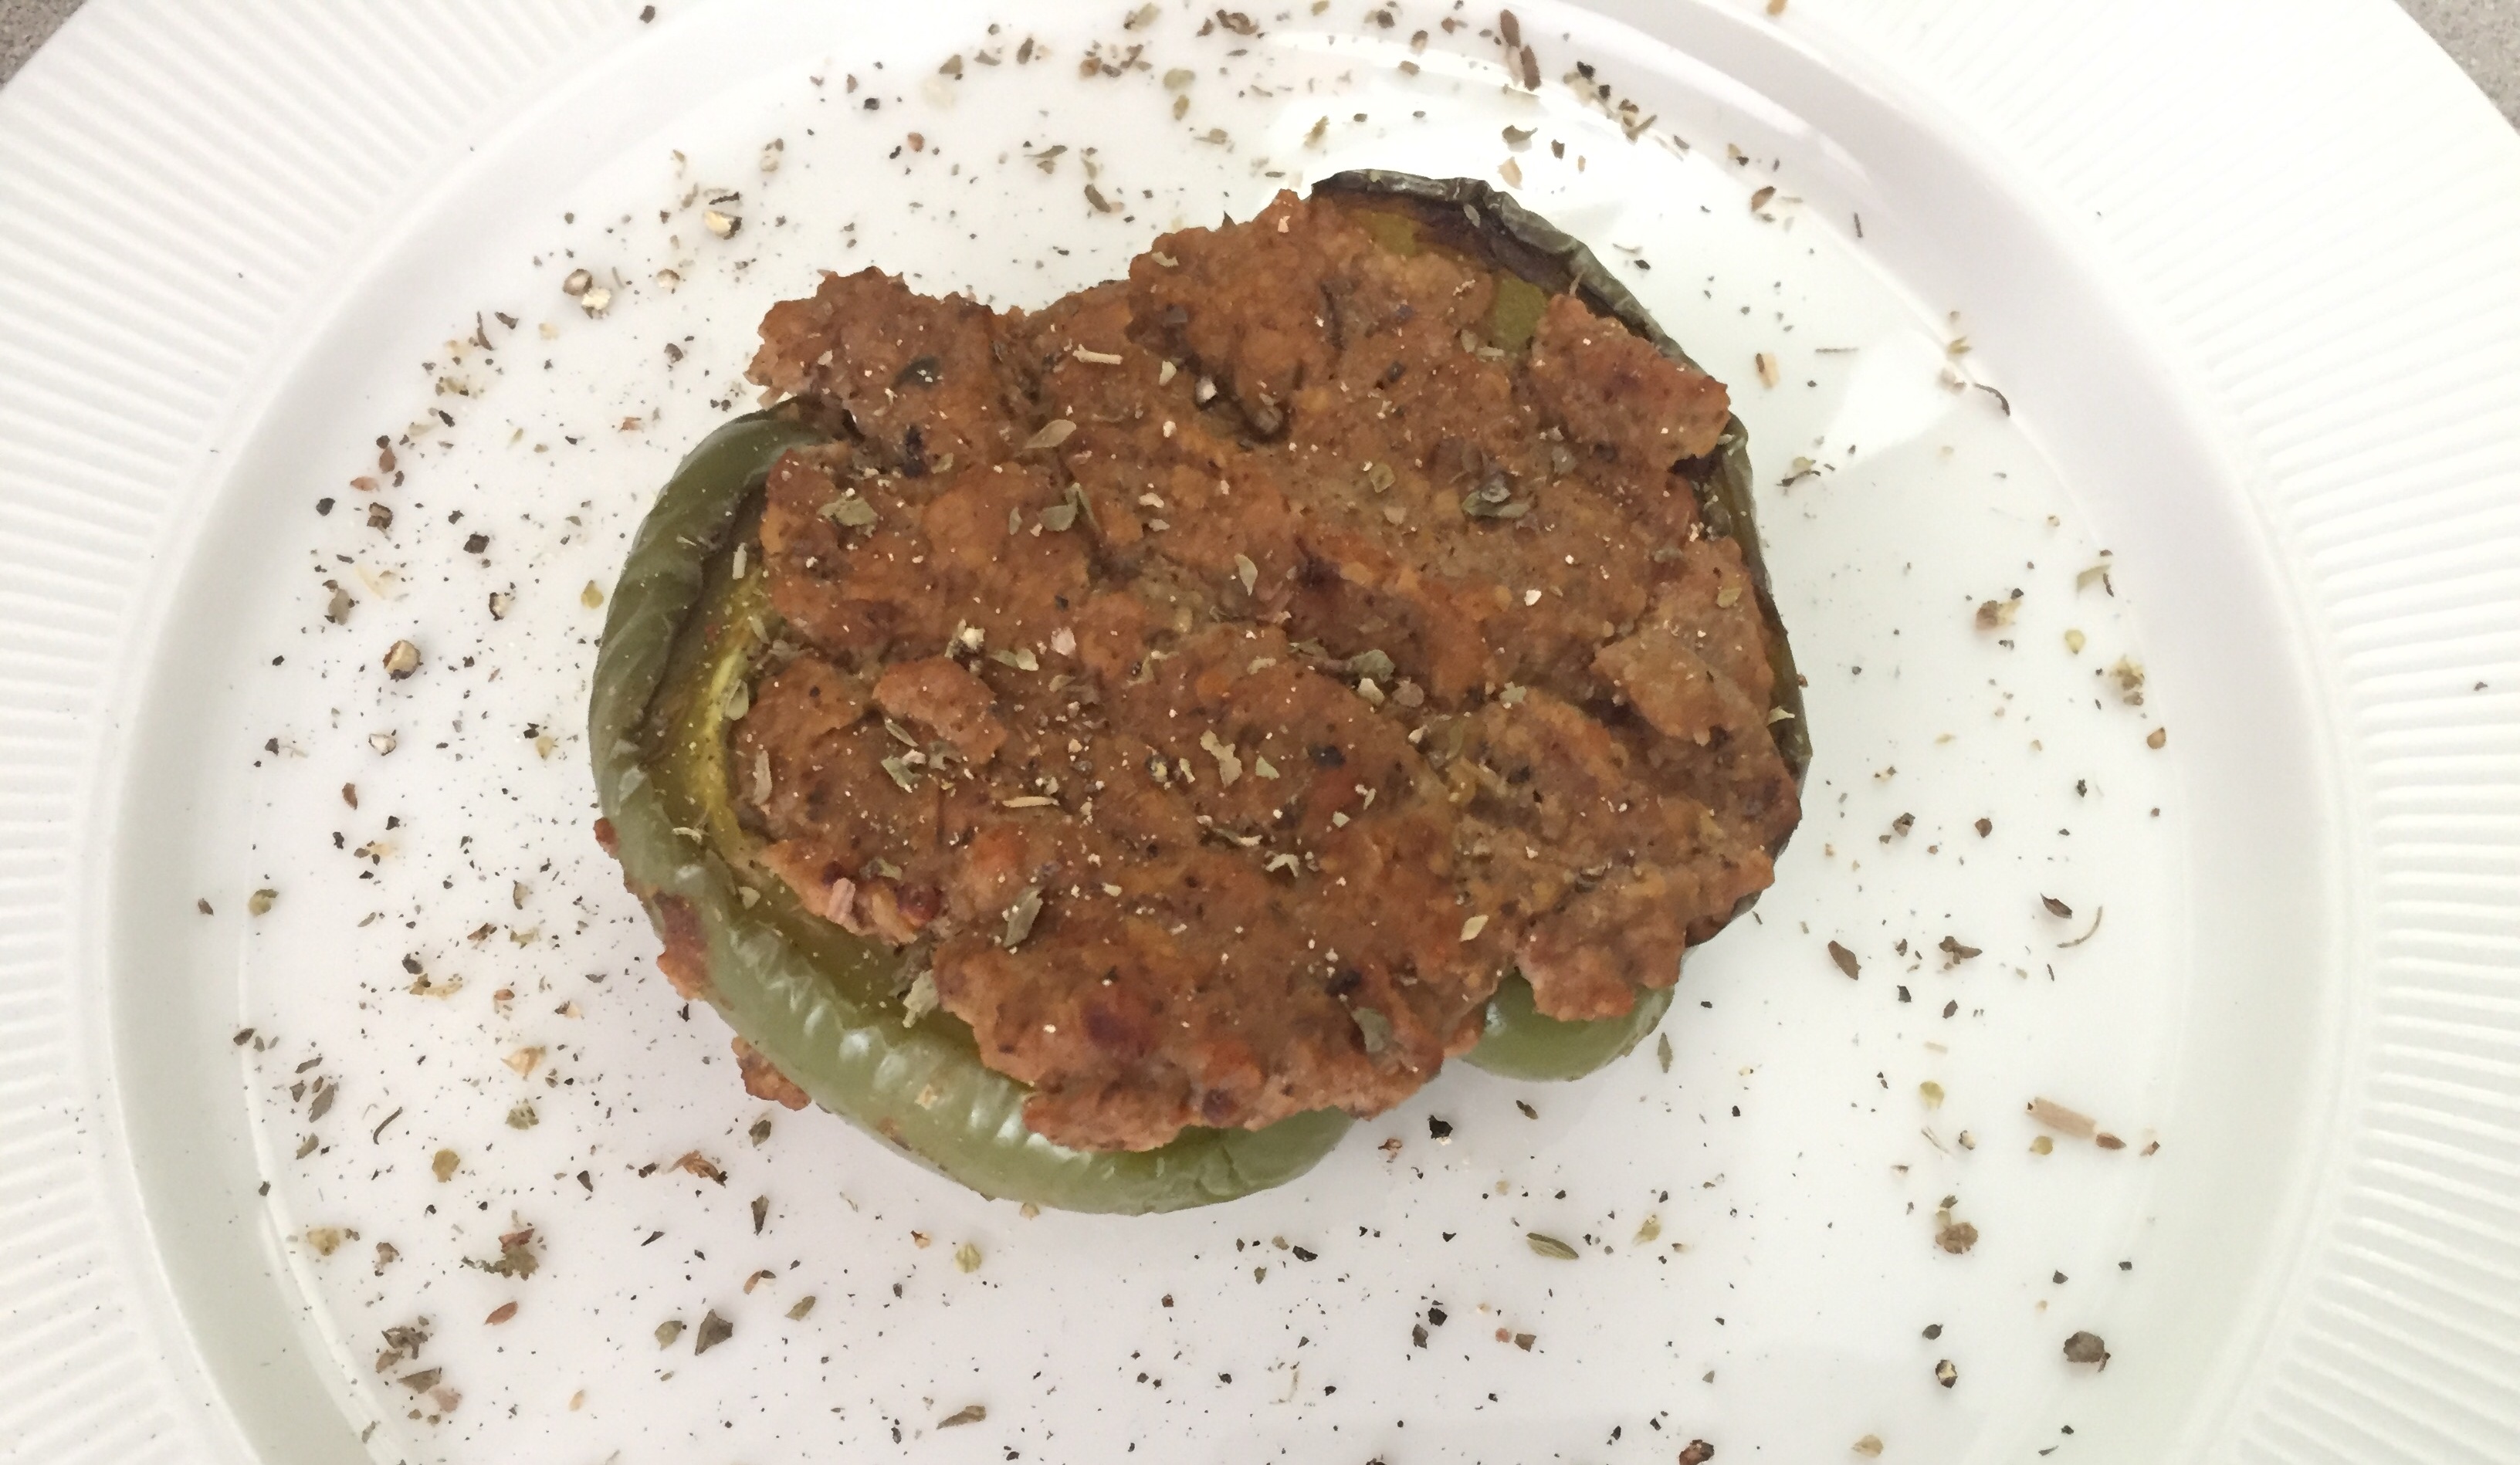
Nice, big bell peppers are perfect for stuffing, which makes them versatile. There are numerous types of stuffing you can choose from, and I’ve shared a couple in the past, like a simple rice based stuffing with pistachios, and one using a homemade beef substitute.
No matter which stuffing you choose there is one big tip for making the best stuffed peppers that are soft yet flavorful. I recommend that you par-roast the peppers (that’s like par boil but with roasting). The bell peppers I grew up with were less thick and if the peppers you get have thin flesh, this tip will not apply. But, here in US bell peppers are large and thick, and if you are to start from raw peppers that you stuff and roast you may end up with a pepper that is chewy and a bit rubbery. After some experimentation, I discovered that par-roasting the peppers before stuffing helps with all these issues.
What do I mean by par-roasting? It means roasting the peppers at high heat until they are only half way done, then using them in the rest of the recipe. The roasting will also help add a bit of a flavor to the peppers as their edges will brown. The pepper will finish cooking with the rest of the stuffing and be nice, soft and full of flavor.
I recommend slicing the peppers length-wise. That creates a nice boat to hold the stuffing. Also: when roasting the peppers I place them cut side down on the pan. This prevents liquid from pooling inside your pepper-boat, keeping the peppers dry and not mushy.
Now onto the stuffing. The key ingredient of the stuffing here is tempeh. Tempeh is made of soy, but unlike tofu it retains the whole grain, and it is dense and hard. If you want to soften the tempeh a bit you can place it into a pot of boiling water for a minute or two, but for this stuffing you don’t need to do that. By the way, tempeh is great for summer grilling, and as an ingredient for a fantastic taco filling!
The stuffing also uses sautéd onion and mushroom mix. I recommend sautéing these ingredients as I find raw onions hard to digest and sautéd mushrooms are much more flavorful. The recipe below also uses capers – pickled flower buds of the caper bush. Capers have a strong flavor and if you never head them before you may want to try a few before using them or if you can’t find them in the store where you live you can always add 1/4 cup of black or other olives. That will help boost the flavors as well.
The recipe also uses nutritional yeast. Nutritional yeast adds a bit of a nutty and cheese flavor to the dish and if you are looking for ways to substitute for nutritional yeast one suggestion I can make is to use some ground nuts, like almonds. Or you can use marmite or vegemite, which are both made from yeast extract that’s left over from brewing beer. A spoonful of miso paste may also work – but nutritional yeast will work best, so it’s worth tracking some down.
The stuffed peppers are best enjoyed with some sour cream or just a bit of melted cheese on top, and perhaps a simple side salad. That’s all you’ll need!
Tempeh Stuffed Peppers
What you’ll need:
4 bell (stuffing) peppers (any color)
8 oz (227 g) white button mushrooms or cremini (baby bella) mushrooms
1 yellow onion, diced
2 8 oz (227 g) packages of tempeh (plain a.k.a. original will work best)
1/4 cup nutritional yeast
1/4 cup capers (can be substituted by black or green olives, but not stuffed olives)
2 tablespoons soy sauce
1 tablespoon dried oregano
1 teaspoon garlic powder
1-2 tablespoons olive oil
Cooking spray
What you’ll do:
Preheat the oven to 425 F (220 C).
Line a large baking sheet with parchment paper or some aluminum foil.
Wash the peppers, dry them, then cut them in half lengthwise. Remove the stem and seeds. Place the peppers cut side down on the baking sheet. Put in the oven and roast for 15 minutes. The peppers should be moderately soft but not roasted all the way through. Take the peppers out and let them cool.
Lower the oven temperature to 350 F (175 C).
While the peppers are cooling, prepare the stuffing. First, place a frying pan over the medium-high heat, add the oil and diced onion. Sauté the onion until soft and slightly yellow on the edges (4-5 minutes), then add the mushrooms. Mix well and continue to sauté until mushrooms are done (an additional 4-5 minutes).
Place the tempeh, sautéd onions and mushrooms, nutritional yeast, capers, soy sauce and spices into a large food processor and process until well combined and mostly smooth. If you don’t have a large food processor you will need to do this in batches in which case mix everything together in a large bowl then process bit by bit.
Drain any liquid out of the semi-roasted bell peppers and place them hole side up into a deep baking dish. Spoon out the stuffing evenly among the peppers. Spray the tops with some cooking spray, cover with foil and bake for 25 minutes. Remove the foil, increase the heat to 375 F (190 C) and let the tops brown for another 10 minutes.
Let the peppers cool for couple of minutes before serving. These are great with some sour cream on top or with a light salad. Enjoy!
A slow cooker, also known as Crock Pot (which is a brand name I think), may seem like one of those kitchen gadgets that you’ll get, use once and forget. Although I use my slow cooker once a month or so, it is absolutely wonderful to have around. There have been many instances when my weekends were busier than my work days (and I do all my cooking on weekends) and slow cooker came to the rescue. I would set the thing up in the morning before I got out the door, and the dinner would be ready by the time I came back in the evening, warm and delicious!
For example, the recipe I am sharing here was the one I made for a dinner party – and everyone walked away with their bellies and taste buds completely happy!!! That’s another reason to get a slow cooker – it can really help with all those dinner parties and pot lucks. The crock pot serves not only to cook food but can hold food warm for hours.
My favorite thing to make in a crock post are sort of stews – hearty dishes with a handful of ingredients that are full of flavors and warmth. This jackfruit stew is a good example (and I also used jackfruit to make a “chicken” tikka masala in a slow cooker as well as BBQ pulled pork), as is this tofu-mango-chickpea curry.
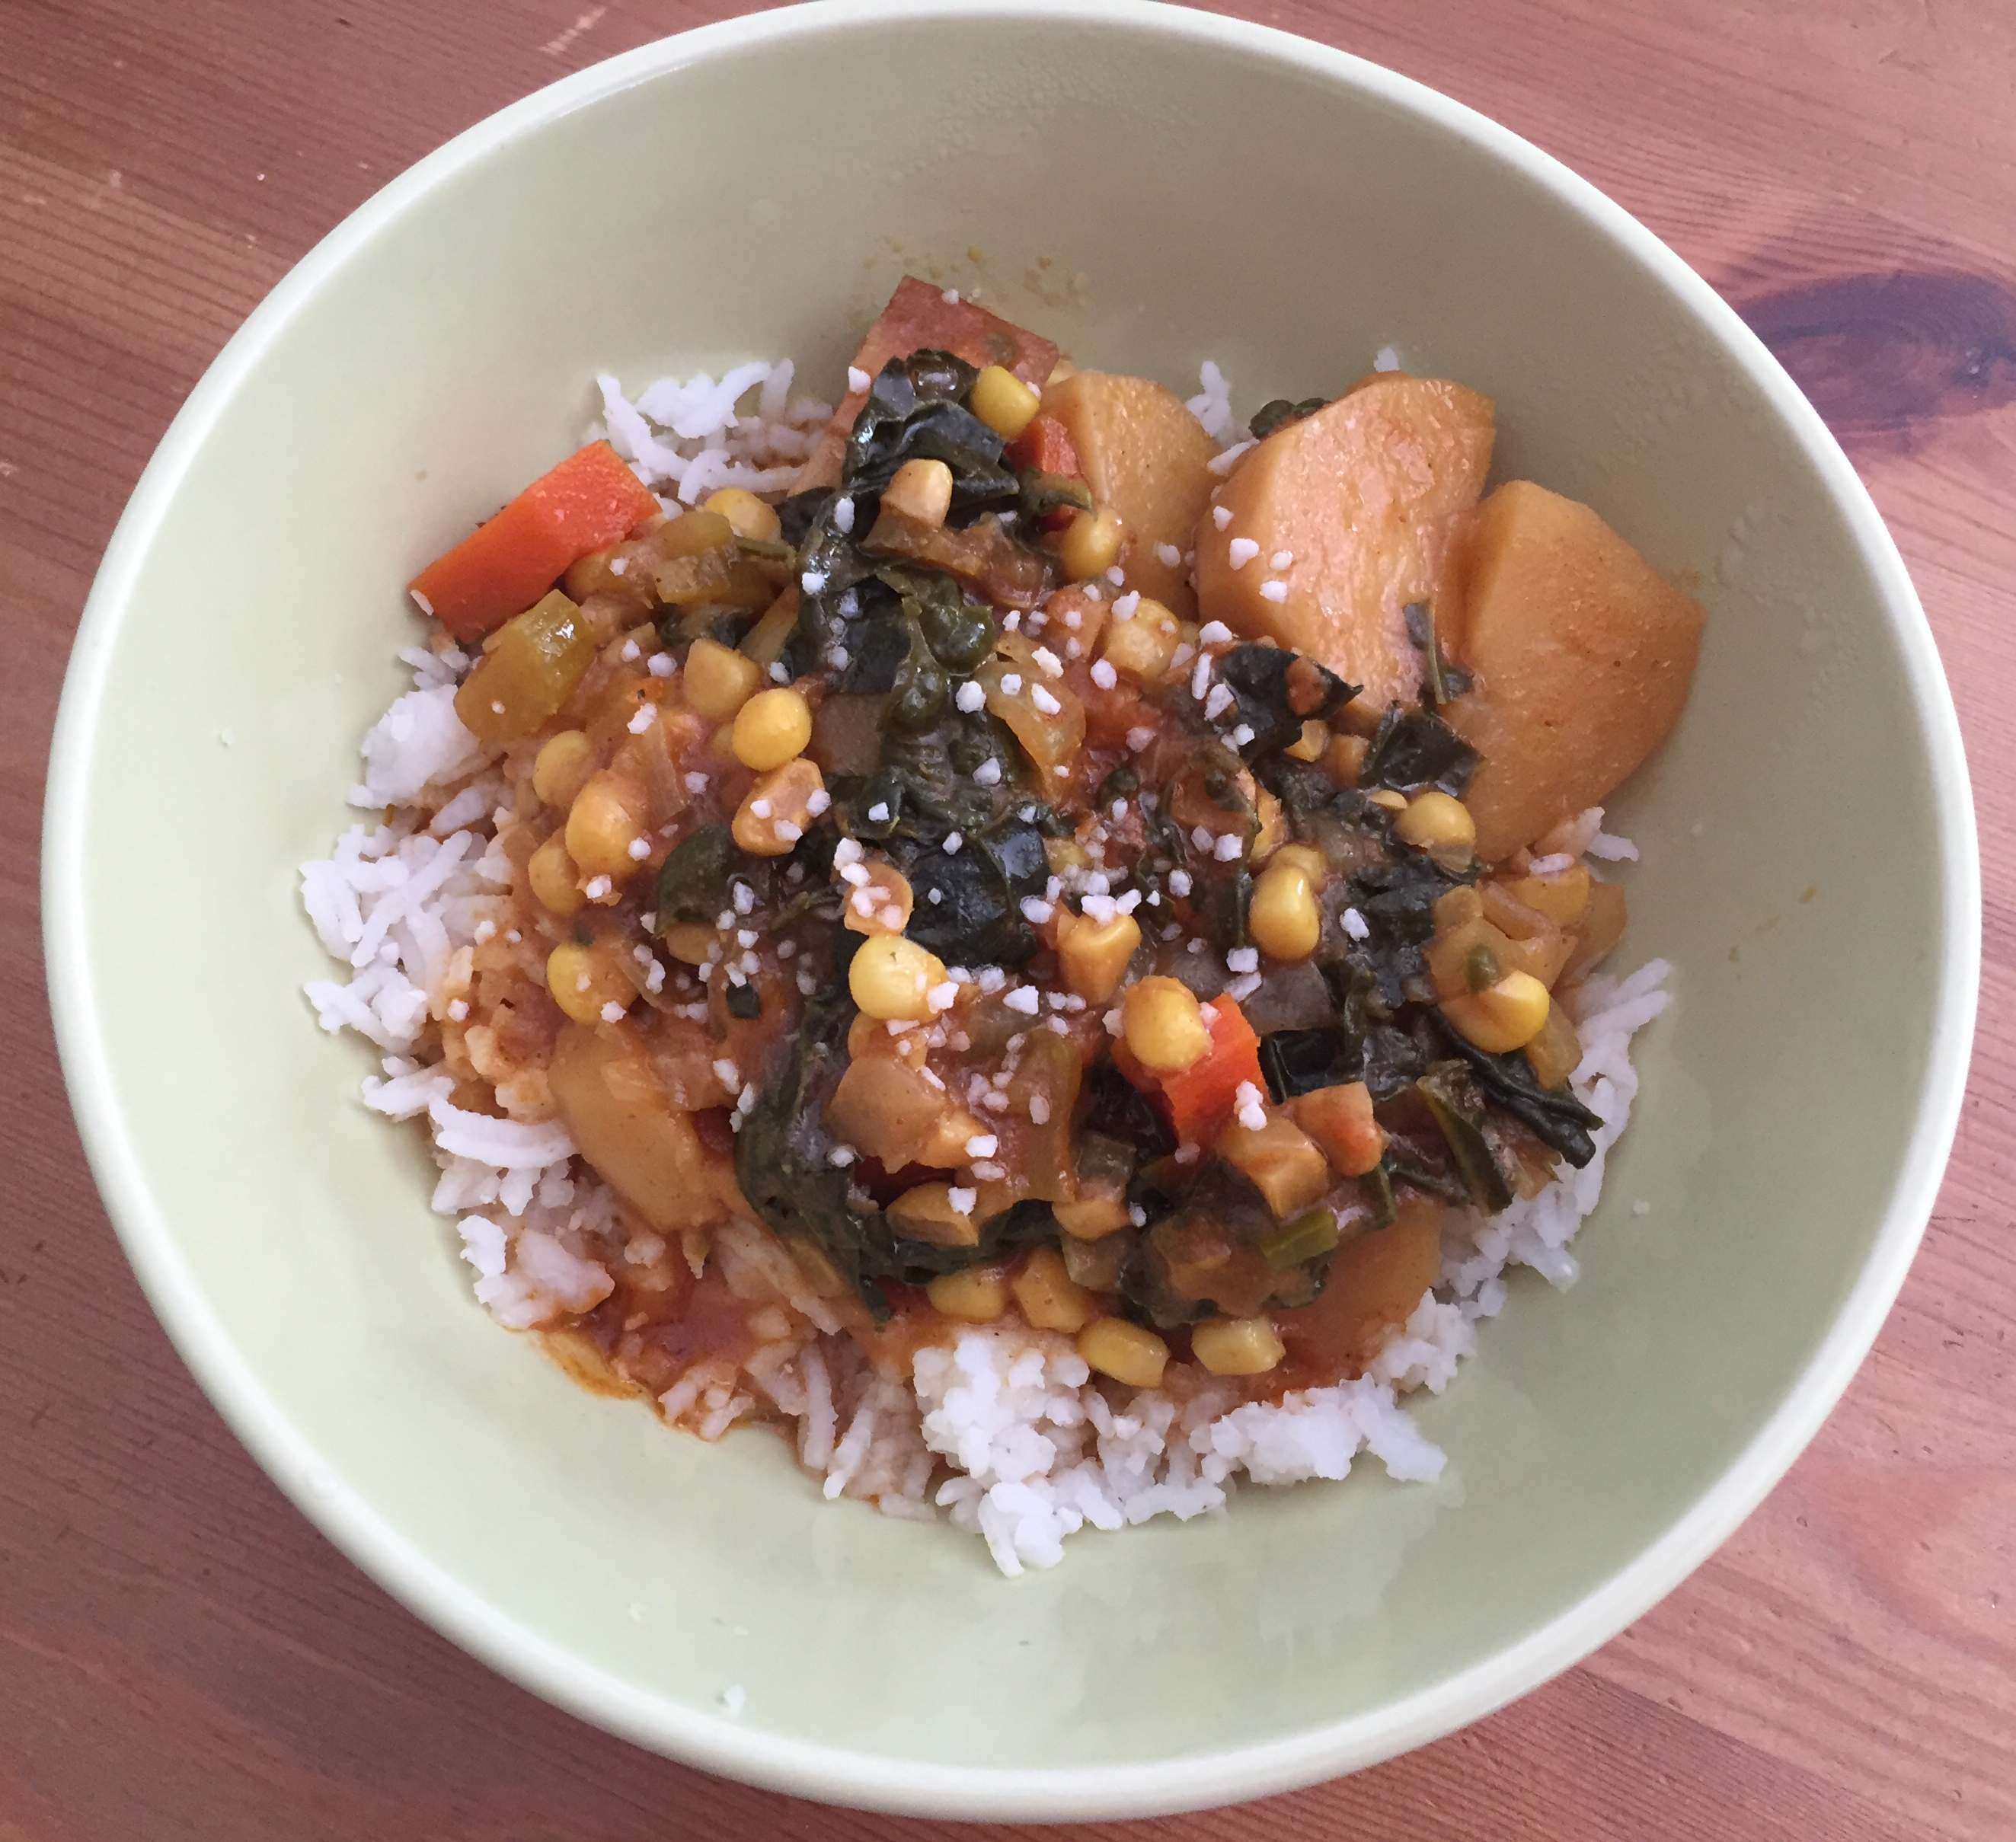
The inspiration for this hodgepodge – which technically means “confused mixture” – was all the great vegetables that were in my weekly CSA share (CSA stands for Community-Supported Agriculture and is a program in the area where I live that supports local farmers and give local folks like me access to farm fresh produce). The recipe uses corn (kernels only), kale, potatoes, carrots, celery, and onion. All these ingredients work together well, and I don’t recommend that you make some sweeping swaps. Things that would likely work are using peas instead of corn, using rutabaga or turnip instead of potatoes, and chard, collard greens or spinach instead of kale.
However, there really is no substitute for the mirepoix – carrots, onions and celery. This makes the base of the dish and I can’t think of the ways to sub these – my apologies for those of you with onion allergies! Usually, mirepoix ingredients are sautéd; however, the slow cooker does not have this function. So, I recommend either sautéing diced carrots, celery and onion in a pan over medium-high heat for 8-10 minutes, or mixing the diced vegetables with some oil and putting them in a microwave oven for about 5 minutes. This will help brown and soften them, and will help with flavors!
In addition to veggies, what makes this an amazing feast are the spices, curry powder and bay leaves, and coconut milk, which gives this stew its creaminess. Serve over rice or couscous, and perhaps with some coarse salt (which is what I topped mine with). Enjoy!
Slow Cooker Hodgepodge
What you’ll need:
1-1.5 lbs (500-800 g) white potatoes
4 ears of corn, just the kernels (or 4 cups frozen corn kernels, defrosted, or about 2 cans (15 oz; 400 g) of whole kernel corn)
1 bunch (6 cups) kale (or chard or collard greens), just sliced leaves, stems removed
4 large carrots, peeled and diced
6 talks celery, sliced
1 onion, diced
1 tablespoon curry powder
3 tablespoons tomato paste
2 cups vegetable stock
1 can (13.66 fl oz; 400 mL) coconut milk
4-5 bay leaves
1 tablespoon vegetable (or olive, or canola) oil
OPTIONAL: Rice to serve
What you’ll do:
Wash, peel and chop the potatoes into 1 to 1 1/2 in (2.5 – 3.5 cm) cubes. Place in the crock pot that has been lined with a liner, if using.
If starting from fresh corn, wash the ears, and using a sharp knife go down each ear and get just the kernels. If using frozen corn, it’s best to leave it on the kitchen counter overnight to defrost, but you can start from frozen as well. If using canned whole kernel corn, drain and rinse before using. Place over the potatoes.
Wash, drain and de-vein the kale to remove all the tough stems. Chop the leaves into rough shreds. Place over the corn.
Peel and dice the onions and carrots, and dice the celery. Place onions, carrots and celery into a microwave safe dish, mix with 1 tablespoon of oil, and place in a microwave for 5-6 minutes on high power. You can also sauté on the stove top. Pour over the potatoes, corn and kale.
Place a non-stick frying pan over medium-high heat. Add the curry powder and dry toast for 1-2 minutes, then pour over the veggies in the crock pot.
Pour the coconut milk, vegetable stock and tomato paste into a measuring cup or a mixing bowl large enough to hold everything. Mix together to combine. Don’t worry if there are chunks and clumps, but do give it a good mix. Pour over the vegetables in the crock pot.
Give everything a good mix, tuck the bay leaves throughout the stew, cover with the lid and turn the crock pot on high heat for 6-8 hours.
Serve over rice, or couscous, and sprinkle with salt (Note: this recipe does not use added salt, but you can add as little or as much salt as you like!).
Basic Falafels with Pan-Toasted Chickpeas, via Eat the Vegan Rainbow
Falafels are the kind of food I struggled with. I love them when I get them in restaurants (etc.), but I hated every single batch I ever made at home. They would taste weird, either with a strange metallic taste or uncooked garlic flavor, and I could never get them to be cooked through and nicely crunchy.
One reason for this that I am very much aware of is that most restaurants deep fry their falafels. That’s fair enough for them, but I’m not a deep frying sort of person. So, I started experimenting to see what can be done to recreate the great falafel taste without too much extra oil. (I did tried baking and broiling, and oil free but could not get those to work – so oil is in!)
My first issue was with chickpeas. Although you can use canned or chickpea flour, for authentic flavor you do need to start with raw chickpeas. And that was a part of my problem – no matter what I did, there was always something a bit unappetizing with the flavor. One explanation for why deep fried falafels don’t suffer from this shortcoming is that deep frying actually cooks everything through to a high temperature while most of other methods leave things a bit underdone.
So I came up with a solution that made a huge difference. After soaking the dry chickpeas for about a day, rinsing them and changing the water once half way through, I rinse them, dry them in a kitchen towel and then pan-toast them. What I do is place a large non-stick pan over high heat, make it quite hot, then add the chickpeas and let them toast so that they are browned but not burned. You can also try roasting but that may take longer. Pan-toasting takes about 5 minutes, and at the end you have chickpeas that are lightly cooked, enriched with flavor, and with most of that metallic tang removed. One problem solved!
Second problem is garlic. Again, I would end up with falafels with raw garlic flavor, probably for the same reason – without deep frying the inside does not have time to cook through. So, I decided to dial down the amount and use just a bit of garlic powder instead of raw garlic.
The rest is all about mixing everything together and adding a binder, in this case some flax “egg” – that’s flax meal that has been soaked in hot water for a while. I also recommend letting the falafel mixture rest for at least 30 minutes in the fridge before frying.
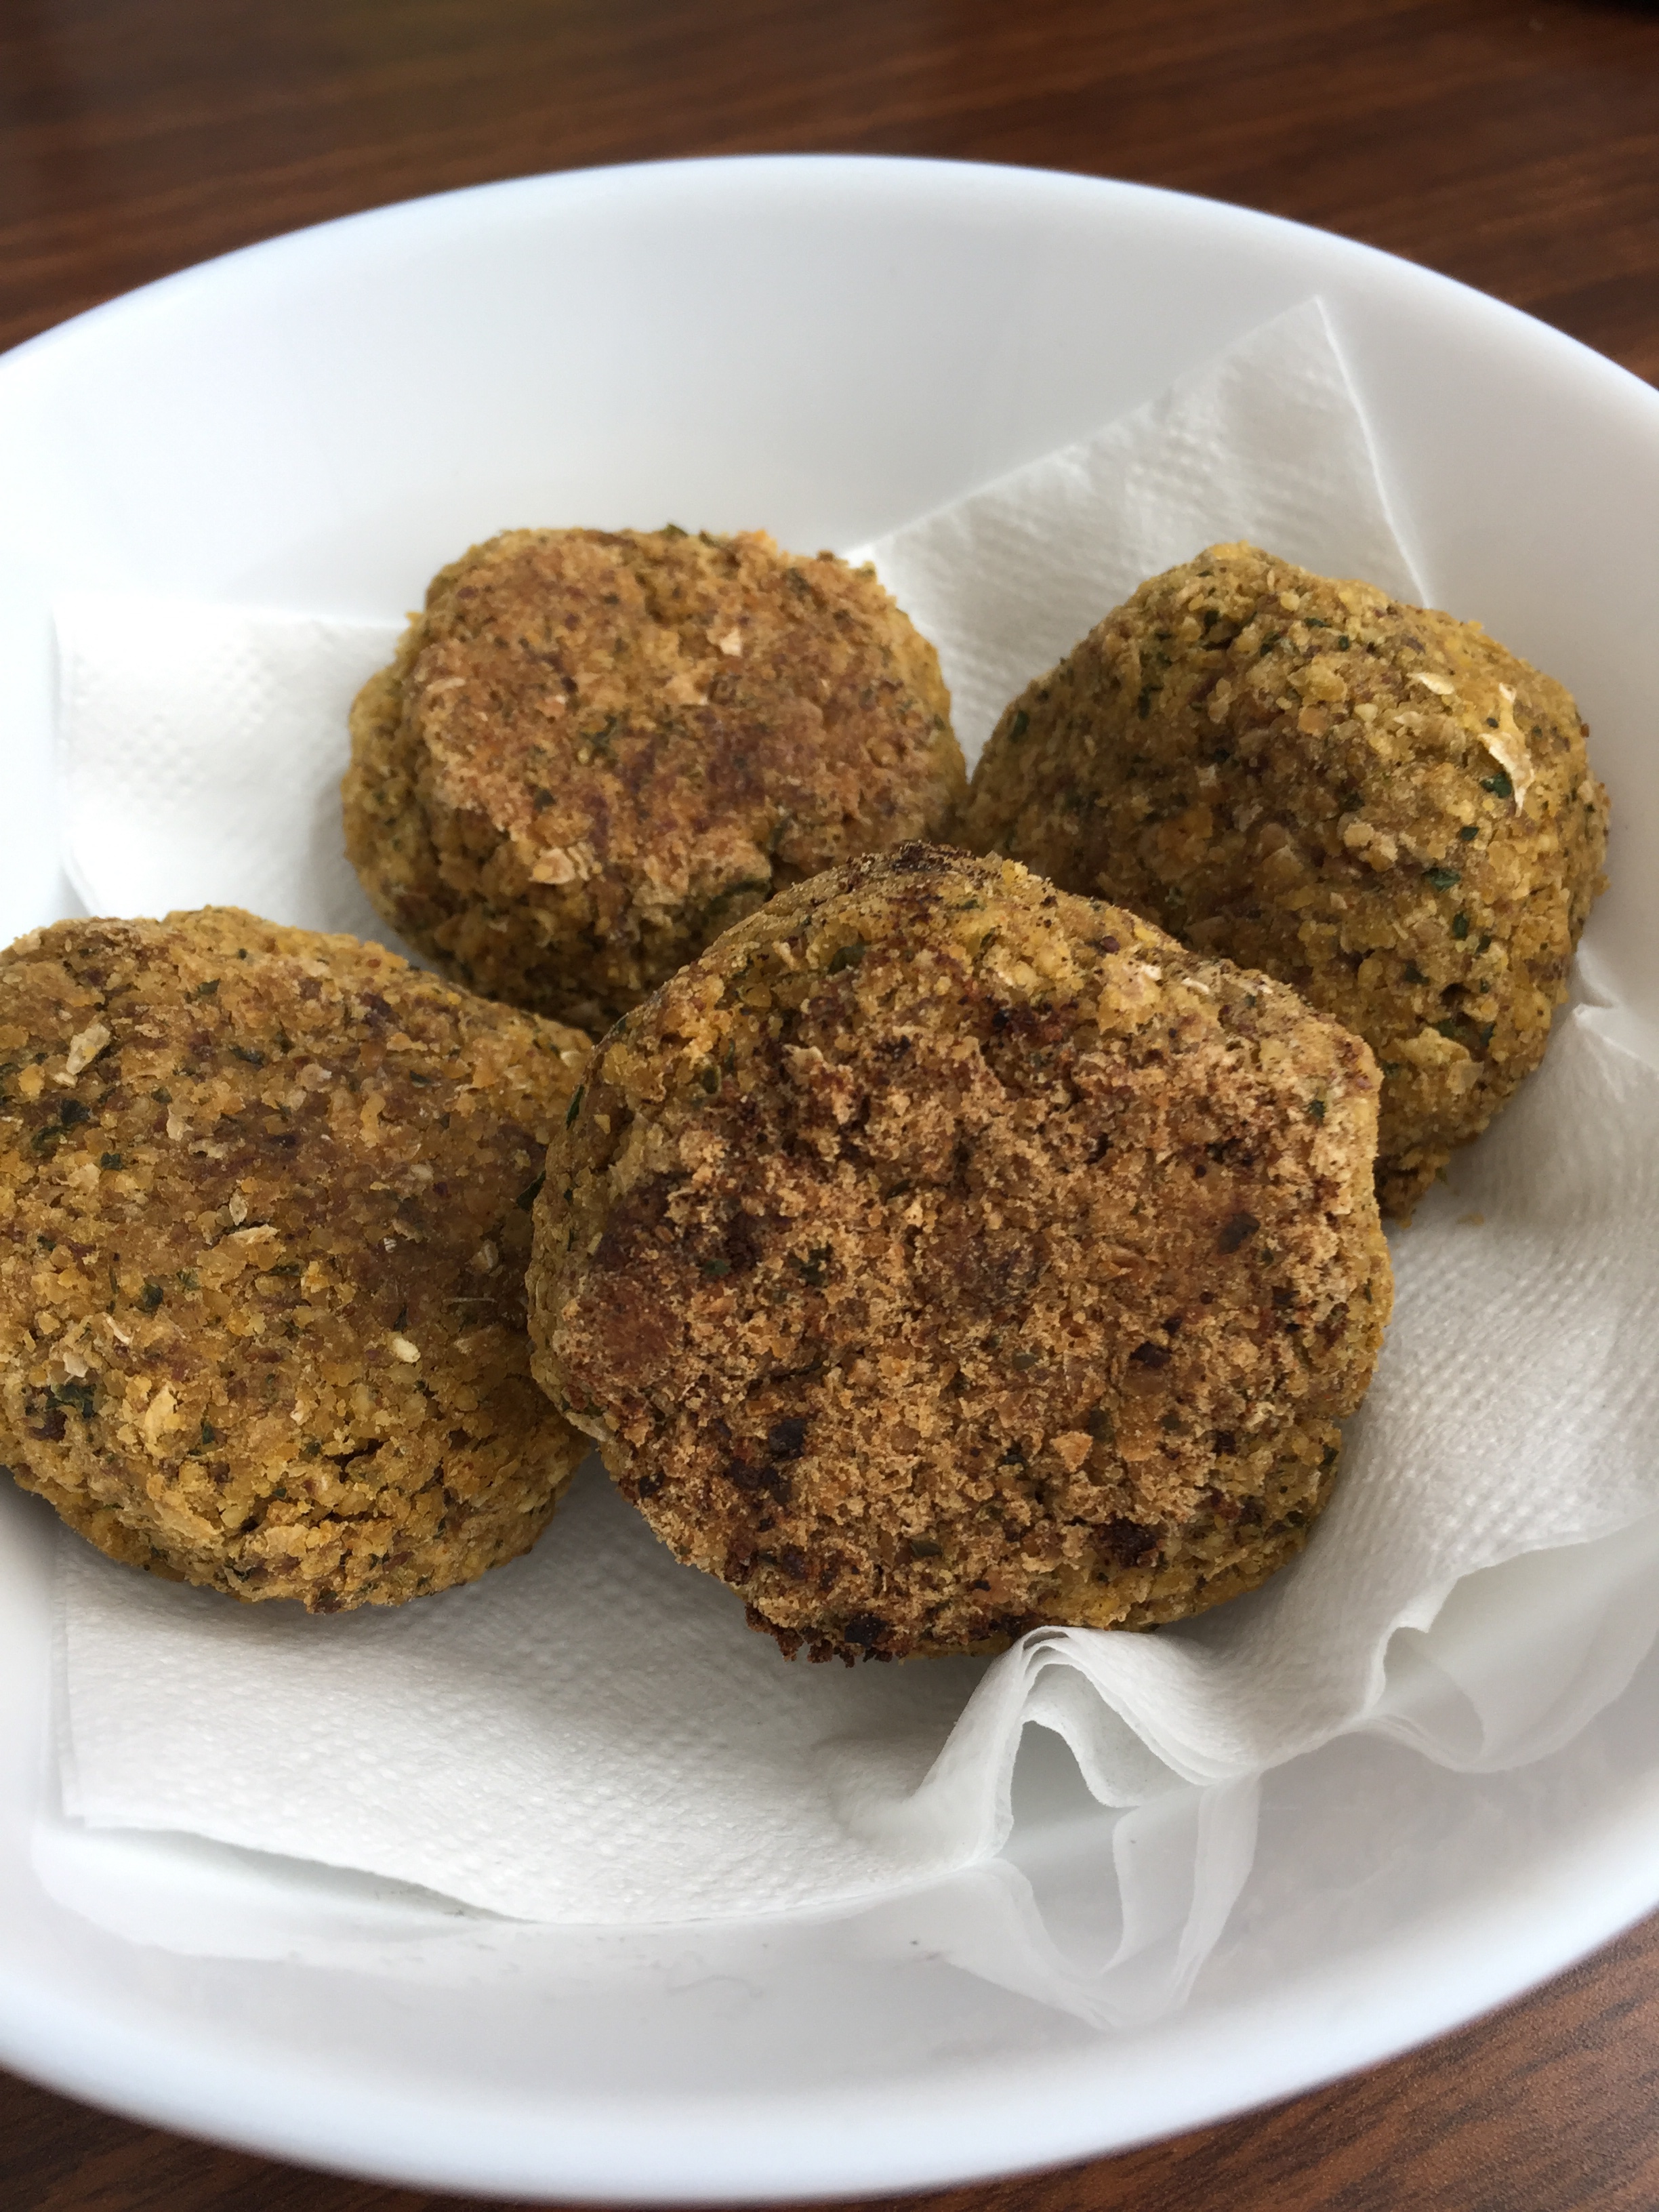
And now we come to frying – there’s just no other way to make these come out awesome. So, use some oil, real oil not a cooking spray – in my case using just enough oil to cover the bottom of a pan was enough – and let the “fried” falafels rest on some paper towel to soak the excess grease.
Eat these falafels while they are fresh and crunchy. Leftovers will be fine but there’s nothing better than a fresh batch.
Enjoy!
Basic Falafels with Pan-Toasted Chickpeas
What you’ll need:
1 lbs chickpeas, soaked for 24 hours, drained, rinsed oat dried and pan toasted
1/4 cup flax meal
3/4 cup hot water
1 cup parsley flat leaf
Juice of 1 lemon
1 teaspoon cumin
1 teaspoon paprika
1 teaspoon onion powder
1/2 teaspoon garlic powder
Oil for frying
What you’ll do:
Soak dry chickpeas in 8-10 cups of water (they need to be fully submerged with about an inch (2.5 cm) of water above the chickpea layer. I recommend soaking for 12 hours, changing the water, then soaking for another 12 hours for a total of 1 day. I also suggest you do this at room temperature on your kitchen counter.
Drain and rinse the chickpeas and shake of excess water.
Bring a large non-stick pan over high heat. Once the bottom of the pan is hot, pour in the chickpeas and let them toast until they get dry and fairly browned. This will take about 5-8 minutes and you will need to stay next to the pan to mix the chickpeas frequently and prevent burning.
Pour the toasted chickpeas into the food processor, and let them cool for 15-20 minutes.
While chickpeas are cooling, make the flax egg by soaking the flax meal in 3/4 cup hot water. Mix really well to fully combine flax meal and hot water and leave for 15 minutes. The mixture will become dense and gel-like.
Add parsley, lemon juice and the spices to chickpeas and process until the mixture is well combined and smooth.
Add the flax egg and process for another minute or so.
Let the mixture stand for 30 minutes, until chickpeas are completely cool and the mix has had time to settle and combine.
Bring your favorite frying pan (or a cast iron pan) over medium high heat. Add enough oil to cover the bottom well. Using your hands, form falafels and fry them in the hot oil. These will take 3-5 minutes per side, with the second side usually taking a bit less time to brown. Don’t over-crowd the pan as you do need some space to maneuver the falafels, so be ready to fry them in batches, adding extra oil as needed.
Let the fried falafels rest on some paper towels, which will help absorb any excess oil.
Vegan Take on Smokey Shredded Pork and Beans, via Eat the Vegan Rainbow
If you Google “Pork and Beans” the first thing that pops up is the Weezer‘s music video for their “Pork and Beans” hit made more than ten years ago. Armed with YouTube celebrities of the day and a pile of erupting Diet Coke + mentos experiments, it is a site to behold!
This, on the other hand, is a story of actual pork and beans, well not the actual pork part of it, but the vegan version that works. But, the final dish is a real team effort as was the crazy Weezer’s video. What do I mean by that? Well, none of the ingredients below would work on their own to re-created deep flavors of smoked meat. Put them together (and treat them right!) and they will deliver.
The base for this concoction are onions, carrots, and celery, which you will need to chop and slice relatively finely, then let caramelize, and even burn, over medium-high heat until cooked. And when I say burn, I mean burn – you definitely don’t want to end up with a black mess but I want you to let some of your base vegetables get a bit black. The char will help the sauce get it’s final deep flavor. The best way to accomplish this is to stop mixing the veggies towards the end and let some of them stick to the bottom of either the Dutch oven, or a large cast iron pan – I recommend using either one of those here.
Additional things that will help the flavor are liquid smoke and/or mesquite powder and chipotle chiles in adobo sauce. There is lots of heat in the chilis so unless you are a real lover of hot food, I recommend you go easy and you use only the sauce. You can store the leftover chilis and the sauce in the air tight container in the fridge for a month and use in other dishes. If you don’t have any of these on hand, some smoked paprika and chili powder will probably work – I have not tried this substitution but I’m guessing you’ll be fine.
You will also need plenty of beans, and although I used red kidney beans you can use any variety of beans you have on hand, except maybe butter beans as they are huge and your final texture will probably be a bit weird. You can used canned beans or, as I did here, start from dry beans, which I soaked overnight, and cooked in a pressure cooker.
You will also need jackfruit, and if you are unfamiliar with that ingredient you should probably get to know it. Jackfruit is this magnificent beast of a fruit that’s huge and looks really unwieldy – so I stay away from getting it raw and buy canned young (green) jackfruit in brine. This type of jackfruit can be used for many savory dishes and I love it in vegan versions of crab cakes, clam chowder, stews, barbacoa, and pulled pork. What makes jackfruit perfect for dishes like these is it’s appearance more than anything else – when pulled apart, it looks like shredded meat or lumps of crab.
Vegan Smokey Shredded Pork and Beans
What you’ll need:
1 onion, finely chopped
2 cups carrots, finely chopped
6 stalks celery, finely chopped
6 cloves garlic, thinly sliced
1-2 tablespoons chipotle chiles in adobo sauce (I prefer to use just the sauce)
1 tablespoon mesquite powder and/or liquid smoke
1 can (6 oz, 170g) tomato paste
3-4 cups mushroom stock (store bought or homemade)
1 lbs (450 g) dry red kidney beans, fully cooked or 2 29 oz. (822g) canned beans, divided
2 cans green (young) jackfruit in brine
Cooking spray
What you’ll do:
Spray the Dutch oven (or any other heavy and deep pot you are using) with a good amount of cooking spray – enough to cover the bottom and the sides. Place over medium high to high heat, add chopped onions, carrots, celery and garlic. Mix well and cook for about 10-12 minutes. You want the vegetables to be fully browned, even slightly burned, so you don’t need to stir very frequently but you do need to keep an eye on them so they don’t become a burnt mess!
Add the next three ingredients (adobo sauce, tomato paste and liquid smoke or mesquite powder), stir well, and cook for another 1-2 minutes.
Add a cup of mushroom stock to deglaze the bottom. You want to make sure that you loosen all the flavorful bits and pieces that have been stuck to the bottom of the Dutch oven. If you need more that 1 cup of the stock to deglaze the bottom, add more! Once you are done deglazing, turn the heat off.
Caution – you will be working with hot ingredients so be careful! Add 2 cups of mushroom stock into the blender, then spoon your hot ingredients in, and add 2 cups of cooked beans. Cover the blender, and blend until smooth. If you don’t have large enough blender to do this all at once, blend in batches. If you have a stick blender, you can transfer everything into a large bowl and blend with the stick blender. Set the blended sauce aside.
Prepare the jackfruit by draining the cans into a strainer and rinsing the brine of under some cold water. Shake the access water off and pat dry if needed. Pull the jackfruit apart, discarding any very tough core pieces (there will likely be a few of those and if you can’t get your fingers through it means it’s best to get rid of them as they will be hard to chew).
Spray the Dutch over with more cooking spray, bring back to high heat and add the pulled apart jackfruit pieces. Let the jackfruit burn a bit before stirring. You want pieces to get browned and slightly charred on at least one side. This can take 5-10 minutes.
Add the rest of the beans, and mix well. Cook for another 2-3 minutes, then add the sauce and mix well. Lower the heat down and simmer for an additional 10 minutes or so with the lid on.
Serve over rise, couscous, as a burrito, or as a taco. Enjoy with a wedge of lime, chopped avocado or with a scoop of sour cream.
Tex-Mex Stir Fry with Crispy Tofu, via Eat the Vegan Rainbow
Tofu seems to be an ingredient that many would like to use more often but don’t know where to start. It is also something that seems to taste so much better when you get it at a restaurant. I’ve seen a lot of people that complain about never getting tofu to be quite as crispy and quite as crunchy or quite as flavorful as when they have it in their take-outs or at the favorite Asian place.
I love making tofu – and I do it without any tofu presses or other special tofu preparing equipment. My favorite way to eat tofu is as a crunchy snack – I take a block of extra firm tofu (extra firm is my go-to kind of tofu for most of my recipes), drain the liquid out, leave in a colander to drain for about 30 minutes, then slice into cubes that are about 2 cm (3/4 in) long. For a block of tofu that you find in US-based supermarkets (14 oz or so), this means cutting it into 48 cubes – you slice the block of tofu in half, then each half into three slices, which gives you 6 mini blocks of tofu. Each mini block is then sliced in half, and each stick of tofu then divided into 4 cubes, giving you 12 x 4 = 48 cubes. If all this is too complicated math-wise, don’t worry, just cube into whichever number works. Remember to keep the chunks, well chunky!
Next, I lay the tofu cubes onto a baking sheet lined with some parchment paper, and spread them out, so that they don’t touch each other. They go into a hot oven (425 F (220 C)), and after about 15 minutes I check them, flip them around and roast for another 10 minutes. What this gives you at the end is tofu that’s crunchy on the outside and soft on the inside. I eat these as a snack, as is!
This, of course, is not the end of the story, and you can use the roasted tofu to make number of other dishes. For example, you can use it to make Saag Paneer. You can also toss tofu with your favorite dressing and use in a salad. And: you can use your roasted tofu to make a wonderful stir-fry, like the one I will share with you here.
This stir-fry is actually a sort of Mexican-Chinese fusion recipe, and it is sweet from all the caramelized onions and sweet red, yellow and orange peppers, as well as a bit of agave nectar that goes into the tofu marinade. I kept it sweet to encourage my kids to eat it – they are not big fans of hot spices at the moment. Having said all that, you can definitely spice things up and adding a bit of Sriracha into the tofu marinade, and/or sprinkling some crushed red pepper flakes will add some serious spice punch!
I recommend that you serve this stir-fry with simple rice or, even you are counting carbs, this cauliflower rice recipe will definitely work for you. If you are looking for something totally different, this stir-fry will also go well with polenta, or even baked polenta. Enjoy!
Tex-Mex Stir Fry with Crispy Tofu, via Eat the Vegan Rainbow
Tex-Mex Stir Fry with Crispy Tofu
What you’ll need:
2 blocks (14 oz, 400 g) extra firm tofu, drained
1 tablespoon agave nectar
1 tablespoon toasted sesame seed oil
1 tablespoon low-sodium soy sauce (or tamari sauce, if gluten-free)
1/2 yellow or white onion, finely diced
4 scallions, white and green bits, finely sliced
2 tablespoon grated ginger (or pickled ginger, diced very finely)
2 tablespoon canola oil
3 cups finely sliced yellow, orange and/or red peppers sticks
2 cups yellow corn kernels (I used frozen, but fresh or canned would work as well)
What you’ll do:
Preheat the oven to 425 F (220 C).
Take the blocks of tofu out of its packaging and leave in the sieve or a colander to drain for 30 minutes or so. Slice the tofu into 3/4 in-1in (2 cm) cubes (each block should give about 40-48 cubes). Line the baking sheet with some parchment paper and spread the tofu cubes around, so they are not touching each other. Roast the tofu for 15 minutes, check and flip the cubes, then roast for another 10 minutes.
Place agave nectar, toasted sesame seed oil and soy sauce into a large mixing bowl and whisk together.
Slide the hot tofu into the marinade, mix together and set aside.
Place a large wok, or a deep trying pan, over high heat. Add the canola oil, diced onions, sliced scallions, and grated ginger and fry for 2-3 minutes with frequent stirring.
Add sliced peppers and continue to fry at high heat for 10 minutes or so.
Add frozen corn, and fry for another 5-8 minutes.
Finally, add the tofu and the marinade in and stir well. Leave on high heat for another couple of minutes, then turn the heat off. Serve hot over some rice, or polenta – and don’t forget to add some Sriracha to the marinade if you are into spicy!


")


