In the spirit of my more recent posts where I cut to the chase and get straight down to business aka the recipe, here we go!
Note on the recipe: the focus here was on recreating umami flavors of the bolognese sauce mixed in with Parmesan cheese. So, what you’ll see is a lot of umami ingredients: tomatoes, mushrooms, and marmite.
(Please note that I still enjoy writing and cooking, but the pandemic had imposed some restrictions on how much writing I can do. I will try to stick to sharing the recipes as they come, and I hope you don’t mind the decreased quality of phots which I don’t have time to stage these days. So, unlike the photos, food remains yummy.)
Place a large frying pan over medium–high heat. Once the pan is hot add the oil and onions. Sautéfor 5 minutes, or until onionhave softened. Note that onions, garlic and mushrooms don’t need to be finely chopped, rough chop/slicing is ok.
Add garlic, stir well, and sauté for another 1-2 minutes.
Mix in the chili powder and marmite, then add the sliced mushrooms. Toss everything to combine and sauté for another 3-5 minutes, until mushrooms are done.
While onion, garlic and mushroom mix is cooking, crumble the tempeh into rough crumbles into the large food processor (you can also use a hand held blender stick, in which case crumble into a large mixing bowl).
Add the sautéed mix into the tempeh and process until finely chopped and mixed. Please note that the mix will be hot, so handle with care.
Pour the contents of one large can of crushed tomatoes into the same frying pan you used for sautéing and place over medium heat. Add the tempeh mix, and gently fold everything in and combine. Once it starts to bubble, tomato sauce will start to spray all over so cover with the lid to minimize splatter.
Cook for 10 minutes or so with occasional stirring.
Serve immediately over pasta (my latest discovery is lentil and chickpea pasta, including the spaghetti), and sprinkle with fresh basil and/or oregano. Enjoy!
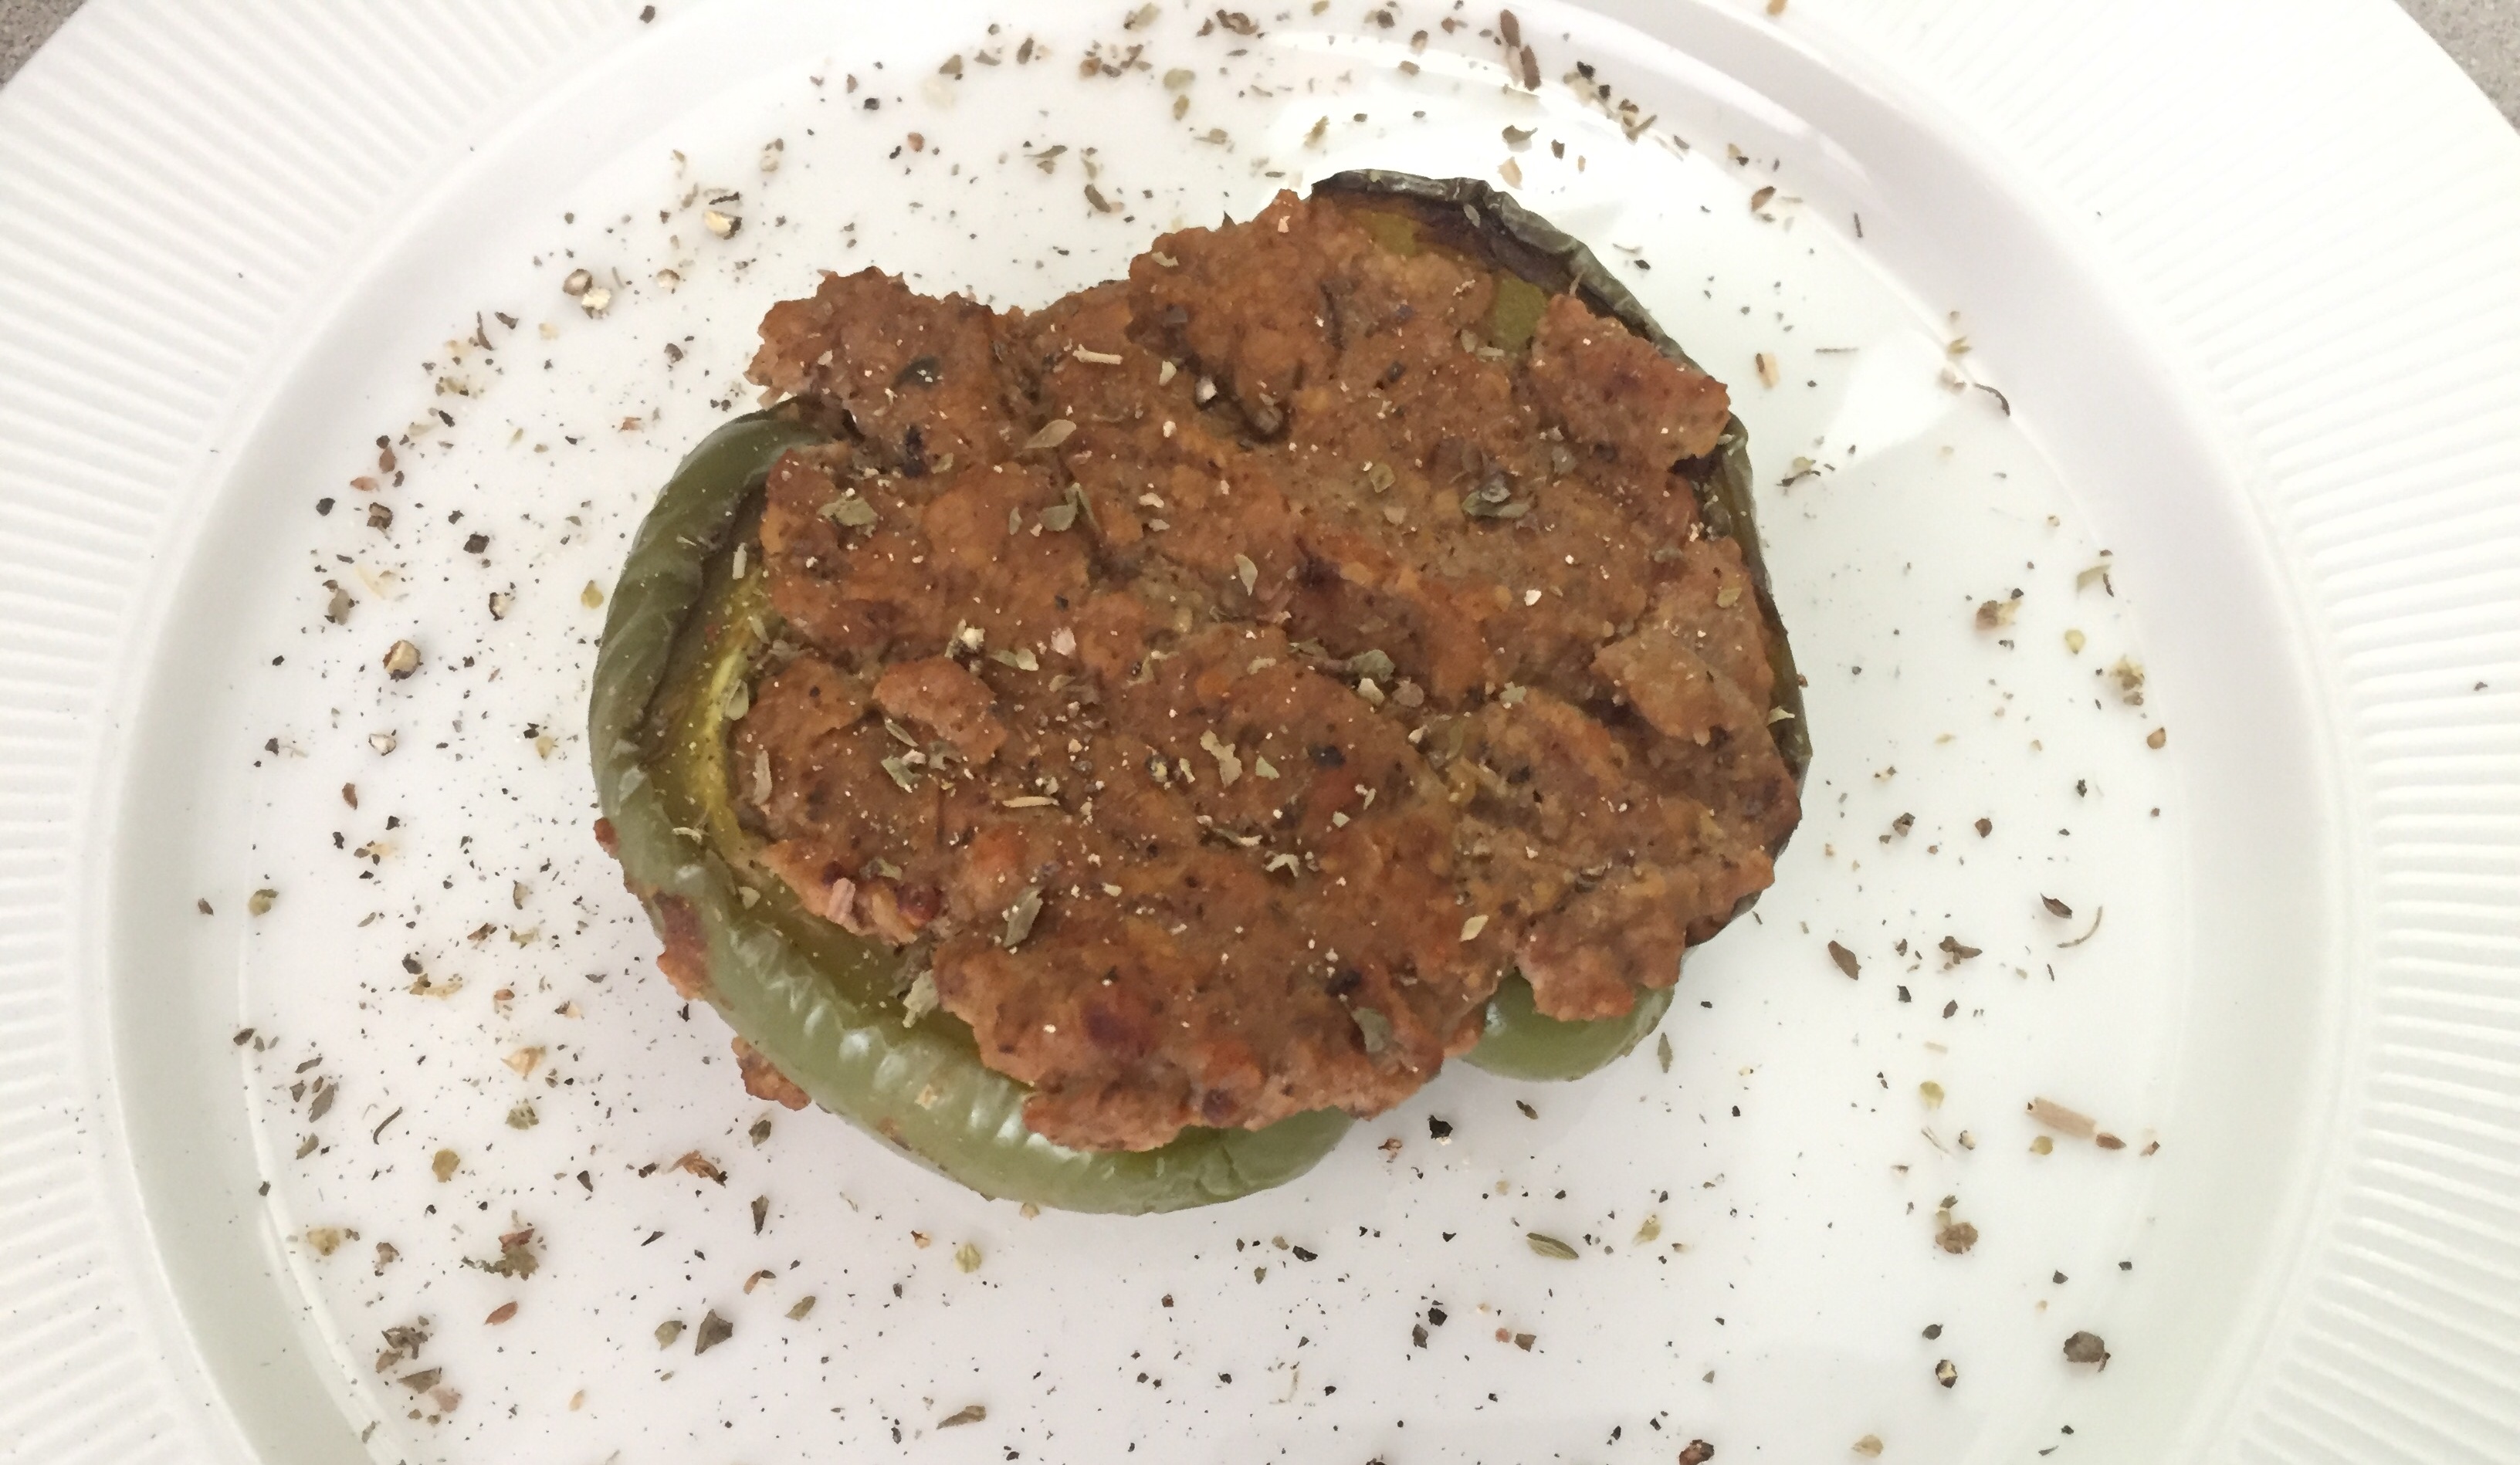
Nice, big bell peppers are perfect for stuffing, which makes them versatile. There are numerous types of stuffing you can choose from, and I’ve shared a couple in the past, like a simple rice based stuffing with pistachios, and one using a homemade beef substitute.
No matter which stuffing you choose there is one big tip for making the best stuffed peppers that are soft yet flavorful. I recommend that you par-roast the peppers (that’s like par boil but with roasting). The bell peppers I grew up with were less thick and if the peppers you get have thin flesh, this tip will not apply. But, here in US bell peppers are large and thick, and if you are to start from raw peppers that you stuff and roast you may end up with a pepper that is chewy and a bit rubbery. After some experimentation, I discovered that par-roasting the peppers before stuffing helps with all these issues.
What do I mean by par-roasting? It means roasting the peppers at high heat until they are only half way done, then using them in the rest of the recipe. The roasting will also help add a bit of a flavor to the peppers as their edges will brown. The pepper will finish cooking with the rest of the stuffing and be nice, soft and full of flavor.
I recommend slicing the peppers length-wise. That creates a nice boat to hold the stuffing. Also: when roasting the peppers I place them cut side down on the pan. This prevents liquid from pooling inside your pepper-boat, keeping the peppers dry and not mushy.
Now onto the stuffing. The key ingredient of the stuffing here is tempeh. Tempeh is made of soy, but unlike tofu it retains the whole grain, and it is dense and hard. If you want to soften the tempeh a bit you can place it into a pot of boiling water for a minute or two, but for this stuffing you don’t need to do that. By the way, tempeh is great for summer grilling, and as an ingredient for a fantastic taco filling!
The stuffing also uses sautéd onion and mushroom mix. I recommend sautéing these ingredients as I find raw onions hard to digest and sautéd mushrooms are much more flavorful. The recipe below also uses capers – pickled flower buds of the caper bush. Capers have a strong flavor and if you never head them before you may want to try a few before using them or if you can’t find them in the store where you live you can always add 1/4 cup of black or other olives. That will help boost the flavors as well.
The recipe also uses nutritional yeast. Nutritional yeast adds a bit of a nutty and cheese flavor to the dish and if you are looking for ways to substitute for nutritional yeast one suggestion I can make is to use some ground nuts, like almonds. Or you can use marmite or vegemite, which are both made from yeast extract that’s left over from brewing beer. A spoonful of miso paste may also work – but nutritional yeast will work best, so it’s worth tracking some down.
The stuffed peppers are best enjoyed with some sour cream or just a bit of melted cheese on top, and perhaps a simple side salad. That’s all you’ll need!
Tempeh Stuffed Peppers
What you’ll need:
4 bell (stuffing) peppers (any color)
8 oz (227 g) white button mushrooms or cremini (baby bella) mushrooms
1 yellow onion, diced
2 8 oz (227 g) packages of tempeh (plain a.k.a. original will work best)
1/4 cup nutritional yeast
1/4 cup capers (can be substituted by black or green olives, but not stuffed olives)
2 tablespoons soy sauce
1 tablespoon dried oregano
1 teaspoon garlic powder
1-2 tablespoons olive oil
Cooking spray
What you’ll do:
Preheat the oven to 425 F (220 C).
Line a large baking sheet with parchment paper or some aluminum foil.
Wash the peppers, dry them, then cut them in half lengthwise. Remove the stem and seeds. Place the peppers cut side down on the baking sheet. Put in the oven and roast for 15 minutes. The peppers should be moderately soft but not roasted all the way through. Take the peppers out and let them cool.
Lower the oven temperature to 350 F (175 C).
While the peppers are cooling, prepare the stuffing. First, place a frying pan over the medium-high heat, add the oil and diced onion. Sauté the onion until soft and slightly yellow on the edges (4-5 minutes), then add the mushrooms. Mix well and continue to sauté until mushrooms are done (an additional 4-5 minutes).
Place the tempeh, sautéd onions and mushrooms, nutritional yeast, capers, soy sauce and spices into a large food processor and process until well combined and mostly smooth. If you don’t have a large food processor you will need to do this in batches in which case mix everything together in a large bowl then process bit by bit.
Drain any liquid out of the semi-roasted bell peppers and place them hole side up into a deep baking dish. Spoon out the stuffing evenly among the peppers. Spray the tops with some cooking spray, cover with foil and bake for 25 minutes. Remove the foil, increase the heat to 375 F (190 C) and let the tops brown for another 10 minutes.
Let the peppers cool for couple of minutes before serving. These are great with some sour cream on top or with a light salad. Enjoy!
Vegan Onion and “Bacon” Tart, via Eat the Vegan Rainbow
Savory tarts are a great source of comfort during long, and cold, winter months, so fall seems like a perfect time to stock pile great savory tart recipes. One of the favorite topping combinations for this type of tart is onions and bacon. There can be little mystery about why this is so. Caramelized onions are sweet and juicy, and browned bacon is crispy and salty. Putting those two together makes for a sweet, salty, juicy yet crispy topping. Add to that a thin tart crust – and you get the picture!
In this recipe I wanted to recreate a bit of that onion-bacon dichotomy, by combining thinly sliced onions caramelized to perfection with marinated, thinly sliced, tempeh that has been browned until crispy on the outside. The trick with onions is to slice them into thin strips and then let them caramelize for a long time over medium heat. If you are counting calories and trying to stay as oil-free as possible, you can use just a bit of cooking spray to get your onions going – I did it, and it works just fine! But if you regularly use oil, starting with a tablespoon of olive oil will work well here. I recommend using a well-seasoned cast iron skillet here – not only will it help caramelize the onions and brown the tempeh bacon, it will also go straight from the cooktop to the oven, making this a one pot dish.
To prep the tempeh, first boil it for couple of minutes, pat dry it, cut into thin strips, and let it marinate for couple of hours. I used the same basic marinade that The Buddhist Chef used for his Tofu Bacon. It’s made of oil, maple syrup (I did skip maple syrup in this case since caramelized onions are plenty sweet), soy sauce, liquid smoke, and nutritional yeast. I prepped the tempeh ahead of the onions, so when the onions were done I could remove them from the skillet and cook the “bacon” immediately afterwards.
My version of the tart is crustless, so there is no fancy pastry making required. What holds the tart together is the mix of almond milk and corn starch that comes in last, as the veggies are finishing cooking. And speaking of veggies, one other ingredient here is jackfruit. I use canned jackfruit and for this tart you will want to rinse it out well, drain it, then shred with your fingers, and remove any tough core bits. I can’t comment on using raw jackfruit since I’ve never done it, but I am guessing that it would be better since canned food does come with a bit of that canned taste/flavor.
The tart will spend some time in the oven, and to finish it off I recommend turning on the broiler at the end for five minutes or so to crisp up and brown the top. Let the tart cool for about ten to fifteen minutes before serving, and enjoy as is, or with some yogurt – I used a drizzle of cashew yogurt and a sprinkle of thyme. The tart is rich, fragrant and fantastic!
Vegan Onion and “Bacon” Tart
What you’ll need:
2 large onions
8 oz (225 g) tempeh
2 tablespoons soy sauce
2 tablespoons oil
1 tablespoon nutritional yeast
1 teaspoon liquid smoke (or more, depending on your taste)
2 20 oz (570 g) can young green jackfruit in brine
3/4 cup almond milk (plain, unsweetened)
2 tablespoons corn starch
1 teaspoon dry thyme
Cooking spray
What you’ll do:
Bring 2 cups of water to gentle boil in a pan that’s large enough to hold the entire piece of tempeh flat without cutting. Lower the tempeh into the boiling water and let it boil for couple of minutes.
While the tempeh is boiling mix together the marinade by combining oil, soy sauce, liquid smoke, and nutritional yeast.
Take the tempeh out and pat dry. Let it cool for a moment, until it feels ok to handle. My heat tolerance is pretty high so I usually wait only a few minutes, but depending on your comfort zone when it comes to handling hot things you may want to wait longer before slicing the tempeh into relatively thin slices. Lower the slices down into the marinade and let it stand for an hour or two.
While tempeh is marinating, prepare the jackfruit. Rinse the canned jackfruit well and let the excess water drain. Using a fork or fingers, pull the jackfruit into shreds. Discard the hard core, if present. Set aside.
Slice the onions thinly into fine strips.
Turn the oven to 400 F (200 C).
Heat a heavy skillet, like a cast iron skillet, over medium high heat. Spray with cooking spray (or add a tablespoon of olive oil if using), and add the onions. After about 5 minutes at medium high heat, reduce the heat to medium to medium low and cook for another 10 minutes, until onions are soft and golden brown. Transfer the onions into a separate dish.
Increase the heat to high and add tempeh “bacon” strips. Let the side brown then turn over and brown on the other side.
Add back the onions, and jackfruit, mix the “bacon”, onions and jackfruit well, and continue to brown.
In a small mixing bowl combine almond milk and corn starch. Whisk them together so that there are no clumps. Pour over the rest of the ingredients and let it start to bubble.
Sprinkle the thyme and nutmeg, mix again and place the skillet into the oven for 20 minutes.
To brown the top, turn the broiler on and broil for 5 minutes, until the top is browned and crispy.
Take the tart out of the oven and let it rest for 10 to 15 minutes. Serve with a side of salad, or drizzle some yogurt over the top for a delicious meal.
Miso Glazed Grilled Tempeh, via Eat the Vegan Rainbow
If you have not done so already, you should definitely try tempeh. I’ve been hearing about it for some time now, and seeing several different brands and varieties right next to the tofu that I usually get but I only got the first batch of tempeh just the other day. I bought several different varieties to try them out and spent few days reading about what’s tempeh good for and how to best cook with it. Tempeh is related to tofu because both are soy based. But, in terms of flavor and texture (and as far as I can tell in terms of how you actually make the two, based on what Wikipedia says), tofu and tempeh are quite different. Tempeh is firm, much firmer than the firmest tofu, and does not come in liquid. It is actually fermented soy beans mixed with rice [edited after reading comment from Mary S below – thanks Mary S, it’s good to get the facts all squared away. I am still a bit confused since the ingredients’ list of the tempeh I used did include rice; at the end of the day my confusion does not matter change the fact that the food was delicious], so although it is dry, it does feel sticky to touch and just a bit slimy. FYI: I am not saying this to freak you out, rather to forewarn you so that you are not as surprised when you start handling it as I was – I thought my tempeh has gone bad and wanted to throw it out! But, I double-checked the date on the bag, regained my cool and went for it.
I decided to start simple and build from there, so this Miso Glazed Grilled Tempeh is more or less my starting point. The brand of tempeh I got is Lightlife and the two varieties I started with are their Organic Garden Veggie and Organic Soy Tempeh. Each package is half a pound (about 250 g), and the block of tempeh comes in a vacuumed-sealed package, that’s within a sealed plastic bag, so there are two bags to remove! I used both blocks at the same time, since one just did not seem enough to make for the end of the week Friday dinner.
The first thing I did was to fire up the grill. I have a gas grill and it takes it about ten to fifteen minutes to get to be sizzling hot, with burners going at full blast and the lid down. That was just enough time for me to prep the tempeh and the glaze. For tempeh, I placed the pieces into a pan large enough to keep the pieces flat, covered with water, brought to boil and boiled for four to five minutes per side – I did flip the pieces over once since the pan I was using was shallow and the water did not fully cover the tempeh, so if your tempeh is fully covered you will not need to do the flip! After about ten minutes I took the tempeh out, pat dried the pieces, and left them uncovered on some paper towels.
While the tempeh was boiling and the grill was heating up, I mixed together a simple glaze with some soy sauce, Worcestershire sauce, white miso glaze and vegetable oil. I spread the glaze over the tempeh pieces just before placing them on the grill the glazed side down. Then I glazed the top and let it grill for about five to six minutes. By that time the grill marks will be perfect, and the pieces ready to be flipped. I did reglaze both sides again and flipped again, so that at the end each side got two layers of glaze and about eight to ten minutes of grilling, so in total the grilling bit took less than twenty minutes. If you are in a rush, you can definitely skip the reglazing, but if you are outside hanging around the grill with friends and family and enjoying the lovely summer evening, then why not give tempeh extra love, glaze and grill time?
Let grilled tempeh rest for just a second, then slice and serve. You can serve it in a hamburger or a hot dog bun with the usual trimmings, but note that condiments, like mustard and ketchup, are going to overpower the flavor of the grilled tempeh. So, I recommend serving tempeh with a side of coleslaw and baked, or barbecue beans, which is how I had mine. Add to that a glass of cold beverage of choice, and what can be better?
Miso Glazed Grilled Tempeh Sliced, via Eat the Vegan Rainbow
Miso Glazed Grilled Tempeh
What you’ll need:
2 8 oz (227 g) blocks of tempeh (any variety and brand you like)
2 tablespoons soy sauce, reduced sodium
2 tablespoons white miso paste
2 tablespoons vegetable oil
1/2 tablespoon Worcestershire sauce (vegan)
Oil for oiling the grill grates
What you’ll do:
Prepare your grill like you normally do. I recommend getting the grill really hot and letting any bits and pieces from the previous grill session burn off, then scrapping the grates with an appropriate type of a brush (please be careful here because you can really damage your grill grates if you don’t follow the manufactures instructions and recommendations), and then oil them generously with a paper towel dipped in vegetable oil – please use long tongs here to prevent getting burned!
Take tempeh out of the wrapping and palace in a pan large enough to hold it flat and straight. Cover with water, bring to boil and let it boil for 5 to 10 minutes. Make sure you flip the tempeh half way through if your tempeh is not fully submerged in water. If it is, no mid-way flipping is needed!
While tempeh is boiling and the grill is getting hot, mix together the glaze by whisking together soy sauce, vegetable oil, miso paste and Worcestershire sauce. The glaze should be smooth, but even if you have few lumps in there don’t worry about it – it won’t matter at the end.
Place the boiled tempeh onto some paper towels and gently dry.
Using a (silicone) food brush spread the glaze liberally ove the tempeh and place the piece of tempeh glaze side down on the hot grill. Keep the gas grill on medium high heat, or if you are using a charcoal grill keep it as hot as you would when grilling vegetables, veggie burgers, or mushroom or tofu steaks. Grill the glazed tempeh 5 to 6 minutes on one side, and while it is grilling apply the glaze on the other side, flip over, grill for 4 to 5 minutes, glaze, flip, grill, repeat for as long as you like.
Let stand for just a moment or two, slice and serve!!! This Miso Glazed Grilled Tempeh will work as an appetizer, finger food, as well as dinner, especially with some grilled corn, veggies, coleslaw, baked or barbecue beans, or as a salad topping…