Mushroom Bourek (or Burek or Börek)

I have not been sharing recipes for a while, but this one reminded me of home and comfort food I grew up with, so I thought why not share it with the world! Bourek or Burek or Börek is one of the most favorite breakfast foods (yes, you heard that right – BREAKFAST) on the Balkans, Eastern Europe, Turkey… Burek is a baked pastry made of very thin layers of dough – in the US this type of dough is known as phyllo. A “pie” filling (traditionally meat, cheese, spinach (or other leafy greens like chard), sautéd mushrooms…) is placed in between the dough layers to create a very rich and amazingly delicious pie. It’s actually quite impossible to describe burek – if you have not tried it, you should, and with the recipe below now you can make one at your home!

Mushroom Bourek

What you’ll need:

  • 20 sheets of phyllo dough (about 8 oz, 250 g)
  • 16 oz (450 g) white mushrooms, diced
  • 1 onion, finely diced
  • 3-4 cloves garlic, minced
  • 1/4 cup nutritional yeast
  • 1 tablespoon olive oil
  • 1/2 teaspoon dried rosemary
  • 1/2 teaspoon crushed red peppers
  • 1/4 cup + 1 tablespoon vegetable oil
  • 1/4 cup water
  • salt and pepper to taste

What you’ll do:

  1. Prepare the phyllo dough according to the instructions on the package. For most of you who live in the US, this means leaving the dough out to thaw either in the fridge or on the kitchen counter following the directions of the manufacturer. This can take anywhere between 4 hours to overnight.
  2. Once the dough is ready, preheat the oven to 375 F (190 C).
  3. Prepare your mushrooms, onion and garlic by: dicing the mushrooms and the onion into small pieces (1/4 inch (0.5 cm) or so), and mincing the garlic.
  4. Add 1 tablespoon of olive oil into a large frying pan and heat over medium high heat. Add the onions and sauté for 3-5 minutes, until golden.
  5. Add garlic and sauté for 1-2 minutes.
  6. Add the mushrooms and cook them through, which will take about 5-8 minutes.
  7. Stir in nutritional yeast, crushed red pepper flakes, rosemary, salt and pepper and sauté for another 1-2 minutes. Turn the heat off and let the mixture cool.
  8. Place 1/4 cup vegetable oil and 1/4 water in a bowl. They will not mix, so you will have to “agitate” aka mix the two each time before applying.
  9. Using a pastry brush, or a spoon, spread 1 tablespoon of vegetable oil around 9 x 13 in (23 x 33 cm) baking dish.
  10. Once the dish is oiled, start layering your phyllo dough sheets into the dish. The sheets are gentle, so treat them with care. Layer a single sheet to cover the bottom (you will likely need to fold it in half to fit into the dish, and that’s ok), then sprinkle with water/oil mix. To do this, use your pastry brush to mix the water/oil well then “paint” the dough layer all over. The dough should not be soaking wet, but it should be moist. Layer another sheet of dough in the same manner, moist with water/oil mixture, and repeat until you’ve used 5 sheets of dough.
  11. Once the 4th (or 5th) sheet of dough is in, you are ready to add 1/3 of your mushroom filling. Spread the filling evenly across the phyllo dough. It should cover the layer thinly. Proceed to layer the phyllo dough, 5 sheets wetted with water/oil mix in between each layer. Top with another third of your mushroom mix, topped with another 5 sheets of phyllo dough and repeat one more time. At the end, you should have a pie with 5 sheets of phyllo – 1/3 of mushroom filling – 5 sheets of phyllo – 1/3 of mushroom filling – 5 sheets of phyllo – 1/3 of mushroom filling – 5 sheet of phyllo. Make sure that the top sheet of phyllo is brushed well with the water/oil mix.
  12. Place the pie into the hot over and bake for 20 minutes then increase the heat to 425 F (220 C) and bake for another 10-15 minutes, until the top layer is crispy and golden brown (see photo). Let cool for 5-minutes before cutting. Enjoy hot for breakfast, lunch, or dinner! I like to add some yogurt on the side – it’s delicious!

Copyright © Eat the Vegan Rainbow, 2021

Quick No-Knead Artisan Bread

Quick No-Knead Artisan Bread
Quick No-Knead Artisan Bread, via Eat the Vegan Rainbow

Would you like to be able to make an artisan loaf of bread in your own house in less than 4 hours with no kneading and almost no effort? I knew you would!

This recipe was inspired by several things: (1) impatience; (2) dislike of kneading; (3) internet; and (4) Twitter. I am not a baker, and have very little patience for recipes that ask me to knead the dough for 15 minutes, then wait for 3-4 hours, then pound the dough and knead more, then wait for another 1-2 hours, then pound again and then bake (and don’t even start me on sourdough starter which is this magical thing that is handed down through generation and treasured… enough said!). It’s a lot of work and it’s not much fun, at least not for me.

But: I do love bread! And I love freshly baked bread which is easy to get your hands on in Serbia where I grew up, but almost impossible to find in the US where I live now. To try to fix this disconnect between wanting fresh bread and not wanting to spend ages making, it I bought a bread machine some time ago. Bread machines work well and they are really easy to use (see my bread machine bread recipes here and here). However, the loafs you get are very much of an industrial looking kind, so if you are craving something more rustic and artisan the bread machine will not be able to help you – I will!

The recipe below came to me in a flash. I guess because of the COVID-19 pandemic that’s destroying the world at the moment mostly due to the lack of leadership and gross incompetence, there has been a major increase in random bread making videos and tutorials in my social media feeds. One of them showed how to make something called No-Knead Bread (and yes, this type of bread has it’s on Wikipedia page while many female scientists are not considered important enough to have one). That was intriguing enough – a bread that requires only 4-5 ingredients, is cooked in the Dutch oven and looks like something from a magazine? Sign me up!

What spurred me into action was a random tweet by Nigella Lawson that someone in my feed retweeted that said that using pasta water, instead of simply water, will make the bread have better texture and rise. Below is the recipe that combines the two – the quick no-knead bread strategy and the pasta water tip. Results will amaze you!

Quick No-Knead Artisan Bread

What you’ll need:

  • 3 cups flour (all-purpose)
  • 2 teaspoons sugar
  • 1 teaspoon salt
  • 1 teaspoon instant quick-rise yeast
  • 1 cup pasta water (when left in the fridge, pasta water can gel because it has a lot of starch. Don’t worry about it – measure 1 cup and carry on)
  • 3/4 cup water
  • extra flour for dusting


What you’ll do:

  1. In a large mixing bowl combine flour, sugar, salt and yeast.
  2. Measure out pasta water and water and combine into a microwave safe bowl. Heat up for about 1 minute or until water feels hot to touch. (I take a drop or two of water out using a spoon and then drip it onto the inside of my wrist – same way you would check the temperature of the baby’s bottle.) The water should be hot, but not boiling.
  3. Pour the liquid into the bowl and mix with a wooden spoon until everything is well combined. The dough will be sticky, but don’t worry about it. Cover with a plastic wrap and let stand on the kitchen counter for 3-4 hours.
  4. After about 3-4 hours, take the dough out onto your working surface. I line my kitchen counter with some wax paper, which helps with the clean up. The dough should have doubled in volume and be ready to be transferred into a large Dutch oven lined with some parchment paper (or another oven-safe heavy pot with a lid). Dust your working surface with some flour, as well as your hands and sides of your bowl. The dough will be soft and sticky so you will need to use flour to help you scoop the dough out onto your working surface. Use your hands to form a nice round loaf – this is a no-knead bread, so don’t knead! Just move the dough gently into a rounded shape.
  5. Place the dough into the Dutch oven and cover with a moist kitchen towel and let stand while the oven pre-heats. (Please note that some of the recipes I’ve seen suggest that you preheat the Dutch oven with the lid on while you leave your loaf to rise covered with a moist kitchen towel on your working surface. This may make the transfer of the loaf into a really hot Dutch oven tricky and potentially dangerous, so I recommend placing the dough into the cold pot and skipping the pot preheating step).
  6. Preheat the oven to 450 F (230 C), with a rack place in the middle 1/3 of the oven (more of less).
  7. Once preheated, remove the moist towel from your Dutch oven, put the lid on and place the pot into the oven. Bake for 25-30 minutes covered, then remove the lid and finish baking the bread uncovered for 15 minutes. This will help crisp up the top.
  8. Take the loaf out of the Dutch oven and onto a cutting board. Let the bread cool for at least 30 minutes before cutting – this is a very hot loaf and even after 30 minutes the inside may still be warm. Enjoy!!!
COPYRIGHT © EAT THE VEGAN RAINBOW, 2020


Dark Chocolate Donuts – oil-free, gluten-free, and vegan

Dark Chocolate Donuts - Vegan, Gluten-Free
Dark Chocolate Donuts, via Eat the Vegan Rainbow

Quite frankly, these donuts are nothing like the donuts I grew up with. Those were masterpieces of my grandmother, made with yeast-based dough that would rise for hours, be beaten down, and kneaded, rolled out, cut in circles with a glass and fried in some piping hot oil. Then, while still hot, dusted with powdered sugar or injected with jam. Those were donuts of my childhood and I loved making them with my grandma!

Now that I am well into my adulthood and struggling to maintain healthy weight, and allow myself an occasional treat, I’ve been re-inventing old treats into new treats. With less (or in this case no) oil, less sugar, and taking far less time to make, yet equally as delicious!

One thing that makes these donuts possible is a non-stick donut pan. I never thought I would buy one, but I did, and it works really, really well. Although these donuts don’t have any wheat flour and are surprisingly sticky and wet, they came out perfect, and I think that’s all thanks to the pan. (I got this one from Amazon, in case you are wondering).

The donuts some together in less than 5 minutes, and take about 15 minutes to bake. You need a large bowl and a spatula. No waiting for dough to rise, no rolling it out, none of that. All you need to do it spoon it into the donut pan, fill each ring about 3/4 of the way full, leaving the room on the top for donuts to rise and fill, and that’s it!

The dough will be sticky and dense, so you will need to spoon it out bit by bit, until the donut ring is done. Don’t overfill as I said and don’t pack it in too much. You will need to nudge the dough in and smooth the surface a bit, but try not to overfill. It’s best to bake in batches than end up with a batch that’s not looking too good.

These donuts are not very sweet, which is the way I prefer them. But if you do have a sweet tooth you can glaze them by simply using some powdered sugar and a squeeze of lemon juice to make a dense sugar paste. Or you can melt a bit of dark chocolate and dunk them in for a chocolate glaze. Feel free to go as wild as you like, and enjoy!


Dark Chocolate Donuts – oil-free, gluten-free, and vegan

What you’ll need:

  • 1 cup almond flour (this is usually called bleached almond flour and it is not almond meal; coconut flour will probably work as well, and any gluten-free flour will likely work too but using rice flour will make this less keto-friendly if you are into that sort of diet)
  • 1/2 cup pea protein powder, unsweetened (you can use any vegan protein powder and you could use sweetened versions and vanilla or chocolate flavored ones – in that case you need to remember to dial down maple syrup)
  • 2 tablespoons dark cacao powder
  • 2 tablespoons maple syrup
  • 1 cup unsweetened apple sauce
  • 1/4 cup almond butter, creamy and unsalted (you could use peanut butter, but I find almond butter to be of a milder flavor)
  • 2 tablespoon vanilla
  • 1 teaspoon baking soda
  • 1 teaspoon baking powder
  • 1/2 lemon – juice (about 1/4 cup)


What you’ll do:

  1. Preheat the oven to 375 F (190 C).
  2. In a large mixing bowl, combine all the ingredients – except the lemon juice. Using a spatula or a similar flat mixing utensil, mix  well until fully incorporated, smooth and even.
  3. Add the lemon juice and mix again until all is fully mixed in. This will take about 2-3 minutes of mixing. The dough will be moist, sticky and dense.
  4. Use a small spoon to transfer the dough into the donut pan. Spoon it out bit by bit, until a donut ring is done, then proceed to the next ring and so on until all the rings are full or all the dough is used up. Don’t overfill as I said and don’t pack it in too much. You will need to nudge the dough in and smooth the surface a bit, but try not to overfill. The amount of though is enough for 8-10 donuts using regular size donut pan (like this one, which is sold as a pair on Amazon).
  5. Bake for 12-15 minutes, until the tooth pick comes out clean. Let cool for 5-10 minutes before taking out of the pan. The donuts should slide right out and are ready to enjoy!
COPYRIGHT © EAT THE VEGAN RAINBOW, 2020

Chia Seed Bread (Bread Machine Recipe)

Chia Seed Bread (Bread Machine Recipe)
Chia Seed Bread (Bread Machine Recipe), via Eat the Vegan Rainbow

When it comes to comfort food, I think we can all agree that there are not many things that can compete with freshly baked bread. Bread making is part science, part art, and part therapy. Watching the dough rise, pounding the dough down, letting the house fill with the aroma of freshly baked bread…, and then biting into a fresh, crusty loaf.

This sounds almost too good to be true, and in practice it really is. Who has the time to baby sit the dough? Not me! That’s why I bought a bread machine. It’s a specialized kitchen gadget that I use 5-6 times a year, which may not seem like much but it is worth it!

The model I have is a very basis one, without too many fancy bells and whistles. However, it is consistent and although it did not produce a good gluten-free loaf I did come close.  (To be fair, the reason for not having luck with gluten-free breads is that my bread machine does not have a gluten-free setting as some fancier machine do, and gluten-free dough does require a totally different treatment and timing.)

Back to the chia seed seed bread. I decided to try to make a rustic bread with chia seeds for added nutritional touch and a bit of texture. If you have not used chia seeds before, they are often used to make vegan puddings, or as a substitute for eggs in vegan baking. When soaked, these seeds produce a thick, gelatinous mass which can be used as a binder. This was the basic idea behind using them in a bread recipe.

The first step in this recipe, and in others that use chia seeds is soaking the seeds. I recommend using hot water to speed things up here, but you can also soak your seeds in cold water overnight. If you are using hot water please remember to let the water temperature come down to room temperature before using it in the bread machine as hot water will destroy your yeast.

Last tip for this chia seed bread is to use some lemon juice and a bit of lemon zest, plus some baking powder to help the bread rise. Chia seeds are heavy and may weigh the bread down, so a bit more leavening helps. Another modifications to the bread machine set-it-and-forget-it is to use the first resting time in the bread machine program to go in with a spatula and make sure that chia seeds are well incorporated throughout. Once that’s done, you can walk away and let the machine take care of the rest. Enjoy!

Chia Seed Bread (Bread Machine Recipe)

FOR A 2 LBS (1 KG) LOAF, FRENCH BREAD SETTING ON A BASIC OSTER MODEL)

What you’ll need:

  • 1/4 cup chia seeds
  • 3/4 cup hot water
  • 2 3/8 cups water
  • 1/4 cup oil
  • 1/2 lemon, zest and juice
  • 1 3/4 cups white flour
  • 1 3/4 cups whole wheat flour
  • 2 teaspoons baking powder
  • 1 teaspoon salt
  • 1 tablespoon sugar
  • 2 1/2 teaspoons quick rise yeast


What you’ll do:

  1. Place chia seeds in a bowl or a mug, cover with hot water, mix well and let stand until chia seeds are soaked and gelatinous, and don’t feel warm to touch. This may take 30 minutes or more, so you may want to do this step in the morning if you are planing to have the bread ready for dinner.
  2. Follow your bread machine instructions for the order in which you put your ingredients in. In my case, the order is water, oil, lemon juice and lemon zest, chia seeds, salt, flour, sugar, baking powder and yeast as the very last ingredient.
  3. Turn the program on and let the machine complete the first mixing step. When the mixing blade stops moving, open the machine and mix everything by hand with a spatula. This step is necessary as chia seeds may lump together and not mix well with the rest of the ingredients. Once you have ensured that everything is well mixed together, close the lid and let the machine take care of the rest.
  4. Your bread should be ready in 3 hours or so. Enjoy!
Copyright © Eat the Vegan Rainbow, 2020


Gluten-free flatbread with corn, cashews and chia seeds

Gluten-free flatbread with corn, cashews and chia seeds
Gluten-free flatbread with corn, cashews and chia seeds, via Eat the Vegan Rainbow

Making your own gluten-free flatbread is easy! Yes, you heard that right – so, now you don’t have any excuses not to try it. Why flatbread? Well, to be quite honest, I don’t have patience or the time needed to work with yeast – you need to babysit a piece of dough for hours and at the end all you have to show for is a loaf of bread. Undoubtedly, it’s a loaf superior to anything you may get in the store, but that usually does not compensate for the time investment.

That’s why I like my bread machine. It’s set-it-and-forget-it kind that does everything for you. And I’ve been able to get some great results this way. But sometimes you just need something more fun and unusual and flatbreads are something to try. I love tortillas (flatbread in my book), lavash, as well as Indian flatbreads, like chapati (or roti) and paratha. These are all great options for wraps, but what they miss is enough structure to make a sandwich.

I love sandwiches, and have shared recipes for sandwiches in the past, like this grilled tofu with coleslaw sandwich, or this tomato-basil-mozarella (aka caprese salad) one. So, I needed a quick, easy and flat (but not floppy) bread. Plus: the bread needed to be gluten-free.

Below is the result. I would call it a step in the right direction, as I wished that it was a bit crispier. Still, that’s nothing a toaster (or a toaster oven) can’t fix. The bread is basically made of corn, cashews and chia seeds all mixed together with some nutritional yeast, baking powder and spices.

The trick I discovered which helps bake the bread is to use a pizza stone. And if you don’t have one, don’t worry, I provide alternatives below.

Enjoy!


Gluten-free flatbread with corn, cashews and chia seeds

What you’ll need:

  • 4 cups corn kernels (fresh, frozen (defrosted) or from the can (drained))
  • 1 cup cashews
  • 1/3 cup chia seeds
  • 1/3 cup nutritional yeast
  • 1 teaspoon baking powder
  • 1/2 teaspoon black pepper
  • 1/4 teaspoon crushed red pepper flakes
  • Optional: 1/4-1/2 teaspoon salt (to taste)
  • Cooking spray

What you’ll do:

  1. Preheat the oven to 425 F (220 C) with a pizza stone in it, if using.
  2. Put all the ingredients into a food processor and process until fully combined and smooth. This will take couple of minutes.
  3. If you are not using a pizza stone there are several different ways in which you can bake this. You can use a baking sheet or a 9 in x 13 in (23 cm x 33 cm) baking dish. Regardless of a method, you will need parchment paper. If using the pizza stone you will place the parchment paper on your pizza peel and pour the batter on it, shaping into a 1/4 in (5-6 mm) thick rectangle (I am assuming you have a pizza peel if you have a pizza stone, the two go hand in hand; but if you don’t just use your kitchen counter and be very, very, very careful when placing your bread onto the pizza stone as it will be hot and you can get burned). If you are using a baking sheet or a baking dish you need to spray the parchment paper with some cooking spray to prevent sticking and pour in your batter. Smooth the top and make sure the thickness is even throughout.
  4. Place the bread into the oven. If using the pizza stone, it will take about 15 minutes to bake this bread half way through, then you will turn the oven off. Leave the bread in the oven with the heat turned off for another 15 minutes. The pizza stone and the oven retain lot of heat, so the bread will continue to bake. If you are baking without the pizza stone, bake for 25 minutes, then check for doneness. The bread will feel soft but it should not feel wet.
  5. Take the bread out, and slide the parchment paper out of the baking sheet/dish. Let the bread cool on the parchment paper until cool enough to handle, then slide on the cooling rack. This will prevent the bottom from getting soggy.
  6. Serve warm or cold, and use as you would normally use a flat bread. Enjoy!

Copyright © Eat the Vegan Rainbow, 2020

Stuffed Cornbread with Kale, Artichoke Hearts, and Sun Dried Tomatoes

Stuffed Cornbread with Kale, Artichoke Hearts, and Sun Dried Tomatoes, via Eat the Vegan Rainbow

I love cornbread – not the sweet stuff from the southern states of US of A, but the rustic savory kind of the Southern Europe. And I think you will love it too!

I recently shared a recipe for basic gluten-free cornbread, which I hope you tried, especially as a side for a nice pot of bean chili. This, on the other hand, is not your basic cornbread and it’s not gluten free, so make a note of that if you need to (I offer advice on how to make it gluten-free if you need to below).

This cornbread is a bit inspired by lasagna, and a bit inspired by lovely summer produce and flavors. With a bit of freshly grated vegan Parmesan or a dollop of vegan sour cream, and a side salad this can be your lunch or a light dinner! Or: you can serve this as appetizer bites at your next party when freshly baked and warm!!!

The key to this recipe are three layers that make the stuffing: sautéd kale layer, topped with sliced artichoke hearts layer, topped with sun dried tomatoes layer! Doesn’t this just make your mouth water?

The cornbread better is a mix of three flours: semolina (wheat flour; you can use all purpose white flour or all purpose gluten-free flour as well), fine corn meal and chickpea flour (or other bean-based flour like mung bean flour, or soy bean flour, for extra protein). What helps the bread rise is a mix of baking powder, baking soda and lemon juice, with added acidity giving an extra leavening boost.

The recipe is a bit labor intensive as I don’t recommend using raw kale, and advise getting your kale cooked all the way beforehand. Depending on how “mature” your kale is, this could take anywhere between 10 minutes if working with baby kale to 20 minutes if working with really old kale.

Additionally, I recommend that you soak the sun dried tomatoes in some hot water, to spruce them up a bit. If you are using sun dried tomatoes stored in olive oil, please skip this step and make sure the tomatoes have been well drained to remove excess oil. Better still, use the excess oil to sauté the kale and infuse it with more of that great tomato flavor!

Enjoy!!!

Stuffed Cornbread with Kale, Artichoke Hearts and Sun Dried Tomatoes

What you’ll need:

  • 1 bunch kale (about 1 lbs or 450g), de-stemmed, and finely chopped
  • 1 yellow onion, finely diced
  • 3-4 cloves garlic, thinly sliced
  • 6 oz sun dried tomatoes
  • 1 15 oz can artichoke hearts
  • 1 cup fine corn meal
  • 1 cup semolina flour (or all purpose flour, or all purpose gluten-free flour for a gluten-free version)
  • 1 cup chickpea flour (or other bean flour)
  • 2 teaspoons baking powder
  • 1 teaspoon baking soda
  • Juice of 1 lemon
  • 2 tablespoons olive oil, plus some for greasing the baking dish
  • 2 to 2 1/2 cups water

What you’ll do:

  1. Preheat the oven to 350 F (175 C).
  2. If using sun dried tomatoes that are dry, I recommend that you reconstitute them by soaking them in boiling water for 10-15 minutes. If you are using sub dried tomatoes in olive oil, please skip this step.
  3. Heat the olive oil over medium heat in a very large frying pan, or a wok. This will take 30 seconds or so. Add diced onion and sauté for 4-5 minutes, until soft and golden. Add the garlic and sauté for another minute.
  4. When garlic begins to bloom and develop the aroma, add chopped kale. The volume of a bunch of kale may seem like a lot, but it will cook down. If you are having difficulty fitting all the kale in at once, add in batches. Sauté kale until fully cooked, which will take about 10-15 minutes. You may need to add a tablespoon of water to keep kale from sticking to the pan, so stir frequently and keep an eye to prevent burning.
  5. While the kale is cooking, drain and rinse the artichoke hearts. Shake off the excess water, and slice thinly. Set aside.
  6. Drain the sun dried tomatoes either from the water they were soaking in or from the oil they are stored under. Slice them thinly and set aside.
  7. In a large mixing bowl combine cornmeal, the flours, baking soda and baking powder. In a separate container mix two cups of water with lemon juice then pour into the flour mix. Use a spatula or a wooden spoon to mix well. Add more water if needed. Depending on how fine your corn meal is (there is some variability between brands) you may need more than 2 cups of water to make a smooth, yet thick batter. Your batter should be pourable but not runny. If you run a spoon through it, it should come apart with ease.
  8. Grease the bottom and sides of a 9 x 13 in (23 x 33 cm) baking dish with some oil. Pour in half of your batter and spread evenly. Top with sautéd kale that you drained from access liquid, then top with sliced artichoke hearts, then with sliced sun dried tomatoes. Finally, pour over the rest of the batter, smooth the top and place in the oven for 30 minutes.
  9. Increase the temperature to 425 F (220 C), and bake for another 10 minutes.
  10. Take the stuffed corn bread out and let it rest for 10-15 minutes before serving. Serve as an appetizer or as a really wonderful side dish with your main course. I also enjoy it for breakfast, with some grated cheese, or as lunch with a side salad and some yogurt. Yummy!
Copyright © Eat the Vegan Rainbow, 2019

Gluten-free and Oil-free Pumpkin Cookies

Gluten-free Pumpkin Cookies
Gluten-free Pumpkin Cookies, via Eat the Vegan Rainbow

Looking for something easy and healthy to make for the holidays? Look no further than these super simple and super healthy cookies. They are full of pumpkin – and we all know that this is the pumpkin season – and are completely and naturally gluten-free. The combination of oats, coconut flour and almond flour does not really need backing and you could mix them all together, let the mix stand, and form the cookies as is. So, if you are into raw food, or minimally processed food this could be a path you take.

Baking the cookies does enhance the flavors, and that’s worth keeping this in mind. Baking also makes all the spices develop and merge. A combination of cinnamon, ginger and cardamom really blooms when heated up! At the end, baking the cookies will give you a more aromatic kitchen and platter.

What will also enhance the flavors is roasting your own pumpkin. (So, I guess not everything will be as a raw as possible since I am not sure you can use raw pumpkin – I have never tried and I am not even sure that it can be done!). Roasting the pumpkin is super easy – you don’t even need to peel it, just slice it in half, scoop out the seeds and place the pumpkin halves on a baking sheet, cut side down and roast at 425 F (220 C) for 45 minutes or so. It also helps to line the baking sheet with some foil or parchment paper – this helps the roasting and the clean up!

After the pumpkin is roasted, all you need to do is scoop the flash and purée, either in a food processor or using a masher. Food processor will make everything much smoother, but if you prefer your a more rustic pumpkin hands or a masher will do.

Enjoy!


Gluten-free and Oil-free Pumpkin Cookies

What you’ll need:

  • 1 15 oz (425 g) can pure pumpkin (not pumpkin pie filling) or 15 oz (425 g) roasted sugar pumpkin, puréed
  • 1 cup old fashioned oats
  • 1/2 cup coconut flour
  • 1/2 cup almond flour
  • 1/4 cup sugar (or solid sweetener of your choice)
  • 2 teaspoons cinnamon
  • 1 teaspoon cardamom
  • 1/2 teaspoon ginger
  • Optional: 1/4 cup maple syrup, for brushing

What you’ll do:

  1. Preheat the oven to 350 F (175 C).
  2. Combine all the ingredients in a large food processor. If you don’t have a food processor that’s large enough, you can either process in batches or process pumpkin and oats well and then just mix in the rest of the ingredients (except the optional maple syrup) by hand.
  3. Line a large cookie sheet with parchment paper.
  4. Use an ice cream scoop to measure out the amount for each cookie, than form a round and flat shape and place on the parchment paper. This amount of batter should yield about 12-14 cookies.
  5. Cross-hatch the surface of each cookie.
  6. Bake for 18-23 minutes. Cookies will be lightly browned but stay soft.
  7. Let the cookies cool for 15-20 minutes before brushing with maple syrup. You could skip this step, but why would you want to do that? Enjoy!

Copyright © Eat the Vegan Rainbow, 2019

Homemade Nut and Seed Granola

Homemade Nut and Seed Granola
Homemade Nut and Seed Granola, via Eat the Vegan Rainbow

There are so many granolas out there. And there are ready made ones that you can get from the store. So, why should you ever bother making granola at home?

Well, I bet it is sometimes hard to find the perfect granola – some may be too sweet, some may include things you don’t like, some may have flavoring agents (spices) that you can’t stand or that overpower your palate. So, what I am getting at here is that knowing how to make granola comes in handy – you can use the same technique and just switch ingredients in and out as you please.

For example, I am not a huge lover of dried fruit in my granola so I made this batch with nuts and seeds. If you are allergic, you can make granola entirely out of nuts and still get a great snack/breakfast item.

Also: you are in complete control of the sugar levels. In many cases, store bought granola mixes are just to sweet. Making your own allows you to dial sugar up or down – recommend using a syrup: agave or maple or even stevia or molasses. You do need something sticky that will serve as a glue to bind all the ingredients together. Here, I used agave syrup, and 1/3 of a cup, although it does not sound like much, is plenty.

Now, when it comes to preparation, you will need a parchment paper-lined baking sheet (or two). The first step is getting the granola spread out as much as possible. It is nice to have clusters, so don’t break every cluster apart, but you do want to make sure that you are leaving plenty of space between clusters so that they get a chance to brown and crisp up on all sides. If you discover that a single baking sheet can’t hold the entire amount you get using the measures below, use two sheets. The main trick here is to start low and slow, and “dehydrate” the granola at 200 F (which is just about 100 C) for an hour or two.

However, in order to get the final, toasted crunchiness you do need to increase the heat to 425 F (220 C) or higher. This second step takes only 5-10 minutes, and you do need to stay put and check how things are going every minute or two. It’s important to keep stirring the granola, move pieces around, and flip them over. This will prevent the burning, yet let the toasty flavors develop.

You can keep the granola in the air tight container for a week, and it will keep. You can bring it along to hikes, or have on hand as a quick snack. You can certainly enjoy it for breakfast. Putting a bit of yogurt (preferably unsweetened because granola does contain added sugar) in a small jar, and topping it with fresh fruit or a fruit compote, and some granola is all you need to get going in the morning. Closed with a tight lid, these jars can go right into your bag and come along as you rush out of house. They can also be a great mid-afternoon pick-me-up.

I admit that I sometimes go a bit crazy and add granola into my oatmeal – it is indulgent but once in a while I think it’s OK. Enjoy!


Homemade Nut and Seed Granola

What you’ll need:

  • 1/3 cup almonds
  • 1/3 cup buckwheat
  • 1/3 cup flax seed
  • 1/3 cup unsweetened coconut flakes
  • 1/3 cup sunflower seed
  • 1/3 cup pumpkin seed
  • 1/3 cup rolled oats
  • 1/3 cup hemp seeds (hulled)
  • 1/3 cup agave syrup (maple syrup or other liquid sweetener of your choice)
SERVING SUGGESTIONS
  • 1/2 cup plain plant-based yogurt
  • 1/2 cup fresh fruit (like blackberries pictured above)

What you’ll do:

  1. Preheat the oven to 200 – 210 F (about 100 C).
  2. Place the almonds into the food processor and process 4-5 times, until roughly chopped.
  3. Add the next 6 ingredients (all except hemp seeds and agave syrup) and process for another 4-5 times. You want everything to be chopped finely but not turned into a meal or flour.
  4. Pour everything into a large mixing bowl, add hemp seed and the syrup and mix well to combine. Make sure that the syrup covers everything evenly.
  5. Line a large baking sheet with parchment paper. Spread the granola evenly in a single layer of well separated clusters. Place into the oven on low heat for an hour.
  6. After an hour at low heat, increase the heat to 425 F (220 C) and toast the granola for another 5-8 minutes. Make sure you check on your granola every minute and mix each time to allow every nook and cranny to get toasted. CAUTION: you do need to baby sit this part because your granola will easily burn!!!
  7. Once nicely toasted, take the granola out and let it cool completely before using. You can use it as a dry snack, or with some milk for breakfast. My favorite is topping a bit of yogurt with a homemade berry syrup and granola – yummy!

Copyright © Eat the Vegan Rainbow, 2019

Easy Gluten-free and Vegan Corn Bread

IMG_6216
Easy Gluten-free and Vegan Corn Bread, via Eat the Vegan Rainbow

What you will learn from this recipe is how to make corn bread that needs only seven ingredients (that’s including baking powder, baking soda, salt, and oil), is completely gluten-free, and entirely vegan! It is also simple, yet delicious, without extra sugar and other funky stuff that many recipes include.

I grew up eating plenty of corn bread, especially during winter months. I’ve also shared a recipe or two, providing different variations on the theme. Here, I wanted to share a recipe that strips away all the complexity and uses corn meal, corn starch and oil, together with leavening agents and carbonated (sparkling) water to create a nutty and mealy corn bread.

The bread is a bit on a crumbly side and it is best used with hearty stews, chilis and soups, those types of dishes that need a bit of bread to mix it in. For example, it would pair well with a cabbage and bean stew, or a bean soup with chorizo, or 15 bean chili!

The down side of this corn bread is that it does not store well, and it is really at its prime when it is fresh from the oven. So, if you feel that you may not need this much corn bread, make a smaller batch. It is so easy to make that you can whisk it all together as needed. If you are bothered by crumbliness, you can add some flax egg to the batter or chia egg.

Easy Gluten-free and Vegan Corn Bread

What you’ll need:

  • 3 cups of yellow corn meal
  • 1 cup of corn starch
  • 1/3 cup canola (or other vegetable or olive) oil
  • 1 teaspoon baking powder
  • 1 teaspoon baking soda
  • 1/4 teaspoon salt
  • 2 cups sparkling (carbonated) water
  • Cooking spray


What you’ll do:

  1. Preheat oven to 425 F (220 C).
  2. In a large mixing bowl, combine cron meal, corn starch, baking soda, baking powder and salt. Mix well, then add oil and combine. Batter will be soft (see picture above).
  3. Let the batter stand for 10 minutes or so.
  4. Spray the bottom and the sides of the 8 in x 8 in (20 cm x 20 cm) baking dish. Pour the batter in, smooth the top, then place in the preheated oven to bake at high temperature for 10 minutes.
  5. Lower the temperature to 350 F (175 C) and continue baking for another 20 minutes.
  6. Let the corn bread cool for 15 minutes or so, then cut and serve. Please note that this bread will not be asa great the next day so I suggest that you enjoy it fresh!


Copyright © Eat the Vegan Rainbow, 2019

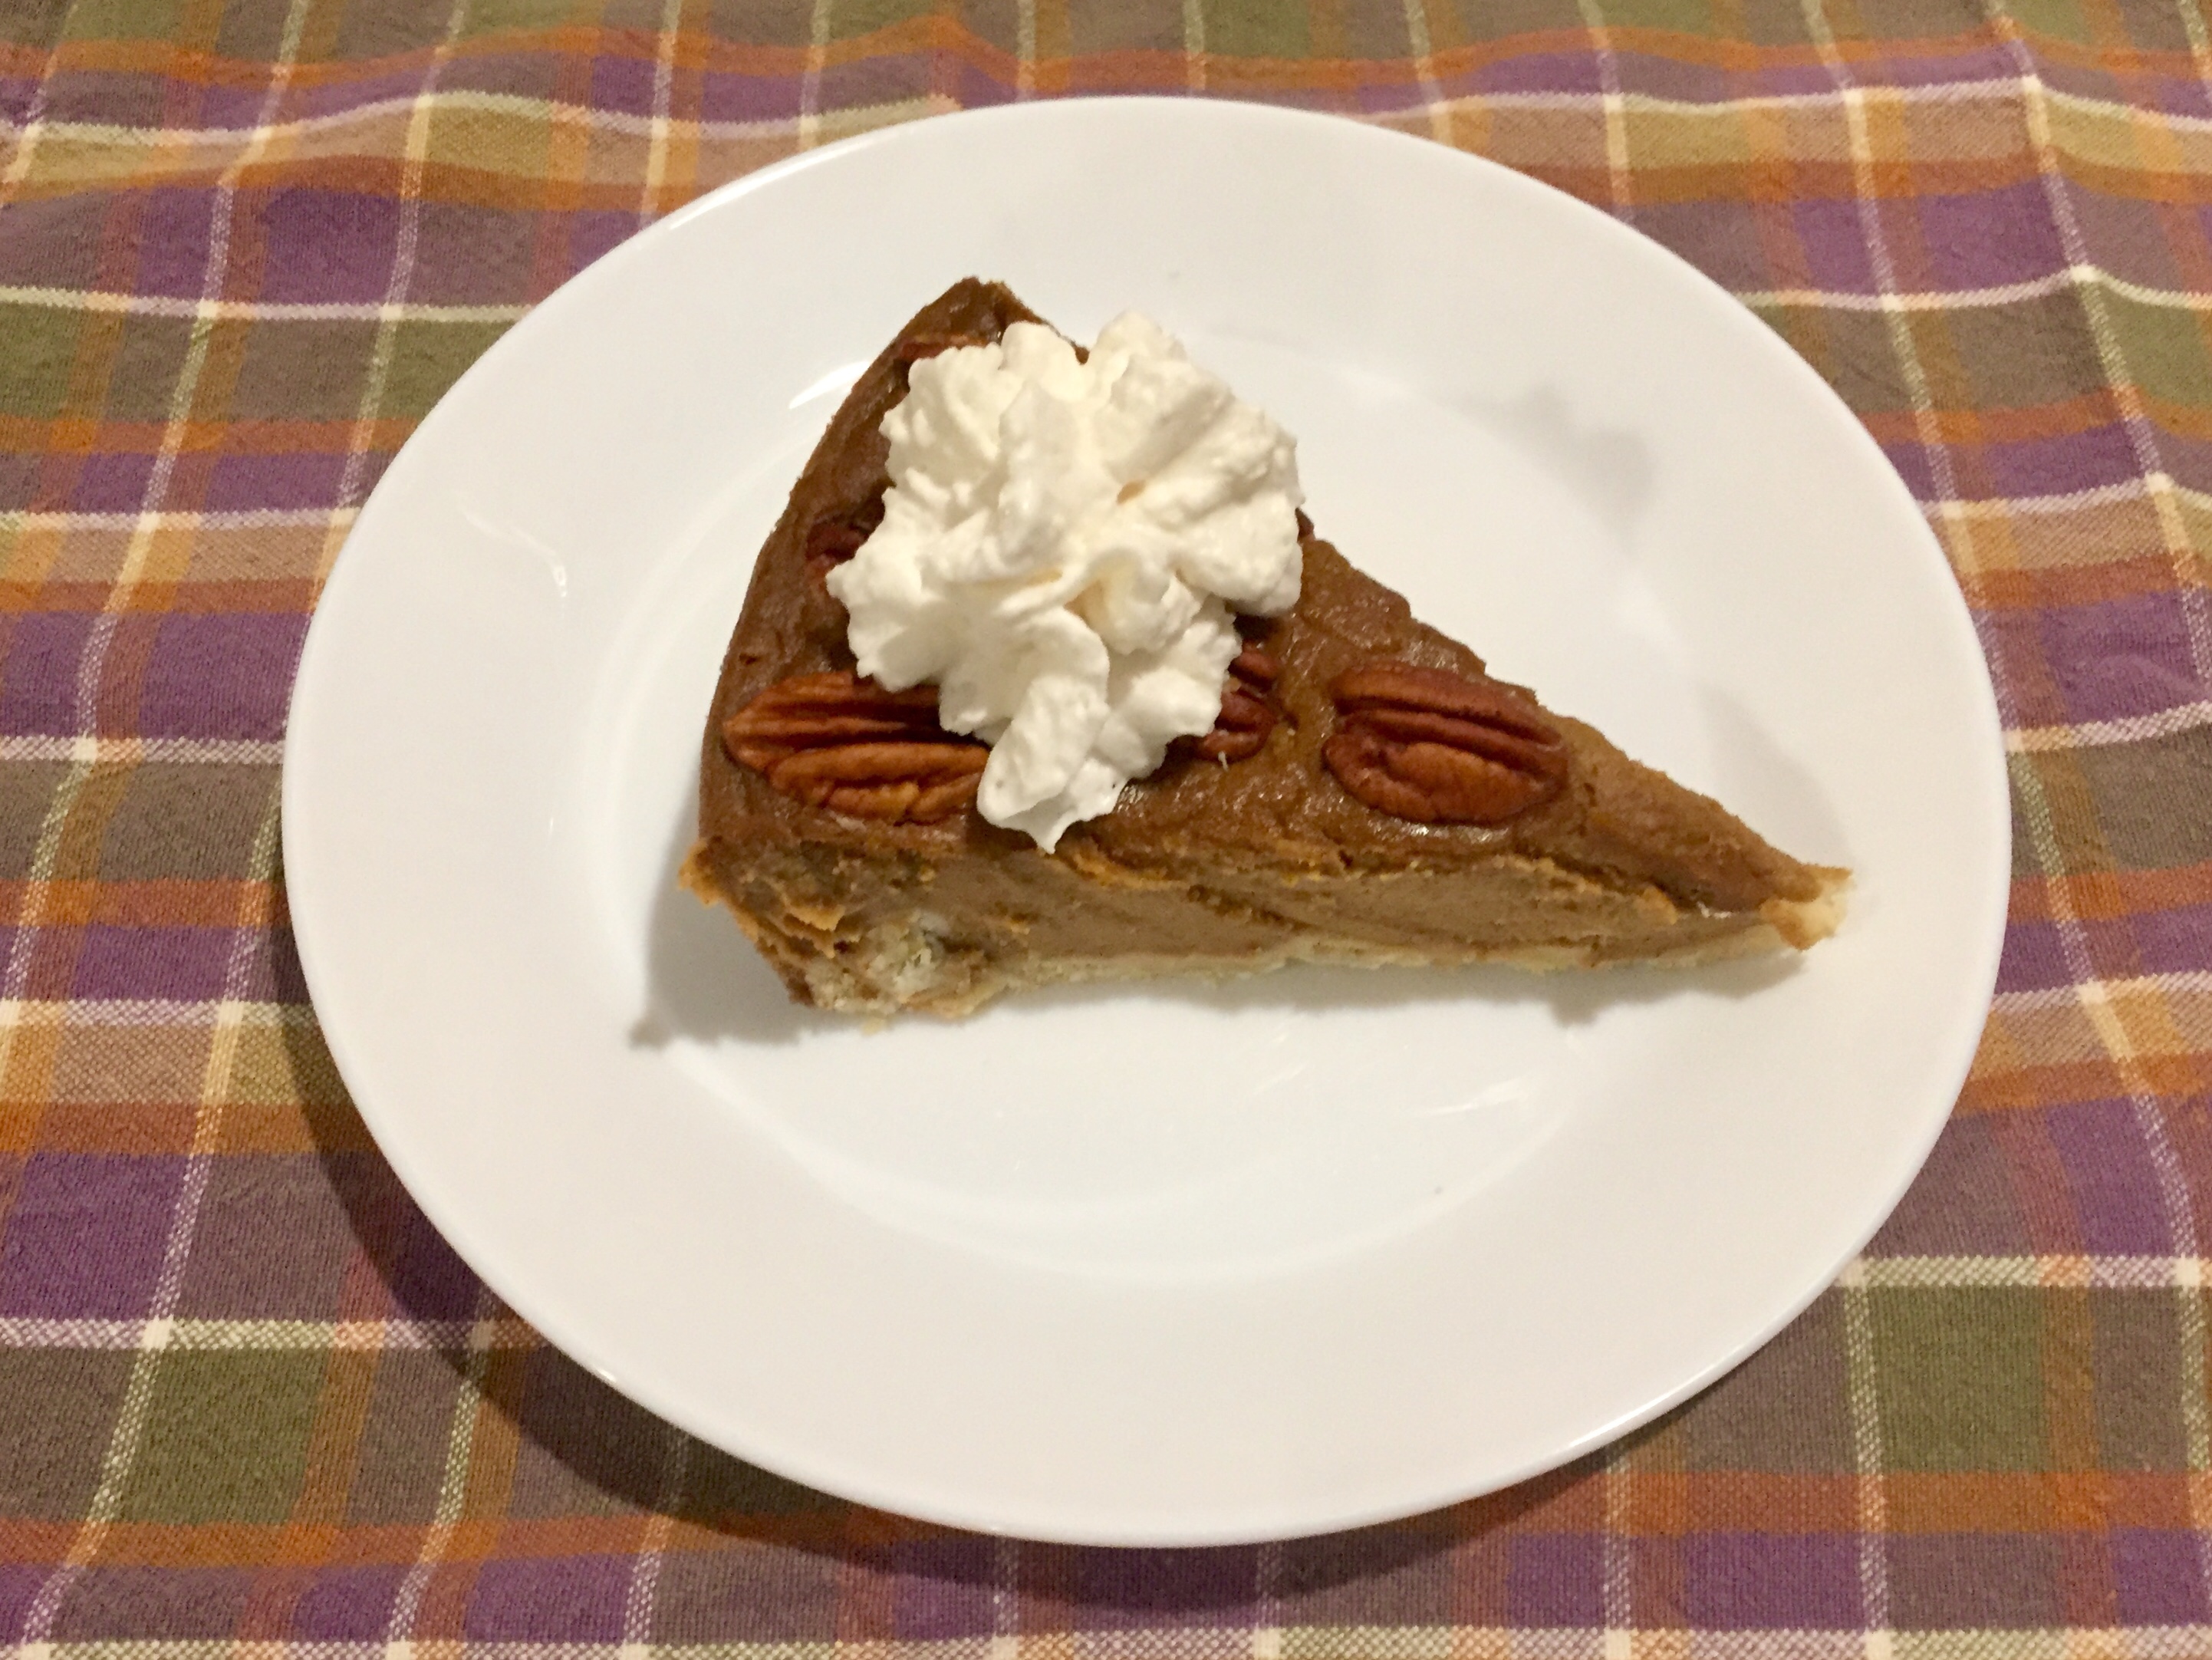
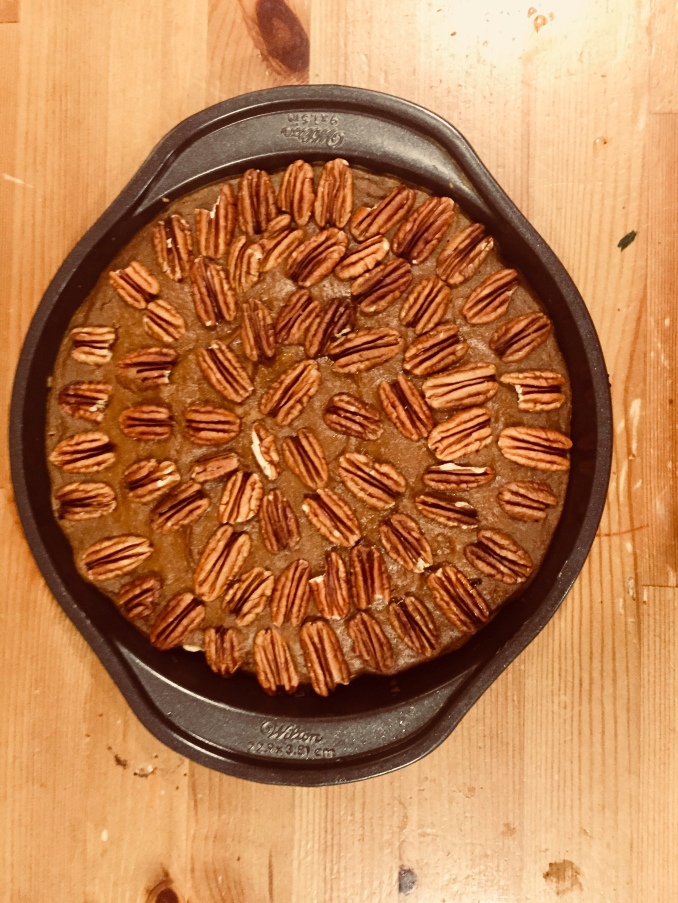
Vegan Sweet Potato Pie with Pecan Topping

img_5985
Vegan Sweet Potato Pie with Pecan Topping, via Eat the Vegan Rainbow

Sweet potatoes are the most amazing vegetable that I used to avoid like the plague. I could not stand being served sweet potatoes as a side dish at traditional American Thanksgiving dinners, and I did not enjoy them as fries either.

But: I did give them a second chance (under y own conditions) and I am very glad I did. Sweet potatoes are sweet, very sweet, especially when roasted! This makes them an ideal natural sweetener for desserts and treats, and I’ve been using them as a key ingredient for pancakes, super-sweet sweet potato butter, and even chocolate mousse pie. Sweet potatoes are also a handy substitute for pumpkin as the consistency of roasted then mashed sweet potatoes matches that of canned pumpkin well. The main difference is the sweetness level, as the sweet potatoes tend to be sweeter, while pumpkin tends to be mild. So, if you decide to make something like these brownies, you may want to adjust the amount of additional sweet ingredients you put in.

My main trick when using sweet potatoes as an ingredient in desserts, is to roast the potatoes. Roasting sweet potatoes usually takes about 45 minutes at 425 F (220 C), and can’t be simpler. All you need to do is wash the potatoes, then place them, unpeeled, on a baking sheet and let them roast until soft. You can eat these roasted sweet potatoes as a quick snack, plus breakfast, lunch and dinner. If using to make desserts, let the potatoes cool completely before puréeing, so it is best to do the roasting a day in advance.

Sweet Potato Pie is not my invention. Oh, no – it’s a very traditional dessert of the southern United States. As with its cousin, the pumpkin pie, this dessert is traditionally made with condensed (evaporated) milk and eggs, which results in a custard-like pie. For this vegan version, coconut milk and brown sugar are cooked together to make a thick and sweet “condensed milk” substitute. Plus: the recipe uses corn starch that combines to give the pie smooth, creamy and rich consistency that is very similar to the original, and cinnamon, nutmeg and clover, which give it the easily recognizable aroma.

If you love baking, you may want to make your own pie crust. However, the store-bought crusts work well and many are vegan, so you do have a choice here. I recommend baking the crust half way through before pouring in the pie filling, and pricking it with the fork before placing in the oven to back. You may even want to weigh the crust down with beans because these crusts do tend to puff up, which is to be avoided (here is some handy advice on how to get to the perfect pre-baked crust)!

The final touch for this sweet potato pie are pecans. These nuts are also traditionally found in the southern United States, and if you don’t have them where you live you can definitely use walnuts, or almonds. You can also skip the topping altogether – the pie will not taste any less awesome!!!


Vegan Sweet Potato Pie with Pecan Topping

What you’ll need:

  • 1 store-bought pie crust (or make your own – a good recipe to follow is here)
  • 1 can (13.5 fl oz; 400 mL) full fat coconut milk (you can use coconut cream, but I don’t recommend using light coconut milk)
  • 1 cup brown sugar
  • 1 tablespoon vanilla extract
  • 3 roasted sweet potatoes, puréed
  • 1 cup corn starch
  • 1 teaspoon cinnamon
  • 1/2 teaspoon ground nutmeg
  • 1/4 teaspoon grund clover
  • 30-40 whole pecans
  • Whip cream for serving (optional)


What you’ll do:

  1. Preheat the oven to 350 F (175 C).
  2. In a heavy sauce pan, combine coconut milk, sugar and vanilla extract and place over medium heat. Bring to boil and decrease the heat to low, then simmer for 15 to 20 minutes, until thick. Final volume will be about 1/3 to 1/2 less than what you started with. Set aside and let the “condensed milk” cool.
  3. While the “condensed milk” is cooling, pre-bake the crust to about half way through, which will take about 10-15 minutes (if you are making your own crust, you will need to have one ready to go so plan accordingly). Take the pre-baked crust out and let it cool.
  4. As the crust is cooling, use a food processor to combine the “condensed milk”, sweet potato purée, corn starch, and the spices. The pie filling should be smooth, thick and rich.
  5. Pour the filling into the pre-baked pie crust, and return everything into the oven for another 20 minutes. After about 20 minutes, take the pie out, and working quickly top with pecan (or walnut, or almond) halves, arranging them in neat circles or spiral until the entire surface is covered. Return to the oven and bake for another 5 to 10 minutes, to allow the pie to finish baking and pecans to get slightly toasted. If you are keeping this pie nut free, skip the nuts, and bake for a total baking time of about 25 to 30 minutes.
  6. Leave the pie to cool completely before serving. Traditionally, this pie is served with whip cream, but you can serve it just as is, with whip cream or ice cream. Yummy!

Copyright © Eat the Vegan Rainbow, 2019

Gluten-free Cinnamon Raisin Monkey Bread

Gluten-free Cinnamon Raisin Monkey Bread, via Eat the Vegan Rainbow

Have you ever heard of monkey bread? Well, neither have I until recently when I started thinking about an easy breakfast type of a bread that can be made quickly and without much fuss. Monkey bread, a pull apart sticky bread full of cinnamon and drenched in a sticky syrup, is one such option.

Most recipes for monkey bread out there start with a pre-made biscuit dough of some sort – this is fine, especially when you are in a rush, but most of these doughs are not gluten-free. Also: if you are paying attention to what you eat and how much salt and fat you consume, these products are probably not for you although most of them are actually vegan.

The recipe below is my attempt at making monkey bread that is gluten-free, relatively low on oil (and you can skip oil if you want an oil-free version), and full of lovely fruit and vegetable. To boost the flavors and sweetness, I am using pumpkin purée and raisins, and too boost healthy fats and provide a binder for the bread dough I am using chia seeds. Lastly, I am not using a great deal of sticky syrup – but just enough agave syrup to make this slightly over the top. This means that unlike monkey breads you may have had in the past this one is not dripping with gooey syrup, although it is sticky (and finger licking’ good!).

You can play with arrangements of the small dough pieces when you start to lay them out, and create any pattern you like. Traditional monkey bread is made in the Bundt pan. If you would like to experiment with that you will need to make several adjustments to the recipe below. First of all, you will need to prepare a different sticky sauce that is made from brown sugar and butter, and if you don’t want to use butter (vegan or otherwise), you may want to use a bit of corn or tapioca starch as a thickener. The sticky sauce would go to the bottom of your pan and dough chunks are layered one on top of each other. In that case, you will need to double the amount of dough from the recipe below and follow the instructions on how to assemble the bread here.

Gluten-free Cinnamon Raisin Monkey Bread

What you’ll need:

1 cup raisins

1/2 cup chia seeds

1 cup hot water

1 cup rice flour

1/2 cup arrowroot flour

1/4 cup glutinous rice flour (or corn/tapioca starch)

1 teaspoon baking powder

1 teaspoon baking soda

1 tablespoon cinnamon 

3/4 cup  pumpkin purée

3 tablespoons oil (canola or vegetable; you can skip if oil-free)

1 tablespoon apple cider vinegar 

1/3 cup agave nectar (or maple syrup), divided

Butter or oil for greasing the baking dish (optional)


What you’ll do:

  1. Cover the raisin with some water and leave them to soak overnight. If you are in a pinch and need them sooner, you can soak them in hot water and they should be ready to use within 15-30 minutes.
  2. When ready to make the monkey bread, turn the oven on to 350 F (175 C).
  3. Soak chia seeds in a cup of boiling water until gel-like substance forms. This usually takes 10-20 minutes.
  4. While chia seeds are soaking, mix together all the dry ingredients (flours and spices).
  5. In a separate bowl, mix together the wet ingredients: pumpkin puree, soaked chia seeds, oil, and vinegar. Mix well.
  6. Pour the wet ingredients into the dry ones, mix well, then add the raisins and mix again.
  7. Grease the bottom and the sides of a baking dish (8 x 8 in (20 x 20 cm)). You can skip this step if you are using a high quality non-stick pan. Pinch smaller chunks of the dough (roughly 1/4 cup), form into a ball by gently rolling (don’t pack too tightly, the dough should feel loose but not falling apart), and start arranging the monkey bread by placing the balls next to each other. Let them touch but don’t press the balls together. If you can’t squeeze them all in, start another layer and continue until all the dough is used up.
  8. When all the dough balls are all arranged, brush one half of the agave nectar over the top, and bake for 20-30 minutes. The monkey bread is done when the surface is completely brown.
  9. Take the monkey bread out of the oven, brush the rest of the agave nectar over, and leave to soak and cool for 15 minutes or so before digging in!

Copyright © Eat the Vegan Rainbow, 2019


Pumpkin Brownies with Chocolate Avocado Frosting

Image 2-12-19 at 8.25 AM
Pumpkin Brownies with Chocolate Avocado Frosting, via Eat the Vegan Rainbow

The magic of chocolate is real – just ask anyone who has ever had a piece of delicious, rich, dark chocolate goodness. Of course, that makes desserts like brownies so addictive. But: they don’t need to be such a guilty pleasure if you take the time to add couple of things that are good for you, like fruit and veggies, and take away couple of things that are not so good, like added sugar and eggs. And the best thing about this strategy is that, guess what? – nobody will know your secret.

I recently profiled a Veggie Patch Brownie recipe from a recently published cook book, and that inspired me to experiment on my own. My concoction includes lots of vegan chocolate – Enjoy Life is the brand I can find around where I live but any semi-sweet vegan chocolate chips or baking chocolate will work – and some vegan butter which you could likely omit if going for a really healthy version. But, if you are making these brownies for a special occasion like Valentine’s Day, Thanksgiving, St. Patrick’s Day, New Year’s Eve, graduation…, being a bit indulgent seems justified to me. In a need of healthier option? These brownies full of oats and chickpeas may do the trick!

Another thing to note is that you don’t need to use pumpkin purée if not available. You can replace it with sweet potato or butternut squash purée. Even carrots would work here – all you need is a dense purée made of somewhat sweet vegetable and you should be fine. I usually recommend roasting (not boiling) the vegetables, as roasting brings out more sweetness and makes the veggies less mushy.

One final tip? Oh, yes: let the brownies cool completely before frosting and after you frost them it’s best to give them some time for the frosting to firm up a bit before biting in. Happy eating!

Image 2-12-19 at 8.25 AM (1)

Pumpkin Brownies with Chocolate Avocado Frosting

What you’ll need:

FOR THE BROWNIES:
  • 4 tablespoons golden flax meal (other flax meal will work as well)
  • 1 cup hot water 
  • 1 stick butter, softened (vegan, or if making vegetarian version regular butter will work)
  • 10 oz dark chocolate chips (vegan brand I like is Enjoy Life)
  • 1 15 oz (425 g) can pumpkin purée
  • 2 cups flour (all-purpose gluten-free if needed)
  • 2 teaspoons baking powder
  • 1 teaspoon baking soda
  • 1 teaspoon cinnamon 
  • 1/2 teaspoon nutmeg 
  • 1/4 teaspoon clover
  • 1 tablespoon lemon juice
FOR THE FROSTING
  • 1 cup dark chocolate chips, melted
  • 1 avocado
  • 2 tablespoons butter, softened

(Optional toppings): Sprinkle with crushed freeze-dried strawberries and/or raspberries for a Valentine’s Day version; or chopped shelled pistachios for St. Patrick’s Day; or top with chopped walnuts or shredded coconut for an extra special winter holiday spread.


What you’ll do:

  1. Preheat the oven to 350 F (175 C).
  2. Pour 1 cup of boiling water over the flax meal, mix really well and set aside to soak for 5-10 minutes. Flax meal should become gooey and dense, almost like a gel.
  3. Place the chocolate chips into a microwave safe bowl or a double boiler. If using a double boiler, bring water to boil then add the chocolate chips, and mix until about 75% melted. Take off the double boiler and continue mixing until all chocolate is melted, smooth and combined. You will need to do the same if using microwave oven. Microwave on high in 30 second increments. After each 30 second period, check the chocolate and mix. Stop when about 75% of chips are melted, but continue to mix. Your bowl and the chocolate will have enough residual heat to melt the rest.
  4. Add softened butter, melted chocolate chips, pumpkin purée, and soaked flax meal into the food processor and combine until smooth.
  5. In a large mixing bowl, combine the dry ingredients: flour, baking soda, baking powder and all the dry spices.
  6. Add the wet ingredients as well as the lemon juice and mix well.
  7. Pour the batter into a 9 x 13 in (23 x 33 cm) slightly greased pan. Even the top out then bake for 25 minutes or so. Your brownies are done when the top looks baked and the sides look as they are starting to come loose. Please note that these brownies have lots of chocolate so the toothpick may not come out dry. But, it should still be fairly dry, with perhaps some melted chocolate on it.
  8. Take the brownies out of the oven and let them cool completely. They should be room temperature before frosting.
  9. To make the frosting, mix the softened butter with avocado using a hand held mixer, a stick blender or a blender. Add melted chocolate and mix until creamy. Spread the frosting over the brownies, decorate as desired (the wiggles on my photo above were done using a fork), and let the frosting firm up (30-60 minutes should do it!). You can sprinkle any or all of the optional toppings or leave as is. 
  10. Cut into square and serve! These brownies are very rich, without being very sweet and you will likely not need ice cream or whip cream to go with them – but if that’s how you roll, then just roll with it!!!

Copyright © Eat the Vegan Rainbow, 2019