Quick No-Knead Artisan Bread

Quick No-Knead Artisan Bread
Quick No-Knead Artisan Bread, via Eat the Vegan Rainbow

Would you like to be able to make an artisan loaf of bread in your own house in less than 4 hours with no kneading and almost no effort? I knew you would!

This recipe was inspired by several things: (1) impatience; (2) dislike of kneading; (3) internet; and (4) Twitter. I am not a baker, and have very little patience for recipes that ask me to knead the dough for 15 minutes, then wait for 3-4 hours, then pound the dough and knead more, then wait for another 1-2 hours, then pound again and then bake (and don’t even start me on sourdough starter which is this magical thing that is handed down through generation and treasured… enough said!). It’s a lot of work and it’s not much fun, at least not for me.

But: I do love bread! And I love freshly baked bread which is easy to get your hands on in Serbia where I grew up, but almost impossible to find in the US where I live now. To try to fix this disconnect between wanting fresh bread and not wanting to spend ages making, it I bought a bread machine some time ago. Bread machines work well and they are really easy to use (see my bread machine bread recipes here and here). However, the loafs you get are very much of an industrial looking kind, so if you are craving something more rustic and artisan the bread machine will not be able to help you – I will!

The recipe below came to me in a flash. I guess because of the COVID-19 pandemic that’s destroying the world at the moment mostly due to the lack of leadership and gross incompetence, there has been a major increase in random bread making videos and tutorials in my social media feeds. One of them showed how to make something called No-Knead Bread (and yes, this type of bread has it’s on Wikipedia page while many female scientists are not considered important enough to have one). That was intriguing enough – a bread that requires only 4-5 ingredients, is cooked in the Dutch oven and looks like something from a magazine? Sign me up!

What spurred me into action was a random tweet by Nigella Lawson that someone in my feed retweeted that said that using pasta water, instead of simply water, will make the bread have better texture and rise. Below is the recipe that combines the two – the quick no-knead bread strategy and the pasta water tip. Results will amaze you!

Quick No-Knead Artisan Bread

What you’ll need:

  • 3 cups flour (all-purpose)
  • 2 teaspoons sugar
  • 1 teaspoon salt
  • 1 teaspoon instant quick-rise yeast
  • 1 cup pasta water (when left in the fridge, pasta water can gel because it has a lot of starch. Don’t worry about it – measure 1 cup and carry on)
  • 3/4 cup water
  • extra flour for dusting


What you’ll do:

  1. In a large mixing bowl combine flour, sugar, salt and yeast.
  2. Measure out pasta water and water and combine into a microwave safe bowl. Heat up for about 1 minute or until water feels hot to touch. (I take a drop or two of water out using a spoon and then drip it onto the inside of my wrist – same way you would check the temperature of the baby’s bottle.) The water should be hot, but not boiling.
  3. Pour the liquid into the bowl and mix with a wooden spoon until everything is well combined. The dough will be sticky, but don’t worry about it. Cover with a plastic wrap and let stand on the kitchen counter for 3-4 hours.
  4. After about 3-4 hours, take the dough out onto your working surface. I line my kitchen counter with some wax paper, which helps with the clean up. The dough should have doubled in volume and be ready to be transferred into a large Dutch oven lined with some parchment paper (or another oven-safe heavy pot with a lid). Dust your working surface with some flour, as well as your hands and sides of your bowl. The dough will be soft and sticky so you will need to use flour to help you scoop the dough out onto your working surface. Use your hands to form a nice round loaf – this is a no-knead bread, so don’t knead! Just move the dough gently into a rounded shape.
  5. Place the dough into the Dutch oven and cover with a moist kitchen towel and let stand while the oven pre-heats. (Please note that some of the recipes I’ve seen suggest that you preheat the Dutch oven with the lid on while you leave your loaf to rise covered with a moist kitchen towel on your working surface. This may make the transfer of the loaf into a really hot Dutch oven tricky and potentially dangerous, so I recommend placing the dough into the cold pot and skipping the pot preheating step).
  6. Preheat the oven to 450 F (230 C), with a rack place in the middle 1/3 of the oven (more of less).
  7. Once preheated, remove the moist towel from your Dutch oven, put the lid on and place the pot into the oven. Bake for 25-30 minutes covered, then remove the lid and finish baking the bread uncovered for 15 minutes. This will help crisp up the top.
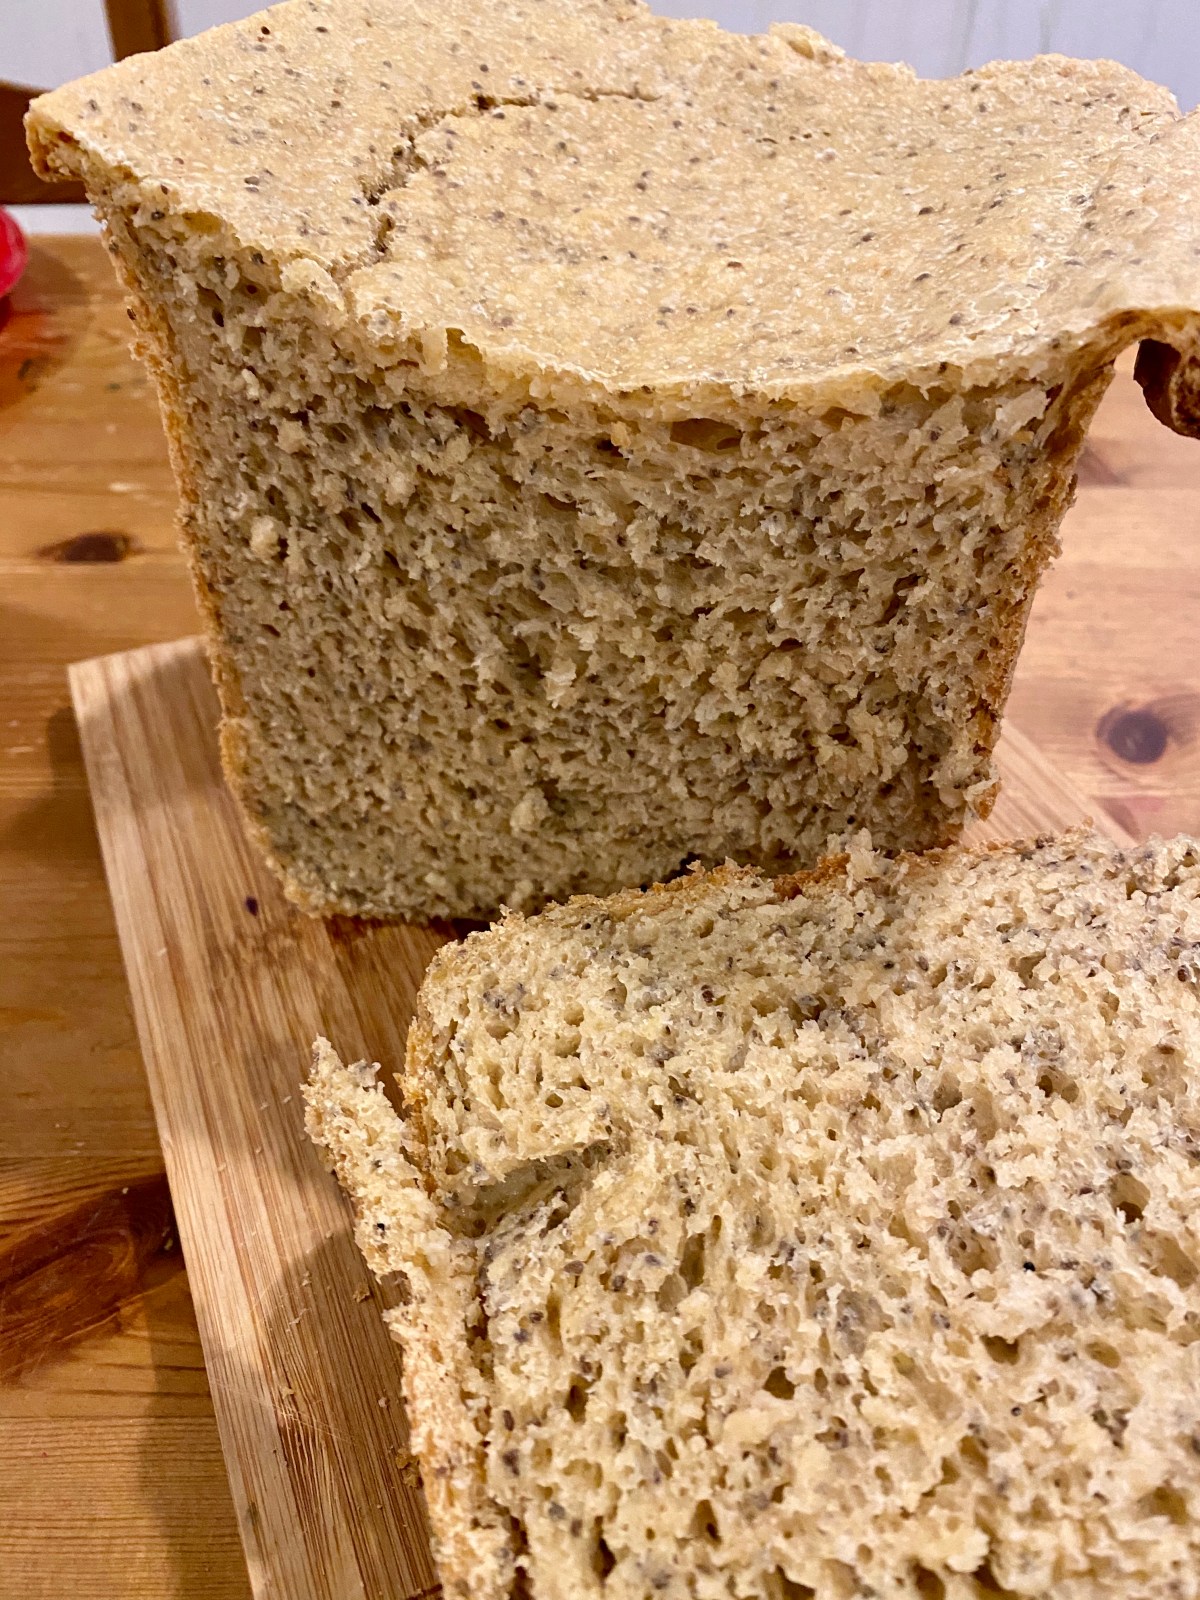
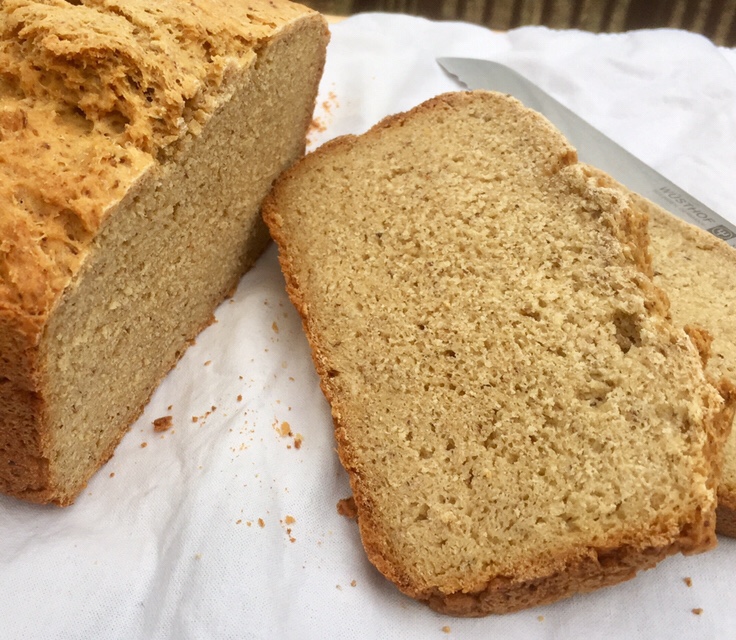
  8. Take the loaf out of the Dutch oven and onto a cutting board. Let the bread cool for at least 30 minutes before cutting – this is a very hot loaf and even after 30 minutes the inside may still be warm. Enjoy!!!
COPYRIGHT © EAT THE VEGAN RAINBOW, 2020


Chia Seed Bread (Bread Machine Recipe)

Chia Seed Bread (Bread Machine Recipe)
Chia Seed Bread (Bread Machine Recipe), via Eat the Vegan Rainbow

When it comes to comfort food, I think we can all agree that there are not many things that can compete with freshly baked bread. Bread making is part science, part art, and part therapy. Watching the dough rise, pounding the dough down, letting the house fill with the aroma of freshly baked bread…, and then biting into a fresh, crusty loaf.

This sounds almost too good to be true, and in practice it really is. Who has the time to baby sit the dough? Not me! That’s why I bought a bread machine. It’s a specialized kitchen gadget that I use 5-6 times a year, which may not seem like much but it is worth it!

The model I have is a very basis one, without too many fancy bells and whistles. However, it is consistent and although it did not produce a good gluten-free loaf I did come close.  (To be fair, the reason for not having luck with gluten-free breads is that my bread machine does not have a gluten-free setting as some fancier machine do, and gluten-free dough does require a totally different treatment and timing.)

Back to the chia seed seed bread. I decided to try to make a rustic bread with chia seeds for added nutritional touch and a bit of texture. If you have not used chia seeds before, they are often used to make vegan puddings, or as a substitute for eggs in vegan baking. When soaked, these seeds produce a thick, gelatinous mass which can be used as a binder. This was the basic idea behind using them in a bread recipe.

The first step in this recipe, and in others that use chia seeds is soaking the seeds. I recommend using hot water to speed things up here, but you can also soak your seeds in cold water overnight. If you are using hot water please remember to let the water temperature come down to room temperature before using it in the bread machine as hot water will destroy your yeast.

Last tip for this chia seed bread is to use some lemon juice and a bit of lemon zest, plus some baking powder to help the bread rise. Chia seeds are heavy and may weigh the bread down, so a bit more leavening helps. Another modifications to the bread machine set-it-and-forget-it is to use the first resting time in the bread machine program to go in with a spatula and make sure that chia seeds are well incorporated throughout. Once that’s done, you can walk away and let the machine take care of the rest. Enjoy!

Chia Seed Bread (Bread Machine Recipe)

FOR A 2 LBS (1 KG) LOAF, FRENCH BREAD SETTING ON A BASIC OSTER MODEL)

What you’ll need:

  • 1/4 cup chia seeds
  • 3/4 cup hot water
  • 2 3/8 cups water
  • 1/4 cup oil
  • 1/2 lemon, zest and juice
  • 1 3/4 cups white flour
  • 1 3/4 cups whole wheat flour
  • 2 teaspoons baking powder
  • 1 teaspoon salt
  • 1 tablespoon sugar
  • 2 1/2 teaspoons quick rise yeast


What you’ll do:

  1. Place chia seeds in a bowl or a mug, cover with hot water, mix well and let stand until chia seeds are soaked and gelatinous, and don’t feel warm to touch. This may take 30 minutes or more, so you may want to do this step in the morning if you are planing to have the bread ready for dinner.
  2. Follow your bread machine instructions for the order in which you put your ingredients in. In my case, the order is water, oil, lemon juice and lemon zest, chia seeds, salt, flour, sugar, baking powder and yeast as the very last ingredient.
  3. Turn the program on and let the machine complete the first mixing step. When the mixing blade stops moving, open the machine and mix everything by hand with a spatula. This step is necessary as chia seeds may lump together and not mix well with the rest of the ingredients. Once you have ensured that everything is well mixed together, close the lid and let the machine take care of the rest.
  4. Your bread should be ready in 3 hours or so. Enjoy!
Copyright © Eat the Vegan Rainbow, 2020


Gluten-free flatbread with corn, cashews and chia seeds

Gluten-free flatbread with corn, cashews and chia seeds
Gluten-free flatbread with corn, cashews and chia seeds, via Eat the Vegan Rainbow

Making your own gluten-free flatbread is easy! Yes, you heard that right – so, now you don’t have any excuses not to try it. Why flatbread? Well, to be quite honest, I don’t have patience or the time needed to work with yeast – you need to babysit a piece of dough for hours and at the end all you have to show for is a loaf of bread. Undoubtedly, it’s a loaf superior to anything you may get in the store, but that usually does not compensate for the time investment.

That’s why I like my bread machine. It’s set-it-and-forget-it kind that does everything for you. And I’ve been able to get some great results this way. But sometimes you just need something more fun and unusual and flatbreads are something to try. I love tortillas (flatbread in my book), lavash, as well as Indian flatbreads, like chapati (or roti) and paratha. These are all great options for wraps, but what they miss is enough structure to make a sandwich.

I love sandwiches, and have shared recipes for sandwiches in the past, like this grilled tofu with coleslaw sandwich, or this tomato-basil-mozarella (aka caprese salad) one. So, I needed a quick, easy and flat (but not floppy) bread. Plus: the bread needed to be gluten-free.

Below is the result. I would call it a step in the right direction, as I wished that it was a bit crispier. Still, that’s nothing a toaster (or a toaster oven) can’t fix. The bread is basically made of corn, cashews and chia seeds all mixed together with some nutritional yeast, baking powder and spices.

The trick I discovered which helps bake the bread is to use a pizza stone. And if you don’t have one, don’t worry, I provide alternatives below.

Enjoy!


Gluten-free flatbread with corn, cashews and chia seeds

What you’ll need:

  • 4 cups corn kernels (fresh, frozen (defrosted) or from the can (drained))
  • 1 cup cashews
  • 1/3 cup chia seeds
  • 1/3 cup nutritional yeast
  • 1 teaspoon baking powder
  • 1/2 teaspoon black pepper
  • 1/4 teaspoon crushed red pepper flakes
  • Optional: 1/4-1/2 teaspoon salt (to taste)
  • Cooking spray

What you’ll do:

  1. Preheat the oven to 425 F (220 C) with a pizza stone in it, if using.
  2. Put all the ingredients into a food processor and process until fully combined and smooth. This will take couple of minutes.
  3. If you are not using a pizza stone there are several different ways in which you can bake this. You can use a baking sheet or a 9 in x 13 in (23 cm x 33 cm) baking dish. Regardless of a method, you will need parchment paper. If using the pizza stone you will place the parchment paper on your pizza peel and pour the batter on it, shaping into a 1/4 in (5-6 mm) thick rectangle (I am assuming you have a pizza peel if you have a pizza stone, the two go hand in hand; but if you don’t just use your kitchen counter and be very, very, very careful when placing your bread onto the pizza stone as it will be hot and you can get burned). If you are using a baking sheet or a baking dish you need to spray the parchment paper with some cooking spray to prevent sticking and pour in your batter. Smooth the top and make sure the thickness is even throughout.
  4. Place the bread into the oven. If using the pizza stone, it will take about 15 minutes to bake this bread half way through, then you will turn the oven off. Leave the bread in the oven with the heat turned off for another 15 minutes. The pizza stone and the oven retain lot of heat, so the bread will continue to bake. If you are baking without the pizza stone, bake for 25 minutes, then check for doneness. The bread will feel soft but it should not feel wet.
  5. Take the bread out, and slide the parchment paper out of the baking sheet/dish. Let the bread cool on the parchment paper until cool enough to handle, then slide on the cooling rack. This will prevent the bottom from getting soggy.
  6. Serve warm or cold, and use as you would normally use a flat bread. Enjoy!

Copyright © Eat the Vegan Rainbow, 2020

Towards a Gluten-free Vegan Bread Loaf

img_4482
Kamut and Chickpea Fluor Vegan Loaf, via Eat the Vegan Rainbow

Imagine the smell of freshly baked bread spreading throughout your kitchen, and beyond… Cozy, sweet, homey, friendly and welcoming – the smell of freshly baked bread sends all those signals to our senses and more.

But, bread making and baking has always seemed too complicated and too impractical to me, especially since you can get an almost-freshly-baked loaf at any large supermarket these days. And if you live in Europe, small, local bakeries are likely on every street corner, offering really delightful breads made in small batches and very often available right out the oven.

Now, freshly baked gluten-free breads are far less widely available. And if you are looking for gluten-free and vegan breads, freshly baked or otherwise, you may be completely out of store-bought options because almost all gluten-free breads use either eggs or egg whites to give the bread structure in absence of gluten.

I’ve been tinkering with gluten-free baking a bit, and it’s generally forgiving if you are going for cookies, muffins, brownies, or pizza. But, making anything that needs to rise, and stay up, has been a challenge.

Enter bread machine! I recently purchased a basic bread machine model that offers couple of bread settings and loaf size and crust options, and have now used it to get very close to achieving the impossible, a loaf of 100% gluten-free vegan bread.

I’m not there yet but I think I’m getting closer. My most recent experiment used sprouted kamut (khorasan) flour, which is a wheat variety and therefore not gluten-free. But, khorasan flour seems to be easier to digest, especially when sprouted, and therefore better for people who are trying to avoid and/or minimize gluten for reasons other than allergy, celiac or intolerance. I’ve combined khorasan flour with chickpea flour, which is a gluten-free option, a mix of starches (corn and tapioca), and some flax meal. I also added some xantham gum into my dry ingredients as well as some baking powder. This baking powder is in addition to yeast and it helps the bread rise – gluten-free and low-gluten breads need all the help they can get! I meant mixed all the dry ingredients together before adding them to the bread machine.

Regarding the order of the ingredients, you must follow your bread machine instructions. Mine start with the liquids and end with instant rise yeast that is not supposed to touch the liquids directly, so it always added last into the dry ingredients.

If you have an option to select gluten-free setting, I recommend you use it. If not, you may want to play around with the timing a bit. Gluten-free breads tend to work best when they are allowed to rise only once, so you may want pick an express cycle or do a more manual prep if your machine does not have a gluten-free program. Here, I used French bread setting, 2 lbs (1 kg) loaf size, and medium crust on the basic Oster model.

The result is a very hearty loaf, with a good amount of chew, and a very nice nutty earthiness to it. You can enjoy it as is, with a salad, or with a quick jam, or homemade Nutella. The crunch and the aroma of freshly baked bread can’t be beat!!!

Vegan Kamut and Chickpea Flour Bread Loaf

What you’ll need:

1/4 cup oil, canola

1 3/8 cup (300 ml) water

2 cups khorasan flour, sprouted

3/4 cup chickpea flour

1/2 cup corn starch

1/2 cup tapioca starch

1 tablespoon sugar

1 1/2 teaspoon salt

2 tablespoons flax meal

1 1/2 teaspoon xantham gum

1 teaspoon baking powder

2 teaspoons quick-rise active yeast

What you’ll do:

loaf

  1. Add water and oil into your bread machine pan.
  2. In a separate mixing bowl mix all dry ingredients except the yeast. Add the dry ingredients to the wet.
  3. Using your finger make a small hole in your dry ingredients and add yeast to it.
  4. Close your bread machine, pick the appropriate cycle keeping in mind that this amount of ingredients is supposed to yield a 2 lbs (1 kg) loaf, and that you should preferably go with a gluten-free bread setting. If unavailable, you can use Express setting if the baking step is at least 40-50 minutes long. If none of this is what your bread machine offers in terms of options, go with the most basic program. You may need to re-adjust so approach this with an open and experimental mind. Remember: your perfect loaf is within your reach!

Copyright © Eat the Vegan Rainbow, 2018

Coconut Bread Pudding: So Yummy, Good for the Tummy

Easy Coconut Bread Pudding
Easy (and Vegan) Coconut Bread Pudding, via Eat the Vegan Rainbow

A lovely dessert is always a welcome ending for a great meal. I have a major sweet tooth, but I am not a great baker and cake maker. So, my desserts are usually no-bake, like the Chocolate Bon Bons and the Blueberry Cheesecake, or simple cookies, muffins and crumbles that are full of fruit and really forgiving when it comes to exact measurements.

Still, none of those come even close to the simplicity and versility of my Coconut Bread Pudding. This bread pudding requires no prior knowledge of baking techniques, and uses plant-based ingredients. The final product is deliciously sweet, comforting and satisfying, so you can eat it as a dessert, as well as breakfast or brunch.

In terms of the skills required to make this wonder bread pudding happen, you only need how to mix and soak. The recipe starts with a super easy wet mix which you can whisk in a flash. Then comes bread which you can cut up or break into chunks by hand. The best type of bread to use here is a spongy one, because the main thing the bread needs to do is soak up the wet ingredients. One trick people sometimes use is to leave a loaf of bread on the kitchen counter for a day or so, and use this, slightly stale bread, to make the bread pudding. In my opinion there’s no reason to do this on purpose, but if you have stale bread on your hands then transforming it into a bread pudding is the way to go! Regardless whether you use fresh or stale bread, you should give your bread chunks time to soak up all the juices before taking the next step, so leave them in the wet mix for at least fifteen minutes.

Once the bread is ready, add raisins and shredded coconut, mix gently, pour into a baking dish and about half an hour later you will have a kitchen that smells like heaven and a bread pudding that tastes like paradise!

Coconut Bread Pudding

What you’ll need:

6 slices of bread, cubed (or about 1/2 of a large bread loaf)

1 cup almond milk

1/4 cup orange juice

1/4 cup brown sugar

1/4 cup coconut flakes, unsweetened

1/4 cup raisins

1 tablespoon cinnamon

1/2 teaspoon nutmeg

Cooking spray


What you’ll do:

  1.  Preheat the oven to 400 F (205 C).
  2. Chop the bread into 1 x 1 in (2.5 x 2.5 cm). Note that these are approximate measures and you don’t have to go crazy here. The point is to have bread chunks that can hold their shape yet have enough surface area to soak up all the liquid. If you are using stale bread you can go smaller. If you like your bread pudding to maintain more of your bread dough texture go bigger! Place the bread chunks into a large mixing bowl.
  3. In a separate mixing bowl (or a large soup plate, which is my preferred way) mix the wet ingredients, everything except raisins and coconut flakes.
  4. Pour over the bread chunks and gently fold everything together. Be gentle here if your bread is very soft because you don’t want to end up with a mushy mess. Larger bread chunks and more rustic bread can take a bit more beating but do proceed with caution. Let the mix rest for at least 15 minutes.
  5. When the bread has soaked up (almost all) the liquid, add raisins and coconut flakes and mix gently. At this point your bread chunks will be fragile and mushy so you want to preserve their structural integrity as much as possible so give your pudding a more interesting texture.
  6. Spray a bottom of a deep 8 x 8 in (20 x 20 cm) baking dish with cooking spray and pour the bread mix in.
  7. Put in the oven and bake for 25 to 35 minutes. Keep an eye on your oven, as you want the top of your bread pudding to be nice and brown. Let it cool for a moment or two and dig in. You can sprinkle powdered sugar on top of you like, or add some fresh fruit if you are feeling adventurous!

Enjoy for breakfast, brunch, snack, dessert… Sky is the limit!

Copyright ©Eat the Vegan Rainbow, 2017

Balkan Style Cornbread, Gluten-free and Vegan

Balkan Corn Bread
Balkan Style Cornbread, via Eat the Vegan Rainbow
Yesterday I shared the recipe for Balkan Cabbage and Bean Stew that I developed as a way of keeping my grandmother’s culinary traditions going in the 21st century. The very best, and also very traditional, side food for a sturdy Balkan dish featuring a pile of cabbage and beans is proja (pronounced pro-ya), a savory cornbread that is, in its pure form simple and subtle.  Think polenta but in sold form!

Over the years, recipes for proja have diversified away from using just corn flour, water, oil and baking soda, into more elaborate recipes that include eggs, cheese, yogurt, ham, and even pickles. I tried and enjoyed many of them, and they are delicious. But when it comes to pairing with a rich main dish, simpler is better. The recipe below is a relatively pared down but not-your-grandma’s Balkan style cornbread that is gluten-free and vegan.

I decided to add actual corn kernels to this recipe for a slightly more interesting texture. The corn I use is frozen corn that I defrosted on my kitchen counter top (you can always do it overnight in the fridge or quickly in the microwave). To jazz things up a bit I did add a can of fire roasted diced green chiles. You can totally skip this or add any other pepper you like if you are into a spicier version of the corn bread with a bit of kick!

Balkan Style Corn Bread
Balkan Style Cornbread, Gluten-free and Vegan, via Eat the Vegan Rainbow

Balkan Style Cornbread, Gluten-free and Vegan

What you’ll need:

1 1/2 cup corn meal, fine

1 1/2 cup rice flour

1/2 cup corn starch

2 cups kernel corn

1 can chili peppers

2 teaspoon baking powder

1 teaspoon baking soda

3 tablespoons  vegetable oil

2 cups water

Cooking spray

What you’ll do:

  1. Preheat the oven to 425 F (220 C).
  2. In a large mixing bowl combine all the ingredients except water. Add 1 cup of water and mix well. The cornbread batter should be wet but not too fluid, so I recommend adding the second cup of water in stages to make sure you don’t end up with a corn bread soup.
  3. Spray the bottom and the sides of a 13 x 9 in (33 x 23 cm) baking dish with the cooking spray.
  4. Pour the cornbread batter in, even it out and put it in the oven.
  5. Bake at 425 F (220 C) for 20 min then lower the temperature to 350 F (175 C) for another 20 minutes.
  6. Leave on the counter top for 10-15 minutes to cool, then cut and enjoy!

Note: This corn bread tastes great warm but if you don’t finish the entire cornbread immediately I recommend taking it out of the baking dish and storing in an air tight container in the refrigerator for up to 5 days. You can reheat it in the toaster oven or zap it for 30 sec in the microwave oven.

Copyright © Eat the Vegan Rainbow, 2017