Free and Beautiful – Flourless Double Chocolate Brownies with Chickpeas and Oats

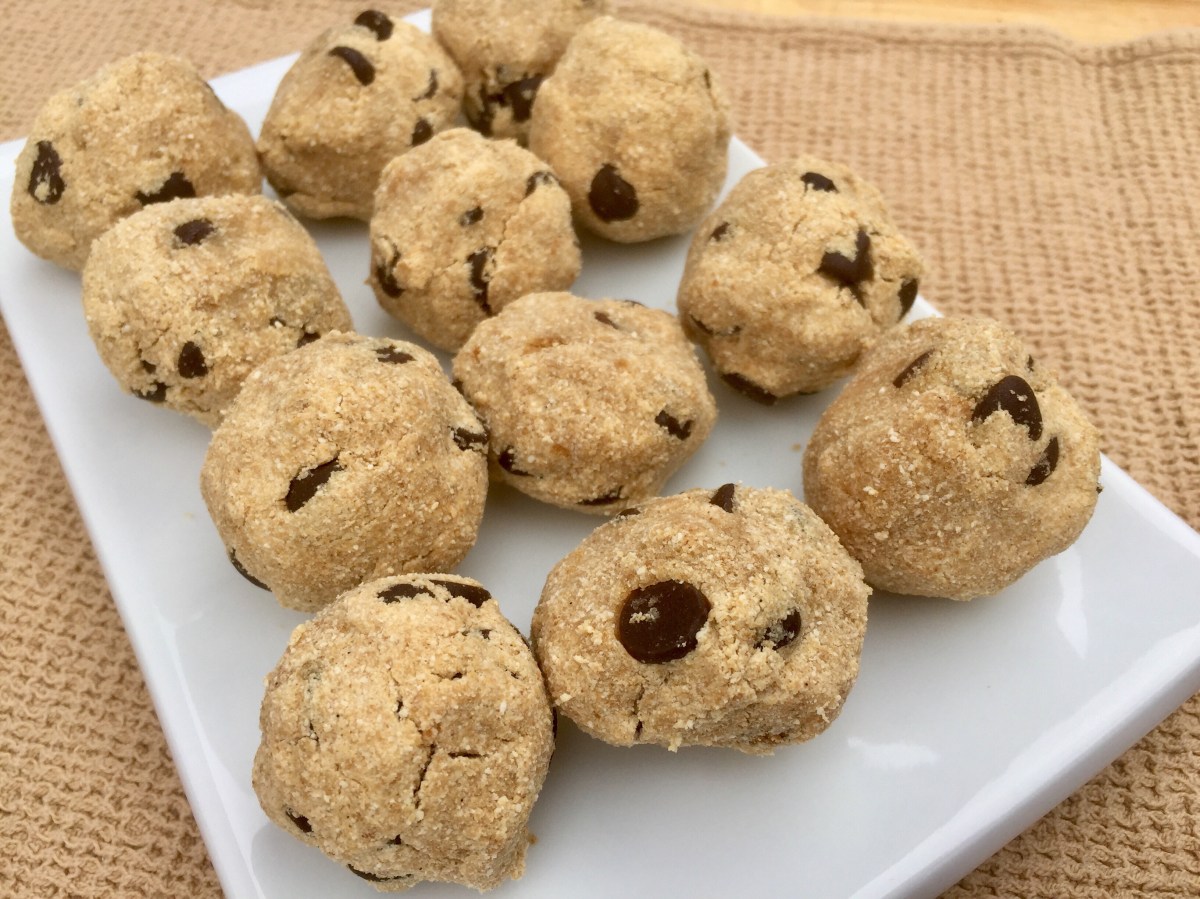
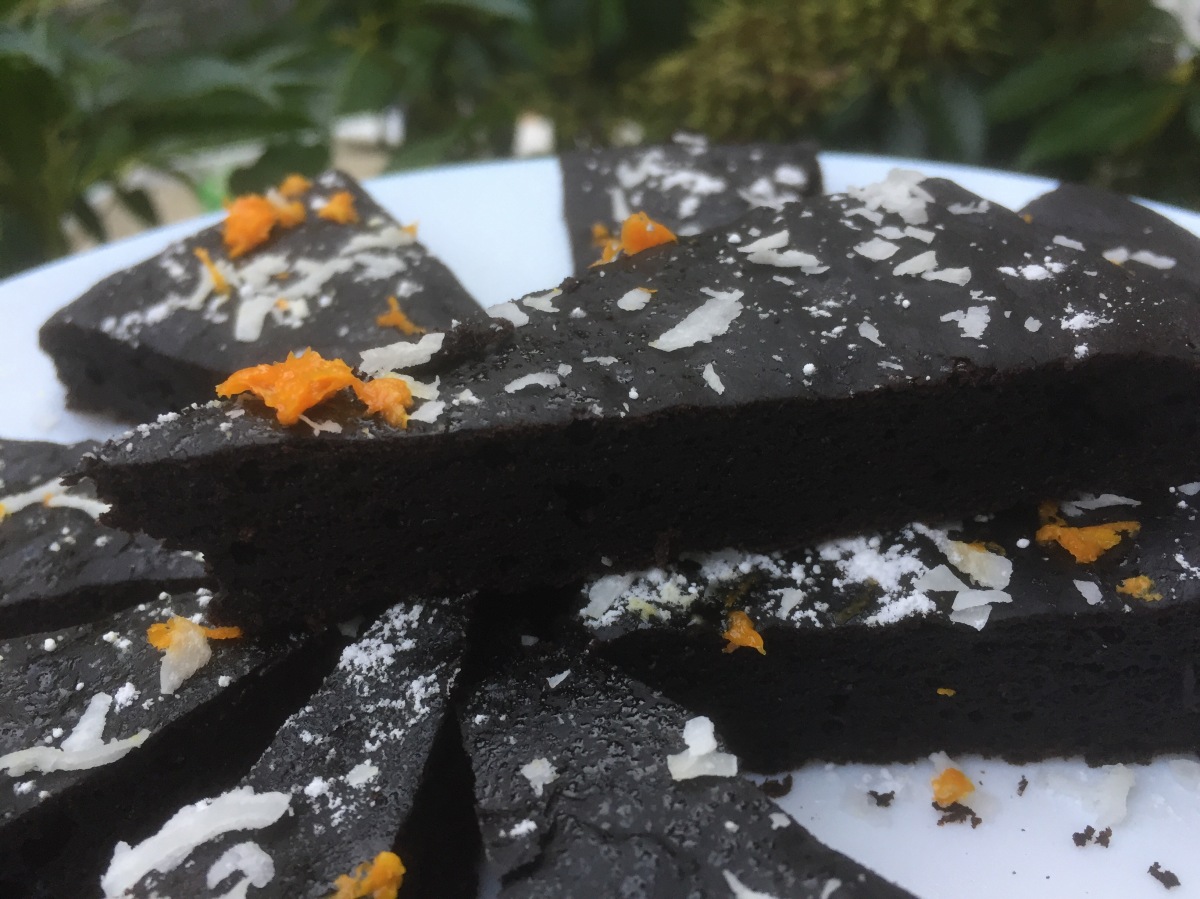
Just how free and beautiful are these brownies? On the “free” side they are vegan, so dairy-free and egg-free, they are also gluten-free and nut-free, plus they are no-added sugar! So, what on Earth do they have? They have plenty of chocolate, cocoa powder, and cocoa nibs, which gives them their chocolate richness.

They are also full of ingredients that you will not find in your regular brownies, like a banana I use here for sweetness and a egg replacement, and oats and chickpeas, which I use as the key flour-like components. Chickpeas and the chickpea water – the miraculous aquafaba – are essential here. They add the protein needed to help give the brownies a bit of structure and texture. They combine well with oats so that the result is not chocolate oatmeal but a real double chocolate brownie with a bite and a chew.

For this and other baking projects, like my meatloaf and my marshmallow topping, I suggest you try making your own chickpeas. They do need some work – you soak them overnight in lots of water, then you rinse them and boil them in double the amount of water to get soft chickpeas and very useful aquafaba. I cook them in an electric pressure cooker on the “beans” setting. To help aquafaba along, I recommend letting the liquid that chickpeas were cooked in sit in the refrigerator for a day or so before using.

Other than cooking the chickpeas that’s a bit elaborate, everything else is smooth sailing. You will need a large food processor, pile everything in, and pulse to mix and combine. The baking is a standard deal, using a 350 F (175 C) oven and taking somewhere between 20 and 25 minutes. Let your brownies rest for at least 15 minutes before serving, then cut and plate. They’d be great with some vanilla nicecream, if you’d like to make them fancy. They are also great as is or with some orange zest on top.

Flourless Double Chocolate Brownies with Chickpeas and Oats

What you’ll need:

2 cups oats, gluten-free

2 cups chickpeas, cooked

1 banana

3/4 cup aquafaba

1/2 cup cocoa powder

1/3 cup chocolate chips or chunks, vegan

2 tablespoons cocoa nibs

2 teaspoons vanilla

1 teaspoon baking powder

What you’ll do:

  1. Preheat the oven to 350 F (175 C).
  2. Place cooked chickpeas, oats, roughly chopped banana, and all the rest of the ingredients except chocolate chips and cocoa nibs into a food processor, and process until you form a dough.
  3. Add the cocoa nibs and chocolate chips and mix everything together.
  4. Pour the mix into a square, 8 x 8 in (20 x 20 cm) baking dish and put your brownies to bake for 20 minutes.
  5. Take the brownies out and let them rest for at least 15 minutes before cutting and serving. Enjoy with some vegan ice cream or as is!

Copyright © Eat the Vegan Rainbow, 2018

Gluten-Free (and Vegan) Chocolate Chip Cookie Dough Balls

Gluten-free and Vegan Chocolate Chip Cookie Dough Balls, via Eat the Vegan Rainbow

If you are looking for a quick, fun, satisfying and irresistible dessert, well look no further. These Chocolate Chip Cookie Dough Balls are it!

They are no-bake dessert that you can whip up on a whim by using a handful of ingredients, most of which you can find in your local grocery store or easily make in a food processor. Some ingredients that you likely already have are almond flour, coconut flour, vegan chocolate chips (I recommend Enjoy Life brand, especially the mini chocolate chips!), almond milk, almond extract, agave nectar, and vanilla bean. Mixing all these together will give you lovely and yummy treats.

What kicks the flavor over the top for me is mesquite powder. Yup, you heard that right – mesquite! This is a new ingredient for me and I’ve been experimenting with its use. The powder comes from and can be used raw, so I’ve been adding it to smoothies. The powder has an earthy and nutty flavor, and that’s why it works really well in these treats.

One tip: add the almond milk gradually in small increments, 1/4 cup at a time. After each addition mix your ingredients well and let them rest for few second before adding more milk. This will help your cookie dough absorb the liquid and result in a moist dough that will come together well as you roll it.

And speaking of rolling, be gentle but not too gentle. The dough should not be crumbly – if it is you likely need a drop or two more almond milk or if you like to kick it up a notch in terms of calories you could add some almond butter which will help hold things together. Use the same technique you would when putting together meatballs: scoop a tablespoon or so of the dough into the palm of your hand and start rolling and squeezing at the same time until you have a nice little treat in your hand.

Since these cookie doughs are free of eggs, butter and flour, they are totally fine to snack on as you make them. Just remember to save a few for later!

Gluten-Free (and Vegan) Chocolate Chip Cookie Dough Balls

What you’ll need:

1 cup almond flour

1 cup coconut flour

1/4 cup mesquite powder

1/4 cup agave nectar (maple syrup, or other sweetener of choice)

1 teaspoon almond extract

1 vanilla bean, scraped

1 cup mini chocolate chips, vegan

3/4 – 1 cup vanilla almond milk, unsweetened (or another dairy-free alternative; if you are using a sweetened version just add less agave nectar; if you are using plain version add a bit more vanilla bean)

What you’ll do:

  1. In a large mixing combine all the ingredients except almond milk. Mix well and start adding the milk, 1/4 cup at a time. The final dough should be moist but not wet.
  2. Using your hands, take one tablespoon of the chocolate cookie dough mix and shape it into a tight ball. As you are shaping the ball, keep rolling and pressing. The ball should stick together, if not consider adding a tablespoon or two of almond milk.
  3. You can enjoy these chocolate cookie dough balls immediately. They are best freshly made, but they also keep ok, covered at room temperature for 2 days or so.

Copyright © Eat the Vegan Rainbow, 2018

Vegan Zucchini Fruitcake

img_4057
Vegan Fruitcake with Zucchini, via Eat the Vegan Rainbow

Fruitcake has a bad reputation. Nobody loves it, yet puts up with it because of the tradition and whatnot. And although some of you may find it hard to believe, fruitcake can be really delicious!

In this veganized version of the milenia-old (oh, yes – fruitcake dates back to Ancient Rome) tradition, I skip the butter, extra sugar, and eggs and go really wild with dried fruits. I combined everything I could get my hands on – figs, dates, cranberries, apricots, prunes, and pineapple – with a nice selection of spices featuring orange and lime zest, as well as almond extract, cinnamon, cloves, and nutmeg. I also used some finely grated, almost sauced, zucchini as a binder, and roughly chopped walnuts and red maraschino cherries for some added texture.

The key to this cake is soaking the fruit and although you could soak the fruit in rum, as is the custom, I soaked mine in water to avoid being too over the top with the flavors and the kick to the system this cake delivers. Although most of the alcohol would evaporate as the cake bakes, I wanted to keep this one rated G so that both kids and adults can enjoy as much of it as they like and decided to skip the rum altogether. At the end, the most important thing is to let the fruit soak in liquid (alcoholic or non-alcoholic) because that will help keep the cake moist and soft.

This fruitcake is pretty rich and filling. It makes for a lovely treat, as well as an excellent breakfast choice. It is definitely one more thing to add to your list of vegan Holiday treats and traditions, like the Peppermint Bark and the Gluten-free Sweet Potato Pancakes. If you are wondering whether this cake can be made gluten-free, the answer is yes, absolutely! Just use your favorite all-purpose gluten-free flour and go for it.


Vegan Fruitcake with Zucchini

What you’ll need:

1 zucchini, small (1 1/2 cup grated)

5 medjool dates

15 dried apricots

1/2 cup dried cranberries

2/3 cup dried pineapple

5 dried figs

1/3 cup prunes

1 cup maraschino cherries, drained and roughly chopped

1 cup flour

1 cup walnuts, chopped

1 tablespoon almond extract

2 teaspoon baking powder

1 teaspoon baking soda

1 teaspoon cinnamon

1/2 teaspoon nutmeg

1/4 teaspoon cloves

Zest of 1 orange

Zest of 1 lime


What you’ll do:

  1. Combine all the dried fruits in a large bowl, cover with warm to hot water, and let soak for 30-60 minutes. Drain the fruit, pat dry to remove excess water, and chop to bits and pieces of different size. Place into a large mixing bowl.
  2. Preheat the oven to 350 F (175 C).
  3. Grate the zucchini using a fine grater or a food processor. The finer the grating the better!
  4. Add the zucchini and the rest of the ingredients to the chopped fruit and mix well until everything is combined.
  5. Line the bread pan, or any other baking pan (I used a spring form pan because it makes getting the cake out a breeze), with some parchment paper. Pour in the fruitcake batter and spread around to form a 1.5 in (3-4 cm) thick layer. The cake will not rise much, and it will be quite moist, so don’t make it too thick as your surface will burn while you wait for your center to bake.
  6. Bake for 35 min or until a toothpick comes out clean. Let the cake stand for at least 15 minutes, ideally an hour, before cutting and serving. Serve with some vegan whip cream, ice cream, or with a glass of eggnog, and enjoy the season!

Copyright © Eat the Vegan Rainbow, 2017

Holiday Peppermint Bark – Vegan and Jolly!

img_3865
Holiday Peppermint Bark, via Eat the Vegan Rainbow

There is something diabolically good about combining dark chocolate with some peppermint flavor. And adding some white chocolate to the mix makes it simply to wicked for words, and it also makes it into a winter holiday classic called Peppermint Bark. In a nutshell, peppermint bark is a layer of melted chocolate with some crushed peppermint candies mixed into it. The chocolate cools and sets with pieces of the peppermint candy poking out of it, giving it a tree bark sort of texture and appearance.

The fancy examples of the Peppermint Bark have two chocolate layers, one dark and the other white, and since it’s the Holidays I am going for the fancy here! Finding vegan dark chocolate these days is easy – even my large supermarket chain carries couple of different options. But, finding a vegan white chocolate is a bit trickier – read impossible at least in my ecosystem. So, I stepped up to the challenge and made my own perfectly silky vegan white chocolate. I suppose that makes me an accomplished chocolatier?

Well, that is to be determined, for now all I can say is that this Peppermint Bark will put a smile on your face. Best of all, no fancy baking required. All it takes is a microwave and lots of mixing because you’ll be melting the dark chocolate, then immediately afterwards the white chocolate, which is a mix of coconut butter, pea protein powder, powdered sugar, and vanilla extract. Finally, making of the Peppermint Bark comes with a tension and stress release valve, as it requires you to take a hammer to peppermint candy or candy canes, and give them some good whacking!!!

Other than that it’s all about waiting for the Bark to set, which may take couple of hours. Be patient and you’ll be rewarded with one of the holiday season favorites that you can enjoy, or better still share with your family, friends, neighbors… Ho, ho, ho!

And if you are up to trying something slightly healthier this holiday season, my Pumpkin Truffles, Squash Pie, or Dark Chocolate Almond Butter Cups are a better option. The Peppermint Bark is pure indulgence.

Holiday Peppermint Bark

What you’ll need:

2 cups dark chocolate chips or chunks, vegan

2 cups coconut oil, melted (unrefined if you like a slight hint of coconut or refined if you don’t)

2 scoops pea protein powder

1/3 cup vegan shortening

1/3 cup powdered sugar

1 1/2 cup smashed peppermint candy canes, divided (8 – 10 peppermint candy canes, unwrapped, placed into a ziplock bag, and smashed with a can, or another heavy implement until broken up into small chunks)

1/2 teaspoon peppermint oil or extract


What you’ll do:

  1. Line a 9 x 13 in (23 x 33 cm) pan or a baking dish with a piece of parchment paper that’s cut to fit. Set aside.
  2. Melt the dark chocolate in the microwave or over a double boiler. Microwave melting is straightforward but it does need hand holding an frequent checking on the chocolate. Keep an eye for any sign of overheating and stop immediately if chocolate starts to separate. Melt until 80% is smooth, then add the peppermint oil and continue mixing until everything is melted and smooth. Pour into the baking dish. Leave to set for 30 minutes on the kitchen counter or 5-10 minutes in a fridge.
  3. In a separate bowl, combine the melted coconut oil – I left my jar in a pot of hot water for an hour and that did the trick – with pea protein powder, shortening, vanilla extract, sugar, and 1 cup of smashed candy canes. Mix well to combine and pour over the dark chocolate layer. Sprinkle the 1/2 cup of smashed peppermint candy canes on top. They’ll sink in as the white chocolate solidifies and give this treat it’s bark.
  4. Leave the Peppermint Bark in a fridge for 1-2 hours then slide out of the dish, peel off the parchment paper and cut into pieces. If you are a skillful chocolatier, which I am not, you can make both dark and white chocolate layers very thin and then break the Bark into pieces by hand. Either way ’tis the season to be jolly, and this is one jolly treat!!!

Copyright ©Eat the Vegan Rainbow, 2017

Pecan Apple Baklava with Orange Maple Syrup

D8D949D5-2F6E-4012-93D8-2A17FF20B807
Pecan Apple Baklava with Orange Maple Syrup, via Eat the Vegan Rainbow

A bite of baklava is a shock to the system, but once you have recovered from that first bite you won’t be able to stop eating, usually until your teeth start feeling like they may just fall out from all the sugar. Baklava is a dessert from Middle East that has made its way to Greece and beyond. It is made with thin sheets of dough, the phyllo dough, and it is usually layered, although some recipes do ask that you roll up the sheets into a strudel.

The most commonly used filling for baklava are ground walnuts. And the signature feature of baklava is the super sweet syrup that is poured over the hot baklava immediately after it comes out the oven. The baklava is then allowed to soak up all the syrup, which usually takes a day or so. At the end of that process you end up with a super sweet and very rich piece of dessert on your plate that is very often an acquired taste.

I personally have a bit of love/hate relationship with baklava. It’s been on my mother’s holiday dessert list for as long as I can remember, and I was not a huge fan until she started using apples to break up the heaviness of walnuts and the syrup, and lighten things up.

In this recipe I wanted to combine that insight into what makes a perfect baklava with what makes a great pecan pie, the apple in the eye of every Southern cook, the amazing creaminess combined with the crunch of pecans.

Neither baklava nor pecan pie is actually good for you. They are both full of high amounts of sugar and fat, so my challenge for this Pecan Apple Baklava was to flip the dessert into something much healthier without sacrificing any flavor. I used lots of apples, some pecans, and to sweeten things up a good amount of maple syrup. But, instead of drowning your baklava in pure maple syrup I recommend combining maple syrup with some orange juice, cooking it down a bit, and pouring it over your baked baklava while both the syrup and the baklava are still hot.

There’s not much in putting baklava together. Traditionally, you would use melted butter on each sheet of phyllo dough but you can achieve the same thing with spreading just a bit of water or water mixed with a drop of lemon juice, or a a bit of oil. It’s up to you to decide how much oil you want to use. Here, I use only some cooking spray on my dish, to make sure the baklava slices come out smoothly at the end. For the rest I use plain water. So you will layer a sheet of phyllo dough, brush very lightly with water, layer another one, put your ground pecans on, layer a sheet of phyllo dough, brush lightly with water, lay another sheet, pour pecans, another layer of phyllo dough, then apples, and so on and so forth until you run out of things to layer. One trick for getting the perfect baklava is to slice before you bake. And don’t forget that a bit of oil mist will help brown the top!

Final touch? Make baklava one day ahead. It will be rich, delicious and ready to serve, and you can feel good about serving your friends and family a dessert that is actually full of good for them stuff!!!

Pecan Apple Baklava with Orange Maple Syrup

What you’ll need:

8 oz (225 g) pecans, ground into a rough meal

4 apples, grated and drained of excess liquid

1 lbs (450 g) phyllo dough

1 teaspoon cinnamon

1/2 teaspoon allspice

1/4 teaspoon ground nutmeg

2/3 cup maple syrup

1 1/2 cup orange juice

Cooking spray or oil

Fresh orange slices, for decoration and presentation

What you’ll do:

  1. Preheat the oven to 375 F (190 C).
  2. Using a food processor grind the pecans into a rough meal. You want the pecans to be almost a meal but having few bigger pieces would add some interesting texture, so keep that in mind. Place pecans into a bowl, mix in cinnamon, allspice and ground nutmeg, and set aside.
  3. Using the same food processor with a grater blade, grate the apples. You don’t need to peel them unless you really want to. But you to have to squeeze the excess moisture out using your hands, and set aside. (Keep the squeezed out juice – it’s delicious as a freshly pressed cider which you can enjoy as you are making you baklava!)
  4. Spray the bottom of 9 x 13 in (22 x 33 cm) baking pan with cooking spray and start layering the baklava. Place one sheet of phyllo dough at the bottom, and brush couple of water drops across. Layer the next sheet, sprinkle pecans, layer another two sheets one at a time spreading a drop or two of water in between, sprinkle pecans, then repeat with two more phyllo sheets, spread a batch of apples, 1/2 cup or so, then continue layering following the same pattern until you use up all the ingredients.
  5. Cut the baklava into pieces, spray the top with a bit of oil, and put in the oven for about 20 minutes. You want the baklava to be nicely golden brown.
  6. While the baklava is baking, prepare the syrup by combining maple syrup and orange juice into a saucepan and reducing the volume down to about 1 1/2 cup or so.
  7. Once the syrup and baklava are ready and still hot, pour the syrup over the pastry one 1/2 cup at the time, starting with pouring along the cut sites so that the syrup can penetrate to the bottom of the baklava, and then what ever you have leftover you can pour right over the top. Place the cut orange pieces over the top, cover with foil and let the baklava sit for at least 6 hours, preferably overnight, before serving.
  8. Serve with a cup of strong coffee – and get ready to dance the night away!

Copyright © Eat the Vegan Rainbow, 2017

Pumpkin Truffles – Two Ways

img_3517-e1510705062190.jpg
Pumpkin Truffles, Traditional and Dark Chocolate, via Eat the Vegan Rainbow

Thanksgiving desserts are all about pies, most often pumpkin, apple, sweet potato, or pecan. Those are the big four, with pumpkin pie being the gold standard. I am not a baker – I mean I do bake, and I have made pies, including the pumpkin variety, in the past, but these pies are a bit too much for me to handle if I am making a big holiday feast.

So, this year I am trying out a no-bake route to a dessert offering that captures the spirit of winter holidays but does not require any oven real estate or lengthy prep work. With this in mind I developed these Spicy Pumpkin Truffles and I did them two ways – Dark Chocolate Covered and the Traditional, which means rolled in cocoa powder.

No baking, a handful of simple ingredients, and your holidays feast will be complete! The only trick, which by the way I am yet to master, is getting an even coat of chocolate. This batch turned out just a bit too irregular but that did not make them any less irresistible – the treats disappeared in a blink of an eye.

The truffles themselves are very easy to mix together and they are inspired by the pumpkin pie recipes. I used some canned pumpkin and mixed it with almond meal, almost flour, and coconut flour. I added some maple syrup to sweeten things up because the pumpkin I was using was not sweet at all. But before you add the sweetener of your choice do try your mix and adjust to taste. Keep in mind that your chocolate is sweet as well, unless you are using bitter kind, so you may need to play around a bit to achieve the right level of sweetness for your taste.

What pulls these truffles over the top are actually the spices. I used ground cinnamon, ground nutmeg and ground cloves. Those three spices blended well with the pumpkin, maple syrup and the almond/coconut flour mix and gave these yummy treats a real winter holidays flair. Bite in, and you’ll forget all about baking and enjoy the no-bake holiday desserts!!!

Pumpkin Truffles

What you’ll need:

1 15 oz. (425 g) can pumpkin

1 1/2 cup almond meal

1 1/2 cup almond flour

1/2 cup coconut flour

2 tablespoons maple syrup

1 teaspoon ground cinnamon

1/2 teaspoon ground nutmeg

1/4 teaspoon ground cloves

12 oz (g) vegan dark chocolate (chunks, chips, or blocks)

3 tablespoons cocoa powder

What you’ll do:

  1. In a large mixing ball combine all your ingredients except cocoa powder and the chocolate – those will come later.
  2. Mix everything well and using your hands for the dough into balls that are approximately 2 in (5 cm) in diameter. Place the preformed truffle balls on a platter and set aside.
  3. Melt the chocolate using either a microwave oven or a double boiler.
  4. Dip half of your truffles into the melted chocolate and place on the platter or a plate that’s lined up with wax paper.
  5. Put your chocolate covered pumpkin truffles in a refrigerator so that the chocolate coating hardens.
  6. Pour the cocoa powder in a flat dish and roll the rest of the pumpkin truffles in cocoa powder.
  7. Arrange the two kinds of Pumpkin Truffles any way you like. You may want to place couple of pieces of cloves in the bottom of your serving dish, or line your serving dish with some finely pulled orange peel. None of this will change the fantastic flavor of the truffles but it will make your dessert tray more festive! Enjoy!!!

Copyright © Eat the Vegan Rainbow, 2017

Dark Chocolate Almond Butter Cups

img_2692
Dark Chocolate Almond Butter Cups, via Eat the Vegan Rainbow
Halloween is almost upon us, which means that piles and piles of candy are everywhere!!! Most of the store bought stuff is, of course, not very good for you. Don’t get me wrong – sweets and candy have their time and place, and a little bit of chocolate at the right moment can go a long way towards restoring harmony in the universe. But finding a vegan-friendly treat that’s rich in flavor yet light in calories, that’s healthy yet decadent, is not easy.

Since transitioning into plant-based, low fat, salt and sugar eating and cooking, I’ve been satisfying my sweet tooth with lots of fruit and lots of smoothiescookies, apple crumbles, muffins, and even chocolate cake that use tons of fruits and sweet veggies (like carrots, bananas, apples, raisins…) to build sweetness without extra sugar. But, there comes a point in everyone’s life when chocolate becomes a necessity, and here’s my answer for those cravings – Dark Chocolate Almond Butter Cups.

These treats are no-bake and super easy to make. You will need some specialized equipment, like a mini muffin pan, the one with 24 muffin holes, and some mini muffin liners, the same kind you would use to line the pan if you were baking muffins. The liners help hold the cups as well as give them the traditional shapes edges.

When it comes to chocolate, you can use any kind you like. My recipe does not use any additional sweeteners, so all the sweetness comes from the chocolate and from the natural sweetness of the almond butter. That’s why I recommend using semi-sweet dark chocolate that does have some sugar added to it. Alternatively, you can add some maple syrup to the almond butter filling and that will elevate the sweetness level. Having said that, I hope you give my original recipe a try before making adjustments because I thought these Dark Chocolate Almond Butter cups turned out just right!

The recipe could not be simpler. You will need to line the mini muffin pan with liners, melt the chocolate using either a double boiler, which you can make yourself, or a microwave, soften the almond butter and mix it with almond meal and maple syrup extract and then work fast to place a tablespoon of melted chocolate in each mini muffin cup, then place a half tablespoon of almond butter filling, which you will need to shape with your fingers into a tiny patty, on top of each chocolate layer, and finally top the almond butter filling with more melted chocolate.

Assembling these Dark Chocolate Almond Butter Cups is a bit of a mad dash but it’s also a lot of fun, with melted chocolate dripping and the aroma of almond butter filling. If you are wondering why I decided to add artificial maple syrup flavor instead of the real thing the answer is simple: calories! The flavoring agent adds just enough warmth to the filling and contributes no calories to the final treat. If you bothered by the idea of an artificial ingredient, skip it or replace it with a dash of cinnamon and/or splash of vanilla extract.

Once filled, Dark Chocolate Almond Butter Cups go into a refrigerator for 30 minutes or so, which will help them firm up. You should leave them out at room temperature for about the same amount of time before serving and you’ll have melt-in-your-mouth, rich and decadent, yet good for you, treat to share (or not!).

Dark Chocolate Almond Butter Cups

What you’ll need:

2 cups dark chocolate chips or baking dark chocolate chip chunks

1 cup almond butter (unsalted, smooth)

3/4 cup almond meal

1 teaspoon imitation maple syrup (or cinnamon, and/or vanilla extract)


What you’ll do:

  1. Line the 24-hole mini muffin pan with baking liners.
  2. Put your chocolate chunks, pieces or chips, into either a double boiler or a microwave safe dish. If you are using a double boiler make sure you start mixing the chocolate continusouly until melted and smooth. If you are using a microwave I recommend going at 50% power and letting the chocolate go for 1-2 minutes at first and then check it at 30 second intervals. It is usually a good idea to pull the chocolate out when it is about 80% melted and then mix for a minute or two and use the heat of the chocolate to melt the rest.
  3. Place the almond butter in a different bowl and microwave for about 30 seconds. The almond butter should be soft but not runny. Add the almond meal and the flavoring agent of choice. Mix well.
  4. Pour a tablespoon of melted chocolate in each muffin hole.
  5. Use half a tablespoon of the almond butter filling and make a small patty with your fingers. Place the patty on top of the chocolate.
  6. Pour another half a tablespoon to a tablespoon of melted chocolate on top of the almond butter filling.
  7. Place the Dark Chocolate Almond Butter Cups into a refrigerator for 30 minutes or until firm and solid.
  8. Take the cups out of the mini muffin pan, and let them come to room temperature before enjoying. You can leave the paper liner on, or remove it – it’s up to you. Those  liners come in many different designs so you can have lots of fun with those as well.
  9. Enjoy!

Copyright © Eat the Vegan Rainbow, 2017


Coconut Bread Pudding: So Yummy, Good for the Tummy

Easy Coconut Bread Pudding
Easy (and Vegan) Coconut Bread Pudding, via Eat the Vegan Rainbow

A lovely dessert is always a welcome ending for a great meal. I have a major sweet tooth, but I am not a great baker and cake maker. So, my desserts are usually no-bake, like the Chocolate Bon Bons and the Blueberry Cheesecake, or simple cookies, muffins and crumbles that are full of fruit and really forgiving when it comes to exact measurements.

Still, none of those come even close to the simplicity and versility of my Coconut Bread Pudding. This bread pudding requires no prior knowledge of baking techniques, and uses plant-based ingredients. The final product is deliciously sweet, comforting and satisfying, so you can eat it as a dessert, as well as breakfast or brunch.

In terms of the skills required to make this wonder bread pudding happen, you only need how to mix and soak. The recipe starts with a super easy wet mix which you can whisk in a flash. Then comes bread which you can cut up or break into chunks by hand. The best type of bread to use here is a spongy one, because the main thing the bread needs to do is soak up the wet ingredients. One trick people sometimes use is to leave a loaf of bread on the kitchen counter for a day or so, and use this, slightly stale bread, to make the bread pudding. In my opinion there’s no reason to do this on purpose, but if you have stale bread on your hands then transforming it into a bread pudding is the way to go! Regardless whether you use fresh or stale bread, you should give your bread chunks time to soak up all the juices before taking the next step, so leave them in the wet mix for at least fifteen minutes.

Once the bread is ready, add raisins and shredded coconut, mix gently, pour into a baking dish and about half an hour later you will have a kitchen that smells like heaven and a bread pudding that tastes like paradise!

Coconut Bread Pudding

What you’ll need:

6 slices of bread, cubed (or about 1/2 of a large bread loaf)

1 cup almond milk

1/4 cup orange juice

1/4 cup brown sugar

1/4 cup coconut flakes, unsweetened

1/4 cup raisins

1 tablespoon cinnamon

1/2 teaspoon nutmeg

Cooking spray


What you’ll do:

  1.  Preheat the oven to 400 F (205 C).
  2. Chop the bread into 1 x 1 in (2.5 x 2.5 cm). Note that these are approximate measures and you don’t have to go crazy here. The point is to have bread chunks that can hold their shape yet have enough surface area to soak up all the liquid. If you are using stale bread you can go smaller. If you like your bread pudding to maintain more of your bread dough texture go bigger! Place the bread chunks into a large mixing bowl.
  3. In a separate mixing bowl (or a large soup plate, which is my preferred way) mix the wet ingredients, everything except raisins and coconut flakes.
  4. Pour over the bread chunks and gently fold everything together. Be gentle here if your bread is very soft because you don’t want to end up with a mushy mess. Larger bread chunks and more rustic bread can take a bit more beating but do proceed with caution. Let the mix rest for at least 15 minutes.
  5. When the bread has soaked up (almost all) the liquid, add raisins and coconut flakes and mix gently. At this point your bread chunks will be fragile and mushy so you want to preserve their structural integrity as much as possible so give your pudding a more interesting texture.
  6. Spray a bottom of a deep 8 x 8 in (20 x 20 cm) baking dish with cooking spray and pour the bread mix in.
  7. Put in the oven and bake for 25 to 35 minutes. Keep an eye on your oven, as you want the top of your bread pudding to be nice and brown. Let it cool for a moment or two and dig in. You can sprinkle powdered sugar on top of you like, or add some fresh fruit if you are feeling adventurous!

Enjoy for breakfast, brunch, snack, dessert… Sky is the limit!

Copyright ©Eat the Vegan Rainbow, 2017

A “Thank You” Cake, for All of You!

Dark Chocolate Brownie “Thank You” Cake, via Eat the Vegan Rainbow

10000 views… I can’t believe that my tiny,  homemade, low key, experimental, and very much just for fun blog recently hit a phenomenal milestone: 10000 views!

I am still in a bit of disbelief about it all, to be quite honest and totally humbled, yet thrilled.

Although I can’t explain how I went from my very first posted to 10000 views in less than 6 months, I’m guessing that this is a sign that there are many of you out there who are looking for guidance, inspiration and help in transitioning to 100% plant-based eating and cooking, while at the same time staying within a reasonable budget.

I can only hope that at least some of you have found my recipes to be yummy, homey, inviting, creative, entertaining and pure fun, which is what this entire transition to vegan cooking has been for me. Thank you for joining me on this journey and for helping me along the way with your kind comments, suggestions and many, many engagements.

And… this being a vegan, plant-based, healthy cooking type of a blog I thought that it would be cool to say a huge “Thank You, All” with some cake. So, thanks everyone – I hope you enjoy this Dark Chocolate Brownie “Thank you!” Cake, and come back again for seconds!!!

The recipe is super simple and uses ripe bananas as an egg replacement, and lots of dark, Dutch process cocoa. It also uses a simple trick to transform almond milk into almond butter milk by adding a tiny amount of cider vinegar to almond milk and letting it stand for fifteen minutes at room temperature before using. Finally, to help the dark cocoa release its color you will need to use some hot water.

Putting all this together, you will start by mixing dry ingredients in a large mixer bowl separately from wet ingredients (all except water), combine them together and then add the hot water gradually as you mix, keeping a close eye on consistency. You want your batter to be smooth and fluid, but not completely liquid. The recipe below makes two 8 in (20 cm) round brownie cakes, or one 9 x 13 in (23 x 33 cm) rectangular cake. I recommend lining the bottom of your baking pan with some parchment paper, as this helps get the cake out. In principle you could bake this cake in a springform pan, and it should pop right out.

The cake tastes rich and decadent, yet it’s relatively light in terms of the ingredients and especially in terms of added sugar. The bananas help not only hold the cake together, but add natural sweetness to it, so you can use 1/3 amount of sugar that a cake of this size would normally use. Of course, you are not limited to sugar and can use a sweetener of your choice, including artificial sweeteners if that’s what you like or need to use.

Dark Chocolate Brownie “Thank You” Cake

What you’ll need:

1 1/2 cup all purpose flour

3/4 cup cocoa, Dutch-processed

2 teaspoons baking soda

1 1/2 teaspoon baking powder

3/4 cup almond milk, unsweetened

3/4 teaspoon apple cider vinegar

1/4 cup canola oil

2 bananas, pretty ripe, brown ok

1/2 cup powdered sugar, vegan (+ 1 tablespoon for dusting)

1 tablespoon vanilla extract

1/2 cup hot water

2 tablespoons coconut flakes, unsweetened (optional)

Zest of one orange (optional)

What you you’ll do:

  1. Preheat oven to 350 F (180 C).
  2. Mix the almond milk with apple cider vinegar (or lemon juice) and let stand for 10 to 15 minutes. This will be your almond buttermilk.
  3. In a large mixing bowl, or the bowl of your standing mixer, combine all your dry ingredients (flour, cocoa powder, baking soda, and baking powder).
  4. In a separate bowl, combine all wet ingredients except the hot water. Note that powdered sugar and the bananas count as a wet ingredients. I recommend that you use a blender to cream your bananas, although you could simply mush them with a fork. Either way, make sure that your wet ingredients are fully mixed together and as smooth as possible.
  5. Next, slowly add your wet ingredients into the dry ones. For this, I keep my standing mixer runing on low, and pour the wet ingredients in, bit by bit.
  6. Let everything combine before adding the hot water. I recommend adding 1/4 cup water at a time, slowly so that you are in full control over the consistency of your batter. It should be smooth and pour out with ease.
  7. Line two 8 in (20 cm) round cake pans with parchment paper and pour the batter in.
  8. Put in the oven for 25 to 30 minutes.
  9. Take the cake out, flip it out of the pan, and leave it to cool for 1-2 hours.
  10. Cut into wedges and sprinkle with powdered sugar, coconut flakes and orange zest. Serve and enjoy!!!
img_2724
Saying “Thank You!” with a Cake, via Eat the Vegan Rainbow

Copyright ©Eat the Vegan Rainbow, 2017

Blueberry Cheesecake 2.0, a Real Space-Age Treat

Vegan Blueberry Cheesecake
Vegan Blueberry Cheesecake, via Eat the Vegan Rainbow

First time I had cheesecake I was twenty five! Yes, it’s true – I spent the first twenty five years of my life in a blissful ignorance, completely unaware that cheesecakes existed. But, soon after moving to US I did partake on a slice and fell in love immediately and over the years things just better and better.

First of all, cheesecakes are easy to make. They are also very versatile because you can customize them in many different ways. I used to make pumpkin cheesecake topped with baked apples and pecan caramel for Thanksgiving because pumpkin pie is sort of boring.

My other favorite cheesecake I used to make was plain vanilla topped with homemade blueberry syrup. So one night, as I was making myself a light dessert of blueberry smoothie, I got inspired to try and make Cheesecake 2.0 – the 21st century version that is dairy-free, gluten-free, and egg-free.

Being the space age type of dessert, this recipe uses an ingredient that you can’t find in a grocery store: agar powder. Chemically speaking, agar is a sugar polymer and I’ve used it a great deal to make many, probably thousands, of agar plates in Petri dishes, which I then used to grow bacterial cultures. (For those interested in the source, agar is isolated from algae (seaweed), so although not of plant origin, I think it is safe to say that definitely plant-like in many ways and not animal-derived.)

So, when I discovered that agar has a culinary application I was skeptical. But when I thought about what I need agar to do – act as a jelling agent in the same way gelatin would – I concluded that my skepticism was not founded in reality and chemical facts but some silly prejudice. Thus, I bought a small jar of agar powder and I’ve been using it to make hard (and shreddable) cheese quite successfully. In this recipe I took agar powder a step further and used it as the firming agent for the cheesecake. It did the trick and the result was a yummy cake with excellent smooth yet firm texture.

Blueberry Cheesecake 2.0
Blueberry Cheesecake for the 21st Century, via Eat the Vegan Rainbow

Blueberry Cheesecake 2.0

What you’ll need:

FOR THE CRUST

1 cup walnuts

1 cup cashews

1 tablespoon brown sugar

1 tablespoon vegan Butter

FOR THE CHEESECAKE FILLING

2 cups blueberries, frozen

1/2 cup oatmeal

1 1/2 cup vanilla almond milk, unsweetened

4 teaspoon agar

2 cups water

What you’ll do:

  1. Use a grinder or a food processor to grind walnuts and cashews to a relatively fine meal.
  2. Pour the ground nuts into an 8 to 9 in (20 to 23 cm) round springform pan.
  3. Add brown sugar and mix well.
  4. Add melted vegan butter (30 sec in a microwave should be enough to melt this amount) and using your fingers mix the melted butter in so that all of your nut and sugar mix is moist. Press the mix into the bottom of the pan to form a crust. Set aside.
  5. In a large blender mix almond milk, blueberries and oatmeal until smooth.
  6. To prepare agar powder, bring 2 cups of water to boil and add the agar. Use a whisk to mix everything together lower the heat to simmer and keep mixing and simmering for 4 to 5 minutes.
  7. Add hot agar to the blender in small batches, 1/2 cup at a time. Pause to incorporate then add more until the entire amount of agar is incorporated.
  8. Pour the filling into the springform pan and use a spatula or a flat spoon to spread around and flatten the top.
  9. Refrigerate for at least 4 hours, best overnight.
  10. Pop it out of the springform pan, cut and serve as is, or with fruit and/or vegan whip cream. I made one from chickpea water (aquafaba), but you can make any one you like or skip it!


Copyright © Eat the Vegan Rainbow, 2017

Oatmeal Raisin Cookies

Oatmeal Raisin Cookies, via Eat the Vegan Rainbow

Today is a double whammy of a day. It’s the National Oatmeal Cookie Day and at the same time the National Raisin Day. So I just had to join in the celebrations by putting those two together into these lovely, healthy and chewy Oatmeal Raisin Cookies that use couple of very simple ingredients and take no time to make.

I decided to start with some naturally sweet ingredients in order to completely omit using added sugar. So I went for a combination of carrots and raisins, both with an amazing amount of sweetness that baking brings out to an amazing extent.

For my oatmeal, I decided to toast some of it to add extra dimensions of nuttiness to the flavor of these cookies without the need to use any nuts. Additional trick I used is to grind most of the oats which made it easy to skip using flour. Still, I did add a bit of corn starch to help the cookies along, and “flax egg” to bind everything together.

Of course, you can’t have a good batch of moist cookies without adding a bit of fat and in this case I decide to use solids out of the can of coconut cream. I used all the liquid and couple of tablespoons of solids for my Bread Fruit Curry, so I had some solids leftover. You can also use coconut oil in this application as well. The oil does not need to be fully melted but it does need to be softened so that can mix well with the rest of the ingredients.

So without any further ado I give to you on this special day gluten-free and dairy-free, no sugar added Oatmeal Raisin Cookies.

Gluten-free, Dairy-free, No Sugar Added Oatmeal Raisin Cookies, via Eat the Vegan Rainbow

Oatmeal Raisin Cookies

What you’ll need (for 24, 2 in (5 cm) diameter cookies):

3 large carrots

1 cup raisins

2 cups oatmeal

1/4 cup flax meal

3/4 cup water

1/4 cup corn starch

1/4 cup coconut oil, melted

1 tablespoon cinnamon

1 tablespoon vanilla

1 teaspoon baking powder

1/2 teaspoon baking soda

What you’ll do:

  1. Preheat oven to 350 F (175 C).
  2. Place raisins into a large cup and cover with hot water. Let them soak for 30 minutes.
  3. Add flax meal to a large cup and mix well with 3/4 cups of hot water. Let stand for 15-30 minutes.
  4. Toast 1/2 cup of oat meal in a toaster oven until they begin to slightly brown and start smelling lovely and deliciously toasty, which should take about 2-3 minutes. Keep an eye on the toaster oven though as the oats will burn quickly. You can toast the oatmeal on the stove top, using a frying pan. I recommend dry toasting them, although you can use a drop of oil or cooking spray to help the toasting along.
  5. Add the toasted oats to a food processor and grind to a fine meal. Pour the toasted oatmeal into a large mixing bowl.
  6. Add another 1 cup of oatmeal to the food processor and grind as finely as the previous batch. Combine with the ground toasted oatmeal.
  7. Add reminder of the oatmeal (1/2 cup) into the mixing bowl without grinding for added texture.
  8. Grind carrots finely using the food processor and add to the oatmeal mix.
  9. Drain the raisins well and add to the oatmeal and carrots.
  10. Add “flax egg” and mix well. The mixture should be moist but not runny.
  11. Add the rest of the ingredients and mix well. If your coconut oil needs a but of melting, put it in the microwave for 30 to 60 seconds. Keep an eye on it because you don’t want it to be completely melted, just soft enough to be able to mix well.
  12. Line two baking sheets with parchment paper and spoon out the cookies with a tablespoon. This should yield 24 cookies, 12 per baking sheet. Use your fingers to shape the cookies into nice, flat rounds or any shape you like. Their final thickness is about 1/2 in (1 cm) and they will not spread or rise much so make sure that you do actually flat them out before baking.
  13. Bake for 16 to 18 minutes. The cookies will be soft to touch but will firm up a bit as they cool.
  14. You can frost them with simple sugar frosting if you like, but I did want to keep this recipe “added sugar” free and they are delicious as is. Enjoy!!!
  15. Copyright © Eat the Vegan Rainbow, 2017

Chocolate Bon Bons with Dates, Walnuts and Apples

Chocolate Bon Bons with Dates, Walnuts and Apples
Chocolate Bon Bons with Dates, Walnuts and Apples, via Eat the Vegan Rainbow
It is Easter Sunday, so you might as well kick back, relax and have some bon bons. So I wanted to share with everyone who observe Easter today and everyone who are just looking for a simple, nutritious and adorable dessert recipe this super-easy and kids-friendly recipe for Bon Bons. This recipe was my entry into Food52 contest Your Best Recipe with Dates.

Dates, especially Medjool dates, are fabulously sweet fruit of date palm trees and have been used in Middle Eastern and North African regions for centuries. Growing up in Serbia (ex-Yugoslavia), dates were a special, almost candy, treat we’d get especially for Christmas Eve.

You may have seen dates in your dried fruit aisle, and that is exactly where you’ll find Medjool dates as well. Some stores have also been featuring them around the produce stands, but don’t expect to find raw dates – at least I’ve never seen them raw. Not to worry though, dried dates work really well in a recipe like these bon bons with a little help of warm water and thirty minutes of rehydration.

The bon bons come together really quickly and there isn’t much to making them really. But, in order to make them easier to handle in the last stage where they meet the melted chocolate you should let them sit in a freezer for half an hour. That will help them hold their shape during their chocolate bath.

Not fan of chocolate? You can skip it and roll the bon bons in coconut flakes, chopped walnuts, slivered almonds or anything else that will make your taste buds jump for joy!!!

One last thing: this recipe is super kid-friendly and if you are looking for something you can make together with any little chefs in your life this is it. There is a bit of mixing and a bit of hands on digging into a mix and making bon bons with your hands, which is sure to please. Plus: as the recipe is no-bake everything is safe to try and lick for those without tree nut allergies. If you are looking to make this recipe tree nut free, you could try doubling the amount of oats and skipping the walnuts. I am not 100% sure this will work, but I am about 95% sure it will – I hope this is good enough for you to give these bon bons a try.

Chocolate Bon Bons with Dates, Walnuts and Apples

What you’ll need:

medjool dates

cup oats

cup walnuts

Granny Smith apple

teaspoon cinnamon

ounces chocolate, vegan

cup coconut flakes, unsweetened

What you’ll do:

  1. Remove the pits and soak medjool dates in warm water for 30 – 60 minutes.
  2. Place oats and walnuts into a food processor and grind them into a fine meal. Pour out into a large mixing bowl.
  3. Core the Granny Smith apple, but don’t peel it. Add it to the food processor and processes it until very fine. Add the apple to the walnut and oats mix. Add the cinnamon.
  4. Drain the dates. Using a small food processor or a hand held (stick) blender, blend the dates into a fine paste. Add the paste to the mixing bowl. Mix everything together using a wooden spoon or a spatula.
  5. Using a measuring spoon, measure out 1 tablespoon of the mix out into your hand. Form a ball (a bon bon) and place it on a freezer safe tray covered with wax paper. The recipe should make 18-24 bon bons.
  6. Put the bon bons in the freezer for 30 minutes.
  7. Just before 30 minutes is up, melt the chocolate either in the microwave or using a double boiler.
  8. Place 1/4 cup of unsweetened coconut flakes at a time in a flat dish. Take the bon bons out of the freezer, dip them into the melted chocolate and roll them in the coconut flakes. Alternatively, you can skip the chocolate and roll the bon bons in coconut flakes only!
  9. Leave the finished bon bons on the kitchen counter for about 30 minutes to allow the chocolate to harden.
  10. Enjoy!
  11. Copyright © Eat the Vegan Rainbow, 2017