Unbelievably Creamy Oatmeal, via Eat the Vegan Rainbow
Water or milk? Apparently, when it comes to oatmeal there are two warring ideologies out there, with one side proclaiming that oatmeal can only be made with water and the other declaring that oatmeal with milk is the only way to be. Although I understand why people may prefer milk, I put myself firmly in the water camp on this one. And I am not alone: even bon appétit, a renowned food magazine, seems to agree that if you want to some creamy and delicious oatmeal, cooking it with water is the way to go!
Having said that, I recently discovered to way to kick it up a notch and create an incredibly creamy oatmeal, that’s silky, smooth, rich, and packed with protein. The secret to my newfound success is adding some protein powder to the oats.
I use quick cooking oats, those are oats that have been specially processed to decrease the cooking time. I prepare them in the microwave and they are done in about 2 minutes. But: if you prefer steel-cut oats, or rolled oats – go for it! The recipe below will work with any oat variety, and you don’t need to change anything about how you normally cook your oatmeal. All you need to do is mix in one scoop of your favorite protein powder with your oats before adding water (1/4 cup more than you would otherwise) and then cook the way you usually do.
This small amount of protein powder will add incredible creaminess and smooth texture. As I said, you can add any protein powder you like. I used unsweetened, unflavored pea protein powder, but vanilla flavored varieties will work, as will peanut butter protein powder – although in that case you better like peanut butter flavored oatmeal!
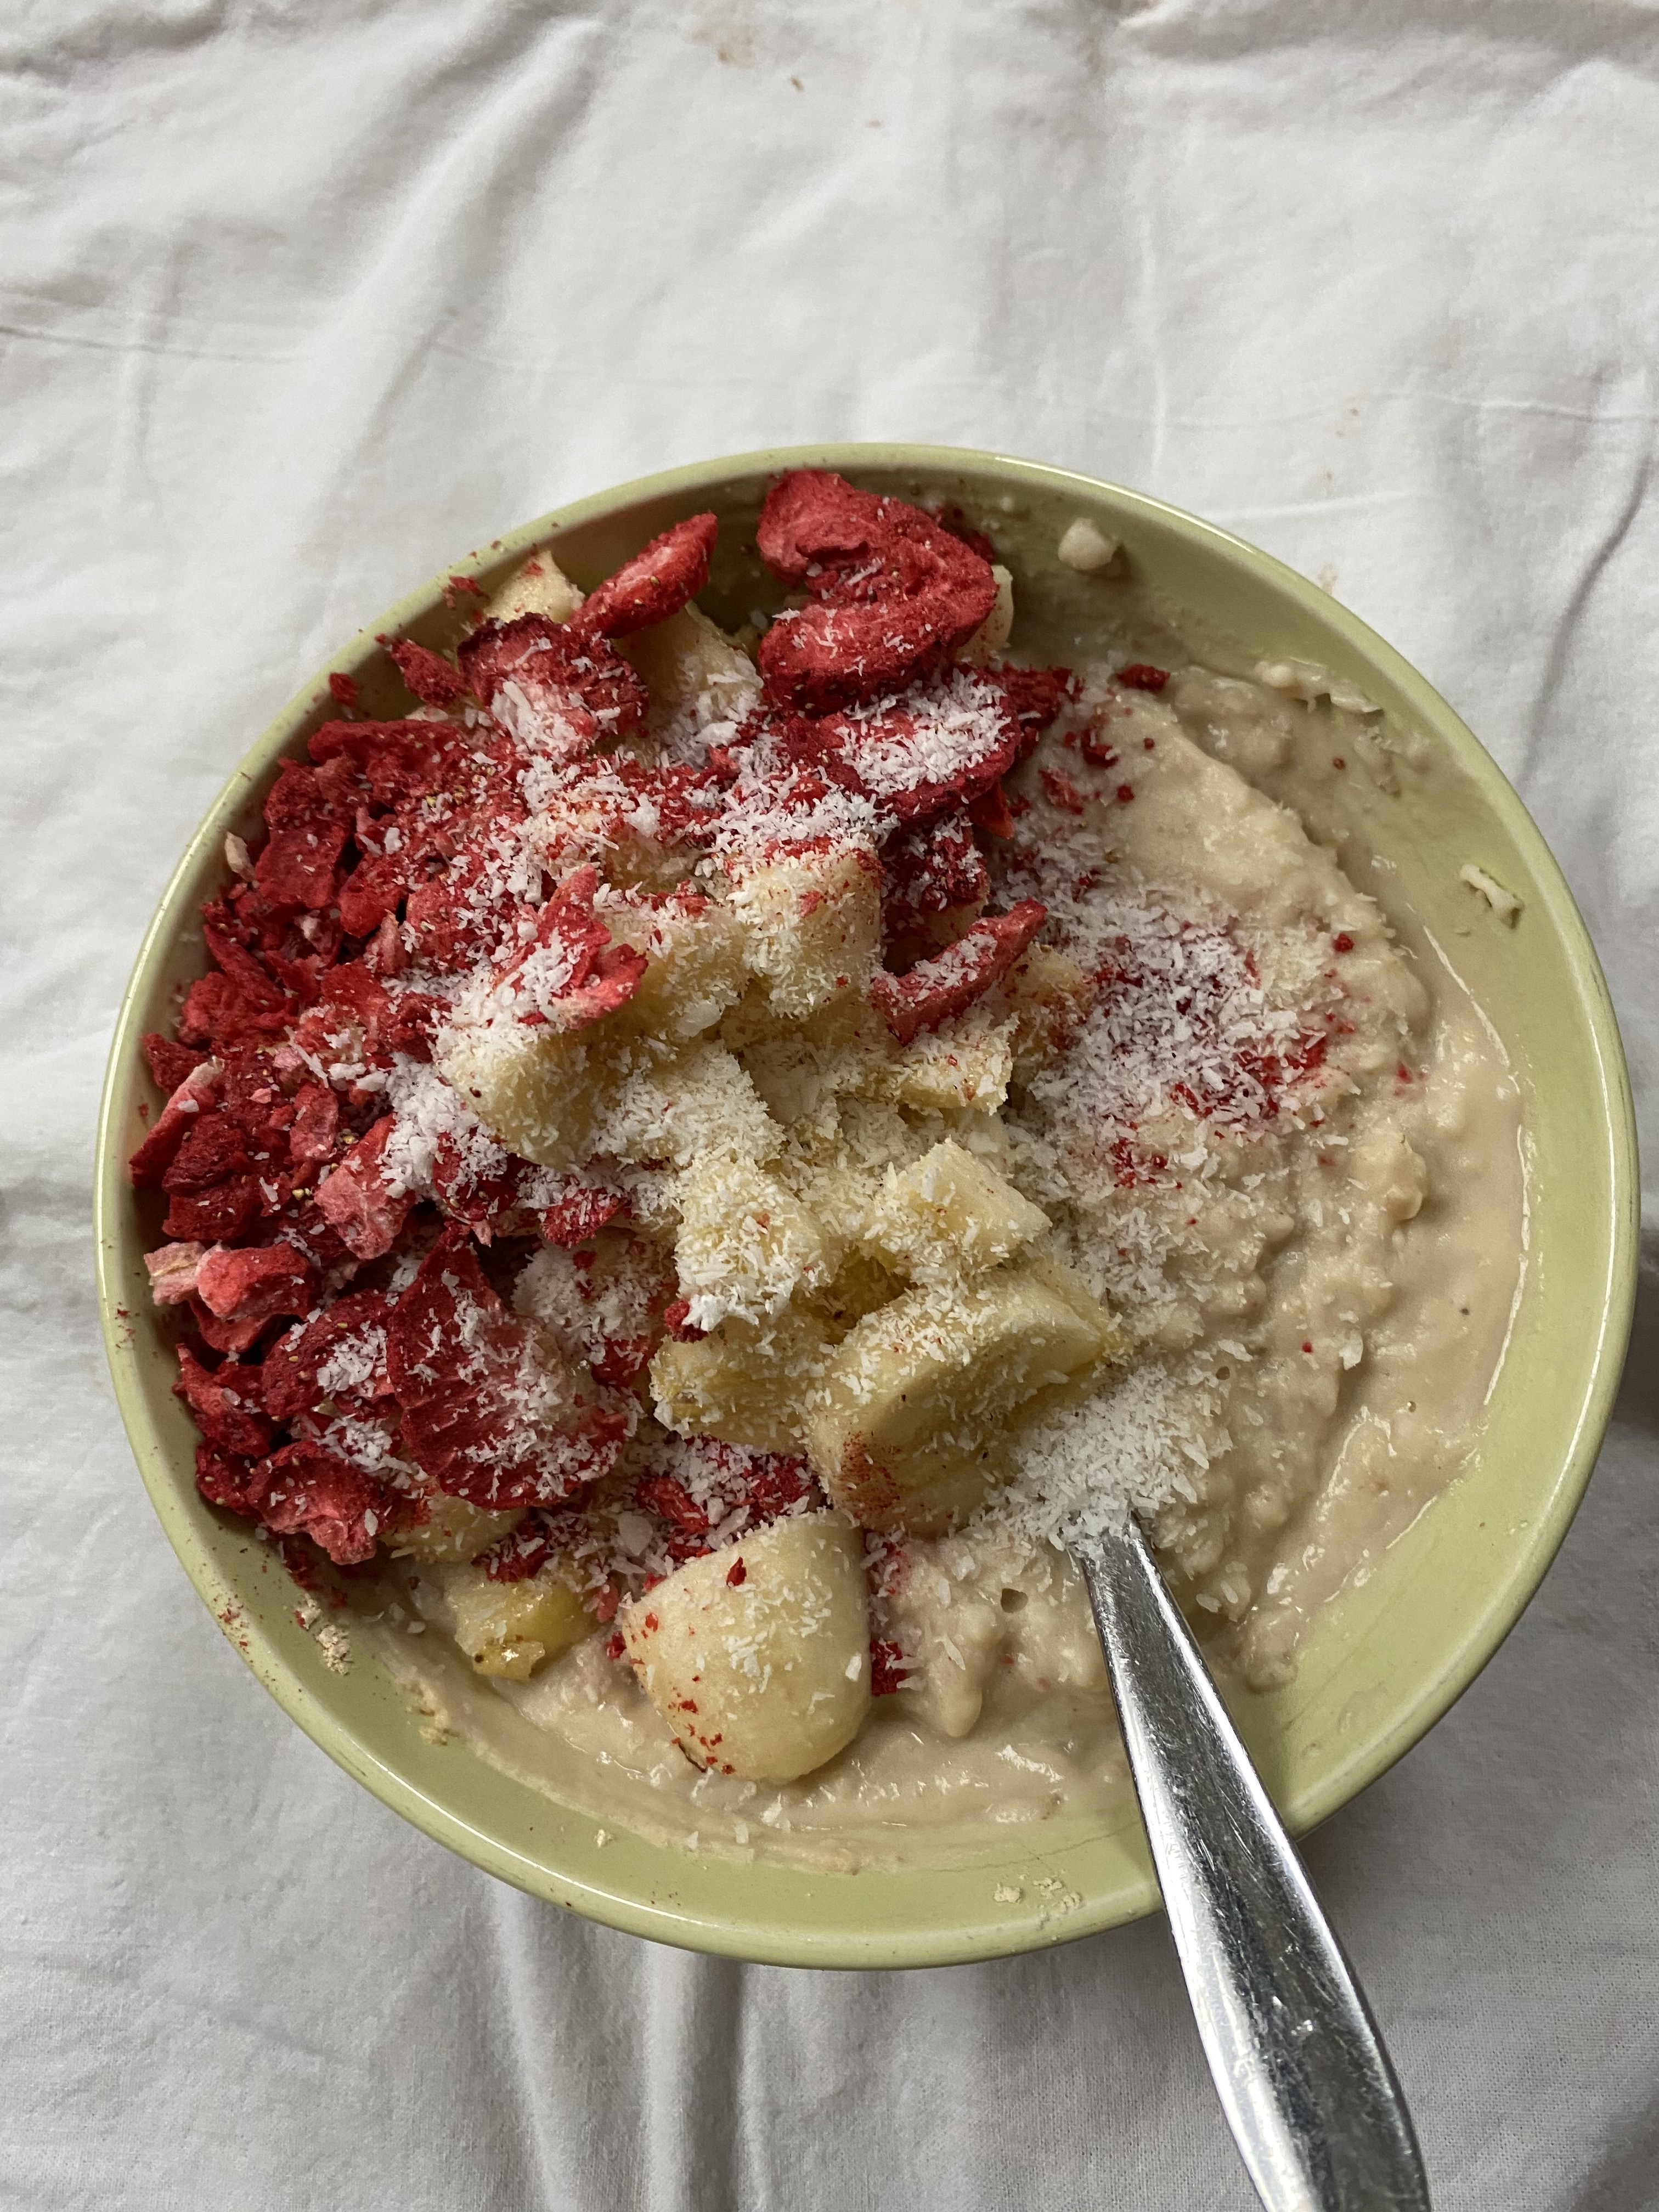
Lastly, don’t forget the toppings – you can use anything you have on hand. In the case of my recent breakfast, I had some bananas, coconut flakes and freeze dried strawberries. Some others topping you may want to try are raisins, or other dried fruit, chopped walnuts, slivered almonds, brown sugar, maple syrup, fresh fruit of any kind (well, maybe not citrus fruit, but you get the idea), some spices, like cinnamon or cardamom…
Or, if you are feeling adventurous (and you used unsweetened and unflavored protein powder) you may want to try savory oatmeal and add sour cream, perhaps some hummus, or some diced olives and similar types of toppings. I can see how this may sound strange, but oatmeal is really almost like polenta or grits, so it’s worth playing around with savory side of oatmeal as well.
Enjoy!
Unbelievably Creamy Oatmeal, via Eat the Vegan Rainbow
Unbelievably Creamy Oatmeal
Note: serves 1
What you’ll need:
1/2 cup quick cooking oats (or any other type of oats you like)
1 scoop pea protein powder (or any other type of protein powder you enjoy)
1 1/4 cup water (use the amount of water you usually use to cook oatmeal + 1/4 cup extra)
optional: toppings of any kind you prefer (fresh fruit (bananas, berries…), dried fruit (raisins, chopped dates…), nuts (chopped walnuts, slivered almonds…), sweeteners (maple syrup, brown sugar…), coconut flakes, spices (cinnamon, vanilla, cardamom….)
What you’ll do:
Note: this is a recipe for quick cooking oats prepared in the microwave. You will need to make adjustments if you are using other types of oats or other cooking methods. In a microwave safe bowl, mix the oats and protein powder. Pour the water in, and mix again. Cook on high for 2 to 3 minutes (this will depend on your microwave so stick to the time you usually use; if this is your first time making oatmeal, please note that oatmeal has a tendency to boil over very quickly and make a sticky mess that’s pain to clean. I recommend you place your ingredients in a deep bowl to avoid spills. Also: place a paper towel or something similar under the bowl, to help soak up the mess in case the spill over happens). Mix the oatmeal and return to the microwave for another 20-30 seconds.
Serve the hot oatmeal with as many of your favorite toppings as you like. Keep it simple or go wild – you can’t go wrong with oatmeal!
Vegan Scrambled Eggs with Mushroom and Scallions (oil-free), via Eat the Vegan Rainbow
Do you eat breakfast every day? Many consider breakfast essential – a meal that can’t be skipped no matter what. I personally ebb and flow on this. When I was younger I could not imagine starting a day without a solid meal. Nowadays, breakfast may or may not happen, and it may or may not happen at different times after I wake up. Very often, it is a quick piece of fruit, a banana, apple, or (one of my weird favorites) roasted sweet potato, or my attempt to dethrone avocado toast – the banana toast (huh, you didn’t see that one coming, did you?)
I blame my busy morning for this state of the affairs, so when I do have a chance I try to make breakfast a bit more substantial. Often that means some sort of doughie concoction like muffins, pancakes, crêpes, waffles, scones, or even popovers and I enjoy making them as they are real crowd pleasers. But, I personally prefer a savory breakfast when I have a choice, like a breakfast taco, or something like these soy-free scrambled eggs.
Few days ago I made another version of scrambled eggs (not soy-free), which I am very proud of. The recipe uses tofu, so if you are trying to minimize soy intake for whatever reason, you can refer back to soy-free scrambled egg recipe for instructions on how to make the “egg” base, and combine with the rest of the recipe below.
The recipe is really simple. You will need a blender to create a very smooth mix of silken tofu and arrowroot powder (or starch) that will serve as binder for the scramble, but that’s the only specialized equipment you need here. All the rest you can do by hand.
There are two optional ingredients below – black salt or kala namak and smoked paprika. Black salt is salt that has traces of sulfur containing salts which give it a sulfurous smell, a smell of eggs. I usually skip this, but you may want to experiment with small amounts and see whether you like it or not. For a smokey aroma, I recommend using a small pinch of smoked paprika just before serving. If you prefer to add some heat, you can replace with a pinch of chipotle powder or a drizzle of hot hot sauce, like tabasco.
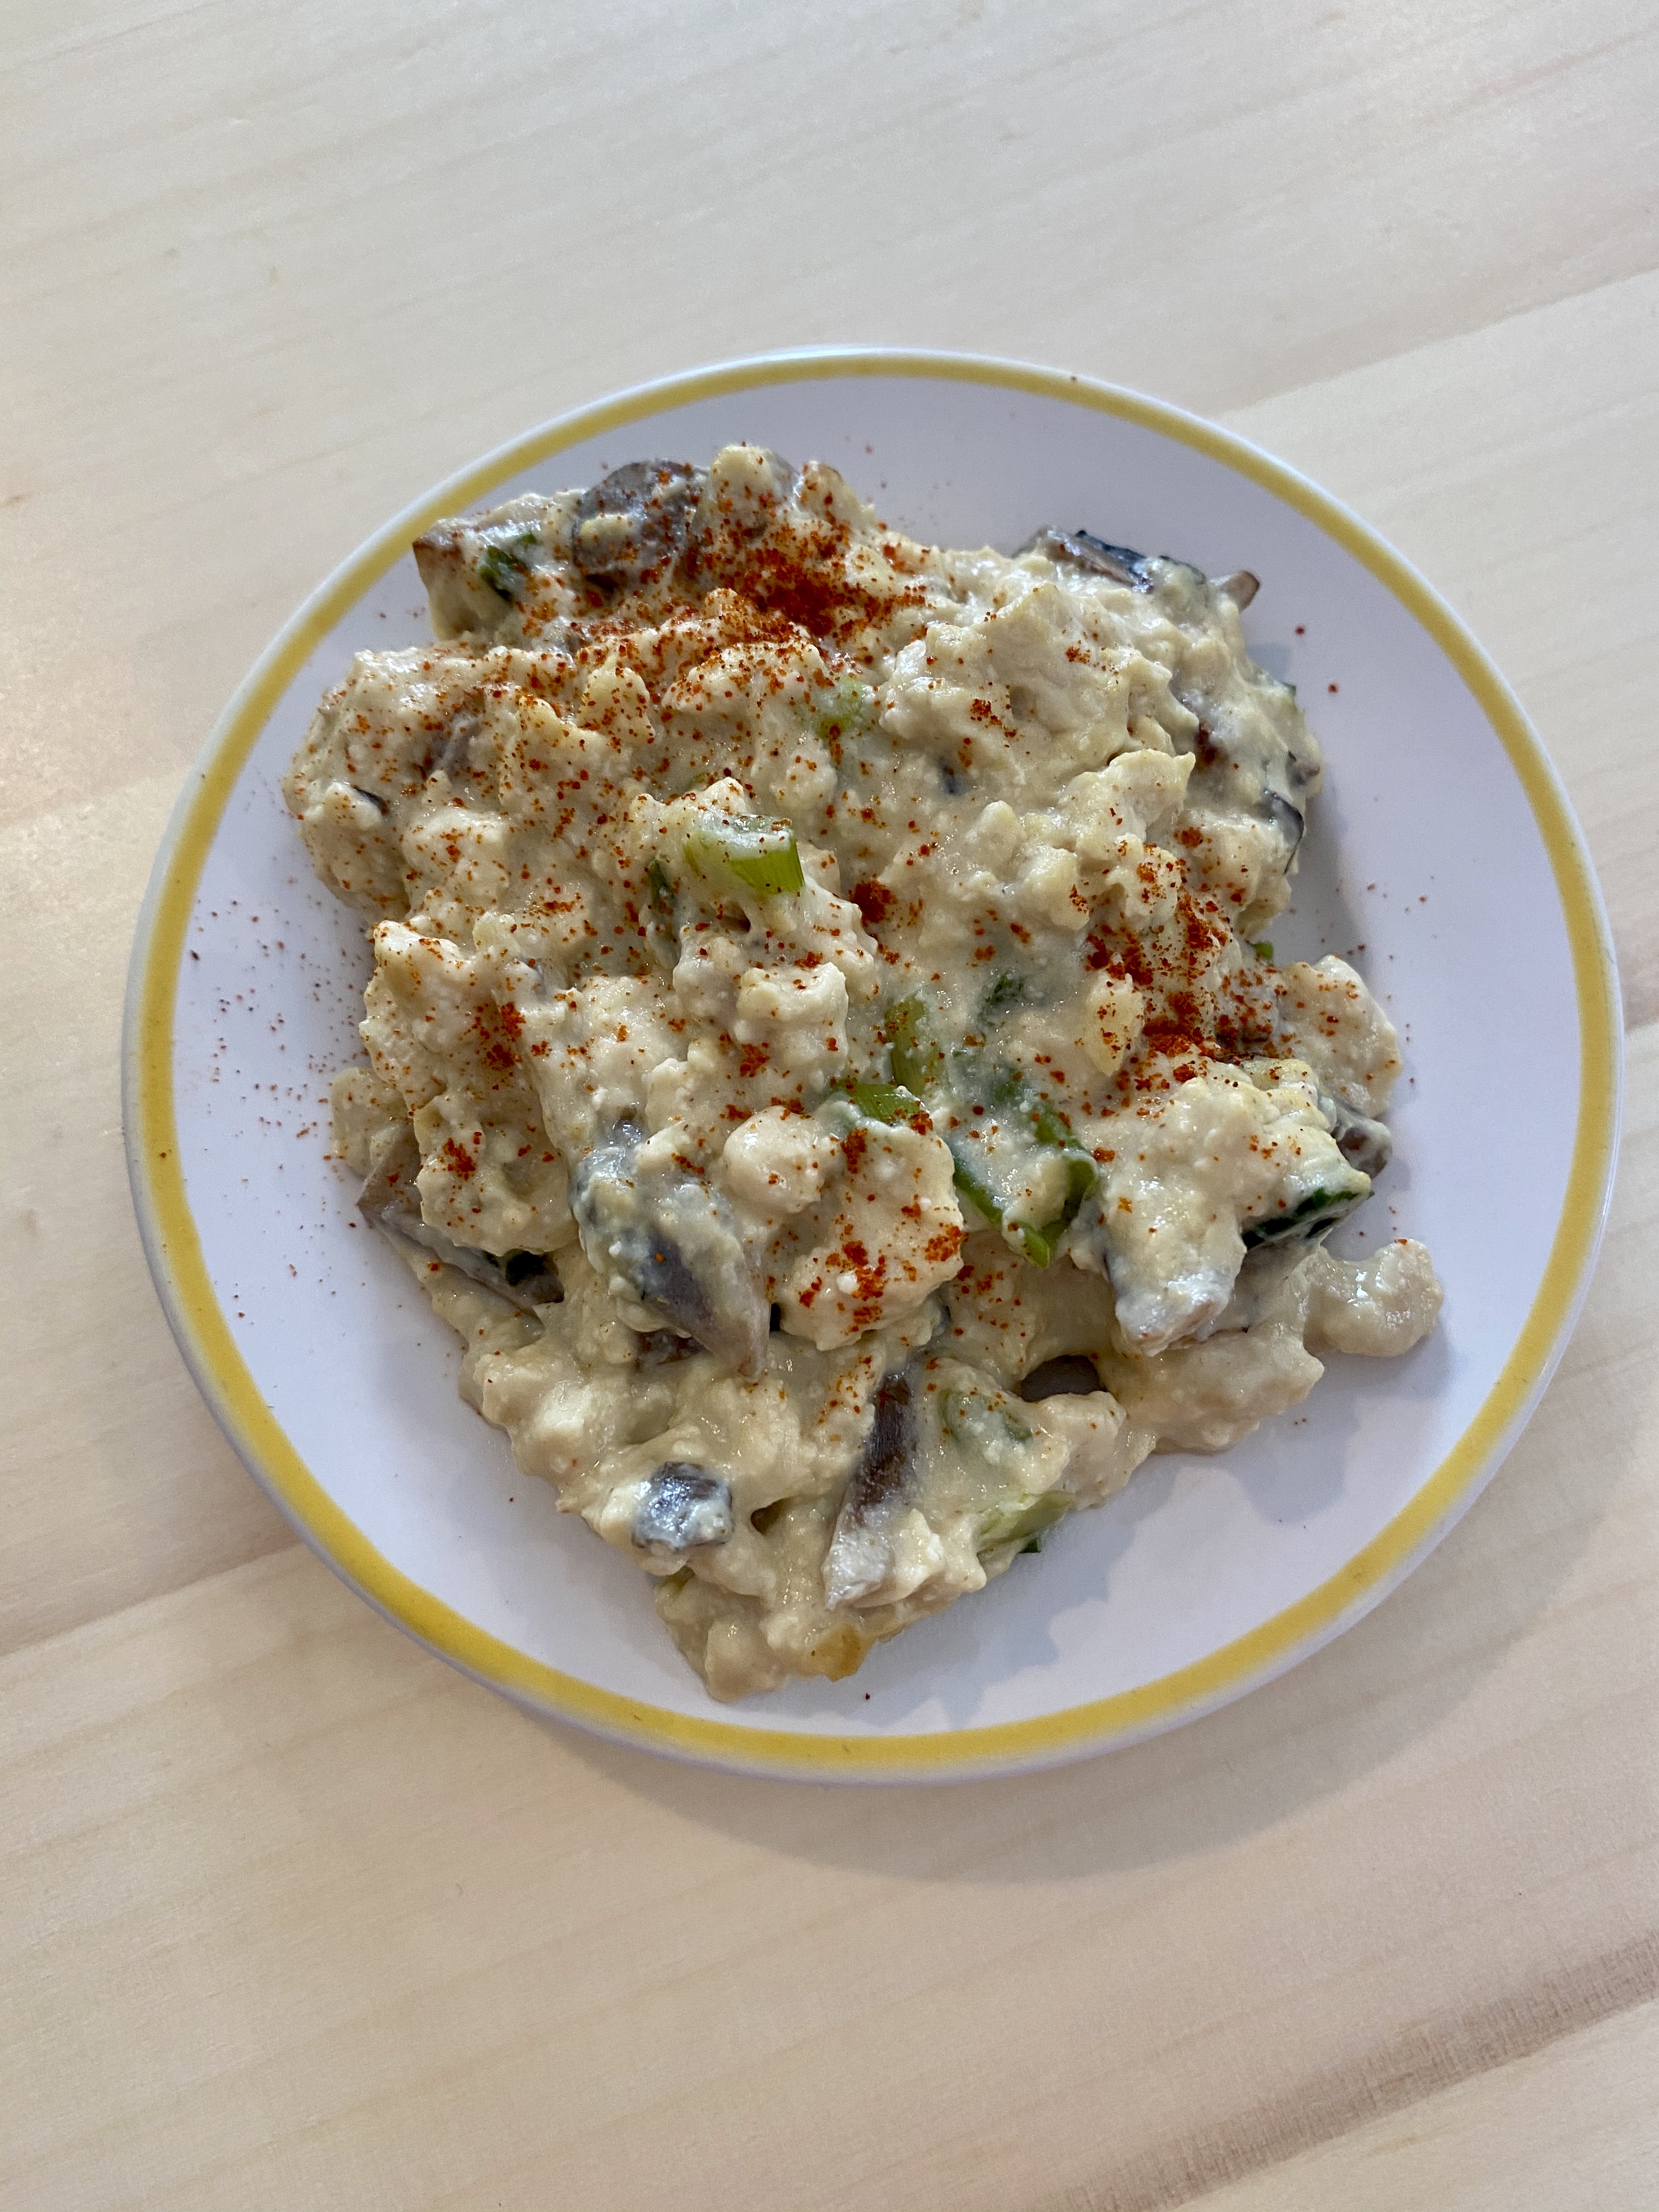
Vegan Scrambled Eggs with Mushroom and Scallions, via Eat the Vegan Rainbow
Vegan Scrambled Eggs with Mushroom and Scallions (oil-free)
What you’ll need:
4-5 scallions (green onions), white parts and green parts, finely sliced
5-6 mushrooms (white or cremini), whole, sliced (I prefer slicing them finely)
1 box (10 oz, 300 g) silken tofu
1/4 cup nutritional yeast
1 tablespoon arrowroot powder (or tapioca starch or any other starch you have on hand)
1/2 lemon, just the juice
1 teaspoon garlic powder
1 teaspoon onion powder
1 teaspoon cumin powder
1 box (14 oz, 400 g) extra firm tofu, drained and crumbled
(Optional) pinch of black salt
(Optional) pinch of smoked paprika for serving (or chipotle powder for more heat)
(Optional) tabasco sauce, drop or two
What you’ll do:
Sauté scallions and mushrooms in a dry pan over medium-high heat, stirring frequently and adding a tablespoon of water at a time as needed to prevent food from sticking to the bottom of the pan. You can use oil if you like – 1 tablespoon should be sufficient here.
While scallions and mushrooms are cooking, place silken tofu and the rest of the ingredients except a block of extra firm tofu, into a blender and blend until smooth.
Once they are done cooking, push mushrooms and scallions to the side of the pan and poor in the silken tofu mix. Deglaze the bottom of the pan, then add the extra firm tofu crumbles, and mix well to incorporate all the ingredients.
Increase the heat to high, and let the mix start to bubble. Mix well to prevent burning, and cook for 3-4 minutes. Serve hot with an optional pinch of black salt, sprinkle of smoked paprika, chipotle powder or hot sauce. A piece of toast and some black coffee would go well with this scramble, too!
Perhaps you can’t get enough of Avocado Toast, or perhaps you are just fed up with all the hype! Perhaps you view it as a generational thing, given how much grief millennials have been getting about it.
I happen to think Avocado Toast is delicious, especially when topped with some tomatoes and basil (see here for some great variation on this theme). but avocados don’t come cheap. They are one of the pricier produce out there, and it seems that they are not the best choice environmentally speaking either.
So, to offer an alternative to the Avocado Toast craze, I offer you Banana Toast! Cheaper than chips and easy to make. Plus, unlike Avocado Toast that may not work with things like chocolate chips, Banana Toast is friends with chocolate, cinnamon, raisins, craisins, coconut flakes, different protein powders (if you like to mix them in with the banana) and all that good stuff!
All you need is a good piece of bread – I love sprouted kinds – and a fork to mush that banana. Spread the love and accessorize!
Banana Toast, via Eat the Vegan Rainbow
Banana Toast
1 SERVING
What you’ll need:
1 banana
2 pieces of bread (whole grain and/or sprouted recommended)
Optional: any topping of your choosing (raisins, craisins, chocolate chips, cinnamon, coconut flakes, brown sugar,…)
What you’ll do:
Toast the bread.
While bread is toasting, mash the banana with the fork until well mashed.
Spread the mashed banana over the toast, and top with any topping of your choice and enjoy!
“Where do you get your protein from?” is probably the most detested question that those enjoying plant-based (vegan) diet get asked all the time. Of course, we know that this is an easy question to answer because plants are full of protein.
But just in case you feel that you need an extra protein boost, especially when it comes to breakfast, I have a perfect solution for you. How about some protein packed English muffins? Actually, these are not oven-baked; rather they are done within a few minutes using a microwave.
Perhaps you’ve seen recipes for mug cakes? Or you may have seen new “mug cake” product lines in your local supermarket? The idea is that you whip up your ingredients in a mug, mix them together and after 3-5 minutes in a microwave you have your single-serve cake or a muffin ready to enjoy.
I use the same basic idea here except that instead of eggs and flour I use pea protein powder, peanut butter powder (which is really peanut protein powder), some flax meal, baking soda, a dash of vinegar (or lemon juice) and water or plant milk of choice. Believe it or not, after 3 minutes in the microwave on high power you get a nice little muffin. I recommend slicing the muffin across horizontally, then toasting it for some extra crunch. Yummy!
So, how does this work? I don’t know for sure but I do have a working theory that the carbon-dioxide released when baking soda meets a splash of vinegar or lemon juice is enough to lift the “dough”, and once up the protein molecules have sufficient strength to support the structure.
The main trick here is not to make the mix too wet. When you mix your ingredients together, you will have something that looks more like a paste than a muffin batter. Don’t worry, this is as it should be. The best dish to microwave the muffin in is a 3-4 inch (8-10 cm) ramekin, and I recommend that you grease it with either a bit of butter or some cooking spray. A little will go a long way to help your muffin slide out.
Lastly: a note about microwaves. They are all different and have moods of their own. I recommend you start on high power, and check how things are doing after about 2 minutes. You should look for a dry looking top and sides that are coming away from the ramekin. At the end, the muffin should slide out of the ramekin without much resistance, usually after you run a butter knife around the edges to release the muffin.
Gluten-free and Vegan Protein-Packed No-Bake English Muffins
What you’ll need:
2 tablespoons pea protein powder
2 tablespoons peanut protein powder
1 tablespoon ground flax meal (golden is preferred)
1/2 teaspoon baking soda
1/4 cup and 1 tablespoon almond milk or water
1 teaspoon apple cider vinegar
Vegan butter (optional)
What you’ll do:
Place all the ingredients into a small bowl, and mix to combine. I recommend adding a splash of acid (vinegar or lemon juice) last. The batter will be dense and sticky, just FYI.
Pour the batter into a microwave safe ramekin or a mug that’s about 3-4 in (8-10 cm) in diameter and that has been greased with butter or sprayed gently with some cooking spray.
Microwave on high for 3 minutes or so. The top should be dry and look baked, and the sides should be coming of. If all is well, the muffin will slide out of the ramekin without much resistance after you run a knife around the edges. If not, it means that the bottom is still moist, and the mix needs to go back for another 30-60 seconds.
Enjoy the muffin as is, or toast if you prefer things a bit crunchier. You can top the muffin with butter, jam, hummus, avocado, fruit, or anything else you like. The muffin itself is neither sweet nor salty so lends itself to utmost customization!
Oui, oui… we all love crêpes! Savory or sweet these flat wraps are easy to make and delightful. Of course, those in the business of crêpes making may lead you to believe that crêpes are beyond your capabilities. And even if you are brave to venture into the crêpes land, you may hesitate to accept the vegan crêpes challenge. Yet, there’s nothing to worry about as crêpes can be not only vegan but gluten-free as well.
Choosing the right crêpes pan
The pan you use makes a huge amount of difference when making crêpes. You need a good, preferably non-stick, shallow frying pan with large surface area. The pan should also not be too heavy because there is a fair bit of pan handling (lifting, tilting, swirling) that will need to take place. I use IKEA but you can use any pan the fits this description – roughly.
Preparing the pan
I recommend getting the pan nice and hot before adding a batch of batter. Also, remember to oil the pan before each crêpes. I place my oil in a small bowl which I keep on the stove for easy access and use a silicone brush to brush the oil over the pan’s bottom just before pouring in a batch of batter. And keep doing this each time!
The first crêpe is always the worst!
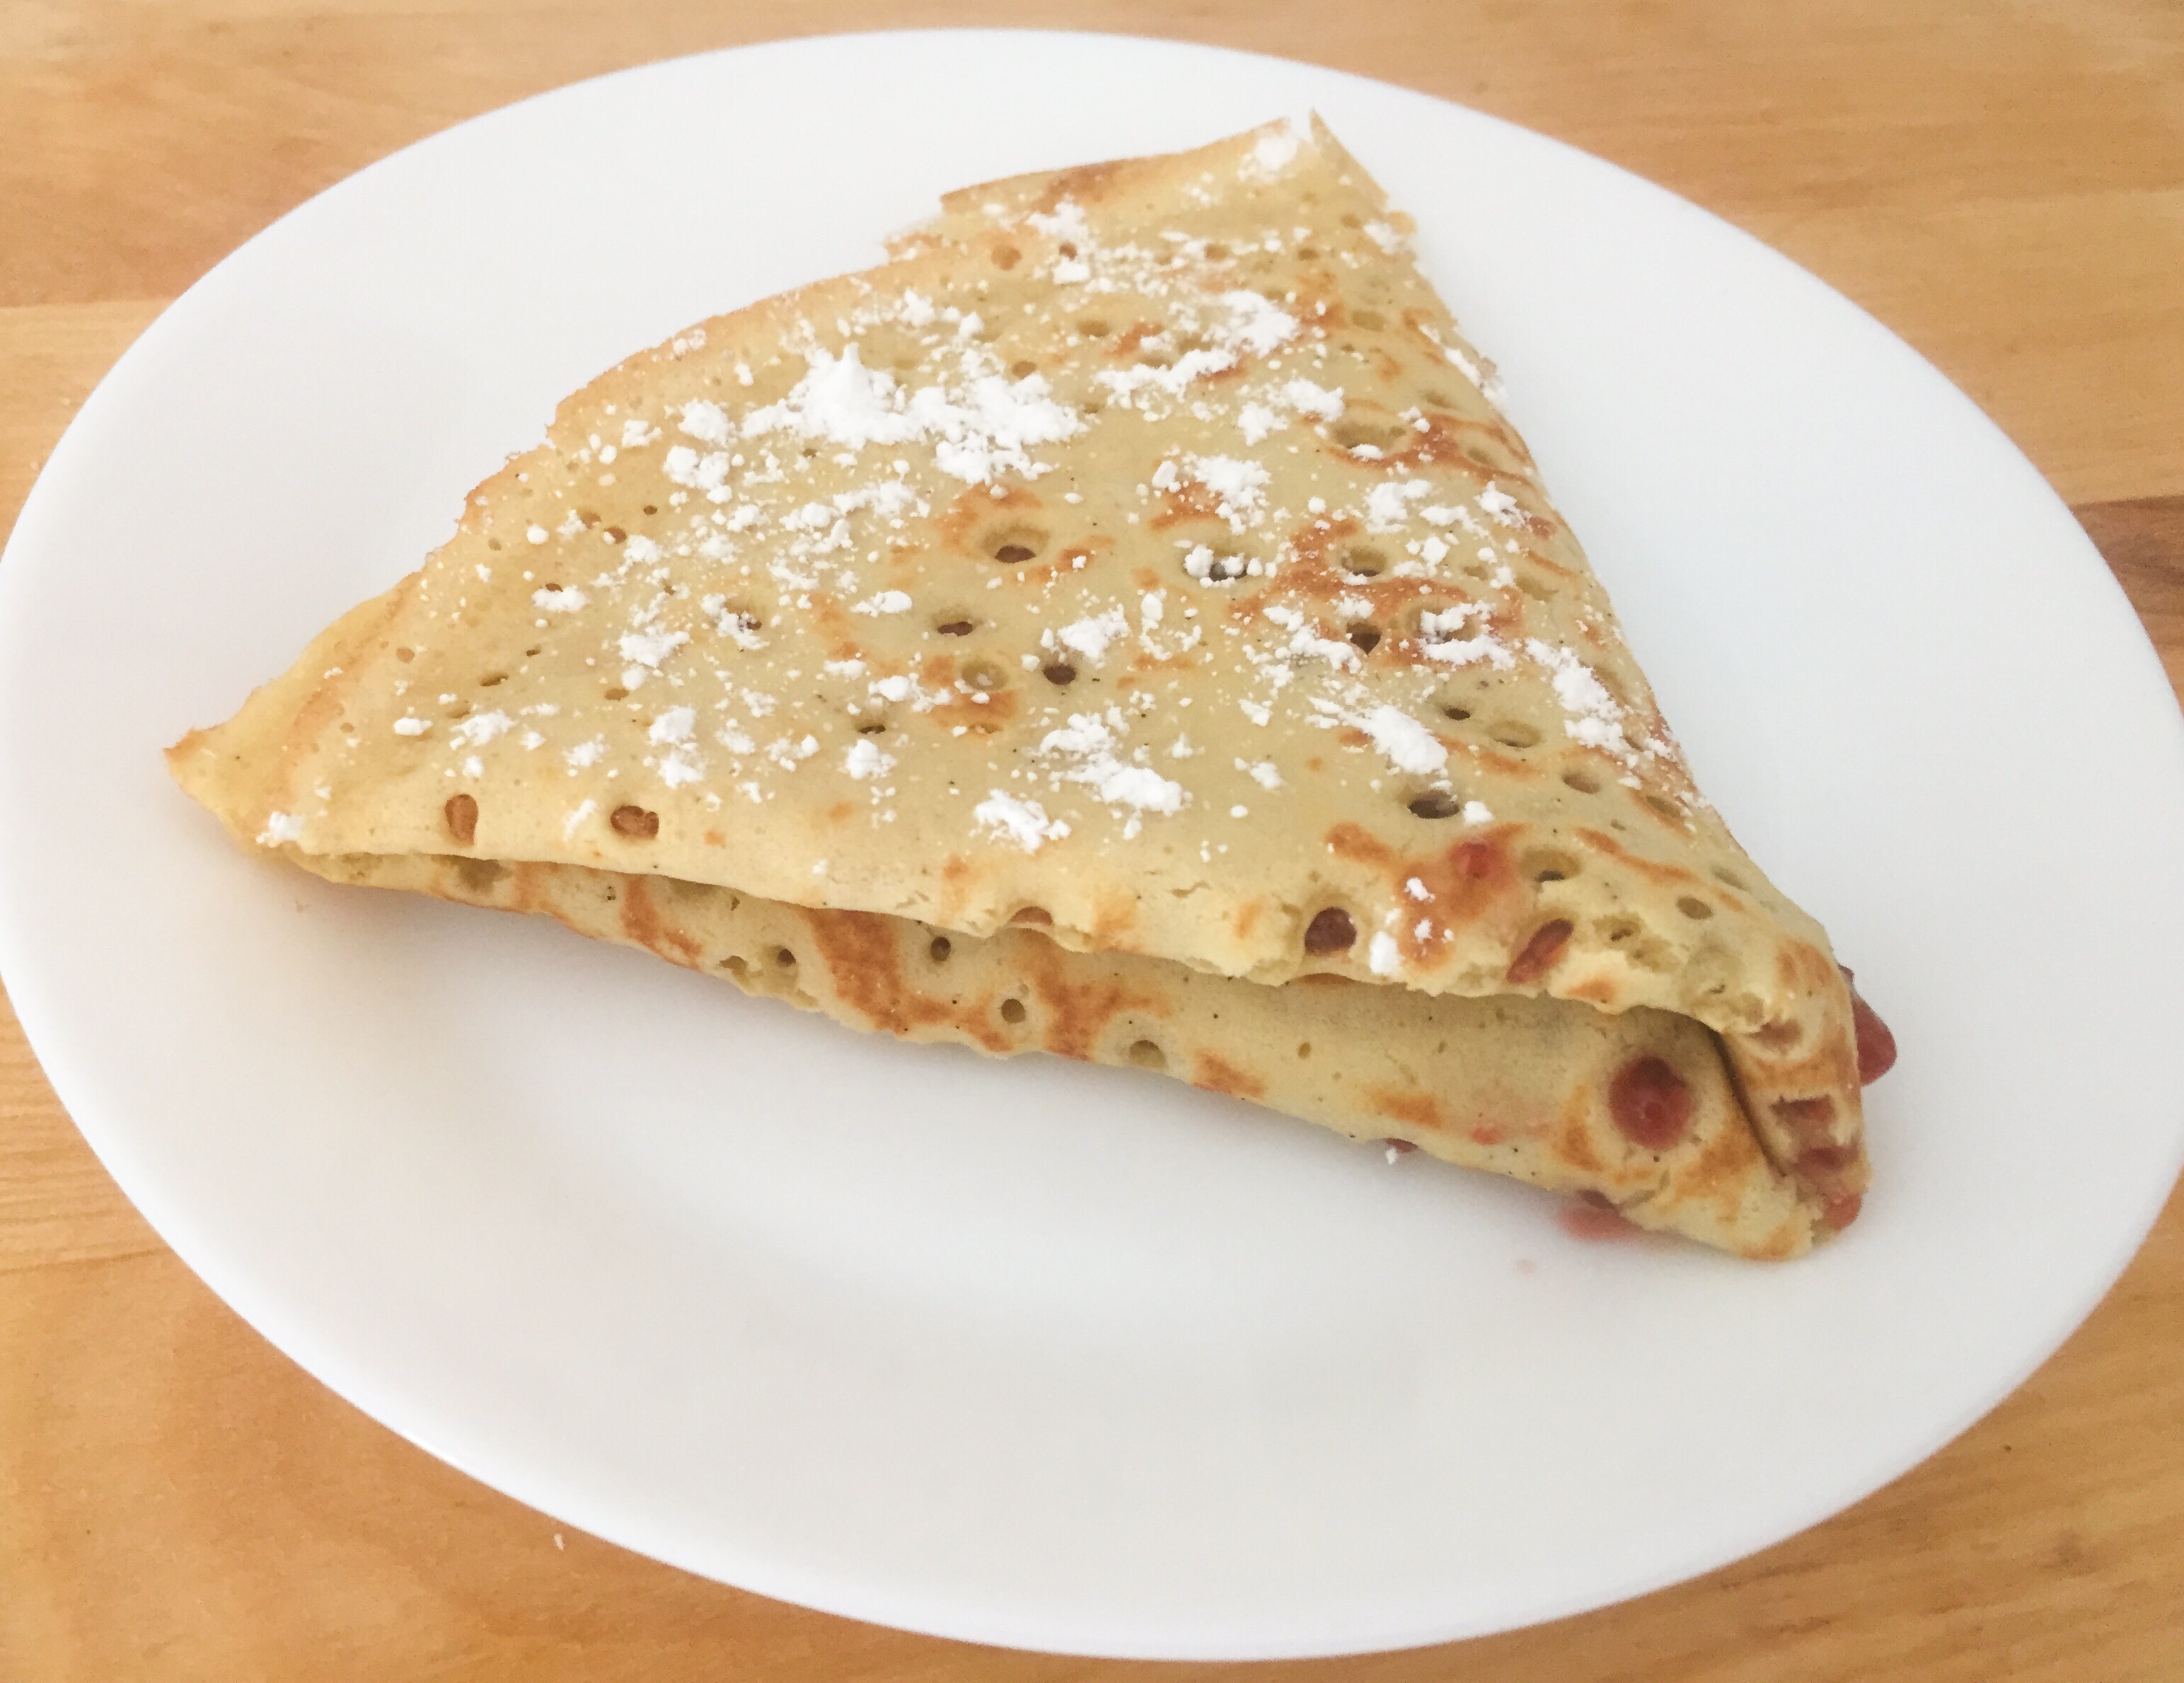
One dirty little secret of crêpe making is that the first crêpe is always the worst!!! So, although this first crêpe will be nerve wracking and make you feel like a total crêpe disaster, please do persevere and things will get better. This phenomenon seems to be all down to improperly oiled and insufficiently heated pan – and following the instructions here or in this very helpful post will ensure that your second, third, fourth, and so on crêpe all come out perfect. What helps is keeping the heat up, oiling the surface and using a really long and thin spatula to gently peel the crêpe off and flip over. What also help is being stingy with a batter. You are going for a very, very thin pancake here and the pictures below show you what my crêpes looked like.
Finishing crêpe touches
There are many different ways to enjoy the crêpes. You can use light spreads, like jams, chocolate syrup or nut butters, or simply sprinkle with some sugar and cinnamon, or go for the classic combination of butter and maple syrup. Chopped up fruit and/or nuts, as well as walnut and almond meal also work. If you are want to totally impress your guests you may want to make a crêpe cake, and if you made a batch of savory crêpes you can definitely use them in the same way as tortillas or other thin, unleavened breads. If you are wondering what savory crêpes are all about, I previously shared an easy to make scallion crêpe recipe with a sesame dipping sauce.
All in all, this recipe is perfect for a Sunday brunch, or a nice family breakfast around the Holidays. It is something that you could make ahead and bring to a pot luck, but the best way to enjoy crêpes is straight out of the pan, while they are still hot and soft. Incredible – oh là là!!!
Basic Gluten-free Vegan Crêpes
What you’ll need:
2 cups chickpea flour
1 cup corn starch
2 tablespoon agave syrup (omit if you plan on savory toppings)
1 teaspoon baking powder
1 teaspoon baking soda
1/4 teaspoon salt
1 tablespoon vanilla paste
1 teaspoon maple flavor
2 cups almond milk
1 cup water
2-3 tablespoons vegetable oil
What you’ll do:
Combine all the ingredients as listed in a large mixing bowl, and whisk them all together. Let the batter rest for 15-20 minutes.
Place a large pan with a flat surface over high heat. Let the pan heat up then using a silicon brush spread some oil uniformly over the entire surface. Pour just enough batter to cover the surface with a thin layer – for my 9 in (23 cm) pan I use about 3/4 cup. Pour the batter gradually towards the middle and keep pouring as you twirl the pan around.
Place the crêpe over high heat for 2 minutes or so, then lower the heat just a tad and let the crêpe finish cooking on the first side. The way you can tell the crêpe is ready to be flipped is by looking at the surface – once the surface starts looking dry you are ready to flip.
If you have a very good pan and have done everything right your crêpe will not be tightly attached to the bottom and you may even be able to flip it through the air. But if your crêpe is not loose then use your spatula to gently loosen the crêpe and flip it over. The flipping needs some practice, so be patient.
The crêpe needs to cook on the other side for just 1-2 extra minutes. Slide the crêpe out, then increase the heat, leave the pan on for a minute to get it back to being really hot, spread some oil and repeat. Your friends and family may want to start eating the crêpes are they come out of the pan, and I say let them! Crêpes are the best when fresh, so it makes total sense to jump right in!!!
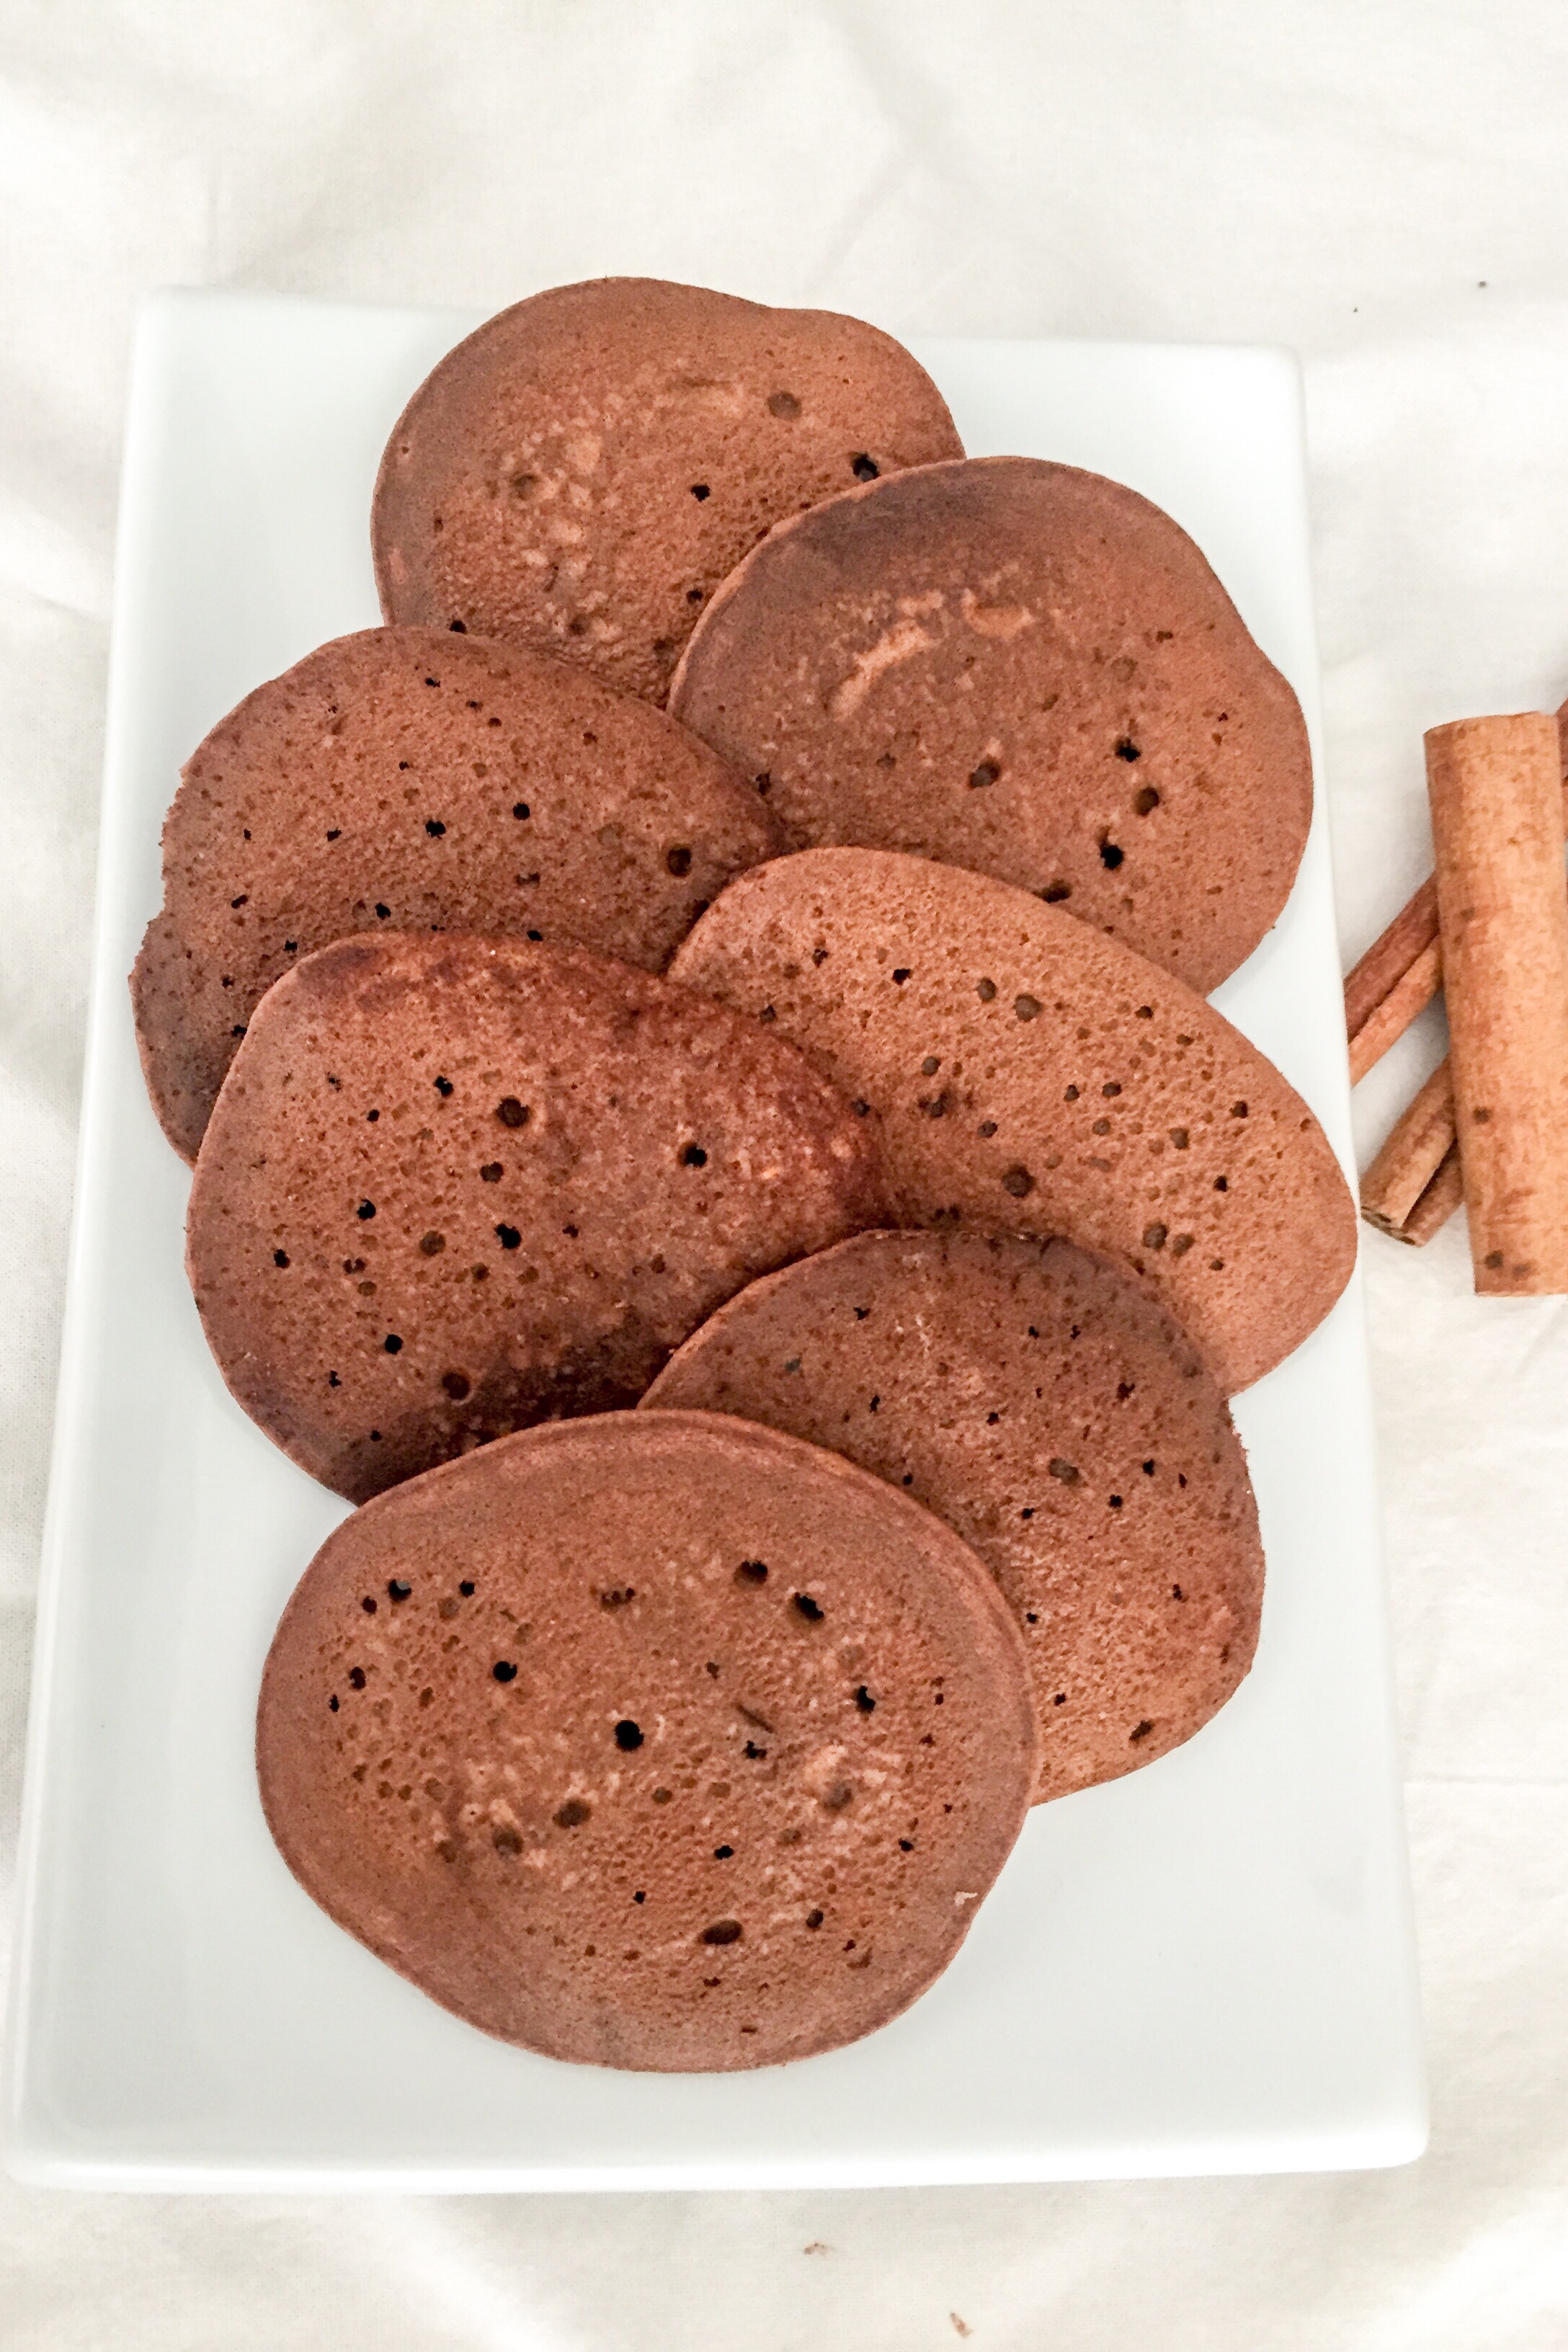
Snickerdooled Gluten-free Vegan Pancakes, via Eat the Vegan Rainbow
Autumn and winter are both better with some cinnamon. This spice, which is actually a tree bark, fills our homes and kitchens with calm and coziness comes colder weather and can often be found in all the delicious food that surrounds our harvest and winter holidays. For example, cinnamon was the key spice that I used for my Spice Infused Apple Butter, and has made a significant appearance in Pumpkin Truffles, Buttercup Squash Pie, and Pecan Apple Baklava!
But, I don’t want to leave you with an impression that cinnamon is only good for sweets and treats. Actually, this rich spice can add a lot to Sweet Potato Burgers and Meatless Keema Matar, both lovely main dishes with complex flavor structure.
Having said that, these “snickerdoodled” pancakes are probably the recipe with the most cinnamon powder I ever used! If 1/4 cup of cinnamon seems like a lot you could start with less, but for the full snickerdoodle flavor on your breakfast plate I recommend going full blast ahead into the cinnamon bliss.
Because these pancakes are so rich in flavor you really don’t need to fuss too much about condiments and toppings. These are great with a splash of maple or agave syrup, or a dollop of a plant-based vanilla yogurt, or a simple Vanilla Sauce. I hope you give these a try – your kitchen will smell fantastic and your tummy will be happy!
If you prefer regular flour, this recipe can be made following same steps below using 1 cup white wheat flour, 1 cup whole wheat flour, omitting corn starch, and going from there. In this case, please go easy with adding water, and start with 1 1/2 cups – that might be enough.
Snickerdoodled Gluten-free Pancakes
What you’ll need:
1 cup fine corn flour
1 cup chickpea flour
1/2 cup corn starch
2 teaspoons baking soda
1/4 cup cinnamon powder
1/4 cup sugar (vegan)
1/4 cup vegetable oil
2-3 tablespoons lemon juice (juice of 1/2 lemon)
1 1/2 to 2 cups water
What you’ll do:
Combine all dry ingredients in a large mixing bowl. Mix well, then add oil, lemon juice and 1 1/2 cup water. Whisk the pancake batter together, making it smooth and lump-free. The batter should be dense yet flowing, and you can add up to an additional 1/2 cup of water if needed. Please do add this last bit of liquid gradually to avoid adding too much. The mixing can be done in a blender, in which case you will need to add liquid ingredients first (1 1/2 cup water + oil + lemon juice) and then dry ingredients. Mix everything well before deciding whether any additional water is needed.
Let the batter rest for 5-10 minutes.
Heat a non-stick pan (or a non-stick griddle) until very hot. I usually crank the heat on my burner to the maximum for 1-2 minutes than lower down to medium-high before pouring in the batter. Please note that if you are using a cooking surface that is far from non-stick you will need to brush on some oil to prevent the pancakes from sticking.
Ladle 1/4 cup of batter for each pancake. Let them cook on one side until bubbles stop to form (2-4 minutes), then flip the pancake over and cook on the second side for an additional 2 minutes.
Serve hot with maple syrup or a simple Vanilla Sauce.
Gluten-free and Vegan Scone with Chia and Coconut, via Eat the Vegan Rainbow
I recently had a pleasure of teaching an evening plant-based cooking class at our local technical and vocational school. I enjoyed the experience immensely and in addition to having a really very pleasant evening I have also learned about some of the things that people who are relatively new to plant-based cooking wonder and care about.
For example, I had several conversations about vegan breakfast items and whether it is possible to make vegan pancakes (yes!) and vegan crêpes (also yes!). And based on many conversations online, people are just having hard time figuring out what their plant-based breakfast options are.
What’s for vegan breakfast?
Breakfast is not as limited as people usually think. After all oatmeal, cereal with nut milk, fruits, vegetables, toast (including with avocado), smoothies, muffins, cauliflower tofu burritos, vegan “scrambled eggs”, and many, many more options are currently available. Some require a bit more hands on preparation but the offerings are as diverse as for people that eat meat, eggs and cheese. For me, a roasted sweet potato is a great breakfast that keeps me going well into the afternoon!
How about vegan baked breakfast treats?
Of course the number of options increases vastly on those days when you find yourself with extra time to do some baking. Vegan baking is actually not all that difficult. There are quite a few vegan options when it comes to replacing eggs, and nut milks usually work just as well as dairy. Plus: there are now a couple of vegan butters on the market so if the recipe asks for butter there are now alternatives to be used (including the dreaded margarine, but I don’t recommend you go there!)
Are gluten-free vegan treats possible?
Having said all that, if you are trying to be vegan and gluten-free you may be out of luck. In gluten-free baking, gluten, a protein that makes some people unhappy yet provides baked goods with their lovely structure, is usually replaced by extra eggs to keep the levels of protein high. Unfortunately, finding a plant-based replacement for eggs in this context is not easy because most options, like flax meal, bananas, apple sauce, and various starches are not protein rich; they are mostly carb heavy.
Chia seeds as an egg replacer for gluten-free vegan baking
Enter chia seeds! These little seeds are one of my current favorites. Chia seeds can be made into a pudding and they are an excellent binding agent for making seed crackers – and in this category nothing compares to Oh She GlowsEndurance Crackers, so give them a try! Amazingly, they also work in these super easy and quick scones. A critical step in this recipe is soaking chia seeds for 15-30 minutes in some warm water. This will transform them into a gel like substance that will keep your scone batter together. And that’s more than half a battle won! The rest is all about mixing things together, adding the right leavening agents to helps things rise high, and some flavors in.
Vegan buttermilk trick
A common way to help a leavening agent like baking powder and baking soda is to add some buttermilk. Acidity is what makes buttermilk so special, and what provides an extra push for the baking powder and baking soda. The easiest way to make a vegan buttermilk is to add some lemon juice or lime juice to your plant-based milk, mix it together and let it stand for 5 minutes or so. And, if you don’t have any sour citrus on hand, you can also use some apple cider vinegar as well. If you are using milk with lots of protein, like soy or pea protein milk, you may see quite a bit of curdling – that’s normal.
These delicious scone will please your entire household – so you may want to make a double batch. So, next time when someone asks you what’s for breakfast you can tell them: freshly baked scones. Enjoy!
Gluten-free and Vegan Scones with Chia and Coconut
What you’ll need:
3 tablespoon chia seeds
6 tablespoon warm water
1/3 cup almond milk, unsweetened (vanilla flavor or plain)
1 teaspoon lime juice
1 cup brown rice flour
1/3 cup corn starch
1/3 cup almond flour
1/3 cup shredded coconut unsweetened
1/6 cup tapioca starch
1 teaspoon psyllium powder
1 teaspoon baking soda
1 teaspoon baking powder
1/4 teaspoon salt
1/3 cup agave syrup
1/3 cup coconut oil, melted
Unsweetened coconut flakes and raw sugar, for sprinkling on top
What you’ll do:
Preheat the oven to 375 F (190 C).
Mix chia seeds and warm water together and set it aside for 15-30 minutes until a sticky gel-like substance forms.
Measure out the almond milk and add the lime juice to it. Let that stand for 5 minutes before using.
In a large mixing bowl measure out and mix all your dry ingredients.
Mix your wet ingredients (almond buttermilk, agave syrup, soaked chia seeds, and melted coconut oil), then add to your dry ingredients. Combine everything together. The batter will be sticky but not falling apart.
Line a large baking sheet with some parchment paper. Place your batter in the middle of the sheet, and form a round, domed structure. Using a thin and sharp knife, cut your dough into six even pieces. Use your knife to separate the cur pieces out just a bit, but you don’t need to pull them apart. The scones will bake well and break of easily when they are done.
Top the scones with some extra coconut flakes and sugar, then place in the oven for 20-25 minutes. Let the scones cool for 15 minutes or so before serving, then enjoy with some butter and/or jam, like his 10 minute, no sugar added blueberry jam I shared some time ago.
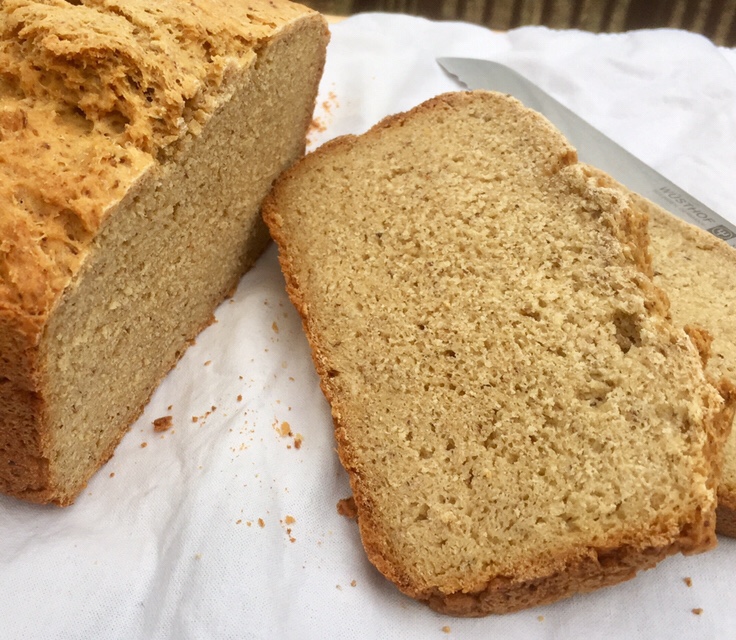
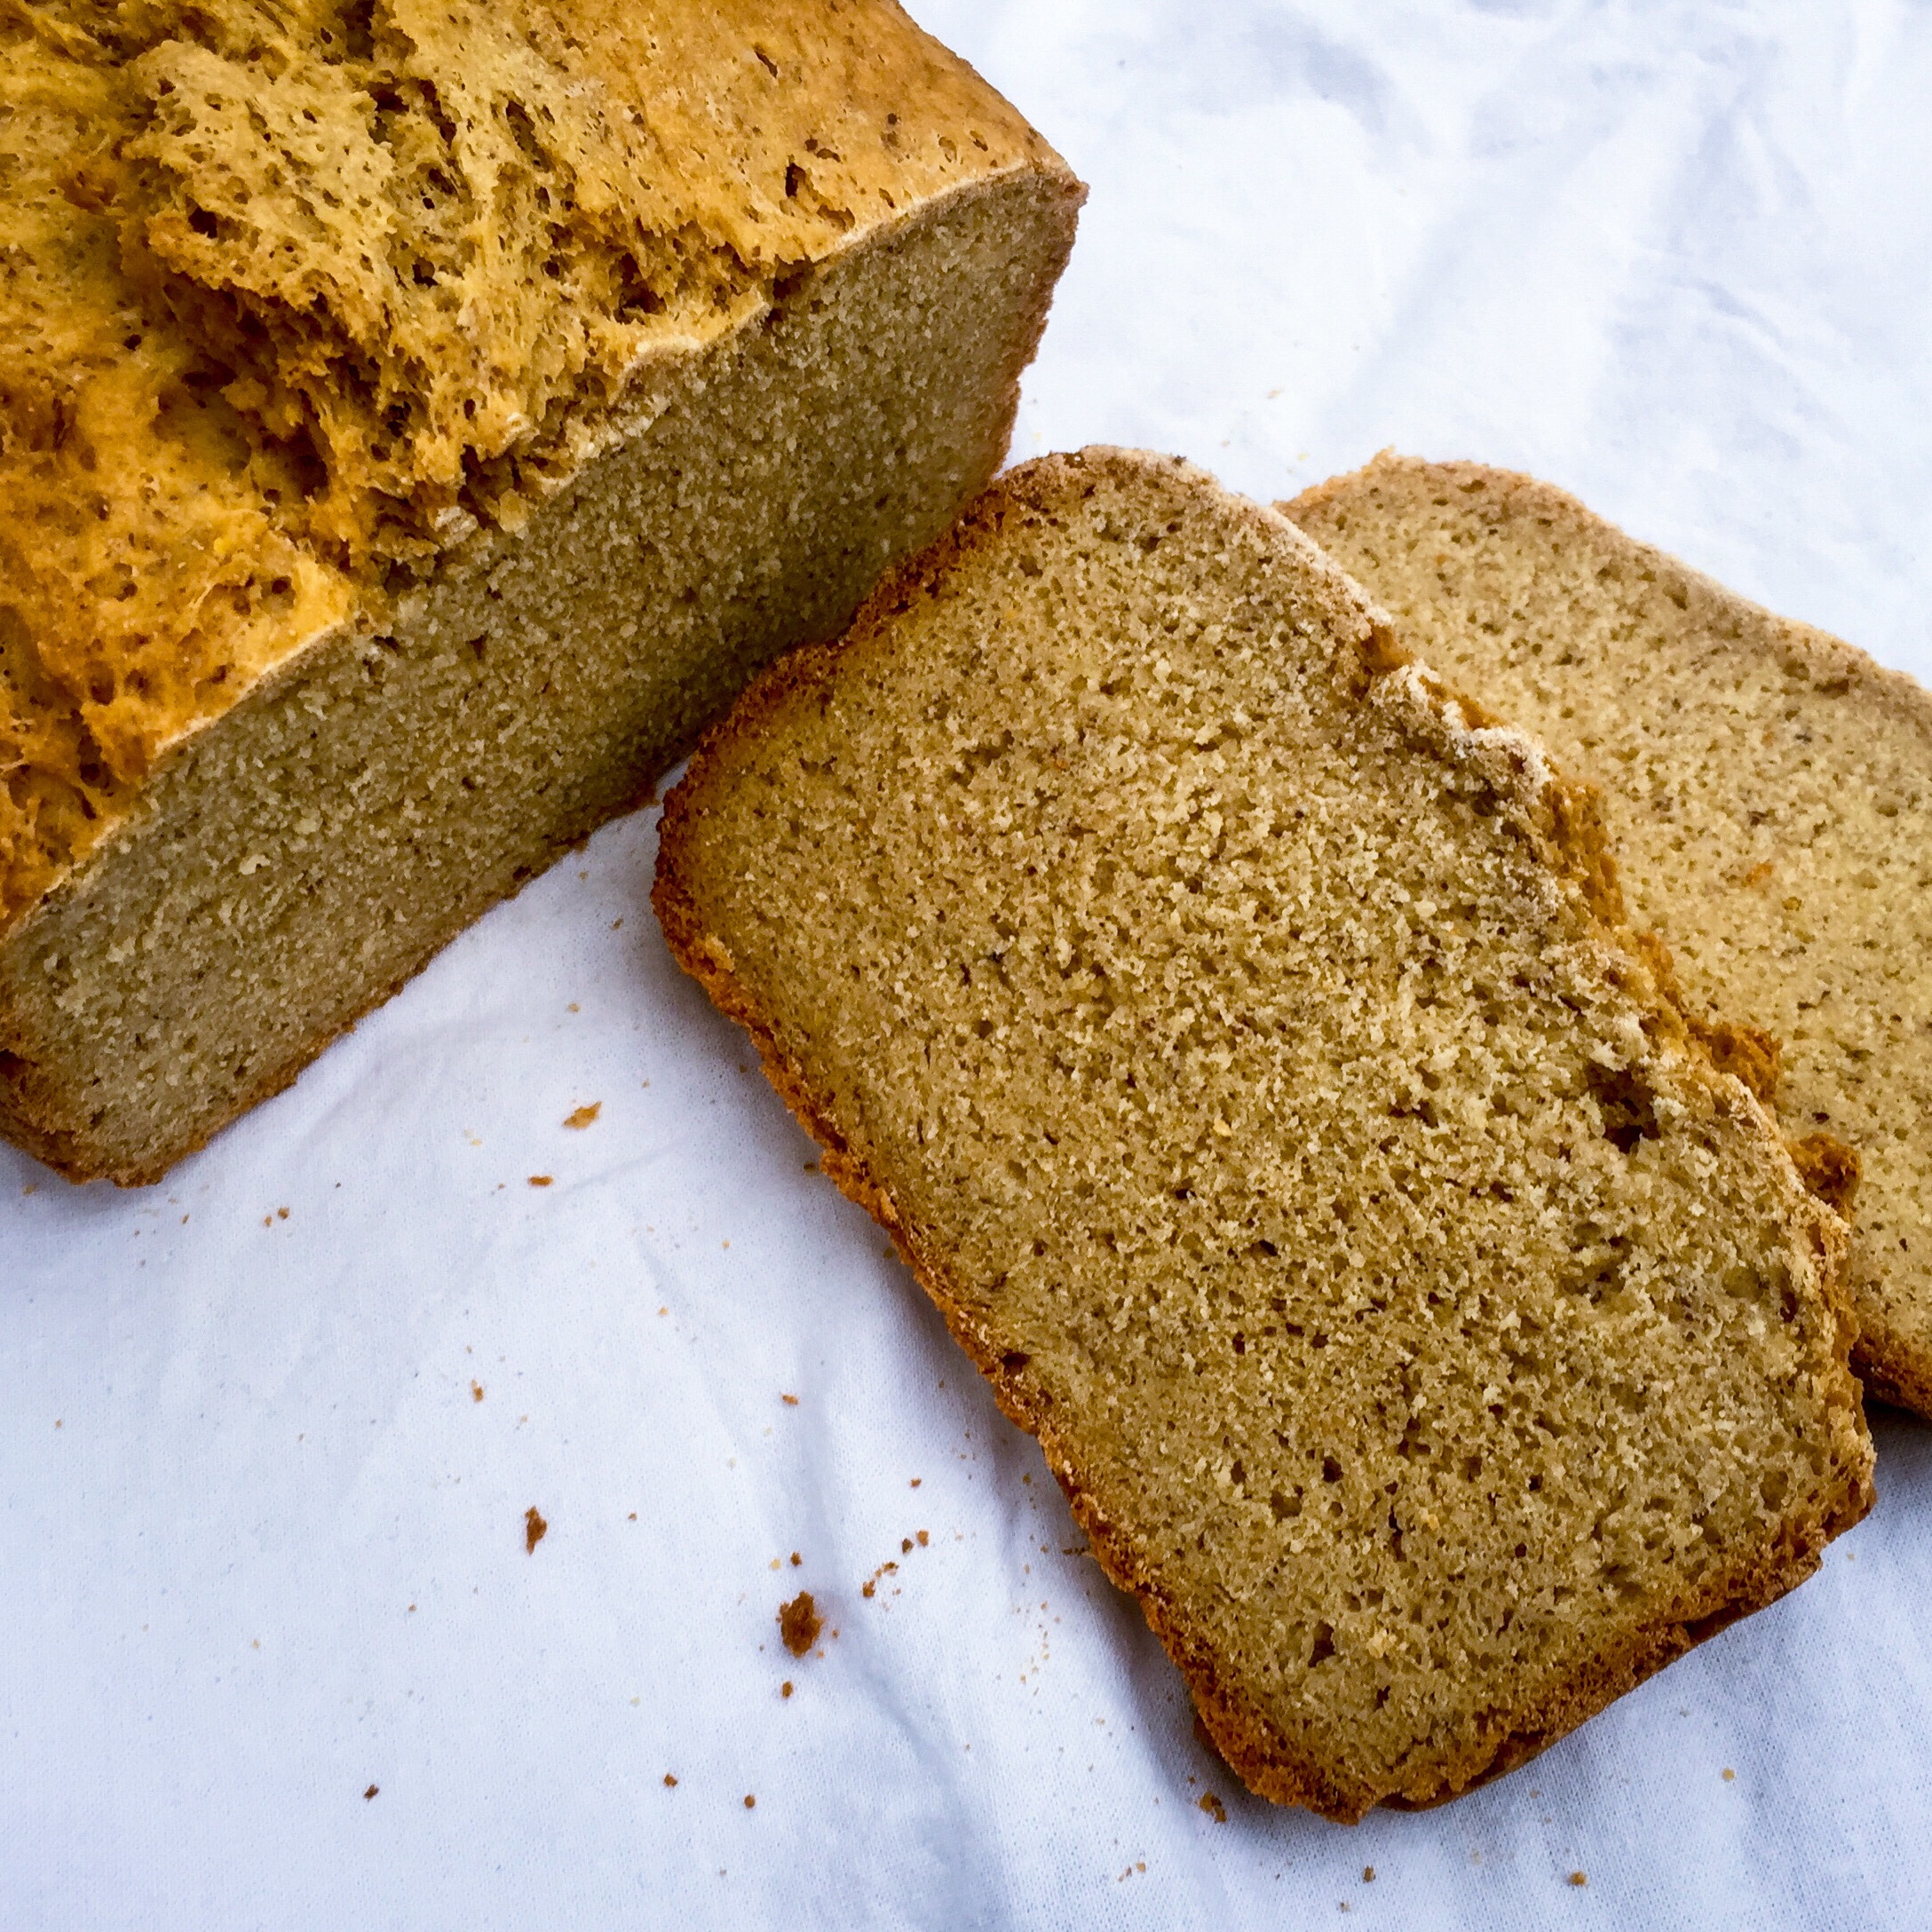
Kamut and Chickpea Fluor Vegan Loaf, via Eat the Vegan Rainbow
Imagine the smell of freshly baked bread spreading throughout your kitchen, and beyond… Cozy, sweet, homey, friendly and welcoming – the smell of freshly baked bread sends all those signals to our senses and more.
But, bread making and baking has always seemed too complicated and too impractical to me, especially since you can get an almost-freshly-baked loaf at any large supermarket these days. And if you live in Europe, small, local bakeries are likely on every street corner, offering really delightful breads made in small batches and very often available right out the oven.
Now, freshly baked gluten-free breads are far less widely available. And if you are looking for gluten-free and vegan breads, freshly baked or otherwise, you may be completely out of store-bought options because almost all gluten-free breads use either eggs or egg whites to give the bread structure in absence of gluten.
I’ve been tinkering with gluten-free baking a bit, and it’s generally forgiving if you are going for cookies, muffins, brownies, or pizza. But, making anything that needs to rise, and stay up, has been a challenge.
Enter bread machine! I recently purchased a basic bread machine model that offers couple of bread settings and loaf size and crust options, and have now used it to get very close to achieving the impossible, a loaf of 100% gluten-free vegan bread.
I’m not there yet but I think I’m getting closer. My most recent experiment used sprouted kamut (khorasan) flour, which is a wheat variety and therefore not gluten-free. But, khorasan flour seems to be easier to digest, especially when sprouted, and therefore better for people who are trying to avoid and/or minimize gluten for reasons other than allergy, celiac or intolerance. I’ve combined khorasan flour with chickpea flour, which is a gluten-free option, a mix of starches (corn and tapioca), and some flax meal. I also added some xantham gum into my dry ingredients as well as some baking powder. This baking powder is in addition to yeast and it helps the bread rise – gluten-free and low-gluten breads need all the help they can get! I meant mixed all the dry ingredients together before adding them to the bread machine.
Regarding the order of the ingredients, you must follow your bread machine instructions. Mine start with the liquids and end with instant rise yeast that is not supposed to touch the liquids directly, so it always added last into the dry ingredients.
If you have an option to select gluten-free setting, I recommend you use it. If not, you may want to play around with the timing a bit. Gluten-free breads tend to work best when they are allowed to rise only once, so you may want pick an express cycle or do a more manual prep if your machine does not have a gluten-free program. Here, I used French bread setting, 2 lbs (1 kg) loaf size, and medium crust on the basic Oster model.
The result is a very hearty loaf, with a good amount of chew, and a very nice nutty earthiness to it. You can enjoy it as is, with a salad, or with a quick jam, or homemade Nutella. The crunch and the aroma of freshly baked bread can’t be beat!!!
Vegan Kamut and Chickpea Flour Bread Loaf
What you’ll need:
1/4 cup oil, canola
1 3/8 cup (300 ml) water
2 cups khorasan flour, sprouted
3/4 cup chickpea flour
1/2 cup corn starch
1/2 cup tapioca starch
1 tablespoon sugar
1 1/2 teaspoon salt
2 tablespoons flax meal
1 1/2 teaspoon xantham gum
1 teaspoon baking powder
2 teaspoons quick-rise active yeast
What you’ll do:
Add water and oil into your bread machine pan.
In a separate mixing bowl mix all dry ingredients except the yeast. Add the dry ingredients to the wet.
Using your finger make a small hole in your dry ingredients and add yeast to it.
Close your bread machine, pick the appropriate cycle keeping in mind that this amount of ingredients is supposed to yield a 2 lbs (1 kg) loaf, and that you should preferably go with a gluten-free bread setting. If unavailable, you can use Express setting if the baking step is at least 40-50 minutes long. If none of this is what your bread machine offers in terms of options, go with the most basic program. You may need to re-adjust so approach this with an open and experimental mind. Remember: your perfect loaf is within your reach!
10-Minute No-Sugar Added Blueberry Jam, via Eat the Vegan Rainbow
Let me try to make this post as short as the recipe itself. It’s probably already too long because, amazingly, you will need less than ten minutes to go from frozen blueberries to this instant blueberry jam!
The jam is sweet, spreadable and full of pure blueberry flavor. You can use it on anything you would normally put the jam on, and you can store it in the fridge for a week or so, although it will probably not last that long.
What’s the secret? Not much really. It all comes down to mixing frozen blueberries with tapioca starch in a large, microwave safe bowl and letting you microwave oven take care of the rest. You can have some warm jam on you pancakes but I recommend patience and letting the jam cool completely before enjoying!
10-Minute No-Sugar Added Blueberry Jam
What you’ll need:
3 cups blueberries, frozen
2 tablespoons tapioca starch
What you’ll do:
In a microwave safe bowl, mix together blueberries and tapioca starch. Mix well until the blueberries are well covered with starch.
Place in the microwave and microwave on full power for 5 minutes.
Take the bowl out, mix well again and put back into the microwave oven for another 5 minutes.
When the second 5 minutes are up, mix again and check that jam is starting to become dense.
You can use both the warm and the cold blueberry jam on pancakes, toast, oatmeal…
You see… I told you it was short and it is absolutely sweet!!!
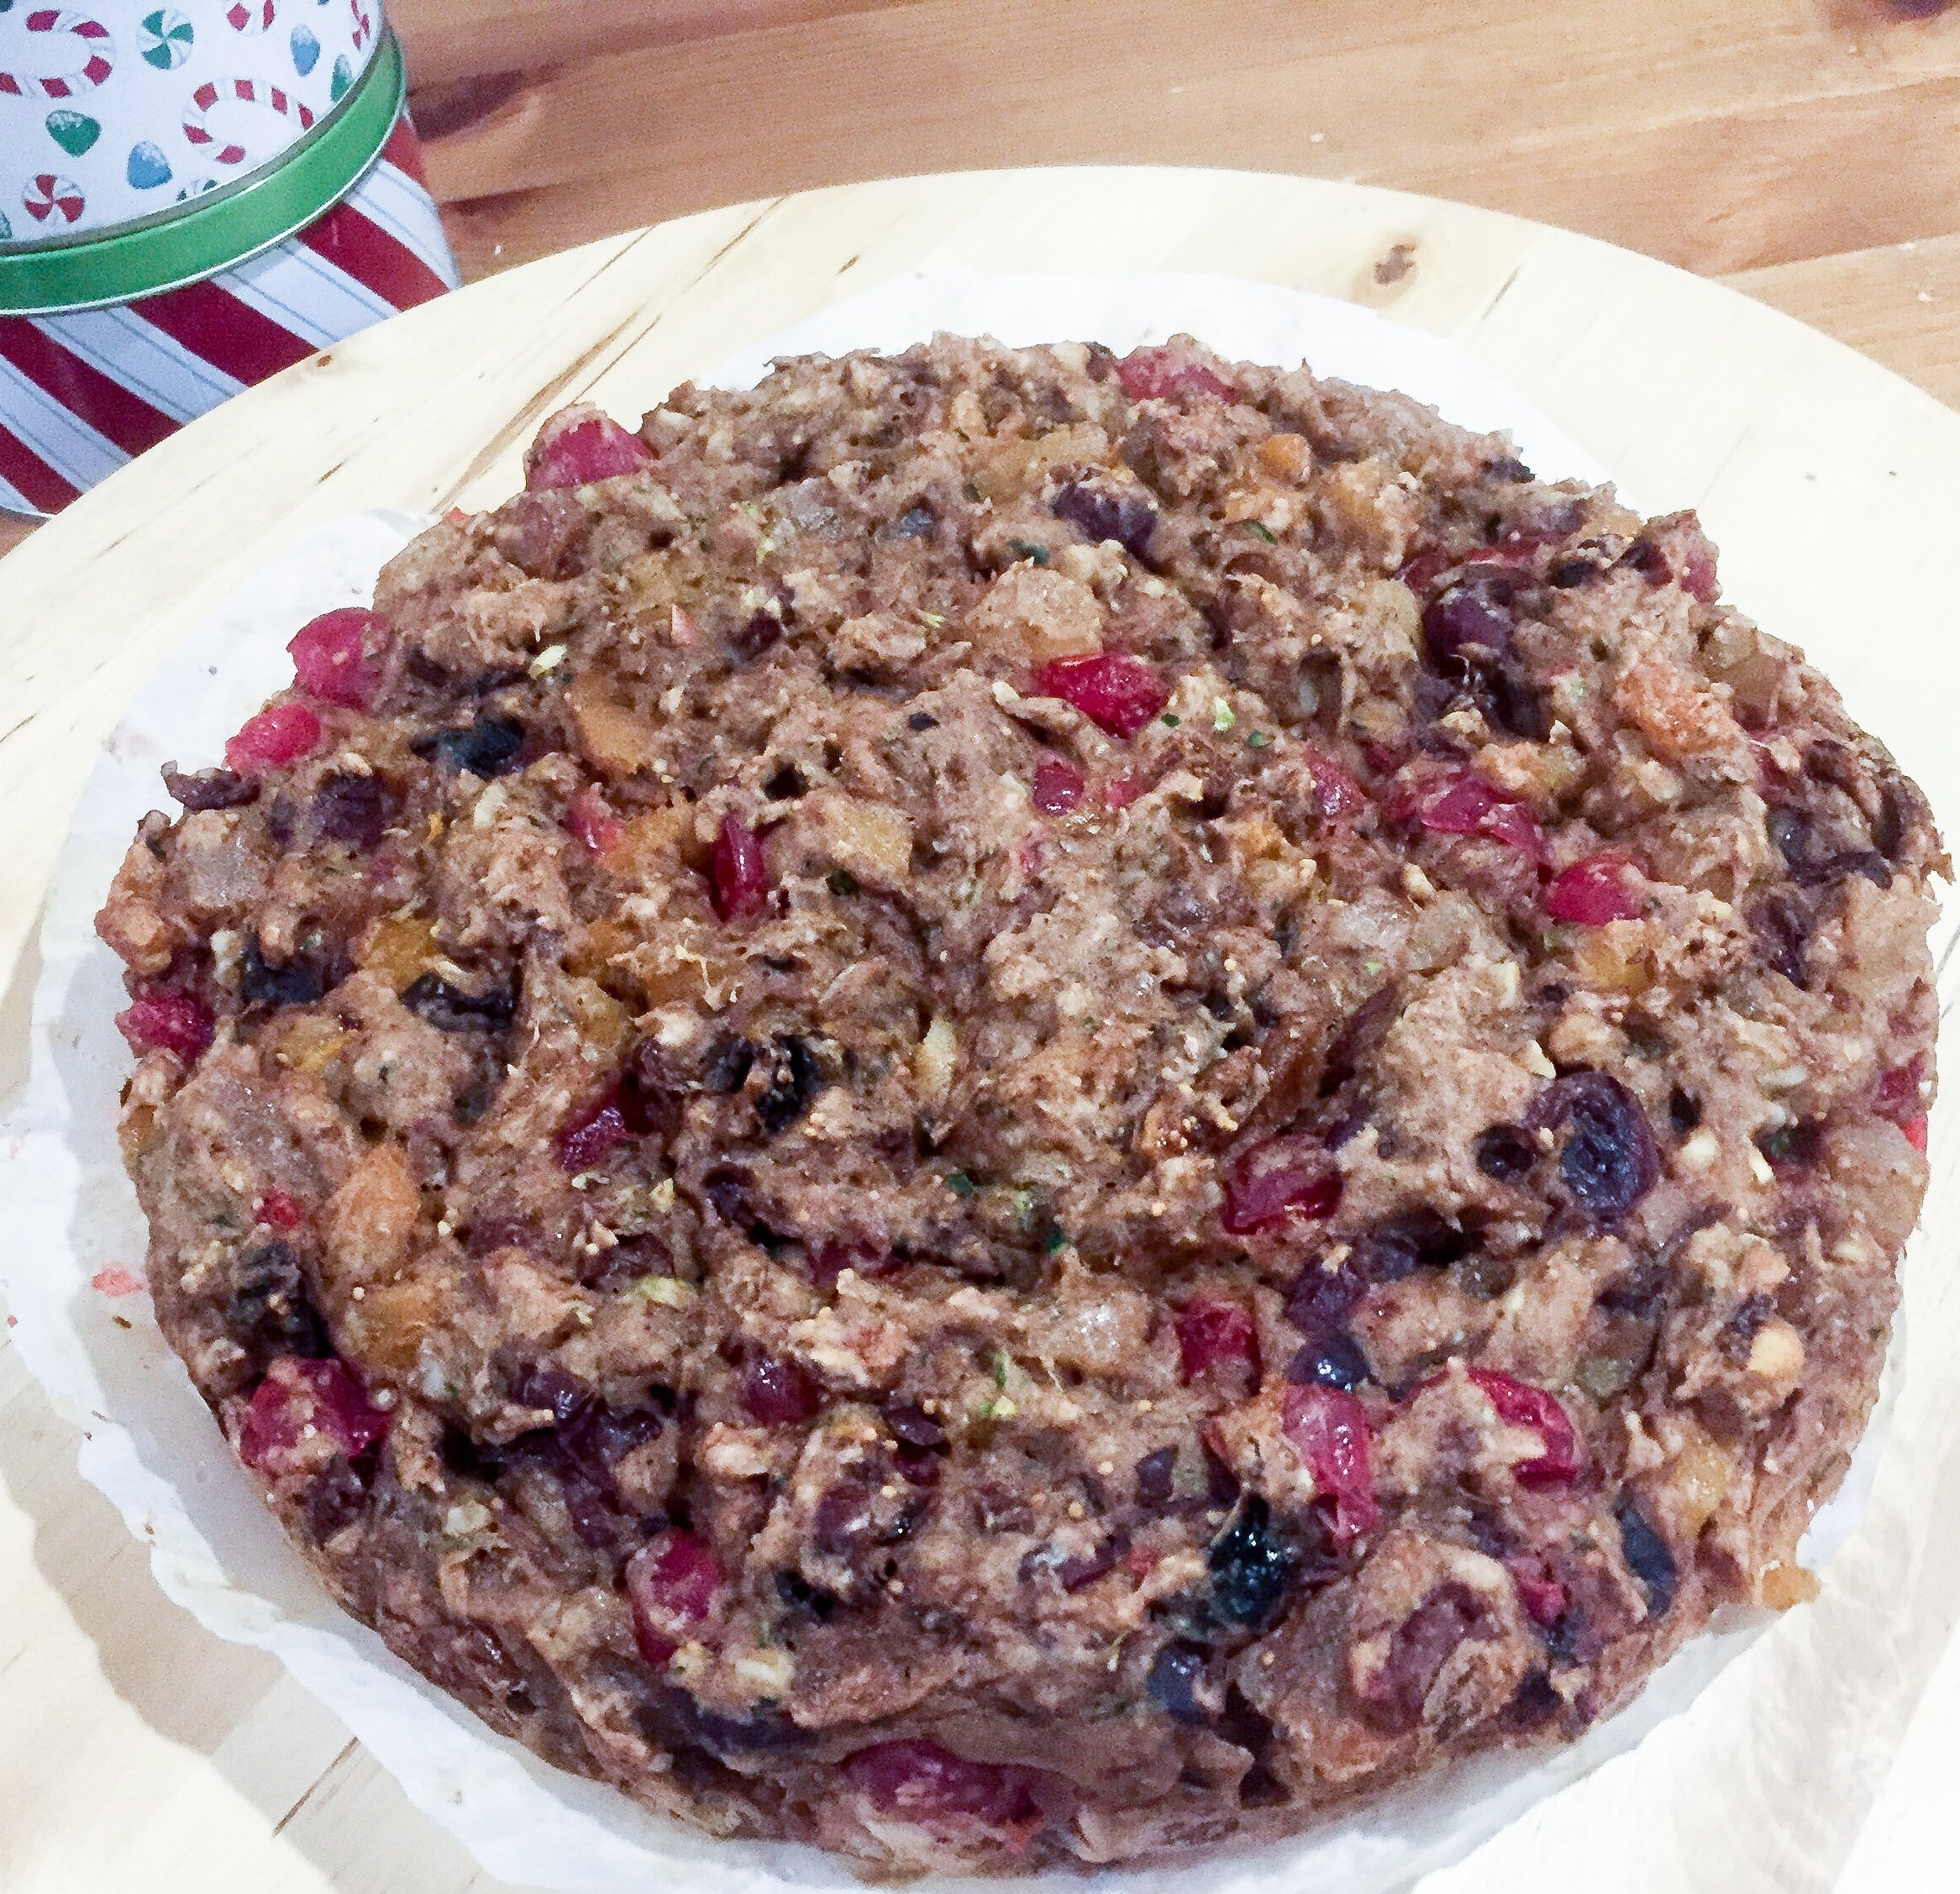
Vegan Fruitcake with Zucchini, via Eat the Vegan Rainbow
Fruitcake has a bad reputation. Nobody loves it, yet puts up with it because of the tradition and whatnot. And although some of you may find it hard to believe, fruitcake can be really delicious!
In this veganized version of the milenia-old (oh, yes – fruitcake dates back to Ancient Rome) tradition, I skip the butter, extra sugar, and eggs and go really wild with dried fruits. I combined everything I could get my hands on – figs, dates, cranberries, apricots, prunes, and pineapple – with a nice selection of spices featuring orange and lime zest, as well as almond extract, cinnamon, cloves, and nutmeg. I also used some finely grated, almost sauced, zucchini as a binder, and roughly chopped walnuts and red maraschino cherries for some added texture.
The key to this cake is soaking the fruit and although you could soak the fruit in rum, as is the custom, I soaked mine in water to avoid being too over the top with the flavors and the kick to the system this cake delivers. Although most of the alcohol would evaporate as the cake bakes, I wanted to keep this one rated G so that both kids and adults can enjoy as much of it as they like and decided to skip the rum altogether. At the end, the most important thing is to let the fruit soak in liquid (alcoholic or non-alcoholic) because that will help keep the cake moist and soft.
This fruitcake is pretty rich and filling. It makes for a lovely treat, as well as an excellent breakfast choice. It is definitely one more thing to add to your list of vegan Holiday treats and traditions, like the Peppermint Bark and the Gluten-free Sweet Potato Pancakes. If you are wondering whether this cake can be made gluten-free, the answer is yes, absolutely! Just use your favorite all-purpose gluten-free flour and go for it.
Vegan Fruitcake with Zucchini, via Eat the Vegan Rainbow
Vegan Fruitcake with Zucchini
What you’ll need:
1 zucchini, small (1 1/2 cup grated)
5 medjool dates
15 dried apricots
1/2 cup dried cranberries
2/3 cup dried pineapple
5 dried figs
1/3 cup prunes
1 cup maraschino cherries, drained and roughly chopped
1 cup flour
1 cup walnuts, chopped
1 tablespoon almond extract
2 teaspoon baking powder
1 teaspoon baking soda
1 teaspoon cinnamon
1/2 teaspoon nutmeg
1/4 teaspoon cloves
Zest of 1 orange
Zest of 1 lime
What you’ll do:
Combine all the dried fruits in a large bowl, cover with warm to hot water, and let soak for 30-60 minutes. Drain the fruit, pat dry to remove excess water, and chop to bits and pieces of different size. Place into a large mixing bowl.
Preheat the oven to 350 F (175 C).
Grate the zucchini using a fine grater or a food processor. The finer the grating the better!
Add the zucchini and the rest of the ingredients to the chopped fruit and mix well until everything is combined.
Line the bread pan, or any other baking pan (I used a spring form pan because it makes getting the cake out a breeze), with some parchment paper. Pour in the fruitcake batter and spread around to form a 1.5 in (3-4 cm) thick layer. The cake will not rise much, and it will be quite moist, so don’t make it too thick as your surface will burn while you wait for your center to bake.
Bake for 35 min or until a toothpick comes out clean. Let the cake stand for at least 15 minutes, ideally an hour, before cutting and serving. Serve with some vegan whip cream, ice cream, or with a glass of eggnog, and enjoy the season!
Gluten-free Sweet Potato Pancakes, via Eat the Vegan Rainbow
One thing that sweet potatoes have going for them is their amazing natural sweetness. Another thing they have going for them is their price – they are super affordable. And, for those of you keeping a nutritional score, sweet potatoes are an amazing source of vitamins, fiber and even protein.
Speaking from a recipe developer’s perspective, sweet potatoes are a versatile ingredient that lends itself to a range of recipes, from main dishes to desserts. The very first recipe I shared on this blog was the Sweet Potato Butter. More recently, I used sweet potatoes as a key ingredient in a red curry. And now it’s time to introduce Gluten-free Sweet Potato Pancakes.
The key ingredient for the Gluten-free Sweet Potato Pancakes are the roasted sweet potatoes. Roasting sweet potatoes brings out their sweetness and adds nice caramelized overtones. Plus it makes the otherwise hard potatoes easy to mash. You could boil the sweet potatoes as well, or put them in the microwave for ten minutes to soften them up, but none of these methods will help the sweetness fully develop. So, unless you are in a super huge rush do take the time to roast your spuds. What I do is roast the whole pile of sweet potatoes at the same time and stash them into the refrigerator. Then I have a roasted sweet potato on hand to use for all sort of different applications, like these pancakes.
The pancake recipe asks for two large sweet potatoes, and I mean large. They should yield anywhere between cup and a half to two cups of sweet potato purée, so find some good, big specimens for this one. Roasting sweet potatoes could not be easier. You will need to wash the potatoes, pat them dry and place them on a baking sheet – I like to line mine with either parchment paper or aluminum foil to easy cleanup more than anything else. Put the baking sheet into a hot oven – I recommend 425 F (220 C) and roast the potatoes for about thirty to forty five minutes. Take them out and let them cool completely before handling. And thats’ why is handy to have a stockpile of roasted sweet potatoes in your fridge!
One note on the flour. This recipe is gluten-free and uses a combination of white rice flour and corn starch, but if you are not looking to restrict your gluten intake feel free to use all-purpose flour. In that case you can skip corn starch and you don’t need to replace it with anything else. Two cups of all-purpose flour should work well enough.
Gluten-free Sweet Potato Pancakes
What you’ll need:
2 large sweet potatoes, roasted and peeled
2 cups rice flour
3 tablespoons corn starch
2 teaspoons baking powder
1 teaspoon baking soda
2 teaspoons imitation maple syrup flavor (or vanilla extract)
1 teaspoon cinnamon
1/4 teaspoon nutmeg
3 cups vanilla almond milk, unsweetened
Cooking spray (optional)
Topping suggestions: fresh fruit, powdered sugar, jam, maple syrup, vegan butter or cream cheese, nut butter, melted vegan chocolate…
What you’ll do:
Place all the ingredients in a large blender or a food processor. Blend untill a smooth, lump-free batter forms. Pour the batter into a large bowl – this will make it easier fo you to ladle out the pancakes. If you don’t a blender or a food processor, all this can be done by hand in an old fashioned, whisk-based sort of way. If you are doing everything by hand, do spend some time on mashing the sweet potatoes – the smoother you get them the better the pancakes. Let the batter rest for about 10 to 15 minutes.
Place a large frying pan over high heat. You can also use a griddle if you have one. In both cases make sure your surface is nice and hot before using. You could spray with some cooking spray if needed – some pans have a lovely non-stick surface and you can definitely skip the oil.
Pour out half a cup worth of the pancake batter per pancake. This should make 5 inch (12 cm) pancakes, and the amount of batter will be enough to serve 4 to 6 people. After the first 1-2 minutes lower the heat to medium-high and let the pancakes brown. You will know that it is time to flip them when the top surface becomes nice and bubbly and almost dry. Flip the pancakes, let them brown on the other side, which will take just a minute or two, them slide them to a serving plate. To keep the pancakes warm as you work you can keep the done batch in a warm oven or under some foil or a kitchen towel. To get the pan ready for a new batch increase the heat to high, let the pan come up to temperature again and repeat…
Serve warm with any topping you like, fruit, maple syrup, powdered sugar, chocolate syrup… I used sliced banana and a drizzle of softened almond butter. Yummy!!!
Note: These pancakes freeze well, so if you do end up with leftovers, let them cool than place them into a freezer safe bag or container, and you’ll have great pancakes to enjoy on another day. One trick to prevent frozen pancakes for sticking to each other is to use wax paper to separate the pancakes. You can separate them one by one, two by two, three by three, whatever is you preferred serving size. Then, when you are in a need for a quick breakfast, snack or even dessert you can take the batch out with ease. I usually zap mine in a microwave for a minute or so and they are ready. You can also use a toaster oven to heat them up, just remember that the toaster oven will dry them out a bit, so they will come out a bit less soft.