Vegan Scrambled Eggs with Mushroom and Scallions (oil-free), via Eat the Vegan Rainbow
Do you eat breakfast every day? Many consider breakfast essential – a meal that can’t be skipped no matter what. I personally ebb and flow on this. When I was younger I could not imagine starting a day without a solid meal. Nowadays, breakfast may or may not happen, and it may or may not happen at different times after I wake up. Very often, it is a quick piece of fruit, a banana, apple, or (one of my weird favorites) roasted sweet potato, or my attempt to dethrone avocado toast – the banana toast (huh, you didn’t see that one coming, did you?)
I blame my busy morning for this state of the affairs, so when I do have a chance I try to make breakfast a bit more substantial. Often that means some sort of doughie concoction like muffins, pancakes, crêpes, waffles, scones, or even popovers and I enjoy making them as they are real crowd pleasers. But, I personally prefer a savory breakfast when I have a choice, like a breakfast taco, or something like these soy-free scrambled eggs.
Few days ago I made another version of scrambled eggs (not soy-free), which I am very proud of. The recipe uses tofu, so if you are trying to minimize soy intake for whatever reason, you can refer back to soy-free scrambled egg recipe for instructions on how to make the “egg” base, and combine with the rest of the recipe below.
The recipe is really simple. You will need a blender to create a very smooth mix of silken tofu and arrowroot powder (or starch) that will serve as binder for the scramble, but that’s the only specialized equipment you need here. All the rest you can do by hand.
There are two optional ingredients below – black salt or kala namak and smoked paprika. Black salt is salt that has traces of sulfur containing salts which give it a sulfurous smell, a smell of eggs. I usually skip this, but you may want to experiment with small amounts and see whether you like it or not. For a smokey aroma, I recommend using a small pinch of smoked paprika just before serving. If you prefer to add some heat, you can replace with a pinch of chipotle powder or a drizzle of hot hot sauce, like tabasco.
Vegan Scrambled Eggs with Mushroom and Scallions, via Eat the Vegan Rainbow
Vegan Scrambled Eggs with Mushroom and Scallions (oil-free)
What you’ll need:
4-5 scallions (green onions), white parts and green parts, finely sliced
5-6 mushrooms (white or cremini), whole, sliced (I prefer slicing them finely)
1 box (10 oz, 300 g) silken tofu
1/4 cup nutritional yeast
1 tablespoon arrowroot powder (or tapioca starch or any other starch you have on hand)
1/2 lemon, just the juice
1 teaspoon garlic powder
1 teaspoon onion powder
1 teaspoon cumin powder
1 box (14 oz, 400 g) extra firm tofu, drained and crumbled
(Optional) pinch of black salt
(Optional) pinch of smoked paprika for serving (or chipotle powder for more heat)
(Optional) tabasco sauce, drop or two
What you’ll do:
Sauté scallions and mushrooms in a dry pan over medium-high heat, stirring frequently and adding a tablespoon of water at a time as needed to prevent food from sticking to the bottom of the pan. You can use oil if you like – 1 tablespoon should be sufficient here.
While scallions and mushrooms are cooking, place silken tofu and the rest of the ingredients except a block of extra firm tofu, into a blender and blend until smooth.
Once they are done cooking, push mushrooms and scallions to the side of the pan and poor in the silken tofu mix. Deglaze the bottom of the pan, then add the extra firm tofu crumbles, and mix well to incorporate all the ingredients.
Increase the heat to high, and let the mix start to bubble. Mix well to prevent burning, and cook for 3-4 minutes. Serve hot with an optional pinch of black salt, sprinkle of smoked paprika, chipotle powder or hot sauce. A piece of toast and some black coffee would go well with this scramble, too!
Tex-Mex Stir Fry with Crispy Tofu, via Eat the Vegan Rainbow
Tofu seems to be an ingredient that many would like to use more often but don’t know where to start. It is also something that seems to taste so much better when you get it at a restaurant. I’ve seen a lot of people that complain about never getting tofu to be quite as crispy and quite as crunchy or quite as flavorful as when they have it in their take-outs or at the favorite Asian place.
I love making tofu – and I do it without any tofu presses or other special tofu preparing equipment. My favorite way to eat tofu is as a crunchy snack – I take a block of extra firm tofu (extra firm is my go-to kind of tofu for most of my recipes), drain the liquid out, leave in a colander to drain for about 30 minutes, then slice into cubes that are about 2 cm (3/4 in) long. For a block of tofu that you find in US-based supermarkets (14 oz or so), this means cutting it into 48 cubes – you slice the block of tofu in half, then each half into three slices, which gives you 6 mini blocks of tofu. Each mini block is then sliced in half, and each stick of tofu then divided into 4 cubes, giving you 12 x 4 = 48 cubes. If all this is too complicated math-wise, don’t worry, just cube into whichever number works. Remember to keep the chunks, well chunky!
Next, I lay the tofu cubes onto a baking sheet lined with some parchment paper, and spread them out, so that they don’t touch each other. They go into a hot oven (425 F (220 C)), and after about 15 minutes I check them, flip them around and roast for another 10 minutes. What this gives you at the end is tofu that’s crunchy on the outside and soft on the inside. I eat these as a snack, as is!
This, of course, is not the end of the story, and you can use the roasted tofu to make number of other dishes. For example, you can use it to make Saag Paneer. You can also toss tofu with your favorite dressing and use in a salad. And: you can use your roasted tofu to make a wonderful stir-fry, like the one I will share with you here.
This stir-fry is actually a sort of Mexican-Chinese fusion recipe, and it is sweet from all the caramelized onions and sweet red, yellow and orange peppers, as well as a bit of agave nectar that goes into the tofu marinade. I kept it sweet to encourage my kids to eat it – they are not big fans of hot spices at the moment. Having said all that, you can definitely spice things up and adding a bit of Sriracha into the tofu marinade, and/or sprinkling some crushed red pepper flakes will add some serious spice punch!
I recommend that you serve this stir-fry with simple rice or, even you are counting carbs, this cauliflower rice recipe will definitely work for you. If you are looking for something totally different, this stir-fry will also go well with polenta, or even baked polenta. Enjoy!
Tex-Mex Stir Fry with Crispy Tofu, via Eat the Vegan Rainbow
Tex-Mex Stir Fry with Crispy Tofu
What you’ll need:
2 blocks (14 oz, 400 g) extra firm tofu, drained
1 tablespoon agave nectar
1 tablespoon toasted sesame seed oil
1 tablespoon low-sodium soy sauce (or tamari sauce, if gluten-free)
1/2 yellow or white onion, finely diced
4 scallions, white and green bits, finely sliced
2 tablespoon grated ginger (or pickled ginger, diced very finely)
2 tablespoon canola oil
3 cups finely sliced yellow, orange and/or red peppers sticks
2 cups yellow corn kernels (I used frozen, but fresh or canned would work as well)
What you’ll do:
Preheat the oven to 425 F (220 C).
Take the blocks of tofu out of its packaging and leave in the sieve or a colander to drain for 30 minutes or so. Slice the tofu into 3/4 in-1in (2 cm) cubes (each block should give about 40-48 cubes). Line the baking sheet with some parchment paper and spread the tofu cubes around, so they are not touching each other. Roast the tofu for 15 minutes, check and flip the cubes, then roast for another 10 minutes.
Place agave nectar, toasted sesame seed oil and soy sauce into a large mixing bowl and whisk together.
Slide the hot tofu into the marinade, mix together and set aside.
Place a large wok, or a deep trying pan, over high heat. Add the canola oil, diced onions, sliced scallions, and grated ginger and fry for 2-3 minutes with frequent stirring.
Add sliced peppers and continue to fry at high heat for 10 minutes or so.
Add frozen corn, and fry for another 5-8 minutes.
Finally, add the tofu and the marinade in and stir well. Leave on high heat for another couple of minutes, then turn the heat off. Serve hot over some rice, or polenta – and don’t forget to add some Sriracha to the marinade if you are into spicy!
Zucchini Lasagna with Walnut and Brown Lentil Ragù, via Eat the Vegan Rainbow
Let’s cut to the chase and be honest here – although we can pretend otherwise, we are all as obsessed with lasagnas as Garfield is! The layers of soft noodles, amazing sauce, fresh herbs, and most commonly lots and lots of ground meat and soft cheese. All this means that lasagnas are not the healthiest thing on the menu. Having said that, there is no reason to ban lasagnas from your plate; you just need to learn how to keep it healthy and plant-based, and I think I can help you to troubleshoot both of those problems.
Keeping lasagnas meat-free seems to be the problem many have tackled, usually by overloading lasagna with cheese, cheese and eggs, or cheese and a selection of vegetables, like mushrooms, and increasing the amount of tomato sauce and making it chunkier. But, really the most prominent ingredient in majority of meatless lasagna recipes is the cheese. When I was developing this lasagna recipe I did not want to give up on idea of “meat”, so what I came up with is a hearty, meaty, and flavorful walnut and brown lentil “meat” ragù base. My thinking was inspired by my previous, wildly successful Meatless Shepherd’s Pie, which I served for Easter this year as a substitute for a more traditional, lamb-based dish. In that recipe, lentils, mixed with ground mushrooms and cooked with rosemary and thyme, made for an amazing feast.
Here, I wanted to recreate the traditional meat ragù and went for a combination of chopped walnuts and dark lentils. The trick is too cook the lentils separately and add them to the rest of the ragù when they are fully cooked. Also, chop your walnuts into pieces that are about the size of what ground meat pieces may look like. I chopped the walnuts by hand, just by going over walnut pieces with a knife few times, back and forth. You can buy whole walnuts, or walnut halves in store and start from there, but for this a bag of walnut pieces will make your life easier and make the dish cheaper. Walnuts work really well in this lasagna, because they add some of their natural crunchy texture, protein, and a bit of fattiness to the otherwise very lean recipe. Worried about this extra fat? Walnuts are known for having a lot of unsaturated fat, which is the good kind, so don’t skip it! The meatiness of the ragù is further enhanced by a good amount of tomato paste and crushed tomatoes and letting the ragù simmer for a while.
Walnut and Brown Lentil Ragù, via Eat the Vegan Rainbow
The preparation of any lasagna happens in several stages and this one is no different. In order to make the process more efficient I recommend that you start roasting the zucchini at the same time you start making the ragù, and then start boiling the lasagna noodles when zucchini is just about done. In that way you don’t even need to turn the oven off, you can just lower the temperature from roasting to baking and be ready for lasagna to go in immediately. Please note that I don’t use zucchini as a complete lasagna noodle replacement. I suppose you could, but then you’ll end up in a more of a Zucchini Mousaka territory than lasagna paradise. If you are concerned about gluten, there are now many gluten-free lasagna noodle options for you to choose from and most of them work perfectly.
The final touch on this lasagna is the Béchamel sauce (besciamella), which is a white sauce traditionally made with milk, butter and flour. In this case, the quick white sauce I put together requires only a blender, some soft, silken tofu, a squeeze of a lemon, and a bit of nutritional yeast. It is very much the blend-and-pour type of sauce, so you can do it a in a blink of an eye. The sauce adds a nice, slightly cheesy flavor to this very rich lasagna, and makes for a nice, almost golden glaze.
Zucchini Lasagna with Walnut and Brown Lentil Ragù
What you’ll need (for 9 x 13 in (23 x 33 cm) baking dish):
8-10 lasagna noodles, gluten-free if preferred
1 lbs (450 g) brown lentils
3 zucchinis, cut lengthwise into long strips
2 large carrots, diced
3 stalks celery, diced
1 cup raw walnut pieces, chopped
1/2 yellow onion, diced
1 can (28 oz, 800 g) crushed tomatoes
2 tablespoon tomato paste
1 tablespoon crushed garlic
1 teaspoon dried oregano
1 teaspoon dried basil
3 tablespoons fresh Italian (flat leaf) parsley
1 lbs (450 g) silken tofu
2 tablespoons lemon juice, freshly squeezed
1 tablespoon nutritional yeast
Cooking oil spray
What you’ll do:
Preheat oven to 425 F (220 C).
Prepare the lentils according to the instructions on the bag. Basically, bring 4 cups of water to boil and add the lentils that have been washed and picked over to remove any impurities that may have made their way to the lentils. Bring the lentils back to boil than lower the heat to a gentle simmer, and cook for 20 minutes or so, until lentils are completely cooked. Drain the lentils from excess water and set aside to cool.
While the oven is preheating, and lentils are cooking, prep your veggies. Peel, wash, and dice the onions and carrots, and wash and dice the celery. Wash the zucchini well, remove the ends, then cut into long, thin strips. You can use a mandolin slicer for this, but cutting by hand also works. The zucchini slices should be as close to the thickness of the lasagna noodles as possible, but you don’t need to go crazy here – just keep in mind that a bit thinner is better.
Line a baking sheet with parchment paper, place the zucchini slices on and spray with cooking spray. You may need to use two baking sheets, since you may discover that you can’t manage to have all your zucchini slices arranged in a single layer. Don’t pile the zucchini on top of each other and do roast in batches if needed. Place the zucchini “lasagna noodles” into the oven to roast. The roasting will take anywhere between 15 and 25 minutes and will depend on the thickness of your zucchini. Keep an eye on the oven and if you are roasting two pans of the zucchini at the same time do rotate the pans mid way through the roasting. You will know that the zucchini is done when the edges are slightly brown and the middle is golden. Once you take the zucchini out, decrease the oven temperature to 350 F (175 C).
While the zucchini is roasting, start your the ragù. Spray the bottom of a Dutch oven, or another type of heavy pan, with cooking spray and heat up over the medium to medium high heat. Add carrots, onions and celery and let them brown for 10 minutes. Add chopped walnuts and let them pan roast for about 2 to 3 minutes. Add garlic, oregano, and basil, and let the flavors develop for a minute. Next comes tomato paste – add it to the pan, mix well and let brown just slightly. This takes about 2 minutes or so. Add the cooked lentils and the crushed tomatoes, and mix well. Let the ragù simmer for 10 to 15 minutes. Turn the heat off, add the fresh parsley and mix well to combine.
Once the ragù is simmering, it’s time to start cooking your lasagna noodles. Most varieties ask for a large pot of boiling water and about 10 minutes of boiling time. The noodles don’t need to be cooked all the way through as they will continue to cook in the oven but they do need to soften quite a bit, so 8 to 10 minutes should be enough to achieve that. Drain the noodles and use immediately.
Combine tofu, lemon juice and nutritional yeast in a blender and blend until smooth. Set the besciamella to the side.
Spray the bottom and sides of your 9 x 13 in (23 x 33 cm) pan with some cooking spray. Cover the bottom liberally with the ragù (use about a half of the amount you made), layer the first set of noodles (for me that came to about 5 noodles per layer), then layer the zucchini in a single layer, pour the rest of the ragù, and top with the remaining noodles. Pour the besciamella over and cover with foil.
Place the covered lasagna into the 350 F (175 C) oven and let bake for 30 minutes covered and then about 10 minutes uncovered. Let the lasagna sit for about 10 minutes before serving. I like to add some freshly ground black pepper or a mix of black pepper and red pepper flakes to my lasagna just before enjoying, but you can also sprinkle some fresh parsley, or fresh basil. Have fun!
You probably know that veggie burgers are going through somewhat of a revolution, with companies like Beyond Meat and Impossible Foods, leading the way within US in creating plant-based products that taste and look like the real meat. I have not had an Impossible Burger yet, but I can attest to Beyond Burger being everything its creators wanted it to be – a plant-based burger that looks, cooks and tastes like fresh ground beef burger. It is absolutely spot on, thanks to some interesting protein biochemistry and biophysics that transfrorms pea protein into ground beef, as well as the use of plenty of fat for that greasy burger feeling, and a good amount of salt. And fat and salt are likely two components of this burger that, in addition to getting the texture of the protein component just right, make this type of burger so realistic and so delicious and so addictive.
Indulging in one of these burgers as an occasional treat is all fine and good, but making it on a daily basis is almost us unhealthy as eating the beef patty. That’s why I’ve been focusing on creating plant burgers (call them veggie burgers if you like) that can work on a grill or in a grill pan, look very burgery, and taste great without huge amounts of salt and fat. My blog now has the entire section dedicated to Burgers, Hot Dogs & More. Some of the burgers I made taste very much like a beef patty, some less so… At the end, what I discovered is that plant burger needs to pass two tests in order to qualify for being on my plate: it has to hold its shape well and sustain grilling on the grill or in a grill pan, and it has to taste amazing. Any burger that checks those two boxes off deserves to be shared!
The patty I am sharing today has three twists. Twist number one is that I decided to try using avocados as a fat source to add some juiciness to the burgers. Avocados, also known as Alligator Pear – isn’t that awesome? – are not something I ever considered cooking with but we recently had a huge avocado sales in my local grocery store and I got more than I should and there is a limit to how much avocado toasts one can eat in a week, so I was looking for something else to do with them. The idea to try making a burger with avocados was inspired by their high fat content and their creamy consistency (when they are ripe and perfect). I did quite a few internet searchers to see what other have done, but I could not find a single recipe that used avocados inside the actual burger patty. So, off I went to see if Avocado Burgers can be made into reality.
My twist number two is one of my favorite tricks to add umami flavor to just about anything – finely ground mushrooms. They work wonders in a dish like Meatless Shepherd’s Pie, or more generally any time you want to recreate that special “je ne sais quoi” of ground beef.
Final twist to this story is using extra firm tofu that has been frozen for few days than thawed all the way over the course of one to two days in the refrigerator. Freezing and defrosting tofu changes its texture daramatically. The tofu becomes tougher and stronger, and it absorbs the marinades and flavors better. There are no tricks to freezing tofu in my kitchen as I just put the container tofu comes in from the store into the freezer, but if you need a more refined method The Spruce has detailed step by step instructions. Before you use tofu, drain it well and then dig in – use your hands to press and squeeze and get the excess water out. I suppose you could use the tofu press for this or a method where you place tofu slices between paper towels and place a large weight on top for twenty minutes, but because tofu that’s been frozen then defrosted has this tougher and stronger texture, using your hands actually works quite well. Plus, you can easily go from squeezing to crumbling, which is the next step. At the end you will end up with a pile of small tofu crumbles.
To this pile of crumbles you will add mashed avocado, ground mushrooms, tomato paste, and couple of staples when it comes to boosting umami and grilled food flavors: soy sauce or liquid aminos, Worcestershire sauce and liquid smoke. The patties will be soft so it is a good idea to stick them into the fridge or a freezer to firm up before cooking. I felt like pairing only some crispy lattice with this burger but pickles, mustard, ketchup, tomatoes, and all the other common burger fixings will go well with it too!
Avocado Burger, step by step, via Eat the Vegan Rainbow
Avocado Burger
What you’ll need:
1 16 oz. (450 g) block of extra firm tofu, frozen then thawed
8 oz. (225 g) crimini (baby bella) mushrooms
1 large avocado, ripe
2 tablespoon tomato paste
1 tablespoon Worcestershire sauce, vegan
1 tablespoon soy sauce or liquid aminos
1 teaspoon garlic powder
1 teaspoon liquid smoke
Cooking spray (for the pan)
What you’ll do:
Freeze the tofu few days in advance and when completely frozen take it out of the freezer and leave it in refrigerator for a day or two, until completely defrosted. Drain the tofu and using your hands squeeze the water out of tofu. The tofu should feel like a relatively tough sponge soaked with water at the beginning, and at the end it should feel moist but not dripping wet. Crumble the tofu into a large mixing bowl.
Chop the mushrooms using a food processor until they are finely ground. Few chunkier bits here and there will not hurt but try to get the mushrooms to be about the same consistency as your tofu crumbles. Add to the tofu.
Cut and peel the avocado, and scoop out the green flesh into a small bowl and mash with the fork until finely mashed. Ideally the avocado should be as smooth as you can get it, and if you are using a perfectly ripe avocado this should not be a problem. Side note: If you discover that your avocado is tough that means that it is not ripe enough. If your avocado is turning black it means that it is past its prime. Unfortunately, when it comes to avocados only the perfectly ripe, perfectly green and perfectly soft will work, for this or any other recipe. If your avocados are tough to touch it means they need to ripen and you can help them out by putting them in a paper bag, closing it tightly and leaving them on the kitchen counter overnight. That usually helps – and if they are really, really green you can a ripe banana to the bag to help avocados along.
Add the avocado purée to the tofu mix, as well as the rest of ingredients.
Mix well to combine using your hands. You want to work the mix a bit, which means squeezing and mixing at the same time. Once everything is combined together, use your hands to form patties. Place the patties onto a tray lined with wax paper, and put them into the refrigerator for 30-60 minutes or into a freezer for 15 minutes or so.
Heat your grill pan or a cast iron skillet over the medium high heat. Spray with cooking spray and add 2-3 patties at a time. You need to leave enough room around tha patties to be able to flip them so keep that in mind. Cook on one side for 5 minutes then flip over and cook for another 4-5 minutes, until both sides are nice and brown.
Serve on your favorite hamburger bun with your favorite toppings. And in case you have couple of avocados still left over, go wild – slice them up, toss them on top, and have yourself a Double Avocado Burger!
Roasted Tofu Steak Tips, via Eat the Vegan RainbowOne of the most frequent questions that I get when I tell people that I am vegan is: “What do you eat?”. And when I explain I eat plants, then the next question is almost without a fail: “Where do you get your protein from?”.
Putting aside the fact that gluten is a protein and that, therefore, you can get protein from eating wheat bread, there are numerous other plant sources of protein. Peas and quinoa come to mind, as well as beans and chickpeas, edamame, nuts and nut butter, tempeh and tofu. This last one, tofu, does raise some eyebrows and comments along the lines of “Tofu is so bland… How do you make it taste any good?”.
Being bland is what makes tofu perfect. It is a blank canvas, ready for you to paint flavors on. I use tofu all the time, and it works in Indian inspired dishes, like Saag Paneer and Mango Chickpea Curry Tofu, in Pad Thai, grilled, as well as Popovers. An eye opening moment for me came when I realized how super easy it is to transform tofu into incredible bacon!
Tofu comes in couple of different consistencies and textures so you can pick and choose from silken to extra firm to match the recipe you are making. Extra firm tofu works well for applications where it is critical that the final product is solid and slightly chewy and that’s why I went with extra firm tofu in this Roasted Tofu Steak Tips recipe.
Most tofu recipes start with tofu pressing and draining. You can go professional and get yourself a tofu press, but I am keeping it low tech (for now) and usually just take a block or two of extra firm tofu, drain it and then leave it in a strainer for couple of hours. That usually does the trick for me. Once pressing and draining is completed, you can slice the tofu any way you like or crumble it if you are making something like a ground beef substitute.
Next comes adding flavors, which usually involves marinating, meaning letting your tofu sit in a mix of species, aromatics, and usually some liquids (oil, vinegar, citrus juice of choice, liquid smoke, or other sauces). I recommend being patient and leaving the tofu to marinate for at least an hour. But, if you are pressed for time you could use the marinade ingredients and cook the tofu in them. You will end up with something really flavorful that way as well, just not necessarily grill or broiling friendly.
These tofu steak tips can be roasted, as I did here, but they can also be made into kebabs and grilled. That was my original plan but rain interfered and I went from outdoor grilling straight into the hot oven. The tofu steak tips did not mind at all and come out absolutely delicious!
Roasted Tofu Steak Tips, Plated via Eat the Vegan Rainbow
Roasted Tofu Steak Tips
What you’ll need:
2 16 oz. block tofu, extra firm
1/3 cup olive oil
1/3 cup Worcestershire sauce (vegan)
1/3 cup soy sauce
1/3 cup balsamic vinegar
3 cloves garlic pressed
1 tablespoon dry basil
1 tablespoon dry oregano
Zest of one lemon
What you’ll do:
Drain the tofu and press it using a method that works for you. I usually leave my blocks of tofu in a strainer for few hours on the kitchen counter or overnight in the refrigerator. You can do whatever your normally do to prep your tofu.
Once drained, cut the tofu into 1 in x 1 in (2.5 x 2.5 cm) cubes.
Combine all the other ingredients in a large freezer or food storage bag (or a large container with a flat bottom) and mix everything together. Add tofu cubes and let the tofu marinate for 1-2 hours.
Preheat the oven to 450 F (230 C).
Line the baking sheet with parchment paper and spread the marinated tofu cubes on it. Make sure to leave some space between them for more even roasting.
Put the tofu into the oven and roast for 15 minutes. Check, turn over if needed and roast for another 10 minutes. The tofu steak tips should be brown, with charred edges. You can adjust the roasting time to fit your taste preference – I like my steak tips charred and blackened!
Take out of the oven and enjoy with a salad, roasted corn, mashed potatoes, coleslaw, corn bread, pasta salad, or anything else you like. These tofu steak tips are versatile and are a great match for many of the summer favorites. And as I already mentioned they can be made into fantastic kebabs and grilled!
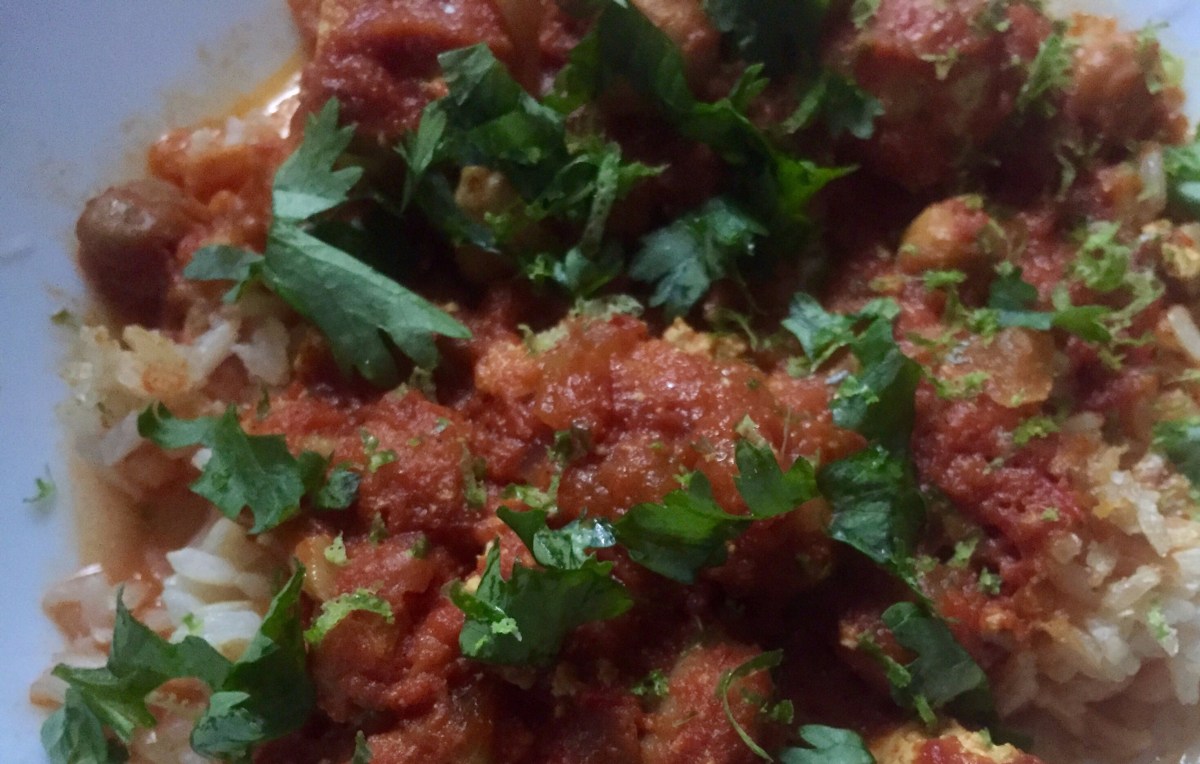
Creamy Mango & Chickpeas Curry Tofu, via Eat the Vegan RainbowSlow cooker (crock pot) is one of my favorite small kitchen appliances and definitely the best way to make dishes that come together only after long, long simmering. Putting everything into a slow cooker is so much easier than baby sitting a simmering stew bubbling away on the stove top! But: slow cooker is slow and if you’d like to have food ready for the dinner (supper) time, you need to remember to fill it up and turn it on 3 to 6 hours in advance. Once all is set and you press the start button, you are free to do whatever and enjoy the day knowing that your delicious dinner is simmering away.
I use my slow cooker often and I find that it works really well for things like stews, or dishes like Vegan Chicken Tikka Masala. Here is another example of a delicious curry that combines tofu, chickpeas and mango with some crushed tomatoes and coconut cream into a fragrant and very creamy curry.
Creamy Mango & Chickpea Curry Tofu in the Slow Cooker, via Eat the Vegan Rainbow
Creamy Mango & Chickpea Curry Tofu
What you’ll need:
2 16 oz (454 g) tofu blocks, extra firm
28 oz (800g) can crushed tomatoes
2 15.5 oz (439g) cans chickpeas
1 cup mango chunks, frozen
15 oz (425g) can coconut cream
1 yellow onion, diced
3 cloves garlic, thinly sliced
2 teaspoons curry powder
1 teaspoon ground cumin
1/2 teaspoon turmeric
Fresh cilantro
Cooking spray
What you’ll do:
Drain or press tofu for 30 minutes. I usually just leave the block of tofu in a strainer and flip the block over once. That’s usually enough for dishes that don’t need the tofu to be super dense and chewy.
Cut the tofu into single bite chunks. From a 16 oz block I usually get 16 pieces so you can use that as a rough guideline.
Line the inside of your slow cooker crock pot with a liner. You can skip this step of course – I just recommend it as it makes clean up an absolute breeze. Add the tofu, chickpeas that have been drained, and frozen mango chunks. You can use fresh as well but frozen mango chunks are just something I have on hand for my smoothies so it’s a bit of a staple in my kitchen.
Add the spices and mix well.
Dice the onion and slice the garlic. Place in a microwave safe dish, spray with cooking spray and microwave for 5 minutes. This will start the caramelization process of your aromatics and help them develop flavors.
Pour the onions and garlic over the mango chunks.
Pour in the crushed tomatoes and mix again.
Add coconut cream and mix to incorporate.
Put the lid on and turn your slow cooker on high for 3 to 4 hours.
When playing, serve over rice, quinoa or couscous and top with fresh cilantro.
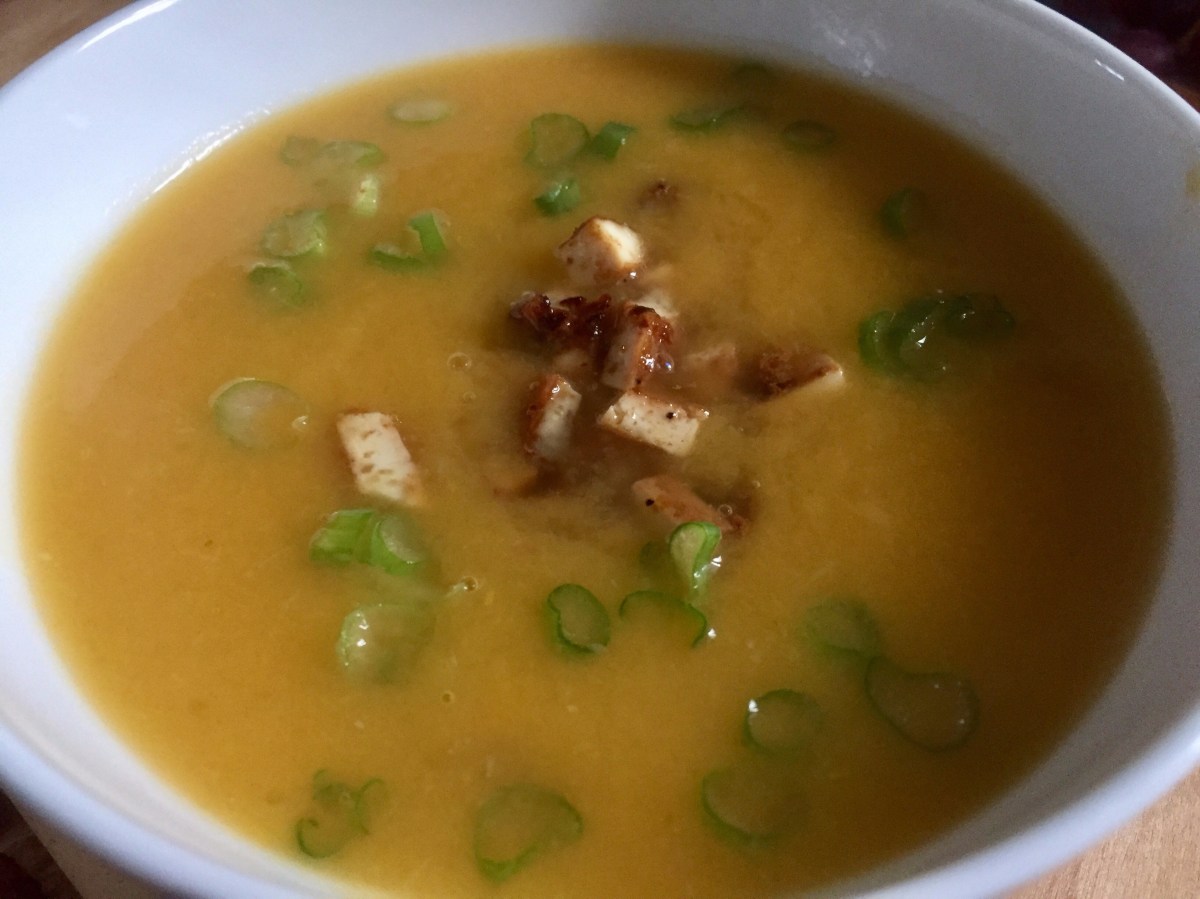
Sweet Potato and Leek Soup with Tofu Bacon, via Eat The Vegan RainbowSoups are part of all cultures and culinary traditions. So it is no wonder that I make pots and pots of soups each week. My absolutely go to soup is Vegan Split Pea Soup or variations of it made with lentils, but over the last few months I have also shared with you a colorful and fabulously satisfying Bean & Leek Soup with Soy Chorizo, and even a vegan version of the New England Clam Chowder.
Why such a soup passion? Well, I grew up eating soup almost every day, and the soups my mom made came in many different shapes, forms and sizes. Soups are a great way to combine different bits and bobs into a one pot to create a satisfying meal for a family. In general, soups are easy to make, very inexpensive, and they store and reheat very well. So, what’s not to love?
This Sweet Potato and Leek Soup is my take on a standard soup that is usually made with potatoes, leeks, butter and heavy cream. I got rid of butter and heavy cream and replaced potatoes with sweet potatoes, making this version a bit sweeter. But, I did not remove all the fun – I made some tofu bacon to top this soup with. The Buddhist Chef makes the most fabulous tofu bacon and I’ve been using his recipe to make crunchy and delicious vegan bacon that works as a snack, in sandwiches and now on soups.
You can top this soup with couple of other toppings if you don’t have time to make the tofu bacon. Chives or green onions (scallions) will work, as will cashew sour cream like the one Angela Liddon shared on her Oh She Glows site, or simple croutons aka piece of toast cut in smaller pieces. Regardless what you put on top of your bowl of Sweet Potato and Leek soup what’s inside it is a tasty, creamy and healthy soup.
Sweet Potato and Leek Soup
What you’ll need:
5 sweet potatoes
2-3 large leeks
2 carrots
4 cups vegetable stock (optional)
3 cups water (or 7 cups if you decide not to use stock)
1 cup almond milk
2 tablespoons potato starch
2 bay leaves
Cooking spray
What you’ll do:
Peel and cube sweet potatoes and carrots into a rough chunks. The size of the chunks does not really matter because you will use a blender at the end to create a smooth and creamy soup. But, the smaller the chunks the quicker the cooking so decide for yourself if you would like to spend more time simmering or more time chopping.
Prepare the leeks using the cleaning method of your choice. The leeks are very often full of send and dirt that gets inside the leek so you will need to open them up and wash everything out. I described my preferred cleaning method in one of my previous posts.
Spray the bottom of a large pot with the cooking spray and place it over the medium high heat. Add leeks and sauté for 5 minutes. The leeks should soften and start to brown.
Add sweet potatoes, carrots, bay leave and potato starch. Mix well and sauté for another 3 to 5 minutes.
Add vegetable stock and/or water. mix well and turn the heat on high. Stirring occasionally, bring the pot to boil then turn the heat down to a gentle simmer. Simmer for 15 to 30 minutes, depending on whether your vegetables were chopped into smaller or larger chunks.
Take the bay leaves out and add the almond milk. Using either a counter top blender or a hand held stick blender to blend the soup together and create smooth soup. Top with any topping you like and enjoy!
Quick Quiche with Tofu and Mushrooms, via Eat the Vegan Rainbow
Eating pie for lunch sounds so decadent, doesn’t it? And that’s what makes quiche so appealing. I usually stay away from making quiche because I can’t deal with making my own crust. The crust takes time and effort that is beyond my capacity. Luckily for me, and I am guessing many of you, stores carry pre-made pie crusts that are ready to use.
My quiche recipe uses one of those and that really makes it come together relatively quickly. One tip when using the store bought frozen pie crust is to bake the crust by itself first for ten to fifteen minutes while you are mixing and preparing the other ingredients. This pre-baking will help make the crust nice and crunchy and help it hold the filling.
Filling is definitely the star of any quiche and it is traditionally made of eggs and cheese, often with mushrooms, ham, spinach, artichokes or other meat and vegetable components thrown into it. So, the result is usually light in texture but heavy on your stomach and very calorie dense.
In my first attempt to veganize quiche I decided to keep it simple and start with mushrooms, red onions and tofu as main ingredients. Most of the cooking actually takes place in a pan on the stove top as both red onions and mushrooms need to be fully cooked before they hit the pie crust. I recommend taking the time to caramelize the onions nice and slow, as well as let the mushrooms cook most of the way before adding tofu. In this case, the tofu needs to be drained and crumbled but you can skip the “pressing tofu” step that almost all tofu recipes have making this a really quick dish!
Quick Quiche with Caramelized Onions, Mushrooms and Tofu
What you’ll need:
1 store bought pie crust, vegan
1 red onion
10 oz (300 g) white mushrooms
14 oz (400 g) extra firm tofu, drained
2 tablespoons nutritional yeast
1 tablespoon corn starch
1 teaspoon dry basil leaves
1 teaspoon dry oregano leaves
Cooking spray
What you’ll do:
Preheat oven to 350 F (180 C). Once ready, put the pie crust in to pre-bake for 15 minutes.
Cut the onion into fine, thin slices.
Spray the bottom and sides of a frying pan with cooking spray and place it over medium high heat. Add the onion and let caramelize for 5 to 10 minutes. The onion should be nicely browned and soft.
While the onion is caramelizing, clean and slice the mushrooms, or you can always buy sliced mushrooms and skip this step.
Add sliced mushrooms to the onion mix and cook until mushrooms soften, which will take another 5 minutes or so.
Drain tofu and crumble it into small crumbles with a fork or with your hand. The size of the crumbles should be similar to scrambled egg.
Add crumbled tofu, nutritional yeast, corn starch, basil and oregano. Stir well the quiche filling, let brown for another 1 to 2 minutes, then turn the heat off and let sit until your pie crust is done pre-baking.
Pour the filling into the crust, spray the top with some cooking spray and return to oven for another 20 to 25 minutes, until the top is golden brown.
Take the quiche out, let stand for 5 minutes then serve with your favorite salad or top with some sun dried tomato shreds like I did on this occasion.
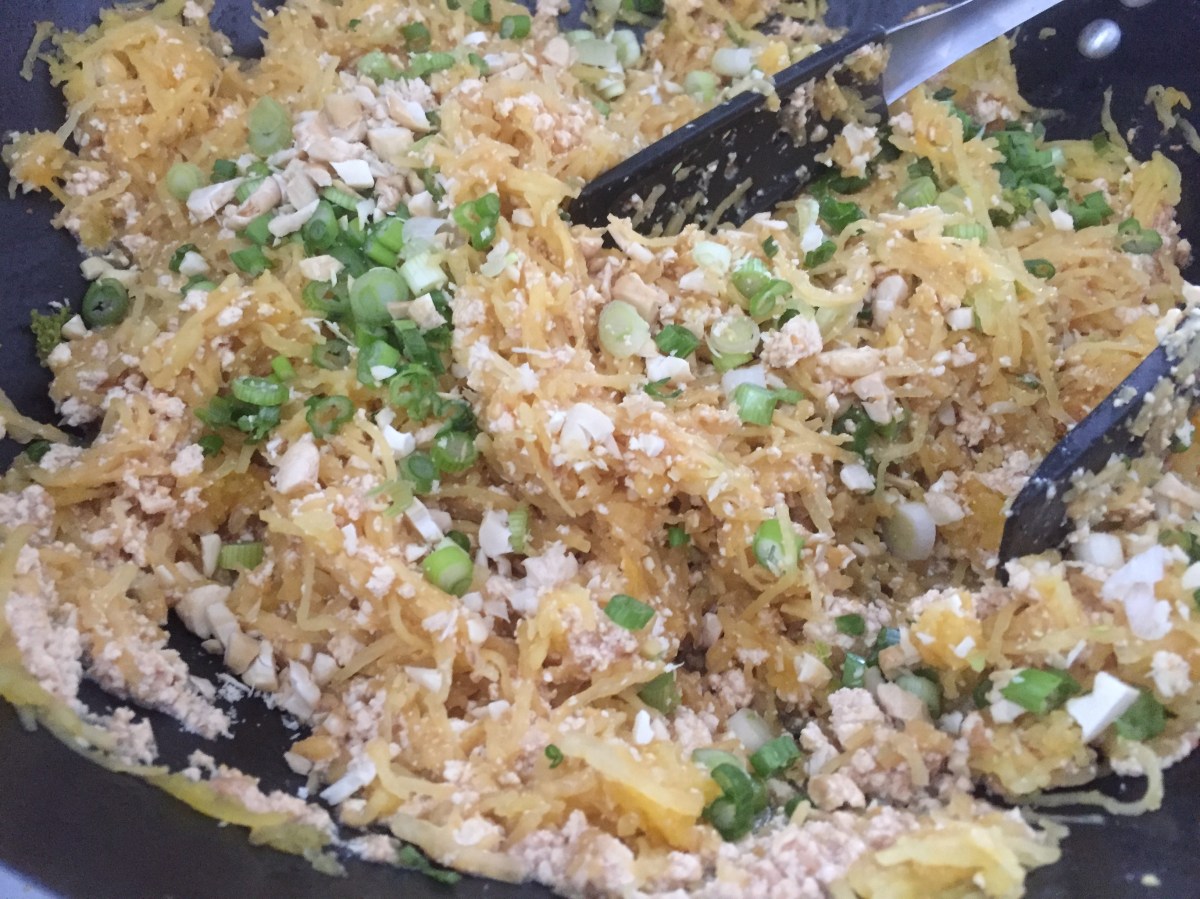
Spaghetti Squash Pad Thai, via Eat the Vegan Rainbow
Basic Pad Thai is a simple noodle dish, where wide rice noodles are mixed with eggs and chopped peanuts, then sprinkled with crushed red pepper flakes, lime juice and chopped scallions (green onions) and sometimes fresh cilantro. The whole dish comes together in five to ten minutes and can be eaten as is, or customized with a range of toppings so it is definitely a very popular dish found in every Thai restaurant.
Although it is relatively straightforward to find the right type of rice noodles that are typically used in Pad Thai, I decided to explore whether spaghetti squash would work. Spaghetti squash is a squash that, as the name suggests, has a stringy flesh structure that can be forked into a noodle-like structures. The texture of these noodles is softer than the regular pasta, and they are usually shorter but the flavor is rich and delicious, and the nutritional facts are definitely on the side of the squash when compared to either rice noodles that one would use in Pad Thai or any other pasta.
One down side to using spaghetti squash in a recipe like Pad Thai is that squash needs to be roasted first, which means that a five to ten minute recipe all of a sudden becomes a sixty to ninety minute recipe. Still, I recommend you give it a try especially as the hands on time is not as intense.
Are there any tricks to spaghetti squash? No, not really. The only two tips that are worth mentioning is to roast the squash cut side down on a parchment paper lined baking sheet, and to let the roasted squash cool as it will help with handling the squash as well help the squash noodles come out better defined.
Cut Spaghetti Squash, via Eat the Vegan Rainbow
Cleaned Spaghetti Squash, via Eat the Vegan Rainbow
Spaghetti Squash Ready for Roasting, via Eat the Vegan Rainbow
Roasted Spaghetti Squash, via Eat the Vegan Rainbow
Forking the Spaghetti Squash, via Eat the Vegan Rainbow
Spaghetti Squash Bowl of Spaghetti, via Eat the Vegan Rainbow
To make this into vegan Pad Thai, I recommend using extra firm tofu instead of eggs. You don’t need to press it, but do let it drain for just a bit. Otherwise it may make your Pad Thai too mushy.
One final modification to the traditional Pad Thai recipe I made is using peanut butter in the sauce and some chopped cashews for the topping. Reason for this? I ran out of peanuts!
Spaghetti Squash Pad Thai
What you’ll need:
1 medium spaghetti squash, 1 to 1.5 lbs (about 500 to 700 g)
2 tablespoons garlic, crushed
2 tablespoons peanut butter
2-3 tablespoons lime juice
14 oz. (400 g) extra firm tofu
7 scallions (green onions), finely sliced
1/3 cup cashews, chopped
Cooking spray
What you’ll do:
Preheat your oven to 425 F (220 C).
Wash the spaghetti squash, wipe dry and cut in half lengthwise. Use a spoon to clean out the seeds.
Line a large baking sheet with parchment paper. Place spaghetti squash on the parchment paper, cut side down. Place in the oven and let roast for 25 to 30 minutes. Check with a knife and it goes in without resistance your squash is done. Take it our of the oven and let cool for at least 30 minutes. Be patient because the squash needs to be cool to handle.
Once cool, take half of the squash, flip over and using a large fork go in and pull the flesh to make the “spaghetti”.
Spray the bottom of a large pan or wok with cooking spray and place it over medium-high heat. Add garlic and let the garlic aroma develop, which will take about 1-2 minutes.
Add soy sauce and peanut butter. Stir well and cook for 1-2 minutes.
Add spaghetti squash and mix with the sauce. Here, I recommend using a pair of tongs to gently fold the squash into the sauce. Once the two are well incorporated add tofu that you have crumbled to small bits that look like scrambled eggs.
Mix everything well together and cook for another 4-5 minutes.
Turn the heat off, add the lime juice, scallions and cashews.
If you like to add some heat you can use crushed red pepper flakes, or a dash of sriracha sauce. You can also top with fresh cilantro for some added freshness.