Casserole can be everything and anything. To me, a casserole is a baked dish with a lot of creaminess and goodness, although if one would go by looks only, most casserole could seem quite unexciting and homely.
One of my recent posts described a recipe for quinoa and broccoli casserole, and now it’s time for zucchini to shine. Zucchini is a super versatile vegetable and it’s usually very cheap during the summer months. It’s also easy to grow if you have a plot of land handy, and can yield quite a lot.
Mix raw almonds and flax seeds together in a large bowl, cover with hot (boiling) water and soak for at least one hour. If soaking overnight, store it in the fridge. For soaking that’s less than 2-4 hours, leaving on the kitchen counter will be fine.
Preheat over to 350F (175C).
Slice the zucchini into discs, either by hand or using a food processor. Ideally, you want your slices to be about 3-4 mm, which is about 1/8 of an inch.
Place the sliced zucchini into a large mixing bowl.
Add the rest of the ingredients into a food processor or a blender, and blend until combined and relatively smooth.
Pour the mixture over the zucchini and mix well, then place everything into a 9 x 13 in (33 x 23 cm).
Place the baking dish into the oven and bake for 40-45 minutes.
Let rest for 10 minutes before serving. Enjoy with a side salad!
Easy Garden Vegetable Pasta Sauce, via Eat the Vegan Rainbow
It’s not quite summer yet, but it does not hurt to line up few new recipes to try when the vegetable gardens start to yield the wonderful, delicious produce. Of course, with modern day supermarkets, the produce in my Easy Garden Vegetable Pasta Sauce is on hand any time of the year!
The recipe is easy, because you only need a handful of ingredients: eggplant, zucchini, garlic, crushed tomatoes, olive oil, and a bit of salt, dried basil and dried oregano. You also need an ingredient that you may have hard time finding – pomegranate molasses. I found mine in a local Indian grocery store, and started experimenting with it recently. This molasses is thick and sticky, like the more common molasses made as a byproduct of refining sugar from sugar cane or sugar beets, but it is not sweet – actually it is quite tart. That’s why you will not find this molasses in many desserts, but you will in savory dishes.
If you are now thinking to yourself “I’n not buying yet another ingredient that I’ll never use again”, no worries – just use balsamic vinegar, especially the one that’s rich, sweet and dark. That will work just as well to add a bit of acidity and sweetness to the sauce.
Enjoy!
Easy Garden Vegetable Pasta Sauce, via Eat the Vegan Rainbow
Easy Garden Vegetable Pasta Sauce
What you’ll need:
1 eggplant, cubed
1 zucchini, cubed
3 cloves garlic, sliced
1 28 oz (800 g) can crushed tomatoes
2 tablespoons pomegranate molasses (or use balsamic vinegar)
1 teaspoon basil, dried
1/2 teaspoon oregano, dried
1/4 teaspoon salt
2 tablespoons olive oil
What you’ll do:
Place a sturdy pot (I like my Dutch oven) over a medium high heat. Add olive oil and garlic. Sauté for a minute, to allow garlic to start releasing its aroma.
Add the eggplant and zucchini, mix well and sauté for 10-15 minutes, until vegetables are fully cooked.
Mix in the molasses (or balsamic vinegar), and all the herbs (basil and oregano), then pour in the crushed tomatoes. Bring to simmer, cover with a lid, lower the heat down all the way, and let cook for another 10 minutes.
Using a stick blender or a regular kind, blend the sauce until rich and dense. Use on your favorite pasta, or spiraled vegetables, like zoodles, which are my personal favorite.
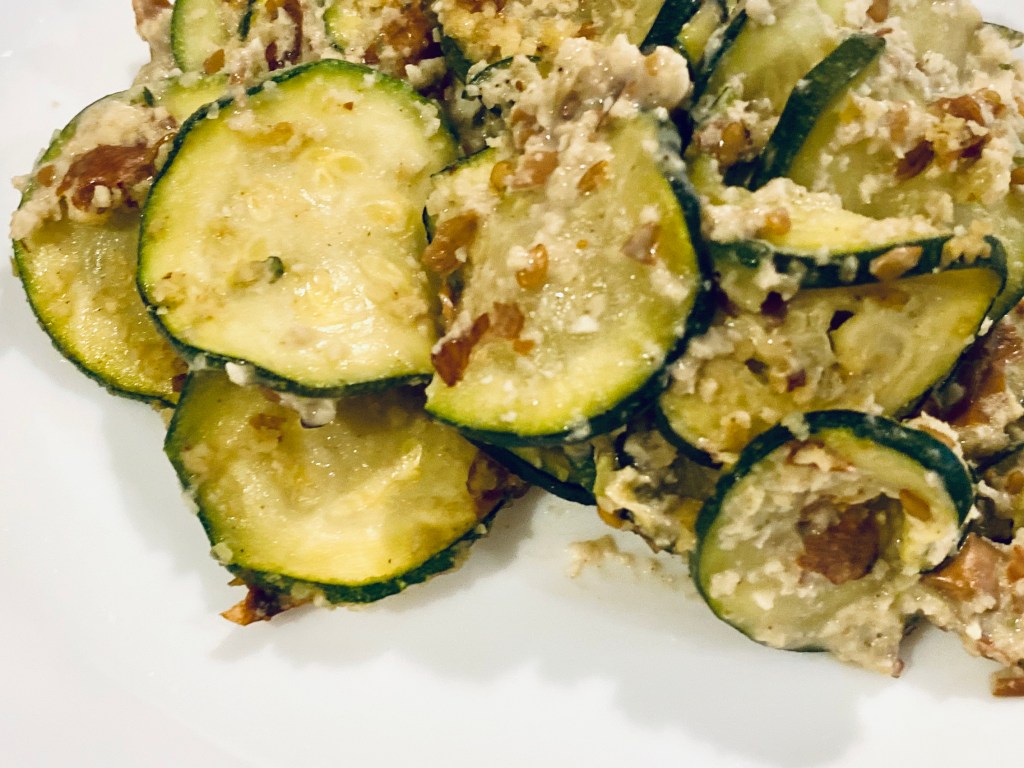
Zucchini and Summer Squash With Garlic and Basil, via Eat the Vegan Rainbow
You know that you have been slacking when the post about CSA Week 9 recipe comes couple of weeks after the finish of the CSA program. How did all those weeks disappear? All I’m going to say is that summer vacation, start of school year, and crazy work schedule happens to the best of us! Wild, I know!!!
In Week 9, Upswing Farm share included some lovely zucchini and basil. So recipe here is a really easy and quick take on what to do when life gives you zucchini, summer squash (this one was from my garden), and lots of fresh basil.
The recipe takes less than 30 minutes to make, used only a handful of ingredients, and is light, fragrant and incredible for the long, hot, lazy days of summer, as well as these fall moments we are now enjoying.
As summer squash, zucchini and fresh basil are now available year round, you can actually serve this “summer sunshine in a bowl” even at the dead of the winter. When choosing your zucchini and squash pick those that have smooth surface with bright color and fresh look. Those will be fresher pieces that you can use without peeling after giving them a good wash.
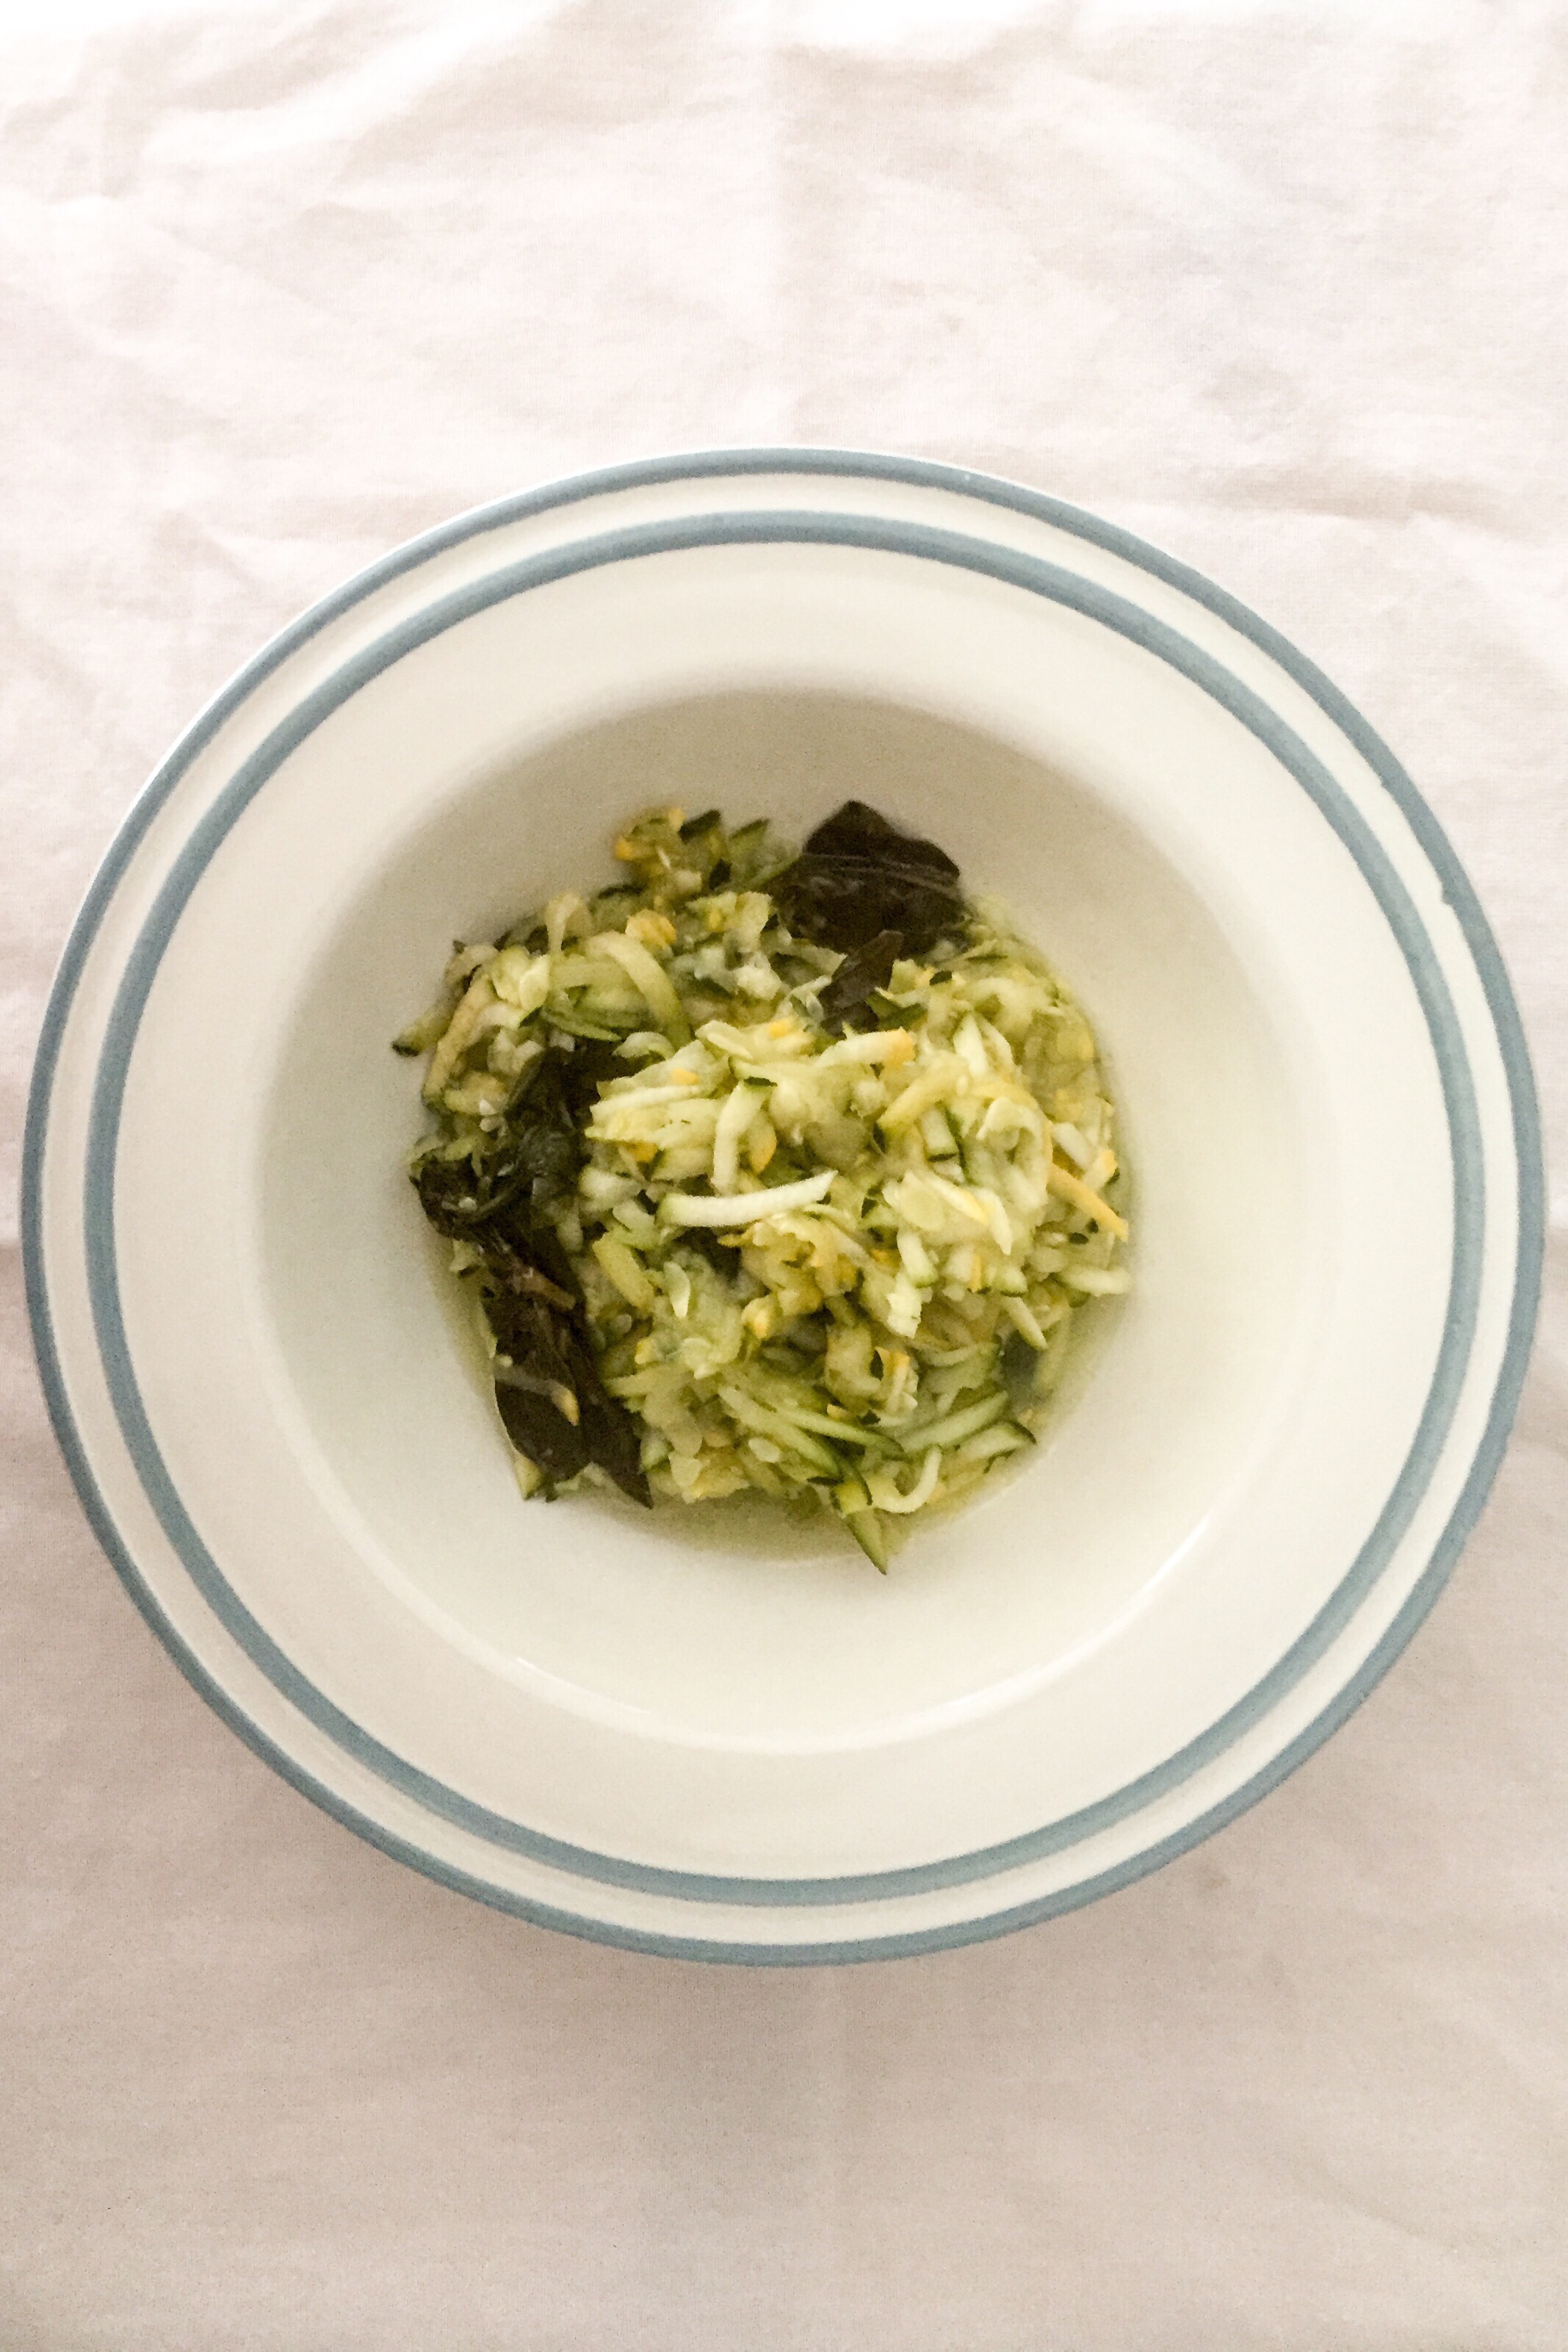
This recipe requires grating, and the easiest way to do this is to run the zucchini and squash through a grater attachment that most food processors include. Traditional hand-held grater works too! I recommend that you squeeze some of the excess water out of the grated squash and zucchini before using. If you skip this step, the final dish will be quite water-y, although it will still taste good. So, it’s up to you to decide the amount of liquid you’d like your final result to have.
Lastly, when it comes to fresh basil you will not need to do much to prep it. You can use the entire bunch, after you wash it and trim it. The point is to have basil infuse the dish, and you can fish the large pieces of basil out before serving. Of course, basil is delicious in its own right and if you want to enjoy it just go for it!
This side dish is best served warm, with some toast or good hearty bread for dipping and mopping the bowl. Delicious!
Zucchini and Summer Squash with Garlic and Basil
What you’ll need:
2 zucchinis, washed, trimmed, and grated
2 summer squash, washed, trimmed, and grated
6 cloves garlic, peeled and thinly sliced
2 cups basil leaves, whole
1 tablespoon apple cider vinegar
2 tablespoons olive oil
What you’ll do:
Wash the zucchini and summer squash, trim the ends, and grate either using a food processor or a manual grater.
Peel and slice garlic thinly. You can adjust amount of garlic to taste but I don recommend going beyond your comfort zone here.
In a large pan bring oil to medium heat, add garlic and sauté for 1-2 minutes.
Add the zucchini and squash, mix well, and sauté for 5-8 minutes until fully cooked.
Add the fresh basil and vinegar, mix well and let rest for 10 minutes or so before serving. Enjoy!
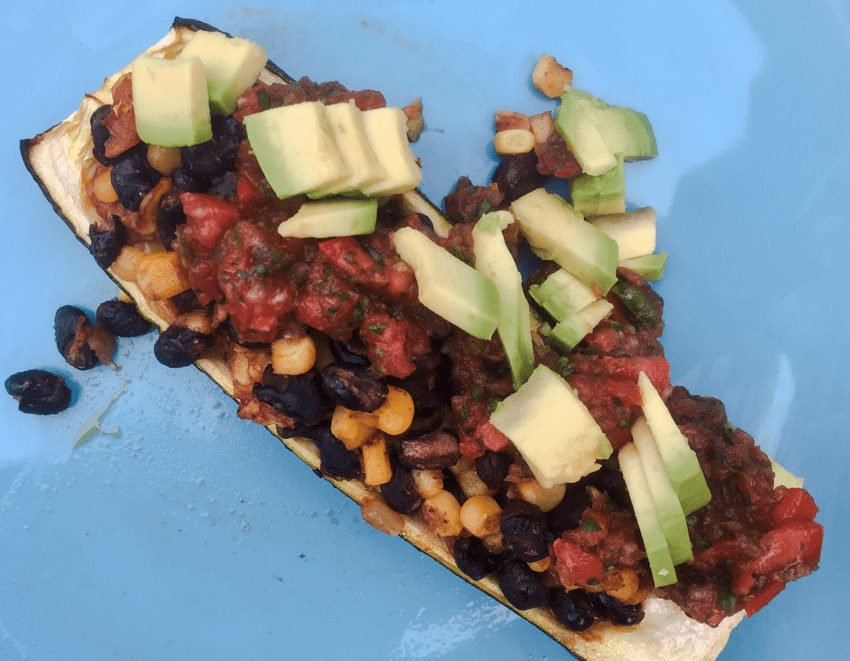
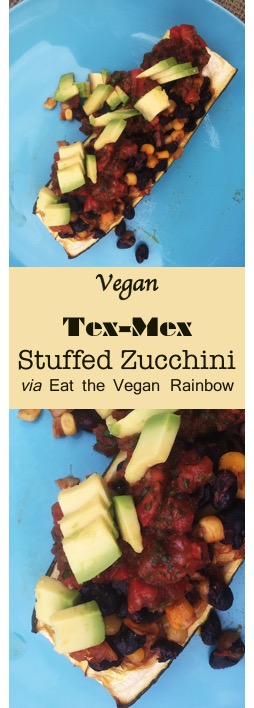
Tex-Mex Stuffed Zucchini with Homemade Salsa and Diced Avocado, via Eat the Vegan Rainbow
When life gives you zucchini, there are actually many things you can do with it, grilling and sautéing being my go-tos most of the time. But, doing same thing over over again, no matter how tasty and satisfying they are, does get old. When it comes to zucchini, I have been trying new things, like zucchini lasagna, and zucchini fruitcake – I did also give zucchini cheese a try but that one did not work for me, so I am putting my zucchini cheese making days behind me.
To me, perfect stuffing zucchini is about 8-9 in (20-25 cm) and what makes this the perfect size is the fact that it matches is the size of my 9 x 13 in (23 x 33 cm) baking dish! Plus, the zucchini in this size range is in the Goldilocks zone – not too big and not too small, yet just right for carrying a good amount of stuffing.
The best way to get the zucchini ready for stuffing is to wash them, cut the ends off (this step is actually optional, you could skip it and leave the ends on – this would give your dish a nice, rustic presentation at the end), then slice the zucchini lengthwise and scoop out the seeds. If the zucchini is old and seeds look well-formed and unappetizing, please feel free to discard them. But, if the inside looks fresh and soft, scoop it out into a bowl and put aside to use as a part of the stuffing.
Par-roasting zucchini
You may have heard about par-boiling, when you boil something only half way through before doing something else with it. Par-roasting is essentially the same thing, just using roasting as a strategy to get the nice, roasted and caramelized flavors going without too much oven time. This can come in handy during hot summer months, for example.
I use par-roasting when prepping most of my stuffed vegetables, be it mushrooms, peppers, eggplant, or zucchini. The method is simple: you turn your oven on high (425 F (220 C) or higher), line a baking sheet with some parchment paper, toss the veggies with some oil, or spray with some cooking spray, or skip the oil altogether if avoiding fat (you can also sprinkle salt on if using, I don’t because the stuffing is usually plenty salty for me), and let the veggies brown for 15 minutes or so, flipping them over once if needed to get them equally browned on both sides.
Why par-roasting?
Well, most stuffing I make is already cooked by the time all is said and done. So, the stuffing itself usually does not need any more cooking time – all it needs to do is go into the oven for 10 minutes or so to get nicely browned on top. Par-roasting is my way of brining whichever vegetable is supposed to hold the stuffing up to speed so that the vehicle is ready for the final oven ride, when the stuffing gets browned and the vehicle finishes baking while absorbing some of the flavors that seep from the stuffing. In this way everything gets harmonized and delicious.
My secret to a perfect (and easy) Tex-Mex flavor
The best way to get the tex-mix flavors going is to start with a good chili powder, then add cumin powder and smoked paprika. These three things combined make for nice smokiness with just a hint of heat, so even with the amount of chili powder I use here the heat will not be overpowering. Having said that, do adjust the chili powder to fit your preferences. Of course, having corn and black beans in this dish is also essential. Here, I used canned corn and canned beans, but you can definitely use frozen corn and cook your beans from scratch. If you are using frozen corn, 1-1/2 cups of frozen corn should be enough, and if you are cooking the beans, 1 cup dry beans will probably be plenty.
Easy homemade salsa
What also helps tex-mix flavors is topping the stuffed zucchini with some freshly made salsa. If you don’t have the time, store-bought is perfectly fine to use here, either freshly made or from a jar – you can pick your own favorite flavor and enjoy! But, if you do want a quick homemade salsa, then follow the instructions below. The main tip here is to cut the tomatoes lengthwise and scoop out the seeds. Don’t throw them out – you can mix them into the tex-mex stuffing! Here, almost everything goes into a food processor for easy chopping. I recommend leaving one cleaned out tomato aside, and dicing it finely by hand to give the final salsa a bit more texture. This salsa takes only a few minutes to make, and you will love the flavor of freshly chopped cilantro and freshly squeezed lime, so it is worth doing it from scratch.
Diced avocado for a final touch
Last but not least is the diced avocado. You actually don’t need the avocado if you can’t stomach it (I know there are some people out there that have trouble with avocado), but it does add a nice, smooth, rich and creamy flavor to the final dish. It’s like a five layer dip right there in your zucchini “boat”!
To pick the best avocado, get those that are still quite hard and then leave them next to some bananas on your kitchen counter for a day or so. The avocado will soften and then you can store it in the fridge until ready to use. In this way you will avoid getting avocados that are too bruised by all the squeezing and poking, and can buy extra avocados on sale and use them 5-7 days later.
After that PSA, back to the Tex-Mex Stuffed Zucchini – to finish the stuffed zucchini, squeeze some fresh lime juice over your avocado and sprinkle some fresh cilantro. If you are using homemade salsa you can skip the cilantro, but if you are using the store-bought then no cilantro-skipping is allowed!
Tex-Mex Stuffed Zucchini with Homemade Salsa and Diced Avocado
What you’ll need:
3 zucchini, washed but not peeled
1 15.25 oz (430 g) can yellow corn (whole kernel)
1 29 oz (820 g) can black beans
1 medium yellow onion, finely diced
4 cloves garlic, thinly sliced or crushed if you prefer
2 tablespoons vegetable oil
2 teaspoons chili powder
1 teaspoon cumin powder
1 teaspoon smoked paprika
Freshly ground black pepper and additional salt to taste!* (see Note)
1 avocado, finely diced, for garnish, optional
Fresh cilantro and freshly squeezed lime juice for topping (optional)
SIMPLE HOMEMADE SALSA
4 plum tomatoes, seeded, divided
1/4 – 1/2 jalapeño pepper, deseeded (or more, to taste)
1/4 onion or red onion
3 tablespoons tomato paste
1/2 cup fresh cilantro
1/2 lime, juice
1/4 teaspoon sat (more or less, to taste)
Cooking spray, salt, pepper
What you’ll do:
Preheat the oven to 425 F (220 C).
To make the salsa, cut the tomatoes lengthwise, the use a paring knife to take out the seeds and the middle of the tomato. Reserve the middles for the stuffing. Place all the ingredients, except one tomato into a food processor and buy until finely chopped. Dice the leftover tomato finely and mix in with the rest of pasta. Once mixed, set the pasta to the side.
Wash the zucchini, remove the ends, and cut lengthwise into two pieces (I prefer to remove the ends but you don’t need to do that). Use a teaspoon to scrape out the inside of the zucchini – if full of seeds you can discard, otherwise add to the tomato scrap pieces and put aside.
Line a large baking sheet with parchment paper. Spray with some cooking spray, then place zucchini on, spray the tops and place the zucchinis into the oven. Zucchini will be nicely browned in about 10 minutes. Take the zucchini out and set aside.
Lower the oven temperature to 375 F (190 C).
While the zucchini is par-roasting, get going on the stuffing. Add the oil to a large pan (frying or sauté) and place over the medium-high heat. Add the chopped onions and sliced garlic and let them caramelize for 2 minutes or so. Next add the spices (chili powder, cumin powder, smoked paprika) and let them “bloom” for 1-2 minutes.
Next add the scooped out zucchini and tomato scraps, and mix well. Sauté for couple of minutes, then add corn and black beans. For corn and black beans, I recommend straining them using a large colander, and rinsing them for half a minute under some cold water before using. If you are using frozen corn, or fresh corn, and the beans you cooked yourself this washing and straining step is, of course, not necessary! Mix everything well and sauté for another 8-10 minutes.
Spray a 9 x 13 in (23 x 33 cm) baking dish (or a large casserole pan) with cooking spray, then cover the bottom with a layer of stuffing. Place the par-roasted zucchini boats in and fill them with stuffing. Pile the stuffing high, and press gently in as you fill to make sure you get to all the little nooks and crannies. (You may end up with extra stuffing – if that’s the case you can serve the stuffing itself as a side for another dinner, for example this would be a grate thing to put into a taco shell and enjoy, or serve cold on your next tex-mix salad!).
Put the stuffed zucchini into the oven and bake for about 15 minutes. All you are looking for is some nice caramelization on the top and the sides. Pull the stuffed zucchini out, and let it cool for couple of minutes before serving.
When serving, top each zucchini boat with salsa and diced avocado, freshly chopped cilantro, and a squeeze of lime and you are done!
Vegan, fully plant-based meatballs are one of the easiest thing in the world to make. I like putting meat-free “meatballs” together because they are fun – fun always comes first of course – and they are versatile, you can stick them into a sandwich, over pasta, serve with mashed potatoes, with rice and beans, and the list goes on and on…
Plus: unlike dealing with meat, especially poultry, all the ingredients in these meatballs are safe to eat as is, which means that even young kids can get involved and roll some meatballs. I told you – these can be fun for everyone!
What makes these meatballs Asian is the combination of scallions (green onions), Sriracha (hot red chili sauce), fresh ginger, panko (Japanese breadcrumbs), and peanut butter that get mixed with chopped, not ground, soya chunks. The idea is to retain some of the soya chunks structure rather than grind them to the consistency of ground beef. Think chicken salad, rather than taco meat.
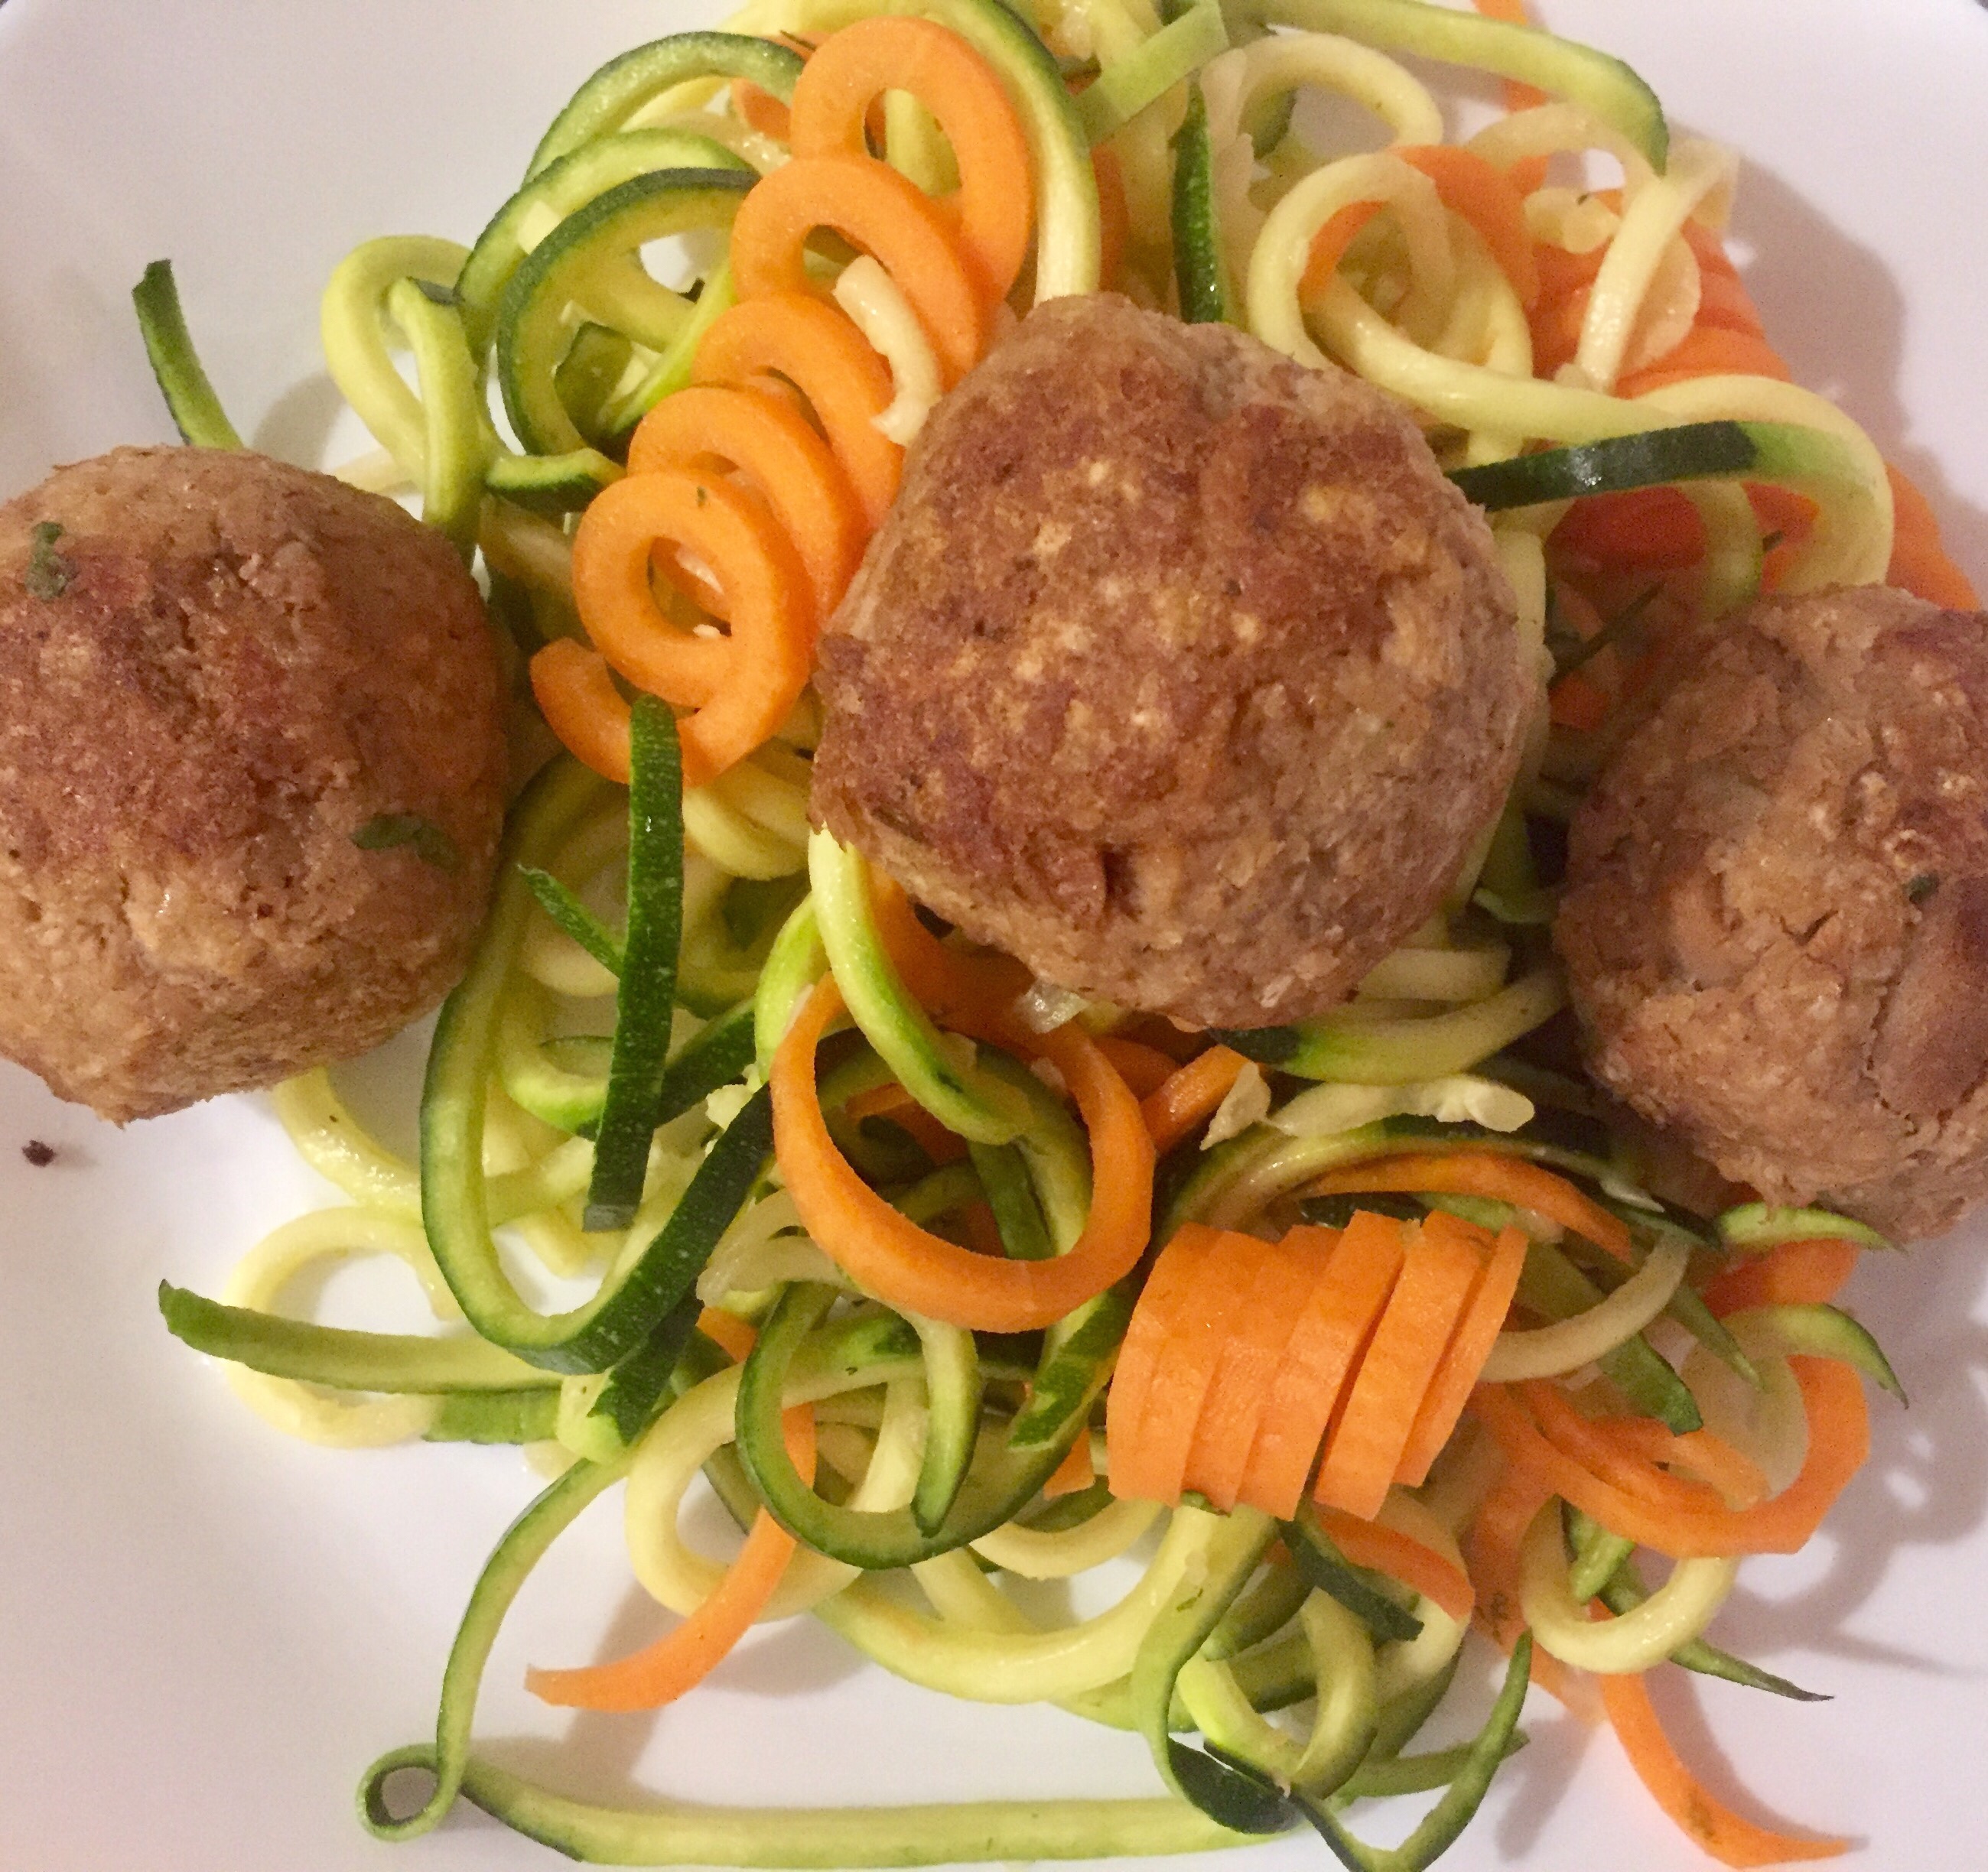
To complete the meal you will need to do some spiralizing, which is one of my favorite things to do with zucchini, summer squash, and even potatoes. Here, I combined carrots and zucchini which gives the salad a nice contrast of crunch versus softness, plus a colorful appearance. The spiralized vegetables are mixed with some slivered almonds, lime juice and zest, and tossed to combine. Top them with a meatball or three, and you got yourself a dinner!
Asian Meatballs with Spiralized Zucchini and Carrot Salad
What you’ll need:
FOR THE SALAD
3 zucchinis, spiralized
3 fat carrots, spiralized
1/2 cup slivered almonds
1 lime, juice and zest
FOR THE MEATBALLS
200 g soya chunks
1 1/2 cup panko, Japanese breadcrumbs, regular or gluten-free
3 scallions, white and green parts, finely chopped
1 tablespoon ginger, freshly grated
1 tablespoon peanut butter, natural and unsalted
3 tablespoons soy sauce, reduced sodium
1/2 teaspoon hot chili sauce (sriracha)
Cooking spray
What you’ll do:
Prepare soya chunks according to the instructions on the box. They usually need about 3-5 minutes in a pot of boiling water.
Drain and rinse your soya chunks under some cold water, then chop or grind them into small chunks, similar to chicken chunks commonly used in Asian Dumplings recipes. Place them in a large bowl, and add all the rest of the ingredients. Mix everything well and let stand for 5-10 minutes before making the meatballs.
Heat a large skillet or a cast iron pan over the medium high heat. Spray with some cooking spray and brown the meatballs on all sides until golden brown. Brown the meatballs in batches and make sure you don’t overcrowd the pan.
While the meatballs are browning, prepare the salad. You can either buy a box of spiralized carrots and spiralized zucchini and toss them with some lime juice, lime zest, and toasted slivered almonds, or you can spiralize your own if you have the spiralizer. Let the salad rest while the meatballs finish browning.
To plate, place a good amount of salad in the middle of the plate, and top with 2-3 meatballs. Enjoy!
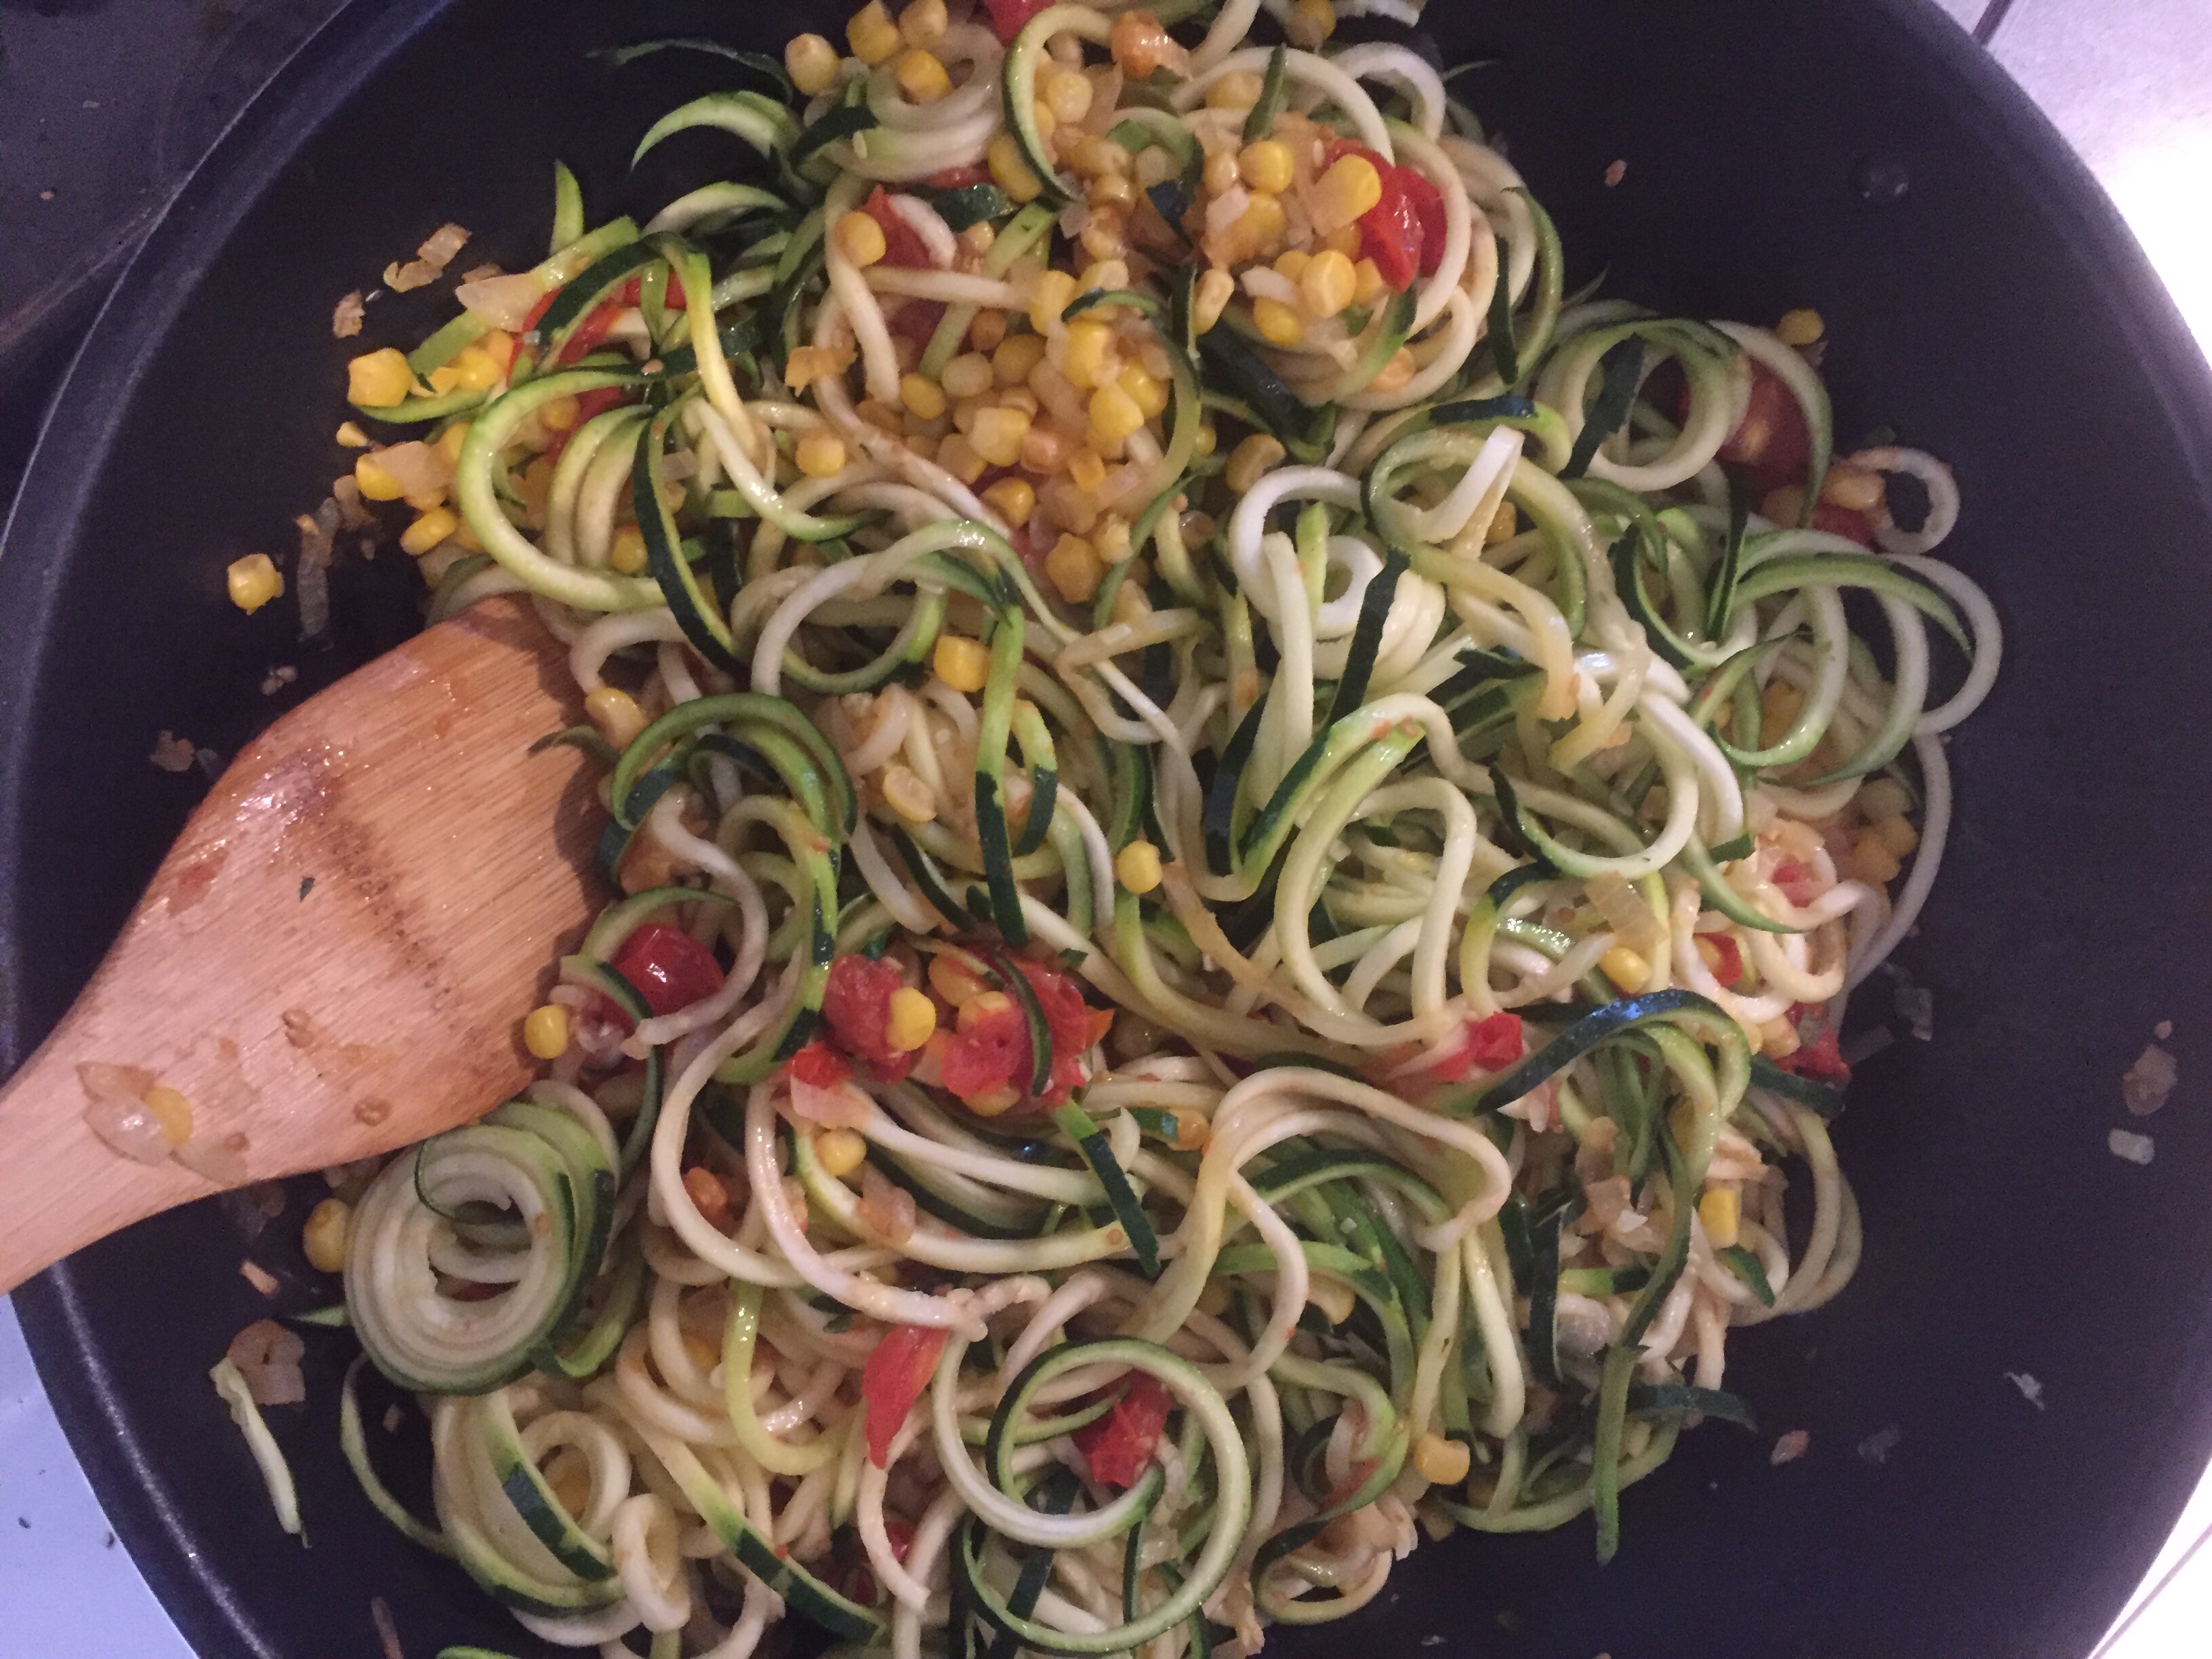
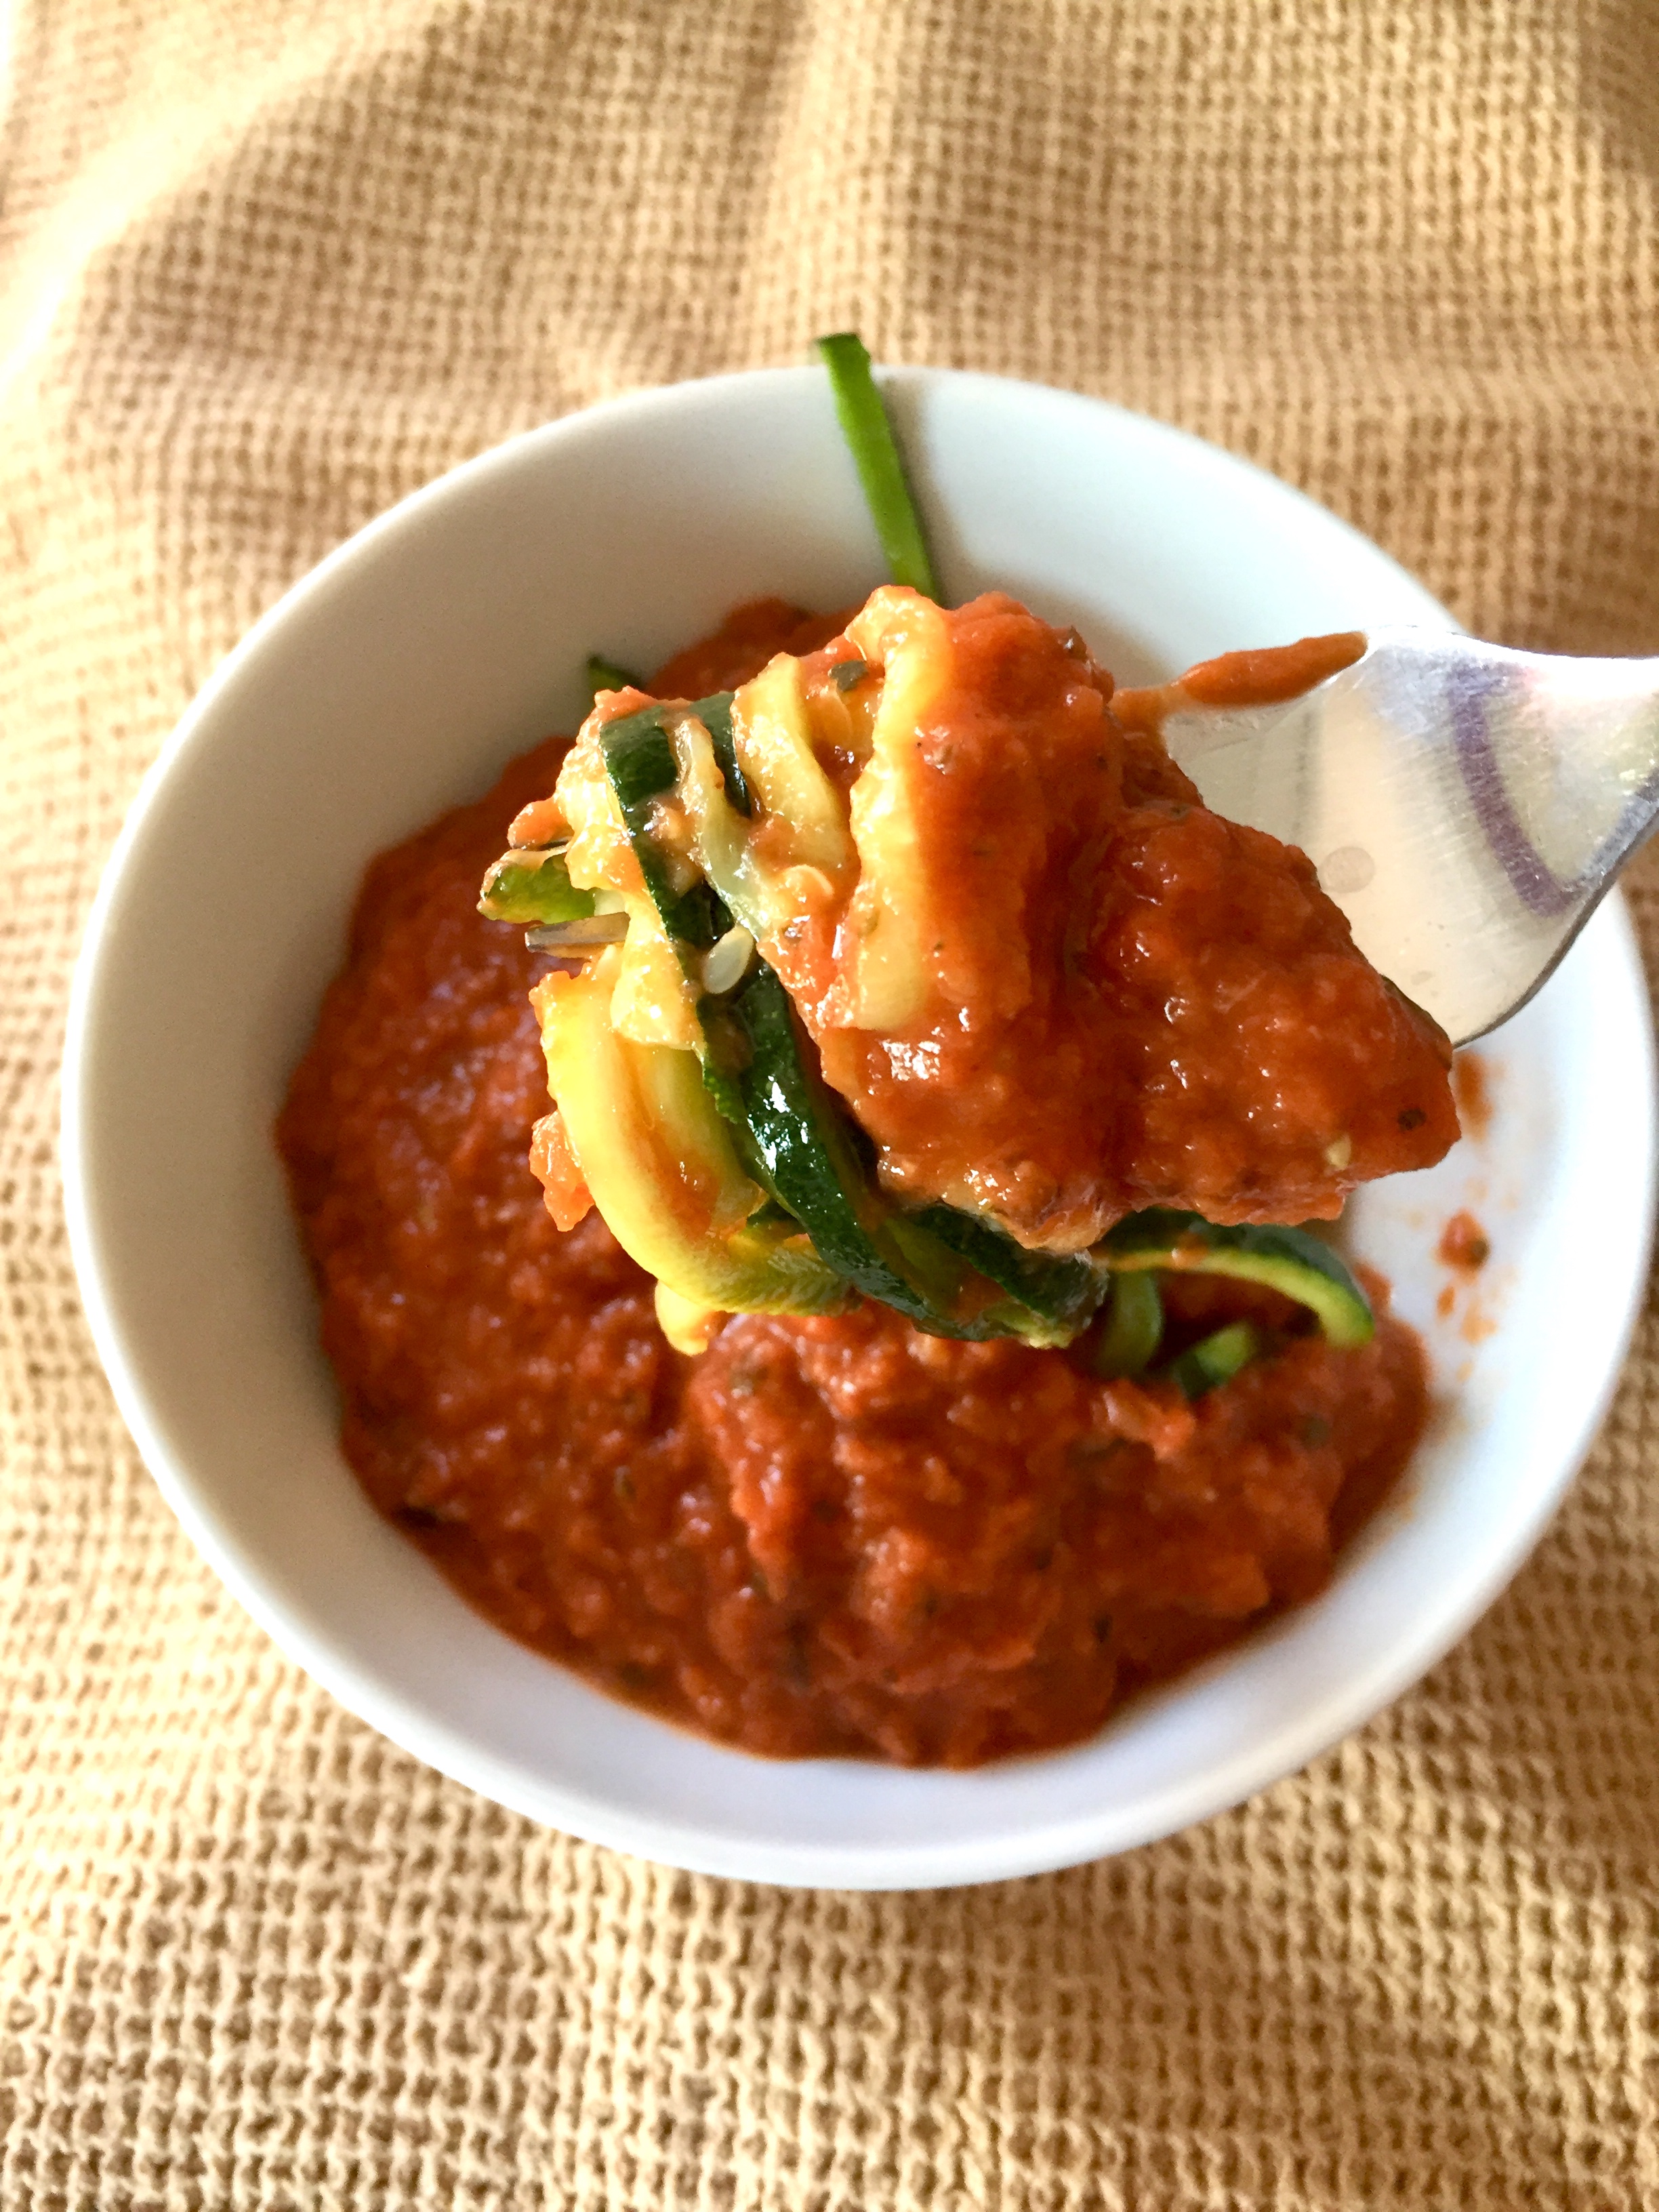
Zucchini Noodles with Cherry Tomatoes and Corn, via Eat the Vegan Rainbow
Who ever invented a spiralizer deserves one of those Breakthrough Technology prizes – future generations of parents will not know the painful process of getting kids to eat zucchini or summer squash, or even beets because with this magical machine all kids will be diving into is spaghetti, and who doesn’t love that!!!
What I like about zucchini noodles is that they cook really fast, they have a lovely texture, and a bit of chew to them – very similar to a broader noodle pasta variety, like fettuccine. The recipe here combines only a handful of ingredients and, once you have your zucchini noodles ready, it only takes 15 minutes from start to finish. So, it is ideal for a quick lunch, or a healthy dinner after a very, very busy day. It looks very glamorous, it tastes crisp and delicious, and you will get all your recommended daily servings of vegetables in one plate – but, hey, who’s counting those, right?
The easiest way to get zucchini noodles, or many other kinds of noodles, is to buy them from a grocery stores. Almost all I go to carry those, so grab them and try them. If you like them, stop grabbing them from the store and buy yourself a spiralizer. The gadget is going to pay iteself off after 5-10 times of use, depending on how much you spend, because buying zucchini and doing the spiralizing yourself is much, much cheaper – I did the math and came up with the number 5. It will cost you five times more to buy pre-spiralized veggies than to do it yourself… Plus, once you have a spiralizer you can do all sorts of fun stuff with it, like these Spiralized Oven Fries.
Hope you give this recipe a try!
Zucchini Noodles with Cherry Tomatoes and Corn
What you’ll need:
4 pieces of zucchini, medium sized, spiralized
1 onion, finely diced
10 oz (275 g) cherry tomatoes, washed and halved
1 1/2 cup frozen corn
Cooking spray
Fresh parsley, nutritional yeast, fresh or dry oregano, fresh or dry basil – these are all possible toppings for you to consider.
What you’ll do:
Spray the bottom of a large and deep frying pan, or even a wok, with cooking spray and put over the medium high heat.
Add the diced onions and brown for 3-4 minutes, until soft, slightly browned and translucent.
Add the tomatoes and let them sauté for 3-4 minutes.
Once the tomatoes are soft, add the corn and let it thaw as it cooks. No need to thaw it ahead of time. It will take about 5 minutes for corn to be ready for the next step.
Add the zucchini noodles, mix everything gently together, and sauté for another 5 minutes. Serve immediately with a dash of fresh basil or a sprinkle of nutritional yeast on top!
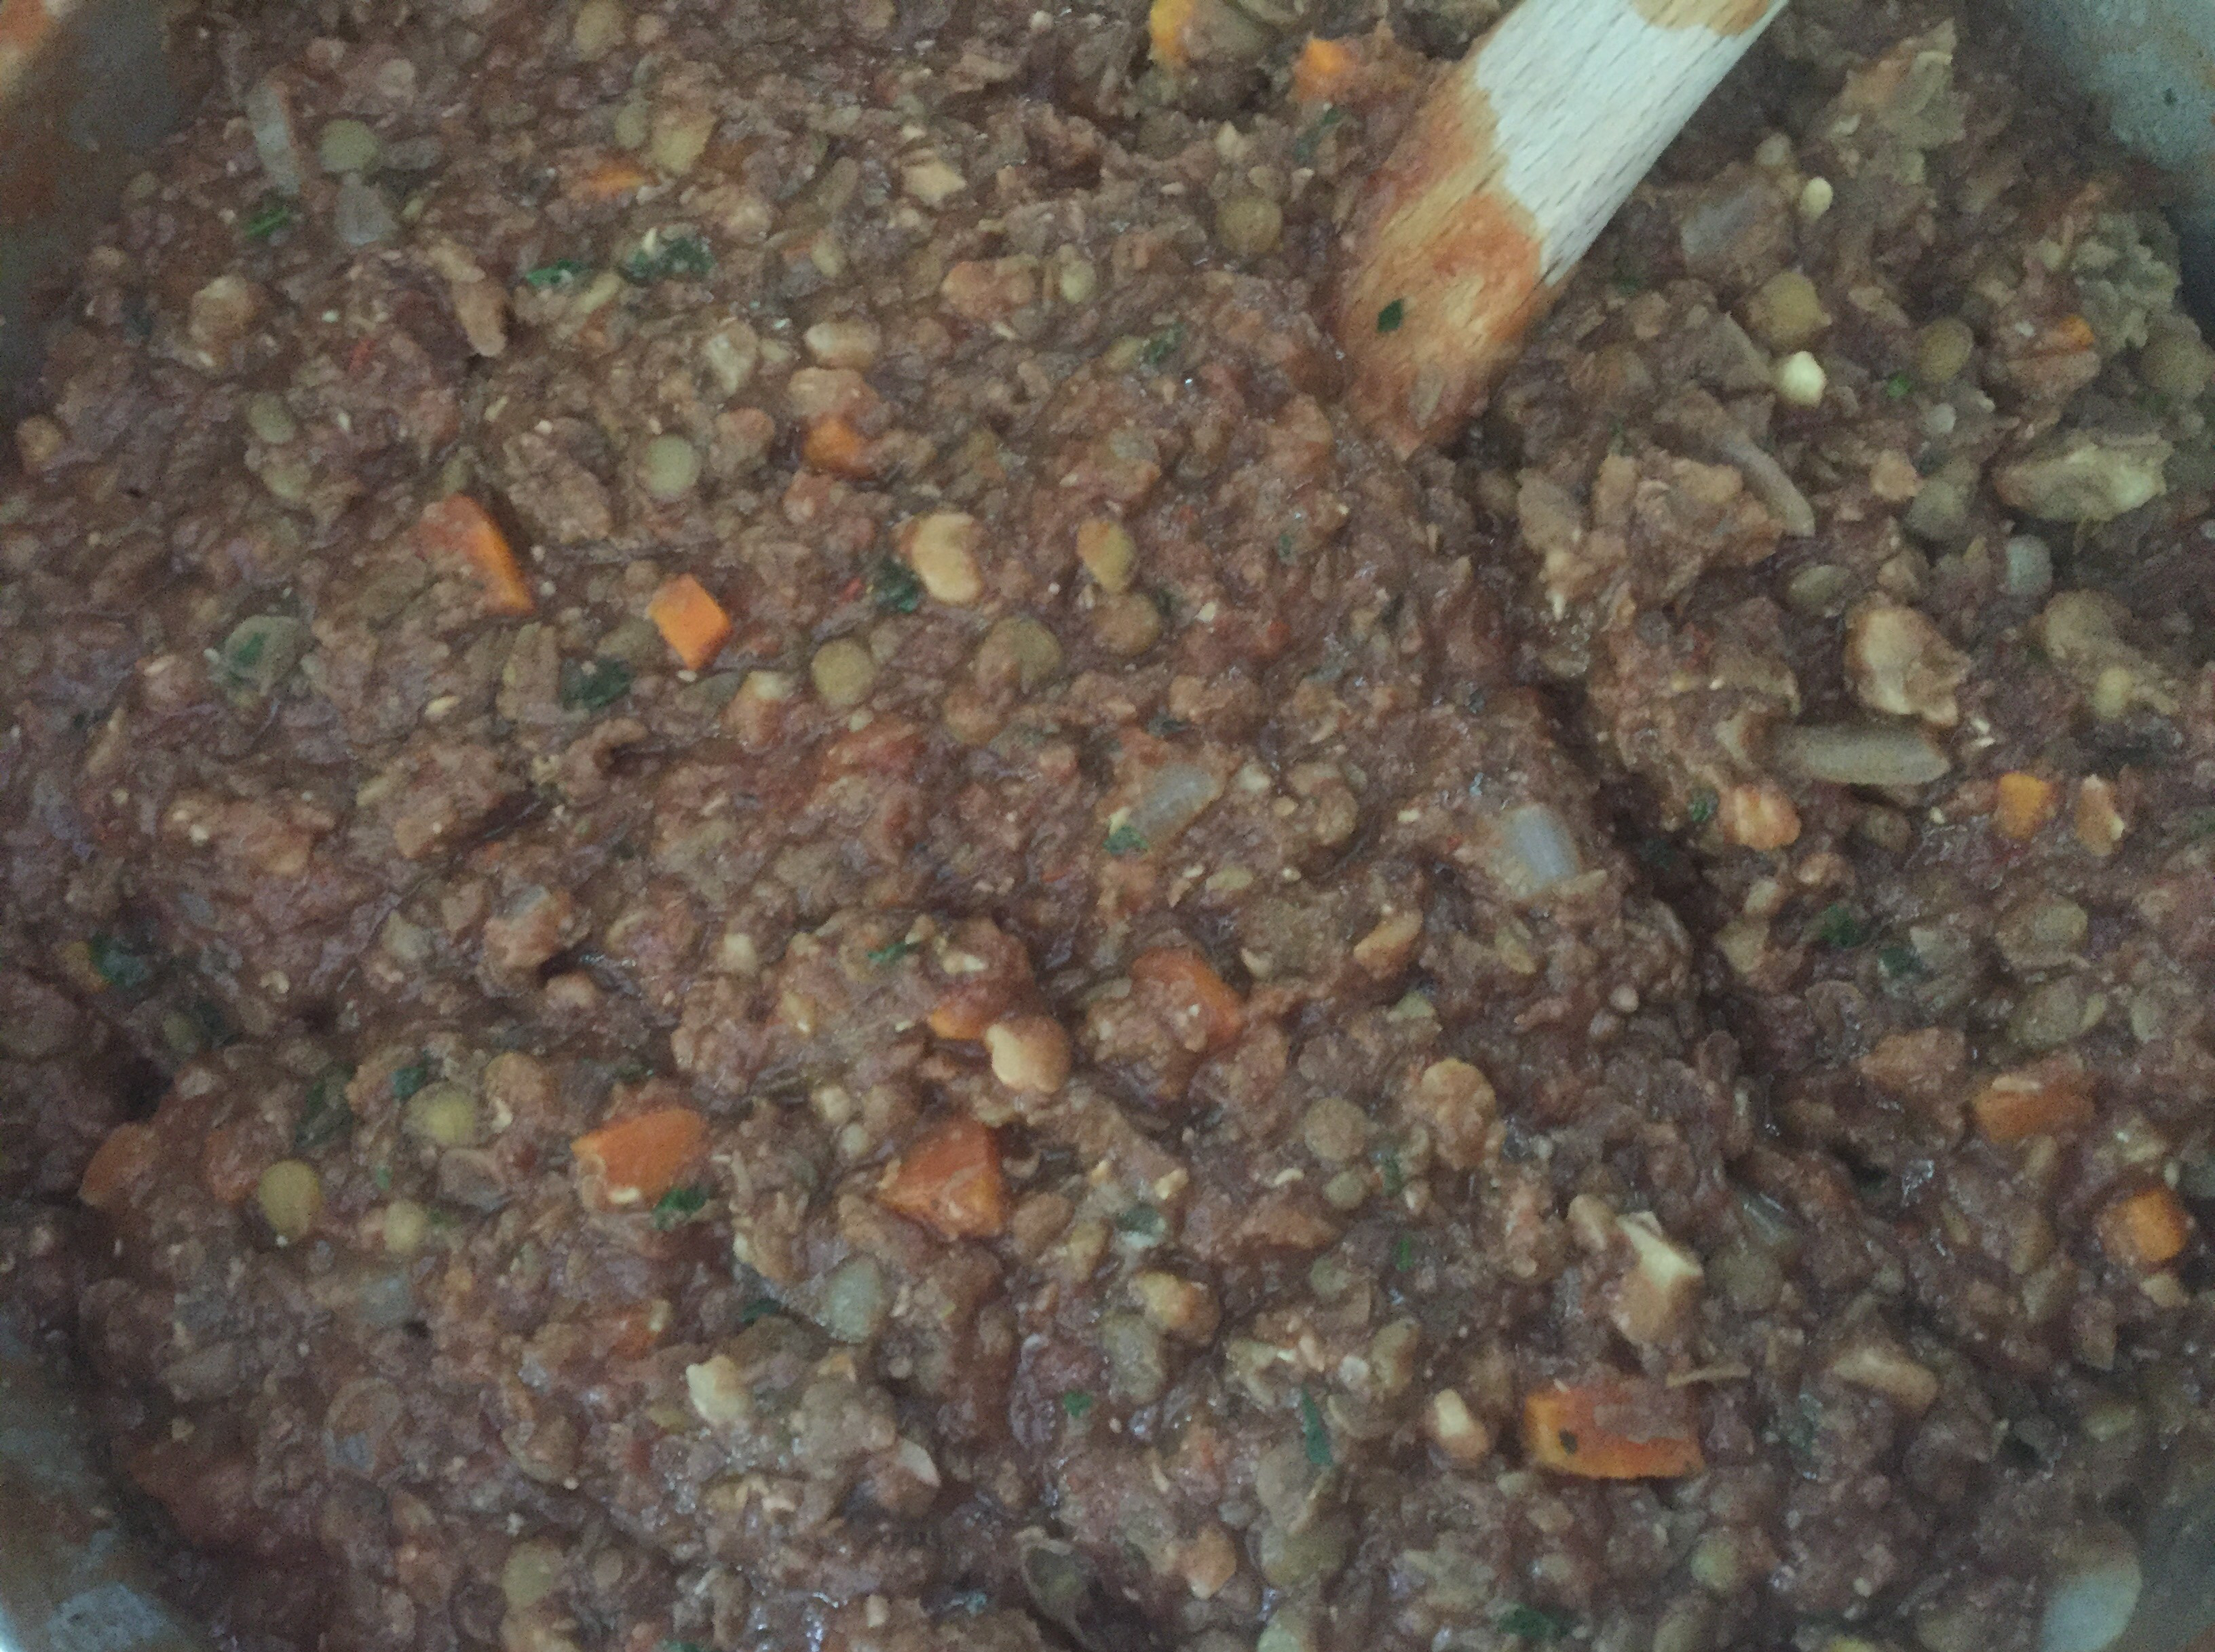
Zucchini Lasagna with Walnut and Brown Lentil Ragù, via Eat the Vegan Rainbow
Let’s cut to the chase and be honest here – although we can pretend otherwise, we are all as obsessed with lasagnas as Garfield is! The layers of soft noodles, amazing sauce, fresh herbs, and most commonly lots and lots of ground meat and soft cheese. All this means that lasagnas are not the healthiest thing on the menu. Having said that, there is no reason to ban lasagnas from your plate; you just need to learn how to keep it healthy and plant-based, and I think I can help you to troubleshoot both of those problems.
Keeping lasagnas meat-free seems to be the problem many have tackled, usually by overloading lasagna with cheese, cheese and eggs, or cheese and a selection of vegetables, like mushrooms, and increasing the amount of tomato sauce and making it chunkier. But, really the most prominent ingredient in majority of meatless lasagna recipes is the cheese. When I was developing this lasagna recipe I did not want to give up on idea of “meat”, so what I came up with is a hearty, meaty, and flavorful walnut and brown lentil “meat” ragù base. My thinking was inspired by my previous, wildly successful Meatless Shepherd’s Pie, which I served for Easter this year as a substitute for a more traditional, lamb-based dish. In that recipe, lentils, mixed with ground mushrooms and cooked with rosemary and thyme, made for an amazing feast.
Here, I wanted to recreate the traditional meat ragù and went for a combination of chopped walnuts and dark lentils. The trick is too cook the lentils separately and add them to the rest of the ragù when they are fully cooked. Also, chop your walnuts into pieces that are about the size of what ground meat pieces may look like. I chopped the walnuts by hand, just by going over walnut pieces with a knife few times, back and forth. You can buy whole walnuts, or walnut halves in store and start from there, but for this a bag of walnut pieces will make your life easier and make the dish cheaper. Walnuts work really well in this lasagna, because they add some of their natural crunchy texture, protein, and a bit of fattiness to the otherwise very lean recipe. Worried about this extra fat? Walnuts are known for having a lot of unsaturated fat, which is the good kind, so don’t skip it! The meatiness of the ragù is further enhanced by a good amount of tomato paste and crushed tomatoes and letting the ragù simmer for a while.
Walnut and Brown Lentil Ragù, via Eat the Vegan Rainbow
The preparation of any lasagna happens in several stages and this one is no different. In order to make the process more efficient I recommend that you start roasting the zucchini at the same time you start making the ragù, and then start boiling the lasagna noodles when zucchini is just about done. In that way you don’t even need to turn the oven off, you can just lower the temperature from roasting to baking and be ready for lasagna to go in immediately. Please note that I don’t use zucchini as a complete lasagna noodle replacement. I suppose you could, but then you’ll end up in a more of a Zucchini Mousaka territory than lasagna paradise. If you are concerned about gluten, there are now many gluten-free lasagna noodle options for you to choose from and most of them work perfectly.
The final touch on this lasagna is the Béchamel sauce (besciamella), which is a white sauce traditionally made with milk, butter and flour. In this case, the quick white sauce I put together requires only a blender, some soft, silken tofu, a squeeze of a lemon, and a bit of nutritional yeast. It is very much the blend-and-pour type of sauce, so you can do it a in a blink of an eye. The sauce adds a nice, slightly cheesy flavor to this very rich lasagna, and makes for a nice, almost golden glaze.
Zucchini Lasagna with Walnut and Brown Lentil Ragù
What you’ll need (for 9 x 13 in (23 x 33 cm) baking dish):
8-10 lasagna noodles, gluten-free if preferred
1 lbs (450 g) brown lentils
3 zucchinis, cut lengthwise into long strips
2 large carrots, diced
3 stalks celery, diced
1 cup raw walnut pieces, chopped
1/2 yellow onion, diced
1 can (28 oz, 800 g) crushed tomatoes
2 tablespoon tomato paste
1 tablespoon crushed garlic
1 teaspoon dried oregano
1 teaspoon dried basil
3 tablespoons fresh Italian (flat leaf) parsley
1 lbs (450 g) silken tofu
2 tablespoons lemon juice, freshly squeezed
1 tablespoon nutritional yeast
Cooking oil spray
What you’ll do:
Preheat oven to 425 F (220 C).
Prepare the lentils according to the instructions on the bag. Basically, bring 4 cups of water to boil and add the lentils that have been washed and picked over to remove any impurities that may have made their way to the lentils. Bring the lentils back to boil than lower the heat to a gentle simmer, and cook for 20 minutes or so, until lentils are completely cooked. Drain the lentils from excess water and set aside to cool.
While the oven is preheating, and lentils are cooking, prep your veggies. Peel, wash, and dice the onions and carrots, and wash and dice the celery. Wash the zucchini well, remove the ends, then cut into long, thin strips. You can use a mandolin slicer for this, but cutting by hand also works. The zucchini slices should be as close to the thickness of the lasagna noodles as possible, but you don’t need to go crazy here – just keep in mind that a bit thinner is better.
Line a baking sheet with parchment paper, place the zucchini slices on and spray with cooking spray. You may need to use two baking sheets, since you may discover that you can’t manage to have all your zucchini slices arranged in a single layer. Don’t pile the zucchini on top of each other and do roast in batches if needed. Place the zucchini “lasagna noodles” into the oven to roast. The roasting will take anywhere between 15 and 25 minutes and will depend on the thickness of your zucchini. Keep an eye on the oven and if you are roasting two pans of the zucchini at the same time do rotate the pans mid way through the roasting. You will know that the zucchini is done when the edges are slightly brown and the middle is golden. Once you take the zucchini out, decrease the oven temperature to 350 F (175 C).
While the zucchini is roasting, start your the ragù. Spray the bottom of a Dutch oven, or another type of heavy pan, with cooking spray and heat up over the medium to medium high heat. Add carrots, onions and celery and let them brown for 10 minutes. Add chopped walnuts and let them pan roast for about 2 to 3 minutes. Add garlic, oregano, and basil, and let the flavors develop for a minute. Next comes tomato paste – add it to the pan, mix well and let brown just slightly. This takes about 2 minutes or so. Add the cooked lentils and the crushed tomatoes, and mix well. Let the ragù simmer for 10 to 15 minutes. Turn the heat off, add the fresh parsley and mix well to combine.
Once the ragù is simmering, it’s time to start cooking your lasagna noodles. Most varieties ask for a large pot of boiling water and about 10 minutes of boiling time. The noodles don’t need to be cooked all the way through as they will continue to cook in the oven but they do need to soften quite a bit, so 8 to 10 minutes should be enough to achieve that. Drain the noodles and use immediately.
Combine tofu, lemon juice and nutritional yeast in a blender and blend until smooth. Set the besciamella to the side.
Spray the bottom and sides of your 9 x 13 in (23 x 33 cm) pan with some cooking spray. Cover the bottom liberally with the ragù (use about a half of the amount you made), layer the first set of noodles (for me that came to about 5 noodles per layer), then layer the zucchini in a single layer, pour the rest of the ragù, and top with the remaining noodles. Pour the besciamella over and cover with foil.
Place the covered lasagna into the 350 F (175 C) oven and let bake for 30 minutes covered and then about 10 minutes uncovered. Let the lasagna sit for about 10 minutes before serving. I like to add some freshly ground black pepper or a mix of black pepper and red pepper flakes to my lasagna just before enjoying, but you can also sprinkle some fresh parsley, or fresh basil. Have fun!
Vegan Red Curry with Sweet Potatoes and Zucchini, via Eat the Vegan RainbowI do like strong and bold spices, and food that is full of flavors yet not overpowering. So I gravitate towards Indian cuisine as you may have been able to tell given that I’ve already shared my vegan take on Chicken Tikka Masala and Saag Paneer. Another style of food that I enjoy comes from Southeast Asia, and I’ve been experimenting with Thai and Vietnamese recipes in the past. Most of those recipes do involve some animal ingredients so I wanted to try my hand at testing out the idea that Thai can be vegan.
My first stop on this journey is this Red Curry. You can make your own curry paste but Thai Kitchen Red Curry Paste is inexpensive, gluten free and vegan. It worked really well in this recipe so for now I am sticking with it!
In my view the secret to a great Red Curry is to go bold and diverse with your vegetables, and chop them in different ways so that your curry has some interesting color as well as texture. Here I use several different kinds of peppers, sweet potatoes and zucchini. You can use any kind of pepper you have handy. On this day in my kitchen I had a bag of mini sweet peppers that came in two colors, red and orange. I also got some shishito peppers that I’ve never used before but I figured it’s OK to be adventures. At the end, the shishitos turned out to be mild and did not overpower the flavors but I did remove all their seeds before using, which may have reduced any heat they would have brought in. If you do like your curry’s hot, you can use chili peppers, or other varieties with more heat.
Peppers and Zucchini for Vegan Red Curry, via Eat the Vegan RainbowFinal tip that I think makes a big difference is cooking the sweet potatoes almost all the way through before adding them to the curry. I cooked mine, skin on in the microwave and they came out perfectly sweet and delicious. What also makes a huge difference is using fresh basil and adding it at the very end so that it has just enough time to release its aroma without getting cooked.
Vegan Red Curry with Sweet Potatoes and Zucchini
What you’ll need:
2 large sweet potatoes, skin on
2 large zucchini, unpeeled
6 mini peppers, orange
6 mini peppers, red
4 shishito peppers
1 13.5 oz (400 mL) can light coconut milk
3 tablespoons shredded coconut, unsweetened
2 tablespoons red curry paste (like Thai Kitchen)
10 basil leaves, fresh
Cooking spray
What you’ll do:
Wash the sweet potatoes and put them in a large, microwave safe dish with 1/2 cup of water. Put the lid on, but don’t close all the way. Cook on high in the microwave for 10 minutes. Let stand for 15-20 minutes. Make sure sweet potatoes are cool enough to handle before you peel them. Chop the potatoes into 1 in x 1 in (2.5 cm x 2.5 cm) cubes. Set aside.
While sweet potatoes are cooking and resting, chop the zucchini and the peppers. You want zucchini chopped into small dice, and red and orange mini peppers into thin matchsticks. Clean the seeds out the shishito peppers and chop them very finely.
Spray the bottom of a large pan with cooking spray and heat on medium-high. Add all the peppers into the pan at once. Sauté for 10-15 minutes, until peppers are soft and their edges start to get brown.
Add diced zucchini and sauté for another 5 minutes, until zucchini is cooked about half way through.
Add curry paste, stir well and let sauté for another 5 minutes.
Add coconut milk and coconut shreds, and cook for another 5 minutes.
Add sweet potatoes. Mix well, lower the heat and simmer for 15-20 minutes. Turn the heat off, add fresh basil, and let stand for 5 minutes.
Gluten-free Vegan Spaghetti & Meatballs, via Eat the Vegan RainbowCan gluten-free, vegan cooking be budget friendly, healthy, feed the whole family, and yet leave everyone feeling they are getting away with something? The answer is yes, and this recipe is my evidence. I use no fancy ingredients, and no fancy techniques.
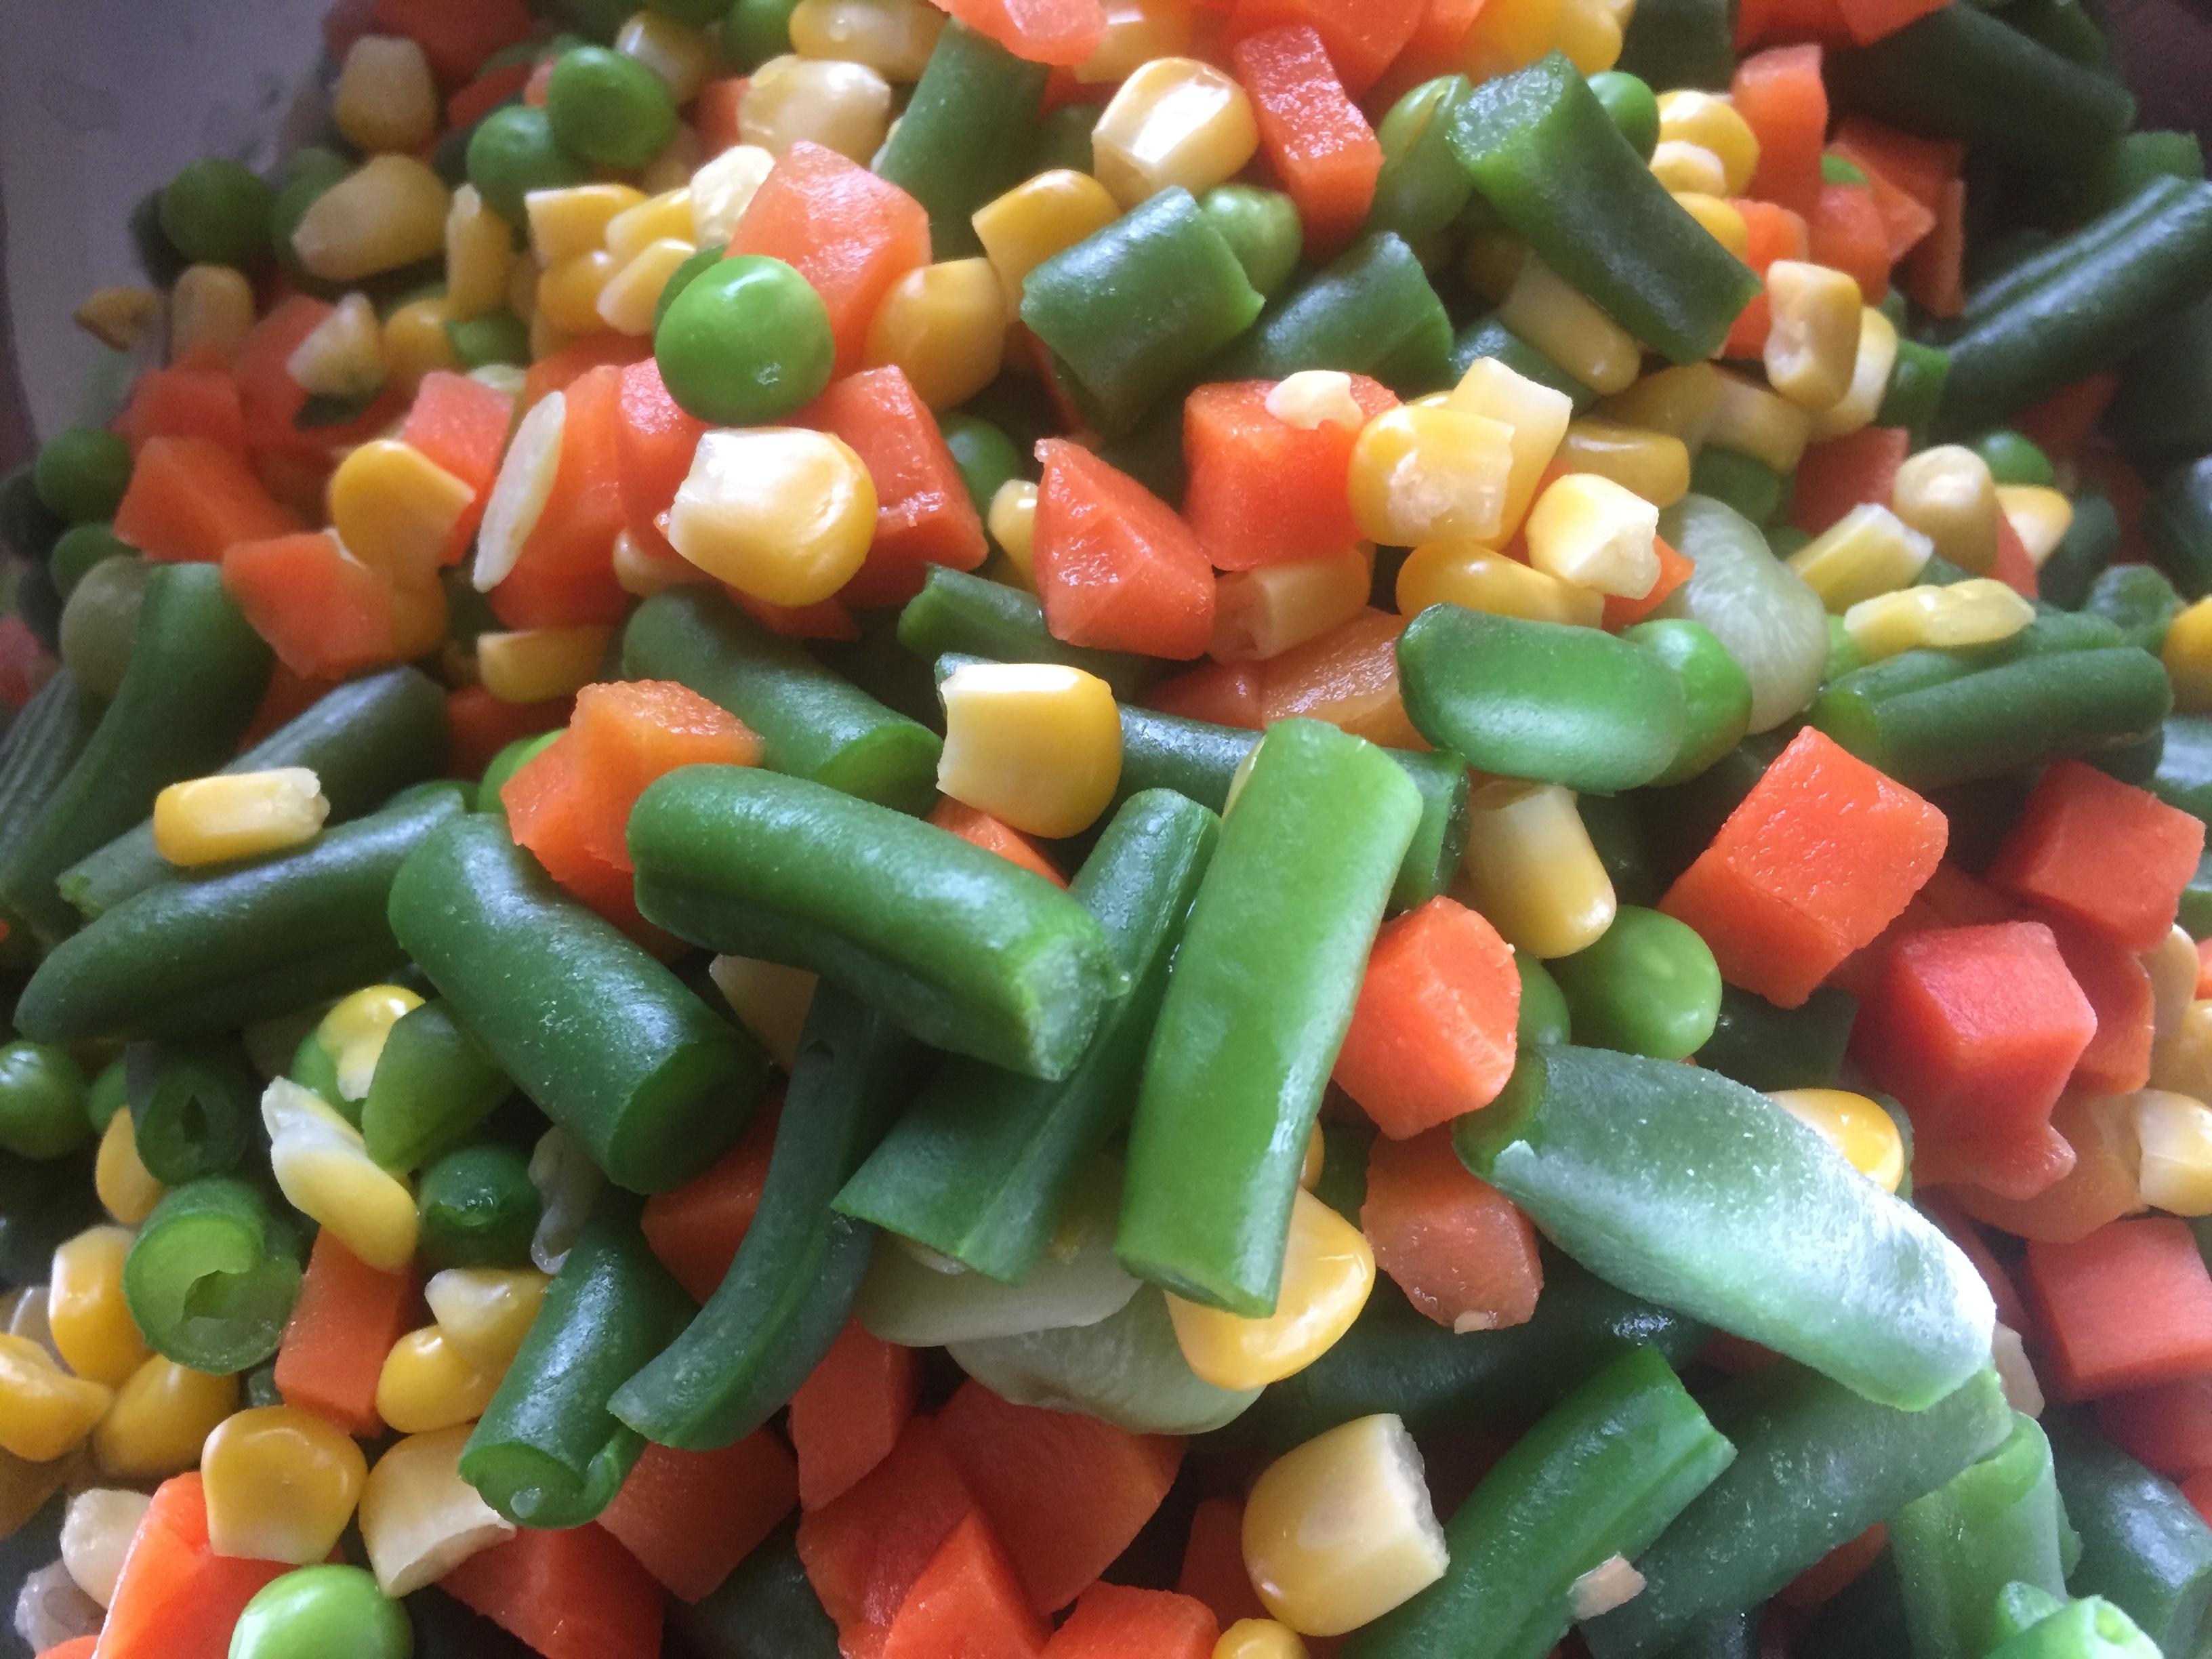
How did I end up here? Well, as they say “Necessity is the mother of invention”. What happened is that I found myself facing a large bag of frozen vegetable mix, which I have cooked with many times before never to any great success. This is a classic item you can find in any grocery store – a bag that includes unspecified amounts of frozen peas, corn, green beans, carrots, and lima beans. The price on these is usually too hard to resist, and they keep really well if kept frozen so I usually have a couple in my freezer in case of an emergency where all other options dry up.
So one of those emergency situations came up and this time around, perhaps because of all this blogging I’ve been doing recently, I had a real brain wave. I decided to transform the relatively amorphous tasting vegetable mix into really incredible vegan meatballs, or should I say veggie balls?
Frozen Vegetable Mix, thawed, via Eat the Vegan RainbowThere are couple of simple tips that when put together make this recipe work. First of all, thaw your vegetables don’t cook them! Depending on the amount of veggies you use this may take 5-10 minutes in the microwave on high. Once the veggies are thawed and soft all through, use a stick (immersion) blender, or a food processor to make a thick paste out of it all. This will be a base for your “meatballs”.
Another thing that you will need to do is add flavor to the mix. Although each one of these veggies is lovely on their own and when fresh, put all together and after freezing and thawing they do lose some of their flavor. My secret ingredient in this recipe is definitely a dash of Trader Joe’s Chile Lime Seasoning Bland. If you don’t live in the area with a handy Trader Joe’s store near by, you can use regular chili powder and add some lime or lemon zest – that will do the trick!
You will have to be a bit patient with this recipe as it does take a bit of time. First of all, I use oats to help the meatballs stick together. I did not leave the oats whole, rather I blended them all into the veggie mix using a stick blender, added the spices, and left the mix to sit for about 15 minutes. That gives oats some time to absorb the liquid and make the mix stick together better, which helps for the next step – forming the “meatballs” and browning them. I recommend using a Dutch oven to brown the “meatballs”, as well as simmering the rich tomato sauce.
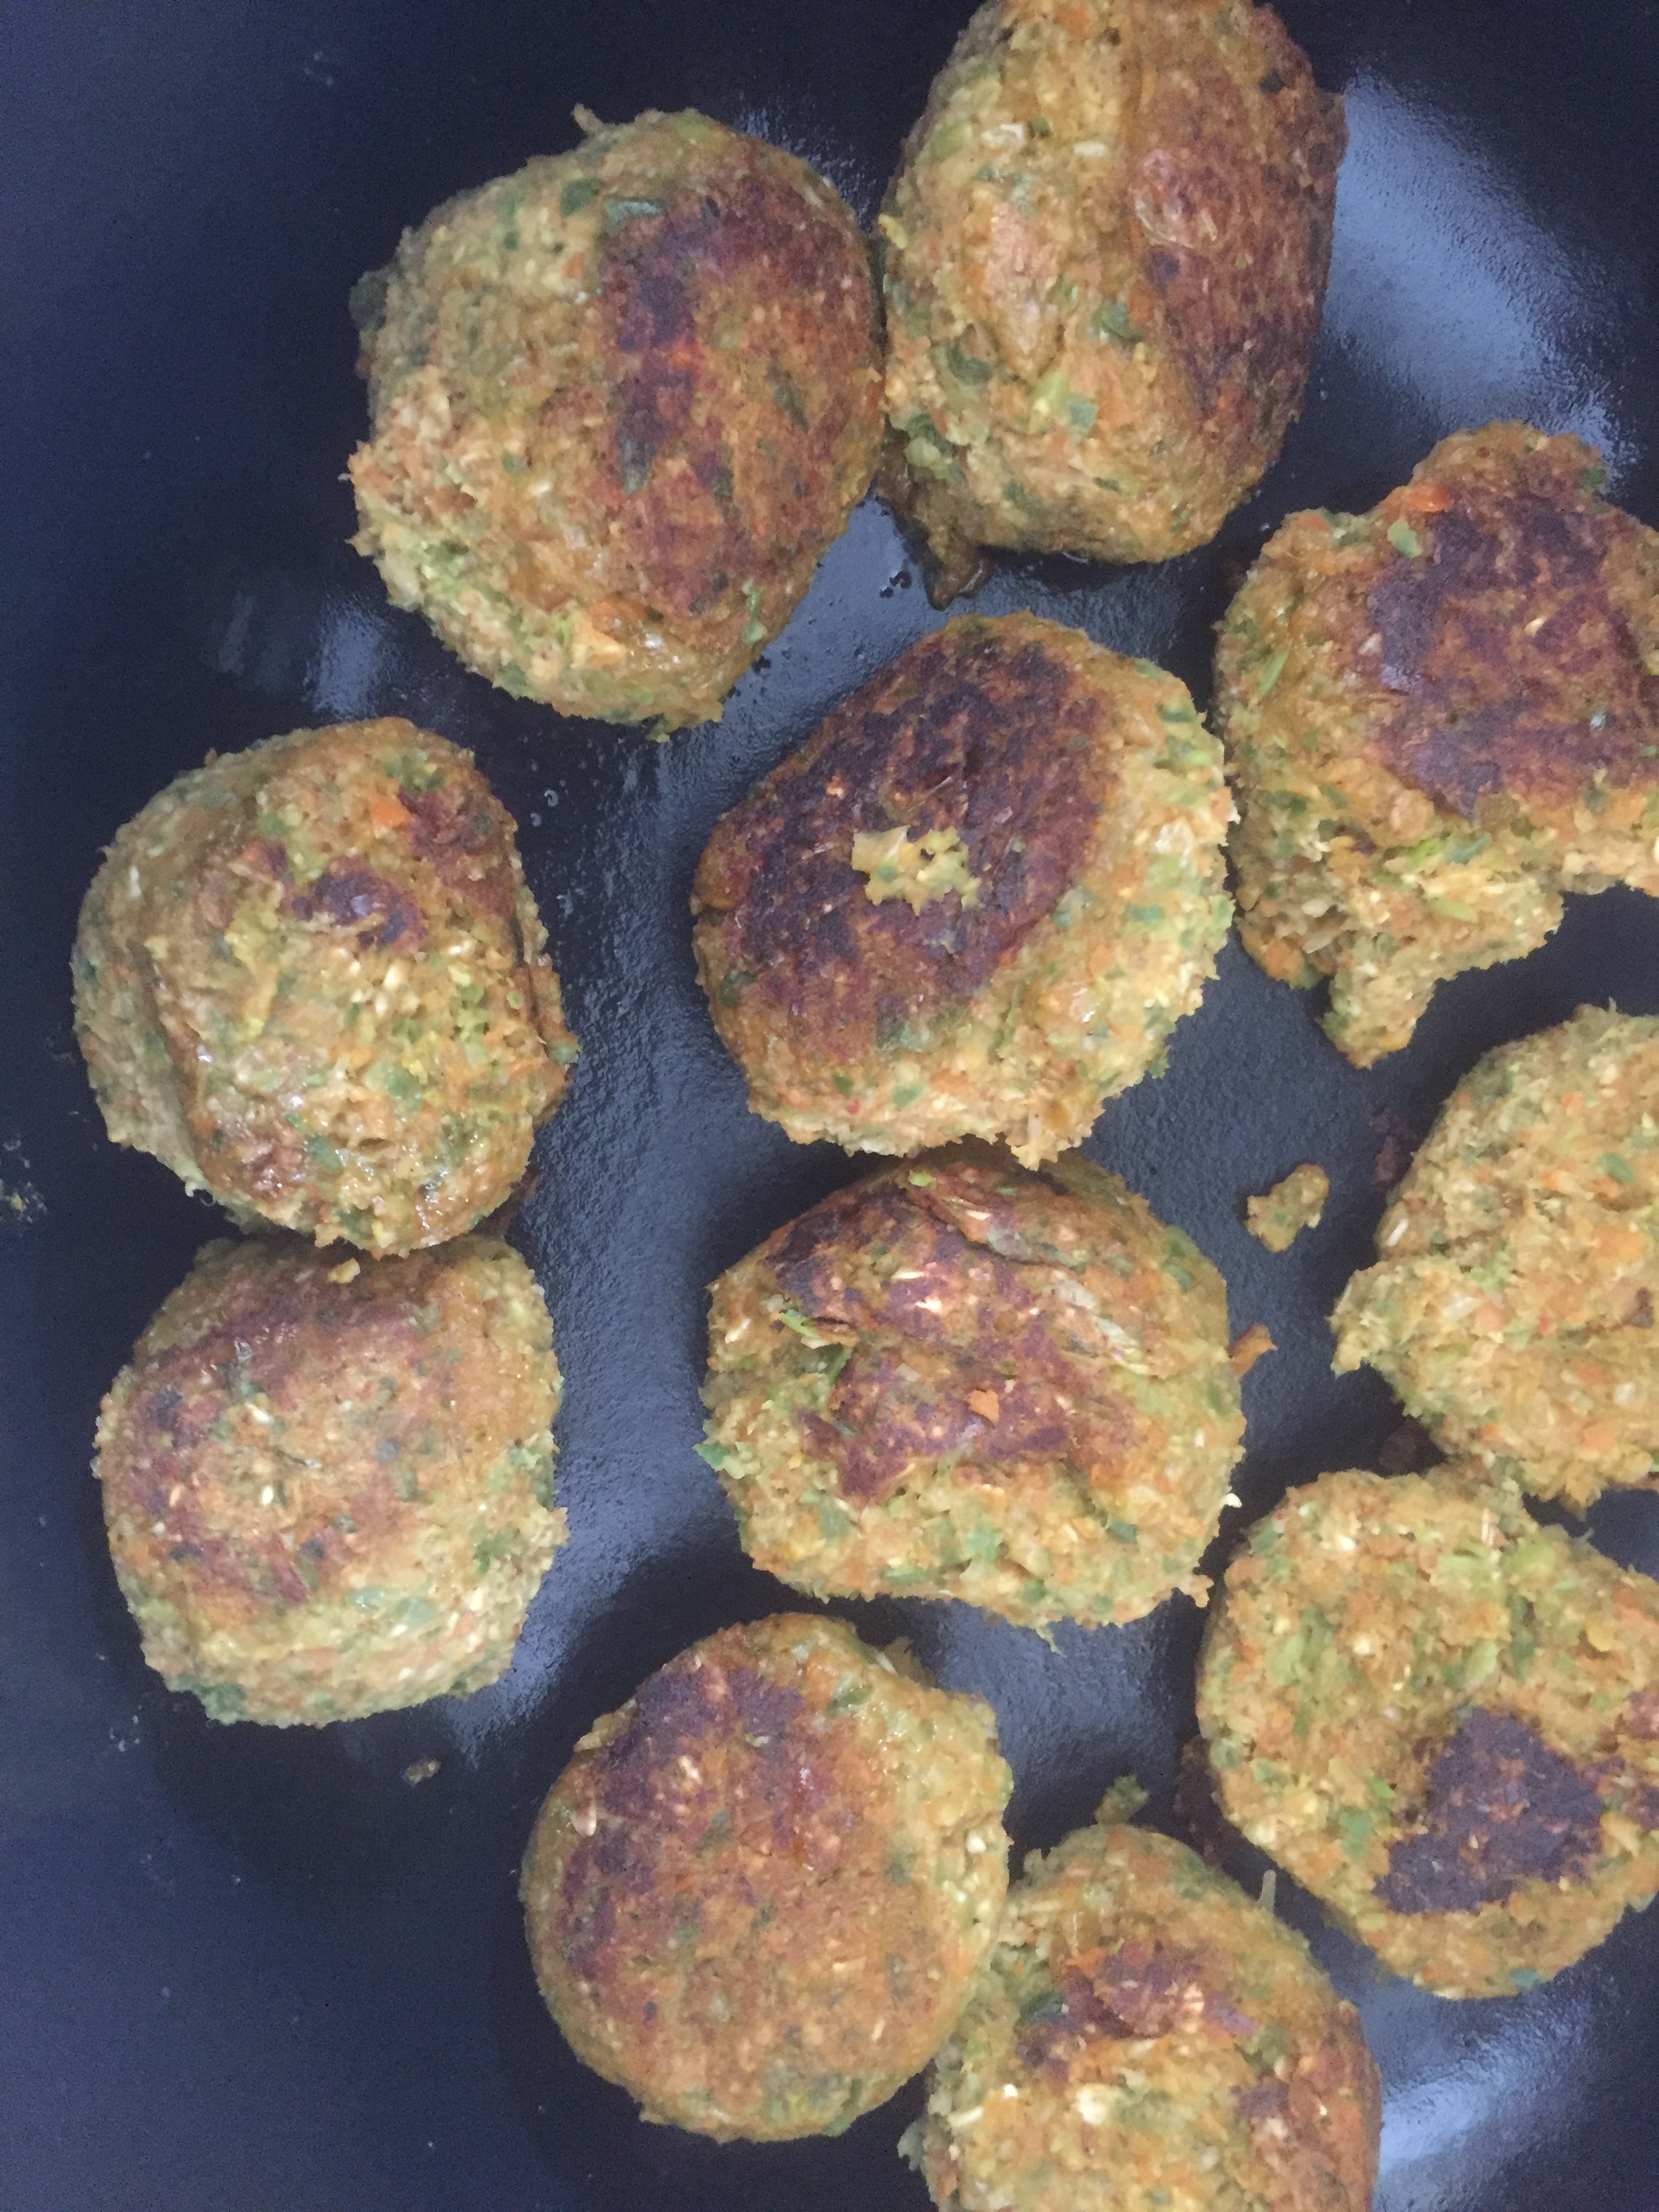
Vegan “Meatballs” Browned in a Dutch Oven, via Eat the Vegan RainbowOne word of advice is not to overcrowd your Dutch oven, and keep some room in between the “meatballs”. This helps them cook, and helps you maneuver them around. Once the “meatballs” are nicely browned set them aside and use the same Dutch oven for putting your tomato sauce together. I kept my recipe simple and my cost down by using canned crushed tomatoes and using some crushed garlic, dried oregano and dried basil to flavor the sauce. The sauce does not need to cook for long, and once it starts to simmer nicely and gently you can add the “meatballs” back.
Vegan Meatballs in Tomato Sauce, via Eat the Vegan RainbowDon’t forget to lower the heat , bring the post to a very gentle simmer, and put the lid on! Without the lid you will soon end up with tomato sauce all over the stove top and the floor as this sauce does erupt in tiny little tomato sauce geysers.
To keep the recipe ultra healthy and gluten-free, I paired the meatballs with simple Zucchini Spaghetti.
Place the frozen vegetable into a microwave safe dish and microwave on high for 5-10 minutes to thaw the vegetables and slightly heat them through.
Place the vegetables into a large mixing bowl. Use the stick blender to grind the vegetables into a relatively fine paste.
Add oats and blend again.
Add tomato paste, soy sauce, as well as onion, garlic, chili and lime chili powder. Mix well and let stand for 15 minutes or so.
Spray the bottom of a large Dutch oven with cooking spray and bring to medium high heat. Use 1/4 cup or the ice cream scoop to scoop out the “meatball” mix and form the balls. Place them into the hot Dutch oven and let brown for 2-3 minutes. Turn the “meatballs” over and brown on the other side. Take them out of the Dutch oven and set aside. Spray with more cooking spray if needed and add another batch of “meatballs”. Continue until all your “meatballs” have been browned.
Bring the heat up to high, add more cooking spray, and add crushed garlic and dried oregano and basil. Let it bloom, develop & release the aroma for 1-2 minutes. Add crushed tomatoes. Depending how much tomato sauce you’d like to have you may need to adjust the amount of crushed tomatoes you add. Bring the tomato sauce to a simmer and let it simmer for 5-10 minutes.
Turn the heat way down and add back the “meatballs”. You will likely have two layers of meatballs which is fine, but it’s a good idea to keep in mind that they are relatively soft so treat them gently! Make sure they are nicely snuggled and covered by the sauce. Put the lid on and let the “meatballs” and sauce simmer for 15 – 20 minutes.
When you are ready to serve, start with a generous amount of Zucchini Spaghetti, add couple of vegan meatballs, spread some sauce, and top with fresh basil. Enjoy!
Update: Few days ago I used the same “meatball” mix and made a “meatloaf” out of it. It worked really well!!! Here are couple of pictures to show you what it all looks like. One tip: bake the “meatloaf” on 375 F (190 C) for 25-30 minutes first, before putting on the tomato paste, then bake for 15 minutes more. Let the “meatloaf” stand for 15 minutes before cutting – the loaf will be soft when it comes out of the oven but it will firm up!
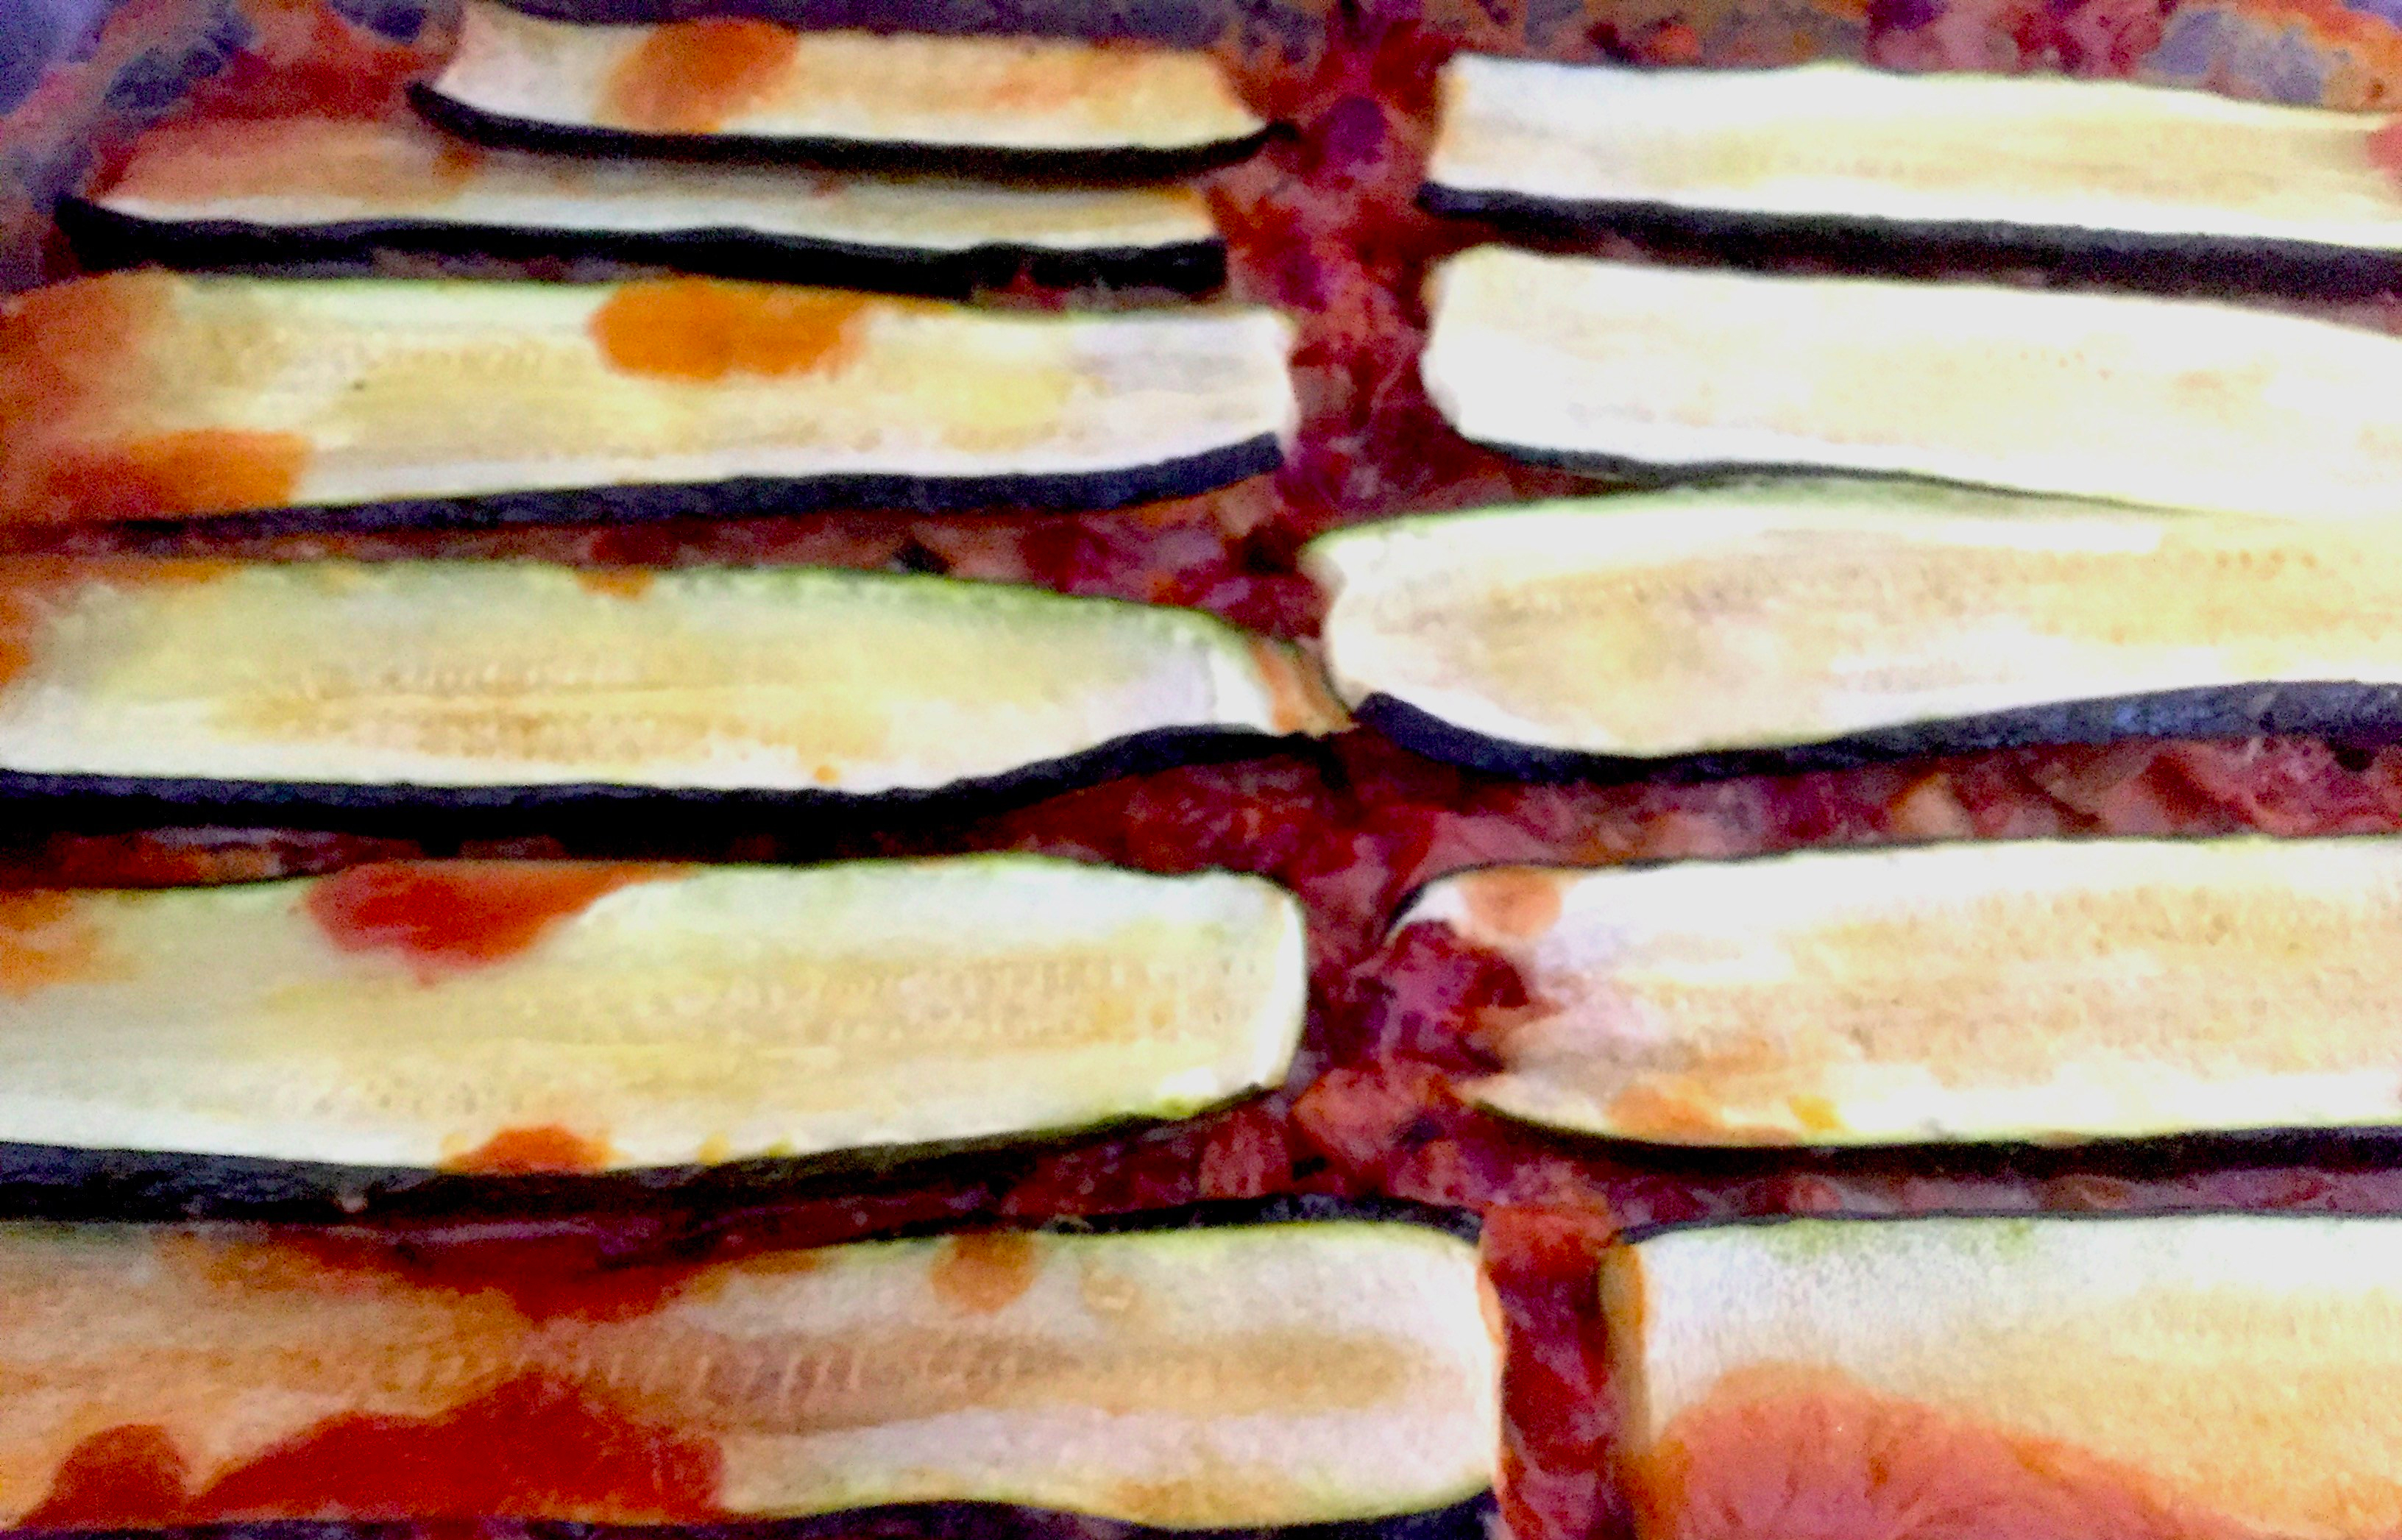
Vegan Zucchini Moussaka, via Eat the Vegan RainbowGrowing up moussaka was probably one of my least favorite dishes. Somehow, layers of potato and ground meat, cooked in rich Béchamel-type of sauce just did not work for me. The version that used zucchini instead of potatoes worked a little bit better, especially when paired up with plain yogurt, but even then the dish was too bland yet to heavy for me.
I decided to give the moussaka of my youth a vegan make-over and I’m happy to report that veganizing this traditional recipe worked! I used rainbow carrots, yellow onion, celery, vegan ground “beef”, all the zucchini ends that are not quite right shape or size to make good layers, and a generous amount of tomato paste for my stuffing.
Zucchini Moussaka ingredients, via Eat the Vegan RainbowFor Béchamel sauce, which usually uses flour, butter and milk, I used almond milk, nutritional yeast and corn starch to make the sauce vegan and gluten free. My moussaka starts with a well oiled deep baking dish, a layer of zucchini slices, stuffing, another layer of zucchini slices and finishes with the vegan Béchamel sauce.
Zucchini Moussaka with Vegan Béchamel sauce, via Eat the Vegan RainbowThe assembled moussaka goes into the oven to cook covered for 30 minutes and uncovered for another 15 minutes. The vegan Béchamel sauce gives this dish great thickness and richness, without making the moussaka heavy. Your taste buds and your tummy will thank you for taking it lightly!
Vegan Zucchini Moussaka
What you’ll need:
4 zucchinis
4 rainbow carrots, diced
6 stalks celery, diced
1 yellow onion, diced
1 cup of vegan ground “beef”, store bought or homemade
2 tablespoons tomato paste
1 teaspoon smoked paprika
2 cups unsweetened, plain almond milk
3 tablespoons corn starch
1 tablespoon nutritional yeast
Cooking spray
What you’ll do:
Preheat the oven to 350 F (175 C).
Spray the bottom and sides of your 13 x 9 in (33 x 23 cm) baking dish with cooking spray. Set aside.
Wash and slice zucchini lengthwise to make 16 to 18 slices that are about 1/4 in (6 mm) thickness. Don’t throw out the left over and edge pieces – dice them to medium size dice and put them in a large mixing bowl.
Add diced onions, carrots and celery to the mixing bowl, as well as vegan ground “beef”, tomato paste, and smoked paprika. Mix well.
Line the bottom of the baking dish with zucchini slices. Pour the filling into the dish. Top with another layer of zucchini slices.
Separately, mix the almond milk, corn starch and nutritional yeast together. Make sure the mix is smooth and lump free. Pour over the moussaka.
Cover the moussaka with foil and bake for 30 minutes. Remove the foil and bake for additional 15 – 20 minutes, until the top is nicely browned.
Take out the oven and let stand for 5-10 minutes before serving.


")