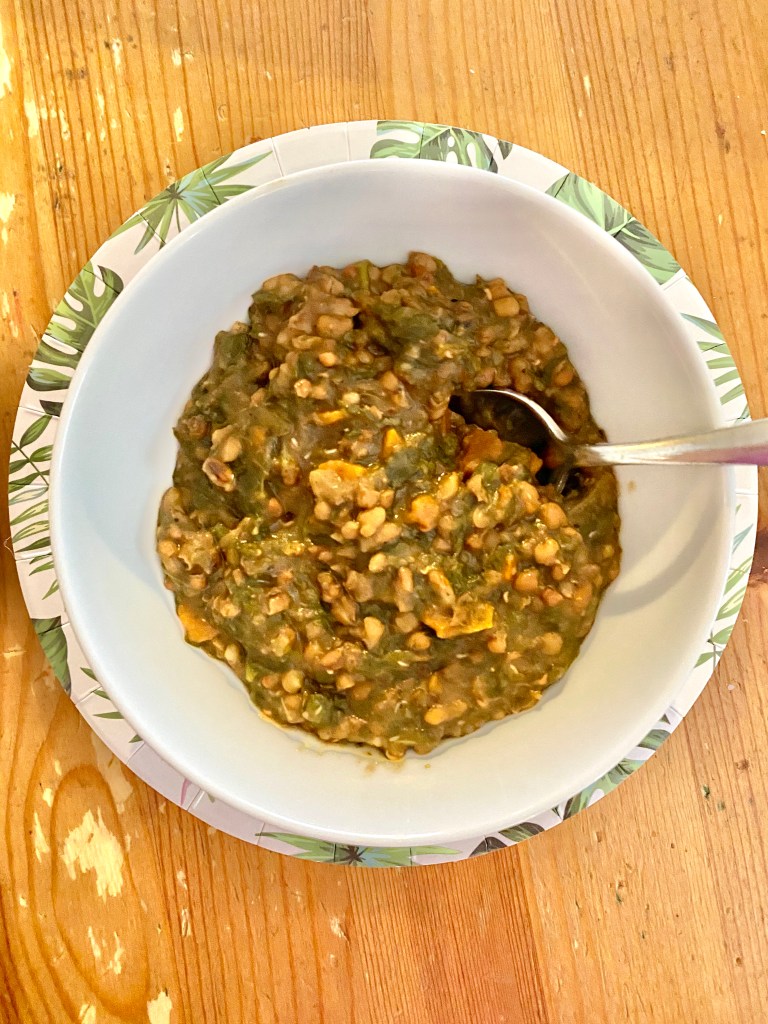
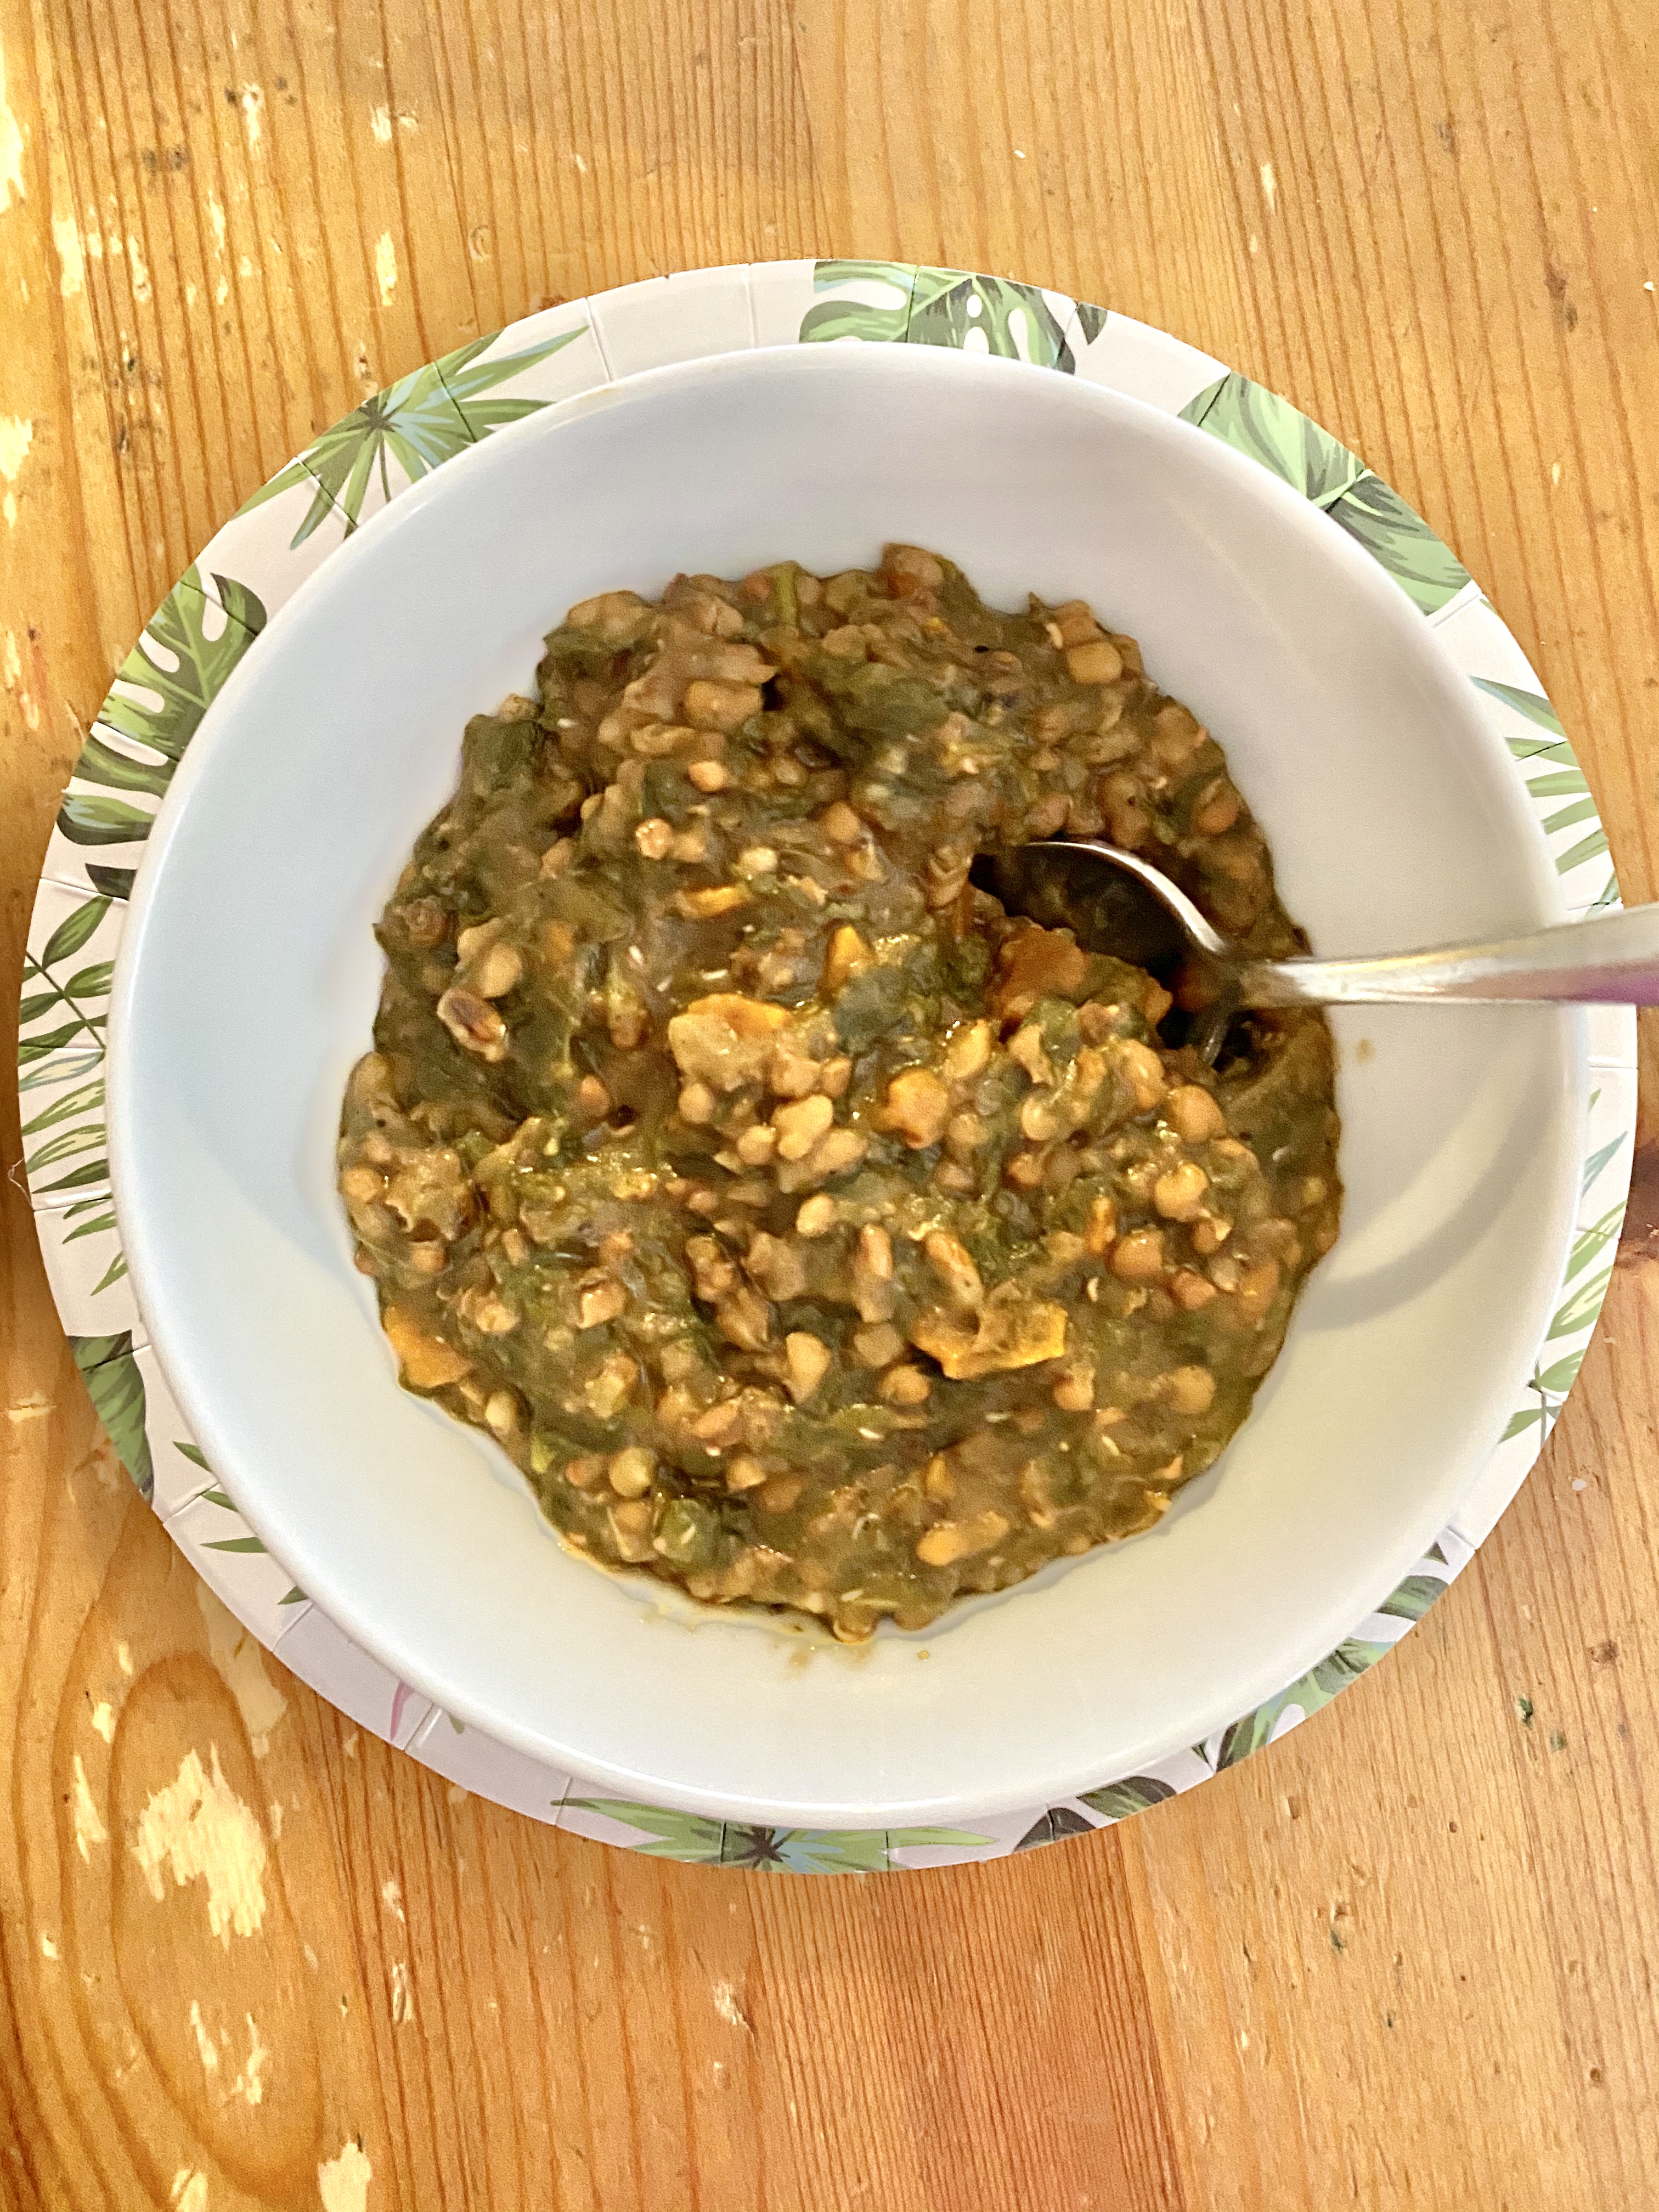
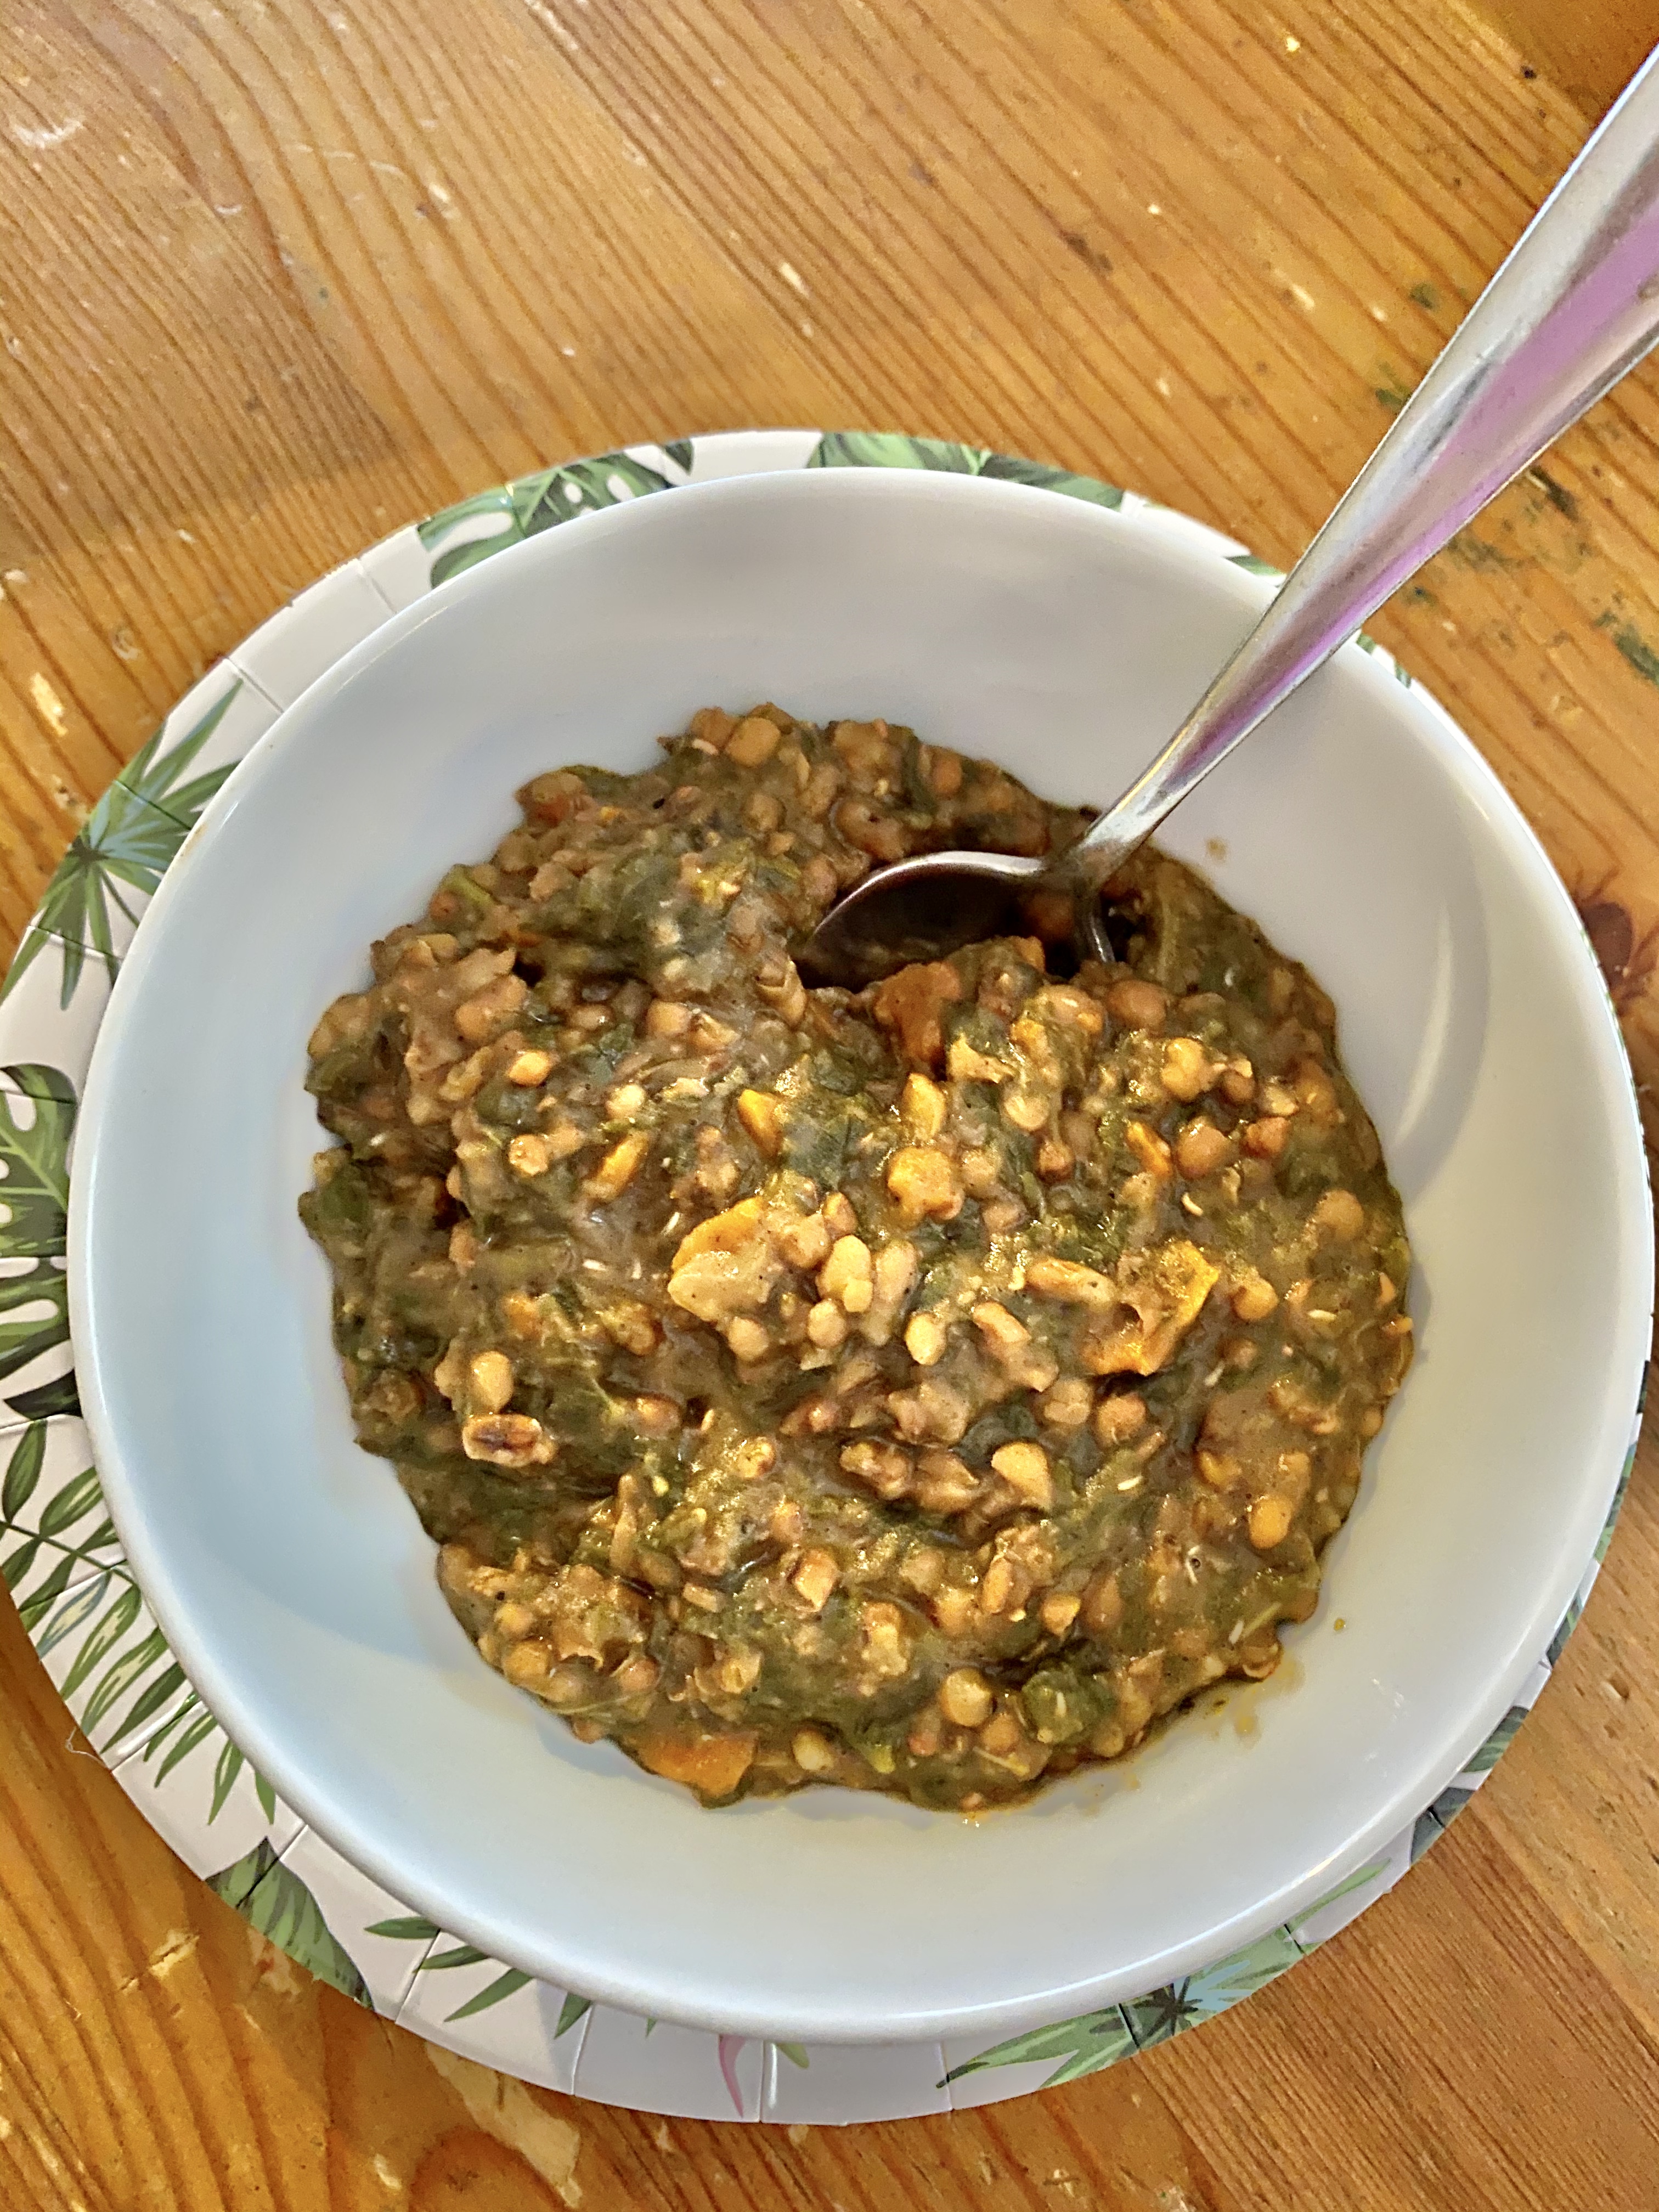
Moth Beans with Spinach, via Eat the Vegan Rainbow
Beans come in many different shapes and sizes. Moth beans are probably the smallest bean variety I ever dealt with. But, their nutritional value and taste run large, so I hope you give them a try.
Enjoy!
Moth Bean Stew with Spinach – Pressure Cooker Recipe
What you’ll need:
1/2 yellow onion, diced
3 large carrots, washed, peeled and finely sliced
3 stalks celery, washed and finely sliced
2 cups moth beans, dry, rinsed (if you are using a pressure cooker you can skip pre-soaking; otherwise pre-soak for at least 6 hours, then drain and rinse before cooking)
1 lbs (454 g) spinach, fresh or frozen
4 cups water
1 tablespoon oil (canola, sunflower or similar)
1 tablespoon garlic powder
1 tablespoon dry mango powder, usually found in speciality stores or international food isle (or replace with a tablespoon of lime or lemon juice)
2 tablespoons garam masala (or cumin powder)
1/2 teaspoon of salt (or salt to taste)
What you’ll do:
Turn your electric pressure cooker to Sauté option. If you don’t have a pressure cooker or if your pressure cooker does not have this option, place a pan over medium high heat and sauté onions, celery and carrots for 5-10 minutes, until softened and slightly browned. If you are following oil-free diet, sauté on water. Otherwise, you can use a tablespoon of oil for this.
Next, add the beans, spinach and water. Close the pressure cooker and select Bean/Chili option. If you presoaked the beans, the cooking time will be about 15-20 minutes, if you skipped presoaking the cooking time will be about 30 minutes. If you don’t have a pressure cooker, you can continue to cook the beans on the stove top. It will take 1 hour or so, if working with presoaked bean.
After the pressure cooker cycle is done, let the pot depressurize, them open the lid and mix the beans. To the beans add the toasted spice mix.
To toast the spice mix, bring a frying pan over the high heat. Add the oil, then the spices (garam masala, dry mango powder, and garlic powder). Toast for 1-2 minutes, then add to the bean stew. Add the salt and mix well, to incorporate. Let the beans cool just slightly before serving. These beans are delicious with some rice or quinoa!
Here where I live, and I imagine where you live too, schools have been closing, events are being cancelled, and most people are advised to work from home and stay away from large gatherings (where I work, we are down to less than 25 people). It’s called social distancing and it is one of the strategies that can help reduce the impact of COVID-19.
In these times of uncertainty and anxiety many will turn to comfort food (I’ve already seen posts about people getting into their Nutella reserves!). And: many will turn to their pantry for the ingredients. So, this recipe is made for such a day, when you want to make something really comforting and filling with things you likely already have on hand: rice and beans.
The recipe here was inspired by an old Italian favorite called Pasta e Fagioli – a pasta and bean soup/stew that is absolutely delicious. This time around I wanted to replace pasta with rice, and see where we end up. Where things ended up was a really rich, and dense stew/casserole dish, with a lot of rich flavors working in harmony!
I took one shortcut to make putting everything together easier and used canned white beans, also known as cannellini beans. Beans are a great source of plant protein and I always have a good supply of canned beans in my pantry. White (cannellini) beans are a fantastic basic bean, and I use them in many different ways, for example in burgers, pasta sauces, or soups. I also used them to make a marvelous mushroom pâté!
If you have dry beans, please remember to soak them overnight before cooking. I recommend that you cook beans first before using them in this stew. The amount of dry beans you need for this recipe is about 1 to 1 1/2 cup, however I recommend that you soak and cook a full batch (in my house that’s usually 1 lbs (about 500 g)), and use the leftover beans for something else, perhaps one of the recipes I listed above. This will save you some time and help with meal prep and batch cooking.
The dish itself is one-pot – all the ingredients go into a single pot, and the lovely meal comes out. Please note that the pot needs to be oven safe, as you will move the dish from the stove top into the oven. I recommend using a Dutch oven or another heavy and sturdy type of pot. If you don’t have such a thing, you can transfer your stew into an oven safe dish and proceed from there. Please note that the food will be very hot, and you can burn yourself badly if you are not careful!!!
Finally, you have options when it comes to rice. To keep things authentic, you may want to choose a short grain rice, like Arborio, as this will give you a creamier texture. However, you don’t need to lose any sleep over the rice choice here and use whatever you have on hand. As you can tell from my pictures, I used a very long grain rice known as Basmati rice, which is the staple I have in my pantry.
Note: When combined with rice, beans make a complete protein (meaning includes all the essential amino acids that we need), just in case you were wondering. In general, if you eat a varied plant-based diet, you really don’t need to stress over whether you are getting enough protein and whether it is complete, because the quick answer to this is: Yes, you are! Plants have plenty of protein, and people eating fruits, vegetables, nuts, legumes, and whole grains are all set.
Italian Rice and Beans, via Eat the Vegan Rainbow
Italian Rice and Beans – Riso e Fagioli (Oil Free)
What you’ll need:
1 cup rice, washed and rinsed
1/2 yellow onion, diced
1 sweet pepper, diced (any color or type provided it’s not hot; you can also used frozen)
2/3 cup tomato paste
1 14.5 oz (400 g) can diced tomatoes
2 15.5 oz (440 g) can white (cannellini) beans, drained and rinsed
Place the Dutch oven over medium high heat. Add the diced onions and dry sauté until soft and slightly browned. You may need to add some water to prevent onions from sticking to the bottom of the pot and burning. Keep stirring! (Note: If you are OK with using oil in your cooking, you can sauté the onion in some olive oil – 1 tablespoon should be sufficient).
Add the diced peppers, and continue sautéing for another 5 minutes, with frequent stirring, until peppers soften.
Once the peppers are softened, add the tomato paste and mix well. Let the tomato paste bloom for 1-2 minutes with frequent stirring.
Add the rice, beans, herbs, water, and diced tomatoes. Stir well and let come to boil, then transfer into the oven and leave in there for 30 minutes.
Take rice and beans out of the oven and enjoy! I recommend topping each plate with some fresh basil, and if you are not entirely oil-free with a drizzle of good olive oil and/or some parmesan (vegan, for those who are vegan or regular if you are a vegetarian or transitioning to plant-based diet), or some nutritional yeast (that’s my guilt-free favorite!!!). A simple side salad will complete this nicely, but if you are out of fresh produce due to social distancing, a pickle may work just as well!
Vegan Take on Smokey Shredded Pork and Beans, via Eat the Vegan Rainbow
If you Google “Pork and Beans” the first thing that pops up is the Weezer‘s music video for their “Pork and Beans” hit made more than ten years ago. Armed with YouTube celebrities of the day and a pile of erupting Diet Coke + mentos experiments, it is a site to behold!
This, on the other hand, is a story of actual pork and beans, well not the actual pork part of it, but the vegan version that works. But, the final dish is a real team effort as was the crazy Weezer’s video. What do I mean by that? Well, none of the ingredients below would work on their own to re-created deep flavors of smoked meat. Put them together (and treat them right!) and they will deliver.
The base for this concoction are onions, carrots, and celery, which you will need to chop and slice relatively finely, then let caramelize, and even burn, over medium-high heat until cooked. And when I say burn, I mean burn – you definitely don’t want to end up with a black mess but I want you to let some of your base vegetables get a bit black. The char will help the sauce get it’s final deep flavor. The best way to accomplish this is to stop mixing the veggies towards the end and let some of them stick to the bottom of either the Dutch oven, or a large cast iron pan – I recommend using either one of those here.
Additional things that will help the flavor are liquid smoke and/or mesquite powder and chipotle chiles in adobo sauce. There is lots of heat in the chilis so unless you are a real lover of hot food, I recommend you go easy and you use only the sauce. You can store the leftover chilis and the sauce in the air tight container in the fridge for a month and use in other dishes. If you don’t have any of these on hand, some smoked paprika and chili powder will probably work – I have not tried this substitution but I’m guessing you’ll be fine.
You will also need plenty of beans, and although I used red kidney beans you can use any variety of beans you have on hand, except maybe butter beans as they are huge and your final texture will probably be a bit weird. You can used canned beans or, as I did here, start from dry beans, which I soaked overnight, and cooked in a pressure cooker.
You will also need jackfruit, and if you are unfamiliar with that ingredient you should probably get to know it. Jackfruit is this magnificent beast of a fruit that’s huge and looks really unwieldy – so I stay away from getting it raw and buy canned young (green) jackfruit in brine. This type of jackfruit can be used for many savory dishes and I love it in vegan versions of crab cakes, clam chowder, stews, barbacoa, and pulled pork. What makes jackfruit perfect for dishes like these is it’s appearance more than anything else – when pulled apart, it looks like shredded meat or lumps of crab.
Vegan Smokey Shredded Pork and Beans
What you’ll need:
1 onion, finely chopped
2 cups carrots, finely chopped
6 stalks celery, finely chopped
6 cloves garlic, thinly sliced
1-2 tablespoons chipotle chiles in adobo sauce (I prefer to use just the sauce)
1 tablespoon mesquite powder and/or liquid smoke
1 can (6 oz, 170g) tomato paste
3-4 cups mushroom stock (store bought or homemade)
1 lbs (450 g) dry red kidney beans, fully cooked or 2 29 oz. (822g) canned beans, divided
2 cans green (young) jackfruit in brine
Cooking spray
What you’ll do:
Spray the Dutch oven (or any other heavy and deep pot you are using) with a good amount of cooking spray – enough to cover the bottom and the sides. Place over medium high to high heat, add chopped onions, carrots, celery and garlic. Mix well and cook for about 10-12 minutes. You want the vegetables to be fully browned, even slightly burned, so you don’t need to stir very frequently but you do need to keep an eye on them so they don’t become a burnt mess!
Add the next three ingredients (adobo sauce, tomato paste and liquid smoke or mesquite powder), stir well, and cook for another 1-2 minutes.
Add a cup of mushroom stock to deglaze the bottom. You want to make sure that you loosen all the flavorful bits and pieces that have been stuck to the bottom of the Dutch oven. If you need more that 1 cup of the stock to deglaze the bottom, add more! Once you are done deglazing, turn the heat off.
Caution – you will be working with hot ingredients so be careful! Add 2 cups of mushroom stock into the blender, then spoon your hot ingredients in, and add 2 cups of cooked beans. Cover the blender, and blend until smooth. If you don’t have large enough blender to do this all at once, blend in batches. If you have a stick blender, you can transfer everything into a large bowl and blend with the stick blender. Set the blended sauce aside.
Prepare the jackfruit by draining the cans into a strainer and rinsing the brine of under some cold water. Shake the access water off and pat dry if needed. Pull the jackfruit apart, discarding any very tough core pieces (there will likely be a few of those and if you can’t get your fingers through it means it’s best to get rid of them as they will be hard to chew).
Spray the Dutch over with more cooking spray, bring back to high heat and add the pulled apart jackfruit pieces. Let the jackfruit burn a bit before stirring. You want pieces to get browned and slightly charred on at least one side. This can take 5-10 minutes.
Add the rest of the beans, and mix well. Cook for another 2-3 minutes, then add the sauce and mix well. Lower the heat down and simmer for an additional 10 minutes or so with the lid on.
Serve over rise, couscous, as a burrito, or as a taco. Enjoy with a wedge of lime, chopped avocado or with a scoop of sour cream.
I grew up eating pâté and loving it. Some pâté, on a piece of freshly baked bread with a glass of yogurt (yes, the liquid kind you drink like they do in Middle East!) was one of my go to breakfasts. And the pâté I ate was not a fancy French kind made with duck fat. At some point I learned that it was actually made of who know what, random bits and pieces of an animal all ground up. Whether you eat meat or not, I hope we can all agree that that’s pretty unappetizing when you think about it!
But: if you don’t think about it and just go with your taste buds, pâtés are really tasty. They are full of umami, savory flavors that we all crave, they are silky and smooth, they are nicely spreadable, and they are an excellent add-on to a nice piece of bread. So, how can we re-create the perfect savoriness with just a small number of ingredients, and make a healthy and satisfying pâté that will keep you coming back for more?
Well, we start with mushrooms, the well-known source of umami. You can use white button mushrooms here or baby bella (cremini) mushrooms as well. I do not recommend some of the mushrooms that have distinct flavors, like shiitakes; however, other mild mushrooms may work. Still, white button mushrooms are readily available, affordable and work!
Another important umami component is tomato paste. Here, you can use any tomato paste you have on hand and you can adjust the amount – anywhere between a tablespoon or two will do the trick.
To make the dip smooth and rich in protein, I recommend adding canned beans. White beans work best (cannellini, great Northern or navy), but any other variety will probably be OK. If you cook your own beans, I recommend that you keep them slightly undercooked for this application, or at least squeeze some of the excesses liquid out before blending to avoid ending with a pâté that’s more of a soup than a rich and dense spread.
The main flavoring agent here is Herbes de Provence, a mixture of dried herbs that usually includes thyme, rosemary, oregano, marjoram and lavender. I use Trader Joe’s version, and they carry it only as a seasonal item in the fall, but any other mix with the same name will do. Alternatively, you can add a pinch of thyme, rosemary, oregano, and other herbs (including basil) that you may have on hand.
Finally, what also adds a lot to this pâté is sautéing and caramelizing onions, garlic and mushrooms before blending everything together. This will help the flavor deepen and develop!
Looking for serving suggestions? You can use it as a spread or a dip, as a pizza “sauce” and topping (why not?), in your quesadillas (let’s be adventurous!), for your baked potatoes, or for any other dish where you feel the need to add rich, yet smooth flavors. Enjoy!
Nut-free Mushroom Pâté, via Eat the Vegan Rainbow
Mushroom Pâté
What you’ll need:
8 oz white button mushrooms (or cremini mushrooms if you like stronger mushroom flavor), sliced
1/2 large, white onion, diced
4 cloves garlic, sliced
2 tablespoons olive oil
2 tablespoons tomato paste
2 teaspoons Herbes de Provence
1 15 oz (425 g) can white beans
Salt to taste
What you’ll do:
Place a large sauté pan over medium high heat. Heat up than add the oil and onions. Sauté for 2-3 minutes, then add the garlic. Let garlic start to release its aroma – this usually takes a minute.
Add the mushrooms and , increase the heat to high, mix well and sauté until mushrooms are browned. This will take about 4-5 minutes.
While the mushrooms are cooking, drain and rinse the can of beans. Shake access water off and place into a food processor or a large mixing bowl if you rather use a stick blender (this is an incredibly useful kitchen gadget and it’s what I used here).
Pour the sautéed mushrooms over the beans and blend until smooth and combined. Leave in the refrigerator until ready to serve.
Serve cold as a spread for sandwiches or as a dip for chips or crackers. This pâté is excellent addition to your menu and it offers a healthy and humane alternative.
Beans are an essential staple of every vegan kitchen. Beans are rich in fiber, especially soluble fiber, which is taught to lower bad cholesterol, folate, good carbohydrates, and plant protein. That’s what makes beans an essential component of plant-based eating.
Beans come in many different colors and sizes – they can be white, like northern, lima, and navy beans, pink to dark red almost brown, like light and dark red kidney beans, black, like black beans, or multicolor, like black-eyed peas (which are actually beans) and pinto beans. All these varieties have slight differences – different cooking times, texture and flavor, not to mention appearance.
For example, if you are looking to make a mild dish that is smooth and buttery, you may want to go with navy beans or cannellini, which both work in a dish like this Tuscan-Style cassoulet, and if you are looking for a playful dish, like this Cowboy Caviar, you may want to reach for black-eyed peas.
I use beans all the time, and use both dry beans and canned beans. Canned beans are super quick and convenient, while dry beans are a bit cheaper, plus give you complete control over the amount of salt that goes in. But: dry beans do take a bit of time to make if you are using a traditional, pot on the stovetop method. Even with soaking the beans overnight, it will still take about 2 hours of cooking time to soften the beans. My preferred way to prepare dry beans is to soak them overnight, then cook them in a pressure cooker until done, and then incorporate them into whatever you are making. And although some claim that the pressure cooker will cook your beans quickly even if they have not been soaked, I have not tried this yet, so can’t advise on this here. An alternative is to use a slow cooker – overnight soaked beans should take about 6-8 hours.
Recently, while browsing around in a grocery store, I discovered something new: Hurst Hambeens 15 Bean Soup Mix. This bag included a mix of 15 different legumes: beans (northern, pinto, large lima, blackeye, baby lima, kidney, cranberry, small white, pink, small red, white kidney, black), as well as lentils, yellow split, and green split peas, and chickpeas. And, of course, I had to give this mix a try!
Apparently, this mix is traditionally used for a ham soup and comes with a bag of seasoning included. I decided to take the mix in a different direction and go for a chili. Chili is a rich and thick bean stew, full of smokey flavors, and a bit of heat. It’s usually made small red beans, but I figured the more could be the merrier, so I went for it!
The recipe below uses stovetop cooking method, but you can definitely make this in a slow cooker (crock pot). And if you don’t have this specific bean mix, you can make one yourself by measuring about 1/4 cup of dry pinto, black, red kidney, black-eyed and navy (white) beans, as well as lentils, chickpeas and yellow and green split peas. Although not the full 15 bean range, there is enough variety in this mix that you will still get all the benefits of flavors and textures. Have fun!
Rinse the beans, then cover them with water and soak overnight. If you are in a hurry you can also do a quick soak by: rinsing the beans, placing them in a pot, making sure they are fully covered with water, brining the water to boil, boiling for 5-10 minutes, turning the heat off and leaving the beans in hot water for an hour.
After the beans are done soaking (either overnight or using a quick method) rinse them well and set aside.
Place a large Dutch oven or another sturdy pot over medium high heat, add 1 tablespoon of oil, and onions, garlic and carrots. Let these caramelize, which can take up to 15 minutes. Don’t stir to frequently as you want to let the vegetables get slightly burnt and charred – that will add deeper flavors to the chili.
Add the tomato paste, cumin and chili powder, coat everything well and cook for another 2-3 minutes.
Place 1 cup of vegetable stock into a blender, then add the onion, garlic, carrot and spice mix, and 1 cup of soaked beans. Blend everything until smooth and take care not to burn yourself as the mix will be hot.
Add the rest of the oil to your Dutch oven, pour the mixture from the blender back in, add the rest of the bean mix, another cup of vegetable stock and bay leaves. Mix to combine and bring to boil. Place the lid on, lower the heat to steady low level boil, a bit more than a simmer, and cook for 2 hours, stirring occasionally. Check after about an hour, as you may need to add more vegetable stock.
Serve with some shredded cheese, sour cream, or diced avocados, and definitely with some corn bread, like this basic gluten-free version (nice and crumbly, perfect for chilis), very corn-y corn bread, or the more flavorful corn bread muffins.
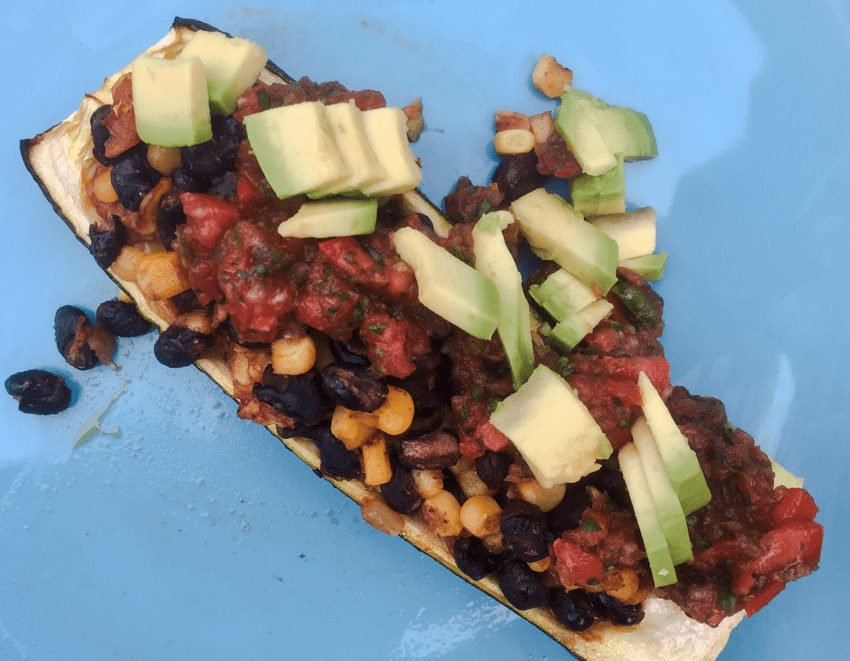
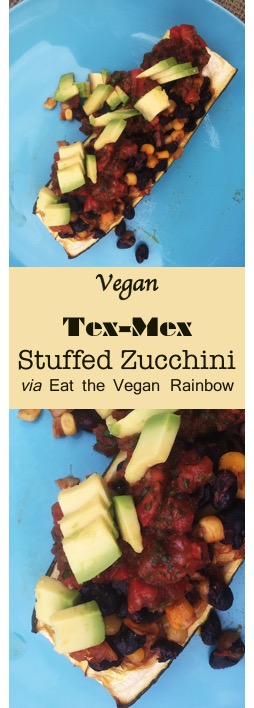
Tex-Mex Stuffed Zucchini with Homemade Salsa and Diced Avocado, via Eat the Vegan Rainbow
When life gives you zucchini, there are actually many things you can do with it, grilling and sautéing being my go-tos most of the time. But, doing same thing over over again, no matter how tasty and satisfying they are, does get old. When it comes to zucchini, I have been trying new things, like zucchini lasagna, and zucchini fruitcake – I did also give zucchini cheese a try but that one did not work for me, so I am putting my zucchini cheese making days behind me.
To me, perfect stuffing zucchini is about 8-9 in (20-25 cm) and what makes this the perfect size is the fact that it matches is the size of my 9 x 13 in (23 x 33 cm) baking dish! Plus, the zucchini in this size range is in the Goldilocks zone – not too big and not too small, yet just right for carrying a good amount of stuffing.
The best way to get the zucchini ready for stuffing is to wash them, cut the ends off (this step is actually optional, you could skip it and leave the ends on – this would give your dish a nice, rustic presentation at the end), then slice the zucchini lengthwise and scoop out the seeds. If the zucchini is old and seeds look well-formed and unappetizing, please feel free to discard them. But, if the inside looks fresh and soft, scoop it out into a bowl and put aside to use as a part of the stuffing.
Par-roasting zucchini
You may have heard about par-boiling, when you boil something only half way through before doing something else with it. Par-roasting is essentially the same thing, just using roasting as a strategy to get the nice, roasted and caramelized flavors going without too much oven time. This can come in handy during hot summer months, for example.
I use par-roasting when prepping most of my stuffed vegetables, be it mushrooms, peppers, eggplant, or zucchini. The method is simple: you turn your oven on high (425 F (220 C) or higher), line a baking sheet with some parchment paper, toss the veggies with some oil, or spray with some cooking spray, or skip the oil altogether if avoiding fat (you can also sprinkle salt on if using, I don’t because the stuffing is usually plenty salty for me), and let the veggies brown for 15 minutes or so, flipping them over once if needed to get them equally browned on both sides.
Why par-roasting?
Well, most stuffing I make is already cooked by the time all is said and done. So, the stuffing itself usually does not need any more cooking time – all it needs to do is go into the oven for 10 minutes or so to get nicely browned on top. Par-roasting is my way of brining whichever vegetable is supposed to hold the stuffing up to speed so that the vehicle is ready for the final oven ride, when the stuffing gets browned and the vehicle finishes baking while absorbing some of the flavors that seep from the stuffing. In this way everything gets harmonized and delicious.
My secret to a perfect (and easy) Tex-Mex flavor
The best way to get the tex-mix flavors going is to start with a good chili powder, then add cumin powder and smoked paprika. These three things combined make for nice smokiness with just a hint of heat, so even with the amount of chili powder I use here the heat will not be overpowering. Having said that, do adjust the chili powder to fit your preferences. Of course, having corn and black beans in this dish is also essential. Here, I used canned corn and canned beans, but you can definitely use frozen corn and cook your beans from scratch. If you are using frozen corn, 1-1/2 cups of frozen corn should be enough, and if you are cooking the beans, 1 cup dry beans will probably be plenty.
Easy homemade salsa
What also helps tex-mix flavors is topping the stuffed zucchini with some freshly made salsa. If you don’t have the time, store-bought is perfectly fine to use here, either freshly made or from a jar – you can pick your own favorite flavor and enjoy! But, if you do want a quick homemade salsa, then follow the instructions below. The main tip here is to cut the tomatoes lengthwise and scoop out the seeds. Don’t throw them out – you can mix them into the tex-mex stuffing! Here, almost everything goes into a food processor for easy chopping. I recommend leaving one cleaned out tomato aside, and dicing it finely by hand to give the final salsa a bit more texture. This salsa takes only a few minutes to make, and you will love the flavor of freshly chopped cilantro and freshly squeezed lime, so it is worth doing it from scratch.
Diced avocado for a final touch
Last but not least is the diced avocado. You actually don’t need the avocado if you can’t stomach it (I know there are some people out there that have trouble with avocado), but it does add a nice, smooth, rich and creamy flavor to the final dish. It’s like a five layer dip right there in your zucchini “boat”!
To pick the best avocado, get those that are still quite hard and then leave them next to some bananas on your kitchen counter for a day or so. The avocado will soften and then you can store it in the fridge until ready to use. In this way you will avoid getting avocados that are too bruised by all the squeezing and poking, and can buy extra avocados on sale and use them 5-7 days later.
After that PSA, back to the Tex-Mex Stuffed Zucchini – to finish the stuffed zucchini, squeeze some fresh lime juice over your avocado and sprinkle some fresh cilantro. If you are using homemade salsa you can skip the cilantro, but if you are using the store-bought then no cilantro-skipping is allowed!
Tex-Mex Stuffed Zucchini with Homemade Salsa and Diced Avocado
What you’ll need:
3 zucchini, washed but not peeled
1 15.25 oz (430 g) can yellow corn (whole kernel)
1 29 oz (820 g) can black beans
1 medium yellow onion, finely diced
4 cloves garlic, thinly sliced or crushed if you prefer
2 tablespoons vegetable oil
2 teaspoons chili powder
1 teaspoon cumin powder
1 teaspoon smoked paprika
Freshly ground black pepper and additional salt to taste!* (see Note)
1 avocado, finely diced, for garnish, optional
Fresh cilantro and freshly squeezed lime juice for topping (optional)
SIMPLE HOMEMADE SALSA
4 plum tomatoes, seeded, divided
1/4 – 1/2 jalapeño pepper, deseeded (or more, to taste)
1/4 onion or red onion
3 tablespoons tomato paste
1/2 cup fresh cilantro
1/2 lime, juice
1/4 teaspoon sat (more or less, to taste)
Cooking spray, salt, pepper
What you’ll do:
Preheat the oven to 425 F (220 C).
To make the salsa, cut the tomatoes lengthwise, the use a paring knife to take out the seeds and the middle of the tomato. Reserve the middles for the stuffing. Place all the ingredients, except one tomato into a food processor and buy until finely chopped. Dice the leftover tomato finely and mix in with the rest of pasta. Once mixed, set the pasta to the side.
Wash the zucchini, remove the ends, and cut lengthwise into two pieces (I prefer to remove the ends but you don’t need to do that). Use a teaspoon to scrape out the inside of the zucchini – if full of seeds you can discard, otherwise add to the tomato scrap pieces and put aside.
Line a large baking sheet with parchment paper. Spray with some cooking spray, then place zucchini on, spray the tops and place the zucchinis into the oven. Zucchini will be nicely browned in about 10 minutes. Take the zucchini out and set aside.
Lower the oven temperature to 375 F (190 C).
While the zucchini is par-roasting, get going on the stuffing. Add the oil to a large pan (frying or sauté) and place over the medium-high heat. Add the chopped onions and sliced garlic and let them caramelize for 2 minutes or so. Next add the spices (chili powder, cumin powder, smoked paprika) and let them “bloom” for 1-2 minutes.
Next add the scooped out zucchini and tomato scraps, and mix well. Sauté for couple of minutes, then add corn and black beans. For corn and black beans, I recommend straining them using a large colander, and rinsing them for half a minute under some cold water before using. If you are using frozen corn, or fresh corn, and the beans you cooked yourself this washing and straining step is, of course, not necessary! Mix everything well and sauté for another 8-10 minutes.
Spray a 9 x 13 in (23 x 33 cm) baking dish (or a large casserole pan) with cooking spray, then cover the bottom with a layer of stuffing. Place the par-roasted zucchini boats in and fill them with stuffing. Pile the stuffing high, and press gently in as you fill to make sure you get to all the little nooks and crannies. (You may end up with extra stuffing – if that’s the case you can serve the stuffing itself as a side for another dinner, for example this would be a grate thing to put into a taco shell and enjoy, or serve cold on your next tex-mix salad!).
Put the stuffed zucchini into the oven and bake for about 15 minutes. All you are looking for is some nice caramelization on the top and the sides. Pull the stuffed zucchini out, and let it cool for couple of minutes before serving.
When serving, top each zucchini boat with salsa and diced avocado, freshly chopped cilantro, and a squeeze of lime and you are done!
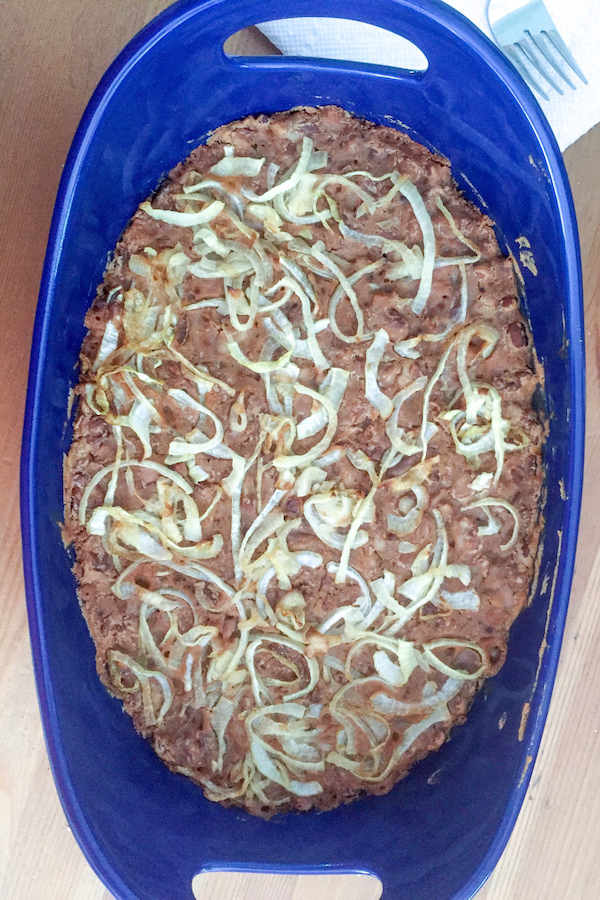
Sweet and Smokey Baked Beans with Caramelized Onions are a perfect side dish for your next BBQ, via Eat the Vegan Rainbow
Grillin’ and chillin’ – that’s what we are all going to be doing for the next couple of months. School is out, summer is here and what better thing to do than to enjoy some grilled foods and outdoor dining. So, if anyone ever asks you “Do vegans (or plant-based eaters) actually grill anything?” all you need to say is “You betcha” and invite them over for a grill and BBQ party. If you are looking for some inspiration, you may want to try these BBQ ribs, or portobello steaks, or grilled tempeh. Besides these you can grill eggplant, lots of other veggies, as well as peaches, pineapple, plums… Grilling is a lovely way to bring intense flavors out and works for a range of fruits and vegetables!
Having the right side dish on your side
Plus, vegetables (and fruit) are essential for making your cookout a really special and memorable treat for everyone. These ingredients get transformed into a lovely array of side dishes, and quite frankly I usually pile up those and completely ignore the “main” course. With things like spicy cole slaw, or corn bread (or corn bread muffins), or Mac’n’Cheese, or delicious collard greens, or potato salad, or… Well, need I say more? Side dishes are what makes these grillin’ and chillin’ cookouts fun!!!
Baked beans are an institution
Although all these side dishes are dear to my heart, none comes even close to baked beans! Baked beans are absolutely an institution, both in the USA where I live, and in the Balkans, where I come from. But we all know that they are more broadly beloved than that, and many countries and cultures across the globe have a very special and prominent place for baked beans. And although many would think that you can’t have an amazing baked beans without some smokey meat component in there, this is far from the truth.
Sweetness and smokey flavors make baked beans special
What makes baked beans really special is a combination of sweetness and smokiness. One way of getting lots of sweetness to your baked beans is to use some dark brown sugar, maple syrup or dark molasses. But, if you are not careful these can quickly overpower the dish. So, I recommend that you go easy on the actual sweetener, and use lots of sweet onion instead for a more subtle sweet flavor. Baked beans are also quite smokey, and here spices like smoked paprika and chili powder, as well as a dash of liquid smoke will go a long way. If you can’t find liquid smoke, ground cumin is an example of a common spice that has a natural smokey flavor, or you could consider adding one or two smoked peppers, whole into the beans and then fishing them out before serving.
Enjoy!!!
Sweet and Smokey Baked Beans with Caramelized Onions
What you’ll need:
1 large sweet onion, finely sliced
3 cups pinto beans, cooked or canned (if using canned rinse and drain the beans first)
Note: to make your own seasoning that’s enough for this recipe mix 1/2 teaspoon of raw sugar or 1/2 teaspoon of dark molasses, 1/4 teaspoon garlic powder, 1/4 teaspoon smoked paprika, 1/4 teaspoon chili powder, 1/4 teaspoon salt, 1/2 teaspoon liquid smoke.
What you’ll do:
Preheat the oven to 375 F (190 C).
Slice the large onion in half than place the cut side down on your chopping board and slice across to create thin onion ribbons. Once the onion is sliced, use your fingers to pull the ribbons apart.
Place a large pan over medium heat and bring to temperature. Add the oil and onion ribbons and caramelize the onions for 5 minutes with frequent stirring. You want the onions to be soft, and partly browned but not fully caramelized.
Add the beans and the spice mix to a large mixing bowl and use your hands or a large fork to mash and mix everything together. Approximately, half of the beans should be mashed and half should stay whole. This will ensure that your baked beans are creamy, yet have an interesting texture.
Spray the bottom of you baking dish with some cooking spray and spread the beans in an even layer. The best size of the dish for this amount of beans is 8 x 8 in (20 x 20 cm), or about 2 QT (approximately 2 L).
Arrange the partly caramelized onions on the top. Don’t mix them in, just let the onions rest on top of the bean mix. You can get creative here and make a pattern or a design, but I went rustic!
Place in the oven and bake for 20-30 minutes. When you see that the edge of your beans is browned, you are done! Serve as a wonderful side dish for you BBQ party, or use the next day to make a yummy breakfast burrito.
Sweet and Smokey Baked Beans with Caramelized Onions, via Eat the Vegan Rainbow – feel free to pin and share!
White Bean Burgers with Chia Seeds, via Eat the Vegan Rainbow
Another veggie burger, another sensation (if you like to see some past examples, there are here, here, here, and here)! And you don’t need to take my word for it, just go ahead and make a batch of these. First of all, they are ultra-cheap. I use dry beans and one pound, approximately half a kilo, of dry beans will make a huge pile of these burgers. At the end, I think my yield from this recipe was about 15 burgers. The burgers store well in the tightly sealed container in a fridge – you can keep them for a week – and reheat easily in the microwave oven, toaster oven or on the stove top. I am not entirely sure they freeze well, but you can try. If you do decide to freeze a batch, I recommend cooking them through, letting them cool, then separating individual burgers with some wax paper, then freezing. In that way you can grab a burger any time you need it!
Chia seeds are the magic ingredient here. I’ve used chia seeds in the past to make puddings, but here I use them as the main binding agent, the same way you would use egg or a flax “egg”. To make chia “egg” all you need to do is soak chia seeds in some water for about 30 minutes or so. By the time half an hour is up you should have a very thick and gooey mixture that looks quite slimy and that is a good sign. It means your chia seeds are ready to use. Chia seeds add not only the cohesiveness to this recipe, but bump up the nutritional value of your burgers because they are rich in polyunsaturated fatty acids.
I used to be afraid of cooking the beans and would get canned ones only. But, I recently started using a pressure cooker and I love it! I soak the beans overnight to speed things up, although I did make the beans without soaking and that works as well – you just need to cook them for a longer time. Once ready for the pressure cooker, I rinse the beans, place them in the pot and cover with water. I use an electric pressure cooker and use a preset bean program which takes about fifteen minutes of pressuraized cooking. Once the program is done and the pressure cooker is safe to open, I drain the beans and use without rinsing. You can save the liquid too, and make it into a soup if you like.
Note: if you are cooking dry chickpeas this water is the actual aquafaba that everybody is raving about, so do keep it and use it as the egg white substitute. I recently made aquafaba meringue and topped my Butter Squash and Cranberry Pie with Praline and Meringue Topping.
Once you have your chia egg and your cooked beans the rest is easy. All the ingredients so into a large mixing bowl or a food processor and get processed together. Once formed, the burger patties need to sit in the fridge or on the kitchen counter for about half an hour to an hour to firm up, and they are ready to go. I made my batch in a non-stick pan sprayed with some cooking spray, but you can grill them or even put them in the oven. They don’t need much cooking really since all the ingredients have already been cooked, so what you are really looking to do is brown the patties nicely on both side and heat them through.
You can serve these veggie burgers through the year and with any condiments you enjoy. I can recommend a piece or two of avocados and a spoonful of Macadamia Nut Queso Fresco with just a spring of cilantro. That out to do the trick!
White Bean Burgers with Chia Seeds
What you’ll need:
1 lbs (450 g) white beans, dry
1/2 cup red pepper paste (or tomato paste, if you don’t have red pepper paste)
2 tablespoons chia seeds
6 oz (3/4 cup) water
1 cup coarse corn meal
1/2 cup fine corn meal
2 tablespoons stake sauce
1 teaspoon cumin powder
1 teaspoon chili lime powder (or regular chili powder)
Cooking spray
What you’ll need:
Cover the beans with water and soak overnight at room temperature.
Rinse the beans before cooking, then cook them in a fresh batch of water until done. If you are using a pressure cooker the total cooking time will likely be about 30 minutes. If you are cooking them in a regular pot they will probably need an hour or an hour and a half. You can also use the canned beans and you probably need 3-4 15 oz (425 g) cans to get the amount equivalent to what you get from a pound of dry beans.
While beans are cooling, start soaking chia seeds in 3/4 cup of water. This will take 30 minutes or so.
By the time chia seeds are ready to use, your beans will be cool. Place the beans, chia seeds, and the rest of the ingredients into a large mixing bowl and process everything together with a stick blender. You can also use a food processor for this step.
For the burger patties and leave them to firm up for about 30 minutes. You can leave them on the kitchen counter or in the fridge. You can also make them a day ahead and leave them in a fridge and finish cooking them the next day.
Preheat the grill, grill pan or a non-stick frying pan to medium-high. I recommend using some cooking spray to help the burgers brown and get them going, but if you do have a good non-stick pan you can probably get away with not using any oil or cooking spray. The burgers need 3-4 minutes per side.
Serve them fresh from the grill/out of the pan and enjoy with your favorite toppings and condiments!
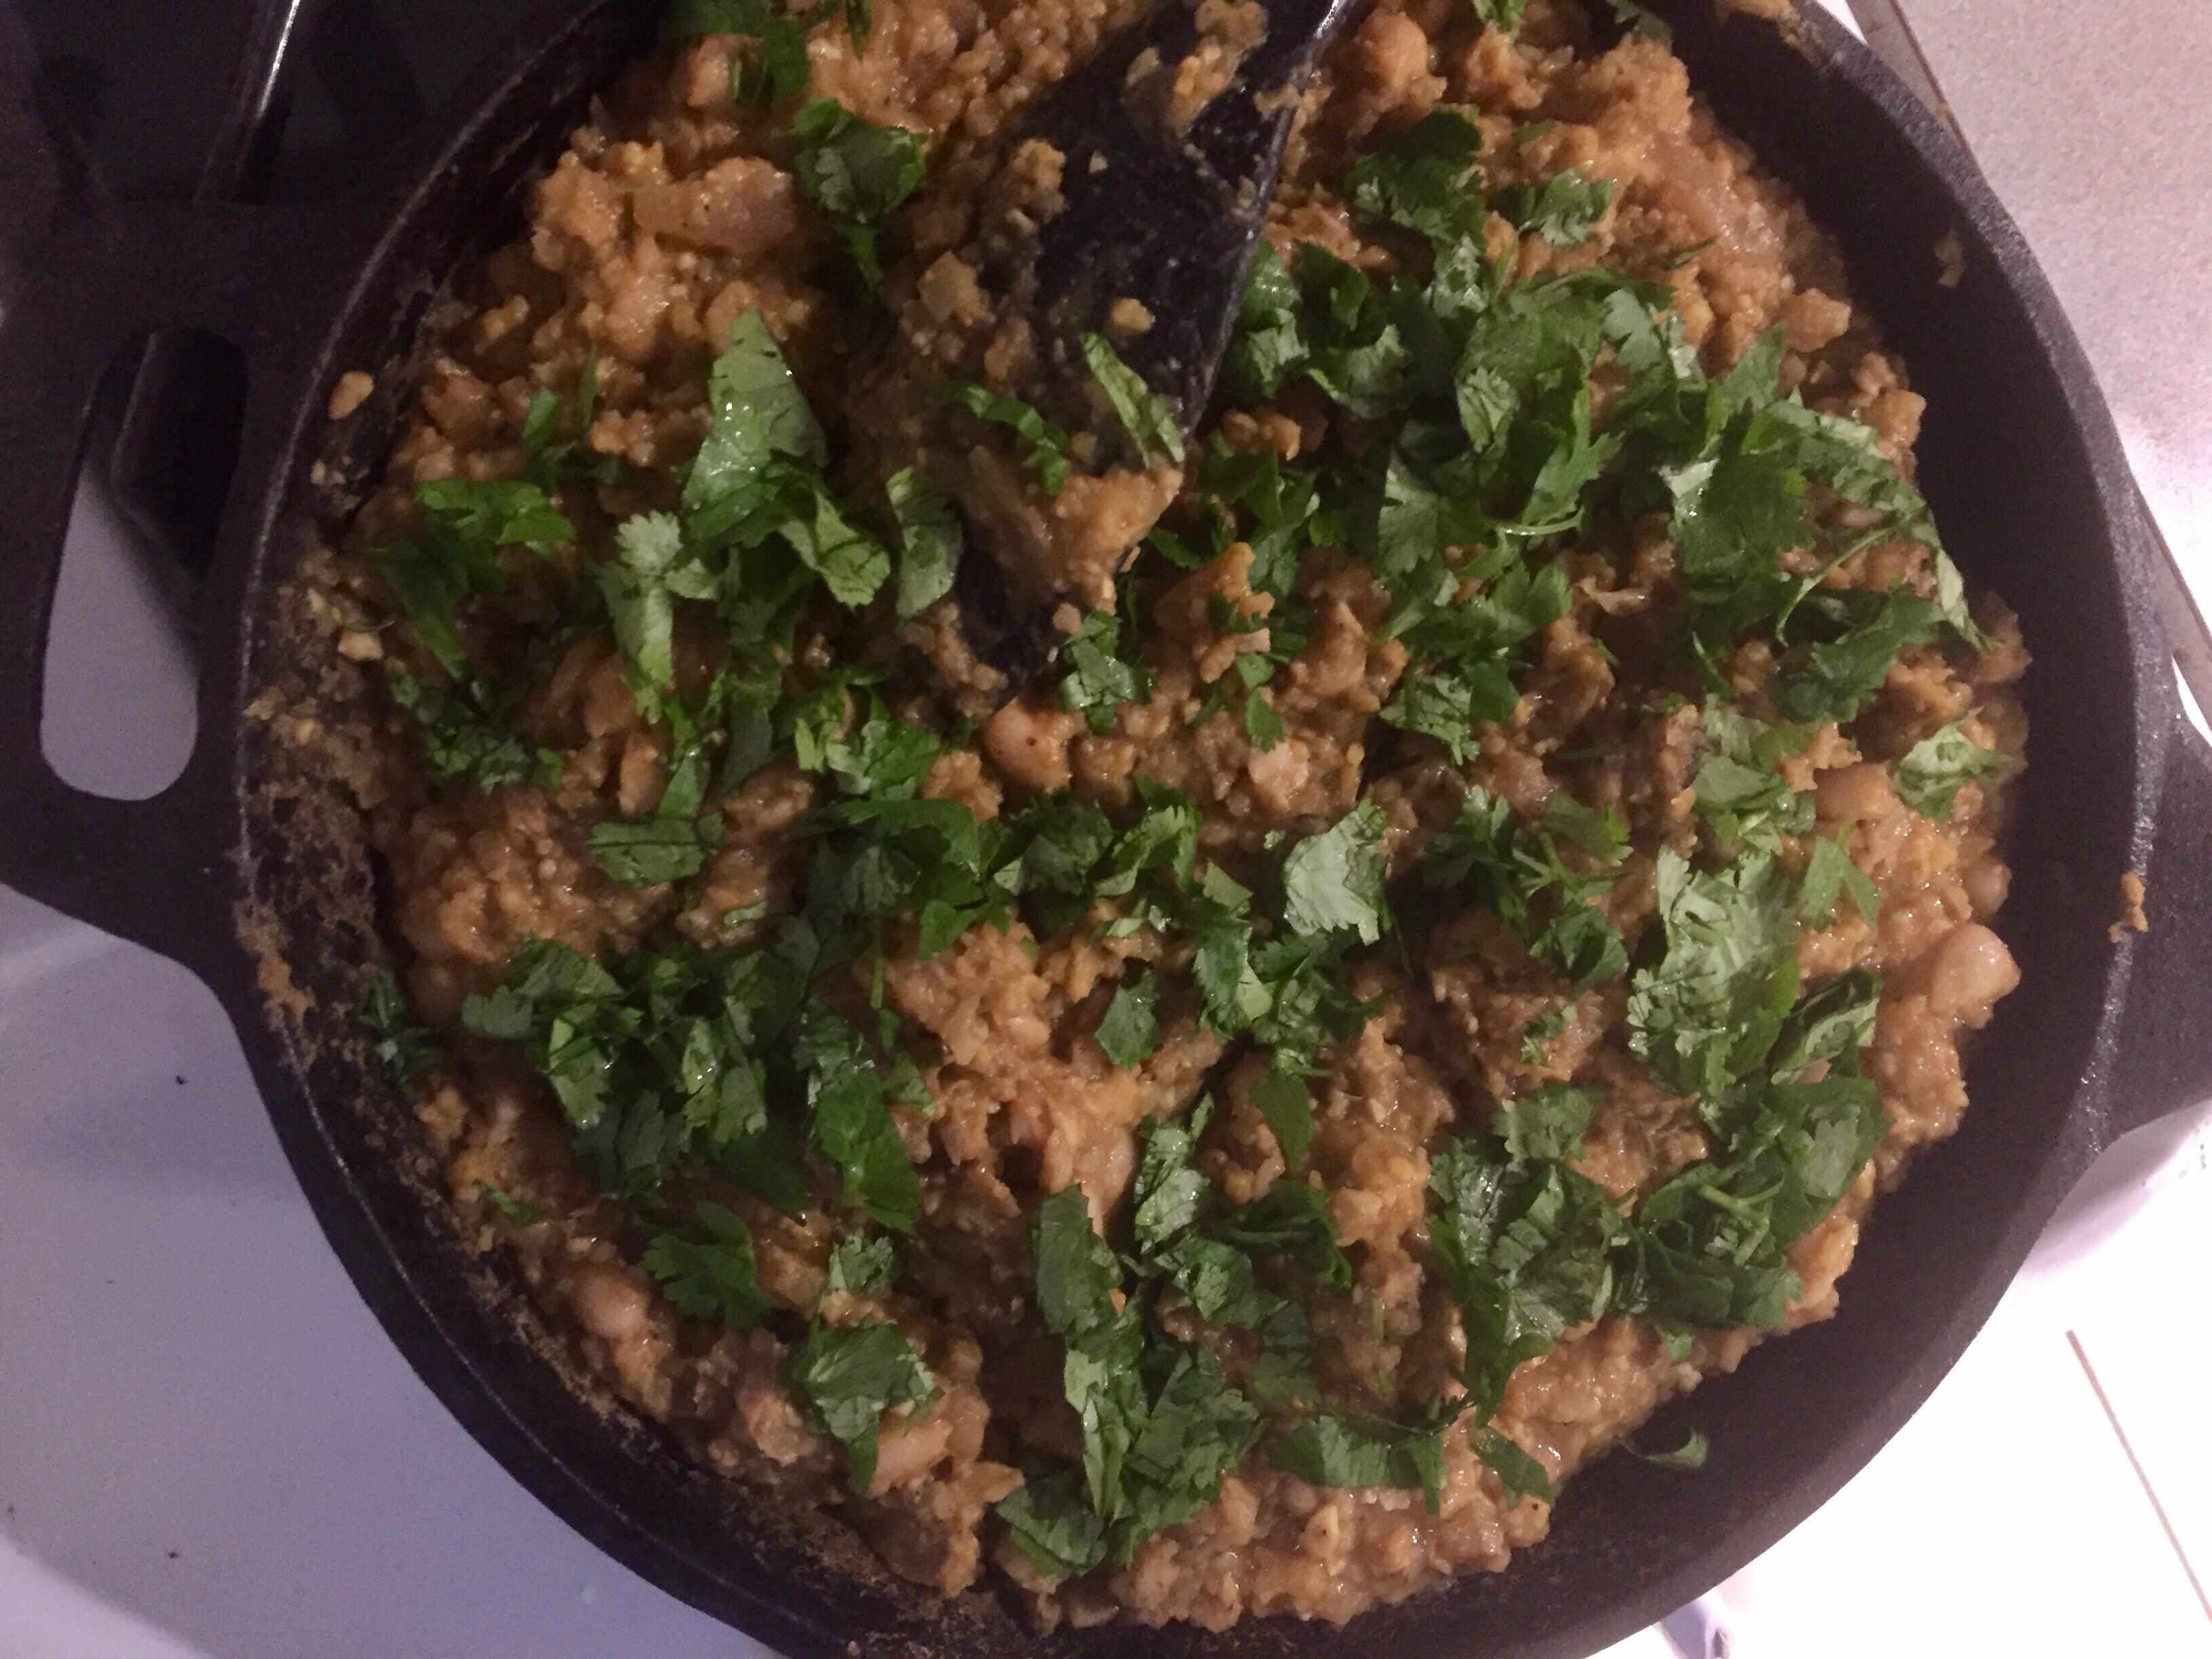
Plantains and Beans Chili, via Eat the Vegan Rainbow
Plantains are those weird looking, giant bananas that look either too green or way past their prime, and usually not very appetizing. But, they are a staple of certain cuisines and I’ve had them while I lived in Ghana, almost exclusively deep fried. Unfortunately, deep fried plantains were not quite to my taste and I stayed away from them until very recently.
I was inspired by a Puerto Rican “lasagna” recipe that used plantains instead of noodles and was happy with the results. Here, I wanted to do something slightly different. I started from really ripe plantains and roasted them without peeling. Then, I made mashed plantains and combined them with plain, white beans (navy beans), and a handful of spices to create a rich and dense chili. Why does this chili work? First of all, plantains are full of starch and relatively sweet, adding lots of great flavor almost as if you were adding molasses. The spices and flavor agents, tomato paste, Chile Lime seasoning bland, and paprika helped the taste along. Lastly, the navy beans worked well here because they added smoothness and creaminess. Sprinkling some fresh cilantro complements the ensemble, and you could also spoon some dairy-free sour cream on top or some plant-based yogurt.
Plantains and Beans Chili, via Eat the Vegan Rainbow
Plantain and Bean Chili
What you’ll need:
4 very ripe plantains, roasted
1/2 lbs (225 g) white beans, cooked or from the can
1 onion, diced
2 tablespoons tomato paste
1 teaspoon ground cumin
1 teaspoon Chile Lime seasoning bland (this is a product from Trader Joe’s but you can make your own with some chili powder, salt, and lime zest)
1/2 teaspoon paprika
Cooking spray
1/4 cups fresh cilantro, roughly chopped
What you’ll do:
Get ripe plantains – those that have quite a few black areas on them – wash them and place them on a baking sheet without peeling. Roast the plantains at 425 F (220 C) for an hour. Their skins will turn black and they should soften inside.
Let the plantains cool then peel them and mash with a potato masher. You could also put them into a food processor and pulse until fine.
Heat a cast iron pan over the medium high heat. Add the cooking spray, spices, tomato paste, and the diced onion and let everything caramelize well, which could take up to 15 minutes.
Add the plantains and let the bottom start to brown. Mix well and cook for 5 to 8 minutes.
Add the cooked beans – I cook mine in a pressure cooker after soaking them overnight – and let the dish simmer for 10 minutes or so.
Serve with a dash of fresh cilantro, or other types of topping you prefer to use on your chili.
Hearty Vegetable Soup with Kale, via Eat the Vegan Rainbow
There’s always room for soup, and in some cases the soup is so rich that there’s room only for the soup. I definitely like making hearty soups that are rich and filling. I’ve already shared with you my split pea soup, which is on the left lighter side, and “clam” chowder and bean and leek soup with soy chorizo, which are both really more a meal in a bowl than a light intro to a main course.
Today’s soup is somewhere in between: not quite hearty enough to qualify as a meal yet not light by any means. It is full with vegetables and resembles Minestrone Soup. The soup builds on the classic mirepoix, a classic base of many soups and stews. Practically speaking mirepoix is a mix of diced carrots, onions and celery that is sautéed until caramelization starts to take place. This what I would normally do when making a soup like this but this time around I had to take a shortcut and I used a lot of frozen and canned veggies, including the frozen peas and carrots mix so my mirepoix started with only onions and celery.
At the end the soup came together well, with frozen corn and canned tomatoes and beans, and a whole bunch of kale. The main trick here was to let the soup simmer for a long time which helps soften kale, which has quite a sturdy leaf structure.
Hearty Vegetable Soup with Kale
What you’ll need:
6 stalks celery, diced
1 yellow onion, diced
16 oz (454 g) kale, roughly chopped
15.5 oz (439 g) can red kidney beans
2 cups yellow corn kernels, frozen
16 oz (454 g) peas and diced carrots mix, frozen
28 oz. (794 g) can crushed tomatoes
32 oz (907 g; 4 cups) vegetable stock
3 cups water
Cooking spray
What you’ll do:
Dice celery and onions to a medium dice. It does not have to be very fine or precise because the whole soup is a bit rustic.
Spray the bottom of a large soup pot with cooking spray and place over medium high heat. Add celery and onions and sauté for 5 to 10 minutes, with occasional stirring.
While onions and celery are cooking, wash the kale and remove any parts of stalk that look particularly tough. Chop the kale roughly into smaller bits. If you are wondering how small should you make them, it’s really up to you. My preference is to keep them at about 2 in (5 cm). Set aside.
Add the frozen veggies in all at once and cook with stirring for 5 to 10 minutes. They will not be completely thawed but they will start to soften.
Add the beans – I usually drain and rinse mine but if you are a fan of keeping all the flavors of canned beans intact (including extra salt they use when canning) go ahead ad just dump the whole thing right in. Stir to combine and cook for 5 minutes.
Add the crushed tomatoes, stir again and cook for another 5 minutes.
At this point you are ready to add the kale. As with all other green leafy vegetables, the raw leaves occupy a significantly larger space than cooked, so don’t panic if adding the kale pushes your pot to its size limits. The kale will settle down. Gently fold the kale into the soup and cook for another 5 to 10 minutes. By the end of this process your pot should look like it can fit the stock and water.
Add the stock and as much water as you like really. What I do is dump the stock into the pot and then use water to rinse the carton out. But if you would like to keep this Soup really dense and almost like a stew you can skip adding water.
Bring everything to boil, lower the heat to low and simmer for another 30 to 45 minutes or until the kale is done to your liking.
Enjoy this soup with some fresh bread, top with some fresh parsley, with a squeeze of lemon or top with a bit of Cashew Sour Cream.
Balkan Cabbage and Beans, via Eat the Vegan RainbowGrowing up in the Balkans cabbage and beans were unavoidable, especially during the winter months when each household used to have bins of dry beans and barrels of homemade sauerkraut. Although for the most part dishes that I grew up with kept cabbage and beans apart, one of my grandmother’s signature dishes was a cabbage and dark bean stew that was packed with both, as well as with piles of smoked meat. I do remember the taste with fondness, so I wondered if I can come up with a vegan way of making a Balkan style cabbage and bean stew.
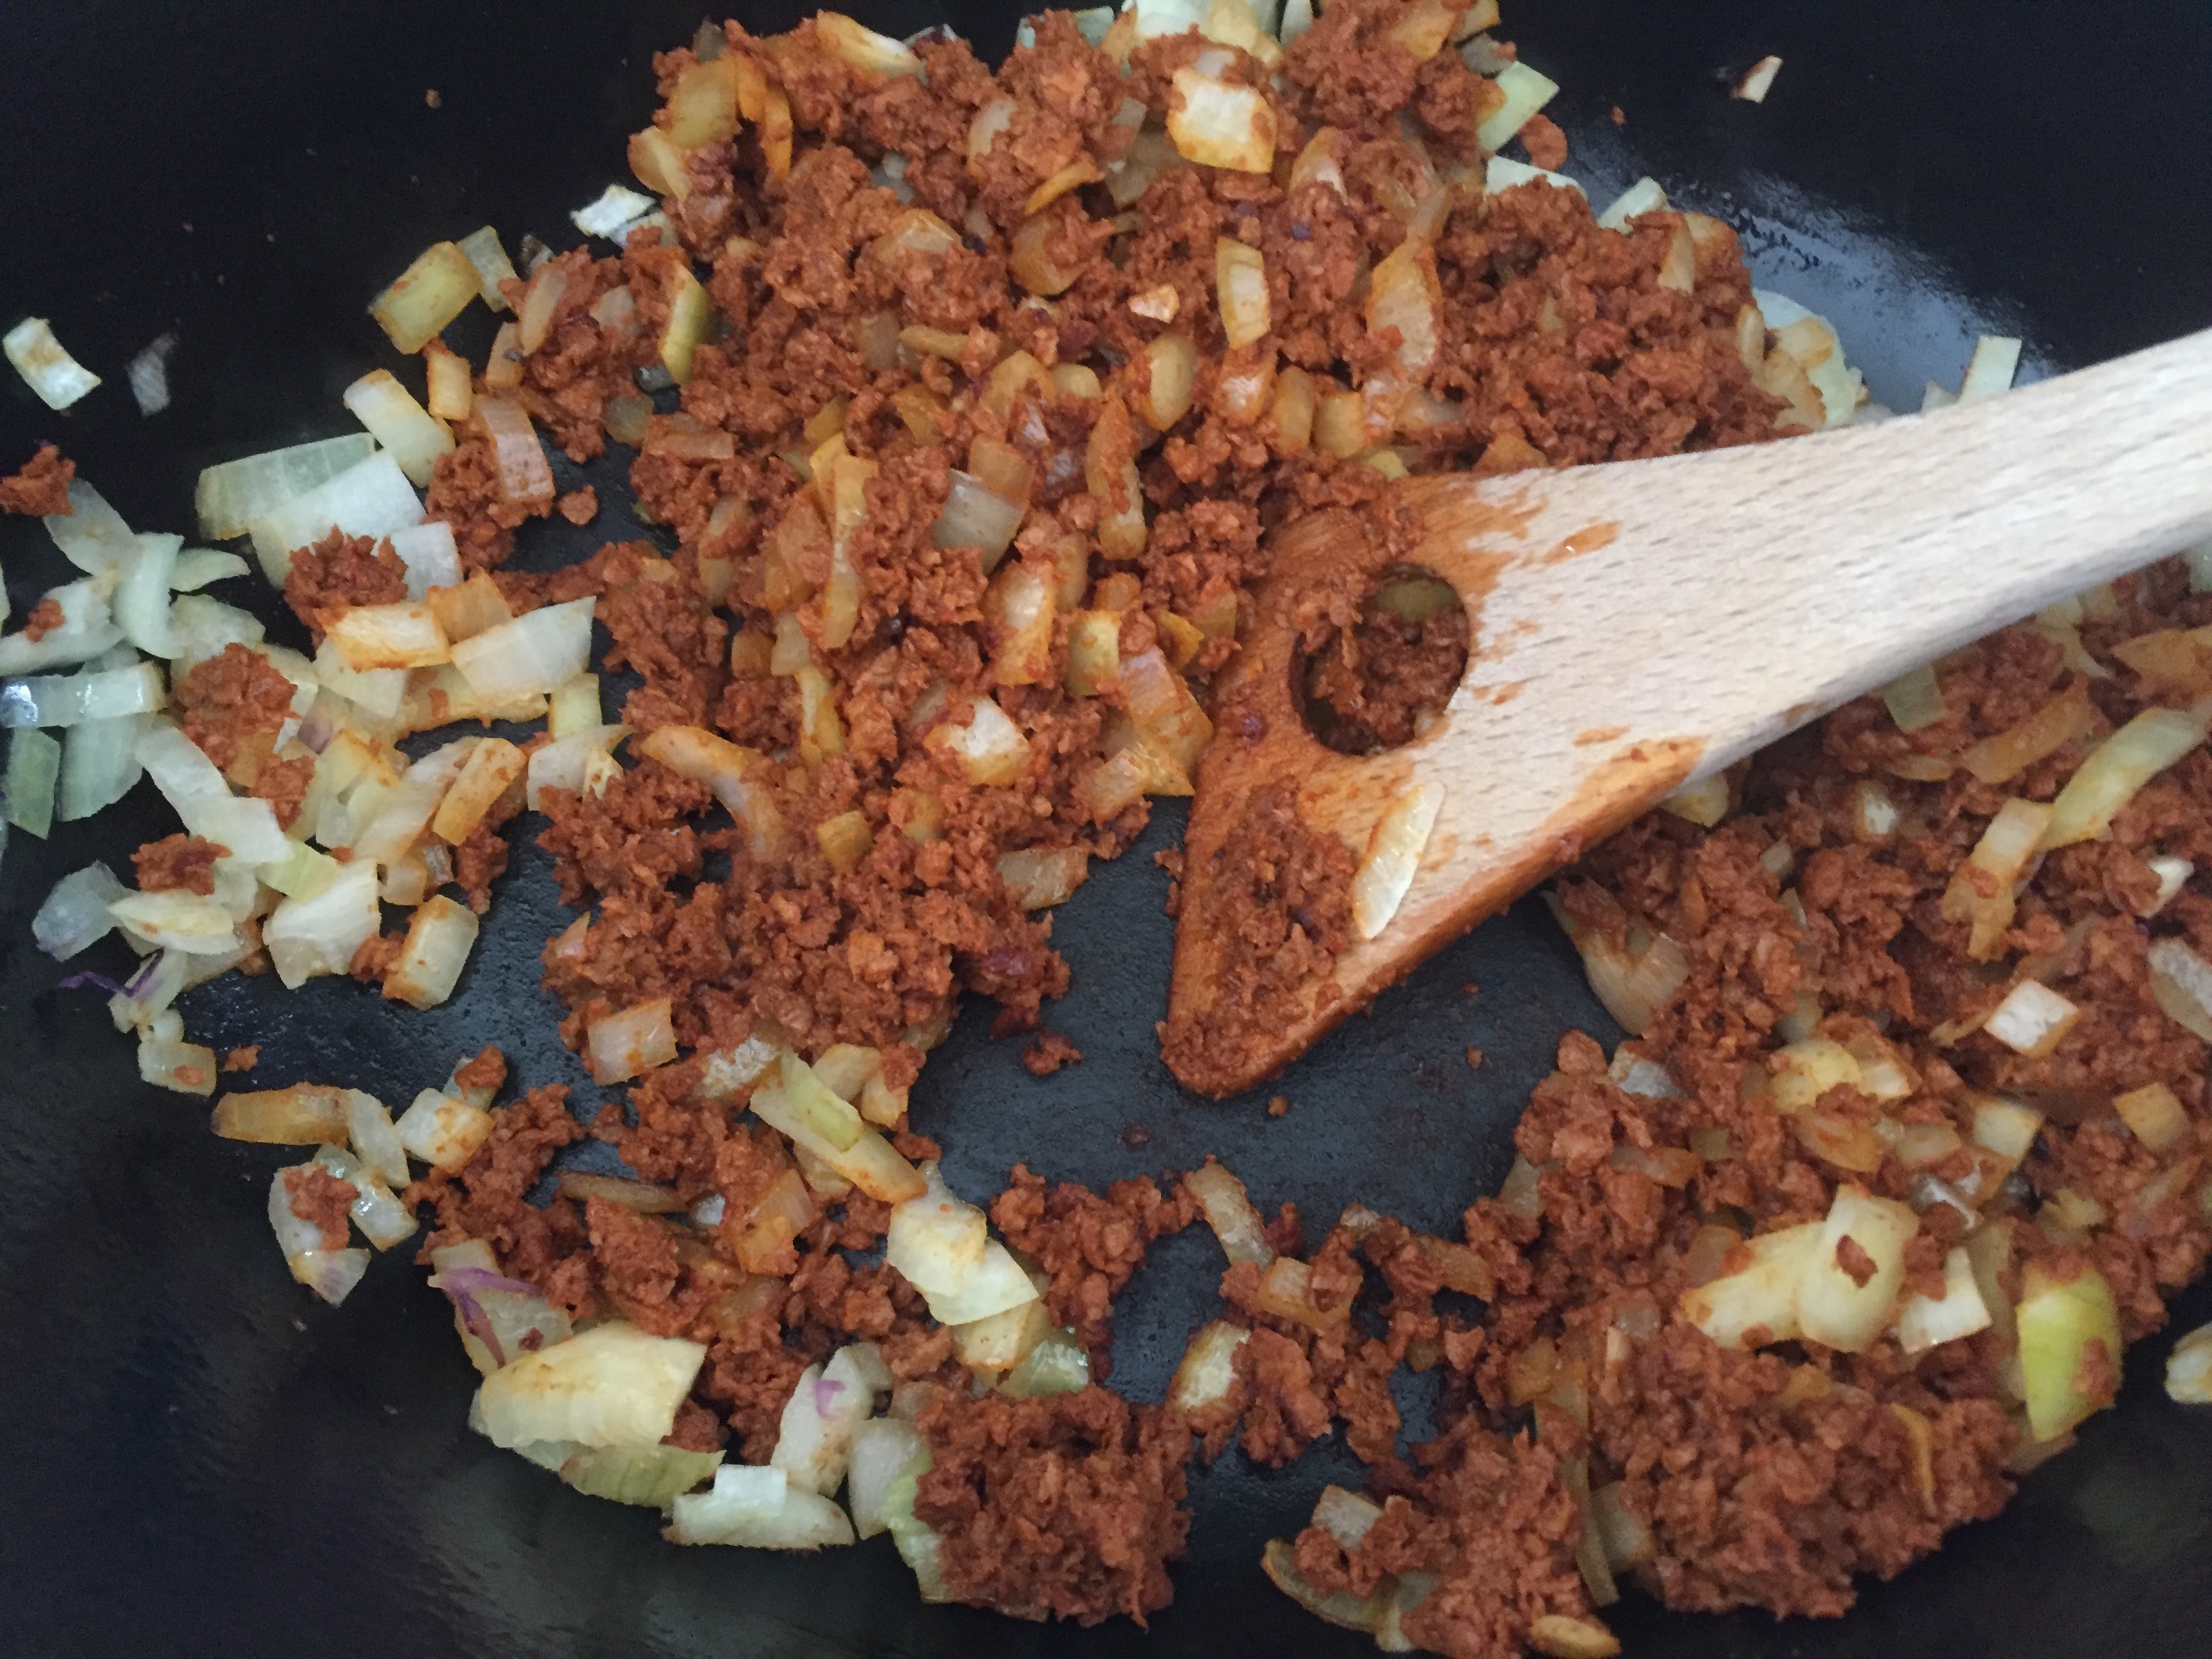
This is a straightforward recipe with only a handful ingredients. I recommend using a Dutch oven, or a similar type of pot, and not being afraid of keeping it on relatively high heat to get the onions, which form the aromatic base of the stew, and Trader Joe’s Soy Chorizo, brown and caramelize. In looking for an ingredient that can replace smoked meat, I decided to go with this chorizo as I found it to work really well in the past, both in Mexican-style lasagnas, and in hearty soups.
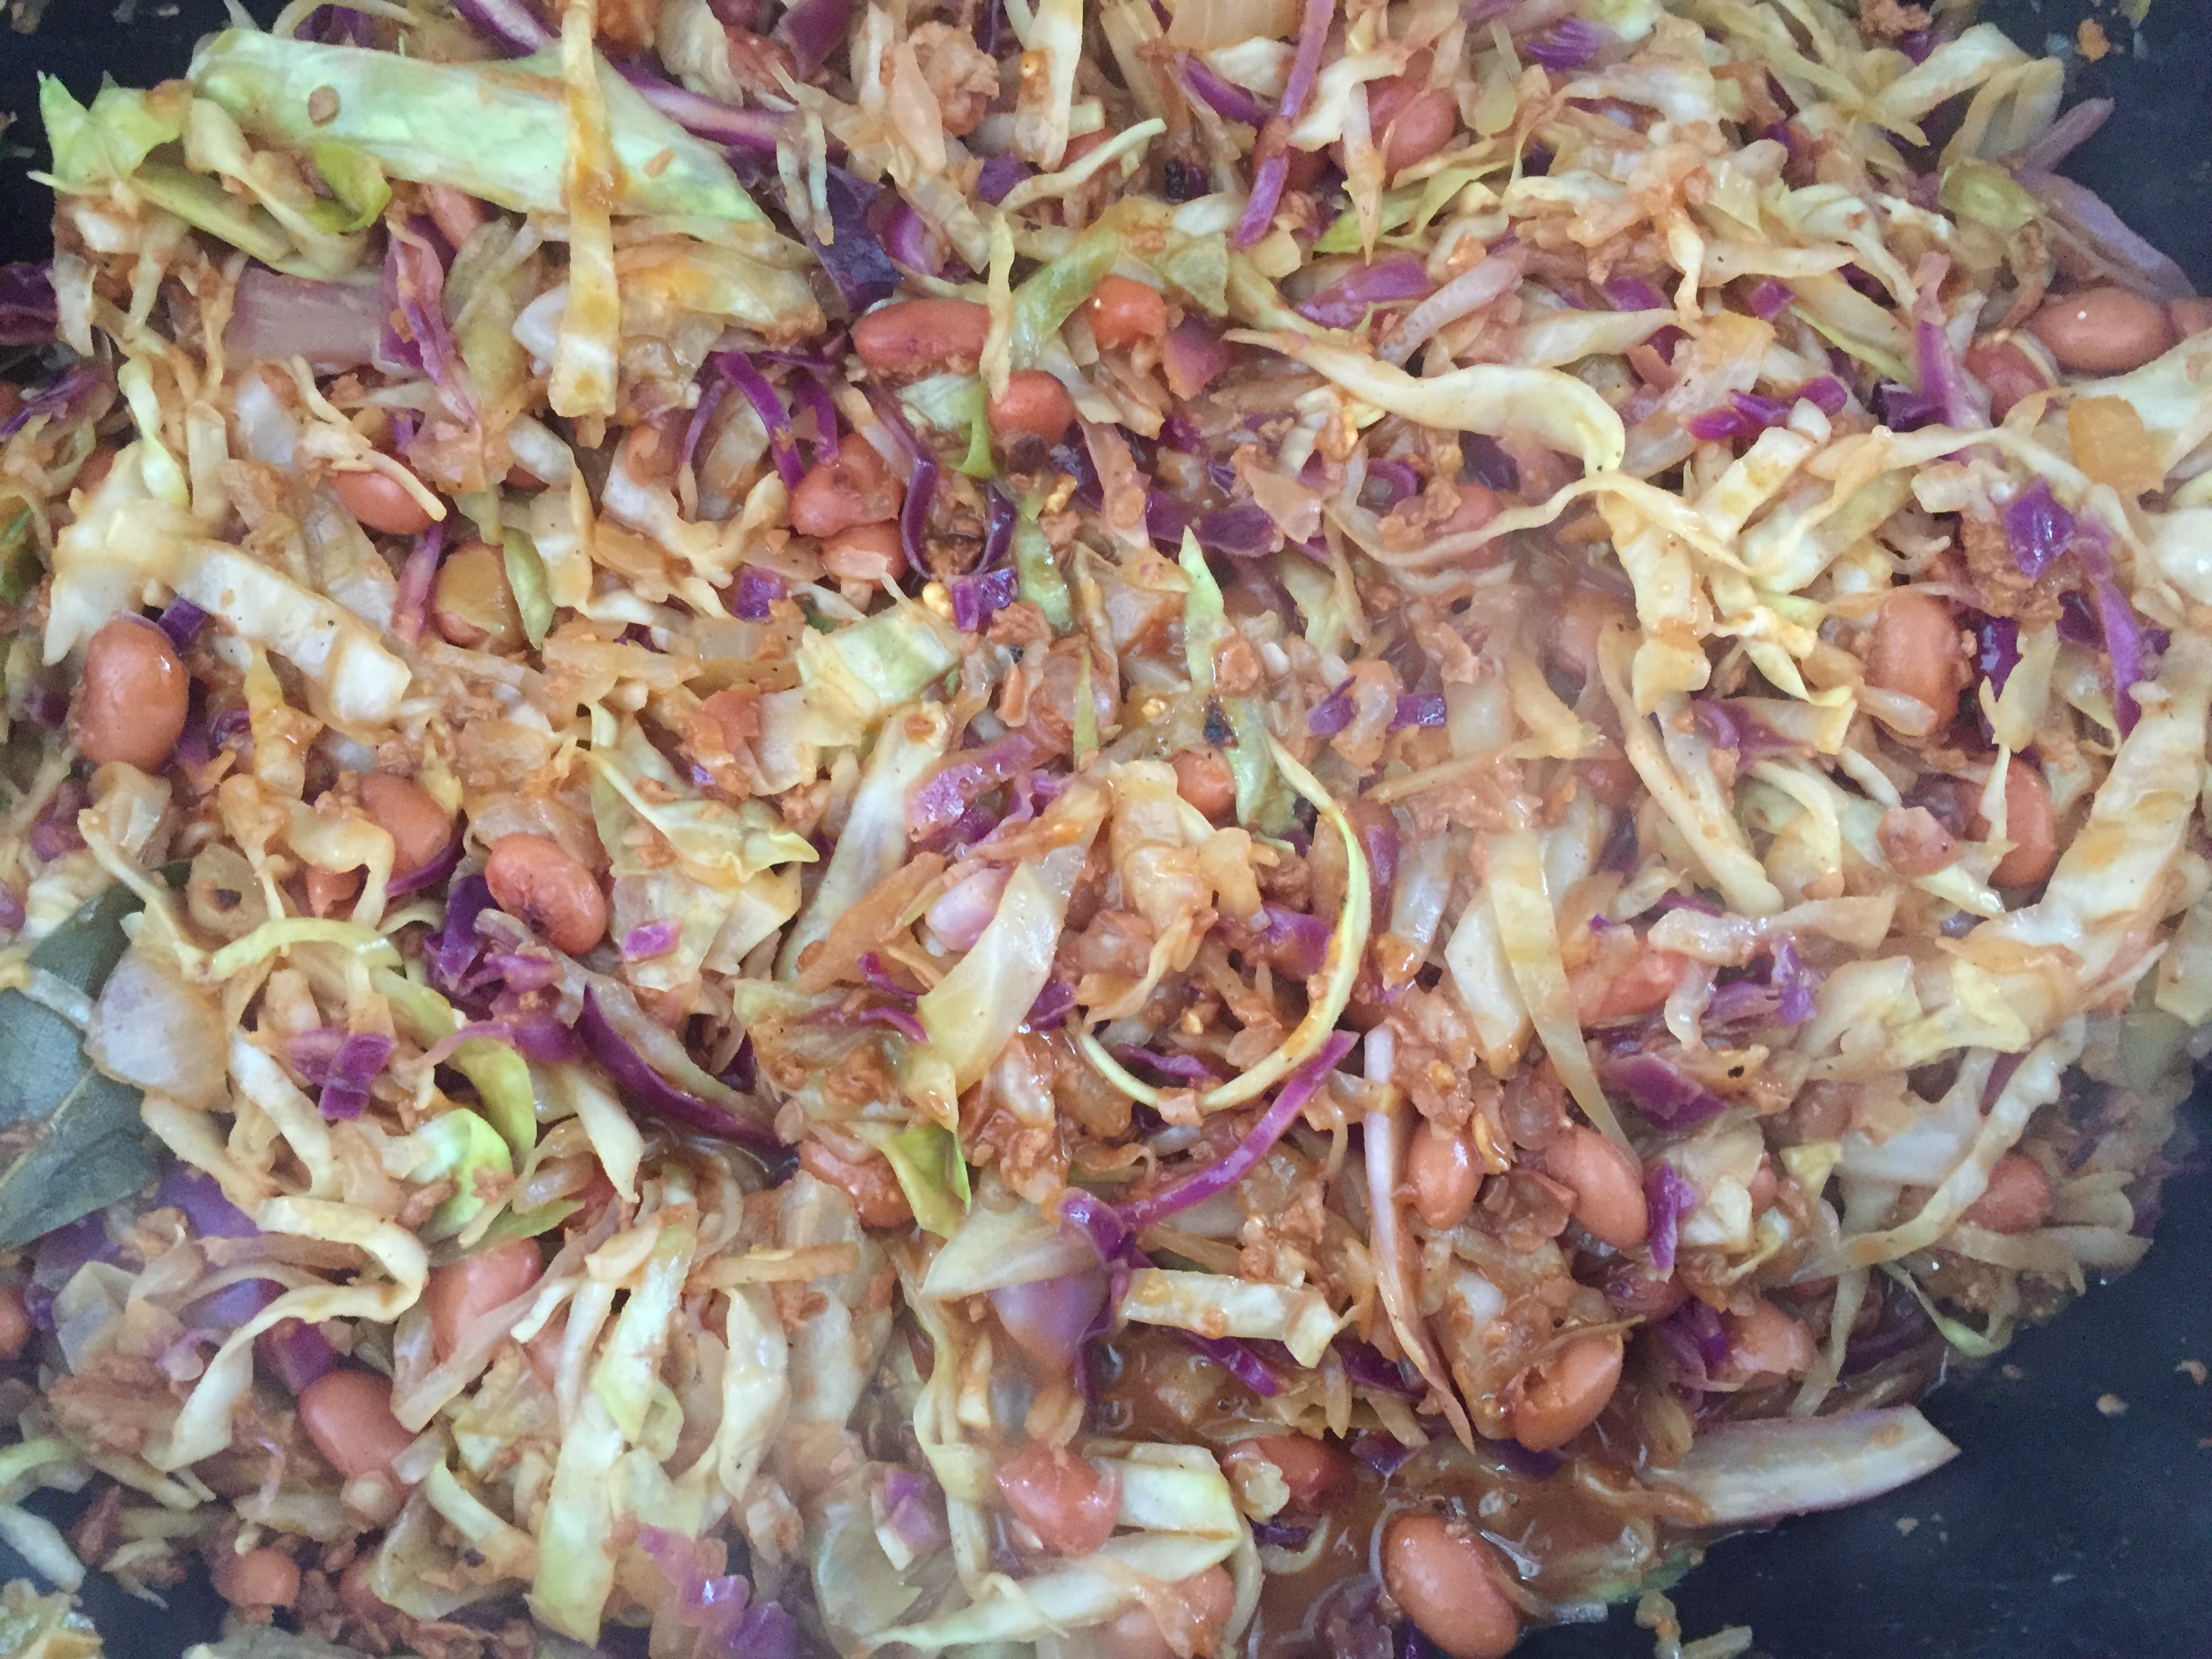
Balkan Cabbage and Beans Stew Step 1, via Eat the Vegan RainbowThe star of this stew is definitely cabbage and for a big pot you will need lots of it. In principle, you could grab few bags of shredded cabbage and that will work fine, but for best texture I recommend shredding the cabbage a bit more thickly. This time around I used both red and green cabbage, but traditionally this type of stew would use fresh green cabbage or even sauerkraut (don’t laugh until you try it – it is delicious!). And don’t freak out about the volume of cabbage, it will cook down.
Balkan Cabbage and Beans Stew Step 2, via Eat the Vegan RainbowOne final trick to this stew is creating a bit of a roux to bind the stew together. Traditionally, the roux in the Balkans starts with lard and flour, and it often includes paprika. To keep this stew vegan and gluten-free, I used corn starch and instead of making the roux in a separate pan and pouring it over I simply sprinkled the corn starch and mixed in with the onion, chorizo and wilted cabbage before adding the beans and water.
Balkan Cabbage and Beans Stew Step 3, via Eat the Vegan RainbowOnce you add corn starch, beans and water, as well as whole peppercorns and bay leaves, the rest is easy. You bring your pot to gentle simmer, put the lid on and leave it on low heat. In less than 30 minutes you have your perfect post of a not-so-traditional Balkan Cabbage and Bean Stew which is best enjoyed hot with a piece of freshly baked Balkan cornbread (proja).
Balkan Cabbage and Beans Stew
What you’ll need:
1 medium head of green cabbage, anywhere between 1.5 to 2 lbs (700 to 900 g)
1/2 small head of red cabbage, anywhere between 0.5 to 0.75 lbs (250 to 350 g)
Spray the bottom and the sides of your Dutch oven or a large pot with the cooking spray. Turn the heat on to medium high to high and add diced onions. Let the onions brown for 3-5 minutes.
Add soy chorizo (note: if using Trader Joe’s Soy chorizo please make sure to remove the casing before cooking because it is plastic and inedible!), and brown for additional 3-5 minutes.
While onions and chorizo are cooking, shred the cabbage into thick shreds. Add the cabbage into the pot, stir well and let it cook down for 5-10 minutes with occasionally stirring.
When the cabbage has gone down a bit, stir in corn starch. Mix well and cook for 1-2 minutes.
Add beans that have been drained and rinsed. Mix well.
Add bay leaves, peppercorns and water. Let the pot come to a simmer than lower the heat to low, put the lid on and let it cook for 20-30 minutes.
Bean & Leek Soup with Soy Chorizo, via Eat the Vegan Rainbow
One of my recent impulse buys was Trader Joe’s Soy Chorizo. This chorizo is vegan, as well as smokey and very spicy so a little goes a long way. I enjoyed it as a topping for an otherwise simple tomato and lettuce sandwich, but I also wanted to experiment a bit and see what else I can use soy chorizo for.
Chorizo and beans usually make for an excellent combination, but I wanted something more adventures than a pot of chili. I decided to mix several types of beans, to diversify the texture of the soup I was building, and in addition to soy chorizo use leeks to expand the range of flavors. The three different types of beans I used are small white beans, black-eyed peas, and dark kidney beans, and I used a canned variety of all three because cooking beans from scratch is not my idea of fun. One thing to keep in mind when using canned vegetables is to rinse them well before use to remove excess salt.
The time I saved on beans, I used to deal with leeks. For those of you who are new to leek, it belongs to the onion family and shares a lot of similarities when it comes to flavor with spring onions (scallions) and spring garlic, which unfortunately is not often found in large supermarket chains. Although I do enjoy leek flavor, I don’t really cook with it often mostly because it does need extensive washing to ensure that all the traces of dirt are removed. The method I use to deal with this is something I’ve seen on Food Network, where you slice the leek and submerge the slices in water. You need to leave chopped leek in for few minutes to let the sediment and dirt fall to the bottom of the bowl, then scoop, rinse and dry the leek slices. They are now ready to go!
Cleaning Leeks, via Eat the Vegan Rainbow
Bean & Leek Soup with Soy Chorizo
What you’ll need:
2 leeks
1 15.5 oz (439g) can small white beans
1 15.5 oz (439g) can black-eyed peas
1 15.5 oz (439g) can dark kidney beans
1/2 soy chorizo
32 oz (907 g) vegetable cooking stock
3 bay leaves
Cooking spray
What you’ll do:
Slice leeks across into thin rounds, then separate each round into individual circles. Fill a large bowl with water and submerge leek circles in it. Let them sit for 5-10 minutes. Using a skimmer spoon to remove the leek without disturbing the sediment that has collected at the bottom of the bowl. Give leek one more rinse, then pat dry with the cloth towel.
Spray the bottom of a large pot with the cooking spray and turn the heat on to medium high. Add leek and let caramelize for 5 minutes or so.
Add soy chorizo and stir to mix. If you are using Trader Joe’s brand please make sure that you remove the casing as this is not edible. Break the chorizo to small pieces and brown leek and chorizo mix for 3-5 minutes.
Add well-rinsed beans to the pot and stir. Cook for another 5 minutes, mixing frequently.
Add vegetable stock and bay leaves to the post. Bring the soup to boil, then decrease the heat to low and let the soup simmer for 15-20 minutes.
Serve the soup with some toast, corn chips or freshly baked bread. If you are feeling very decadent, you can top this soup with some Cashew Cream, or vegan shredded cheese of your choice. Some lime juice would work well, too!
Note for those using Trader Joe’s Soy Chorizo: I used only half of Trader Joe’s Soy Chorizo, which added just enough flavor and spiciness to this soup as far as I am concerned. If you prefer more kick, go ahead and use the whole thing. If you are more on a cautious side, save the other half and transform it into my Vegan Mexican Lasagna.


")