In the spirit of my more recent posts where I cut to the chase and get straight down to business aka the recipe, here we go!
Note on the recipe: the focus here was on recreating umami flavors of the bolognese sauce mixed in with Parmesan cheese. So, what you’ll see is a lot of umami ingredients: tomatoes, mushrooms, and marmite.
(Please note that I still enjoy writing and cooking, but the pandemic had imposed some restrictions on how much writing I can do. I will try to stick to sharing the recipes as they come, and I hope you don’t mind the decreased quality of phots which I don’t have time to stage these days. So, unlike the photos, food remains yummy.)
Place a large frying pan over medium–high heat. Once the pan is hot add the oil and onions. Sautéfor 5 minutes, or until onionhave softened. Note that onions, garlic and mushrooms don’t need to be finely chopped, rough chop/slicing is ok.
Add garlic, stir well, and sauté for another 1-2 minutes.
Mix in the chili powder and marmite, then add the sliced mushrooms. Toss everything to combine and sauté for another 3-5 minutes, until mushrooms are done.
While onion, garlic and mushroom mix is cooking, crumble the tempeh into rough crumbles into the large food processor (you can also use a hand held blender stick, in which case crumble into a large mixing bowl).
Add the sautéed mix into the tempeh and process until finely chopped and mixed. Please note that the mix will be hot, so handle with care.
Pour the contents of one large can of crushed tomatoes into the same frying pan you used for sautéing and place over medium heat. Add the tempeh mix, and gently fold everything in and combine. Once it starts to bubble, tomato sauce will start to spray all over so cover with the lid to minimize splatter.
Cook for 10 minutes or so with occasional stirring.
Serve immediately over pasta (my latest discovery is lentil and chickpea pasta, including the spaghetti), and sprinkle with fresh basil and/or oregano. Enjoy!
Quite frankly, these donuts are nothing like the donuts I grew up with. Those were masterpieces of my grandmother, made with yeast-based dough that would rise for hours, be beaten down, and kneaded, rolled out, cut in circles with a glass and fried in some piping hot oil. Then, while still hot, dusted with powdered sugar or injected with jam. Those were donuts of my childhood and I loved making them with my grandma!
Now that I am well into my adulthood and struggling to maintain healthy weight, and allow myself an occasional treat, I’ve been re-inventing old treats into new treats. With less (or in this case no) oil, less sugar, and taking far less time to make, yet equally as delicious!
One thing that makes these donuts possible is a non-stick donut pan. I never thought I would buy one, but I did, and it works really, really well. Although these donuts don’t have any wheat flour and are surprisingly sticky and wet, they came out perfect, and I think that’s all thanks to the pan. (I got this one from Amazon, in case you are wondering).
The donuts some together in less than 5 minutes, and take about 15 minutes to bake. You need a large bowl and a spatula. No waiting for dough to rise, no rolling it out, none of that. All you need to do it spoon it into the donut pan, fill each ring about 3/4 of the way full, leaving the room on the top for donuts to rise and fill, and that’s it!
The dough will be sticky and dense, so you will need to spoon it out bit by bit, until the donut ring is done. Don’t overfill as I said and don’t pack it in too much. You will need to nudge the dough in and smooth the surface a bit, but try not to overfill. It’s best to bake in batches than end up with a batch that’s not looking too good.
These donuts are not very sweet, which is the way I prefer them. But if you do have a sweet tooth you can glaze them by simply using some powdered sugar and a squeeze of lemon juice to make a dense sugar paste. Or you can melt a bit of dark chocolate and dunk them in for a chocolate glaze. Feel free to go as wild as you like, and enjoy!
Dark Chocolate Donuts, via Eat the Vegan Rainbow
Dark Chocolate Donuts – oil-free, gluten-free, and vegan
What you’ll need:
1 cup almond flour (this is usually called bleached almond flour and it is not almond meal; coconut flour will probably work as well, and any gluten-free flour will likely work too but using rice flour will make this less keto-friendly if you are into that sort of diet)
1/2 cup pea protein powder, unsweetened (you can use any vegan protein powder and you could use sweetened versions and vanilla or chocolate flavored ones – in that case you need to remember to dial down maple syrup)
2 tablespoons dark cacao powder
2 tablespoons maple syrup
1 cup unsweetened apple sauce
1/4 cup almond butter, creamy and unsalted (you could use peanut butter, but I find almond butter to be of a milder flavor)
2 tablespoon vanilla
1 teaspoon baking soda
1 teaspoon baking powder
1/2 lemon – juice (about 1/4 cup)
What you’ll do:
Preheat the oven to 375 F (190 C).
In a large mixing bowl, combine all the ingredients – except the lemon juice. Using a spatula or a similar flat mixing utensil, mix well until fully incorporated, smooth and even.
Add the lemon juice and mix again until all is fully mixed in. This will take about 2-3 minutes of mixing. The dough will be moist, sticky and dense.
Use a small spoon to transfer the dough into the donut pan. Spoon it out bit by bit, until a donut ring is done, then proceed to the next ring and so on until all the rings are full or all the dough is used up. Don’t overfill as I said and don’t pack it in too much. You will need to nudge the dough in and smooth the surface a bit, but try not to overfill. The amount of though is enough for 8-10 donuts using regular size donut pan (like this one, which is sold as a pair on Amazon).
Bake for 12-15 minutes, until the tooth pick comes out clean. Let cool for 5-10 minutes before taking out of the pan. The donuts should slide right out and are ready to enjoy!
Stuffed Cornbread with Kale, Artichoke Hearts, and Sun Dried Tomatoes, via Eat the Vegan Rainbow
I love cornbread – not the sweet stuff from the southern states of US of A, but the rustic savory kind of the Southern Europe. And I think you will love it too!
I recently shared a recipe for basic gluten-free cornbread, which I hope you tried, especially as a side for a nice pot of bean chili. This, on the other hand, is not your basic cornbread and it’s not gluten free, so make a note of that if you need to (I offer advice on how to make it gluten-free if you need to below).
This cornbread is a bit inspired by lasagna, and a bit inspired by lovely summer produce and flavors. With a bit of freshly grated vegan Parmesan or a dollop of vegan sour cream, and a side salad this can be your lunch or a light dinner! Or: you can serve this as appetizer bites at your next party when freshly baked and warm!!!
The key to this recipe are three layers that make the stuffing: sautéd kale layer, topped with sliced artichoke hearts layer, topped with sun dried tomatoes layer! Doesn’t this just make your mouth water?
The cornbread better is a mix of three flours: semolina (wheat flour; you can use all purpose white flour or all purpose gluten-free flour as well), fine corn meal and chickpea flour (or other bean-based flour like mung bean flour, or soy bean flour, for extra protein). What helps the bread rise is a mix of baking powder, baking soda and lemon juice, with added acidity giving an extra leavening boost.
The recipe is a bit labor intensive as I don’t recommend using raw kale, and advise getting your kale cooked all the way beforehand. Depending on how “mature” your kale is, this could take anywhere between 10 minutes if working with baby kale to 20 minutes if working with really old kale.
Additionally, I recommend that you soak the sun dried tomatoes in some hot water, to spruce them up a bit. If you are using sun dried tomatoes stored in olive oil, please skip this step and make sure the tomatoes have been well drained to remove excess oil. Better still, use the excess oil to sauté the kale and infuse it with more of that great tomato flavor!
Enjoy!!!
Stuffed Cornbread with Kale, Artichoke Hearts and Sun Dried Tomatoes
What you’ll need:
1 bunch kale (about 1 lbs or 450g), de-stemmed, and finely chopped
1 yellow onion, finely diced
3-4 cloves garlic, thinly sliced
6 oz sun dried tomatoes
1 15 oz can artichoke hearts
1 cup fine corn meal
1 cup semolina flour (or all purpose flour, or all purpose gluten-free flour for a gluten-free version)
1 cup chickpea flour (or other bean flour)
2 teaspoons baking powder
1 teaspoon baking soda
Juice of 1 lemon
2 tablespoons olive oil, plus some for greasing the baking dish
2 to 2 1/2 cups water
What you’ll do:
Preheat the oven to 350 F (175 C).
If using sun dried tomatoes that are dry, I recommend that you reconstitute them by soaking them in boiling water for 10-15 minutes. If you are using sub dried tomatoes in olive oil, please skip this step.
Heat the olive oil over medium heat in a very large frying pan, or a wok. This will take 30 seconds or so. Add diced onion and sauté for 4-5 minutes, until soft and golden. Add the garlic and sauté for another minute.
When garlic begins to bloom and develop the aroma, add chopped kale. The volume of a bunch of kale may seem like a lot, but it will cook down. If you are having difficulty fitting all the kale in at once, add in batches. Sauté kale until fully cooked, which will take about 10-15 minutes. You may need to add a tablespoon of water to keep kale from sticking to the pan, so stir frequently and keep an eye to prevent burning.
While the kale is cooking, drain and rinse the artichoke hearts. Shake off the excess water, and slice thinly. Set aside.
Drain the sun dried tomatoes either from the water they were soaking in or from the oil they are stored under. Slice them thinly and set aside.
In a large mixing bowl combine cornmeal, the flours, baking soda and baking powder. In a separate container mix two cups of water with lemon juice then pour into the flour mix. Use a spatula or a wooden spoon to mix well. Add more water if needed. Depending on how fine your corn meal is (there is some variability between brands) you may need more than 2 cups of water to make a smooth, yet thick batter. Your batter should be pourable but not runny. If you run a spoon through it, it should come apart with ease.
Grease the bottom and sides of a 9 x 13 in (23 x 33 cm) baking dish with some oil. Pour in half of your batter and spread evenly. Top with sautéd kale that you drained from access liquid, then top with sliced artichoke hearts, then with sliced sun dried tomatoes. Finally, pour over the rest of the batter, smooth the top and place in the oven for 30 minutes.
Increase the temperature to 425 F (220 C), and bake for another 10 minutes.
Take the stuffed corn bread out and let it rest for 10-15 minutes before serving. Serve as an appetizer or as a really wonderful side dish with your main course. I also enjoy it for breakfast, with some grated cheese, or as lunch with a side salad and some yogurt. Yummy!
Gluten-free Pumpkin Cookies, via Eat the Vegan Rainbow
Looking for something easy and healthy to make for the holidays? Look no further than these super simple and super healthy cookies. They are full of pumpkin – and we all know that this is the pumpkin season – and are completely and naturally gluten-free. The combination of oats, coconut flour and almond flour does not really need backing and you could mix them all together, let the mix stand, and form the cookies as is. So, if you are into raw food, or minimally processed food this could be a path you take.
Baking the cookies does enhance the flavors, and that’s worth keeping this in mind. Baking also makes all the spices develop and merge. A combination of cinnamon, ginger and cardamom really blooms when heated up! At the end, baking the cookies will give you a more aromatic kitchen and platter.
What will also enhance the flavors is roasting your own pumpkin. (So, I guess not everything will be as a raw as possible since I am not sure you can use raw pumpkin – I have never tried and I am not even sure that it can be done!). Roasting the pumpkin is super easy – you don’t even need to peel it, just slice it in half, scoop out the seeds and place the pumpkin halves on a baking sheet, cut side down and roast at 425 F (220 C) for 45 minutes or so. It also helps to line the baking sheet with some foil or parchment paper – this helps the roasting and the clean up!
After the pumpkin is roasted, all you need to do is scoop the flash and purée, either in a food processor or using a masher. Food processor will make everything much smoother, but if you prefer your a more rustic pumpkin hands or a masher will do.
Enjoy!
Gluten-free Pumpkin Cookies, via Eat the Vegan Rainbow
Gluten-free Pumpkin Cookies – Yummy!
Gluten-free and Oil-free Pumpkin Cookies
What you’ll need:
1 15 oz (425 g) can pure pumpkin (not pumpkin pie filling) or 15 oz (425 g) roasted sugar pumpkin, puréed
1 cup old fashioned oats
1/2 cup coconut flour
1/2 cup almond flour
1/4 cup sugar (or solid sweetener of your choice)
2 teaspoons cinnamon
1 teaspoon cardamom
1/2 teaspoon ginger
Optional: 1/4 cup maple syrup, for brushing
What you’ll do:
Preheat the oven to 350 F (175 C).
Combine all the ingredients in a large food processor. If you don’t have a food processor that’s large enough, you can either process in batches or process pumpkin and oats well and then just mix in the rest of the ingredients (except the optional maple syrup) by hand.
Line a large cookie sheet with parchment paper.
Use an ice cream scoop to measure out the amount for each cookie, than form a round and flat shape and place on the parchment paper. This amount of batter should yield about 12-14 cookies.
Cross-hatch the surface of each cookie.
Bake for 18-23 minutes. Cookies will be lightly browned but stay soft.
Let the cookies cool for 15-20 minutes before brushing with maple syrup. You could skip this step, but why would you want to do that? Enjoy!
I grew up eating pâté and loving it. Some pâté, on a piece of freshly baked bread with a glass of yogurt (yes, the liquid kind you drink like they do in Middle East!) was one of my go to breakfasts. And the pâté I ate was not a fancy French kind made with duck fat. At some point I learned that it was actually made of who know what, random bits and pieces of an animal all ground up. Whether you eat meat or not, I hope we can all agree that that’s pretty unappetizing when you think about it!
But: if you don’t think about it and just go with your taste buds, pâtés are really tasty. They are full of umami, savory flavors that we all crave, they are silky and smooth, they are nicely spreadable, and they are an excellent add-on to a nice piece of bread. So, how can we re-create the perfect savoriness with just a small number of ingredients, and make a healthy and satisfying pâté that will keep you coming back for more?
Well, we start with mushrooms, the well-known source of umami. You can use white button mushrooms here or baby bella (cremini) mushrooms as well. I do not recommend some of the mushrooms that have distinct flavors, like shiitakes; however, other mild mushrooms may work. Still, white button mushrooms are readily available, affordable and work!
Another important umami component is tomato paste. Here, you can use any tomato paste you have on hand and you can adjust the amount – anywhere between a tablespoon or two will do the trick.
To make the dip smooth and rich in protein, I recommend adding canned beans. White beans work best (cannellini, great Northern or navy), but any other variety will probably be OK. If you cook your own beans, I recommend that you keep them slightly undercooked for this application, or at least squeeze some of the excesses liquid out before blending to avoid ending with a pâté that’s more of a soup than a rich and dense spread.
The main flavoring agent here is Herbes de Provence, a mixture of dried herbs that usually includes thyme, rosemary, oregano, marjoram and lavender. I use Trader Joe’s version, and they carry it only as a seasonal item in the fall, but any other mix with the same name will do. Alternatively, you can add a pinch of thyme, rosemary, oregano, and other herbs (including basil) that you may have on hand.
Finally, what also adds a lot to this pâté is sautéing and caramelizing onions, garlic and mushrooms before blending everything together. This will help the flavor deepen and develop!
Looking for serving suggestions? You can use it as a spread or a dip, as a pizza “sauce” and topping (why not?), in your quesadillas (let’s be adventurous!), for your baked potatoes, or for any other dish where you feel the need to add rich, yet smooth flavors. Enjoy!
Nut-free Mushroom Pâté, via Eat the Vegan Rainbow
Mushroom Pâté
What you’ll need:
8 oz white button mushrooms (or cremini mushrooms if you like stronger mushroom flavor), sliced
1/2 large, white onion, diced
4 cloves garlic, sliced
2 tablespoons olive oil
2 tablespoons tomato paste
2 teaspoons Herbes de Provence
1 15 oz (425 g) can white beans
Salt to taste
What you’ll do:
Place a large sauté pan over medium high heat. Heat up than add the oil and onions. Sauté for 2-3 minutes, then add the garlic. Let garlic start to release its aroma – this usually takes a minute.
Add the mushrooms and , increase the heat to high, mix well and sauté until mushrooms are browned. This will take about 4-5 minutes.
While the mushrooms are cooking, drain and rinse the can of beans. Shake access water off and place into a food processor or a large mixing bowl if you rather use a stick blender (this is an incredibly useful kitchen gadget and it’s what I used here).
Pour the sautéed mushrooms over the beans and blend until smooth and combined. Leave in the refrigerator until ready to serve.
Serve cold as a spread for sandwiches or as a dip for chips or crackers. This pâté is excellent addition to your menu and it offers a healthy and humane alternative.
Easy Gluten-free and Vegan Corn Bread, via Eat the Vegan Rainbow
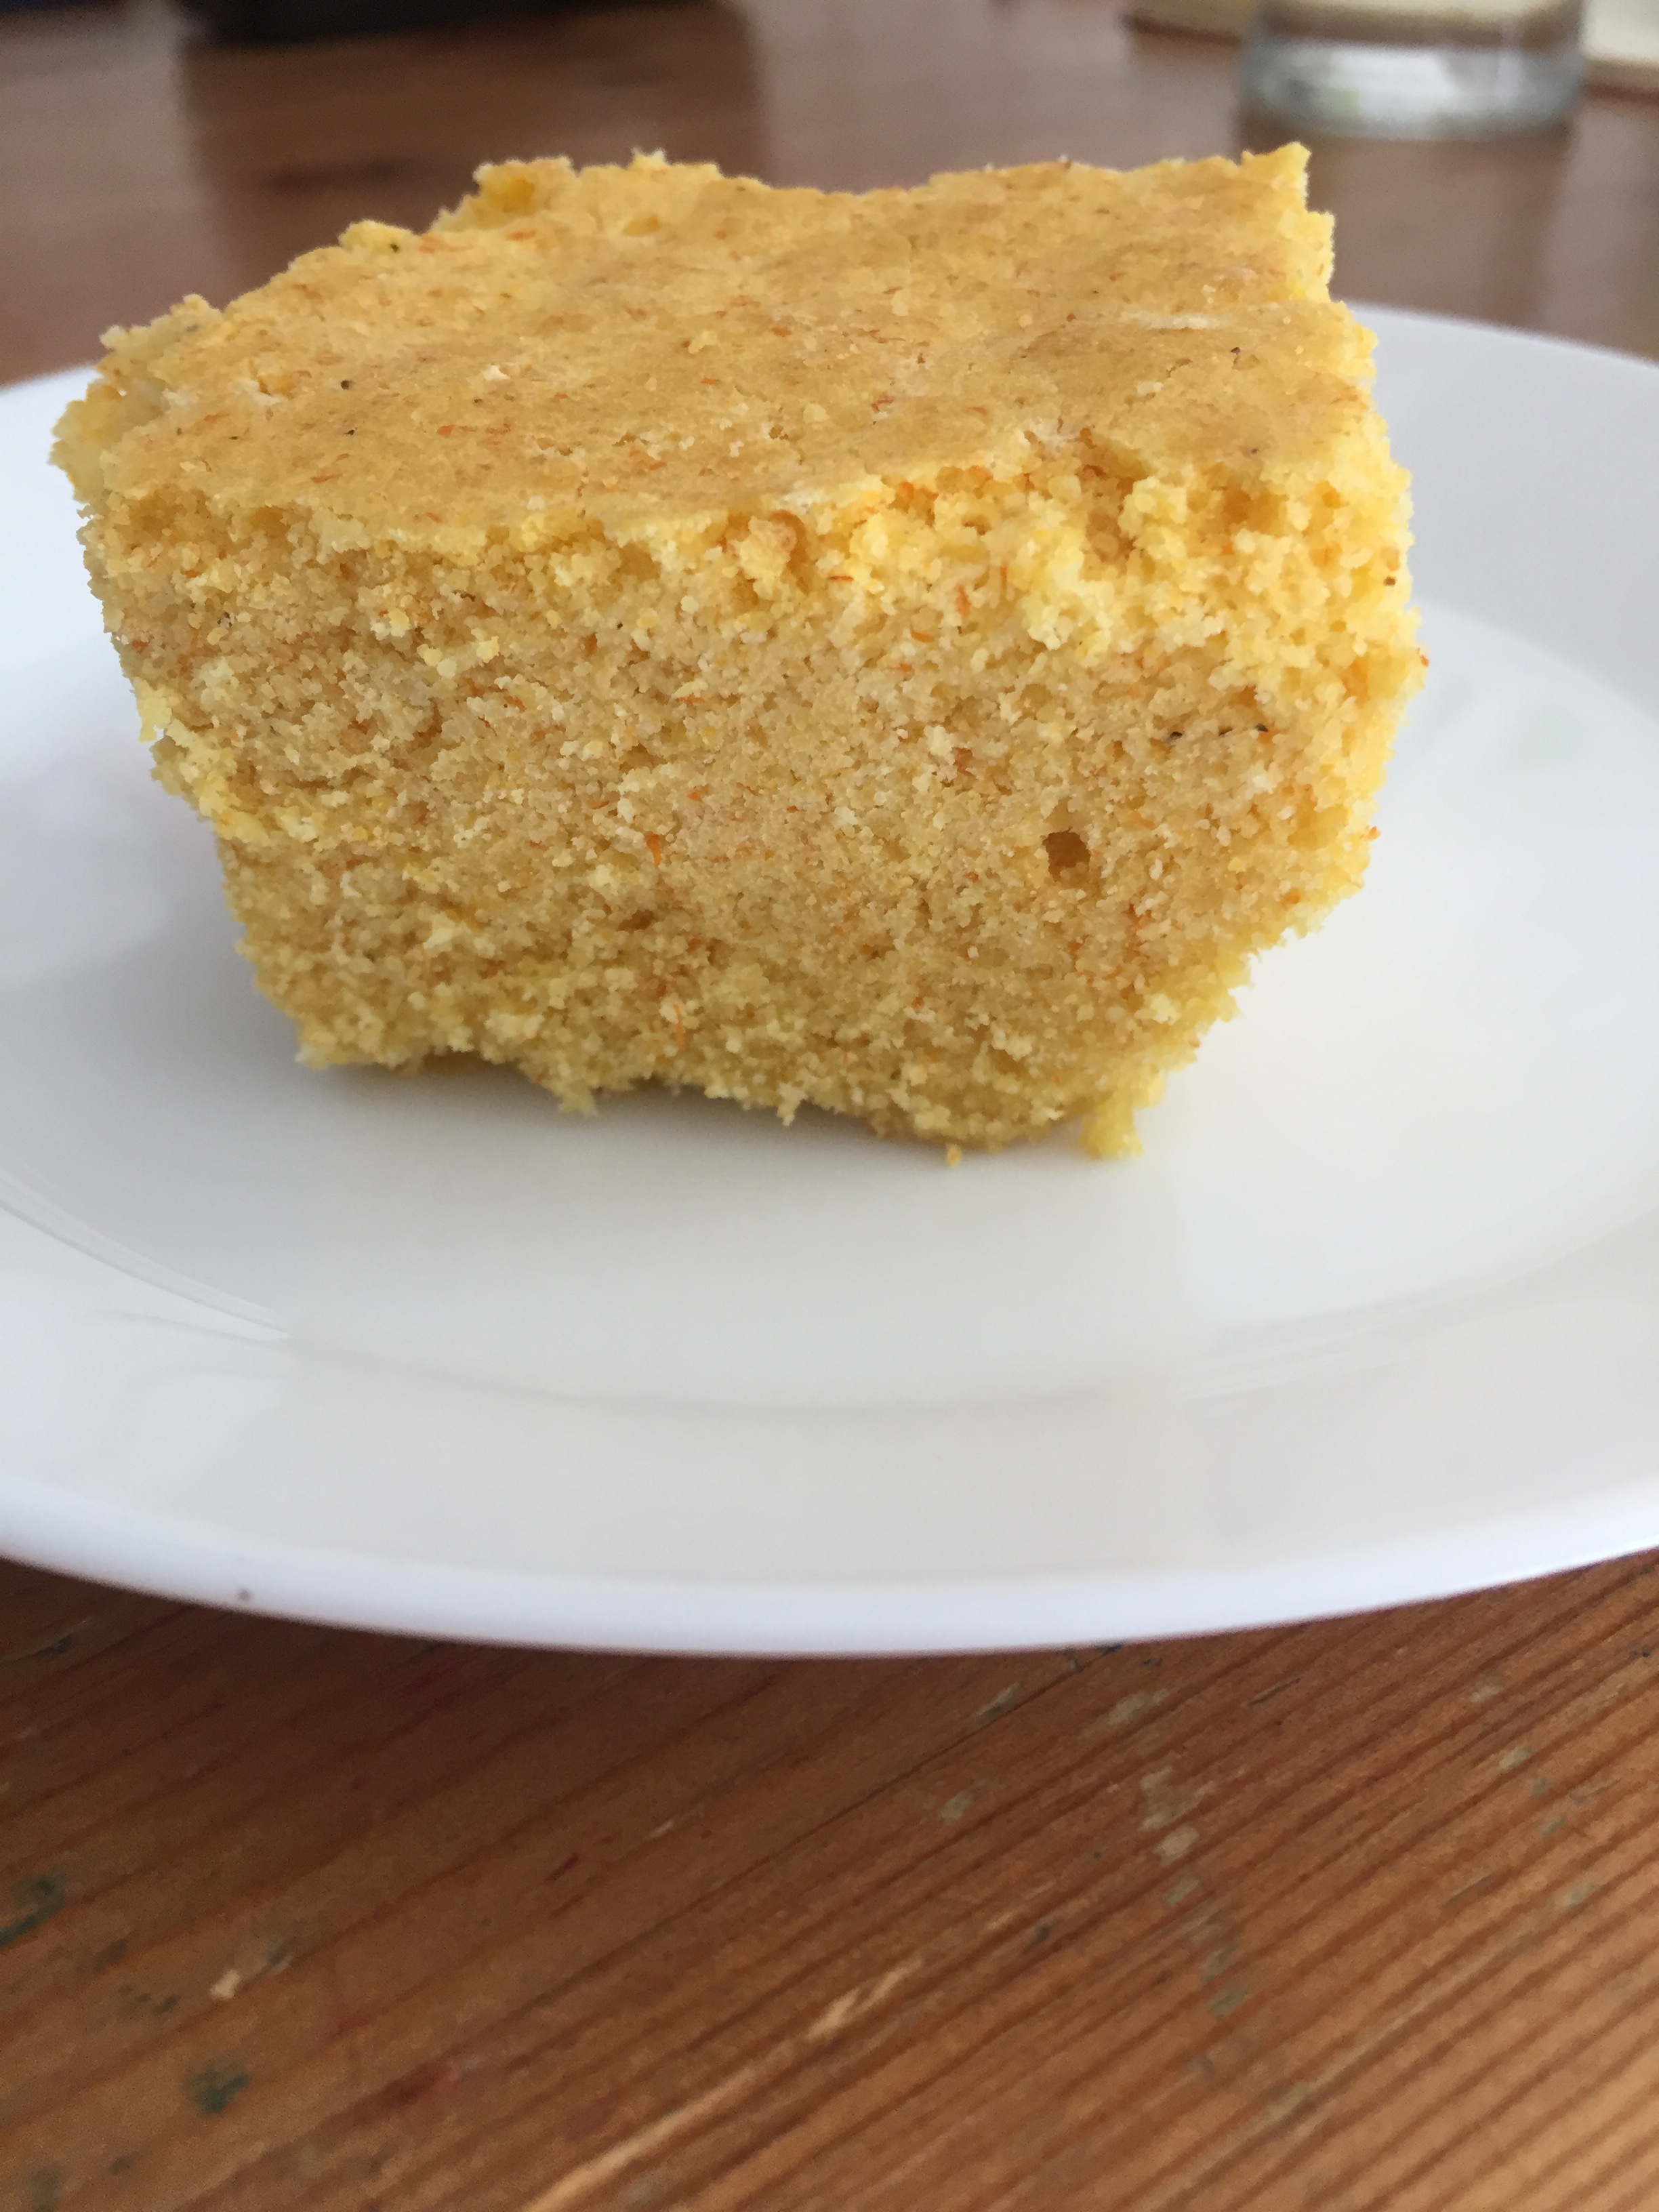
What you will learn from this recipe is how to make corn bread that needs only seven ingredients (that’s including baking powder, baking soda, salt, and oil), is completely gluten-free, and entirely vegan! It is also simple, yet delicious, without extra sugar and other funky stuff that many recipes include.
I grew up eating plenty of corn bread, especially during winter months. I’ve also shared a recipe or two, providing different variations on the theme. Here, I wanted to share a recipe that strips away all the complexity and uses corn meal, corn starch and oil, together with leavening agents and carbonated (sparkling) water to create a nutty and mealy corn bread.
The bread is a bit on a crumbly side and it is best used with hearty stews, chilis and soups, those types of dishes that need a bit of bread to mix it in. For example, it would pair well with a cabbage and bean stew, or a bean soup with chorizo, or 15 bean chili!
The down side of this corn bread is that it does not store well, and it is really at its prime when it is fresh from the oven. So, if you feel that you may not need this much corn bread, make a smaller batch. It is so easy to make that you can whisk it all together as needed. If you are bothered by crumbliness, you can add some flax egg to the batter or chia egg.
Easy Gluten-free and Vegan Corn Bread
What you’ll need:
3 cups of yellow corn meal
1 cup of corn starch
1/3 cup canola (or other vegetable or olive) oil
1 teaspoon baking powder
1 teaspoon baking soda
1/4 teaspoon salt
2 cups sparkling (carbonated) water
Cooking spray
What you’ll do:
Preheat oven to 425 F (220 C).
In a large mixing bowl, combine cron meal, corn starch, baking soda, baking powder and salt. Mix well, then add oil and combine. Batter will be soft (see picture above).
Let the batter stand for 10 minutes or so.
Spray the bottom and the sides of the 8 in x 8 in (20 cm x 20 cm) baking dish. Pour the batter in, smooth the top, then place in the preheated oven to bake at high temperature for 10 minutes.
Lower the temperature to 350 F (175 C) and continue baking for another 20 minutes.
Let the corn bread cool for 15 minutes or so, then cut and serve. Please note that this bread will not be asa great the next day so I suggest that you enjoy it fresh!
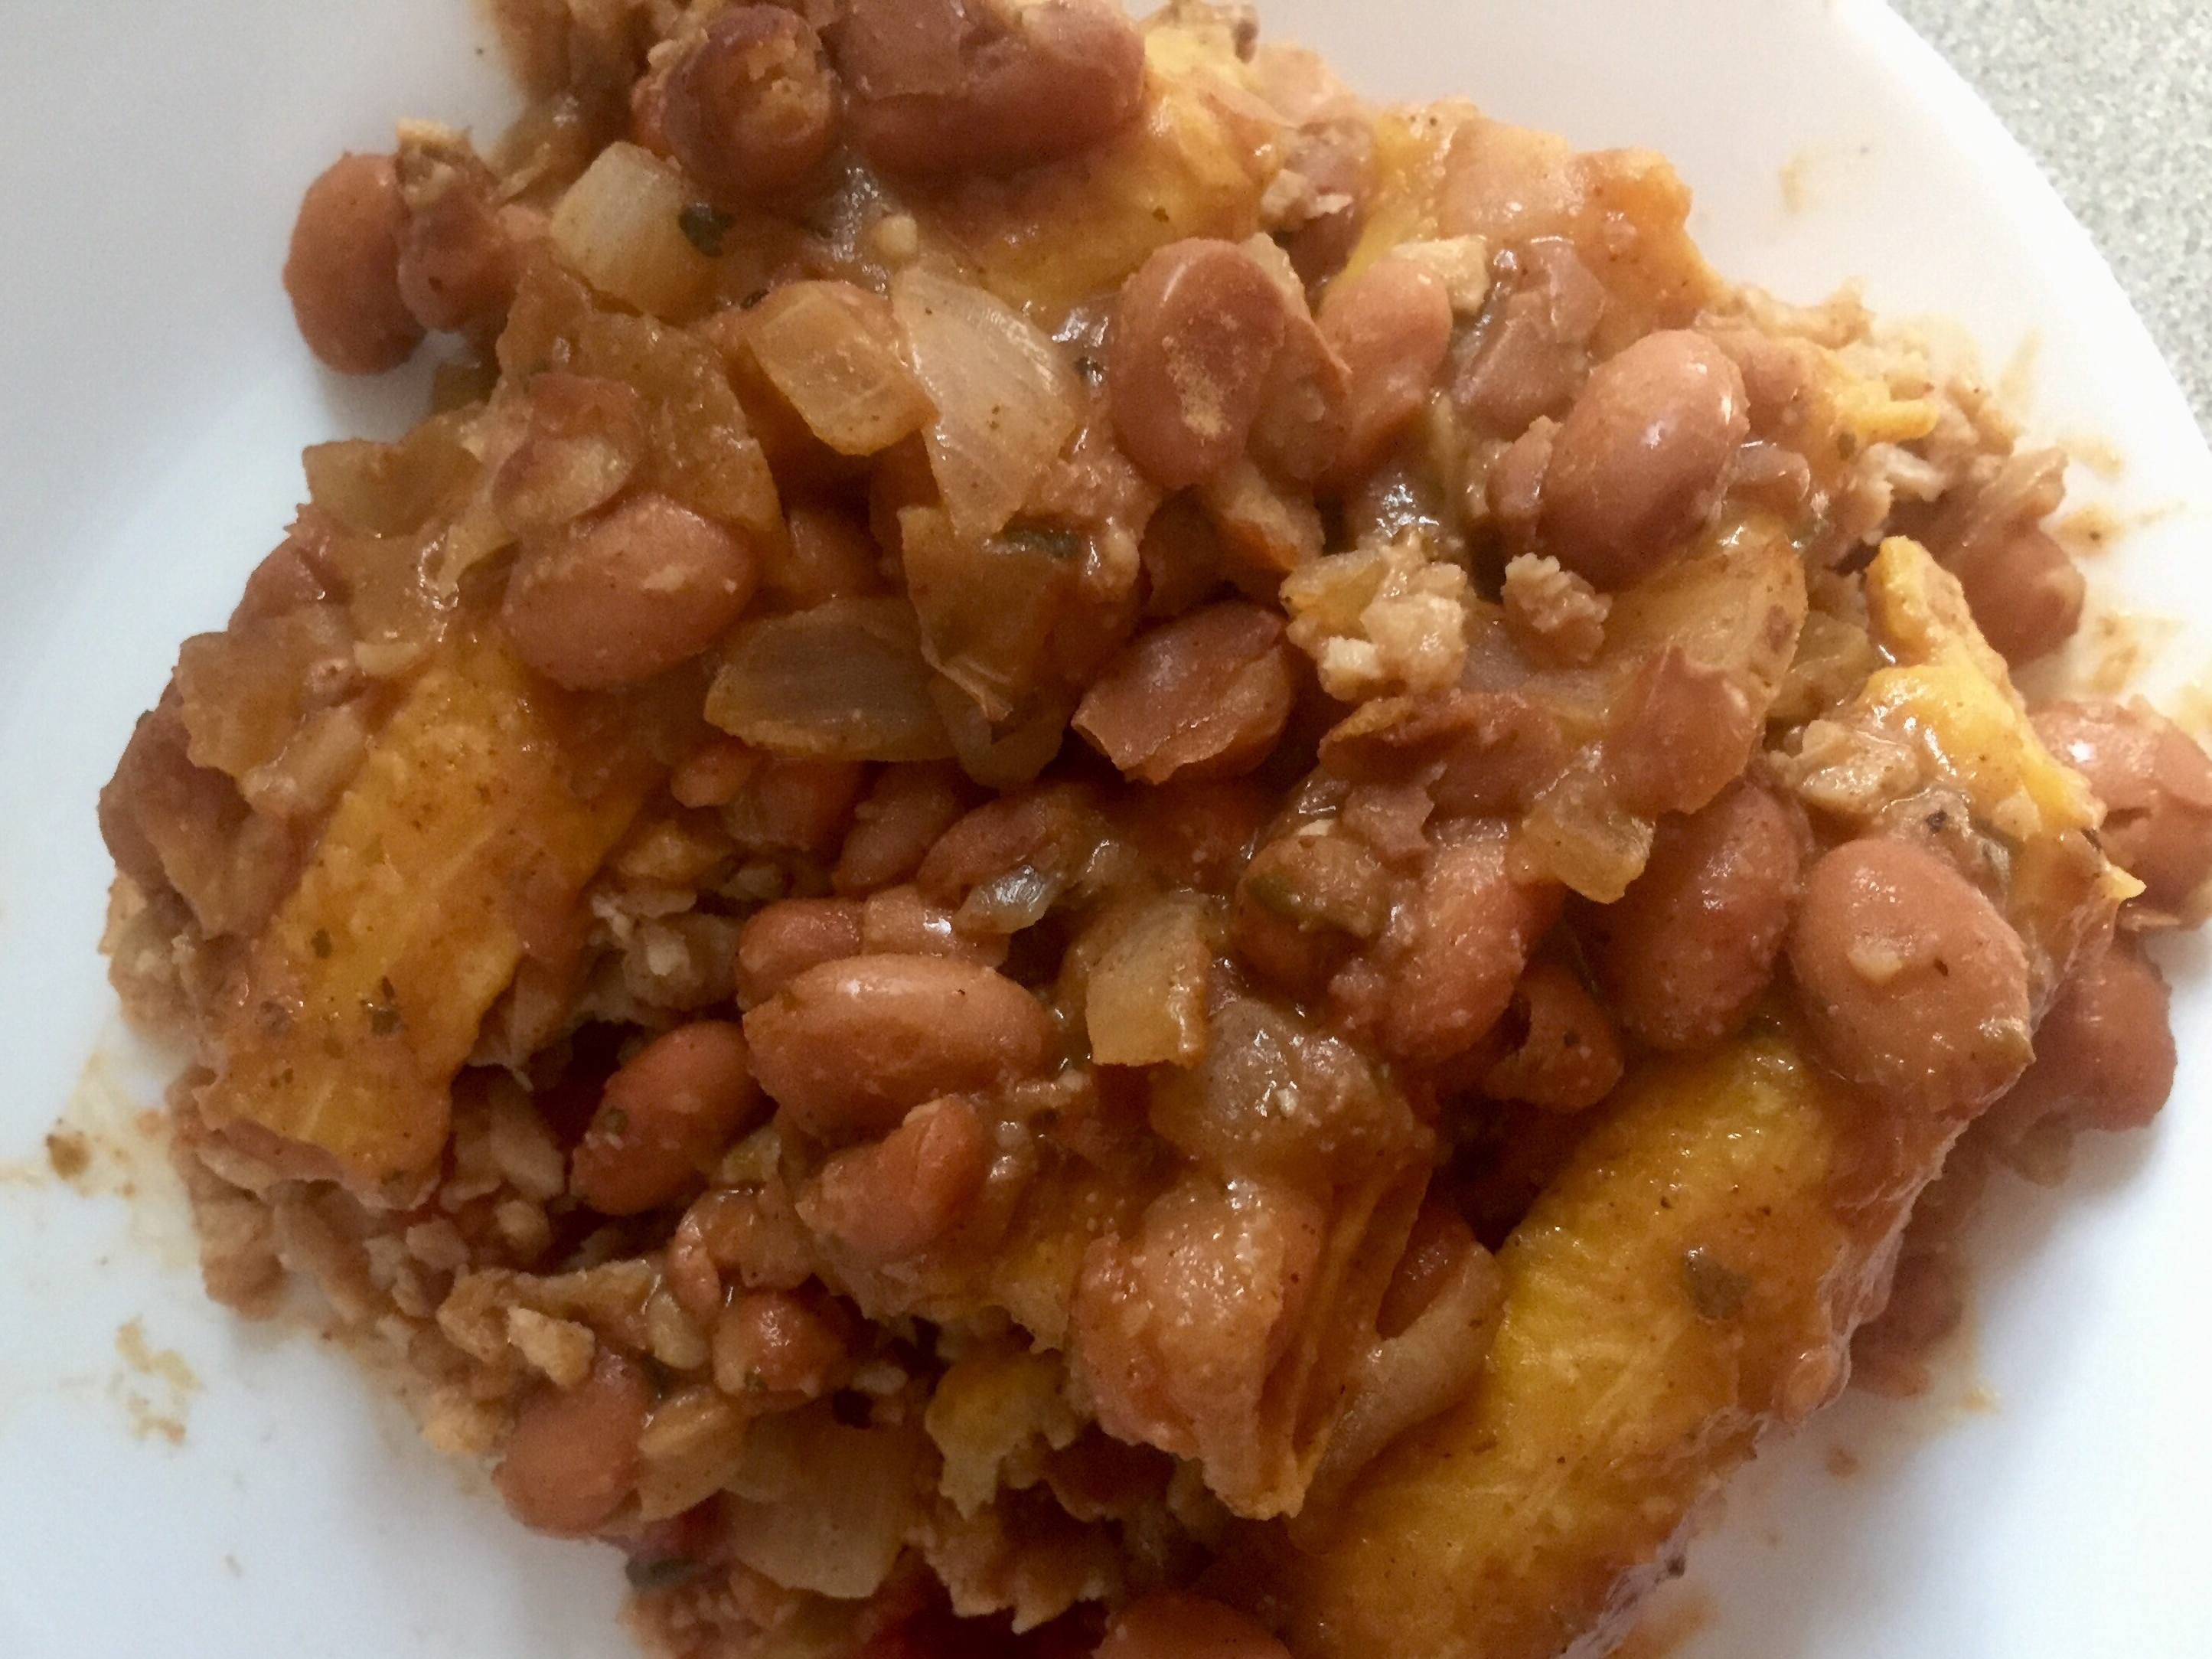
Plantain Lasagna with Pinto Beans, via Eat the Vegan Rainbow
The first time I tasted plantains, those longer, bigger bananas you sometimes see in your grocery store among other exotic fruits and vegetables, I did not like them. They were fried yet sort of mushy, and tasted very sweet although they were served as a savory side dish. So, for the next fifteen years I stayed away from them.
Few months ago I was watching a cooking show, and they talked about Puerto Rican lasagna – Pastelón – that looked delicious, with layers made of plantains rather than noodles. So I decided to give this lasagna a try. Please note that if you expect to see a traditional Pastelón recipe here, stop reading now and go elsewhere. I took a great deal of liberty here, so you will not find any meat or cheese here. What you will find is lots of beans and salsa. And lots, and lots of plantains.
The plantains you want to use here are very ripe. Some stores sell them ripe, but some carry only green looking plantains. You could get those and keep them in a paper bag until they get ripe – I tried this but it did not work really well. So now I go for off the shelf half-ripe plantains that, by the way, are very yellow with a bit of black. This article will help you navigate the plantains and different stages of their ripeness. For me the green plantains were too tough and the very ripe ones were too sweet so I settled on 75%-ripe.
Instead of frying the plantains, which is the most common way people make them edible, I roasted them. You will need to cut through the skin lengthwise and roast them for about half an hour. Their skin should turn totally black and once cooled they should be easy to peel and slice lengthwise into thin slices.
While your plantains are roasting, prepare your lasagna filling, which in this case is a batch of pinto beans, simmered with onions, roasted green chili peppers and spices.
The base for your lasagna will be salsa, and I just use store bought kind, and what will give this lasagna a slightly meaty feel is a layer of TVP – textured vegetable protein. Although the bag TVP comes in may recommend soaking, please don’t do it. This lasagna is juicy enough and the TVP will soften and cook as the lasagna is baking. After the TVP layer, come the plantain slices, and then the beans. Cover everything with foil, but it in the oven for forty five minutes or so, and that will be that. You will have an out of the ordinary lasagna on your hands to enjoy.
Plantains Lasagna with Pinto Beans
What you’ll need:
4 plantains, almost ripe
2 cups salsa, homemade or store bought
2 cups TVP (textured vegetable protein)
1 onion, diced
2 15.5 oz (440 g) cans pinto beans
1 4 oz (113 g) can fire roasted green chili peppers
1 teaspoon cumin
1 teaspoon chili powder
1 teaspoon smoked paprika
Cooking spray
What you’ll do:
Preheat the oven to 425 F (220 C).
Wash the plantains, cut their end off and cut a slit in their skin lengthways. Arrange on the foil or parchment paper lined baking sheet and put in the oven for 35-45 minutes.
While plantains are roasting, prepare the beans. Spray the bottom of a large pan, I used my cast iron pan but you can use any pan you like, and place over medium heat.
Add the onions and cook until golden, which will take about 5 minutes.
Add the spices, and let the spices toast for a minute or so.
Add the can of fire roasted green chili peppers and stir again.
Finally add the beans and using a potato masher mash the beans while they cook. Don’t mash them all the way through – leave some of the beans whole. Let the beans simmer for 15 minutes or so.
By the time the beans are done, plantains will be too. The roasted plantains should be soft but not mushy. Let the plantains cool before handling.
Decrease the oven temperature to 350 F (175 C).
Once cool enough to handle, peel the plantains and cut lengthwise into sheets. Adjust the thickness to your preference.
Spray the bottom and the sides of a deep 9 x 13 in (23 x 33 cm) baking dish with cooking spray. Pour the salsa in and spread to cover the bottom. Distribute the TVP over the salsa to make one even layer. Place the roasted plantain slices over the TVP. Pour the beans over the plantains, cover the dish with some foil and put it in the oven for 30 minutes covered, then uncover and let the top brown for another 10 minutes.
Take the lasagna out of the oven and let it rest for 10 minutes before serving. Serve with plain rice or enjoy as is, perhaps with a sprinkle of cheese alternative or a spoonful of macadamia nut queso fresco. Yum!!!
Gluten-free Cinnamon Raisin Monkey Bread, via Eat the Vegan Rainbow
Have you ever heard of monkey bread? Well, neither have I until recently when I started thinking about an easy breakfast type of a bread that can be made quickly and without much fuss. Monkey bread, a pull apart sticky bread full of cinnamon and drenched in a sticky syrup, is one such option.
Most recipes for monkey bread out there start with a pre-made biscuit dough of some sort – this is fine, especially when you are in a rush, but most of these doughs are not gluten-free. Also: if you are paying attention to what you eat and how much salt and fat you consume, these products are probably not for you although most of them are actually vegan.
The recipe below is my attempt at making monkey bread that is gluten-free, relatively low on oil (and you can skip oil if you want an oil-free version), and full of lovely fruit and vegetable. To boost the flavors and sweetness, I am using pumpkin purée and raisins, and too boost healthy fats and provide a binder for the bread dough I am using chia seeds. Lastly, I am not using a great deal of sticky syrup – but just enough agave syrup to make this slightly over the top. This means that unlike monkey breads you may have had in the past this one is not dripping with gooey syrup, although it is sticky (and finger licking’ good!).
You can play with arrangements of the small dough pieces when you start to lay them out, and create any pattern you like. Traditional monkey bread is made in the Bundt pan. If you would like to experiment with that you will need to make several adjustments to the recipe below. First of all, you will need to prepare a different sticky sauce that is made from brown sugar and butter, and if you don’t want to use butter (vegan or otherwise), you may want to use a bit of corn or tapioca starch as a thickener. The sticky sauce would go to the bottom of your pan and dough chunks are layered one on top of each other. In that case, you will need to double the amount of dough from the recipe below and follow the instructions on how to assemble the bread here.
Gluten-free Cinnamon Raisin Monkey Bread
What you’ll need:
1 cup raisins
1/2 cup chia seeds
1 cup hot water
1 cup rice flour
1/2 cup arrowroot flour
1/4 cup glutinous rice flour (or corn/tapioca starch)
1 teaspoon baking powder
1 teaspoon baking soda
1 tablespoon cinnamon
3/4 cuppumpkin purée
3 tablespoons oil (canola or vegetable; you can skip if oil-free)
1 tablespoon apple cider vinegar
1/3 cup agave nectar (or maple syrup), divided
Butter or oil for greasing the baking dish (optional)
What you’ll do:
Cover the raisin with some water and leave them to soak overnight. If you are in a pinch and need them sooner, you can soak them in hot water and they should be ready to use within 15-30 minutes.
When ready to make the monkey bread, turn the oven on to 350 F (175 C).
Soak chia seeds in a cup of boiling water until gel-like substance forms. This usually takes 10-20 minutes.
While chia seeds are soaking, mix together all the dry ingredients (flours and spices).
In a separate bowl, mix together the wet ingredients: pumpkin puree, soaked chia seeds, oil, and vinegar. Mix well.
Pour the wet ingredients into the dry ones, mix well, then add the raisins and mix again.
Grease the bottom and the sides of a baking dish (8 x 8 in (20 x 20 cm)). You can skip this step if you are using a high quality non-stick pan. Pinch smaller chunks of the dough (roughly 1/4 cup), form into a ball by gently rolling (don’t pack too tightly, the dough should feel loose but not falling apart), and start arranging the monkey bread by placing the balls next to each other. Let them touch but don’t press the balls together. If you can’t squeeze them all in, start another layer and continue until all the dough is used up.
When all the dough balls are all arranged, brush one half of the agave nectar over the top, and bake for 20-30 minutes. The monkey bread is done when the surface is completely brown.
Take the monkey bread out of the oven, brush the rest of the agave nectar over, and leave to soak and cool for 15 minutes or so before digging in!
“Where do you get your protein from?” is probably the most detested question that those enjoying plant-based (vegan) diet get asked all the time. Of course, we know that this is an easy question to answer because plants are full of protein.
But just in case you feel that you need an extra protein boost, especially when it comes to breakfast, I have a perfect solution for you. How about some protein packed English muffins? Actually, these are not oven-baked; rather they are done within a few minutes using a microwave.
Perhaps you’ve seen recipes for mug cakes? Or you may have seen new “mug cake” product lines in your local supermarket? The idea is that you whip up your ingredients in a mug, mix them together and after 3-5 minutes in a microwave you have your single-serve cake or a muffin ready to enjoy.
I use the same basic idea here except that instead of eggs and flour I use pea protein powder, peanut butter powder (which is really peanut protein powder), some flax meal, baking soda, a dash of vinegar (or lemon juice) and water or plant milk of choice. Believe it or not, after 3 minutes in the microwave on high power you get a nice little muffin. I recommend slicing the muffin across horizontally, then toasting it for some extra crunch. Yummy!
So, how does this work? I don’t know for sure but I do have a working theory that the carbon-dioxide released when baking soda meets a splash of vinegar or lemon juice is enough to lift the “dough”, and once up the protein molecules have sufficient strength to support the structure.
The main trick here is not to make the mix too wet. When you mix your ingredients together, you will have something that looks more like a paste than a muffin batter. Don’t worry, this is as it should be. The best dish to microwave the muffin in is a 3-4 inch (8-10 cm) ramekin, and I recommend that you grease it with either a bit of butter or some cooking spray. A little will go a long way to help your muffin slide out.
Lastly: a note about microwaves. They are all different and have moods of their own. I recommend you start on high power, and check how things are doing after about 2 minutes. You should look for a dry looking top and sides that are coming away from the ramekin. At the end, the muffin should slide out of the ramekin without much resistance, usually after you run a butter knife around the edges to release the muffin.
Gluten-free and Vegan Protein-Packed No-Bake English Muffins
What you’ll need:
2 tablespoons pea protein powder
2 tablespoons peanut protein powder
1 tablespoon ground flax meal (golden is preferred)
1/2 teaspoon baking soda
1/4 cup and 1 tablespoon almond milk or water
1 teaspoon apple cider vinegar
Vegan butter (optional)
What you’ll do:
Place all the ingredients into a small bowl, and mix to combine. I recommend adding a splash of acid (vinegar or lemon juice) last. The batter will be dense and sticky, just FYI.
Pour the batter into a microwave safe ramekin or a mug that’s about 3-4 in (8-10 cm) in diameter and that has been greased with butter or sprayed gently with some cooking spray.
Microwave on high for 3 minutes or so. The top should be dry and look baked, and the sides should be coming of. If all is well, the muffin will slide out of the ramekin without much resistance after you run a knife around the edges. If not, it means that the bottom is still moist, and the mix needs to go back for another 30-60 seconds.
Enjoy the muffin as is, or toast if you prefer things a bit crunchier. You can top the muffin with butter, jam, hummus, avocado, fruit, or anything else you like. The muffin itself is neither sweet nor salty so lends itself to utmost customization!
When I was a college student, one of the most despised items served in the campus cafeteria was lentil stew. I can’t even remember the flavor now, but I remember that nobody really liked it so there was always plenty of it left over. So, every time I would run late from a class to lunch, I would end up with a bowl of lentil stew!
Things have, of course, changed quite dramatically since my college days, and I now make lentils almost every week and really enjoy them as a healthy, cheap and tasty ingredient. They are a great source of protein and they are versatile. Once cooked, they can be made into soups, burgers, or delicious Shepherd’s Pie, which I recommend you make and serve to everyone questioning your plant-based (vegan) diet and lamenting that they would never be able to give up meat!
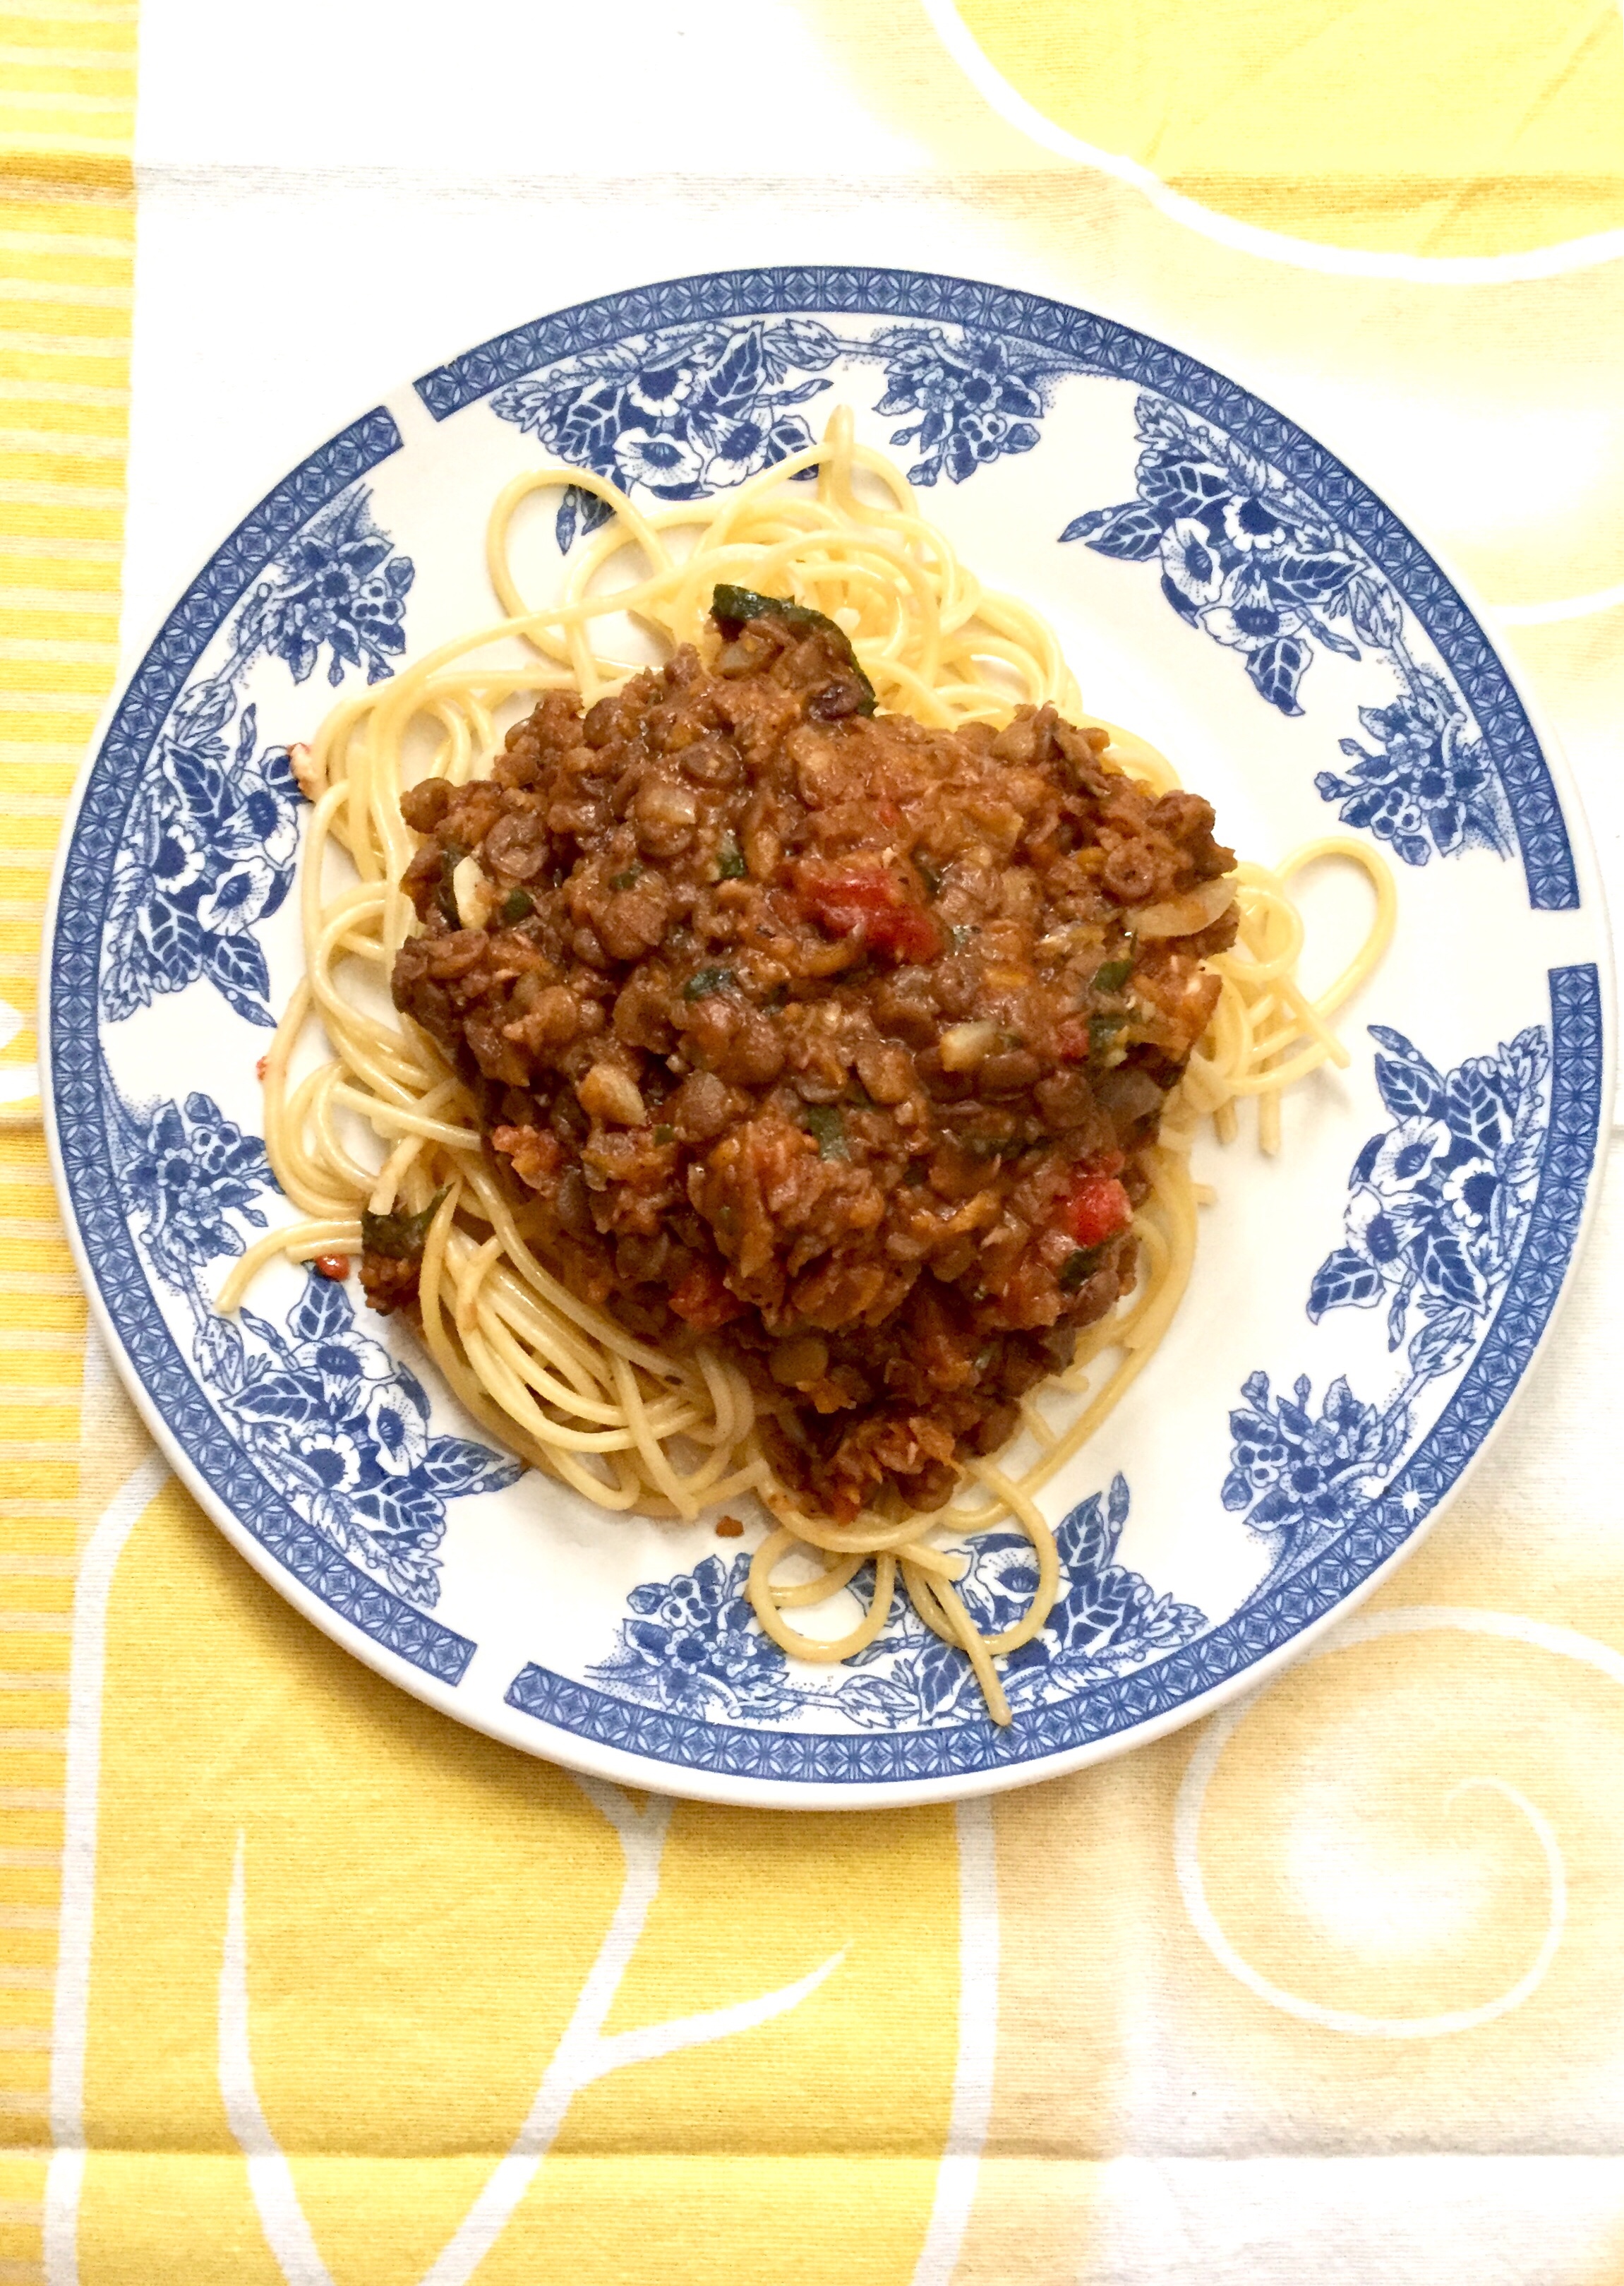
Because of their texture and size, they are often used as a substitute for minced meat. That’s why they work really well in this simple Lentil Bolognese sauce. I hope you enjoy it and share with friends and family, neighbors and the world!!!
Basic Lentil Bolognese
What you’ll need:
200 g brown lentils, cooked
4 carrots, grated
1 yellow onion, diced
4 cloves garlic, thinly sliced
1 can (14.5 oz; 411 g) diced tomatoes
1 tablespoon dried basil
1 tablespoon dried oregano
1/4 cup fresh Italian (flat leaf) parsley, chopped
Freshly ground black pepper to taste
Salt to taste (optional)
Regular or gluten-free pasta to serve, cooked according to the instructions on the packaging
What you’ll do:
Wash the lentils and check them for any non-lentil bits – sometimes little stones and bits can end up in the lentil bag so it is always a good idea to check. Place lentils into a pressure cooker, cover with water, and cook for 10-25 minutes once the pot is fully pressurized. Please note that the time may vary depending on your pressure cooker and you actually can cook your lentils in a pot and skip the pressure cooker all together. You are aiming for lentils that are soft but not mushy.
Place a large pot over medium high heat, add oil, grated carrots, diced onions, and sliced garlic and cook for 5-8 minutes, mixing frequently. Next add the cooked lentils, basil and oregano, and finally diced tomatoes. Lower the heat down to low and let the sauce simmer for 15 minutes or so.
Turn the heat off, then mix in fresh parsley, freshly ground pepper and salt to taste. Serve over pasta or over mashed potatoes!
Vegan Chocolate Mousse Pie, via Eat the Vegan Rainbow
It’s OK to indulge and be decadent from time to time, and in my book the best way to feel indulgent and decadent is to go for some chocolate. Vegan chocolate is not hard to find. Almost any dark chocolate with high cocoa content is likely to be acceptable, so there are no reasons to stay away from chocolate treats. Having said that, if you are trying to drop a few pounds, the recipe below is not for you and most of chocolate treats is probably off limits.
The amazing thing about my chocolate mousse pie recipe below is that it uses roasted sweet potatoes. Roasted sweet potatoes are my favorite snack, often even breakfast , and definitely one of my favorite ways to reduce the amount of sugar that I use in my recipes. Roasting helps the natural sweetness of the potatoes come through, and what you end up with is super sweet and super soft root vegetable ready for puréeing and use in things like pancakes and even ice cream! If you are looking for instructions on how to roast sweet potatoes, you may want to check my post on Sweet Potato Butter for details.
My Chocolate Mousse Pie is as easy as a pie – really! There is no baking involved and all you really need to do is melt lots of chocolate and not shy away from using some butter to help things along. My favorite brand of vegan butter sticks is Melt – the price may be higher than other butters out there, and especially the margarine which is plant-based but just not that good for you because of all those hydrogenated trans fat acids, but I recommend you use it only on special occasions and in small quantities. This means that the pound (half a kilo) of butter will last you a long time!
Final note is that you should feel to customize the frosting to feature your favorite nut butter, or to include cocoa powder for example. I personally love almond butter and also think that almond butter mousse frosting works really well to bring the pie together, by connecting the crust flavors with the frosting. In this way, every single mouthful has harmonized flavors, from the beginning to the end.
Vegan Chocolate Mousse Pie
What you’ll need:
FOR THE CRUST
4-6 large madjool dates
1 tablespoon vegan butter, melted
1 cup raw almonds (unsalted)
FOR THE FILLING
10 oz silken tofu
2 roasted sweet potatoes
2 cups melted chocolate
1 teaspoon cinnamon
1/4 teaspoon nutmeg
2 tablespoon unsweetened, plain rice milk (or any other plant-based milk)
FOR THE FROSTING
1 stick vegan butter
1/2 cup almond butter
2 tablespoons agave syrup
What you’ll do:
To prepare the crust, melt the butter in a microwave (1-2 minutes in 30 second increments until fully melted), then added it to a food processor with dates and almonds. Pulse for 8-10 times, until everything is finely chopped and combined. When the crust is smooth and sticks together well, transfer it into a springform pan, the pan you would normally use to make cheesecake. Using your fingers, press the crust into the bottom, until firmly packed. Place the pan into a refrigerator for 15-20 minutes to allow the crust to firm up.
While the crust is firming up add the drained tofu and chopped roasted sweet potatoes into a large food processor and process for 30-45 seconds. Add the melted chocolate and process for another minute. To melt your chocolate, you can use a double boiler method or a microwave method. At the end, add the spices and plant-based milk and processes until the mixture is smooth.
Pour the filling into the springform pan and even out the surface. Sometimes banging the pan on the kitchen counter helps the filling set, and prevents random empty space areas from forming. Leave the chocolate mousse pie in the fridge for at least 4 hours to firm up. I recommend leaving the pie in the fridge overnight and finishing the frosting the next day.
To mix the frosting, combine the almond butter, butter and agave syrup (or another sweetener like maple syrup) into a bowl and mix until smooth and combined using a hand held mixer. You can also do this using a standing mixer. Apply the frosting any way you prefer. I usually place the frosting into a zip lock bag, and then snip of a corner with scissors to make a hole of a desired size. Holding the top of the bag firmly in my left hand (I am right handed), I then use my right hand to guide the piping bag and create frosting patterns I like. In this case, I went for a flower in the middle, but you can really do anything you like.
After you frosted the pie, pop it back into the fridge for 30-60 minutes. This should be enough time for the frosting to firm, and once that’s done you are ready to pull the pie out. I recommend leaving the pie at room temperature for 15 minutes before serving, and then dig in!