Basic gluten-free vegan crêpes

Oui, oui… we all love crêpes! Savory or sweet these flat wraps are easy to make and delightful. Of course, those in the business of crêpes making may lead you to believe that crêpes are beyond your capabilities. And even if you are brave to venture into the crêpes land, you may hesitate to accept the vegan crêpes challenge. Yet, there’s nothing to worry about as crêpes can be not only vegan but gluten-free as well.

Choosing the right crêpes pan

The pan you use makes a huge amount of difference when making crêpes. You need a good, preferably non-stick, shallow frying pan with large surface area. The pan should also not be too heavy because there is a fair bit of pan handling (lifting, tilting, swirling) that will need to take place. I use IKEA but you can use any pan the fits this description – roughly.

Preparing the pan

I recommend getting the pan nice and hot before adding a batch of batter. Also, remember to oil the pan before each crêpes. I place my oil in a small bowl which I keep on the stove for easy access and use a silicone brush to brush the oil over the pan’s bottom just before pouring in a batch of batter. And keep doing this each time!

The first crêpe is always the worst!

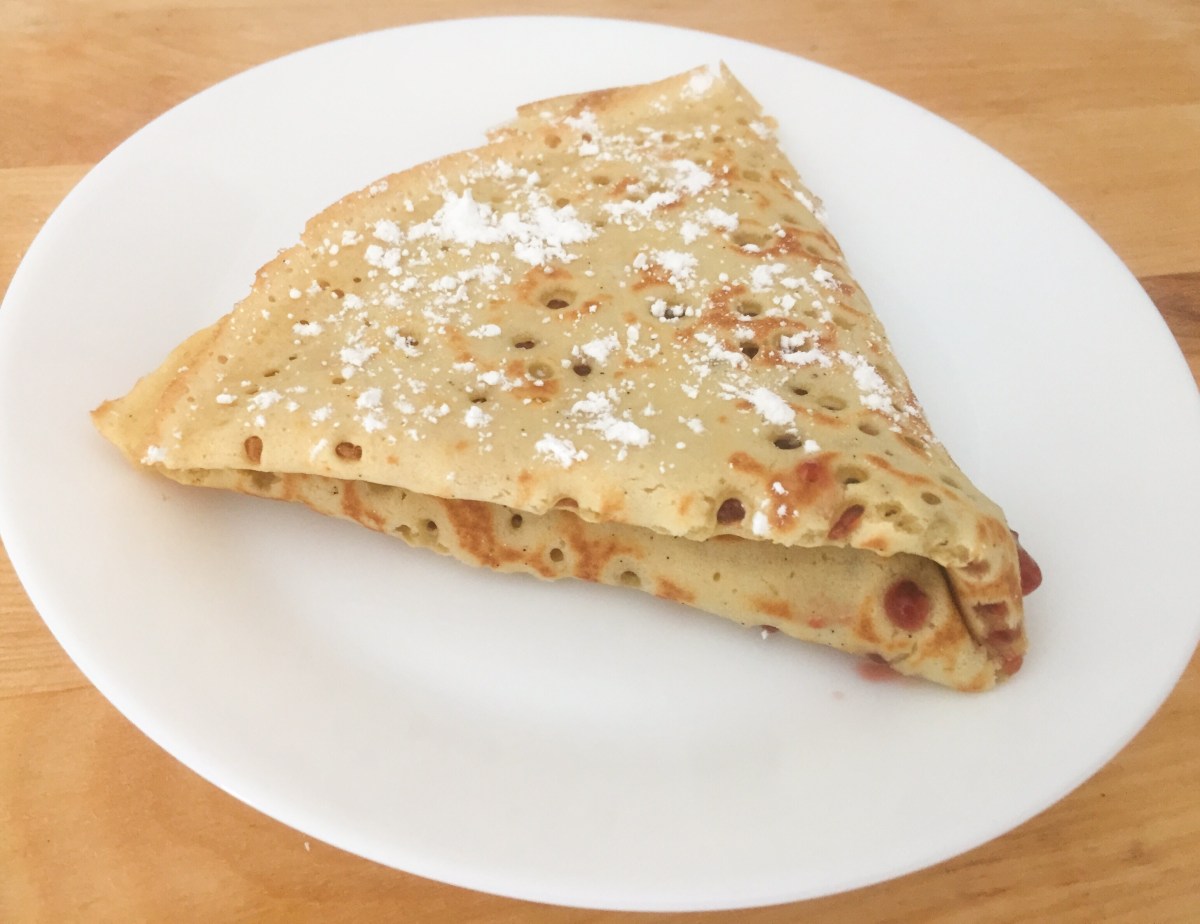
One dirty little secret of crêpe making is that the first crêpe is always the worst!!! So, although this first crêpe will be nerve wracking and make you feel like a total crêpe disaster, please do persevere and things will get better. This phenomenon seems to be all down to improperly oiled and insufficiently heated pan – and following the instructions here or in this very helpful post will ensure that your second, third, fourth, and so on crêpe all come out perfect. What helps is keeping the heat up, oiling the surface and using a really long and thin spatula to gently peel the crêpe off and flip over. What also help is being stingy with a batter. You are going for a very, very thin pancake here and the pictures below show you what my crêpes looked like.

Finishing crêpe touches

There are many different ways to enjoy the crêpes. You can use light spreads, like jams, chocolate syrup or nut butters, or simply sprinkle with some sugar and cinnamon, or go for the classic combination of butter and maple syrup. Chopped up fruit and/or nuts, as well as walnut and almond meal also work. If you are want to totally impress your guests you may want to make a crêpe cake, and if you made a batch of savory crêpes you can definitely use them in the same way as tortillas or other thin, unleavened breads. If you are wondering what savory crêpes are all about, I previously shared an easy to make scallion crêpe recipe with a sesame dipping sauce.

All in all, this recipe is perfect for a Sunday brunch, or a nice family breakfast around the Holidays. It is something that you could make ahead and bring to a pot luck, but the best way to enjoy crêpes is straight out of the pan, while they are still hot and soft. Incredible – oh là là!!!

Basic Gluten-free Vegan Crêpes

What you’ll need:

2 cups chickpea flour

1 cup corn starch

2 tablespoon agave syrup (omit if you plan on savory toppings)

1 teaspoon baking powder

1 teaspoon baking soda

1/4 teaspoon salt

1 tablespoon vanilla paste

1 teaspoon maple flavor

2 cups almond milk

1 cup water

2-3 tablespoons vegetable oil


What you’ll do:

  1. Combine all the ingredients as listed in a large mixing bowl, and whisk them all together. Let the batter rest for 15-20 minutes.
  2. Place a large pan with a flat surface over high heat. Let the pan heat up then using a silicon brush spread some oil uniformly over the entire surface. Pour just enough batter to cover the surface with a thin layer – for my 9 in (23 cm) pan I use about 3/4 cup. Pour the batter gradually towards the middle and keep pouring as you twirl the pan around.
  3. Place the crêpe over high heat for 2 minutes or so, then lower the heat just a tad and let the crêpe finish cooking on the first side. The way you can tell the crêpe is ready to be flipped is by looking at the surface – once the surface starts looking dry you are ready to flip.
  4. If you have a very good pan and have done everything right your crêpe will not be tightly attached to the bottom and you may even be able to flip it through the air. But if your crêpe is not loose then use your spatula to gently loosen the crêpe and flip it over. The flipping needs some practice, so be patient.
  5. The crêpe needs to cook on the other side for just 1-2 extra minutes. Slide the crêpe out, then increase the heat, leave the pan on for a minute to get it back to being really hot, spread some oil and repeat. Your friends and family may want to start eating the crêpes are they come out of the pan, and I say let them! Crêpes are the best when fresh, so it makes total sense to jump right in!!!

Copyright © Eat the Vegan Rainbow, 2018

Baked Spaghetti Marinara

Baked Spaghetti Marinara
Baked Spaghetti Marinara, via Eat the Vegan Rainbow

What can be better than spaghetti tossed with a simple tomato sauce, and sprinkled with some parmesan cheese, olive oil and fresh basil? For me, pasta, and especially spaghetti, have been a huge go to food because they are (a) easy, quick and cheap to make, and (b) absolutely delicious!

Marinara sauce for all seasons

In my view, simple marinara sauce is the best sauce for dressing the spaghetti. Yes, sure, bolognese is also pretty good, especially this amazing lentil and mushroom bolognese sauce, or this ragù made with lentils and walnuts. Marinara sauce is the type of simplicity that can only be described as pure genius. The sauce is tomato based and usually includes only a couple of additional ingredients, like olive oil, garlic, onions, and herbs, like oregano and basil.

Homemade marinara sauce to the rescue

Although I have been known to reach for a jar of store-bought marinara sauce from time to time, I do prefer to make this sauce myself. It’s actually one of the easiest things to make as all you need is some olive oil, garlic, tomato sauce, and dried oregano and/or basil. The sauce is done in less than 15 minutes, which is probably less time than it will take you to boil the spaghetti given that getting a large pot of water to boil does take forever, and your dinner will be ready and on the table in a blink of an eye.

From quick pasta to baked pasta

However, if you do have a bit more time and don’t have to rush I recommend that you give the recipe below a try. It is essentially the same recipe, just elevated to a bit more gourmet experience. The sauce is made with fresh and canned tomatoes, and includes nutritional yeast that boosts the “cheesy” flavors. The spaghetti and sauce are mixed together then baked to create a nice balance of smooth, soft, and just slightly crunchy. Given some gluten sensitivity, my recipe here was made using gluten-free pasta, but you can use any spaghetti you like. I recommend that you cook spaghetti only 80% through as they will continue to cook in the sauce as they bake. I also recommend that you use an ovenproof pot, such as a Dutch oven I used below, in order to go from the stove top directly into the oven.

Don’t forget fresh basil

Finally, don’t forget to top your pasta with some fresh basil. We all know what that will do of you, so let’s not belabor the point. Trust me, this Baked Spaghetti Marinara will quickly become your favorite!


Baked Spaghetti Marinara

What you’ll need:

1 lbs (454 g) box spaghetti (regular or gluten free), cooked al dente

4 cloves garlic, finely sliced

1 pint (10 oz, about 300 g) cherry or grape tomatoes, halved

1 28 oz (794 g) can of chunky crushed tomatoes

1/2 cup nutritional yeast

2 teaspoons dried oregano

2 teaspoons dried basil

2 tablespoons olive oil

Fresh basil

A pinch of salt

What you’ll do:

  1. Preheat the oven to 350 F (175 C).
  2. Bring a large pot of water to boil. Add a pinch of salt, then place spaghetti gently into the boiling water until fully submerged. Cook about 1 minute less than what the instructions on the box suggest. The spaghetti should be al dente, meaning still a bit underdone.
  3. Simultaneously with making the spaghetti, start working on your sauce. Add the oil to a large, ovenproof pot. I used my Dutch oven for this one, and it worked well. Place the pot over the medium heat, and add the sliced garlic. Let the garlic brown for 1-2 minutes.
  4. Once the garlic starts to release its aroma, add the halved cherry (or grape) tomatoes, and sauté until tomatoes are softened. This will take about 5 minutes.
  5. Add the nutritional yeast and let it brown for only a minute.
  6. Next, add the crushed tomatoes and mix well. When the sauce starts to bubble, add dried herbs, cover with a lid and simmer for 5 to 10 minutes.
  7. Turn the heat off, and add the cooked spaghetti to the sauce. Mix well until spaghetti are evenly distributed and fully covered. Place the pot into the oven and bake for 20 minutes or so, until the edges and the top are nicely browned.
  8. Serve with fresh basil and enjoy!

Copyright © Eat the Vegan Rainbow, 2018

SaveSave

SaveSave

SaveSave

SaveSave

Vegan “Chicken” in a Nut Sauce

931d0cf7-f2a2-42db-9b25-e07bd77c6275
Vegan “Chicken” in a Nut Sauce, via Eat the Vegan Rainbow

Creamy, aromatic, and surprisingly sweet – those are just some of the ways to describe this rich dish. Originally made with chicken and cashews, I transformed the recipe into one that uses soya chunks instead of chicken, and walnuts instead of cashews. The result is a nuttier and creamier vegan delight!

What are soya chunks?

Soya chunks are a common meat substitute. According to this Wikipedia page, the ingredient used to make soya chunks is the byproduct of soy oil production, so basically all the protein rich solids left after the fat has been extracted. These solids can be made into many different shapes and sizes and some common products are texturized vegetable protein (TVP), soya curls and soya chunks. All these products usually require some soaking in water or a brief dip in a pot of boiling water to rehydrate them as they are packaged an sold dry.

Where do you find soya chunks?

Most large grocery store chains in the USA don’t carry soya chunks. This is a surprise since we could easily find them in my small home town in Serbia when we visited last summer! But in the US, you either need to order them through Amazon, or visit an South Asian grocery store. The price at my local Indian grocery store is about $2-3 for a 200 g box, which is enough to make a big pot of dinner to feed 6-8 people. Amazing, isn’t it?

Let the food processor do all the work

The recipe calls for a range and of ingredients, and quite a few spices. But the preparation itself is super easy. The sauce comes together in a food processor and then it slowly cooks and simmers with the rest of the ingredients. If you prefer a chunky sauce, dial down the length of processing, and if you prefer a smooth sauce keep processing and add a bit of water as you go for smoother consistency.

This dish is rich and complex, and it’s best served with simple basmati rice. Enjoy!

Vegan “Chicken” in a Nut Sauce

What you’ll need:

200 g soya chunks

2 yellow onions, finely diced

4 cloves garlic, thinly sliced

2 tablespoons sliced ginger

1 cup walnuts

1/4 cup tomato paste

1/4 cup yogurt (almond, cashew or any other one you like)

1/2 lemon, juice only

2 tablespoon vegetable oil

2 teaspoons garam masala

1 teaspoon chili powder

1 teaspoon coriander powder

1/4 teaspoon turmeric

1/4 teaspoon salt

1/4 cup golden raisins (sultanas)

10 oz white mushrooms, quartered

1/2-1 cup water, to taste

2 tablespoons fresh cilantro, and more for garnish


What you’ll do:

  1. Rehydrate soya chunks according to instructions on the box. This will usually require either leaving them in some boiling water for 3-5 minutes or soaking them for a while.
  2. Drain and rinse the soaked chunks. Squeeze them gently to shake a bit of excess liquid off, but don’t squeeze them dry. That will make them rubbery and too chewy. You want the chunks to be soft and moist. Set aside.
  3. Place onions, garlic, ginger, walnuts, tomato paste, spices, oil, lemon juice, and yogurt into a food processor, and process until a smooth sauce forms.
  4. Place a large, heavy pot, like a Dutch oven, over the medium high heat and bring to temperature. Add the sauce and cook for 5 minutes with frequent stirring.
  5. Add the mushrooms and mix well. Cook for another 5 minutes then add the soya chunks. Mix well again, and check if any water is needed. You want the sauce to be dense, but still flowing so adjust the liquid accordingly.
  6. Add the golden raisins and simmer, covered, for another 10-15 minutes.
  7. Serve over some rice and sprinkled with fresh cilantro.

Copyright © Eat the Vegan Rainbow, 2018

Vegan and Gluten-free Baked Eggplant Parmesan

Vegan & Gluten-free Baked Eggplant Parmesan, via Eat the Vegan Rainbow

Eggplant Parmesan – the staple of Italian restaurants in our area, and a frequent favorite of many. Unfortunately, it is so easy to overdo this dish and make it almost inedible. For example, frying the breaded eggplant very often results in a mushy piece of oily eggplant that is far from appetizing. So, to compensate for absence of flavor of a soggy eggplant people usually dump in a whole lot of cheese, usually a mix of ricotta and mozzarella. This makes for a goopy mess of a meal that can be easily avoided by following couple of simple rules. Rule 1: bake your eggplant; Rule 2: make your own tomato sauce; and Rule 3: make the dish 100% plant based.

Prepping the eggplant

Eggplant has a bad reputation for being bitter unless prepared a certain way. However, I don’t remember the last time I had one that was bitter when grilled, or made into a stew. Having said that, for the eggplant parmesan I do recommend that you use the trick that’s supposed to draw the bitterness out. You slice the eggplant, sprinkle with salt and then let drain for 15-30 minutes. The way I did it is to place the eggplant on several layers of paper towels, sprinkle salt, cover with more paper towels, put a baking sheet over the top and weigh with some cans. The amount of liquid that eggplant releases is not enormous but the paper towel should be quite damp.

Breading the eggplant, gluten-free and vegan way

The next step towards your Eggplant Parmesan is breading and baking the eggplant. I don’t recommend frying the eggplant – baking at 425 F (220 C) will give you much better results, and nice crispy eggplant.

To get to a gluten-free version of this classic all you need to do is use gluten-free bread crumbs which are now available in most grocery stores. If you don’t have access to gluten-free breadcrumbs you can use stale and/or roasted gluten-free bread to make your own bread crumbs. Or, if that is not available either, you could use corn flakes and make them into the crumbs! And don’t forget to add some dried oregano and basil to your breading – that just makes everything better!!!

For the breading, you will also need an “egg” mix, in this case some vegan mayo mixed with some plant milk. This mixture gives a nice thick consistency, but if you’d rather skip mayo, you could use just plant milk. The main point of the “egg” mix is to make the surface sticky so that the breading adhere to it well.

Eggplant parmesan breading assembly line

So, your breading assembly line will look something like this – pile of eggplant slices, deep fish (soup plate) with the “egg”, a pie dish with the bread crumbs, and the baking sheet lined with parchment paper sprayed with some cooking spray. An eggplant slice would go from the “egg” mix, to the crumbs, to the pan.

After about 15-25 minutes in the oven the eggplant should be nicely golden and crunchy.

Making the perfect marinara tomato sauce

While the eggplant is baking, you can make your very own amazing tomato (marinara) sauce. The sauce starts with some olive oil and garlic, and includes only five ingredients. You will need olive oil, garlic, crushed and whole peeled tomatoes, and dried oregano and basil.

Vegan eggplant parmesan needs some good cheese

The cheese starts with cashews soaked overnight. It includes nutritional yeast, plant milk, lemon juice and that’s it! As with the tomato (marinara) sauce, this cheese is universally applicable to a range of recipes and dishes. The final consistency is that of a ricotta not mozzarella, but in this case that works great.

Putting the eggplant parmesan together

This magnificent eggplant parmesan starts with a layer of marinara sauce on the bottom, then a layer of breaded eggplant, followed by some tomato sauce then cheese, another layer of eggplant, sauce and cheese, and so on. You can keep layering until you run out of ingredients. Once all the layers are in, put your eggplant parmesan in the oven and let the top and the edges brown. Let the baked dish cool for 15 minutes or so, sprinkle some fresh basil and some freshly ground pepper, then serve with a simple salad. Yummy!

Vegan and Gluten-free Baked Eggplant Parmesan

What you’ll need:

FOR BAKED BREADED EGGPLANT

3 large eggplants, cut across into 1/2 in (1-1.5 cm) rounds

1 teaspoon salt

1/2 cup mayo

1/4 cup milk

1 cup bread crumbs (gluten-free or regular depending on your preference)

1 teaspoon dried oregano

2 teaspoons dried basil

Cooking spray


FOR SIMPLE TOMATO (MARINARA) SAUCE

1 can crushed tomatoes

1 can whole peeled tomatoes, crushed by hand

3 cloves garlic, thinly sliced

2 tablespoon olive oil


FOR SIMPLE RICOTTA CHEESE

1 cup cashews, soaked in water for at least 3 hours (overnight in the fridge is fine)

7 oz. silken tofu

1/2 cup almond milk

1/2 lemon, juice

1 tablespoon nutritional yeast

1/4 teaspoon salt

Fresh basil, finely chopped (optional)

Freshly ground black pepper (optional)


What you’ll do:

  1. Cut the eggplant into rounds, arrange on several layers of paper towel, sprinkle with salt, overlay with several more layers of paper towel, then weight down and leave for 15 minutes. This will draw excess moisture out – your towels should be quite damp, so pat the eggplant dry and set it aside.
  2. Preheat the oven to 425 F (220 C).
  3. Line a large baking sheet with parchment paper and spray with the cooking spray.
  4. In a large soup plate combine mayo and plant milk together. Whisk well. Next, in a separate plate combine bread crumbs and dried oregano and basil. Take a piece of eggplant, dip in the mayo/milk, then move to the breadcrumbs, and lay flat on the parchment paper. Repeat until all the eggplant is used up. You may need two baking sheets for this, so have another one on stand by just in case.
  5. Spray the top with a bit more cooking spray, then bake the eggplant for 15 minutes. Flip it once and bake for 10 more minutes. Take the baked breaded eggplant out and let it cool before handling further.
  6. While the eggplant is baking, prepare the sauce and the cheese. To make the marinara sauce, place a large, heavy pot (I use a Dutch oven) over the medium high heat, add the oil and sliced garlic. After 1-2 minutes, add the can of crushed tomatoes and the can of whole peeled tomatoes that you have smushed with your hands. Let the sauce come to a simmer, lower the heat down, and leave the sauce to simmer with a lid one until needed for the next step.
  7. While the sauce is simmering, combine all the ingredients for the ricotta and blend until smooth using a blender. Set aside.
  8. For the final step you will need a deep baking dish, like the 13 x 9 in (33 x 23 cm) dish. Pour in some tomato sauce, and spread around until the bottom is fully covered. Layer in the eggplant. Top with sauce, then cheese, then add another layer of eggplant, then sauce, and finally cheese. Keep layering until you run out of ingredients. Depending on the size of your baking dish, you may have 2 or 3 layers. If you end up with leftover sauce or cheese, you can store them in the fridge and use for 5 days or so.
  9. Bake the eggplant parmesan for 20-25 minutes, until the dish is bubbling and the top is browned. Let the baked eggplant parmesan rest for 15 minutes before serving and enjoy!

Copyright © Eat the Vegan Rainbow, 2018

Sweet Corn and Sesame Seed Salad

img_4780
Sweet Corn and Sesame Seed Salad, via Eat the Vegan Rainbow

Sometimes salads are complex, feel elaborate and deep, mature and intense. I’ve made couple of those in my life, like this incredible roasted beets and leeks salad with baby kale and the most amazing lemon vinaigrette. I also made salads that are just for fun, with a bit of this and a bit of that, by combining fruits, vegetables and nuts.

But during summer, I like my salads to be simple, yet out of the ordinary. Last summer I went nuts for a pasta salad that used only a handful of ingredients but which I could not stop making over and over again. I think we are at that point in summer when it’s time for another easy, yet amazing salad, with no greens allowed (I love the greens but there is sometimes scope to be just a bit different!).

This corn salad is it – and it’s absolutely a fabulous accompaniment to any grilled food feast. All you need are four simple ingredients and 10-15 minutes. If you have that – boom, boom, boom and you are done.

The corn I use most often is frozen sweet corn, but you could grill your corn and cut the kernels out and use that instead. I bet the grilled/charred corn flavor would be fantastic.


Sweet Corn and Sesame Seed Salad

What you’ll need:

1 lbs (454 g) frozen sweet corn

1/2 cup sesame seeds

2 tablespoon olive oil

2 teaspoons steak spice (I recommend McCormick Grill Mates Montreal Steak Seasoning)


What you’ll do:

  1. Place a large frying pan over medium high to high heat. Add olive oil and frozen corn. Let the corn brown as it defrosts. Mix frequently but do let the corn get some surface caramelization.
  2. While the corn is cooking, toast your sesame seeds. You can do this in a toaster oven or using a stove top. Keep a close eye on your sesame seeds as they toast because they do from nicely toasted to completely burned in a matter of seconds!
  3. Add the toasted sesame seeds to your corn, as well as the steak spice and mix well. The salad is best served room temperature, but you can serve it warm as well. Enjoy!

Copyright © Eat the Vegan Rainbow, 2018

Super Summer Soup Supper – CSA Week 8

Super Summer Soup with Italian Flat Beans, via Eat the Vegan Rainbow

The adventures of the CSA share continue! This is our week 8 share and the eggplant, zucchini, and cucumbers are in full swing. If you need some zucchini inspiration, check out my stuffed zucchini boat recipe from last week. There are also some new items this week, and that’s my focus here: corn, green peppers, and flat (romano beans)! And this is what makes taking part in a CSA (Community Supported Agriculture) program so great – finding surprise ingredients that your local supermarket may not carry, and figuring our what to do with them.

The credit for this soup goes entirely to my 7 year old who suggested we use flat beans for a soup, add corn to it, plus one tablespoon each of dried dill, dried basil and onion powder. Oh, and garlic and vegetable broth! Then I stepped in with some carrots, bay leaves, and green pepper (also courtesy of the CSA share this week). The rest is history and the recipe below!

What are flat beans?

Flat_beans_raw
Flat Beans, Raw – By Andrewa, from Wikimedia Commons

Before we dive into cooking, let me just share what flat beans are. I don’t think I ran into them before, and I am guessing many of you are in the same boat! These beans are also known as romano beans, and also Italian flat green beans. They are similar to green beans, but much broader – about one inch (2.5 cm) or so, and they are quite long too. They have a good bite to them, although my seven year old helper did not like their taste when raw. These beans are meaty and that’s another reason why putting them into a stew or a hearty soup makes a lot of sense as they need a bit of time to cook, and I don’t think steaming them would work. So, if you like to try a green bean variety with a bit more meat and bite to it, these are a great option.

Super Summer Soup with Italian Flat Beans

What you’ll need:

1 lbs (about 500 g) flat beans (romano beans), trimmed and cut into 1 in (2.5 cm) pieces

2 cups grilled corn, just kernels (frozen or canned whole kernel corn would work too!)

2 large carrots, chopped very finely using a food processor

1 green pepper, diced to small pieces

4 cups (about 1 L) vegetable broth

4 cloves garlic, thinly sliced or crushed

1 tablespoon onion powder

1 tablespoon dried dill

1 tablespoon dried basil

4 dried bay leaves

2 tablespoons olive oil

Squeeze of lemon for serving (optional)

What you’ll do:

  1. Place a large pot over the medium-high heat. Add oil then garlic and let the garlic brown just slightly for 1-2 minutes.
  2. Next, add diced green peppers and sauté for 2-3 minutes, with occasional stirring.
  3. Add finely chopped carrots, mix well and cook for another 2-3 minutes.
  4. When the peppers have softened and the carrot pulp starts to brown, add the beans, corn and all the spices and sauté for another 5 minutes, then pour in the vegetable stock, bring to boil, lower the heat to simmer, put the lid on and leave it for 15 minutes.
  5. Serve this soup as a light supper, lunch, or pair with a salad and some bread for a meal!

Copyright © Eat the Vegan Rainbow, 2018

Tex-Mex Stuffed Zucchini with Homemade Salsa and Diced Avocado, CSA Week 7

F91E21D6-3357-425B-A336-B18FA5335FAD
Tex-Mex Stuffed Zucchini with Homemade Salsa and Diced Avocado, via Eat the Vegan Rainbow

When life gives you zucchini, there are actually many things you can do with it, grilling and sautéing being my go-tos most of the time. But, doing same thing over over again, no matter how tasty and satisfying they are, does get old. When it comes to zucchini, I have been trying new things, like zucchini lasagna, and zucchini fruitcake – I did also give zucchini cheese a try but that one did not work for me, so I am putting my zucchini cheese making days behind me.

Couple of zucchini’s that came in my CSA (Community Supported Agriculture) share this week from our local Upswing Farm, here in Ashland, Massachusetts where we live, were just the perfect size for stuffing, and that’s what I decided to do.

Getting zucchini ready for stuffing

To me, perfect stuffing zucchini is about 8-9 in (20-25 cm) and what makes this the perfect size is the fact that it matches is the size of my 9 x 13 in (23 x 33 cm) baking dish! Plus, the zucchini in this size range is in the Goldilocks zone – not too big and not too small, yet just right for carrying a good amount of stuffing.

The best way to get the zucchini ready for stuffing is to wash them, cut the ends off (this step is actually optional, you could skip it and leave the ends on – this would give your dish a nice, rustic presentation at the end), then slice the zucchini lengthwise and scoop out the seeds. If the zucchini is old and seeds look well-formed and unappetizing, please feel free to discard them. But, if the inside looks fresh and soft, scoop it out into a bowl and put aside to use as a part of the stuffing.

Par-roasting zucchini

You may have heard about par-boiling, when you boil something only half way through before doing something else with it. Par-roasting is essentially the same thing, just using roasting as a strategy to get the nice, roasted and caramelized flavors going without too much oven time. This can come in handy during hot summer months, for example.

I use par-roasting when prepping most of my stuffed vegetables, be it mushrooms, peppers, eggplant, or zucchini. The method is simple: you turn your oven on high (425 F (220 C) or higher), line a baking sheet with some parchment paper, toss the veggies with some oil, or spray with some cooking spray, or skip the oil altogether if avoiding fat (you can also sprinkle salt on if using, I don’t because the stuffing is usually plenty salty for me), and let the veggies brown for 15 minutes or so, flipping them over once if needed to get them equally browned on both sides.

Why par-roasting?

Well, most stuffing I make is already cooked by the time all is said and done. So, the stuffing itself usually does not need any more cooking time – all it needs to do is go into the oven for 10 minutes or so to get nicely browned on top. Par-roasting is my way of brining whichever vegetable is supposed to hold the stuffing up to speed so that the vehicle is ready for the final oven ride, when the stuffing gets browned and the vehicle finishes baking while absorbing some of the flavors that seep from the stuffing. In this way everything gets harmonized and delicious.

My secret to a perfect (and easy) Tex-Mex flavor

The best way to get the tex-mix flavors going is to start with a good chili powder, then add cumin powder and smoked paprika. These three things combined make for nice smokiness with just a hint of heat, so even with the amount of chili powder I use here the heat will not be overpowering. Having said that, do adjust the chili powder to fit your preferences. Of course, having corn and black beans in this dish is also essential. Here, I used canned corn and canned beans, but you can definitely use frozen corn and cook your beans from scratch. If you are using frozen corn, 1-1/2 cups of frozen corn should be enough, and if you are cooking the beans, 1 cup dry beans will probably be plenty.

Easy homemade salsa

What also helps tex-mix flavors is topping the stuffed zucchini with some freshly made salsa. If you don’t have the time, store-bought is perfectly fine to use here, either freshly made or from a jar – you can pick your own favorite flavor and enjoy! But, if you do want a quick homemade salsa, then follow the instructions below. The main tip here is to cut the tomatoes lengthwise and scoop out the seeds. Don’t throw them out – you can mix them into the tex-mex stuffing! Here, almost everything goes into a food processor for easy chopping. I recommend leaving one cleaned out tomato aside, and dicing it finely by hand to give the final salsa a bit more texture. This salsa takes only a few minutes to make, and you will love the flavor of freshly chopped cilantro and freshly squeezed lime, so it is worth doing it from scratch.

Diced avocado for a final touch

Last but not least is the diced avocado. You actually don’t need the avocado if you can’t stomach it (I know there are some people out there that have trouble with avocado), but it does add a nice, smooth, rich and creamy flavor to the final dish. It’s like a five layer dip right there in your zucchini “boat”!

To pick the best avocado, get those that are still quite hard and then leave them next to some bananas on your kitchen counter for a day or so. The avocado will soften and then you can store it in the fridge until ready to use. In this way you will avoid getting avocados that are too bruised by all the squeezing and poking, and can buy extra avocados on sale and use them 5-7 days later.

After that PSA, back to the Tex-Mex Stuffed Zucchini – to finish the stuffed zucchini, squeeze some fresh lime juice over your avocado and sprinkle some fresh cilantro. If you are using homemade salsa you can skip the cilantro, but if you are using the store-bought  then no cilantro-skipping is allowed!

TexMex_Zucch

Tex-Mex Stuffed Zucchini with Homemade Salsa and Diced Avocado

What you’ll need:

3 zucchini, washed but not peeled

1 15.25 oz (430 g) can yellow corn (whole kernel)

1 29 oz (820 g) can black beans

1 medium yellow onion, finely diced

4 cloves garlic, thinly sliced or crushed if you prefer

2 tablespoons vegetable oil

2 teaspoons chili powder

1 teaspoon cumin powder

1 teaspoon smoked paprika

Freshly ground black pepper and additional salt to taste!* (see Note)

1 avocado, finely diced, for garnish, optional

Fresh cilantro and freshly squeezed lime juice for topping (optional)


SIMPLE HOMEMADE SALSA

4 plum tomatoes, seeded, divided

1/4 – 1/2 jalapeño pepper, deseeded (or more, to taste)

1/4 onion or red onion

3 tablespoons tomato paste

1/2 cup fresh cilantro

1/2 lime, juice

1/4 teaspoon sat (more or less, to taste)

Cooking spray, salt, pepper


What you’ll do:

Tex-Mex_Pin

  1. Preheat the oven to 425 F (220 C).
  2. To make the salsa, cut the tomatoes lengthwise, the use a paring knife to take out the seeds and the middle of the tomato. Reserve the middles for the stuffing. Place all the ingredients, except one tomato into a food processor and buy until finely chopped. Dice the leftover tomato finely and mix in with the rest of pasta. Once mixed, set the pasta to the side.
  3. Wash the zucchini, remove the ends, and cut lengthwise into two pieces (I prefer to remove the ends but you don’t need to do that). Use a teaspoon to scrape out the inside of the zucchini – if full of seeds you can discard, otherwise add to the tomato scrap pieces and put aside.
  4. Line a large baking sheet with parchment paper. Spray with some cooking spray, then place zucchini on, spray the tops and place the zucchinis into the oven. Zucchini will be nicely browned in about 10 minutes. Take the zucchini out and set aside.
  5. Lower the oven temperature to 375 F (190 C).
  6. While the zucchini is par-roasting, get going on the stuffing. Add the oil to a large pan (frying or sauté) and place over the medium-high heat. Add the chopped onions and sliced garlic and let them caramelize for 2 minutes or so. Next add the spices (chili powder, cumin powder, smoked paprika) and let them “bloom” for 1-2 minutes.
  7. Next add the scooped out zucchini and tomato scraps, and mix well. Sauté for couple of minutes, then add corn and black beans. For corn and black beans, I recommend straining them using a large colander, and rinsing them for half a minute under some cold water before using. If you are using frozen corn, or fresh corn, and the beans you cooked yourself this washing and straining step is, of course, not necessary! Mix everything well and sauté for another 8-10 minutes.
  8. Spray a 9 x 13 in (23 x 33 cm) baking dish (or a large casserole pan) with cooking spray, then cover the bottom with a layer of stuffing. Place the par-roasted zucchini boats in and fill them with stuffing. Pile the stuffing high, and press gently in as you fill to make sure you get to all the little nooks and crannies. (You may end up with extra stuffing – if that’s the case you can serve the stuffing itself as a side for another dinner, for example this would be a grate thing to put into a taco shell and enjoy, or serve cold on your next tex-mix salad!).
  9. Put the stuffed zucchini into the oven and bake for about 15 minutes. All you are looking for is some nice caramelization on the top and the sides. Pull the stuffed zucchini out, and let it cool for couple of minutes before serving.
  10. When serving, top each zucchini boat with salsa and diced avocado, freshly chopped cilantro, and a squeeze of lime and you are done!

Copyright © Eat the Vegan Rainbow, 2018


SaveSave

SaveSave

SaveSave

Kale Pesto with Cashews

7a3243f9-9e9d-46af-bcc4-c1ecf7927934
Kale Pesto with Cashews, via Eat the Vegan Rainbow

Pesto, a fragrant bright green pasty sauce made by crushing or blending basil, garlic, pine nuts and olive oil together has been around in one form or another since Ancient Rome. There are quite a few variations on the original theme, but they all boil down to combining a ground nut base with a flavor enhancer, like garlic and basil, and fortifying these with some oil and usually cheese.

My first attempt at making pesto, many, many years ago did not go that well. I am a bit foggy on detail but as far as I can remember the follow up conversation with friends had revealed that I used arugula instead of basil, and that I should have used pine nuts, which I completely skipped. Still, it was not all a waste and a horde of graduate students, who this was made for, gobbled it all down nevertheless.

These days I know the difference between basil and arugula, and appreciate that a good pesto does need something more than just greens to give it real body and bite. Yet, as you will see, it seems that I remain determined not to use basil or pine nuts to make the pesto happen.

What happened this time around is that I had two large bags of kale without much interest to use them in a soup or roast them. So, I was looking for something more exciting to do – and the rest may go down in the pesto history!

And once I had my pile of pesto, I went very traditional and used it to dress my pasta. However, pesto, be it basil based or kale based, is quite versatile and you can use it in many different ways. There are even blog posts dedicated to showing what pesto can do beyond pasta (see here for a good example).

Whatever you decided to do with this pesto, I think you’ll like it. It offers a nice kale bite, mixed wit gentle cashew nuttiness and freshness that the lemon brings. And, of course there’s garlic!!!

Kale Pesto with Cashews

What you’ll need:

4 cups kale leaves, stemmed and chopped

1 cup raw cashews, soaked in water overnight

4 cloves garlic, sliced

1 lemon, juice and zest

1/4 teaspoon salt

2 tablespoon olive oil

What you’ll do:

  1. Clean the kale carefully and make sure that all the woody pieces of stems are fully removed. Although you will be using a food processor, which should take care of all the tough kale pieces, I recommend that you do spend some time making sure you have mostly nice, green kale leaves.
  2. Place a large pan over medium heat. Add oil and garlic, and sauté for just a minute, until the garlic starts to release it’s aroma.
  3. Add chopped kale leaves and let them wilt by tossing them with oil and garlic continuously. This will take anywhere between 5 and 10 minutes depending on the size of your pan. The more surface area your bottom has, the quicker it will be. Once the kale is fully wilted, turn the heat of and let the kale cool.
  4. Rinse the soaked cashews under some cold water, drain well and place in a large food processor. Add the wilted kale, lemon juice and lemon zest, and a pinch of salt and process until fully ground and smooth.
  5. Enjoy on pasta, in a sandwich, as a dip, on a pizza… The possibilities are endless and just remember that you are keeping it healthy and eating a whole bunch of kale!

Copyright © Eat the Vegan Rainbow, 2018

Barley Burgers, Barely Believable

img_3989
Barley and Mushroom Burgers, via Eat the Vegan Rainbow

When life gives you barley, you should probably make some burgers! This is especially true when life simultaneously gives you some mushrooms so that your burley burgers can take full inspiration from that old-time favorite, the Mushroom and Barley Soup. The soup is a traditional menu item in delis and other lunch places, and it work because it combines robustness and heartiness of barley with plenty of umami savoriness that comes from mushrooms.

These burgers are built on the same principles. Cooked barley is mixed with plenty of ground mushrooms, and a handful of flavoring agents to make these gently spicy and smokey baked burgers. The patties are sturdy enough to hold up to the outdoor grilling, so you don’t need to limit yourself to an oven.

The key flavor agents in this case are sliced black olives and chipotle peppers in adobo sauce. You need to be careful with the chipotle peppers because they are hot! I usually use either only the sauce or just one pepper as more than that can make a dish, including these burgers, quite uncomfortable. The adobo sauce itself is an excellent source of smokey flavor, so if your taste buds are sensitive you can skip the pepper, or replace the adobo sauce with some smoked paprika.


Mushroom and Barley Burgers

What you’ll need:

2 cups barley

4 cups water

1 cup black olives, sliced

10 oz mushrooms

3 tablespoons tomato paste

1/3 7 oz. (200 g) can chipotle peppers in adobo sauce

1 tablespoon minced garlic

2 tablespoons soy sauce

1 cup flat leaf parsley, fresh

Cooking spray


What you’ll do:

  1. Cook 2 cups of barley in 4 cups of water. I recommend using a pressure cooker (30 min bean cycle on the electric pressure cooker I have gave great results), or cook on the stove top using the instructions on the bag. Let cooked barley cool before using further.
  2. Preheat the oven to 425 F (220 C), or prepare your outdoor grill as you normally do. For the outdoor grilling I recommend getting the grill grates hot, burning off any bits that may have been stuck on them, then scrubbing them, and oiling them before use.
  3. Place the olives and the rest of the ingredients all the way to the cooking spray, into a food processor and process until finely chopped, then add into the cooked barley. Mix well, and using your hands form the patties.
  4. If you are using an oven, place the patties onto a baking sheet lined with some parchment paper. Spray them with cooking spray, then flip over and spray again. Bake on one side for 10-15 minutes then flip them over and bake for 10 min more. For outdoor grilling, 8-10 minutes per side should be enough to get the perfect grill marks and develop that lovely grilled flavor.
  5. Serve the burgers with all your favorite trimmings. They are hearty and just slightly spicy, and pair well with neutral flavors like avocado, lettuce and tomato.

Enjoy!

Copyright © Eat the Vegan Rainbow, 2018


Beet, Carrot and Apple Fritters – CSA Week 4

315c00f7-53f9-450a-b294-9b9cbd514d7a
Beets, Carrots and Apple Latkes, via Eat the Vegan Rainbow

It’s early July, and here in New England (which is, for those of you who hail from across the globe, a name for the Northeastern-most part of the United States that includes six states: Rhode Island, Connecticut, Massachusetts, New Hampshire, Maine, and Vermont) the farm activities are in full swing. The greater Boston area is brimming with farms of different size and produce selection. For example, we went cherry picking on July 4th, and ended up with an amazing selection of cherries. We ate a lot, shared some with neighbors, and washed, pitted  and froze the rest. In this way, the frozen cherries are ready for smoothies, sauces or pies later in the year.

What’s in this week’s CSA basket?

At our local farm where we get our CSA (Community Supported Agriculture) share  the Upswing Farm, the vegetables this week included beets, like it did last week (and I shared  about how to pan roast beets and sauté the beet greens few days ago), carrots, zucchini, squash, cucumbers, yellow and green, cilantro, fennel, and so on and so forth. It was a really great week!

Beets are versatile!

If you are skeptical about beets, don’t be – they are versatile! Yes, you may think that I am saying that because I an Eastern European and there is a bit of a beet culture on the Balkans, but beets really can work in many different ways. In addition to the two recipes I shared last week, beets can be made into a hummus (yummy), used as a salad, sandwich or a veggie burger topping, and also made into tasty burgers (see here, and here for some great beet burger recipes to try). And they are an essential, as in not-to-be-skipped-under-any-circumstance, ingredient for fabulous BBQ ribs, either those made with wheat gluten or gluten-free.

So, how about beet fritters?

And this brings us to these fritters. Without a doubt, vegetable, and in some cases fruit, fritters are ubiquitous. Every cuisine has a recipe or two that fall into this category and take advantage of ingredients in season, often times potatoes, zucchini, squash, carrots, a grater, a bit of flour and usually some eggs, to make a quick meal. So, how about beet fritters? And how about vegan and gluten-free? Well, the recipe here answers these question in affirmative.

Chia seeds and flaxseed meal as binding agents

Grated beets, carrots and the apple make the body of these fritters. The easiest way to grate them is using a large grating attachment on your food processors, although, of course, grating by hand will work too! You don’t need to cooked the beets first, but do peel and wash them, as well as the carrots – apple is the only ingredient that does not require peeling. Just before you start grating you should start soaking your flaxseed meal by combining flaxseed meal with hot water in 1 to 3 ratio. Because the grated fruits and veggies have high moisture content, they do need extra binding agents and that’s why I recommend using quite a bit of flaxseed meal as well as chia seeds. Together, flaxseed meal and chia seeds work together to created fritters that hold their shape well without any eggs or flour.

Don’t forget the spices

I recommend using lime juice and zest, as well as freshly grated ginger and finely chopped fresh cilantro to enhance the flavors. The result are light fritters with interesting texture and


Beet, Carrot and Apple Fritters

What you’ll need:

1/4 cup golden flaxseed meal (you can use other types of flaxseed meal as well)

3/4 cup hot water

2 cups shredded carrots (4-6 carrots depending on size)

2 cups shredded beets (3-4 beets or so)

1 shredded Granny Smith apple

1 teaspoon baking soda

1 teaspoon onion powder

1 teaspoon garlic powder

1/2 lime, zest an juice

1/2 inch ginger root, grated

1/2 cup chia seeds

1/4 cup chopped fresh cilantro

Oil or cooking spray for the pan

Extra lime slices, coarsely ground black pepper and/or apple sauce for serving

What you’ll do:

  1. Place the flaxseed meal and hot water into a bowl and mix well. Let the “flax egg” rest for at least 10 minutes. The final result will be a very gooey mix that will work together with chia seeds to bind the fritters together.
  2. While the “flax egg” is resting, grate beets, carrots and an apple by hand or using a food processor equipped with a grating attachment, then transfer into a large mixing bowl. Add all the rest of ingredients, including the “flax egg”, mix well and let stand for 20-30 minutes. This resting time is needed for chia seeds to soak the extra liquid released by the grated beets, carrots and apple, and transform into a gel-like substance.
  3. Place a large pan over high heat and let it get nice and hot. Add oil or some cooking spray – if you do have a great non-stick pan you can omit the oil – and place small firm patties in. To form a patty, take about 1/4 cup worth of your mix, and using your hands form a 1/2 inch thick patty. Brown over high heat for 2 minutes then lower the heat down to medium and continue browning for 3 more minutes.
  4. Flip the patties over and brown on the other side for 3-4 minutes.
  5. Serve warm as a side dish, or even as an alternative to breakfast pancakes. These fritters go well with yogurt, as well as maple sauce, and I bet they would be delicious cold as well!
BeetCarrotApple_Fritters
Beet, Carrot and Apple Fritters, via Eat the Vegan Rainbow on Pinterest

Copyright © Eat the Vegan Rainbow, 2018

Sunday Morning Cookbook Review: YamChops

YamChops
Reprinted with permission from “From the Kitchen of YamChops” by Michael Abramson, Page Street Publishing Co. 2018. Photo credit: Vincenzo Pistritto

Many of you transitioning into plant-based eating and/or vegan lifestyle may feel overwhelmed. Overwhelmed with all the details, discouraged with too many restrictions, and crushed by the broader society that has not adjusted to support our growing plant-based eating habits. I get it – I’ve been there!

What helped me are some excellent cookbooks that provided initial inspiration, especially the America’s Test Kitchen “Vegan for Everybody“, and an entire community of vegan blogs and bloggers that I discovered – Finding Vegan.  Over time, plant-based cooking and eating stopped being about the restrictions and things you can’t eat, and became about the abundance of ingredients and flavors.

Trying new recipes and ideas remains one of my favorite things to do, and I am always on a lookout for the latests cookbooks. The “From the Kitchen of YamChops” by Michael Abramson is the newest of my acquisitions. If you don’t know about YamChops, let me give some background. YamChops is a plant-based butcher shop, and when it opened in 2014 it was the first of its kind in Canada, and at that time one of only a handful vegetarian butcher shops in North America. Since then, YamChops has become well-known in Toronto, where it is located, and beyond, even earning a spot in USA Today’s list of 10 Best Gourmet Stores. They now offer lots of their products for sale on their website for those of you who live in Canada.

For the rest of us outside Canada, we now have the “From the Kitchen of YamChops” to fall back to and re-create the tastes at home. As could have been expected for a cookbook celebrating the vegan butchers in all of us, the opening chapter is all about meatless main dishes, with a range of burgers, meatballs, steaks, and even a schnitzel! There’s lots of comfort food recipes in there, and I highly recommend giving their Butternut Squash Cheeze ‘n’ Mac Casserole a try – it was delicious!!!

The story does not end at main dishes, and you will find a lot of great recipes for appetizers (including four different “ba-con” recipes – my favorite is coconut flakes ba-con, but that may change as I am looking forward to trying shiitake mushroom ba-con next), soups, salads, sauces, chutneys, dips and dressings. The final chapter is one big homage to chocolate, so your sweet tooth will not remain unsatisfied!

Out of many options, I decided to test a simple meatball recipe. My cooking is not only plant-based, but as gluten-free as possible, so recipes with gluten are a bit of a no-go for me. So, Black Bean Meatless Meatball recipe was definitely appealing because it is naturally gluten-free (if you get the right oats, so do read your labels carefully), and uses common ingredients that I always keep on hand. This made the prep easy and convenient, and these meatballs came together in a snap. You can see the full recipe below, courtesy of “From the Kitchen of YamChops” by Michael Abramson, Page Street Publishing Co. 2018.

Basically, I followed the recipe as provided, and everything came together really well. The meatballs were the right consistency, not too sticky, and not too loose, and came out moist and flavorful. The recipe is also perfect for those who are trying to cut down on their oil and fat consumption because it does not use any!

Having said that, there is one adjustment that I plan to incorporate next time I make these and that’s to sauté the green onions, red pepper and garlic for couple of minutes before mixing them in with the rest of ingredients. I found that these three components were a bit undercooked for my taste and the baking was not able to get the nice caramelized onion/garlic/pepper flavor that I prefer.

But, even without this minor change, these meatballs get a thumbs up! They were easy to make, the recipe yielded quite a good amount, and overall it is very budget friendly. So, definitely worth keeping on hand especially on busy evenings. I look forward to trying some of the other recipes included in “From the Kitchen of YamChops” by Michael Abramson, and if I am ever in Toronto again, I will definitely stop by and feast on what YamChops has to offer!!!

Photo by Vincenzo Pistritto Photo
With permission from “From the Kitchen of YamChops” by Michael Abramson, Page Street Publishing Co. 2018. Photo credit: Vincenzo Pistritto

Black Bean Meatless Meatballs

(Makes 2 Dozen (2 ounce) Meatballs)

What you’ll need: 

½ cup rolled oats

1 ½ cups canned black beans, rinsed and drained

1 tbsp egg replacer mixed with 3 tbsp (45 ml) water

1/3 cup fresh or frozen corn kernels, thawed if using frozen

¼ cup chopped green onion

¼ cup diced red pepper

3 tbsp salsa, homemade or store-bought

3 small cloves garlic, minced

2 tsp ground cumin

½ tsp dried oregano

½ tsp dried basil

½ tsp smoked paprika

¼ tsp cayenne pepper

1/8 tsp sea salt

Large pinch cinnamon

Large pinch black pepper

What you’ll do:

  1. Preheat the oven to 350F
  2. Pulse the rolled oats 3 or 4 times in a food processor. Add the rinsed beans and continue to pulse until the beans are roughly chopped. You want to keep some texture in the beans, so be sure not to over-process them.
  3. Whisk the egg replacer and water together until smooth and set it aside to rest for a couple of minutes.
  4. Empty the contents of the processor into a large bowl and add the corn, onion, red pepper, salsa, garlic, cumin, oregano, basil, paprika, cayenne, salt, cinnamon and pepper. Mix together until all ingredients are evenly distributed. Your hands are the best tool for this job.
  5. Add the egg replacer mixture, and mix everything together until the egg replacer mixture is fully incorporated.
  6. Take a small handful of the mixture, a little bigger than a golf ball, and form it into a fairly tight-packed ball. If the mixture holds together, you’re good to go. If the mixture is too wet, add 1 to 2 teaspoons of pulsed rolled oats. If the mixture is too dry, add 1 to 2 teaspoons of water. At YamChops, we use a 2 ounce scoop to measure these meatballs.
  7. Place the formed meatballs on a parchment paper lined baking sheet and place in your preheated oven for approximately 20 minutes or until firm to the touch. Gently turn the meatballs every 5 minutes to ensure even browning.
Recipe reprinted with permission from “From the Kitchen of YamChops” by Michael Abramson, Page Street Publishing Co. 2018. No further re-publishing allowed without explicit permission of the original content creators.

Disclosure: I received a free copy of this cookbook through a community of vegan bloggers. This did not influence my views about the recipes I tried thus far and mentioned above.

Meat-less Keema Matar

img_2947
Meat-less Keema Matar, via Eat the Vegan Rainbow

By now you probably figured out that I am a huge fan of Indian cuisine. Perhaps it’s the spices, perhaps it’s the long and slow simmering, perhaps is the whole culture of not eating meat that produced an abundance of vegan-friendly recipes and ingredient combinations [EDIT: I was alerted that current facts suggest that India may not be as vegetarian as previously thought; it seems that it’s a myth that India is mostly vegetarian]. Whatever it is, Indian cuisine has always been a huge inspiration for me, and I’ve been sharing some of the results on this blog. Past successes include Jackfruit Tikka Masala, as well as Chicken-less Tikka Masala made with soya chunks, and my version of Sabudana Khichdi.

This recipe is a vegan version of a minced lamb dish called Keema Matar. The recipe uses minced soya chunks that give the final dish the same consistency and appearance as the original recipe. You could use TVP (textured vegetable protein) but note that the food will probably have a softer, less chewy bite to it.

What makes this recipe work are, of course, the spices. I use some pretty standard spices like garlic powder, freshly grated ginger, chili powder, a cinnamon stick, some more specialized spices like turmeric, coriander powder and coriander pods, and some spices that you can only find in an Indian grocery store, like Indian bay leaves and matar masala.  Fear not if you don’t have easy access to these last two spices because you can use regular bay leaves and some cumin powder instead.

The best way to ensure that your soya chunks absorb all the flavors is to cook them according to instructions, which usually say “boil in water for 5 minutes”, rinse, drain, gently squeeze to remove some of the excess water, and mince them – I use a food processor for mincing – and then mix the minced chunks with spices and let them marinate for a while. (Note: if you are using TVP, you will not need to mince since the TVP flakes are already about the right size once they are fully soaked. Although hard to remove access water from TVP once it’s fully soaked, I do suggest you give it a gentle squeeze before marinating!)

Another ingredient that is needed for this dish are green peas. I use frozen peas, and I don’t bother with defrosting – just mix them into the simmering minced soya chunks and they’ll be fine. Once done, serve over  some Basmati Rice, sprinkle with some fresh cilantro and add a side of raita (yogurt sauce with chopped cucumbers and mint – I make mine with cashew yogurt and it comes out great!) or even a piece of naan and you will have an unbelievable restaurant-style dinner right in the comfort of your home.

img_2947

Meatless Keema Matar

What you’ll need:

200 g soya chunks

2 teaspoon coriander powder

2 teaspoon chili powder

2 teaspoon mattar masala

1 tablespoon grated ginger, fresh

1 teaspoon garlic powder

1 teaspoon turmeric

2-3 tablespoon oil

3-4 Indian bay leaves

1 cinnamon stick

10-15 cardamom pods

4 cloves garlic, sliced

1 onion, diced

1 tablespoon tomato paste

1 15 oz can petit diced tomatoes

1 1/2 cup green peas, frozen

Fresh cilantro for garnish

What you’ll do:

  1. Place soya chunks in a large pot, cover with water, bring to boil, and cook for 5 minutes, or according to the instructions on the box. Drain and rinse with cold water. Squeeze the soya chunks gently to remove some of the excess water, them place in the food processor.
  2. Add all the spices up to the oil and bay leaves, and process until soya chunks get a consistency of minced meat. Let the minced soya chunks and spices marinate for an hour or so on the kitchen counter at room temperature.
  3. In a heavy pot, like a Dutch oven, heat the oil over medium high heat then add the Indian bay leaves, cinnamon stick and the cardamom pods and let the aromas bloom for a minute.
  4. Add the onions and garlic, and sauté them for 5-6 minutes.
  5. Add the tomato paste, mix well and continue sautéing for another minute to brown the tomato paste just slightly.
  6. Add the minced soya chunks with all the spices they have been combined with as well as the diced tomatoes and simmer for 10-15 minutes.
  7. Add the peas, mix well and simmer for another 10 minutes. By this point, your food will be ready and your kitchen will smell fantastic. Serve and enjoy with Basmati Rice, and/or naan, and/or raita.

Copyright © Eat the Vegan Rainbow, 2018