In the spirit of my more recent posts where I cut to the chase and get straight down to business aka the recipe, here we go!
Note on the recipe: the focus here was on recreating umami flavors of the bolognese sauce mixed in with Parmesan cheese. So, what you’ll see is a lot of umami ingredients: tomatoes, mushrooms, and marmite.
(Please note that I still enjoy writing and cooking, but the pandemic had imposed some restrictions on how much writing I can do. I will try to stick to sharing the recipes as they come, and I hope you don’t mind the decreased quality of phots which I don’t have time to stage these days. So, unlike the photos, food remains yummy.)
Place a large frying pan over medium–high heat. Once the pan is hot add the oil and onions. Sautéfor 5 minutes, or until onionhave softened. Note that onions, garlic and mushrooms don’t need to be finely chopped, rough chop/slicing is ok.
Add garlic, stir well, and sauté for another 1-2 minutes.
Mix in the chili powder and marmite, then add the sliced mushrooms. Toss everything to combine and sauté for another 3-5 minutes, until mushrooms are done.
While onion, garlic and mushroom mix is cooking, crumble the tempeh into rough crumbles into the large food processor (you can also use a hand held blender stick, in which case crumble into a large mixing bowl).
Add the sautéed mix into the tempeh and process until finely chopped and mixed. Please note that the mix will be hot, so handle with care.
Pour the contents of one large can of crushed tomatoes into the same frying pan you used for sautéing and place over medium heat. Add the tempeh mix, and gently fold everything in and combine. Once it starts to bubble, tomato sauce will start to spray all over so cover with the lid to minimize splatter.
Cook for 10 minutes or so with occasional stirring.
Serve immediately over pasta (my latest discovery is lentil and chickpea pasta, including the spaghetti), and sprinkle with fresh basil and/or oregano. Enjoy!
It seems 2020 may turn out to be pretty depressing and gloomy, but I still hope we can all have health and small, but meaningful victories along the way.
Here, I want to take a brief look back at some of those small victories in 2019, the recipes and posts that brought smiles and happy tummies to me and others, the posts and recipes that helped.
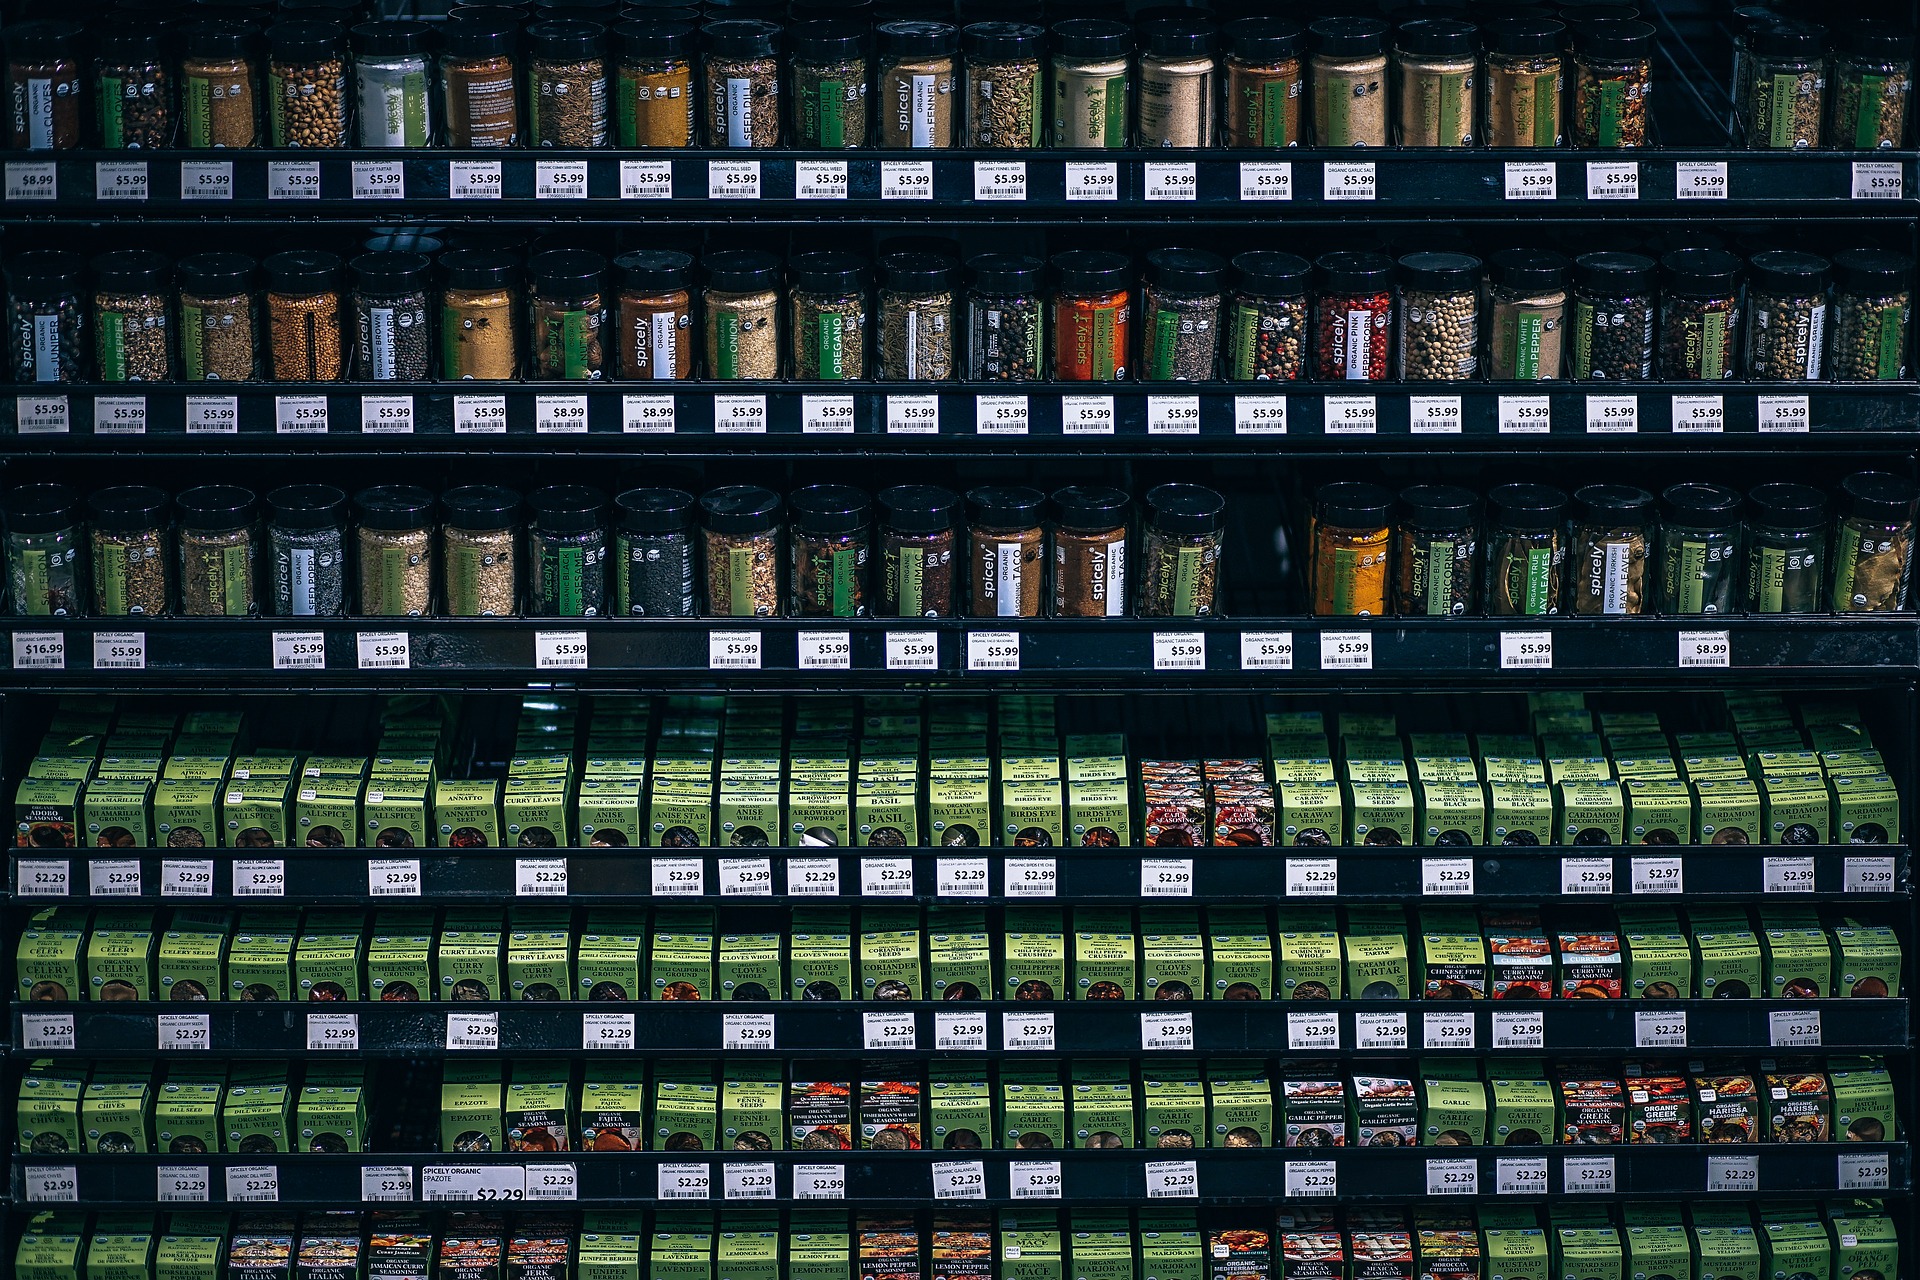
the main motivation behind this post was to help people navigate the spice isle in their grocery store. Those spice bottle displays can be intimidating – too many little bottle with “magic” powders and, very often, scary looking price tags. So, I used this opportunity to boil it down to essentials: dried basil and oregano, garlic powder and onion powder, paprika and smoked paprika, ground cumin and chili powder, liquid smoke, Old Bay Seasoning (or any other seafood seasoning mix), and, for sweet treats, cinnamon, nutmeg, cloves and vanilla extract. With these spices on hand you will have the wide range of basic and not-so-basic recipes covered. You will find that recipes below incorporate many of these spices, some in perhaps unexpected ways.
I love eggplant, and this recipe really works for me. It takes advantage of the natural eggplant texture that makes it very easy to pull into long strings that resemble pulled BBQ meat. Plus, eggplant soaks the liquid really well, and in this recipe we use a marinade made of chili powder, smoked paprika, onion powder, soy sauce, maple syrup (or agave syrup) that makes this a really delicious and rich BBQ experience.
“Fish” Cakes with Chickpeas and Artichoke Hearts, via Eat the Vegan Rainbow
this is an example of a recipe where using Old Bay Seasoning (or a similar type of seafood seasoning mix) is almost essential. These cakes are fantastic and easy to make, they combine chickpeas, artichoke hearts, corn meal, some break crumbs and a good amount of lemon juice and zest. They are light and delightful summer food (although I bet they can bring some much needed summer flavor to your long winter nights as well).
White Bean and Spinach Soup, via Eat the Vegan Rainbow
Speaking of cold winter nights, this soup is all about bringing warmth and comfort to your table. This soup is a complete meal, full of beans, pasta, tomatoes – it comes together in no time and it’s a treat for anyone, vegan or otherwise, young or old. It’s a fantastic weak night dinner option, as well as a great dish to bring to pot lucks!
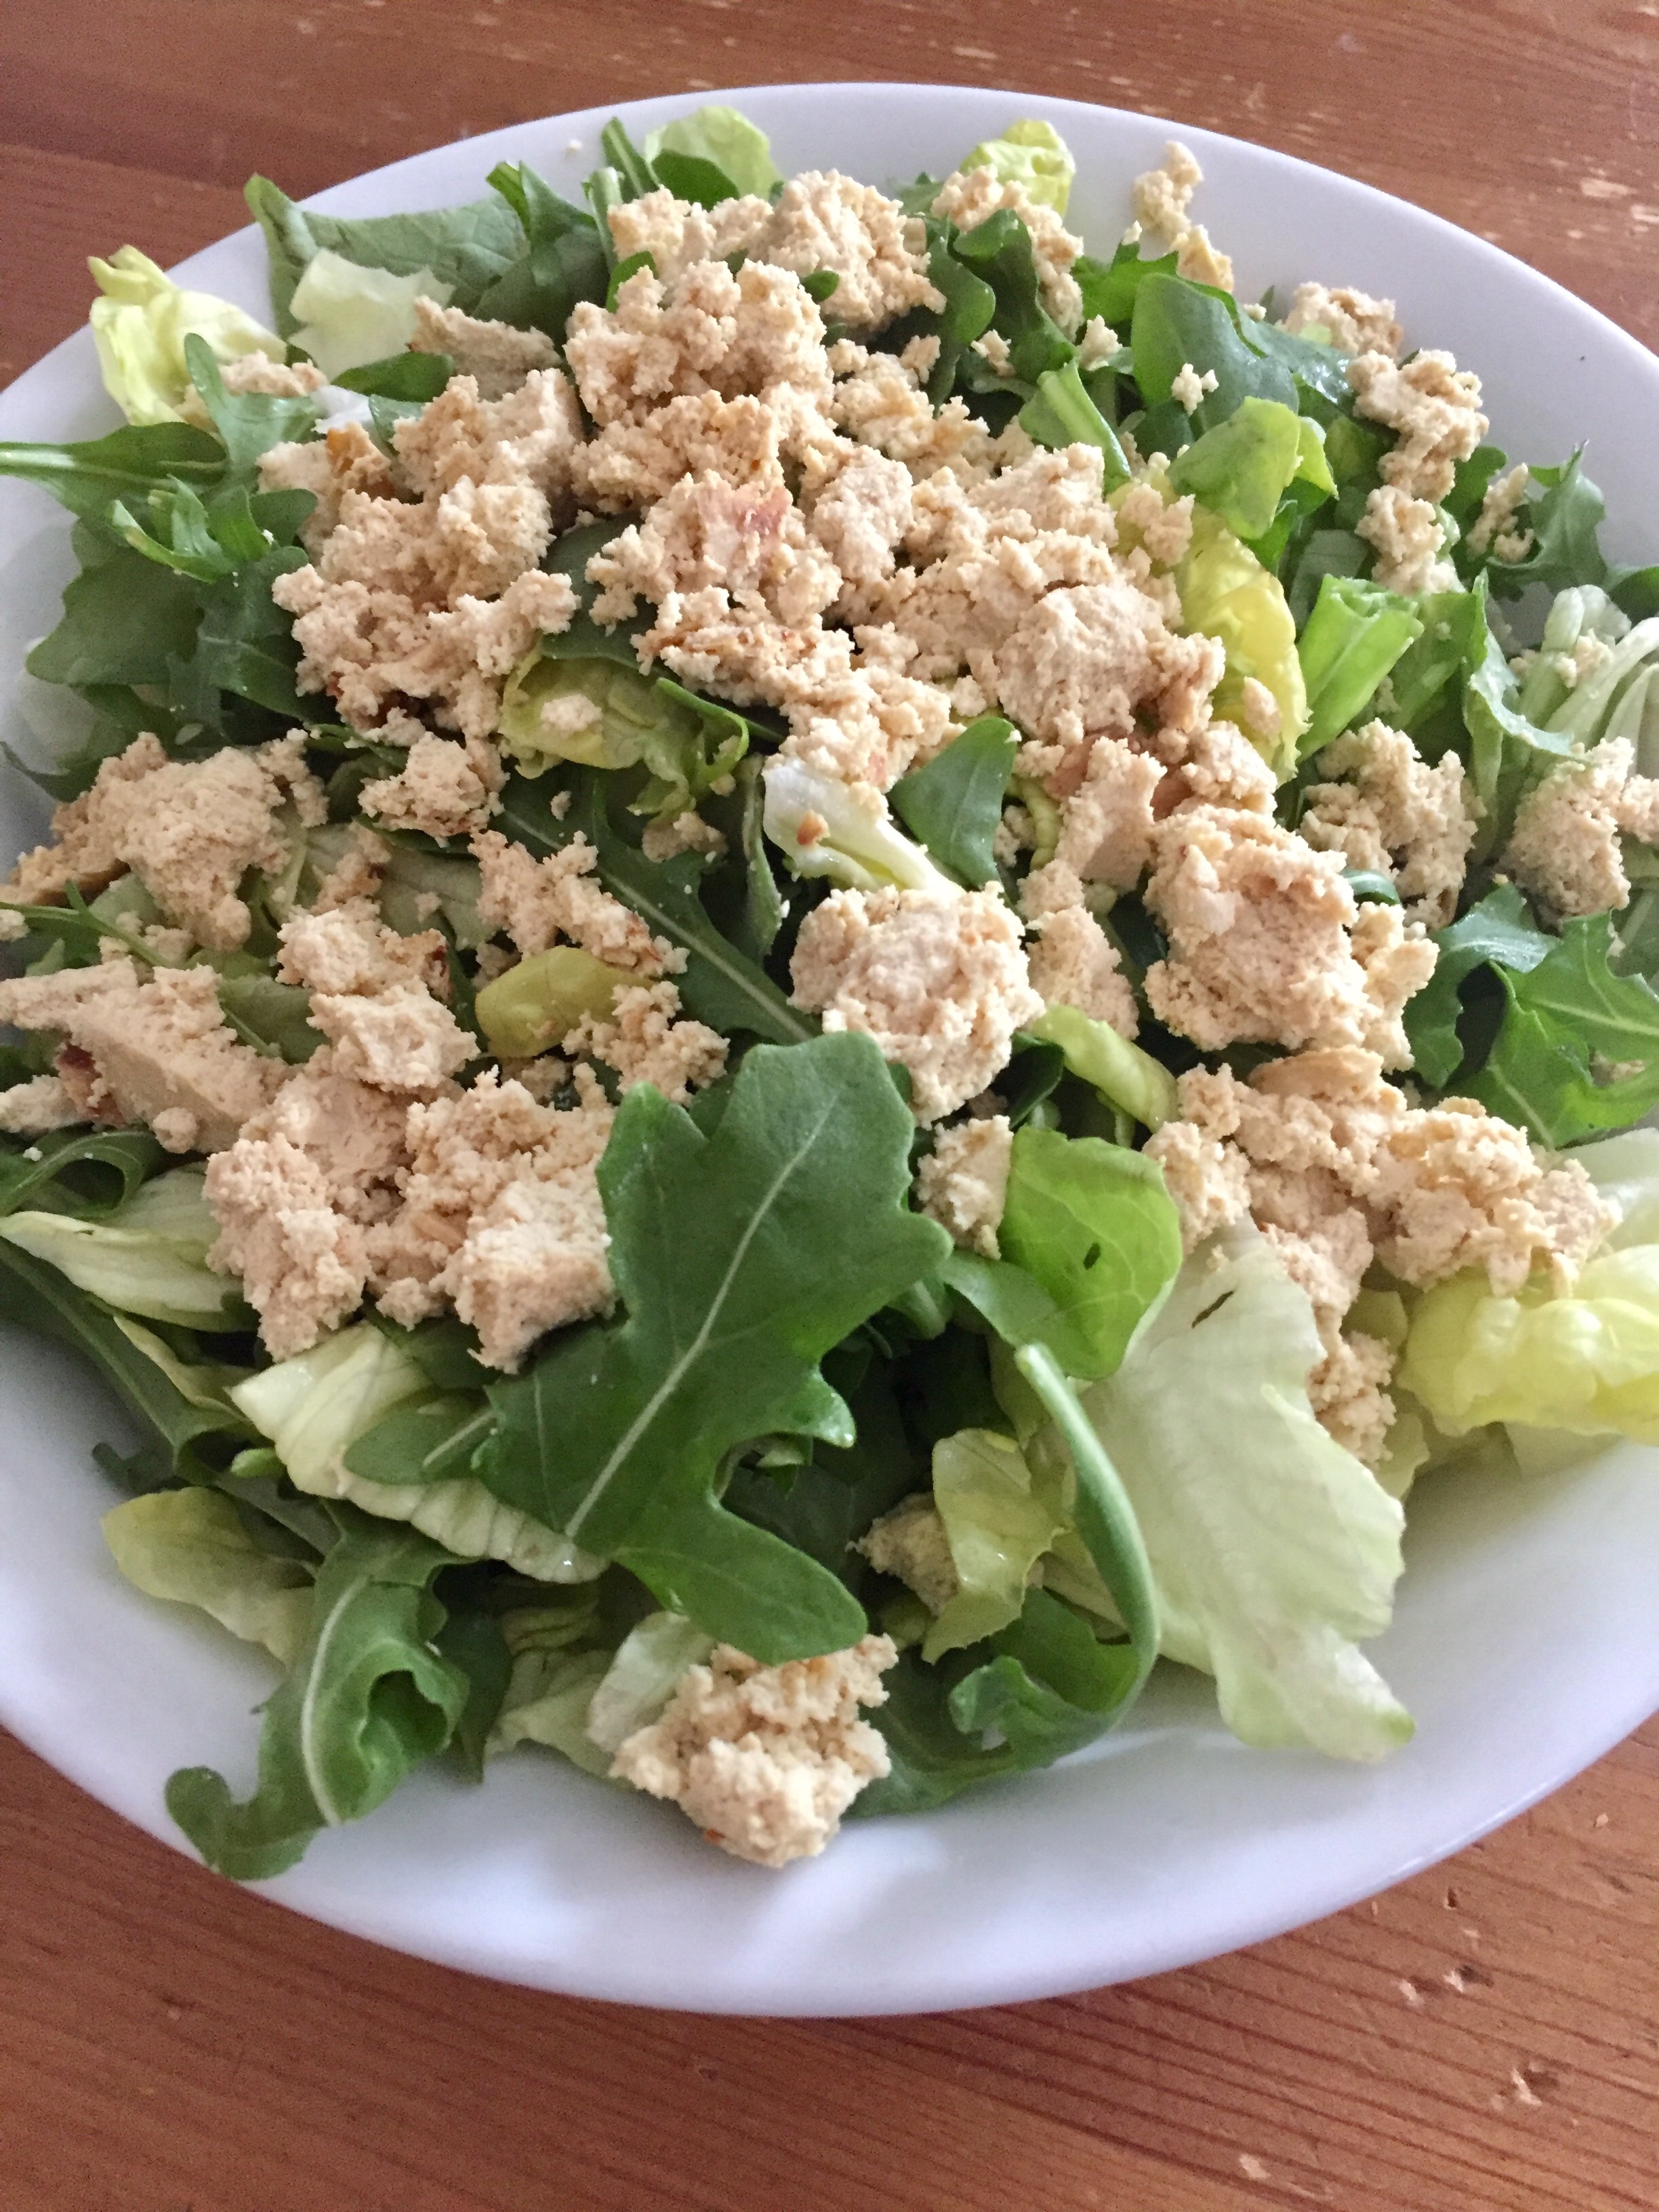
Here, I wanted to develop an easy vegan cheese recipe and nothing is more simple than taking a block of tofu, adding some vinegar, lemon juice, and nutritional yeast to it, mixing well and letting it lose just a bit of moisture by baking it for a bit. The result is a feta-like crumble that you can use any way you would normally use feta, to top salads, to make sandwiches or to even to make pies!
Once you give this recipe a try, you will never be able to have another party without it. It is a rich and flavorful dip that is perfect for crackers of any kind, and as a topping for light bites and sandwiches. Yummy!
Homemade Nut and Seed Granola, via Eat the Vegan Rainbow
I have been afraid of making my own granola for the longest time. Finally I decided to give it a try and, quite frankly nothing can be simpler. You do need to have quite a few ingredients on hand to make it really incredible like almonds, buckwheat, flax seed, sunflower seed, oats, hemp seeds – you get the picture! Also: if you leave out the almonds this granola quickly becomes nut-free!!!
Raw Energy Oatmeal Raisin Muffins, via Eat the Vegan Rainbow
Last recipe that I want to share with you here is the one I made few times while I was experimenting with transitioning into raw food diet. At the end of the experiment I concluded that 100% raw food diet is not for me, but that some of the recipes, like these muffins are a real keeper. They are no bake, and full of good for you ingredients. Plus they use no added oil, no added sugar and feature only wholesome stuff: carrots, raisins, apples, oats, and of course spices – cinnamon and nutmeg.
Here’s to you and yours and a happy and healthy new year!
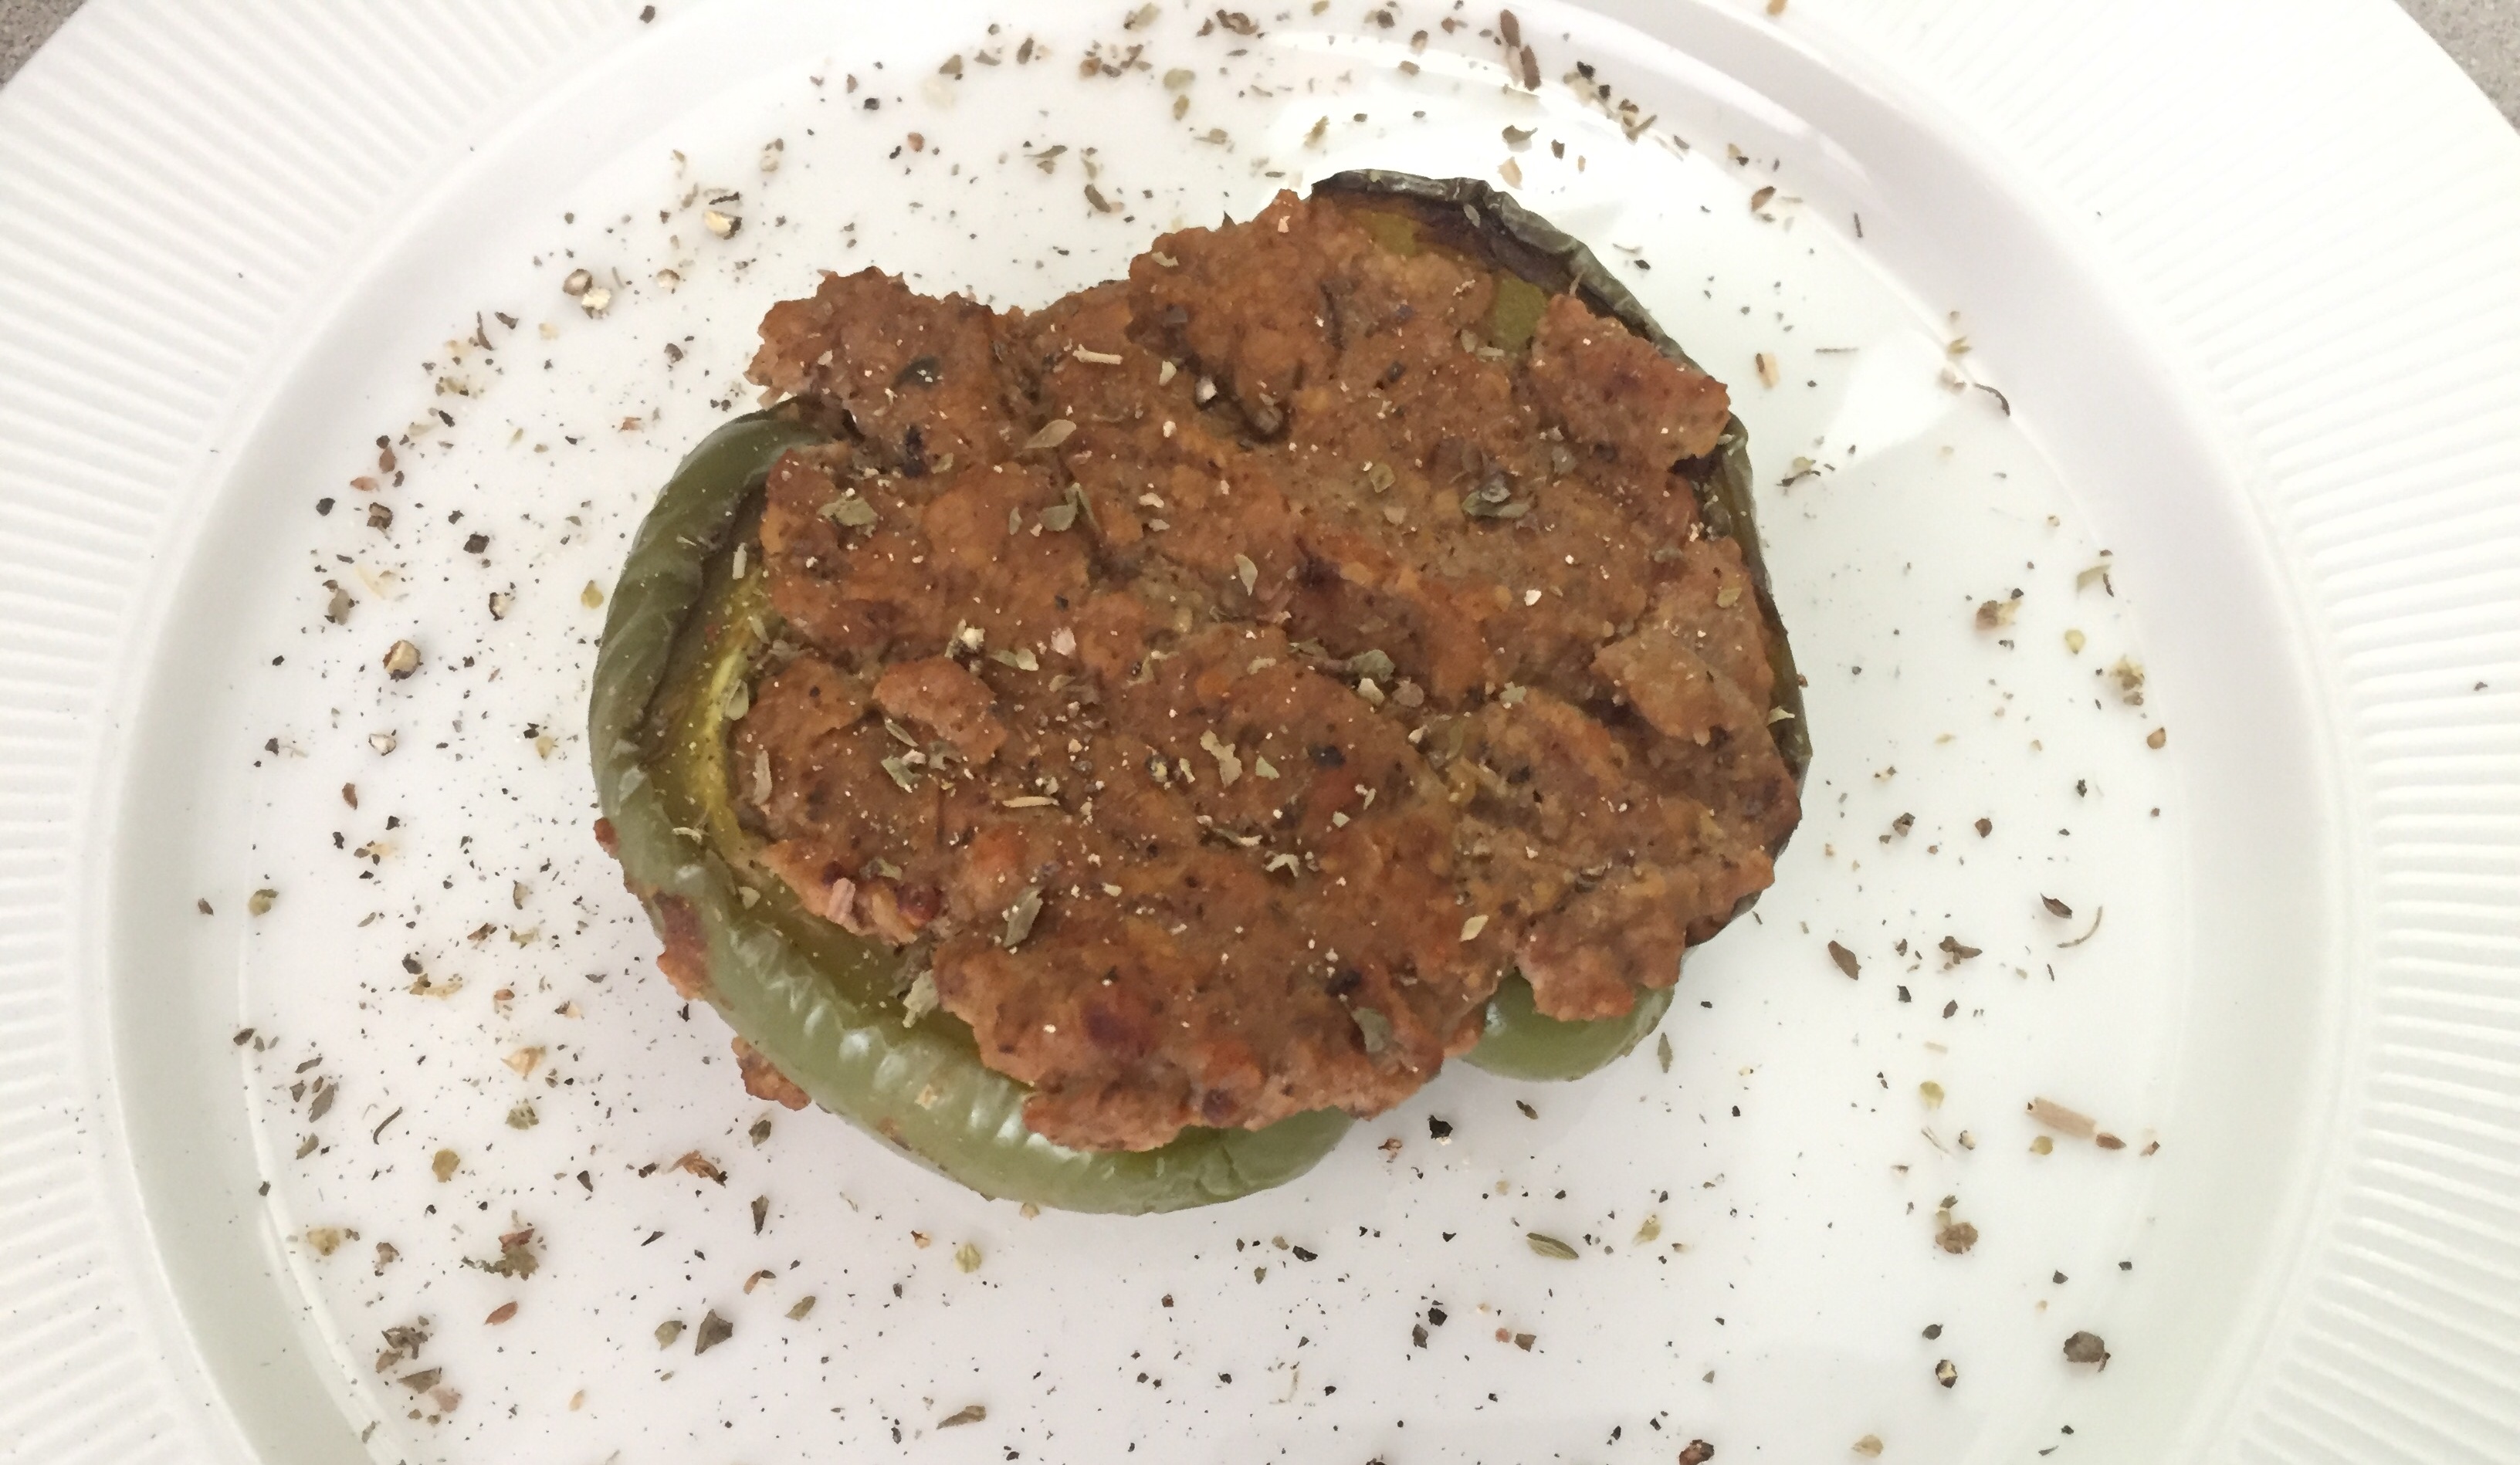
Nice, big bell peppers are perfect for stuffing, which makes them versatile. There are numerous types of stuffing you can choose from, and I’ve shared a couple in the past, like a simple rice based stuffing with pistachios, and one using a homemade beef substitute.
No matter which stuffing you choose there is one big tip for making the best stuffed peppers that are soft yet flavorful. I recommend that you par-roast the peppers (that’s like par boil but with roasting). The bell peppers I grew up with were less thick and if the peppers you get have thin flesh, this tip will not apply. But, here in US bell peppers are large and thick, and if you are to start from raw peppers that you stuff and roast you may end up with a pepper that is chewy and a bit rubbery. After some experimentation, I discovered that par-roasting the peppers before stuffing helps with all these issues.
What do I mean by par-roasting? It means roasting the peppers at high heat until they are only half way done, then using them in the rest of the recipe. The roasting will also help add a bit of a flavor to the peppers as their edges will brown. The pepper will finish cooking with the rest of the stuffing and be nice, soft and full of flavor.
I recommend slicing the peppers length-wise. That creates a nice boat to hold the stuffing. Also: when roasting the peppers I place them cut side down on the pan. This prevents liquid from pooling inside your pepper-boat, keeping the peppers dry and not mushy.
Now onto the stuffing. The key ingredient of the stuffing here is tempeh. Tempeh is made of soy, but unlike tofu it retains the whole grain, and it is dense and hard. If you want to soften the tempeh a bit you can place it into a pot of boiling water for a minute or two, but for this stuffing you don’t need to do that. By the way, tempeh is great for summer grilling, and as an ingredient for a fantastic taco filling!
The stuffing also uses sautéd onion and mushroom mix. I recommend sautéing these ingredients as I find raw onions hard to digest and sautéd mushrooms are much more flavorful. The recipe below also uses capers – pickled flower buds of the caper bush. Capers have a strong flavor and if you never head them before you may want to try a few before using them or if you can’t find them in the store where you live you can always add 1/4 cup of black or other olives. That will help boost the flavors as well.
The recipe also uses nutritional yeast. Nutritional yeast adds a bit of a nutty and cheese flavor to the dish and if you are looking for ways to substitute for nutritional yeast one suggestion I can make is to use some ground nuts, like almonds. Or you can use marmite or vegemite, which are both made from yeast extract that’s left over from brewing beer. A spoonful of miso paste may also work – but nutritional yeast will work best, so it’s worth tracking some down.
The stuffed peppers are best enjoyed with some sour cream or just a bit of melted cheese on top, and perhaps a simple side salad. That’s all you’ll need!
Tempeh Stuffed Peppers
What you’ll need:
4 bell (stuffing) peppers (any color)
8 oz (227 g) white button mushrooms or cremini (baby bella) mushrooms
1 yellow onion, diced
2 8 oz (227 g) packages of tempeh (plain a.k.a. original will work best)
1/4 cup nutritional yeast
1/4 cup capers (can be substituted by black or green olives, but not stuffed olives)
2 tablespoons soy sauce
1 tablespoon dried oregano
1 teaspoon garlic powder
1-2 tablespoons olive oil
Cooking spray
What you’ll do:
Preheat the oven to 425 F (220 C).
Line a large baking sheet with parchment paper or some aluminum foil.
Wash the peppers, dry them, then cut them in half lengthwise. Remove the stem and seeds. Place the peppers cut side down on the baking sheet. Put in the oven and roast for 15 minutes. The peppers should be moderately soft but not roasted all the way through. Take the peppers out and let them cool.
Lower the oven temperature to 350 F (175 C).
While the peppers are cooling, prepare the stuffing. First, place a frying pan over the medium-high heat, add the oil and diced onion. Sauté the onion until soft and slightly yellow on the edges (4-5 minutes), then add the mushrooms. Mix well and continue to sauté until mushrooms are done (an additional 4-5 minutes).
Place the tempeh, sautéd onions and mushrooms, nutritional yeast, capers, soy sauce and spices into a large food processor and process until well combined and mostly smooth. If you don’t have a large food processor you will need to do this in batches in which case mix everything together in a large bowl then process bit by bit.
Drain any liquid out of the semi-roasted bell peppers and place them hole side up into a deep baking dish. Spoon out the stuffing evenly among the peppers. Spray the tops with some cooking spray, cover with foil and bake for 25 minutes. Remove the foil, increase the heat to 375 F (190 C) and let the tops brown for another 10 minutes.
Let the peppers cool for couple of minutes before serving. These are great with some sour cream on top or with a light salad. Enjoy!
Beans are an essential staple of every vegan kitchen. Beans are rich in fiber, especially soluble fiber, which is taught to lower bad cholesterol, folate, good carbohydrates, and plant protein. That’s what makes beans an essential component of plant-based eating.
Beans come in many different colors and sizes – they can be white, like northern, lima, and navy beans, pink to dark red almost brown, like light and dark red kidney beans, black, like black beans, or multicolor, like black-eyed peas (which are actually beans) and pinto beans. All these varieties have slight differences – different cooking times, texture and flavor, not to mention appearance.
For example, if you are looking to make a mild dish that is smooth and buttery, you may want to go with navy beans or cannellini, which both work in a dish like this Tuscan-Style cassoulet, and if you are looking for a playful dish, like this Cowboy Caviar, you may want to reach for black-eyed peas.
I use beans all the time, and use both dry beans and canned beans. Canned beans are super quick and convenient, while dry beans are a bit cheaper, plus give you complete control over the amount of salt that goes in. But: dry beans do take a bit of time to make if you are using a traditional, pot on the stovetop method. Even with soaking the beans overnight, it will still take about 2 hours of cooking time to soften the beans. My preferred way to prepare dry beans is to soak them overnight, then cook them in a pressure cooker until done, and then incorporate them into whatever you are making. And although some claim that the pressure cooker will cook your beans quickly even if they have not been soaked, I have not tried this yet, so can’t advise on this here. An alternative is to use a slow cooker – overnight soaked beans should take about 6-8 hours.
Recently, while browsing around in a grocery store, I discovered something new: Hurst Hambeens 15 Bean Soup Mix. This bag included a mix of 15 different legumes: beans (northern, pinto, large lima, blackeye, baby lima, kidney, cranberry, small white, pink, small red, white kidney, black), as well as lentils, yellow split, and green split peas, and chickpeas. And, of course, I had to give this mix a try!
Apparently, this mix is traditionally used for a ham soup and comes with a bag of seasoning included. I decided to take the mix in a different direction and go for a chili. Chili is a rich and thick bean stew, full of smokey flavors, and a bit of heat. It’s usually made small red beans, but I figured the more could be the merrier, so I went for it!
The recipe below uses stovetop cooking method, but you can definitely make this in a slow cooker (crock pot). And if you don’t have this specific bean mix, you can make one yourself by measuring about 1/4 cup of dry pinto, black, red kidney, black-eyed and navy (white) beans, as well as lentils, chickpeas and yellow and green split peas. Although not the full 15 bean range, there is enough variety in this mix that you will still get all the benefits of flavors and textures. Have fun!
Rinse the beans, then cover them with water and soak overnight. If you are in a hurry you can also do a quick soak by: rinsing the beans, placing them in a pot, making sure they are fully covered with water, brining the water to boil, boiling for 5-10 minutes, turning the heat off and leaving the beans in hot water for an hour.
After the beans are done soaking (either overnight or using a quick method) rinse them well and set aside.
Place a large Dutch oven or another sturdy pot over medium high heat, add 1 tablespoon of oil, and onions, garlic and carrots. Let these caramelize, which can take up to 15 minutes. Don’t stir to frequently as you want to let the vegetables get slightly burnt and charred – that will add deeper flavors to the chili.
Add the tomato paste, cumin and chili powder, coat everything well and cook for another 2-3 minutes.
Place 1 cup of vegetable stock into a blender, then add the onion, garlic, carrot and spice mix, and 1 cup of soaked beans. Blend everything until smooth and take care not to burn yourself as the mix will be hot.
Add the rest of the oil to your Dutch oven, pour the mixture from the blender back in, add the rest of the bean mix, another cup of vegetable stock and bay leaves. Mix to combine and bring to boil. Place the lid on, lower the heat to steady low level boil, a bit more than a simmer, and cook for 2 hours, stirring occasionally. Check after about an hour, as you may need to add more vegetable stock.
Serve with some shredded cheese, sour cream, or diced avocados, and definitely with some corn bread, like this basic gluten-free version (nice and crumbly, perfect for chilis), very corn-y corn bread, or the more flavorful corn bread muffins.
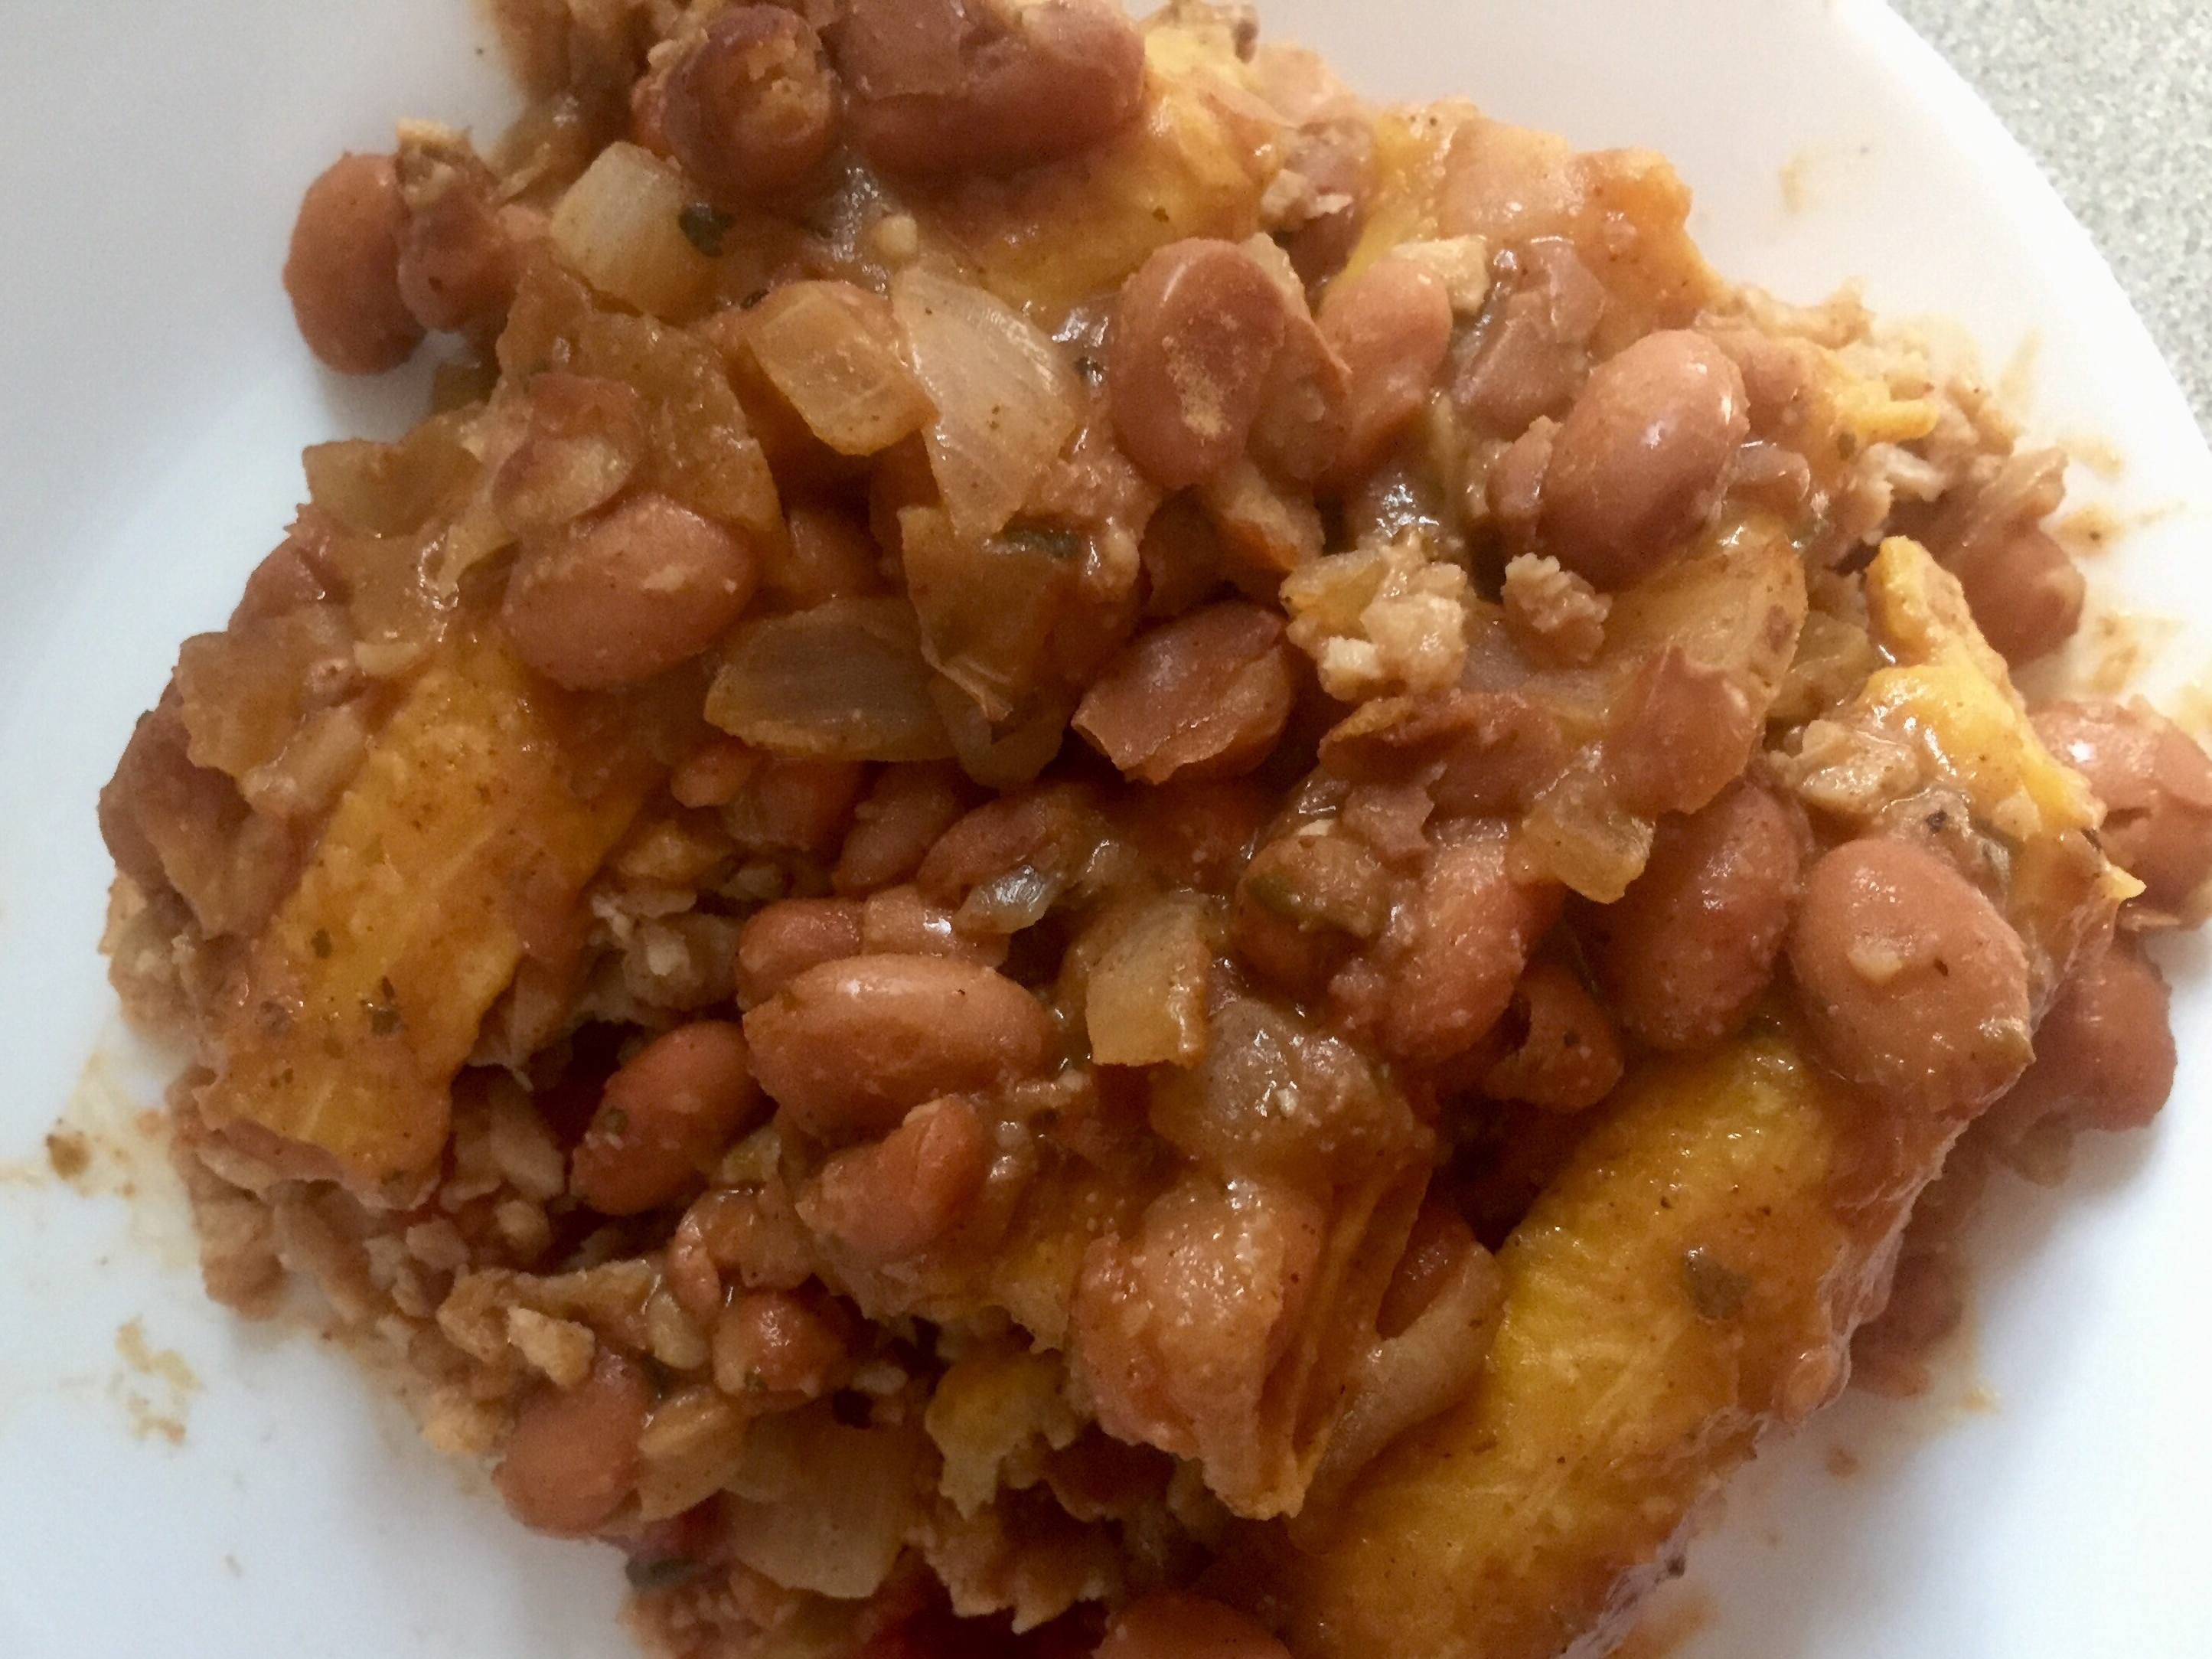
Plantain Lasagna with Pinto Beans, via Eat the Vegan Rainbow
The first time I tasted plantains, those longer, bigger bananas you sometimes see in your grocery store among other exotic fruits and vegetables, I did not like them. They were fried yet sort of mushy, and tasted very sweet although they were served as a savory side dish. So, for the next fifteen years I stayed away from them.
Few months ago I was watching a cooking show, and they talked about Puerto Rican lasagna – Pastelón – that looked delicious, with layers made of plantains rather than noodles. So I decided to give this lasagna a try. Please note that if you expect to see a traditional Pastelón recipe here, stop reading now and go elsewhere. I took a great deal of liberty here, so you will not find any meat or cheese here. What you will find is lots of beans and salsa. And lots, and lots of plantains.
The plantains you want to use here are very ripe. Some stores sell them ripe, but some carry only green looking plantains. You could get those and keep them in a paper bag until they get ripe – I tried this but it did not work really well. So now I go for off the shelf half-ripe plantains that, by the way, are very yellow with a bit of black. This article will help you navigate the plantains and different stages of their ripeness. For me the green plantains were too tough and the very ripe ones were too sweet so I settled on 75%-ripe.
Instead of frying the plantains, which is the most common way people make them edible, I roasted them. You will need to cut through the skin lengthwise and roast them for about half an hour. Their skin should turn totally black and once cooled they should be easy to peel and slice lengthwise into thin slices.
While your plantains are roasting, prepare your lasagna filling, which in this case is a batch of pinto beans, simmered with onions, roasted green chili peppers and spices.
The base for your lasagna will be salsa, and I just use store bought kind, and what will give this lasagna a slightly meaty feel is a layer of TVP – textured vegetable protein. Although the bag TVP comes in may recommend soaking, please don’t do it. This lasagna is juicy enough and the TVP will soften and cook as the lasagna is baking. After the TVP layer, come the plantain slices, and then the beans. Cover everything with foil, but it in the oven for forty five minutes or so, and that will be that. You will have an out of the ordinary lasagna on your hands to enjoy.
Plantains Lasagna with Pinto Beans
What you’ll need:
4 plantains, almost ripe
2 cups salsa, homemade or store bought
2 cups TVP (textured vegetable protein)
1 onion, diced
2 15.5 oz (440 g) cans pinto beans
1 4 oz (113 g) can fire roasted green chili peppers
1 teaspoon cumin
1 teaspoon chili powder
1 teaspoon smoked paprika
Cooking spray
What you’ll do:
Preheat the oven to 425 F (220 C).
Wash the plantains, cut their end off and cut a slit in their skin lengthways. Arrange on the foil or parchment paper lined baking sheet and put in the oven for 35-45 minutes.
While plantains are roasting, prepare the beans. Spray the bottom of a large pan, I used my cast iron pan but you can use any pan you like, and place over medium heat.
Add the onions and cook until golden, which will take about 5 minutes.
Add the spices, and let the spices toast for a minute or so.
Add the can of fire roasted green chili peppers and stir again.
Finally add the beans and using a potato masher mash the beans while they cook. Don’t mash them all the way through – leave some of the beans whole. Let the beans simmer for 15 minutes or so.
By the time the beans are done, plantains will be too. The roasted plantains should be soft but not mushy. Let the plantains cool before handling.
Decrease the oven temperature to 350 F (175 C).
Once cool enough to handle, peel the plantains and cut lengthwise into sheets. Adjust the thickness to your preference.
Spray the bottom and the sides of a deep 9 x 13 in (23 x 33 cm) baking dish with cooking spray. Pour the salsa in and spread to cover the bottom. Distribute the TVP over the salsa to make one even layer. Place the roasted plantain slices over the TVP. Pour the beans over the plantains, cover the dish with some foil and put it in the oven for 30 minutes covered, then uncover and let the top brown for another 10 minutes.
Take the lasagna out of the oven and let it rest for 10 minutes before serving. Serve with plain rice or enjoy as is, perhaps with a sprinkle of cheese alternative or a spoonful of macadamia nut queso fresco. Yum!!!
I transitioned to eating only plant-based food almost two years ago. At that time, I was not aware of the richness of plant-based cooking landscape and that this decision will be a major boost for my culinary creativity. Switching to vegan (plant-based) eating has been revolutionary!
How to transition to vegan (plant-based) eating?
Everyone has their own individual transition path, and it may take some time to recalibrate your taste buds to enjoy all the different flavors of vegan food. Also: it does take some time to learn some basic cooking strategies that elevate your plant-based home cooked meals to a status of scrumptious feast.
My personal mental transition took about two years. I’m a scientist so I looked at data based arguments that have been collecting around the scientific literature, and finally came to a conclusion that the best thing I can do for the health of the planet and my own health is to start eating a plant-based diet. Once I was mentally ready, the actual transition from eating non-vegan to eating vegan happened overnight.
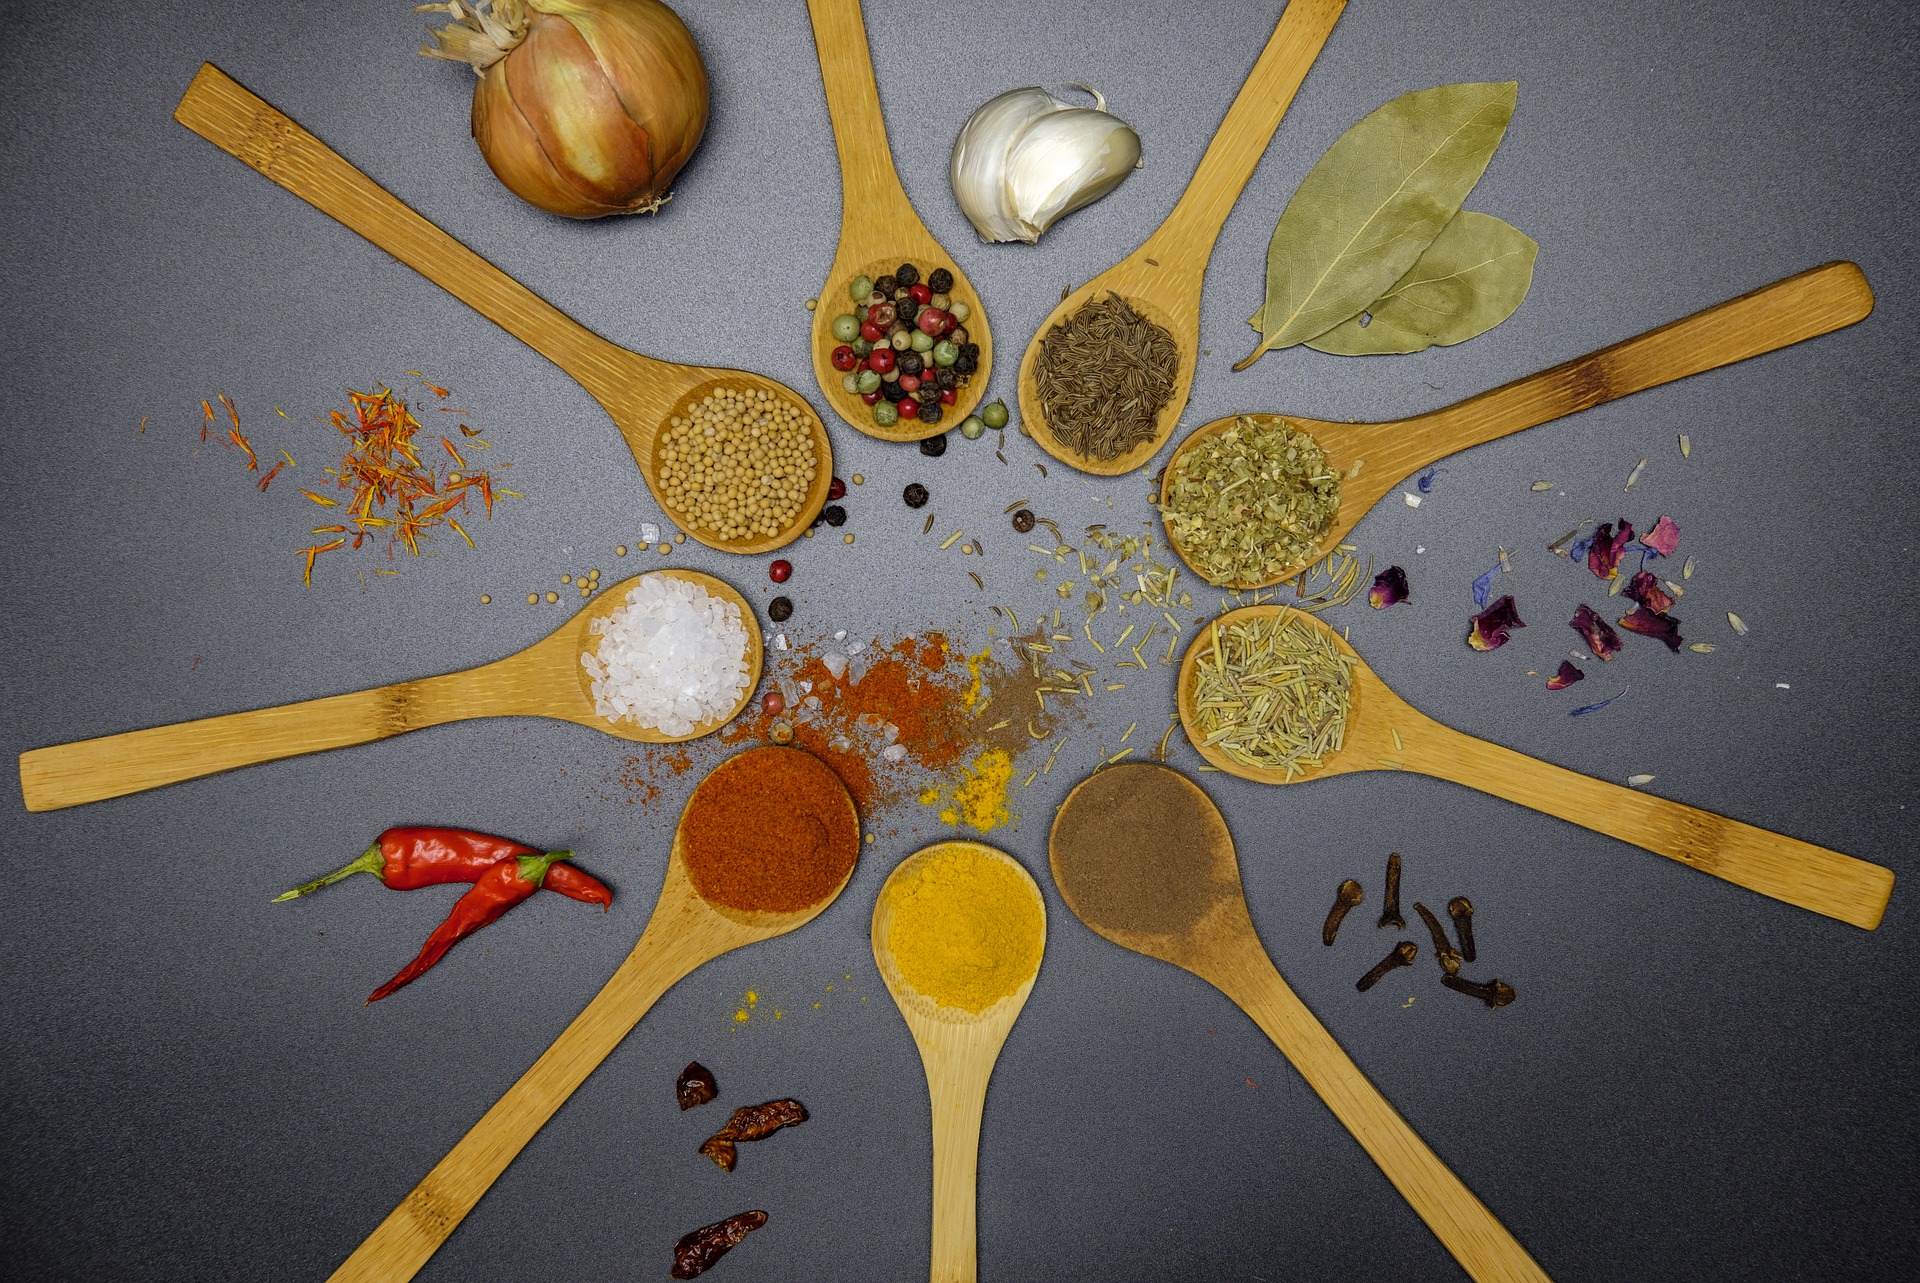
Basic Spice Collection, Image via Pixabay
How to maximize the deliciousness of your plant-based cooking?
No matter which path you take to get here, and no matter if you practice plant-based eating once a week, or 24-7-365, one key cooking skill that you should try to acquire is working with spices. Fruits and vegetables are delicious on their own, of course, but if you are cooking for picky eaters, or omni family and friends, or simply enjoy multidimensional flavors yourself, spices are your secret weapon. They become even more important if you want to minimize the amount of salt, fat (oil) and sugar (sweeteners of any kind) that you use in your cooking.
The selection below includes couple of items that are technically herbs (dried basil, and dried oregano) and liquids (vanilla and liquid smoke), but for every day simplicity (and against culinary books and schools), I call “spice” everything I can find in the spices isle in the supermarket. Also note that I actually have and use more spice than this and continue to discover new flooring agents all the time, but these are some of my favorites that I always have on hand for my everyday cooking as well as entertaining and holidays.
Finding the best deals on spices
Spices can be expensive, so here is a pro-tip: get your spices like cumin, curry powder, Garam Masala, turmeric, and cinnamon in an Indian store if you have one close by. If not, look for store brand, or the international isle in your supermarket. Spices that you can find there are usually half the price as those in the spice isle while being just as good. Trader Joe’s (if you have one in your neck of the woods) also has excellent prices, including on things like saffron. Having said all this, sometimes you will just have to be prepared to pay the premium price. My most expensive spice purchase was a batch of rubbed sage at the height of Thanksgiving shopping when all the cheaper options were gone!
Without further ado, let’s dive in into some essential spices and how to use them:
Dried basil and oregano
Fresh basil and oregano are great to have on hand, and if you are into gardening you can easily grow them, even indoors. But if you are like me – not born with a green thumb – then your next best thing is to have dried basil and oregano on hand at all times. Plus, there are some recipes where fresh herbs just don’t work, like these Roasted Tofu Steak Tips. The recipe I make almost weekly and which in turn uses lots of dried basil and oregano is a very basic marinara sauce (canned crushed tomatoes, garlic, dried oregano and basil, and olive oil – done in 10-15 minutes). Some other yummy food featuring dried oregano and basil are things like Basic Lentil Bolognese and Lentil and Pumpkin Meatloaf. One tip when using dried basic and oregano is to rub the herbs with the palms of your hands before using – that releases more of their fragrancy.
Garlic powder and onion powder
Summer’s hottest trend: Carrot Dogs, via Eat the Vegan Rainbow
There are many recipes that can’t be made without some good garlic powder and onion powder. And, in the same way dried oregano and basil go hand in hand, so do garlic powder and onion powder. These two powders are essential ingredients for any recipe that at the end of the day needs all the flavor but none of the chunkiness that even the finest mincing will not produce if you start from actual garlic and onion. Also, both garlic and especially onion have lots of moisture, and the powders are ideal for adding all the flavor without any added moisture. Recipes you often find these two powders in are many marinades, where they help transform a thing like plain old carrot into a Carrot Dog. Additionally, onion powder and garlic powder add a bit of their power to many mind bending recipes like Vegan Nacho Cheese, and Ground Beef Substitute!
Paprika
It is said that the best paprika comes from Hungary, and that may very well be true because, although peppers that are ground up to make paprika have originated from the area now known as Mexico, they have been cultivated into their sweet variety in Hungary. Having said all that you do not need to hunt for paprika labeled as “Hungarian” – all you need to pay attention to when picking paprika is to get the one that does not say HOT as paprika does come in a hot (very hot) version as well! Paprika you want is sweet and subtle, and you will love it in rich dishes like these Hungarian Lentils from a new The Vegan 8 cookbook, or this Jackfruit Barbacoa. Any time you want deep, rich flavor without the heat you would reach for some paprika!
Ground cumin, chili powder and smoked paprika
Cumin, chili powder and smoked paprika are three very different things, and you experiment and use them individually. But, their combined effect is much more than a simple sum of their parts especially for adding depth to veggie burgers. You can often find them in things like spice rubs as well, so if you are looking to add extra flavor to your grilled corn or other veggies I recommend you try brushing some of the cumin, chili powder and smoked paprika mix (1:1:1 works well, but you can play around and adjust to your taste). In a way this is a universally applicable spice combo for whenever you want that nice tex-mex flavor, like in these great stuffed zucchinis or for breakfast in this tofu scramble, or whenever you are craving a great bowl of chili.
Curry powder, garam masala and turmeric
Vegan “Chicken” in a Nut Sauce, via Eat the Vegan Rainbow
Unlike cumin, chili powder and smoked paprika above, I combined curry powder, garam masala and turmeric into a single bullet point not because I recommend you use them all at the same time (although that could be done!), but rather because the three spices are essential for anyone interested in exploring Indian cuisine. Indian cuisine and flavors are varied and rich, and the number of spices the traditional Indian dishes use is much, much broader than just the three I mention. However, curry powder, garam masala and turmeric (together with already mentioned cumin) are the basics that go a long way towards dishes like Chicken-less Tikka Masala, “Chicken” in Nut Sauce, and Vegan Saag Paneer. Turmeric has another special role it sometimes play – it gives things a bright yellow color and can be used to give an appearance of eggs, like in these popovers.
Old Bay seasoning
Jackfruit “Crab” Cake, via Eat the Vegan Rainbow
Old Bay seasoning is a must-have for anyone craving fish and sea food. The seasoning is off-the-shelf blend that is quite salty so if you are watching salt intake or you can’t find this seasoning where you live, here is a great recipe for a homemade blend (LINK EDITED Sept-13-2020 as the old one stopped working) that comes very close to the original. Add Old Bay seasoning to your Crab-less Crab Cakes, New England “Clam” Chowder, Faux Lobster Rolls, and Tofu Fish Cakes or any other time you want to recreate that special flavor of the coastal cooking.
Liquid smoke
Liquid smoke is definitely not something that I ever thought I would be using, let alone recommending. However, it is essential when you are making recipes like BBQ Ribs, Grilled Tofu, or different kinds of smoked cheese, like this gouda. And: no bacon can ever be imagined without the liquid smoke, and there are many bacons out there. If you have not made “bacon” before, I recommend that you start with tofu bacon, tempeh bacon or coconut bacon, and if you are a bit more adventurous, rice paper bacon. Many also enjoy adding liquid smoke to their vegetable marinades or to things like meatloaf!
Ground cinnamon, ground nutmeg, and ground cloves
Pumpkin Truffles, via Eat the Vegan Rainbow
Not everything vegans eat is savory – there are lots of vegan sweets and treats out there as well! I kick my dessert making into high gear around the end of the year holidays, so for me ground cinnamon, ground nutmeg and ground cloves are essential. I usually use all three of them at the same time and usually in 1 teaspoon: 1/2 teaspoon : 1/4 teaspoon amounts from cinnamon (the most) to cloves (the least). This trends with the intensity of their flavor as well. To me nutmeg and cloves extend and expand the cozy flavor of cinnamon, so next time when you are baking a pie or making cookies that ask for cinnamon try adding the other two as well. Looking for inspiration? This zucchini fruitcake and these pumpkin truffles can be a good starting point.
Vanilla extract (and vanilla bean)
Of course no baking or other dessert making can be imagined without vanilla. When buying vanilla extract, look for “pure” on the label and stay away from imitation stuff. If you have a bit more funds to invest, then do get some vanilla bean. But: unless you plan to make things like nice cream, or raw cheesecake, vanilla extract is all you need because in my experience baking really removes the edge from vanilla beans and the uniqueness of their flavor gets completely lost.
No matter where you start with your spices, remember that spices are supposed to be experimented with, mixed and matched and that more often then not it is the mix of spices that creates an amazing flavor rather than a single spice alone. Enjoy!
Winter squash – they come in what seems to be an endless number of varieties. If you ever find yourself wondering whether you have a summer or a winter squash, all you have to do is take a look at the seeds. All summer squash are picked before their seeds are fully formed and mature, while the winter squash is left on a vine to ripen until seeds are fully formed. So when you cut winer squash, you will find a bunch of seeds that you can often enjoy in their own right, usually roasted.
The types of squash that I can easily find in New England (USA) are acorn, butternut, buttercup, hubbard, and spaghetti squash, which makes lovely Pad Thai among other things. And, of course, pumpkin, which reigns supreme among others in terms of availability and easy of use given that I go straight for the can. Canned pumpkin purée (note: not the pie filling!), is a nice addition to many recipes, including meatloaf, as well as truffles. Actually, all winter squash are quite versatile and can be made into both savory dishes and main courses, as well as dessert.
Winter Squash, image via Pixabay
One of my favorite way to prepare winter squash is roasting. Roasted squash is delicious, and does not require much work to get the roasting going. After it cools, you can enjoy roasted squash as is, or cube it, or purée it for use in number of different recipes, including the risotto below.
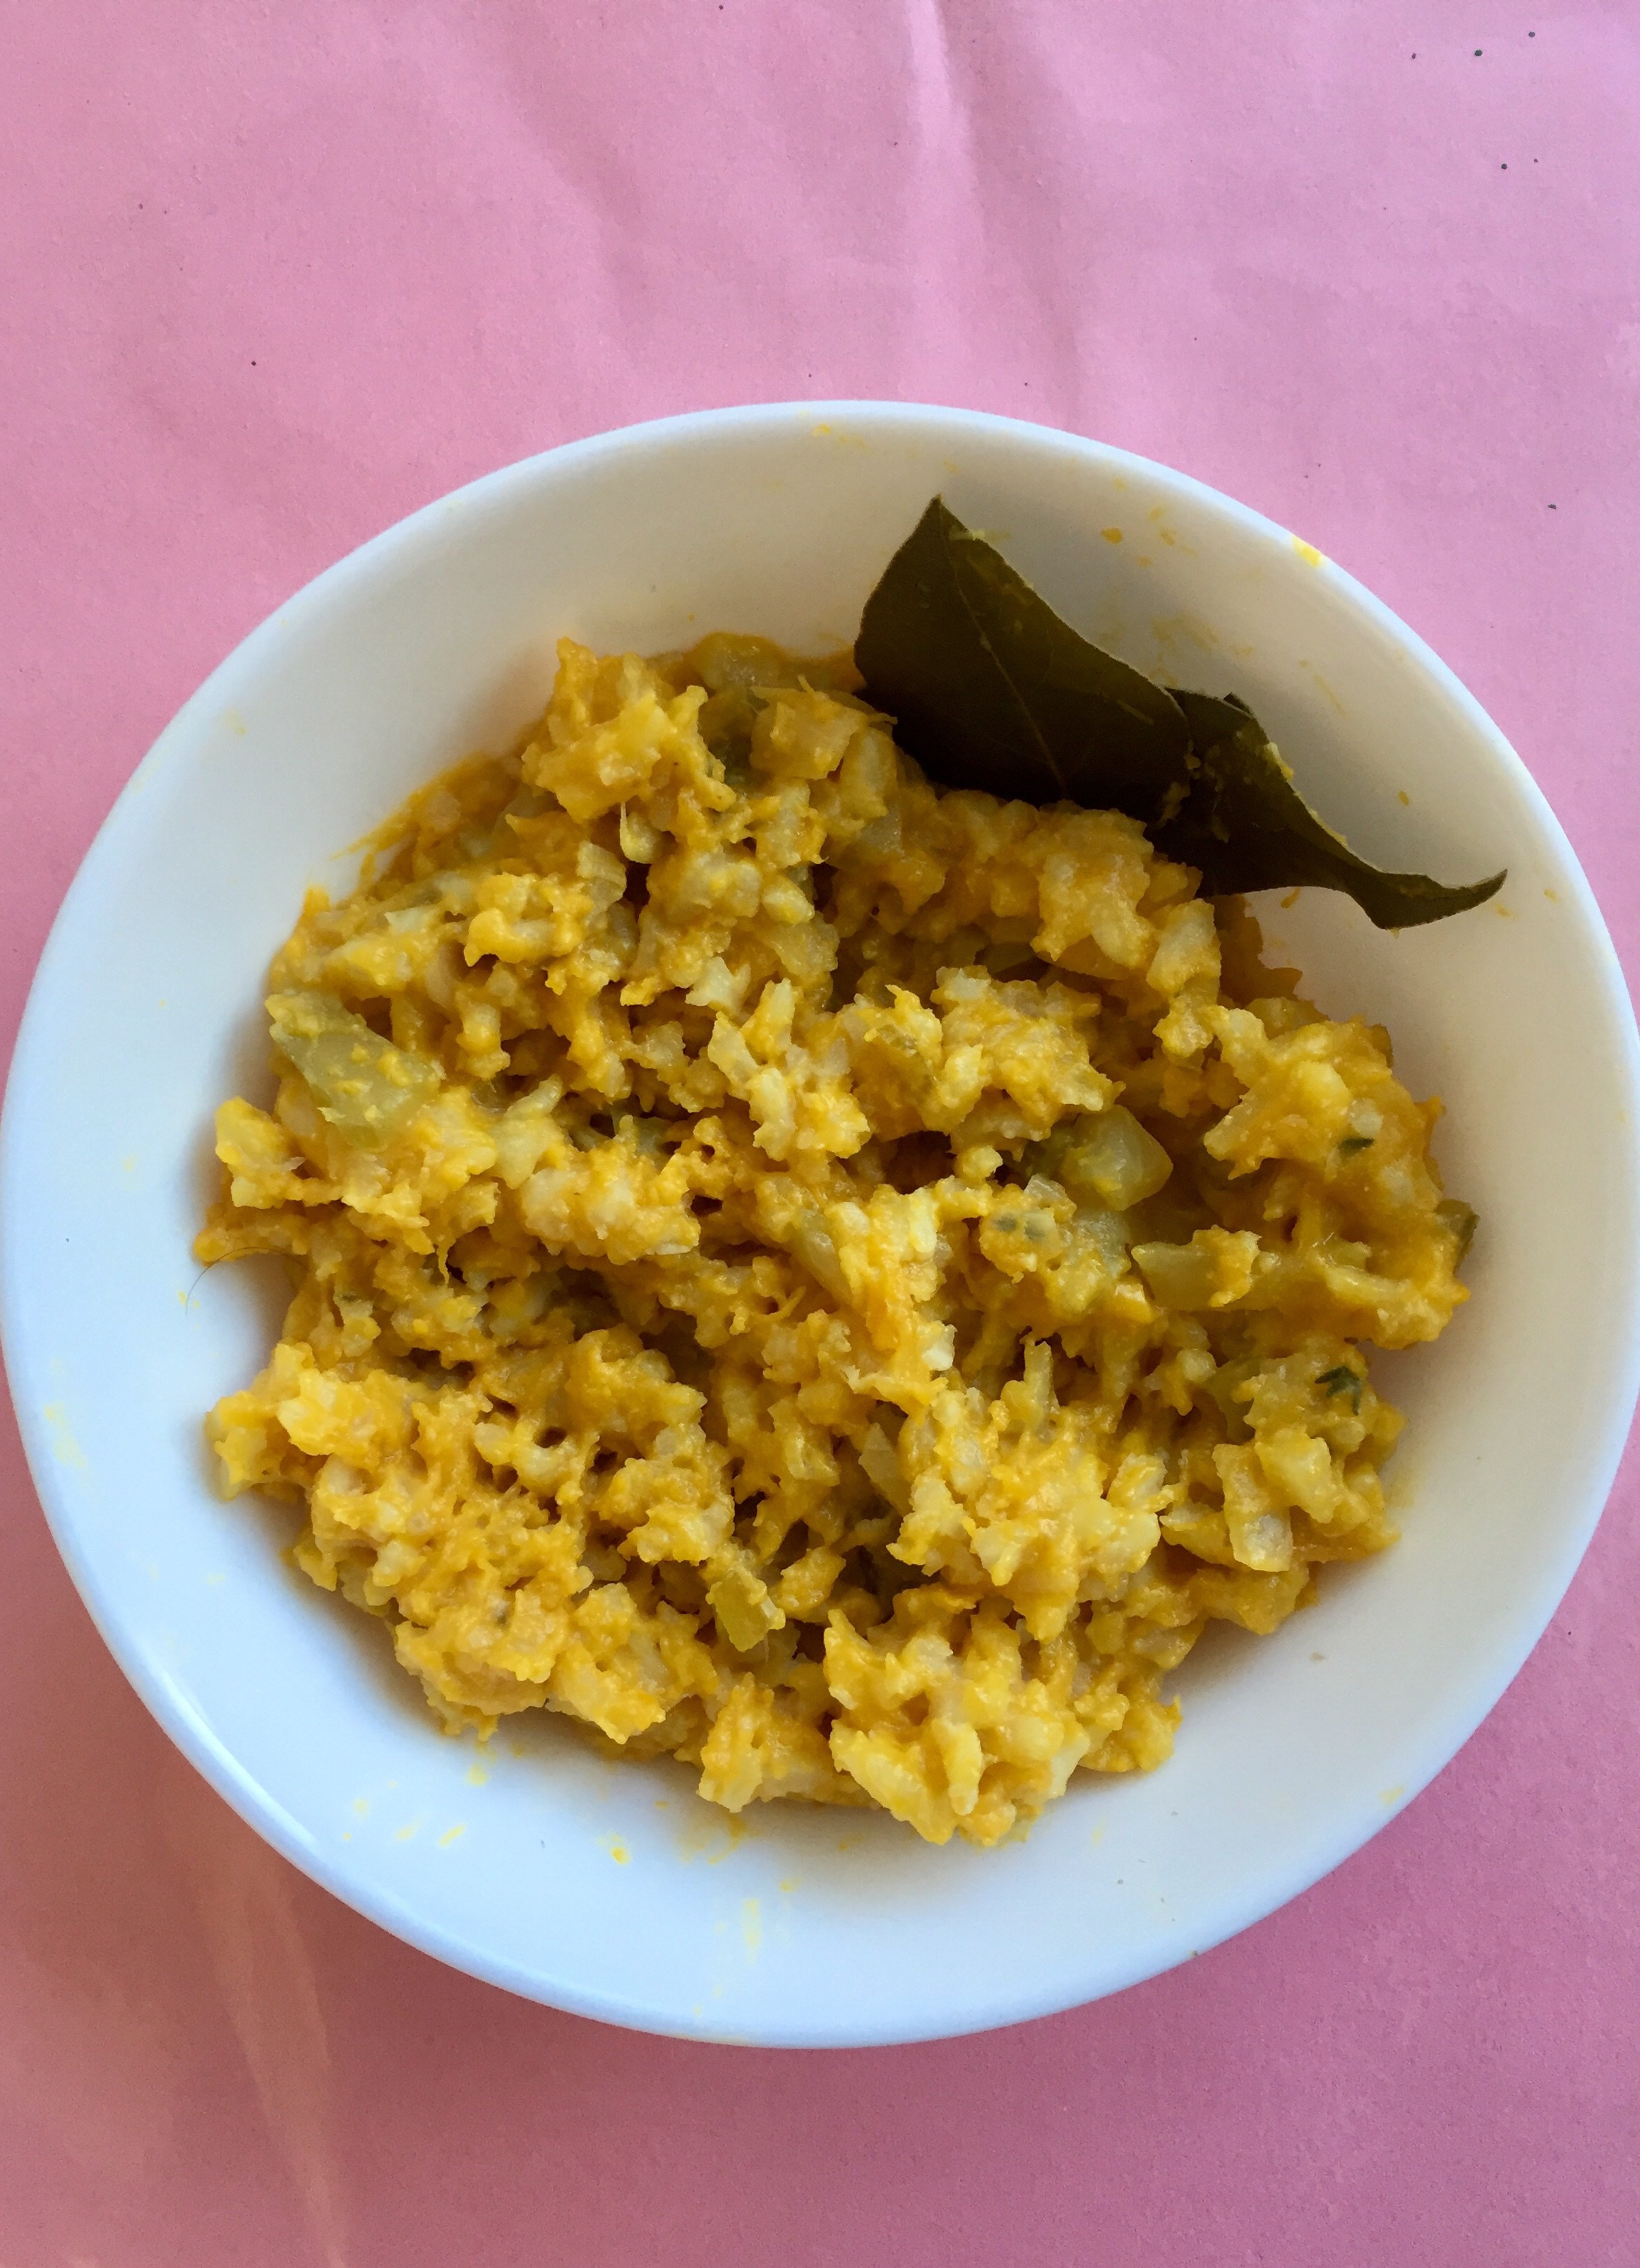
The inspiration for this risotto came from my search for ultimate comfort food. It struck me that combining soft and creamy rice, like the one you get in a well-cooked risotto, with slightly sweet and earthy winter squash is likely to deliver. And: I was right! What helps this risotto come together is nutritional yeast, which I use quite liberally, and bay leaf and thyme, two herbs that infuse the risotto with flavor. Here, I used vegetable stock, but you could use water, or mushroom stock if you like. The texture will not change, but the flavors will. Also: the recipe below does not include salt, so use as much or as little as you like.
The most important thing you need when cooking the risotto is patience, and adding the cooking liquid gradually and in small increments to allow the rice to absorb all the liquid bit by bit. At the end, I always find that risotto uses more liquid then what I expect, so here I recommend having a quart (about 1 L) of stock ready, but add it in small increments. Another thing that a good risotto needs is lots of stirring, so get ready!
Rich Risotto with Roasted Winter Squash
What you’ll need:
1 onion, finely diced
4 stalks celery, diced
2 cups winter squash (or pumpkin) purée (see below)
1 cup medium or short grain rice (for example Arborio)
1/3 cup nutritional yeast
up to 4 cups (1 L) vegetable stock, divided
4 bay leaves
6-8 springs of thyme, laves only
1 tablespoon olive oil
What you’ll do:
I recommend using homemade roasted winter squash for this and any other recipes. Which means that your first step would be to clean and roast the squash until soft and fully roasted. This usually takes about 45-60 minutes at 425F (220 C) oven. You only need 2 cups of puréed squash for this risotto, so you will have some leftover for other things, like soups, pies or even hummus. If you are short on time but still want to enjoy this risotto, go for canned pumpkin. One 15 oz (425g) can of plain pumpkin (NOT pumpkin pie filling!) will do the trick here.
Place a large high-sided skillet over medium to medium-high heat. Add oil, diced onion and celery and let sauté for 5-8 minutes until done. Add puréed squash, mix well and sauté for another 3-4 minutes.
Add the rice (without rinsing it, so that you retain all the sticky starch that will make the final risotto extra creamy), mix well and let the rice brown just a little bit on its own, for about 3 minutes.
Add 2 cups of vegetable stock, bay leaves and thyme leaves and mix well. Bring the risotto to boil then lower the heat down to simmer. Check every 3-5 minutes, mix again and add more stock in 1/2 cup intervals as needed.
After about 15 minutes, mix in all the nutritional yeast, and continue to simmer. Continue to check every 3-5 minutes and add more stock gradually. Any risotto needs lots of attention, and adding the liquid in small increments. So, be patient! The rice should be fully cooked in about 25-30 minutes (fully cooked here means that the rice will not be completely mushy and give sort of al dente resistance when you bite into it.
Serve your risotto warm and enjoy with a nice glass of wine, some olives, or perhaps some nice Giardiniera (Italian pickled vegetables), which I love. That little bit of nice acidity complements the creaminess of this risotto really well.
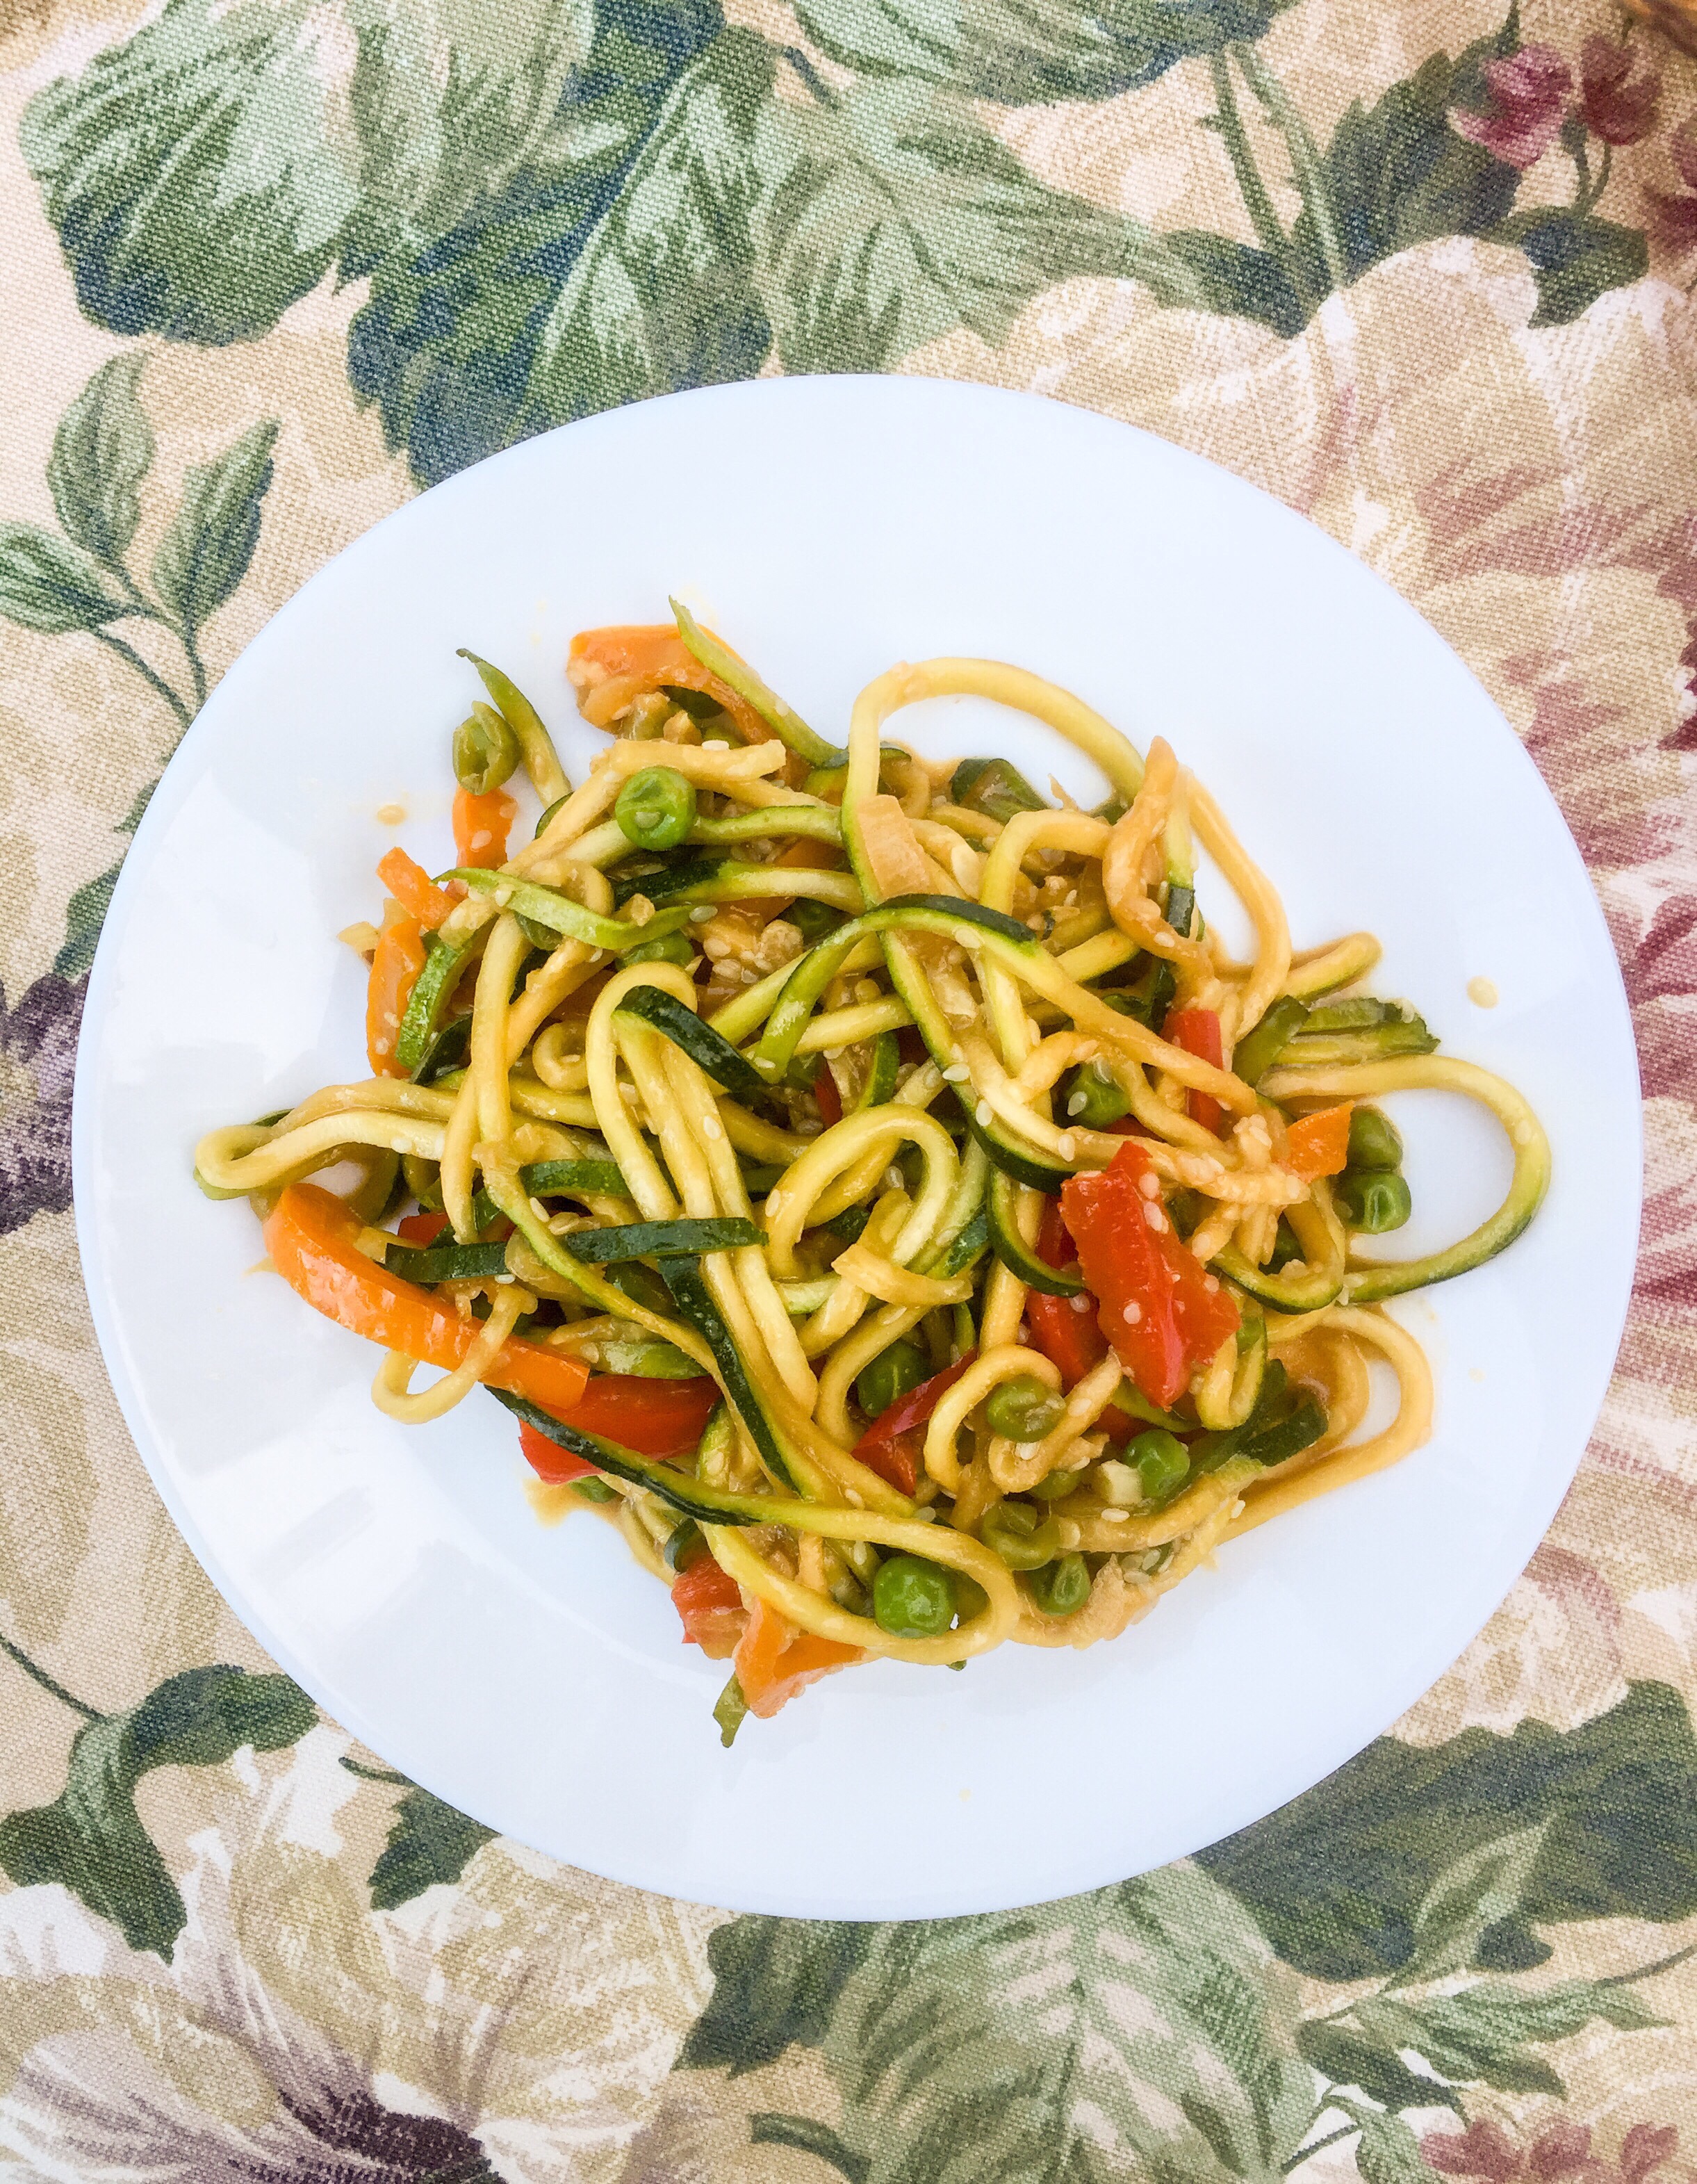
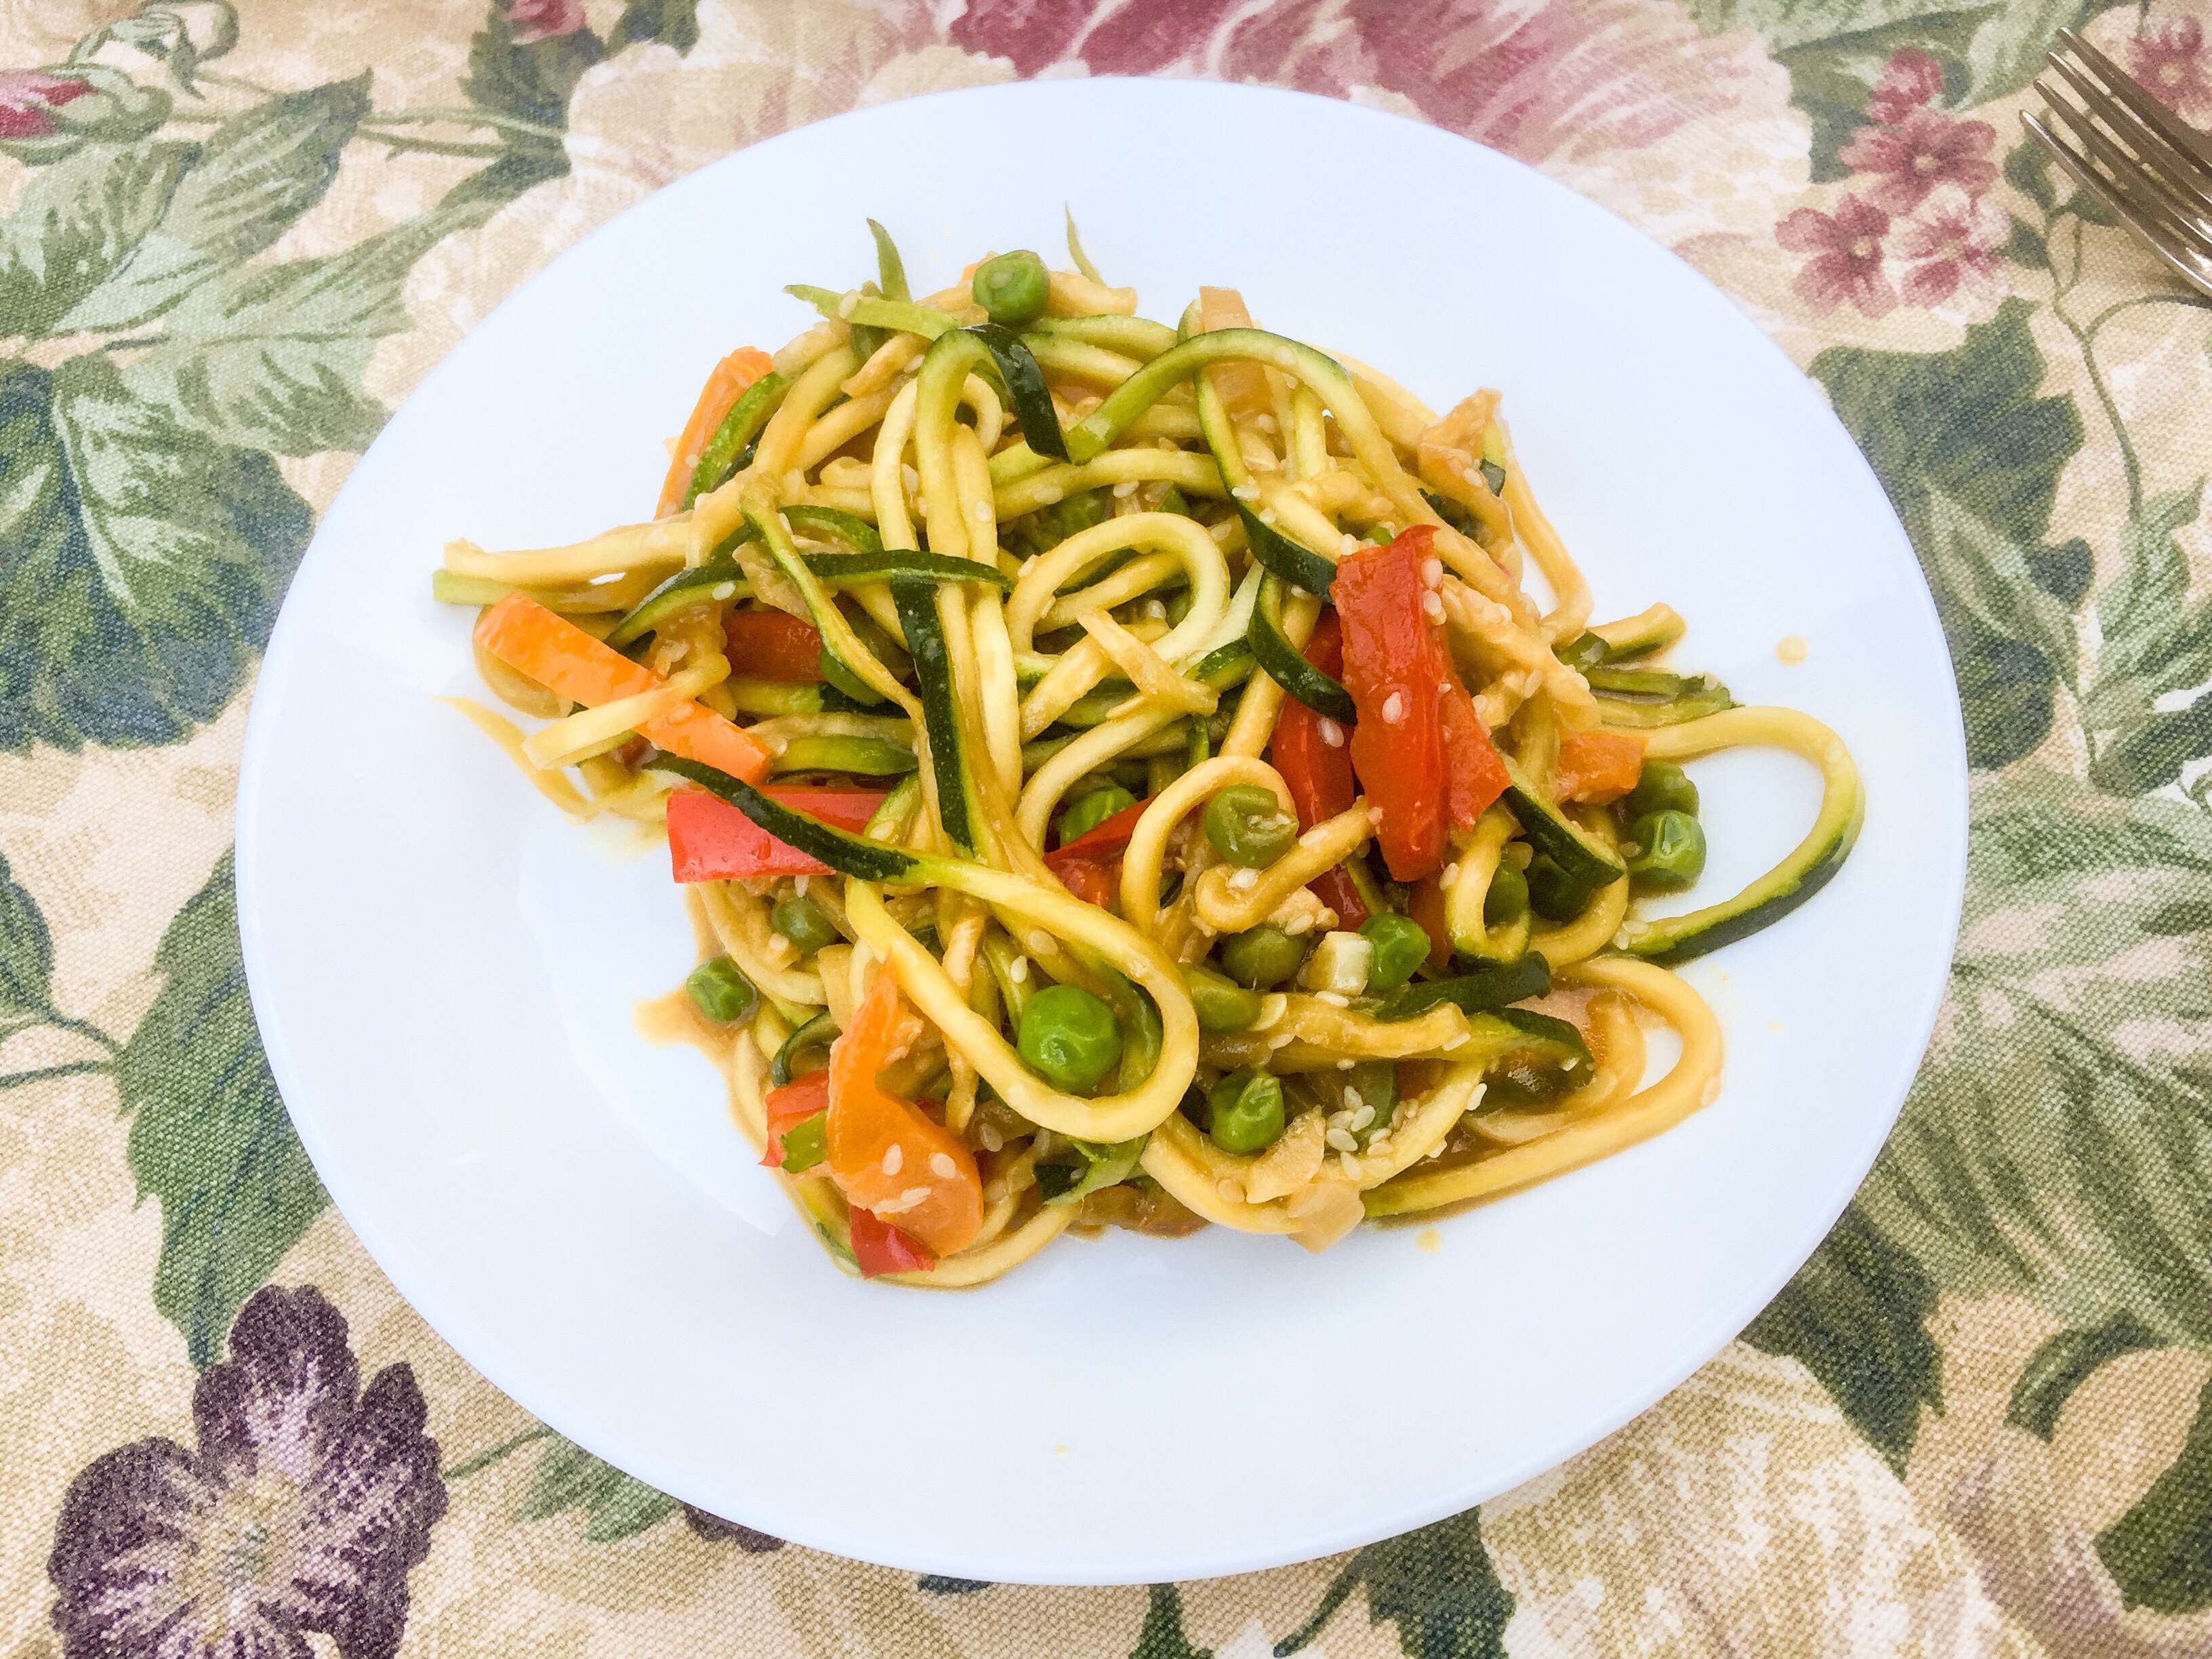
Simple Vegetable Stir-Fry with Zucchini Noodles, via Eat the Vegan Rainbow
We all love pasta and noodles, right? From tiny little noodles in our alphabet soups, to long and slurpy noodles like spaghetti, we can’t get enough of them. Noodles are cheap, easy to make, and taste fantastic. So what’s not to love?
Well, for those who are trying to cut down carbs, noodles are mostly off limits. And although there are many alternatives to noodles made with gluten, they may be unavailable where you are, or out of your price range, leaving those with gluten sensitivity and allergies with no options. Plus, noodles are processed so not an option for those following whole food plant based diet.
Believe it or not, here vegetables can help. First of all, there is the spaghetti squash that makes – and yes this is true – thin spaghetti. I used this squash to make a really authentic Pad Thai. And then there is a range of vegetables that can be transformed into noodles with a spiralizer, one of my must-have kitchen gadgets. By now I have tested a number of vegetables and my favorite are zucchini noodles.
What are zucchini noodles?
Zucchini noodles, or zoodles for short, are spiralized zucchini that’s been growing in popularity in US so much so that you can now get them from your local grocery store. Next time you are grocery shopping, check our your produce section, more specifically the area where you can find pre-chopped packaged produce. This is where I found my first box of zoodles. I really loved them, so I made a long-term investment and acquired a spiralizer – mine is a KitchenAid attachment and works OK (3 out of 4 stars if I had to rate it; if anyone wants me to elaborate feel free to leave a comment below)!
As a side note: the investment into a spiralizer has been worth it, since I use it frequently to create zoodles and other types of spiralized veggies, like summer squash, potatoes and carrots.
Zucchini are my favorite vegetable to spiralize because they create these nice, long noodles that hold their shape well, taste great and look amazing. They are delicious with meatless meatballs, and thats a fact!
How to cook zucchini noodles?
If you google “zucchini spaghetti” you will find a ton of great recipes. But, you will also find posts and warning that you should not be fooled, and that zucchini ain’t pasta! To that I say – you are right, zoodles are no noodles. What I mean by that is that in order for noodles to come out really great, they can’t be cooked the same way, so no boiling big pots of water allowed. To get to great zoodles, you need to sauté them for just a few minutes. These noodles are soft and gentle, and if you push them to far you will end up with a mushy mess. So, cook them only briefly and handle with care!
And what about using zucchini noodles in a stir-fry?
That’s the question I wanted to answer myself. The recipe below is the result of figuring out how to use zucchini noodles in a stir-fry, as well as how to make gluten-free hoisin sauce. For a great result with zoodles in a dish like stir-fry add the “noodles” last and let them cook for only 2-3 minutes than turn the heat off and let them rest for couple of minutes before serving. This will soften them up but not make them mushy.
The main secret to a perfect stir-fry in general is a great wide and deep pan, like a wok, that allows a nice temperature gradient from the bottom, usually kept really hot, to the top of the sides, that are cooler. For this stir-fry I recommend medium high heat, which allows me better control and decreases the likelihood that something will get burned.
Another tip is to add things gradually, starting from those ingredients that need longer stir-frying times, in this case red and orange pepper sticks, to those things that need just a couple minutes, like the noodles. Taking it step by step will help all the vegetables cook at just the right level of doneness.
Homemade gluten-free hoisin sauce
Another ingredient that makes this stir-fry over the top delicious, is the hoisin sauce. It may come as a surprise to some that most hoisin sauces out there are not gluten-free, so if you are avoiding gluten, you will need to read your labels carefully. Although you can find brands that make gluten-free hoisin sauce, it is actually very easy to make some yourself. All you need is a bit of miso paste (check your miso paste label to make sure it is gluten-free since some may not be depending on what grain was used for fermentation), liquid aminos (or tamari sauce, a gluten-free alternative to soy sauce), dark molasses, and a dash of toasted sesame seed oil – whisk it all together and you are done! Here, I skipped sesame seed oil since I am using actual sesame seeds, but you can change it up as you like.
I recommend adding the sauce, mixed in with some arrowroot powder as a thickening agent, before the zoodles. The arrowroot needs few minutes to start working, so getting the sauce nice and thick before adding the more fragile zucchini noodles helps. At the end, all is left to say is – grab yourself a plate and pile this stir-fry high!
Simple Vegetable Stir-Fry with Zucchini Noodles
What you’ll need:
FOR GLUTEN-FREE HOISIN SAUCE
2 tablespoons white miso paste
1/4 cup tamari sauce (or liquid aminos)
1/4 cup dark molasses
1 teaspoon toasted sesame seed oil (optional)
Plus:
2 tablespoons arrowroot powder
FOR STIR-FRY
2 tablespoons vegetable oil
6 cloves garlic, finely sliced
1 inch (2.5 cm) piece ginger root, thinly sliced
1 red pepper, cut into 2 inch (5 cm) strips
1 orange pepper, cut into 2 inch (5 cm) strips
1/4 cup sesame seeds
1 1/2 cups peas, frozen
4-6 cups spiralized zucchini, store-bought or homemade
What you’ll do:
Spiralize the zucchini – to make 4-6 cups of zoodles you will need to start from 2 medium size zucchini. Set aside.
In a small mixing bowl combine all the ingredients for the hoisin sauce (except arrowroot powder/flour – that is not part of the sauce recipe, it is a thickener for the stir-fry), mix well and set aside. Note: this is a basic hoisin sauce recipe and if you are not gluten-sensitive/intolerant, you can definitely use the store-bought variety, in which case use 3/4 cup of the sauce. Plus: you can use this sauce recipes for any other dishes you are making, like fried rice and similar.
Place a large wok, or a large and deep frying pan with curved sides, over medium high heat. Add thinly sliced garlic and sauté for 1 minutes, then dd thinly sliced ginger and let garlic and ginger release their aromas, about 1-2 more minutes.
Add red and orange pepper strips, and sesame seeds. Mix well and let the peppers sauté for 10 minutes.
Add frozen peas and continue cooking and stirring for 5 minutes or so.
Add the arrowroot powder (flour) into the hoisin sauce and mix well to make sure the mixture is smooth and there are no visible clumps. Note here: if you don’t have arrowroot powder, corn starch will work as well.
Add the hoisin sauce slurry into the stir-fry, and keep stirring for 1-2 minutes until the sauce thickens slightly.
Add the zucchini noodles last, lower the heat to medium, and using a pair of kitchen tongs fold the zoodles in gently. Let the noodles cook for 2-3 minutes, then turn the heat off and let the stir-fry cool for couple of minutes before serving.
Oui, oui… we all love crêpes! Savory or sweet these flat wraps are easy to make and delightful. Of course, those in the business of crêpes making may lead you to believe that crêpes are beyond your capabilities. And even if you are brave to venture into the crêpes land, you may hesitate to accept the vegan crêpes challenge. Yet, there’s nothing to worry about as crêpes can be not only vegan but gluten-free as well.
Choosing the right crêpes pan
The pan you use makes a huge amount of difference when making crêpes. You need a good, preferably non-stick, shallow frying pan with large surface area. The pan should also not be too heavy because there is a fair bit of pan handling (lifting, tilting, swirling) that will need to take place. I use IKEA but you can use any pan the fits this description – roughly.
Preparing the pan
I recommend getting the pan nice and hot before adding a batch of batter. Also, remember to oil the pan before each crêpes. I place my oil in a small bowl which I keep on the stove for easy access and use a silicone brush to brush the oil over the pan’s bottom just before pouring in a batch of batter. And keep doing this each time!
The first crêpe is always the worst!
One dirty little secret of crêpe making is that the first crêpe is always the worst!!! So, although this first crêpe will be nerve wracking and make you feel like a total crêpe disaster, please do persevere and things will get better. This phenomenon seems to be all down to improperly oiled and insufficiently heated pan – and following the instructions here or in this very helpful post will ensure that your second, third, fourth, and so on crêpe all come out perfect. What helps is keeping the heat up, oiling the surface and using a really long and thin spatula to gently peel the crêpe off and flip over. What also help is being stingy with a batter. You are going for a very, very thin pancake here and the pictures below show you what my crêpes looked like.
Finishing crêpe touches
There are many different ways to enjoy the crêpes. You can use light spreads, like jams, chocolate syrup or nut butters, or simply sprinkle with some sugar and cinnamon, or go for the classic combination of butter and maple syrup. Chopped up fruit and/or nuts, as well as walnut and almond meal also work. If you are want to totally impress your guests you may want to make a crêpe cake, and if you made a batch of savory crêpes you can definitely use them in the same way as tortillas or other thin, unleavened breads. If you are wondering what savory crêpes are all about, I previously shared an easy to make scallion crêpe recipe with a sesame dipping sauce.
All in all, this recipe is perfect for a Sunday brunch, or a nice family breakfast around the Holidays. It is something that you could make ahead and bring to a pot luck, but the best way to enjoy crêpes is straight out of the pan, while they are still hot and soft. Incredible – oh là là!!!
Basic Gluten-free Vegan Crêpes
What you’ll need:
2 cups chickpea flour
1 cup corn starch
2 tablespoon agave syrup (omit if you plan on savory toppings)
1 teaspoon baking powder
1 teaspoon baking soda
1/4 teaspoon salt
1 tablespoon vanilla paste
1 teaspoon maple flavor
2 cups almond milk
1 cup water
2-3 tablespoons vegetable oil
What you’ll do:
Combine all the ingredients as listed in a large mixing bowl, and whisk them all together. Let the batter rest for 15-20 minutes.
Place a large pan with a flat surface over high heat. Let the pan heat up then using a silicon brush spread some oil uniformly over the entire surface. Pour just enough batter to cover the surface with a thin layer – for my 9 in (23 cm) pan I use about 3/4 cup. Pour the batter gradually towards the middle and keep pouring as you twirl the pan around.
Place the crêpe over high heat for 2 minutes or so, then lower the heat just a tad and let the crêpe finish cooking on the first side. The way you can tell the crêpe is ready to be flipped is by looking at the surface – once the surface starts looking dry you are ready to flip.
If you have a very good pan and have done everything right your crêpe will not be tightly attached to the bottom and you may even be able to flip it through the air. But if your crêpe is not loose then use your spatula to gently loosen the crêpe and flip it over. The flipping needs some practice, so be patient.
The crêpe needs to cook on the other side for just 1-2 extra minutes. Slide the crêpe out, then increase the heat, leave the pan on for a minute to get it back to being really hot, spread some oil and repeat. Your friends and family may want to start eating the crêpes are they come out of the pan, and I say let them! Crêpes are the best when fresh, so it makes total sense to jump right in!!!
Heavenly Crispy Dark Chocolate and Fruit Bar, via Eat the Vegan Rainbow
Behind every recipe there has to be a story. And behind this one there really is not much to tell. I was craving something sweet and chocolaty, and debating what to make, when I came across a recipe for vegan fudge that comes together in a bowl with no baking or complicated steps required.
This recipe takes me back to my childhood and reminds me of chocolates with chewy fruit and crunchy nuts that were so much fun to eat. For those of you who like your chocolate smooth, this may seem too weird, do keep en open mind. These bars have just the right balance of crunch, chewiness, coconut flavors, and chocolate that they will put a smile on your face in single bite. Plus: they have no added sugar, as they get plenty of sweetness from golden raisins.
For the crunch you could use any mild tasting breakfast cereal, like crispy rice, corn flakes, or something like Cheerios. You can also skip cereal all together and go for some nuts. Chopped walnuts, hazelnuts or pecans would work really well in these bars; while cashews, peanuts or macademia nuts are probably not going to give you what you are looking for in terms of the flavor.
For the chewy fruit component, golden raisins work really well, but you could use dark raisins or dried cranberries. No matter which one you decide to go with, before you use the dried fruit, soak them in hot water for at least an hour. The raisins will be plump and juicy after soaking, so you will need to drain them, pat them dry, and they are ready to go.
If you are wondering how to melt the chocolate, you have two options: double boiler ad microwave oven. I use the microwave method where I combine the chocolate with a bit of cream or milk and microwave on high for 30 seconds. I take the bowl out, mix well, and put back for another 30 seconds. Mix again and repeat until most but not all (about 75-80%) of the chocolate has been melted. At that point the mixture has enough internal heat to melt the rest of the chocolate chips with constant mixing. This will give you smooth and well melted chocolate. If you are using a double boiler you will have to continuously mix the chocolate as it melts – don’t walk away! Having the chocolate go too far is not fun!
The bars are really mix, pour and let it set type of treat. I recommend that you line your deep dish with some parchment or wax paper, and that you let these bars set at room temperature, which will take a bit longer than if you put them in the fridge. You should store them in the fridge, in a container with a tight lid, but for the best burst of flavor do let them warm up just a bit before biting in. Yummy!
Heavenly Crispy Dark Chocolate and Fruit Bar, via Eat the Vegan Rainbow
1 cup golden raisins, soaked in water, drained and pat dried
1 cup unsweetened coconut flakes
1/4 cup coconut oil, melted
2 tablespoons coconut milk, cream or any vegan half & half (I used ripple, plain & unsweetened)
What you’ll do:
Soak golden raisins in some hot water for at least an hour. You want them to be nice and plump. Drain them, and pat dry them add to s large mixing bowl.
Line an 8 x 8 (20 cm x 20 cm) baking pan with some parchment paper. Set aside.
In a microwave safe bowl (or a double boiler) mix the chocolate chips with coconut cream (or milk or half & half), and melt the chocolate slowly. If using a microwave, check and mix your chocolate every 30 seconds. Pull the chocolate out when 75% is melted. Keep stirring and the residual heat will melt the rest of the chocolate chips.
Pour the melted chocolate over the rice crispies, raisins and coconut flakes. Mix well.
Pour the chocolate mixture into the pan, even it out, and leave in on the kitchen counter for at least an hour. This will allow for the chocolate to harden and settle. If you are in a hurry you can use the refrigerator – in that case the bars will be ready in about 15 minutes depending on how thick you made them.
Take the chocolate out and let it come to room temperature before cutting and serving. These little treats are great on the go bites as well, so you may want to make a double batch!
Dolmas, Stuffed Grape Leaves via Eat the Vegan Rainbow
Dolmas, stuffed grape leaves, are these delicious savory morsels that you can often find at salad bars, as well as many Greek and Middle Eastern restaurants.
They are one of my favorite appetizers, and although I enjoy them enormously I have not been brave enough to actually make them myself. But, last time I was browsing through my local Indian store I noticed a jar of grape leaves and went for it!
Believe it or not, dolmas are not all that hard to make. They do take time, and lots of hands-on but you end up with a huge batch that can serve a large party so it’s definitely worth the effort. Making dolmas at home will allow you to customize the recipe – in my case that meant less oil, more lemon juice, and adding some pine nuts to diversify the texture.
These dolmas are phenomenal, and will impress your guests to no end! You can eat them warm, you can eat them cold, you can serve them with some hummus or with a dollop of sour cream or yogurt. You can make them into a sandwich with some pita bread or enjoy in your salad the next day if you happen to have leftovers.
If you want to learn the basic “stuffing the leaves” technique, please check my Stuffed Cabbage Rolls post for step-by-step guide!
Stuffed Grape Leaves
What you’ll need:
1 cup rice, medium grain
1 3/4 cup water
6 scallions, finely chopped (green and white parts)
4 cloves garlic, finely sliced
1 cup pine nuts
1/4 cup flat leaf parsley, finely chopped
3 tablespoons fresh mint leaves, finely chopped
1 lemon, zest and juice
1 large jar of grape leaves (2 lbs (1 kg) or similar)
2 tablespoons olive oil
What you’ll do:
Combine medium grain rice with water in a large pot and place over the medium high heat. Bring to boil then turn the heat down to simmer. Cook the rice until fully cooked which takes 15 to 20 minutes. The rice should be soft and sticky.
When the rice is ready, place a large frying pan (or similar) over the medium heat, add oil, scallions, garlic and pine nuts, and let brown for 1-2 minutes. The pine nuts should be well toasted but not burned so keep mixing and keep your eye on the pan.
Add the rice, parsley and mint, and mix well. Let everything cook for another 5 minutes or so.
Turn the heat off, and add lemon juice and lemon zest. Mix everything together and let cool for 1-2 hours.
Open the jar of grape leaves and gently unfold each of the stacks. These will be tightly packed, and you will need to gently peel each grape leaf off. Keep all the leaves, big, small, regular, wacky, ripped and whole because you will use the best ones to make dolmas and the not so great ones to line the pan and create a cozy cooking environment for your stuffed grape leaves.
Use the not so great leaves to completely cover the bottom os a large pot (like a Dutch oven) with grape leaves. I recommend doubling the leaves, so that you have a nice, thick layer at the bottom.
Take bigger leaves, and stuff them. This is actually not that hard – place a leaf on a flat surface and put a tablespoon of stuffing at the bottom of the leaf, where the stem used to be. Use your fingers to form the stuffing into a tight ball – this will help hold everything together. Put the stuffed grape leaf into the pot and continue rolling the dolmas until you run out of the stuffing. If you need to make multiple layers of dolmas in your pot, remember to cover each layer with lots of grape leaves.
Turn the heat to medium high, and simmer dolmas for about 15-20 minutes. Serve cool, at room temperature, and drizzle with some olive oil and freshly squeezed lemon juice just before serving. Enjoy!
Stuffed Savoy Cabbage Rolls, via Eat the Vegan Rainbow
Stuffed cabbage rolls, stuffed peppers, stuffed grape leaves – with so many things to stuff how do you decide on what to put in each one and does it really matter? I grew up with stuffed cabbage leaves, the fermented cabbage leaves to be precise, and the result called “sarma” is a bit of a staple, tradition and highlight of the Serbian and other Balkan cuisines.
The most common stuffing ingredient is a mix of rice and meat, with some onions and carrots, all sautéed together. There’s also a tradition to make vegan versions during the weeks of lent that precede both Christmas and Easter. Most vegan versions either skip the meat or replace it with chopped walnuts.
The key to perfect stuffed cabbage rolls is to have nice, large cabbage leaves that are soft and pliable. Traditional recipe uses fermented cabbage leaves that fit these requirements well, but if you don’t have a barrel-full of fermented cabbage heads don’t worry. There’s a way to go around this problem.
The best way to do this is to pick a cabbage with softer leaves to begin with. I recommend savoy but Napa would work.
No. 2: discard 2-3 leaves that are right on the surface as they can be tougher, and then gently peel off 8-10 large leaves without ripping them.
No. 3: bring a large pot of water to boil and blanch the leaves unto softened then rinse under cold water to prevent them from getting too soggy.
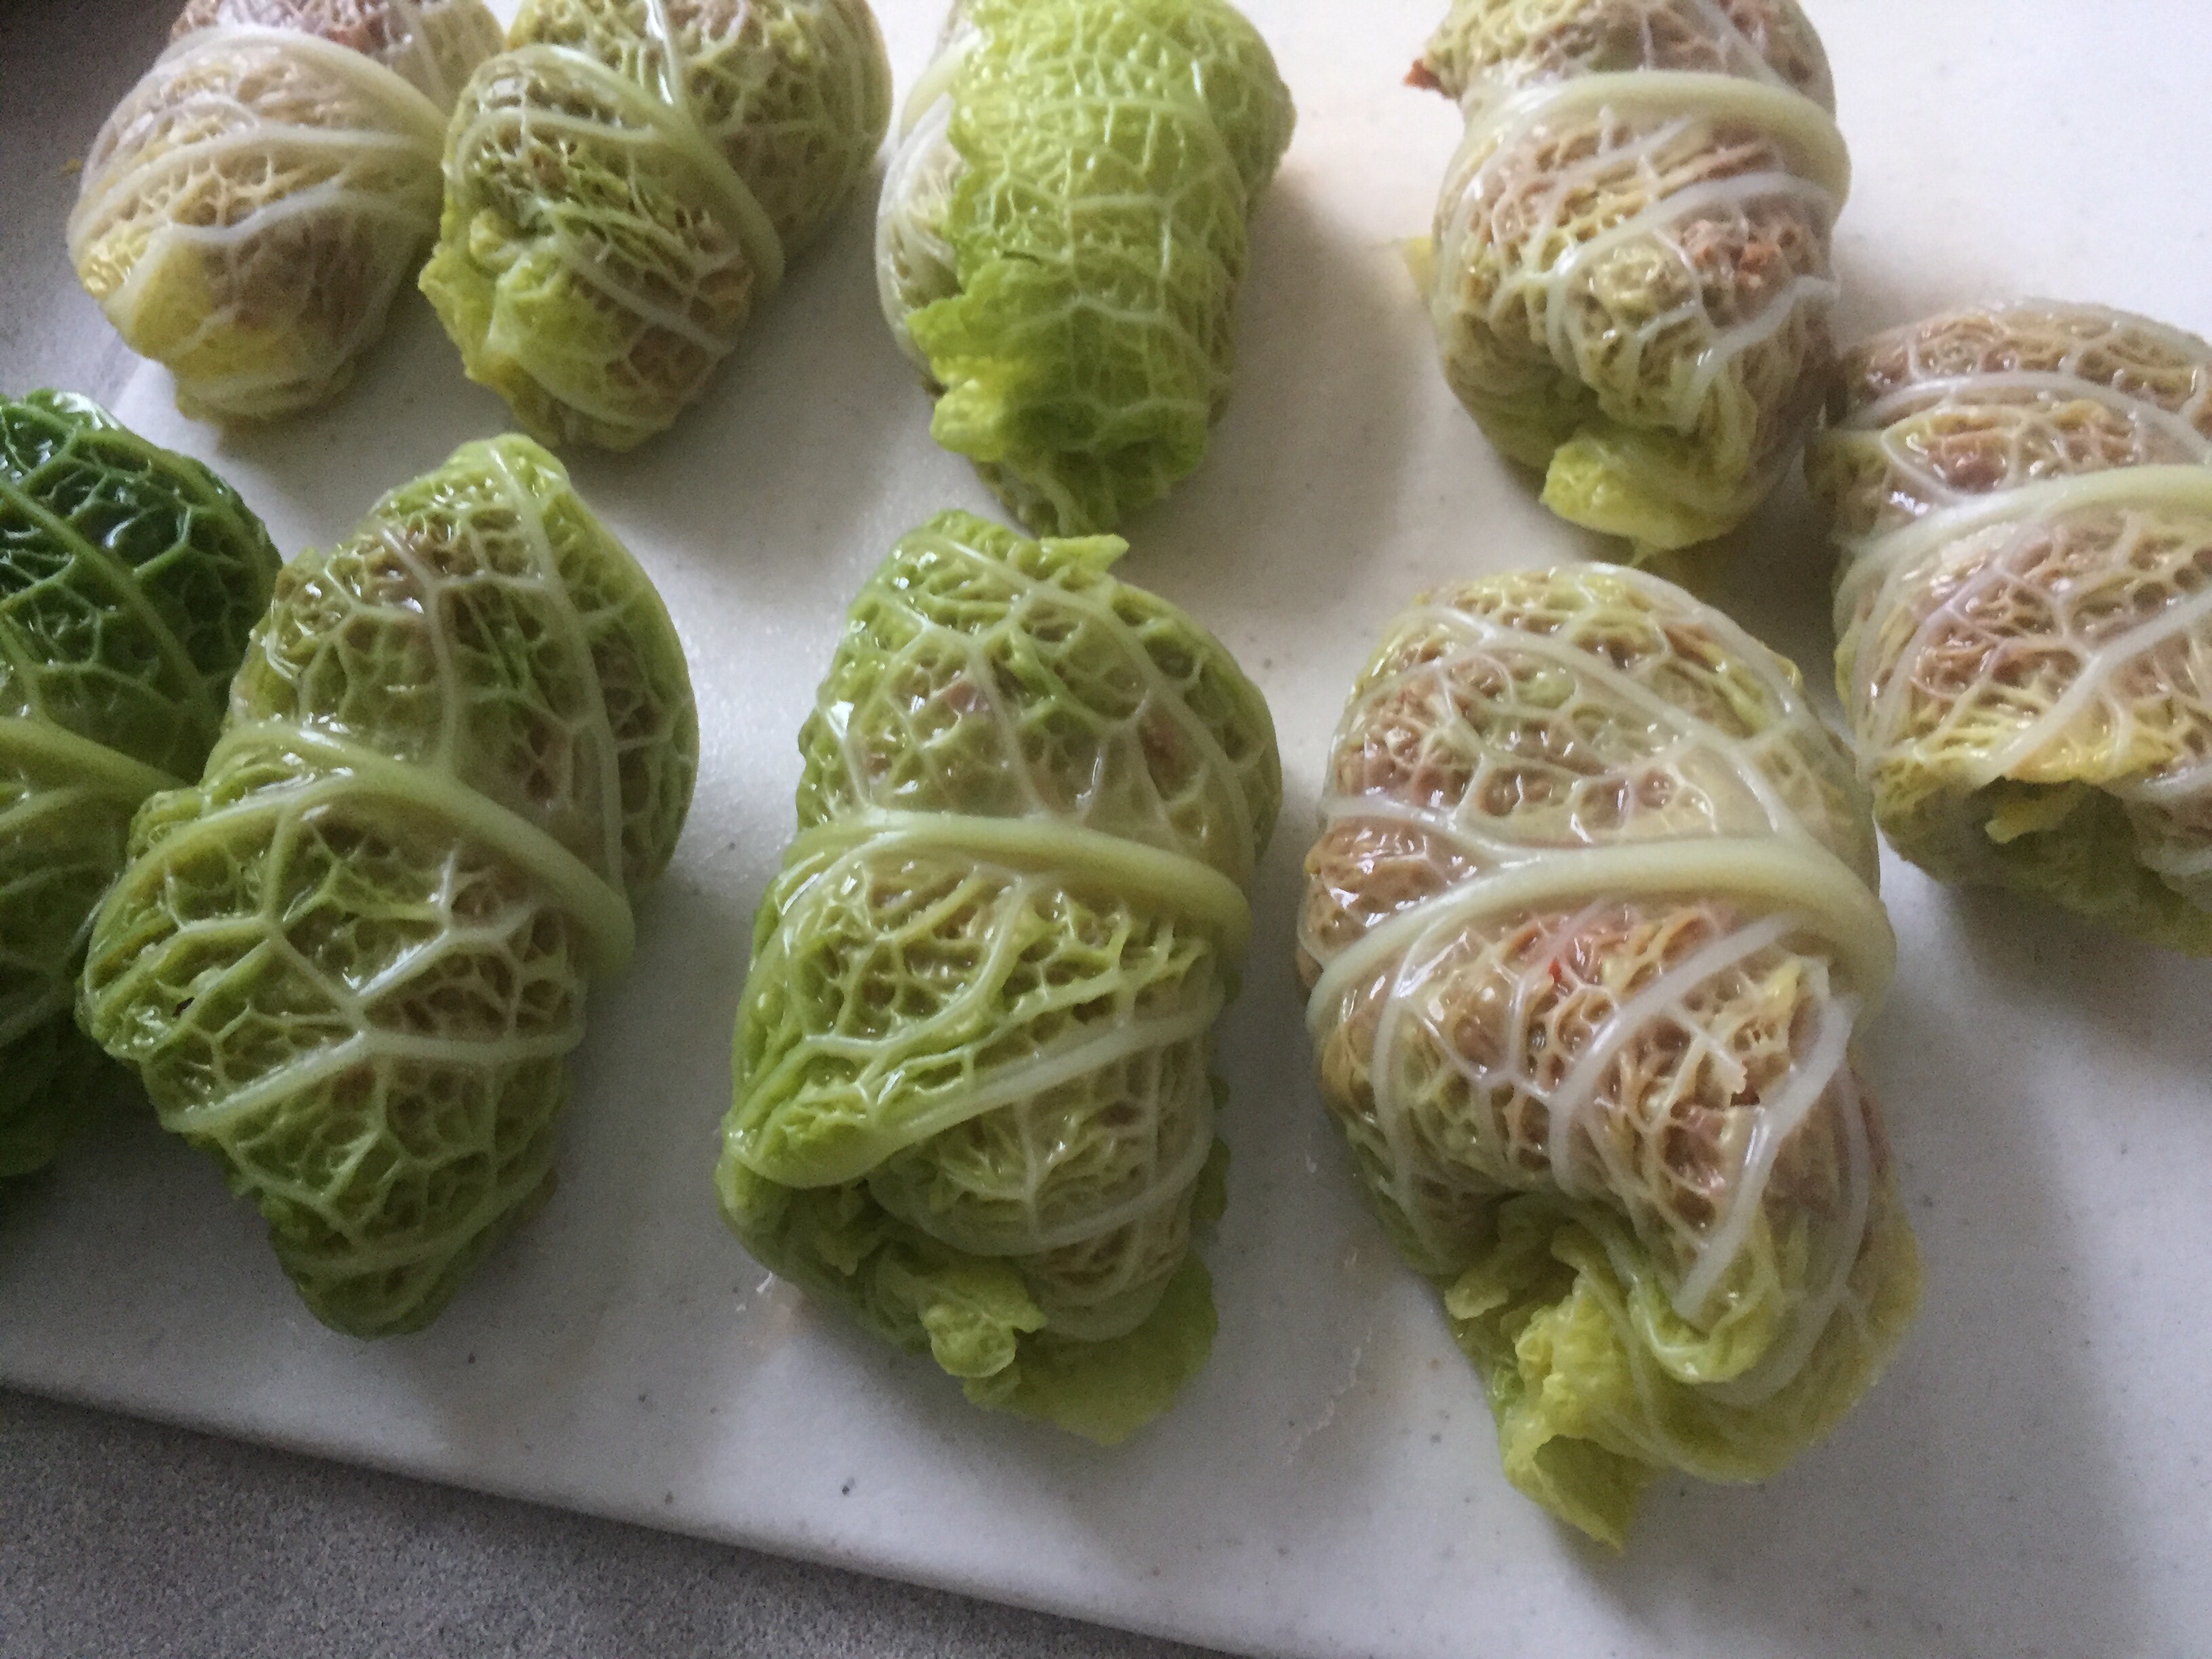
Once you have your leaves ready, it’s time to fill them up, and roll them into tight little packages. My stuffing here is simple – I mixed some store-bought ground beef substitute (Trader Joe’s in this case but you can use any kind you like or make your own), and mixed it with some tomato paste to make a stuffing that sticks together.
Place your leaf on a flat surface, spread it out, place about one to two tablespoons of stuffing at the base of the leaf, fold one side over, roll it up, tuck the other side in, and you are done (see pictures below).
Finish rolling the rest, then place your rolled cabbage into a simple tomato sauce – you can find the recipe for my go to tomato sauce below, but you can also use a jar or two of pre-made marinara sauce as well. Let everything simmer for some time, then enjoy!
Stuffed Savoy Cabbage Rolls
What you’ll need:
10-12 leaves (1 large head) Savoy cabbage
24 oz. (680 g) ground beef substitute (homemade or store-bought)
3 tablespoons tomato paste
2 28 oz cans crushed tomatoes, chunky style
4 cloves garlic, finely sliced
2 tablespoons olive oil
1/4 cup parsley, flat leaf, chopped
What you’ll do:
Starting from a large head of Savoy cabbage, remove 2-3 outermost leaves and discard, then carefully remove the next 10-12 leaves. Wash the leaves a pat dry.
Bring 8-12 cups of water to boil in a large pot. Once the water is boiling, submerge the cabbage leaves and boil for 3 minutes or so.
Place the softened yet still not fully cooked leaves into a strainer and quickly rinse with cold water. Leave in a strainer to continue to drain.
In a large mixing bowl, mix the ground beef substitute with the tomato paste.
Taking one leaf at a time, place them on a flat surface, add 1-2 tablespoons of the stuffing, fold one side over, roll into a tight roll, then tuck the other side in to form the tightly packaged roll. Set aside and continue to roll until all the cabbage and stuffing are used up.
Place a large Dutch oven or a heavier pot over the medium high heat. Add olive oil and sliced garlic. Sauté for 1 minute, which should be enough for garlic to start releasing its aroma without burning.
Add tomato sauce, stir well and simmer for 2-3 minutes.
Gently place your cabbage rolls into the tomato sauce. Spread them into a single layer and Bring the sauce to a gentle simmer, cover and let everything cook for 15-20 minutes.
Sprinkle in fresh parsley and serve. Some complementary sides are freshly baked bread, basmati or cauliflower rice, or classic mashed potatoes. Enjoy!