Zucchini and Summer Squash With Garlic and Basil, via Eat the Vegan Rainbow
You know that you have been slacking when the post about CSA Week 9 recipe comes couple of weeks after the finish of the CSA program. How did all those weeks disappear? All I’m going to say is that summer vacation, start of school year, and crazy work schedule happens to the best of us! Wild, I know!!!
In Week 9, Upswing Farm share included some lovely zucchini and basil. So recipe here is a really easy and quick take on what to do when life gives you zucchini, summer squash (this one was from my garden), and lots of fresh basil.
The recipe takes less than 30 minutes to make, used only a handful of ingredients, and is light, fragrant and incredible for the long, hot, lazy days of summer, as well as these fall moments we are now enjoying.
As summer squash, zucchini and fresh basil are now available year round, you can actually serve this “summer sunshine in a bowl” even at the dead of the winter. When choosing your zucchini and squash pick those that have smooth surface with bright color and fresh look. Those will be fresher pieces that you can use without peeling after giving them a good wash.
This recipe requires grating, and the easiest way to do this is to run the zucchini and squash through a grater attachment that most food processors include. Traditional hand-held grater works too! I recommend that you squeeze some of the excess water out of the grated squash and zucchini before using. If you skip this step, the final dish will be quite water-y, although it will still taste good. So, it’s up to you to decide the amount of liquid you’d like your final result to have.
Lastly, when it comes to fresh basil you will not need to do much to prep it. You can use the entire bunch, after you wash it and trim it. The point is to have basil infuse the dish, and you can fish the large pieces of basil out before serving. Of course, basil is delicious in its own right and if you want to enjoy it just go for it!
This side dish is best served warm, with some toast or good hearty bread for dipping and mopping the bowl. Delicious!
Zucchini and Summer Squash with Garlic and Basil
What you’ll need:
2 zucchinis, washed, trimmed, and grated
2 summer squash, washed, trimmed, and grated
6 cloves garlic, peeled and thinly sliced
2 cups basil leaves, whole
1 tablespoon apple cider vinegar
2 tablespoons olive oil
What you’ll do:
Wash the zucchini and summer squash, trim the ends, and grate either using a food processor or a manual grater.
Peel and slice garlic thinly. You can adjust amount of garlic to taste but I don recommend going beyond your comfort zone here.
In a large pan bring oil to medium heat, add garlic and sauté for 1-2 minutes.
Add the zucchini and squash, mix well, and sauté for 5-8 minutes until fully cooked.
Add the fresh basil and vinegar, mix well and let rest for 10 minutes or so before serving. Enjoy!
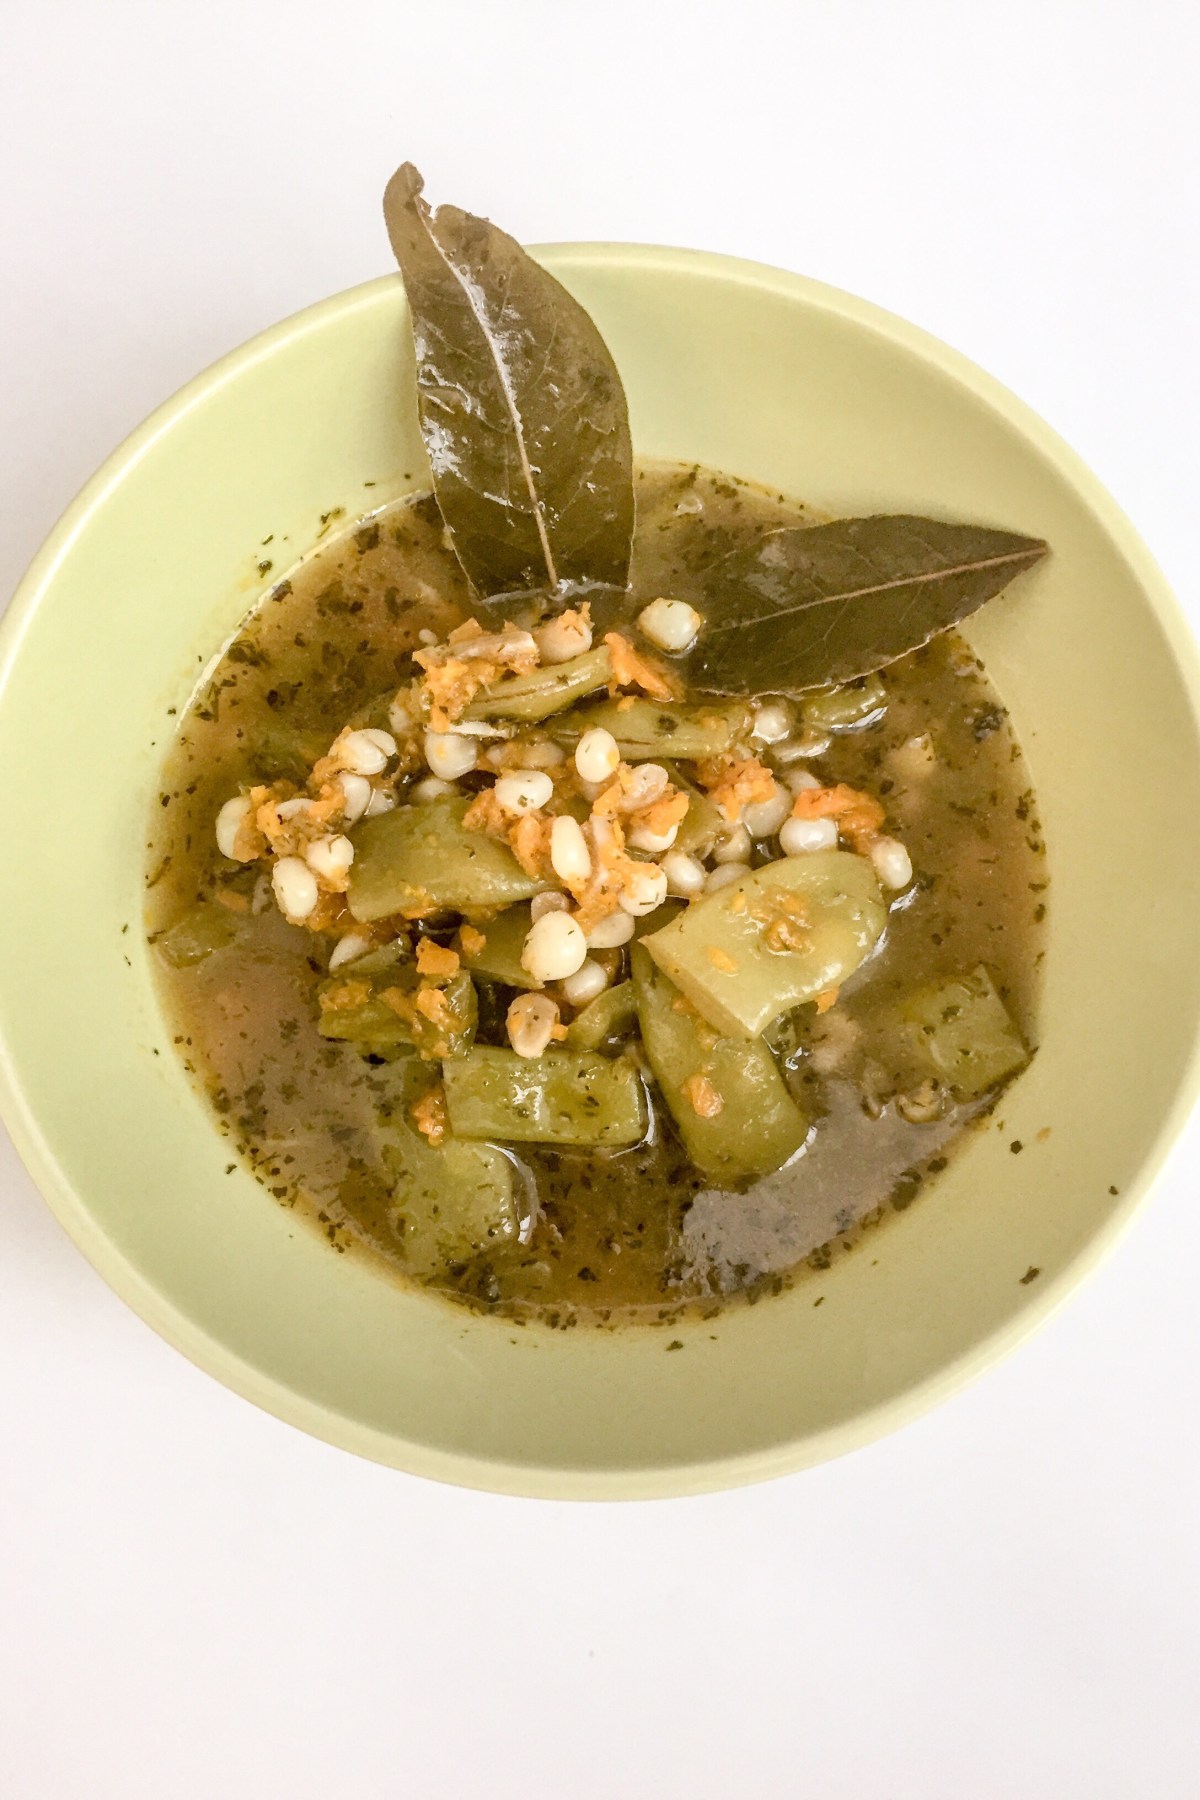
Super Summer Soup with Italian Flat Beans, via Eat the Vegan Rainbow
The adventures of the CSA share continue! This is our week 8 share and the eggplant, zucchini, and cucumbers are in full swing. If you need some zucchini inspiration, check out my stuffed zucchini boat recipe from last week. There are also some new items this week, and that’s my focus here: corn, green peppers, and flat (romano beans)! And this is what makes taking part in a CSA (Community Supported Agriculture) program so great – finding surprise ingredients that your local supermarket may not carry, and figuring our what to do with them.
The credit for this soup goes entirely to my 7 year old who suggested we use flat beans for a soup, add corn to it, plus one tablespoon each of dried dill, dried basil and onion powder. Oh, and garlic and vegetable broth! Then I stepped in with some carrots, bay leaves, and green pepper (also courtesy of the CSA share this week). The rest is history and the recipe below!
What are flat beans?
Flat Beans, Raw – By Andrewa, from Wikimedia Commons
Before we dive into cooking, let me just share what flat beans are. I don’t think I ran into them before, and I am guessing many of you are in the same boat! These beans are also known as romano beans, and also Italian flat green beans. They are similar to green beans, but much broader – about one inch (2.5 cm) or so, and they are quite long too. They have a good bite to them, although my seven year old helper did not like their taste when raw. These beans are meaty and that’s another reason why putting them into a stew or a hearty soup makes a lot of sense as they need a bit of time to cook, and I don’t think steaming them would work. So, if you like to try a green bean variety with a bit more meat and bite to it, these are a great option.
2 cups grilled corn, just kernels (frozen or canned whole kernel corn would work too!)
2 large carrots, chopped very finely using a food processor
1 green pepper, diced to small pieces
4 cups (about 1 L) vegetable broth
4 cloves garlic, thinly sliced or crushed
1 tablespoon onion powder
1 tablespoon dried dill
1 tablespoon dried basil
4 dried bay leaves
2 tablespoons olive oil
Squeeze of lemon for serving (optional)
What you’ll do:
Place a large pot over the medium-high heat. Add oil then garlic and let the garlic brown just slightly for 1-2 minutes.
Next, add diced green peppers and sauté for 2-3 minutes, with occasional stirring.
Add finely chopped carrots, mix well and cook for another 2-3 minutes.
When the peppers have softened and the carrot pulp starts to brown, add the beans, corn and all the spices and sauté for another 5 minutes, then pour in the vegetable stock, bring to boil, lower the heat to simmer, put the lid on and leave it for 15 minutes.
Serve this soup as a light supper, lunch, or pair with a salad and some bread for a meal!
Tex-Mex Stuffed Zucchini with Homemade Salsa and Diced Avocado, via Eat the Vegan Rainbow
When life gives you zucchini, there are actually many things you can do with it, grilling and sautéing being my go-tos most of the time. But, doing same thing over over again, no matter how tasty and satisfying they are, does get old. When it comes to zucchini, I have been trying new things, like zucchini lasagna, and zucchini fruitcake – I did also give zucchini cheese a try but that one did not work for me, so I am putting my zucchini cheese making days behind me.
To me, perfect stuffing zucchini is about 8-9 in (20-25 cm) and what makes this the perfect size is the fact that it matches is the size of my 9 x 13 in (23 x 33 cm) baking dish! Plus, the zucchini in this size range is in the Goldilocks zone – not too big and not too small, yet just right for carrying a good amount of stuffing.
The best way to get the zucchini ready for stuffing is to wash them, cut the ends off (this step is actually optional, you could skip it and leave the ends on – this would give your dish a nice, rustic presentation at the end), then slice the zucchini lengthwise and scoop out the seeds. If the zucchini is old and seeds look well-formed and unappetizing, please feel free to discard them. But, if the inside looks fresh and soft, scoop it out into a bowl and put aside to use as a part of the stuffing.
Par-roasting zucchini
You may have heard about par-boiling, when you boil something only half way through before doing something else with it. Par-roasting is essentially the same thing, just using roasting as a strategy to get the nice, roasted and caramelized flavors going without too much oven time. This can come in handy during hot summer months, for example.
I use par-roasting when prepping most of my stuffed vegetables, be it mushrooms, peppers, eggplant, or zucchini. The method is simple: you turn your oven on high (425 F (220 C) or higher), line a baking sheet with some parchment paper, toss the veggies with some oil, or spray with some cooking spray, or skip the oil altogether if avoiding fat (you can also sprinkle salt on if using, I don’t because the stuffing is usually plenty salty for me), and let the veggies brown for 15 minutes or so, flipping them over once if needed to get them equally browned on both sides.
Why par-roasting?
Well, most stuffing I make is already cooked by the time all is said and done. So, the stuffing itself usually does not need any more cooking time – all it needs to do is go into the oven for 10 minutes or so to get nicely browned on top. Par-roasting is my way of brining whichever vegetable is supposed to hold the stuffing up to speed so that the vehicle is ready for the final oven ride, when the stuffing gets browned and the vehicle finishes baking while absorbing some of the flavors that seep from the stuffing. In this way everything gets harmonized and delicious.
My secret to a perfect (and easy) Tex-Mex flavor
The best way to get the tex-mix flavors going is to start with a good chili powder, then add cumin powder and smoked paprika. These three things combined make for nice smokiness with just a hint of heat, so even with the amount of chili powder I use here the heat will not be overpowering. Having said that, do adjust the chili powder to fit your preferences. Of course, having corn and black beans in this dish is also essential. Here, I used canned corn and canned beans, but you can definitely use frozen corn and cook your beans from scratch. If you are using frozen corn, 1-1/2 cups of frozen corn should be enough, and if you are cooking the beans, 1 cup dry beans will probably be plenty.
Easy homemade salsa
What also helps tex-mix flavors is topping the stuffed zucchini with some freshly made salsa. If you don’t have the time, store-bought is perfectly fine to use here, either freshly made or from a jar – you can pick your own favorite flavor and enjoy! But, if you do want a quick homemade salsa, then follow the instructions below. The main tip here is to cut the tomatoes lengthwise and scoop out the seeds. Don’t throw them out – you can mix them into the tex-mex stuffing! Here, almost everything goes into a food processor for easy chopping. I recommend leaving one cleaned out tomato aside, and dicing it finely by hand to give the final salsa a bit more texture. This salsa takes only a few minutes to make, and you will love the flavor of freshly chopped cilantro and freshly squeezed lime, so it is worth doing it from scratch.
Diced avocado for a final touch
Last but not least is the diced avocado. You actually don’t need the avocado if you can’t stomach it (I know there are some people out there that have trouble with avocado), but it does add a nice, smooth, rich and creamy flavor to the final dish. It’s like a five layer dip right there in your zucchini “boat”!
To pick the best avocado, get those that are still quite hard and then leave them next to some bananas on your kitchen counter for a day or so. The avocado will soften and then you can store it in the fridge until ready to use. In this way you will avoid getting avocados that are too bruised by all the squeezing and poking, and can buy extra avocados on sale and use them 5-7 days later.
After that PSA, back to the Tex-Mex Stuffed Zucchini – to finish the stuffed zucchini, squeeze some fresh lime juice over your avocado and sprinkle some fresh cilantro. If you are using homemade salsa you can skip the cilantro, but if you are using the store-bought then no cilantro-skipping is allowed!
Tex-Mex Stuffed Zucchini with Homemade Salsa and Diced Avocado
What you’ll need:
3 zucchini, washed but not peeled
1 15.25 oz (430 g) can yellow corn (whole kernel)
1 29 oz (820 g) can black beans
1 medium yellow onion, finely diced
4 cloves garlic, thinly sliced or crushed if you prefer
2 tablespoons vegetable oil
2 teaspoons chili powder
1 teaspoon cumin powder
1 teaspoon smoked paprika
Freshly ground black pepper and additional salt to taste!* (see Note)
1 avocado, finely diced, for garnish, optional
Fresh cilantro and freshly squeezed lime juice for topping (optional)
SIMPLE HOMEMADE SALSA
4 plum tomatoes, seeded, divided
1/4 – 1/2 jalapeño pepper, deseeded (or more, to taste)
1/4 onion or red onion
3 tablespoons tomato paste
1/2 cup fresh cilantro
1/2 lime, juice
1/4 teaspoon sat (more or less, to taste)
Cooking spray, salt, pepper
What you’ll do:
Preheat the oven to 425 F (220 C).
To make the salsa, cut the tomatoes lengthwise, the use a paring knife to take out the seeds and the middle of the tomato. Reserve the middles for the stuffing. Place all the ingredients, except one tomato into a food processor and buy until finely chopped. Dice the leftover tomato finely and mix in with the rest of pasta. Once mixed, set the pasta to the side.
Wash the zucchini, remove the ends, and cut lengthwise into two pieces (I prefer to remove the ends but you don’t need to do that). Use a teaspoon to scrape out the inside of the zucchini – if full of seeds you can discard, otherwise add to the tomato scrap pieces and put aside.
Line a large baking sheet with parchment paper. Spray with some cooking spray, then place zucchini on, spray the tops and place the zucchinis into the oven. Zucchini will be nicely browned in about 10 minutes. Take the zucchini out and set aside.
Lower the oven temperature to 375 F (190 C).
While the zucchini is par-roasting, get going on the stuffing. Add the oil to a large pan (frying or sauté) and place over the medium-high heat. Add the chopped onions and sliced garlic and let them caramelize for 2 minutes or so. Next add the spices (chili powder, cumin powder, smoked paprika) and let them “bloom” for 1-2 minutes.
Next add the scooped out zucchini and tomato scraps, and mix well. Sauté for couple of minutes, then add corn and black beans. For corn and black beans, I recommend straining them using a large colander, and rinsing them for half a minute under some cold water before using. If you are using frozen corn, or fresh corn, and the beans you cooked yourself this washing and straining step is, of course, not necessary! Mix everything well and sauté for another 8-10 minutes.
Spray a 9 x 13 in (23 x 33 cm) baking dish (or a large casserole pan) with cooking spray, then cover the bottom with a layer of stuffing. Place the par-roasted zucchini boats in and fill them with stuffing. Pile the stuffing high, and press gently in as you fill to make sure you get to all the little nooks and crannies. (You may end up with extra stuffing – if that’s the case you can serve the stuffing itself as a side for another dinner, for example this would be a grate thing to put into a taco shell and enjoy, or serve cold on your next tex-mix salad!).
Put the stuffed zucchini into the oven and bake for about 15 minutes. All you are looking for is some nice caramelization on the top and the sides. Pull the stuffed zucchini out, and let it cool for couple of minutes before serving.
When serving, top each zucchini boat with salsa and diced avocado, freshly chopped cilantro, and a squeeze of lime and you are done!
Onwards and upwards – this summer has been energizing. We have vegetables growing in our garden, and farm fresh ingredients coming from the Upswing FarmCSA. I’ve been sharing the recipes featuring vegetables from our farm share, and have now created a new CSA – Community Supported Agriculture category to help you navigate my pages, so check it out!
What to do with cabbage?
Week 6 share featured two heads of cabbage, one of those vegetables that people have very mixed feelings about. On one hand you know it’s super healthy for you, with huge amounts of vitamins C and K, but on the other hand you also know that it’s just not something you necessarily like to see on your plate. Unless, of course, you are from Central or Eastern Europe in which case you are raised to adore cabbage!
I hail from the Balkans, so I think of cabbage as a part of my cultural heritage. I grew up eating cabbage stews traditionally made with meat, cabbage salads, sauerkraut, stuffed cabbage leaves (also often done with meat but here is a great vegan version), and overall loving it, especially the cabbage pie my grandmother used to make using shredded cabbage, phyllo dough, salt, pepper and oil. Quite honestly, one of the best things to do with cabbage is to shredded it finely, add some oil, vinegar, salt and black pepper, chill well and enjoy as a crisp salad.
What’s the deal with coleslaw?
Having grown up with abundance of cabbage, coleslaw came as a bit of a surprise to me. If you never had coleslaw, let me take a moment to describe it to you. It’s a very popular side dish for a BBQ, or surprisingly enough, a clam/lobster bake. It’s made of shredded cabbage and carrots, mixed with mayonnaise, some sugar, a bit of milk, a splash of vinegar, a sprinkle of celery seeds, and salt to taste. As with plain shredded cabbage salad I grew up with, coleslaw is at its best after 6-8 hours and served chilled.
By now you can probably guess that I am not a huge fan of many coleslaws that I tried. First of all they are too wet, second of all they are too sweet, and third of all they have too much mayo!
The taming of the coleslaw
After giving traditional coleslaw recipes a try, I decided to make coleslaws my own way. And my own way means more vinegar, usually a bit of Dijon mustard, no sugar, less or no mayonnaise, and absolutely no milk. If you are looking for a version of coleslaw with a bit of a kick to it, try this spicy version, which I shared last summer. The version below was inspired by this week’s CSA share that included cabbage, carrots and celery.
Food processor is your coleslaw making secret weapon
For this recipe I recommend using a food processor. Although cabbage is best when thinly sliced by hand, the food processor does the chopping in a blink of an eye, so it is an acceptable shortcut. So, after buzzing the celery, cabbage and carrots all you need to do us mix in some vinegar, caraway seeds, ground mustard, a pinch of salt, and some mayo (vegan of course, I like Just Mayo and Trader Joe’s Vegan Spread & Dressing). You can eat the coleslaw as soon as it’s mixed, but it will be tastier if you leave it in the fridge for couple of hours.
My favorite way to eat coleslaw? As a coleslaw sandwich! Of course, you can serve it with Beyond Burgers, or vegan BBQ ribs, or with your next vegan sausage. No matter how you serve it, I hope you give it a try – it will help you fall in love with cabbage, guaranteed!!!
Basic Vegan Coleslaw
What you’ll need:
1 medium head cabbage (1 1/2 lbs (600-700 g))
4 large carrots
5-6 stalks celery (I used young celery here, which is dark green but you can use any you have on hand)
Using an S blade in your food processor, chop the celery roughly.
Take the S blade out and put in your grater attachment (I recommend coarser grating side, if you have a food processor that gives you an option to choose between finer and coarser grating). Process your cabbage and your carrots.
Invert the contents of your food processor into a large mixing bowl and add the rest of the ingredients. Mix well to combine.
Cover with some plastic wrap or a lid if your bowl has a tight fitting one, and leave in the refrigerator for at least 2 hours. I think you’ll get best results if you make the salad in the morning and serve that afternoon but making the night before and serving the next day is fine too.
Enjoy as a salad with your next vegan BBQ or burgers, as a topping for your carrot dogs, or in a sandwich – you can’t go wrong with this one!
Baked New Potatoes with Cheesy Basil Sauce, via Eat the Vegan Rainbow
This summer is just flying by! I can’t believe we are already on Week 5 of our CSA – Community Supported Agriculture program. This week’s shares from our local farm, Upswing Farm, included one of my very favorite vegetables – new potatoes.
What are new potatoes?
New potatoes are, well, new! They are the first, early harvest of a potato crop, and growing up these types of potatoes were always a treat and a sign that school was out for summer and the fun was kicking into high gear. Since all the produce I ate growing up came from a farmer’s market, these new potatoes were available for couple of weeks only, making them even more special!!! Another thing that makes them special is that they are sweater than fully grown spuds, and that’s because they have higher sugar content than mature spuds, where most of their sugar has been converted into starch and stored away.
How to skin new potatoes?
New potatoes have very soft skin, and they really don’t need much peeling. What I like to do is take a peeling knife and gently go over the surface of the potato to remove only the thin outer skin without cutting in. This also helps remove any specks of dirt that are left over after the washing. An alternative way of skinning new potatoes is to place washed potatoes on a kitchen towel, sprinkle with some kosher salt and then wrap and gently roll. This will serve to exfoliate the potatoes. It may not remove all the skin but it will get rid of most of it. However, I should point out that none of this is really needed and it I purely cosmetic. New potatoes have such a soft and thin skin that you may decide to just leave it and cook them as is!
What to do with new potatoes?
These little suds are very versatile and easy to deal with. Because they are nicely sweet and soft, it is best to let them shine through. Simple boiling, roasting, or pan frying in very little oil will give you really great results (see here for details). But, you can go as wild as you like and new potatoes can be made into a potato salad, or a potato mash. Although I have not tried this yet, you can also put your new potatoes on the grill. In the recipe below I decided to go a bit wild and over the top. I baked new potatoes with some spring onions – those onions that are in between scallions and onions, with their greens still on but with a nice onion bulb now fully formed, which also came in our CSA share, and then topped them with an amazing sauce.
Easy and cheesy basil sauce
The inspiration for the sauce was another ingredient that came home in this week’s CSA share – a large bunch of fresh basil. The sauce is a simple mix of fresh basil, nutritional yeast and olive oil, and is added to the baked potatoes at the very end. The freshness of basil and the cheesy flavors of nutritional yeast make these baked new potatoes really amazing! I could eat this dish all day long – it does not need anything else really other than a cold glass of lemonade and it tastes good hot as well as cold. And if you have a summer pot luck, or a back yard barbecue, this is a great alternative to an old fashioned potato salad that you may want to try.
Baked New Potatoes with Cheesy Basil Sauce
What you’ll need:
1.5 to 2 lb (750g to 1 kg) new potatoes
4 spring onions, roughly diced
1 large bunch of fresh basil (about 2-3 cups, leaves only)
1/3 cup nutritional yeast
1/4 cup + 2 tablespoons olive oil, divided
Kosher salt to taste
What you’ll do:
Preheat the oven to 350 F (175 C).
Wash the new potatoes and gently remove their outermost skin (or leave the skin on if you prefer). Slice them into 1/4 in (5 mm) thick slices. If your new potatoes are really tiny you may only need to half them, or even leave the intact.
Slice your spring onions any way you like. I quartered my bulbs then sliced them across.
Combine your potatoes, spring onions, a pinch of salt (the amount of salt is up to you!) and 2 tablespoons of olive oil. Mix well, then pour into a deep baking dish.
Bake the potatoes for 45 minutes.
Place the basil into a food processor that can comfortably hold this amount of basil. Pulse until the basil is finely chopped.
Add nutritional yeast, and pulse 2-3 times. Then pour in oil gradually while pulsing. Pour the sauce over the hot potatoes, mix well and return to the oven for another 15 minutes.
Serve hot! You can store the leftovers in a fridge for 5-7 days and enjoy cold or reheated.
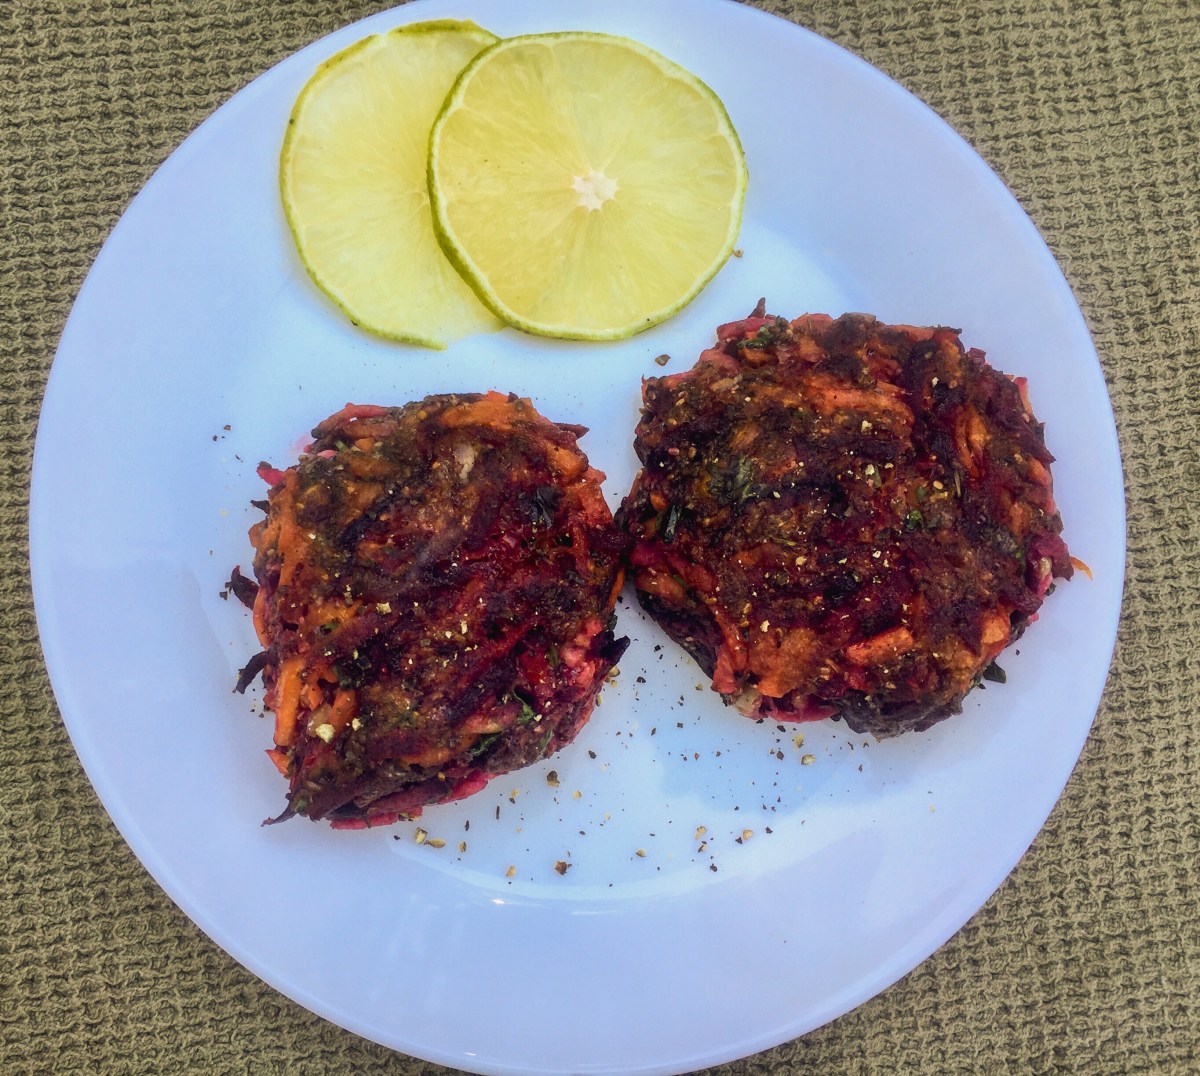
Beets, Carrots and Apple Latkes, via Eat the Vegan Rainbow
It’s early July, and here in New England (which is, for those of you who hail from across the globe, a name for the Northeastern-most part of the United States that includes six states: Rhode Island, Connecticut, Massachusetts, New Hampshire, Maine, and Vermont) the farm activities are in full swing. The greater Boston area is brimming with farms of different size and produce selection. For example, we went cherry picking on July 4th, and ended up with an amazing selection of cherries. We ate a lot, shared some with neighbors, and washed, pitted and froze the rest. In this way, the frozen cherries are ready for smoothies, sauces or pies later in the year.
What’s in this week’s CSA basket?
At our local farm where we get our CSA (Community Supported Agriculture) share the Upswing Farm, the vegetables this week included beets, like it did last week (and I shared about how to pan roast beets and sauté the beet greens few days ago), carrots, zucchini, squash, cucumbers, yellow and green, cilantro, fennel, and so on and so forth. It was a really great week!
Beets are versatile!
If you are skeptical about beets, don’t be – they are versatile! Yes, you may think that I am saying that because I an Eastern European and there is a bit of a beet culture on the Balkans, but beets really can work in many different ways. In addition to the two recipes I shared last week, beets can be made into a hummus (yummy), used as a salad, sandwich or a veggie burger topping, and also made into tasty burgers (see here, and here for some great beet burger recipes to try). And they are an essential, as in not-to-be-skipped-under-any-circumstance, ingredient for fabulous BBQ ribs, either those made with wheat gluten or gluten-free.
So, how about beet fritters?
And this brings us to these fritters. Without a doubt, vegetable, and in some cases fruit, fritters are ubiquitous. Every cuisine has a recipe or two that fall into this category and take advantage of ingredients in season, often times potatoes, zucchini, squash, carrots, a grater, a bit of flour and usually some eggs, to make a quick meal. So, how about beet fritters? And how about vegan and gluten-free? Well, the recipe here answers these question in affirmative.
Chia seeds and flaxseed meal as binding agents
Grated beets, carrots and the apple make the body of these fritters. The easiest way to grate them is using a large grating attachment on your food processors, although, of course, grating by hand will work too! You don’t need to cooked the beets first, but do peel and wash them, as well as the carrots – apple is the only ingredient that does not require peeling. Just before you start grating you should start soaking your flaxseed meal by combining flaxseed meal with hot water in 1 to 3 ratio. Because the grated fruits and veggies have high moisture content, they do need extra binding agents and that’s why I recommend using quite a bit of flaxseed meal as well as chia seeds. Together, flaxseed meal and chia seeds work together to created fritters that hold their shape well without any eggs or flour.
Don’t forget the spices
I recommend using lime juice and zest, as well as freshly grated ginger and finely chopped fresh cilantro to enhance the flavors. The result are light fritters with interesting texture and
Beets, Carrots and Apple Latkes, via Eat the Vegan Rainbow
Extra lime slices, coarsely ground black pepper and/or apple sauce for serving
What you’ll do:
Place the flaxseed meal and hot water into a bowl and mix well. Let the “flax egg” rest for at least 10 minutes. The final result will be a very gooey mix that will work together with chia seeds to bind the fritters together.
While the “flax egg” is resting, grate beets, carrots and an apple by hand or using a food processor equipped with a grating attachment, then transfer into a large mixing bowl. Add all the rest of ingredients, including the “flax egg”, mix well and let stand for 20-30 minutes. This resting time is needed for chia seeds to soak the extra liquid released by the grated beets, carrots and apple, and transform into a gel-like substance.
Place a large pan over high heat and let it get nice and hot. Add oil or some cooking spray – if you do have a great non-stick pan you can omit the oil – and place small firm patties in. To form a patty, take about 1/4 cup worth of your mix, and using your hands form a 1/2 inch thick patty. Brown over high heat for 2 minutes then lower the heat down to medium and continue browning for 3 more minutes.
Flip the patties over and brown on the other side for 3-4 minutes.
Serve warm as a side dish, or even as an alternative to breakfast pancakes. These fritters go well with yogurt, as well as maple sauce, and I bet they would be delicious cold as well!
Beet, Carrot and Apple Fritters, via Eat the Vegan Rainbow on Pinterest
Balsamic Vinegar Glazed Beets and Turnips, via Eat the Vegan Rainbow
Community Supported Agriculture (CSA) is a lovely way to support your local farmers, enjoy the freshest produce and diversify what’s on your plate. This summer I signed up for a share at Upswing Farm, our local, small scale farm that’s relatively new – it opened it’s doors just 2 years ago. So far, the shares were great, with excellent quality of local produce as well as a couple of items that I’ve never seen in my life before.
Introducing garlic scapes
By Evan-Amos [Public domain], from Wikimedia CommonsIn week 3, one such item were garlic scapes, which are twisty and curly green stalks that grow out of garlic plant and if left alone would develop a flower at the top. However, they are removed, usually in late spring and early summer, in order to help the growing garlic channel its energy into the bulb not the flower. The scapes are edible – who knew! – and full of the same garlic flavor so you can use them instead or in addition to (if you really love your garlic) the garlic cloves. I usually chop them finely, but they are funny looking and for this pan roast I decided to leave them intact, after trimming off the ends. If you don’t have garlic scapes, you could use garlic cloves, or whole scallions (green onions), or green (young) garlic. Any one of these will work to infuse your beets and young turnips with some nice flavors.
Pan roasting beets and turnips
The stars of our Week 3 CSA share were a bunch of beets and a bunch of baby turnips. Unlike huge and heavy turnips you usually find in the grocery store, these turnips are smaller and softer. You can cook them without peeling, and they require much less prep time then their more mature versions. They are delicious roasted, as are the beets.
But, we are in the middle of a heat wave and turning the oven on seems extremely unappealing. So, Dutch oven to the rescue! If you don’t know what a Dutch oven is, it’s a very heavy cast iron pot that is perfect for achieving nice caramelization without actual roasting. The best way to do this is to be patient, keep the heat on medium, put the lid on, and stir infrequently. This will help cook the veggies through while at the same time giving them nice roasted look and feel.
Don’t forget the glaze
What also helps the stove top roasting process is a simple balsamic vinegar glaze. This is nothing more than a splash of good quality balsamic vinegar that gets cooked and concentrated with the beets and turnip. The result is a shiny and rich side dish that works well warm as well as cold, especially as a topping for salads.
Don’t throw away the leaves
And since these are all really fresh pieces of produce, don’t forget that you can use the entire plant. So, don’t throw away the leafy parts of your beets and turnips as they can be made into a yummy side dish!
Balsamic Vinegar Glazed Beets and Turnips, via Eat the Vegan Rainbow
Balsamic Vinegar Glazed Beets and Turnips
What you’ll need:
1 bunch (5-6 medium) beets, washed, peeled and cubed
1 bunch young turnips, washed and cubed
5-6 garlic scapes, washed, trimmed, and roughly chopped into long pieces
2 tablespoons olive oil
1/4 cup balsamic vinegar
What you’ll do:
Place a large Dutch oven or a cast iron pan over the medium high heat. Add the oil and garlic scapes. Brown for 1-2 minutes than add the cubed beets and turnips.
Let the vegetables brown on one side before turning them over. This will take 5 minutes or so per side.
After they’ve browned on two sides, add the vinegar and deglaze the bottom of the pan.
Lower the heat to medium low, put the lid on and “roast” the vegetables for 20-25 minutes. Stir occasionally. Both beets and turnips should be soft when you pierce them with a fork, but not mushy or falling apart.
Serve warm, or enjoy cold. The “roasted” beets and turnips will keep for close to a week in the fridge.
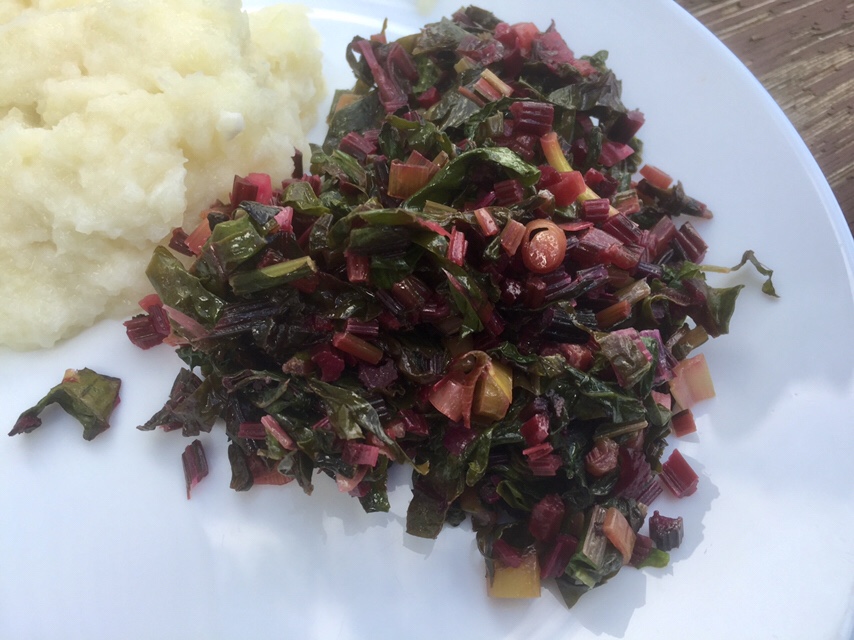
Sautéd Beet and Turnip Greens, via Eat the Vegan Rainbow
This summer I am doing something new – getting some of my produce from a local farm via the CSA, which stands for Community Supported Agriculture. I signed up for a large share at Upswing Farm, where the farmers Brittany and Kevin Overshiner are trying to protect the land they are using from the pressure to develop it into housing, as well as growing some yummy vegetables and beautiful flowers all while respecting the nature and the environment.
Beets and turnips in our CSA share
We are already in Week 3 of our CSA share, and this week the loot included a bunch of beets and a bunch of baby (young) turnips. Although I usually get both beets and turnips when they are much more mature and without any leaves to speak of, knowing how fresh this produce is made me think that I should really be using the entire plant. So, I looked around for recipes and decided that a simple saute would work well. And it did – the greens spoke for themselves with just a bit of help from young garlic* and olive oil!
The result is a wonderfully colorful side dish that goes with anything really. You can serve it with your veggie burgers, rice, pasta, mashed potatoes, or make it into a sandwich. I personally like to combine this sauté with some meatless meatballs and almond yogurt. Yummy!
And if you are wondering what to do with the rest of your beets and turnips, why not try pan roasting them on the stove top?
* Note: if you do have green garlic on hand, use both the white and the green bits, and if you don’t have access to green garlic, just use the regular kind. You can crush it, but I prefer slicing the cloves very thinly – it adds not only flavor but a bit of an interesting bite to the dish.
Sautéd Beet and Turnip Greens
What you’ll need:
3-4 cups beets greens, washed and chopped (leaves and stems from one bunch of beets)
3-4 cups turnip greens, washed and chopped (leaves and stems from one bunch of young turnips)
4 cloves garlic or 4 young (green) garlics, finely chopped
2 tablespoons olive oil
What you’ll need:
Place a large sauté pan over medium heat. Add the sliced garlic and sauté for 1-2 minutes with stirring. Garlic can burn quickly, so do keep an eye on it!
When garlic is slightly browned, add the chopped greens. The volume is going to be huge at the beginning but be patient and let the greens wilt slowly and gradually. I like to use a pair of tongs and keep turning the greens over every few minutes.
Once the leaves are fully wilted, lower the heat and sauté for 15-20 minutes. This will help the bits of stems soften and cook through.
Serve with mashed turnips, or pan roasted beets and turnips for a lovely and healthy meal!