Vegan “Chicken” in a Nut Sauce

931d0cf7-f2a2-42db-9b25-e07bd77c6275
Vegan “Chicken” in a Nut Sauce, via Eat the Vegan Rainbow

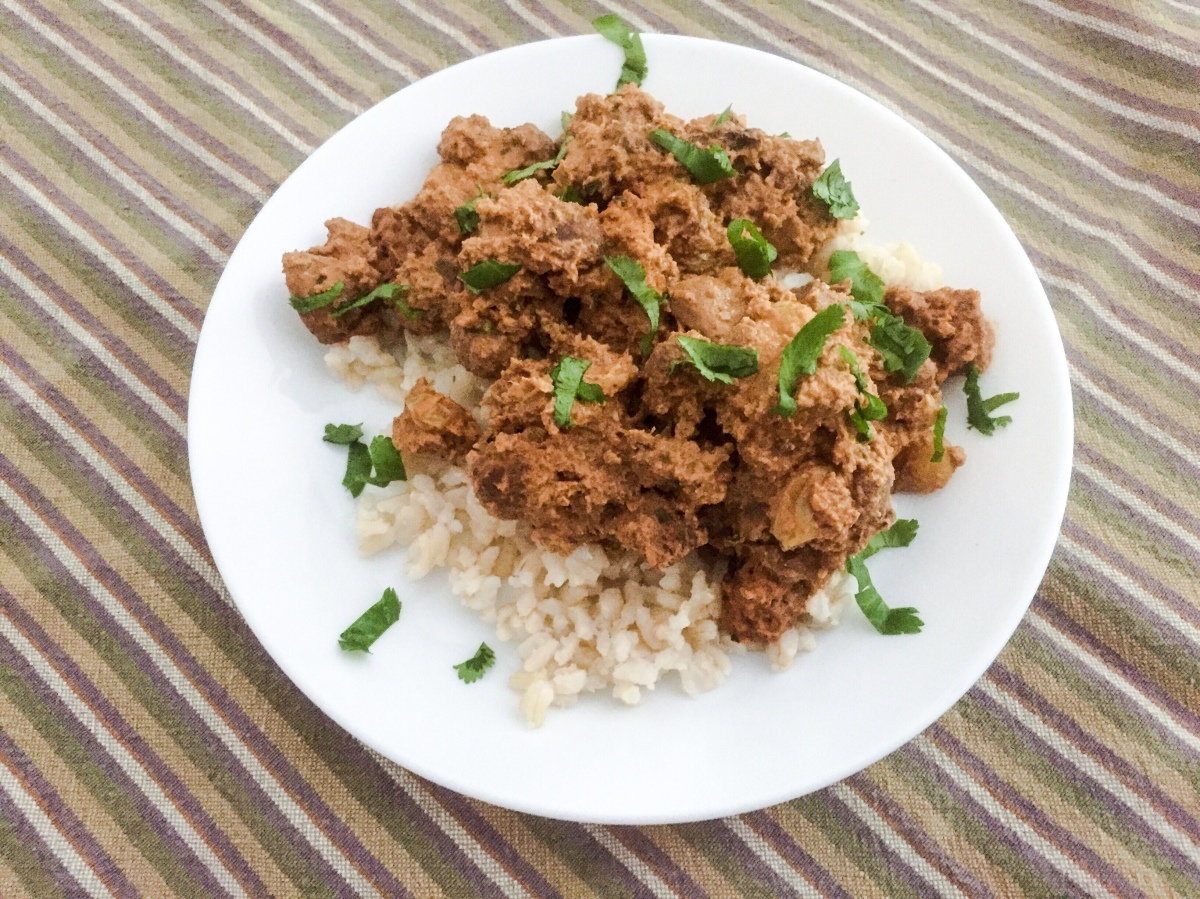
Creamy, aromatic, and surprisingly sweet – those are just some of the ways to describe this rich dish. Originally made with chicken and cashews, I transformed the recipe into one that uses soya chunks instead of chicken, and walnuts instead of cashews. The result is a nuttier and creamier vegan delight!

What are soya chunks?

Soya chunks are a common meat substitute. According to this Wikipedia page, the ingredient used to make soya chunks is the byproduct of soy oil production, so basically all the protein rich solids left after the fat has been extracted. These solids can be made into many different shapes and sizes and some common products are texturized vegetable protein (TVP), soya curls and soya chunks. All these products usually require some soaking in water or a brief dip in a pot of boiling water to rehydrate them as they are packaged an sold dry.

Where do you find soya chunks?

Most large grocery store chains in the USA don’t carry soya chunks. This is a surprise since we could easily find them in my small home town in Serbia when we visited last summer! But in the US, you either need to order them through Amazon, or visit an South Asian grocery store. The price at my local Indian grocery store is about $2-3 for a 200 g box, which is enough to make a big pot of dinner to feed 6-8 people. Amazing, isn’t it?

Let the food processor do all the work

The recipe calls for a range and of ingredients, and quite a few spices. But the preparation itself is super easy. The sauce comes together in a food processor and then it slowly cooks and simmers with the rest of the ingredients. If you prefer a chunky sauce, dial down the length of processing, and if you prefer a smooth sauce keep processing and add a bit of water as you go for smoother consistency.

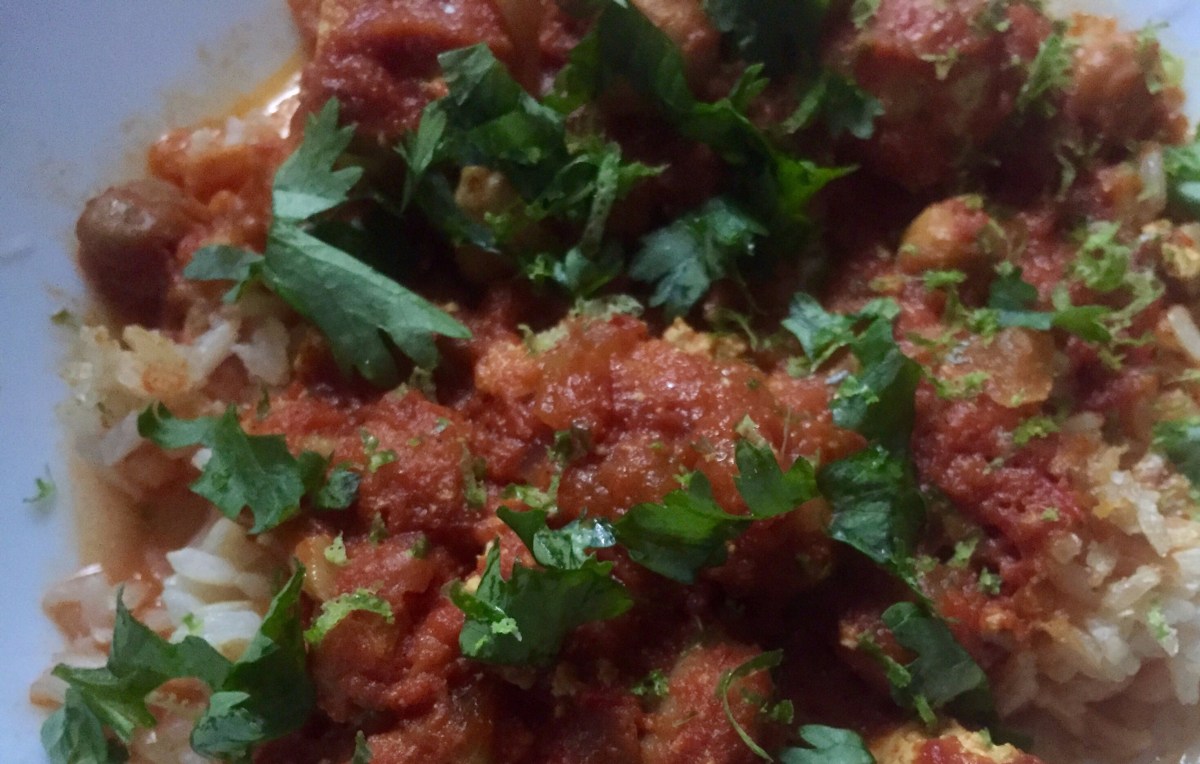
This dish is rich and complex, and it’s best served with simple basmati rice. Enjoy!

Vegan “Chicken” in a Nut Sauce

What you’ll need:

200 g soya chunks

2 yellow onions, finely diced

4 cloves garlic, thinly sliced

2 tablespoons sliced ginger

1 cup walnuts

1/4 cup tomato paste

1/4 cup yogurt (almond, cashew or any other one you like)

1/2 lemon, juice only

2 tablespoon vegetable oil

2 teaspoons garam masala

1 teaspoon chili powder

1 teaspoon coriander powder

1/4 teaspoon turmeric

1/4 teaspoon salt

1/4 cup golden raisins (sultanas)

10 oz white mushrooms, quartered

1/2-1 cup water, to taste

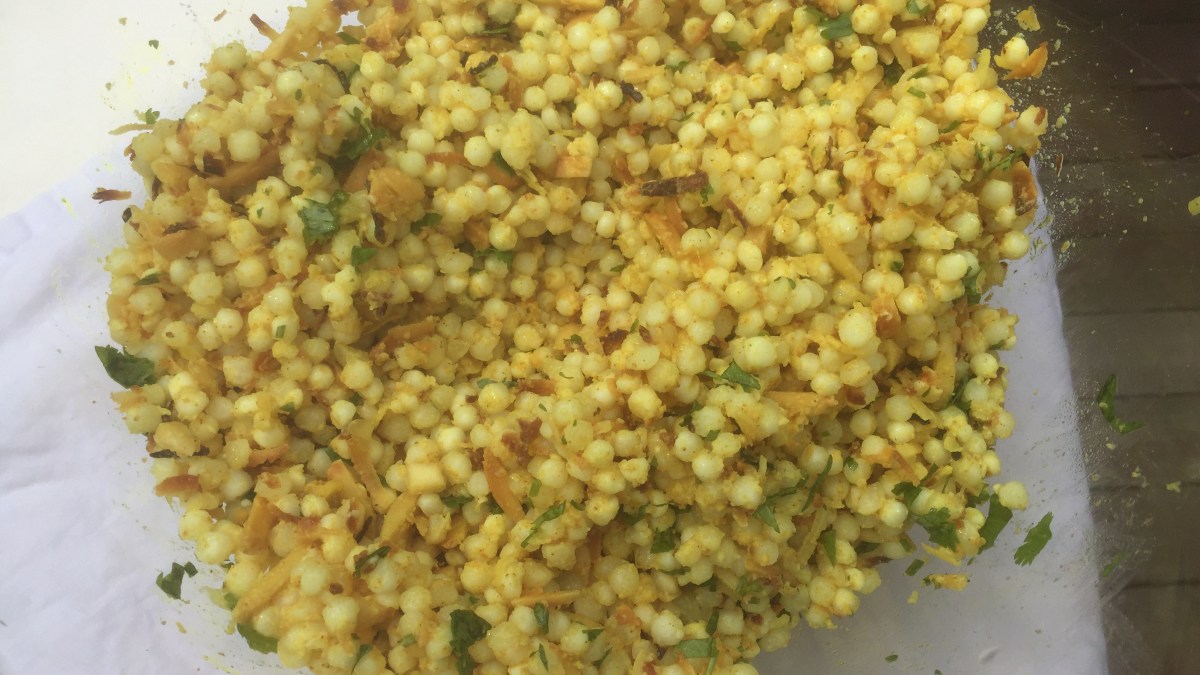
2 tablespoons fresh cilantro, and more for garnish


What you’ll do:

  1. Rehydrate soya chunks according to instructions on the box. This will usually require either leaving them in some boiling water for 3-5 minutes or soaking them for a while.
  2. Drain and rinse the soaked chunks. Squeeze them gently to shake a bit of excess liquid off, but don’t squeeze them dry. That will make them rubbery and too chewy. You want the chunks to be soft and moist. Set aside.
  3. Place onions, garlic, ginger, walnuts, tomato paste, spices, oil, lemon juice, and yogurt into a food processor, and process until a smooth sauce forms.
  4. Place a large, heavy pot, like a Dutch oven, over the medium high heat and bring to temperature. Add the sauce and cook for 5 minutes with frequent stirring.
  5. Add the mushrooms and mix well. Cook for another 5 minutes then add the soya chunks. Mix well again, and check if any water is needed. You want the sauce to be dense, but still flowing so adjust the liquid accordingly.
  6. Add the golden raisins and simmer, covered, for another 10-15 minutes.
  7. Serve over some rice and sprinkled with fresh cilantro.

Copyright © Eat the Vegan Rainbow, 2018

Meat-less Keema Matar

img_2947
Meat-less Keema Matar, via Eat the Vegan Rainbow

By now you probably figured out that I am a huge fan of Indian cuisine. Perhaps it’s the spices, perhaps it’s the long and slow simmering, perhaps is the whole culture of not eating meat that produced an abundance of vegan-friendly recipes and ingredient combinations [EDIT: I was alerted that current facts suggest that India may not be as vegetarian as previously thought; it seems that it’s a myth that India is mostly vegetarian]. Whatever it is, Indian cuisine has always been a huge inspiration for me, and I’ve been sharing some of the results on this blog. Past successes include Jackfruit Tikka Masala, as well as Chicken-less Tikka Masala made with soya chunks, and my version of Sabudana Khichdi.

This recipe is a vegan version of a minced lamb dish called Keema Matar. The recipe uses minced soya chunks that give the final dish the same consistency and appearance as the original recipe. You could use TVP (textured vegetable protein) but note that the food will probably have a softer, less chewy bite to it.

What makes this recipe work are, of course, the spices. I use some pretty standard spices like garlic powder, freshly grated ginger, chili powder, a cinnamon stick, some more specialized spices like turmeric, coriander powder and coriander pods, and some spices that you can only find in an Indian grocery store, like Indian bay leaves and matar masala.  Fear not if you don’t have easy access to these last two spices because you can use regular bay leaves and some cumin powder instead.

The best way to ensure that your soya chunks absorb all the flavors is to cook them according to instructions, which usually say “boil in water for 5 minutes”, rinse, drain, gently squeeze to remove some of the excess water, and mince them – I use a food processor for mincing – and then mix the minced chunks with spices and let them marinate for a while. (Note: if you are using TVP, you will not need to mince since the TVP flakes are already about the right size once they are fully soaked. Although hard to remove access water from TVP once it’s fully soaked, I do suggest you give it a gentle squeeze before marinating!)

Another ingredient that is needed for this dish are green peas. I use frozen peas, and I don’t bother with defrosting – just mix them into the simmering minced soya chunks and they’ll be fine. Once done, serve over  some Basmati Rice, sprinkle with some fresh cilantro and add a side of raita (yogurt sauce with chopped cucumbers and mint – I make mine with cashew yogurt and it comes out great!) or even a piece of naan and you will have an unbelievable restaurant-style dinner right in the comfort of your home.

img_2947

Meatless Keema Matar

What you’ll need:

200 g soya chunks

2 teaspoon coriander powder

2 teaspoon chili powder

2 teaspoon mattar masala

1 tablespoon grated ginger, fresh

1 teaspoon garlic powder

1 teaspoon turmeric

2-3 tablespoon oil

3-4 Indian bay leaves

1 cinnamon stick

10-15 cardamom pods

4 cloves garlic, sliced

1 onion, diced

1 tablespoon tomato paste

1 15 oz can petit diced tomatoes

1 1/2 cup green peas, frozen

Fresh cilantro for garnish

What you’ll do:

  1. Place soya chunks in a large pot, cover with water, bring to boil, and cook for 5 minutes, or according to the instructions on the box. Drain and rinse with cold water. Squeeze the soya chunks gently to remove some of the excess water, them place in the food processor.
  2. Add all the spices up to the oil and bay leaves, and process until soya chunks get a consistency of minced meat. Let the minced soya chunks and spices marinate for an hour or so on the kitchen counter at room temperature.
  3. In a heavy pot, like a Dutch oven, heat the oil over medium high heat then add the Indian bay leaves, cinnamon stick and the cardamom pods and let the aromas bloom for a minute.
  4. Add the onions and garlic, and sauté them for 5-6 minutes.
  5. Add the tomato paste, mix well and continue sautéing for another minute to brown the tomato paste just slightly.
  6. Add the minced soya chunks with all the spices they have been combined with as well as the diced tomatoes and simmer for 10-15 minutes.
  7. Add the peas, mix well and simmer for another 10 minutes. By this point, your food will be ready and your kitchen will smell fantastic. Serve and enjoy with Basmati Rice, and/or naan, and/or raita.

Copyright © Eat the Vegan Rainbow, 2018

Broiled Vegan Koftas

img_3533
Broiled Vegan Koftas, via Eat the Vegan Rainbow

Although it may seem like a mission impossible, recreating meat like appearance, consistency and even the taste with plant-based ingredients is not all that hard. The basis for many of my meatless recipes are mushrooms. I usually use baby portobello mushrooms, also known as the crimini mushrooms, but white button mushrooms would work just as well. Very often I grind the mushrooms into a paste and this also helps with the final meat-like vibe of a dish. Finally, I cook the dish with the same spices and in the same way as someone would a meat version of the same recipe.

The meatless Shepherd’s Pie I made some time ago nicely illustrates these tips. For that recipe I used mushrooms and lentils, as the key umami components, and combined them with herbs that you would typically use in this pie – thyme and plenty of rosemary. What you see and smell will evoke the right memories and experiences, so by the time you have the first bite your brain is already convinced it’s having meat.

Here I use all those strategies to make koftas, which are sort of flat-ish lamb meatballs placed on a skewer and grilled. Minced mushrooms give the right level of umami and TVP (textured vegetable protein) gives the koftas structure. One note on the TVP – instructions usually say that you need to soak the TVP flakes before using which is true for many applications but not for this one. Use dry TVP and mix it with minced mushrooms and the rest of the ingredients to get to the right consistency for the koftas. After all they will need to go on the skewers and need to be robust enough for broiling on high. I did add some bread crumbs to the mix as well, as an extra binding agent. If you are not a fan of bread crumbs, you could add oats, or some corn meal.

Koftas need to be shaped by hand, and the skewers gently threaded through. Ideally, the skewers you are using are long enough to rest on the edges of your broiler pan (see picture below) so that you can turn them midway through broiling and get all sides well browned. I can’t recommend the bamboo skewers I used here – by the end of the broiling they were all black band falling apart – so metal ones seem like a much better idea.

Serve Broiled Vegan Koftas with some Saffron Cauliflower Rice, and with a spoonful of mint chutney, and you will have yourself a great, well-rounded meal.

Broiled Vegan Koftas

What you’ll need:

10 oz (280 g) white button mushrooms

10 oz (280 g) TVP

1 cup bread crumbs, plain, gluten-free

4 cloves garlic

3 tablespoons olive oil

2 teaspoons coriander powder

2 teaspoons ground cumin

2 teaspoons smoked paprika

1 teaspoon crushed red pepper flakes

Cooking spray

What you’ll do:

  1. In a large food processor, mix all the ingredients (except the cooking spray) and pulse to mix and combine. Let this mixture stand for at least 30 minutes and up to one hour.
  2. Start your broiler on “HI” or use the outdoor grill if you like.
  3. Line a broiler pan with some foil. You don’t need the top grate part that broiler pans usually have so leave it aside.
  4. Using your hands take about 1/2 cup worth of koftas’ mix and form an elongated oblong shape about 1 1/2 in (3-4 cm) wide then pierce it with a skewer. These koftas are gentle so handle them with care. You may need to adjust the amount of bread crumbs, or add some flex meal as a blunder. Leaving them in a fridge or freezer to firm up will help them hold their shape. Place the skewers on a broiler pan making sure their ends rest on the pan’s rim and the koftas don’t touch the bottom (see picture above).
  5. Broil on high for 5-8 minutes than turn over to broil on the other side.
  6. Let koftas cool just for a moment then serve with some rice, Saffron Cauliflower Rice, or a mild yogurt, like almond or cashew ones.

Copyright © Eat the Vegan Rainbow, 2018

Chicken-less Tikka Masala


fullsizerender-8
Chicken-less Tikka Masala, via Eat the Vegan Rainbow

Several months ago I shared the recipe for a Vegan Chicken Tikka Masala that used jackfruit instead of the chicken and came together in a slow cooker. I still think that that’s a great, flavorful and aromatic dish and if you are looking for new ways of making and enjoying jackfruit it is definitely something you should try. Having said that, someone did ask about what the source of protein was in a dish like that, and although jackfruit, as well as all the other fruits and vegetables on the planet, has some protein it is not a protein-rich food.

So, I went looking for ways to increase the protein content in the plant-based Tikka Masala and found soya chunks. Soya chunks are not something that’s easy to find in US grocery stores. I was able to find them in Serbia easily enough and I have now also found them on Amazon and in my local Indian grocery store. If you have an Indian grocery store relatively nearby, it’s absolutely worth the trip. I find that the prices in the Indian grocery store I go to are on average three to four times cheaper than online, and things like rice, soy and chickpea flour, and spices are a fraction of the price when compared to my regular grocery store or health food store. Most Indian stores have a freshly made food section as well, so although not many items on the traditional Indian menu are vegan, I’m sure you will find a couple worth trying out.

Back to soya chunks now. Soya chunks are made from fat-free soy meal, a by-product of soybean oil extraction. The meal is molded into different shapes and textures (soya chunks of different shape and size) and dried out to create a shelf-stable, long lasting products. I use several different size of soya chunks, depending on what I am making. For example, the size of soya chunks I chose for a dish like chicken-less tikka masala matches the size of chicken chunks, which are usually about 1 inch (2.5 cm) cubes. An essential step for almost all soya chunk dishes involves boiling soya chunks in water for five minutes or so to rehydrate them. If you are using very fine soya chunks, like TVP (textured vegetable protein), boiling is usually not required but some soaking will be needed. The only TVP application where I advise against soaking is when making burgers, and you can find out why and how come in my recipe.

For this Chicken-less Tikka Masala to work, you will have to marinade soya chunks in a spice-and-yogurt sauce. Basically, you are following all the same steps as you would if you were making the chicken version of this dish, and by the time you are finished all the marinating and simmering nobody will be able to tell that what they are eating is not the real thing. I recommend marinating soya chunks overnight, but if you are in the hurry starting the marinate in the morning and finishing the dish later the same day will work.

The Chicken-less Tikka Masala is best served with some Basamati Rice, and topped with fresh cilantro. For a full restaurant experience you can add some Naan bread and Cucumber Raita, which you can make easily with some finely sliced cucumber, some yogurt, and a squeeze of lemon juice!

Chicken-less Tikka Masala

What you’ll need:

7 oz (200 g) medium soya chunks

2 tablespoon coriander powder

1 tablespoon paprika

1 tablespoon cayenne

1 tablespoon ground cumin

1 tablespoon garam masala

1/2 tablespoon cardamom powder

1 cup cashew yogurt

1 large onion, diced

6 oz (170 g) tomato paste

1 14.5 oz (411 g) can petite diced tomatoes

2 tablespoon vegetable oil (divided)

Fresh cilantro

What you’ll do:

  1. In a large pot cover soya chunks with water, bring to boil, and let cook for 5 minutes. Remove from the heat and let stand for 30 minutes. Transfer soya chunks into a large strainer, rinse with cold water and gently press any access water out. You want your soya chunks to be soft and moist but not dripping with water.
  2. Place one tablespoon of vegetable oil in a pan and heat until the oil is hot. Reduce the heat to medium and add the spices (coriander, paprika, cayenne, cumin, garam masala, and cardamom). Toast the spices for 1-2 minutes, until fragrant. Place the toasted spices into a large mixing bowl and let cool for few minutes.
  3. Once spices have cooled just a bit, add the yogurt and mix well. Next, add the soya chunks, make sure they are well covered with the marinade, and refrigerate for at least 12 hours. If you are in a rush you can cut down the marinating time to couple of hours – in that case leave everything on the kitchen counter.
  4. In a large and heavy pot, like a Dutch oven, heat 1 tablespoon of oil over the medium high heat. When oil is heated, add the diced onion and let it brown for 5 to 7 minutes.
  5. Once the onion is browned, add the tomato paste, mix well and let the tomato paste brown slightly. This will take 3 to 4 minutes.
  6. Next, add the marinated soy chunks together with all the yogurt marinade. Mix well, and let the soy chunks brown just slightly. You will need to give it an occasional stir, but the idea is to let the soy chunks get a chance to caramelize on the edges just slightly. This will take about 10 minutes.
  7. Add diced tomatoes, mix well, decrease the heat to medium low, and let the Chicken-less Tikka Masala simmer for 15 minutes or so. This simmering will allow all the flavors to come together more completely, and the sauce to thicken slightly. If you discover that your sauce is not as thick as you like it, keep simmering until you reach the consistency you like.
  8. Serve over Saffron Brown Basmati Rice and sprinkle with some fresh cilantro!

Copyright © Eat the Vegan Rainbow, 2017

Tapioca Pearls with Spicy Almonds and Toasted Coconut

img_2521.jpg
Tapioca Pearls (Sabudana) with Spicy Almonds and Toasted Coconut, via Eat the Vegan Rainbow

Most people probably think “bubble tea” when they hear “tapioca pearls”. But these delicious little pearls are definitely worth getting to know more intimately, especially in the context of gluten free cooking. They are inexpensive and very simple to make. They actually require no cooking – just soaking – so although no cooking skills are required, some level of patience (and a good amount of time) is.

Before we go any further lets try to answer this questions first: “What are tapioca pearls?”. They can come in different sizes and colors. The ones I will focus here are white and small, close to the size of Israeli couscous. But unlike the couscous, which is made with wheat and thus off limits for those watching their gluten intake, tapioca pearls are made from starch extracted from cassava root. So, they are little starch balls when all is said and done. Think micro potatoes that don’t need peeling!

If you are into Indian food, you have likely already had some tapioca pearls because they are often used to make desserts, like kheer pudding. Earlier this summer I had some homemade Sabudana Khichdi and I loved it. Sabudana Khichdi is a traditional dish and usually consumed during Hindu fast days. The dish includes tapioca pearls, finely chopped, cooked potatoes, finely chopped peanuts, finely grated coconut flakes, and a nice combination of spices (curry leaf, cumin seeds and green chilis). There are some variations on the recipe and the ingredients may vary depending on whethe Sabudana Khichdi is served during the fast or outside the fasting days, and my friend who made the dish for us also mentioned that a more protein-rich version of Sabudana Khichdi can be made using quinoa, and she suggested I check a blog by another friend of hers called Indfused, which I did and so should you, especially if you are interested in creative Indian/American fusion cooking (FYI: Infused is not a vegan blog, so keep that in mind).

Back to the the version of Sabudana Khichdi I had – it was a delicious addition to our summer cook out and prompted me to get some tapioca pearls of my own and start experimenting. The recipe below is the second iteration and deviates from the original recipe quite a bit. I took some liberties so my Tapioca Pearl Salad is Sabudana Khichdi inspired, but not meant to be “traditional” in any way. First point of difference is that I left the potatoes out. In my view, leaving potatoes out does not affect the taste nor the nutritional profile of the dish, yet saves some time and effort. I also left the peanuts out and replaces them with slivered almonds. I used slightly different spice mix, to make the dish a bit more fragrant. Finally, I toasted my coconut flakes, because in my mind coconut is just better toasted!

The key to making tapioca pearls is patience. All you need to do is rinse the pearls in cold water, then soak them in enough cold water, usually in 1:2 ratio (for example 1 cup pearls and 2 cups water), for 2-3 hours. How do you know they are ready? They should feel loose, not stuck together, and soft, yet slightly chewy, to bite – think pasta al dente. You can go a bit further if you prefer softer texture, but you do want your pearls to remain pearly, not mushy, so don’t overdo it.

Now a key to make the dish really flavorful and spices vibrant, is toasting the spices. I use a frying pan here, and, although you can dry toast the spices, I do add a bit of oil in this case and let the spices toast for one to two minutes before adding the almonds to finish it off. I pour the toasted spice and almond mix over the drained tapioca pearls, instead the other way round, but that’s more of a personal preference I suppose. The toasted coconut flakes come next, and the chopped fresh cilantro is the final touch. You can serve this dish immediately, you can heat it up more and serve hot, or you can leave it in the refrigerator overnight and serve it cold. It actually works across the range of temperatures so it could work as a surprising pasta salad at your next picnic. It is a great, easy and inexpensive dish to make for your next pot luck or any other get together!

img_2525
Tapioca Pearls with Spicy Almonds and Toasted Coconut, via Eat the Vegan Rainbow

 Tapioca Pearls with Almonds and Toasted Coconut Flakes

What you’ll need:

2 cups tapioca pearl

4 cups water

1 cup slivered almonds

1/2 cup coconut flakes or shreds, unsweetened

2 tablespoon vegetable (or canola) oil

1 teaspoon cumin powder

1 teaspoon curry powder

1/2 teaspoon turmeric

2 tablespoon fresh cilantro, chopped


What you’ll do:

  1. Rinse the tapioca pearls under cold water and place into a large bowl. Cover with water and let stand for 2 to 3 hours. The pearls will absorb water and they should become soft and al dente.
  2. Drain the pearls well, pat dry with a paper towel and put into a large mixing bowl that you will use for serving as well. You can use the same bowl you used for soaking just remember to dry it well in the meantime.
  3. Heat the oil over medium high in a large frying pan. Add the dry spices (cumin, curry and turmeric powder) and toast in oil for 1 minute.
  4. Add slivered almonds and toast for another 2 to 3 minutes, until almonds start to brown.
  5. Pour the hot almond and spice mix over tapioca pearls and mix well.
  6. Toast coconut flakes in a toaster oven or a frying pan for 2-3 minutes. You need to keep an eye on your coconut flakes as they go from beautifully toasted to inedible in a blink of an eye! If you are using the frying pan, you can use the same pan you just used for almonds and spices, just don’t add extra oil as coconut flakes should be fatty enough.
  7. Add hot, toasted coconut flakes to your tapioca pearls and mix well.
  8. Let the mix stand for couple minutes and while those flavors are combining, wash and chop fresh cilantro.
  9. Sprinkle the cilantro over your tapioca pearls, mix again and serve!

Copyright ©Eat the Vegan Rainbow, 2017

Creamy Mango & Chickpea Curry Tofu

Creamy Mango & Chickpeas Curry Tofu
Creamy Mango & Chickpeas Curry Tofu, via Eat the Vegan Rainbow
Slow cooker (crock pot) is one of my favorite small kitchen appliances and definitely the best way to make dishes that come together only after long, long simmering. Putting everything into a slow cooker is so much easier than baby sitting a simmering stew bubbling away on the stove top! But: slow cooker is slow and if you’d like to have food ready for the dinner (supper) time, you need to remember to fill it up and turn it on 3 to 6 hours in advance. Once all is set and you press the start button, you are free to do whatever and enjoy the day knowing that your delicious dinner is simmering away.

I use my slow cooker often and I find that it works really well for things like stews, or dishes like Vegan Chicken Tikka Masala. Here is another example of a delicious curry that combines tofu, chickpeas and mango with some crushed tomatoes and coconut cream into a fragrant and very creamy curry.

Serve it with Saffron Brown Basmati Rice and you are done!

Creamy Mango & Chickpea Curry Tofu

What you’ll need: 

2 16 oz (454 g) tofu blocks, extra firm

28 oz (800g) can crushed tomatoes

2 15.5 oz (439g) cans chickpeas

1 cup mango chunks, frozen

15 oz (425g) can coconut cream

1 yellow onion, diced

3 cloves garlic, thinly sliced

2 teaspoons curry powder

1 teaspoon ground cumin

1/2 teaspoon turmeric

Fresh cilantro

Cooking spray


What you’ll do:

  1. Drain or press tofu for 30 minutes. I usually just leave the block of tofu in a strainer and flip the block over once. That’s usually enough for dishes that don’t need the tofu to be super dense and chewy.
  2. Cut the tofu into single bite chunks. From a 16 oz block I usually get 16 pieces so you can use that as a rough guideline.
  3. Line the inside of your slow cooker crock pot with a liner. You can skip this step of course – I just recommend it as it makes clean up an absolute breeze. Add the tofu, chickpeas that have been drained, and frozen mango chunks. You can use fresh as well but frozen mango chunks are just something I have on hand for my smoothies so it’s a bit of a staple in my kitchen.
  4. Add the spices and mix well.
  5. Dice the onion and slice the garlic. Place in a microwave safe dish, spray with cooking spray and microwave for 5 minutes. This will start the caramelization process of your aromatics and help them develop flavors.
  6. Pour the onions and garlic over the mango chunks.
  7. Pour in the crushed tomatoes and mix again.
  8. Add coconut cream and mix to incorporate.
  9. Put the lid on and turn your slow cooker on high for 3 to 4 hours.
  10. When playing, serve over rice, quinoa or couscous and top with fresh cilantro.


Copyright © Eat the Vegan Rainbow, 2017

Sunday Slow Cooker Jackfruit Stew

Jackfruit is the “It” ingredient of the plant-based and vegan cooking world. When I started blogging about my plant-based cooking exploration and experimentation, jackfruit was one of those exotic ingredients that I could only get in a local Asian grocery store.

My first jackfruit recipe were the tacos, which still make a frequent appearance at the dinner table because they take no time to make and are really, really good. But what I discovered soon after is that jackfruit is a lovely and realistic stand in for seafood, and you can make a fabulous crab-free crab cakes and clam-free New England clam chowder. I’ve also used jackfruit to make a very rich chickenless tikka masala – yummy!

So in order to feed this new hunger for jackfruit I would go to the Asian grocery store and buy a pile of canned green jackfruit in brine. But, two weeks ago I found out that Trader Joe’s now carries jackfruit suggesting that this amazing plant has gone mainstream.  I still bought more than I need just in case and immediately jumped on testing it out.

What I did with two cans of young (green) jackfruit in brine this time around is transform it into a mellow slow cooker (crockpot) stew infused with onions, garlic, Indian bay leaf, dry basil and ground cumin, as well as spiced up with a bit of red and green chili pepper. In case you are wondering about the Indian bay leaf, the tree it comes from belongs to the same family as the cinnamon tree so the flavor is a bit of a mix between bay leaf and cinnamon. So, if you don’t have Indian bay leaf on hand, you can simply use some regular bay leaf and a dash of cinnamon.

What I like to do when using canned vegetables is to dump the contents of the can out into a strainer and rinse well with lots of water. Then I let access water drain out for few minutes before using. In the case of jackfruit I also prefer to pull the bits of fruit apart, so what I end up with is a pile of pulled jackfruit ready to be flavored in any way I like.

My favorite slow cooker trick that I mentioned before, but is definitely worth repeating, is to combine the aromatics (onion, garlic, chili peppers, and spices), add some oil or cooking spray, and soften in the microwave for three to five minutes.  This helps them develop some caramelization and flavors that slow cooker is not able to achieve. Finally, these days I don’t use the slow cooker unless lined up with crockpot liners that make the cleanup an absolute breeze.

One last note: don’t worry if you don’t have a slow cooker. You can try making this stew on a stovetop in a Dutch oven type of pot or any other. If this is what you are doing remember to brown your aromatics in a bit of oil first then add the jackfruit, and lastly diced tomatoes. The benefit of using a slow cooker is that you set it and forget it, which frees you up to spend your Sunday doing whatever…

Slow Cooker Jackfruit Stew

What you’ll need:

2 cans (10 oz, 280 g) young jackfruit in brine

1 can (28 oz, 800 g) petit diced tomatoes

1 yellow onion, diced

2 tablespoons garlic, crushed

1 red chili pepper, seeds and veins removed

1 green chili pepper, seeds and veins removed

1 tablespoon basil, dried

1 teaspoon ground cumin

2-3 Indian bay leaves

1 teaspoon vegetable oil

What you’ll do:

  1. Rinse and drain the jackfruit to clean out access brine. Pull the jackfruit pieces apart, removing any hard bits of core and seeds that may have been present (I leave softer bits of core and seeds in).
  2. Place the jackfruit in the crockpot that’s been lined with a liner.
  3. Remove the seeds and the veins from the chili peppers and diced them finely. Dice the onions and crush the garlic.
  4. Mix chili peppers, onion, garlic, dry basil, and ground cumin in a microwave safe bowl with the vegetable oil until everything is well coated. Microwave for 3-5 minutes.
  5. Add the aromatics to the crockpot as well as petit diced tomatoes and mix everything together.
  6. Cover and cook on low for 5 hours.
  7. Serve over basmati rice, or even pasta. This stew is fragrant and just discretely spicy. You can definitely adjust the level of spiciness to fit your palate.
  8. Copyright © Eat the Vegan Rainbow, 2017

Vegan Saag Paneer

vegansaagpaneer_saffronrice
Vegan Saag Paneer with Saffron Brown Basmati Rice, via Eat the Vegan Rainbow

Few days ago, I shared my recipe for Vegan Chicken Tikka Masala that uses young jackfruit as a substitute for chicken, and slow cooker as a substitute for using ghee to enhance the flavor, as well as huge time and effort saver. Since then I decided to tackle another jewel of Indian cuisine, Saag Paneer. Saag is a traditional Indian dish made of leafy green vegetables, which is a vegan friendly part of this equation, and paneer is soft, white cheese very common in South Asia, a vegan less friendly ingredient. Putting green leafy vegetables, like spinach, together with cheese, spices and cream is a no-brainer, so it is no surprise that Saag Paneer is very popular.

In order to build a vegan version of Saag Paneer, I focused on transforming extra firm tofu into paneer. This turned out to be easier than I expected. First of all, texture of extra firm tofu and your average paneer are very similar. Additionally, they both have mild flavors and creamy consistency. So far so good!

You do need some time and patience with this one though. I prepped tofu the way I usually do by leaving it in the sieve in the fridge overnight. You can use any other method of getting rid of the excess moisture – I prefer the sieve because it requires no work, cans and paper towels are tedious and a bit wasteful, and I am yet to invest in the tofu press. The next morning I cubed the tofu, and let it “marinate” in the dry spice mix for 4-6 hours.

veganpaneer
Vegan Paneer, via Eat the Vegan Rainbow

Even after sitting in the spice mix, the tofu paneer is not quite ready. Although you can use it, I strongly recommend that you first roast the tofu for 20-30 minutes. This roasting step locks in the spices and adds slight crunchiness that makes every bite a treat.

Few additional tips that will help you put this dish together are to do with spinach. I use frozen chopped spinach, as it is ready to go. The traditional Saag Paneer recipe uses quite a bit of cream to make the spinach nice and creamy. I use coconut milk to add a bit of creaminess to it, and the coconut milk adds a bit of its own nutty flavor that I enjoy. But, I don’t rely on coconut milk alone and have discovered some time ago that stick (also known as hand or immersion) blender is indispensable for creating spinach that’s beyond creamy! If you don’t have a stick blender, you can use a blender or a food processor to purée your spinach.

Once the spinach is puréed, it is ready to meet the tofu paneer, and after about 15 minutes of simmering the Vegan Saag Paneer will be ready to meet your taste buds!

img_1315
Vegan Saag Paneer, before the final mix. Via Eat the Vegan Rainbow

Vegan Saag Paneer

What you’ll need:

For tofu paneer

14 oz. (400 g) extra firm tofu

1 tablespoon garam masala

1 tablespoon ground cumin

1 teaspoon garlic powder

For creamed spinach

2 lbs (1 kg) frozen, chopped spinach

1 tablespoon garlic, minced

2 tablespoons tomato paste

7 fl. oz. (200 mL) coconut milk, reduced fat

Cooking spray

What you’ll do:

  1. Place tofu into a strainer and leave in the refrigerator to drain overnight. Then pat dry with a towel and cut into 1 in/2.5 cm cubes.
  2. In a ziplock bag mix dry spices (garam masala, ground cumin and garlic powder) and add tofu cubes to it. Zip the bag and toss gently to coat the tofu pieces evenly. Leave in refrigerator for 4-6 hours.
  3. Heat the oven to 425 F (220 C). Line a baking sheet with parchment paper and space tofu cubes evenly with some room between the cubes. Don’t brush the spice mix off, just roast the tofu pieces as is for 10-12 min, then go in and flip them over and put them back for another 10-12 min, so that they roast on all sides and get golden brown.
  4. On the stove top, spray the bottom of your pan with cooking spray and heat to medium high. Add minced garlic (I prefer the jar variety that taste great in a dish like this and requires no work), and let it start to develop the aroma for about 1-2 minutes. Next add the tomato paste, and let it mature for 1-2 minutes.
  5. Add frozen spinach. Cook with occasional stirring for 15-20 minutes. Let cool for 15-20 minutes, add coconut milk, and then purée with a stick blender until smooth.
  6. Add roasted tofu and mix gently until tofu is well incorporated. Simmer for 15 minutes. Enjoy with a piece of naan bread, or with Saffron Brown Basmati Rice.

Note: please note that unlike most Saag Paneer recipes I do not add spices to spinach. The flavor intensity comes from tofu paneer, so it is important that your tofu is well coated with the spice mix and nicely roasted until golden brown.

Copyright © Eat the Vegan Rainbow, 2017

Vegan Chicken Tikka Masala

veganchickentikkamassala
Vegan Chicken Tikka Masala with Saffron Brown Basmati Rice, via Eat the Vegan Rainbow
Chicken Tikka Masala has been on the menu of all Indian restaurants that I ever went to. But the origins of this dish are far from clear, some claiming that the dish was created in Glasgow, while others claim it originates from Punjab. Regardless of its origin and history, every Chicken Tikka Masala recipe I ever tasted had five things in common: juicy and tender chicken,a yogurt marinade, fragrant tomato simmer sauce, cream, and lots and lots of ghee (clarified butter).  These five things make Chicken Tikka Masala incredibly tasty, as well as elaborate to make, as well as very heavy on saturated fat and calories.

Well, I think the dish is overdue for a makeover, and there are many that agree with this view. While researching, I found many recipes that explore using tofu, meatless chicken strips, cauliflower, chickpeas, or other things as a chicken substitute, and I bet these all taste great. But, what I wanted to do here is take my new favorite ingredient, jackfruit, which I recently transformed into a fabulous Jackfruit Tacos, and see if it works in an Indian dish.

I also wanted to make a lengthy prep into something more manageable, so my recipe uses a slow cooker to do all the work of bringing jackfruit, spices and the tomato simmer sauce together. This also helps with the fat content, which I cut way, way down while maintaining the intensity of the flavors. The resulting recipe is straightforward but there are couple of tricks and tips to it.

First tip is to use a slow cooker liner. I am not sure if there are other brands out there, but I found that Reynolds Slow Cooker Liners work really well. The food gets cooked perfectly and the clean up is a breeze!

Second tip is to quick pre-cook your aromatics. In this case I use onions and garlic, and apply a method that I found in one of the America’s Test Kitchen cookbooks where you mix your aromatics with a bit of oil and microwave them for 5-6 minutes before adding them to the slow cooker. I’ve been using this method for more than a year now and apply it to get the aromatics (onions, garlic, carrots, celery,…) going, because I found that the slow cooker just can’t get them to develop the slightly caramelized flavor that a stow top cooking will do for you. However, microwaving with a bit of oil takes care of that and works perfectly!

Third tip is to rinse, drain and dry your jackfruit, assuming that you are starting from the canned version, and chopped it into small pieces. Do make sure that jackfruit is well rinsed and drained. Otherwise you will end up with Vegan Chicken Tikka Masala that may be too salty and too soupy.

So, once you have your jackfruit and your aromatics ready, it’s time to get cooking!

veganchickentikkamasala
Vegan Chicken Tikka Masala in a slow cooker, via Eat the Vegan Rainbow

Vegan Chicken Tikka Masala

What you’ll need:

2 cans (10 oz, 280 g) young jackfruit in brine

1 can (28 oz, 800 g) crushed tomatoes, no salt added

1 yellow onion, diced

2 tablespoons garlic, crushed

2 tablespoons tomato paste

2 teaspoons ginger, freshly grated

2 teaspoons garam masala

2 teaspoons ground cumin

1/2 cup cashews, raw

1/4 cup almond milk

cooking spray

fresh cilantro

What you’ll do:

  1. Place diced onions, garlic (I use the one from the jar, as I shared in my Oh My! It’s Vegan Shepherd’s Pie! post) and tomato paste in a microwave safe bowl. Spray the aromatics with cooking spray, mix well and microwave on high for 5-6 minutes. Be careful when you handle the bowl, it will be hot so I recommend using oven mittens.
  2. Line your slow cooker with the liner, and add the can of crushed tomatoes, jackfruit that has been rinsed, dried and chopped to small pieces, as well as all the spices and the microwaved aromatics. Mix well. Cover and turn your slow cooker on “HIGH” for 4 hours.
  3. While the slow cooker is going, start soaking the cashews in water. Let them sit for 4 hours in the refrigerator and once your slow cooker is done take the cashews out, dump the water out and place the cashews and almond milk in a blender. What you are doing here is making vegan Cashew Cream, and this amount of cashews should give you more than enough to make this Vegan Chicken Tikka Masala into a creamy perfection. However, do take it easy when adding Cashew Cream and what I usually do is add the cream one tablespoon at the time, mix Vegan Chicken Tikka Masala well, and check for flavor. I keep adding the Cashew Cream until I am happy with the flavor, color and consistency. Don’t worry if you discover that you made a bit too much Cashew Cream, you can always use it to top your backed potatoes, or turn it into Vegan Herb Mayo.
  4. When  ready to serve, plate your Vegan Chicken Tikka Masala, or should I call it Jackfruit Tikka Masala?, with some Saffron Brown Basmati Rice and top it with fresh cilantro.

Note: Cilantro does tend to go flat in few days from purchase so one way to keep it fresh for longer is to rinse it out soon after you get back from the grocery store, put them in a glass jar like you would a bunch of flowers, and keep them on your kitchen counter top – which is a trick I picked up watching Rachel Ray. Also when it comes to cilantro, basil and parsley, I prefer to use my kitchen scissors to cut them up!

Copyright © Eat the Vegan Rainbow, 2017