Barley and Mushroom Burgers, via Eat the Vegan Rainbow
When life gives you barley, you should probably make some burgers! This is especially true when life simultaneously gives you some mushrooms so that your burley burgers can take full inspiration from that old-time favorite, the Mushroom and Barley Soup. The soup is a traditional menu item in delis and other lunch places, and it work because it combines robustness and heartiness of barley with plenty of umami savoriness that comes from mushrooms.
These burgers are built on the same principles. Cooked barley is mixed with plenty of ground mushrooms, and a handful of flavoring agents to make these gently spicy and smokey baked burgers. The patties are sturdy enough to hold up to the outdoor grilling, so you don’t need to limit yourself to an oven.
The key flavor agents in this case are sliced black olives and chipotle peppers in adobo sauce. You need to be careful with the chipotle peppers because they are hot! I usually use either only the sauce or just one pepper as more than that can make a dish, including these burgers, quite uncomfortable. The adobo sauce itself is an excellent source of smokey flavor, so if your taste buds are sensitive you can skip the pepper, or replace the adobo sauce with some smoked paprika.
Mushroom and Barley Burgers
What you’ll need:
2 cups barley
4 cups water
1 cup black olives, sliced
10 oz mushrooms
3 tablespoons tomato paste
1/3 7 oz. (200 g) can chipotle peppers in adobo sauce
1 tablespoon minced garlic
2 tablespoons soy sauce
1 cup flat leaf parsley, fresh
Cooking spray
What you’ll do:
Cook 2 cups of barley in 4 cups of water. I recommend using a pressure cooker (30 min bean cycle on the electric pressure cooker I have gave great results), or cook on the stove top using the instructions on the bag. Let cooked barley cool before using further.
Preheat the oven to 425 F (220 C), or prepare your outdoor grill as you normally do. For the outdoor grilling I recommend getting the grill grates hot, burning off any bits that may have been stuck on them, then scrubbing them, and oiling them before use.
Place the olives and the rest of the ingredients all the way to the cooking spray, into a food processor and process until finely chopped, then add into the cooked barley. Mix well, and using your hands form the patties.
If you are using an oven, place the patties onto a baking sheet lined with some parchment paper. Spray them with cooking spray, then flip over and spray again. Bake on one side for 10-15 minutes then flip them over and bake for 10 min more. For outdoor grilling, 8-10 minutes per side should be enough to get the perfect grill marks and develop that lovely grilled flavor.
Serve the burgers with all your favorite trimmings. They are hearty and just slightly spicy, and pair well with neutral flavors like avocado, lettuce and tomato.
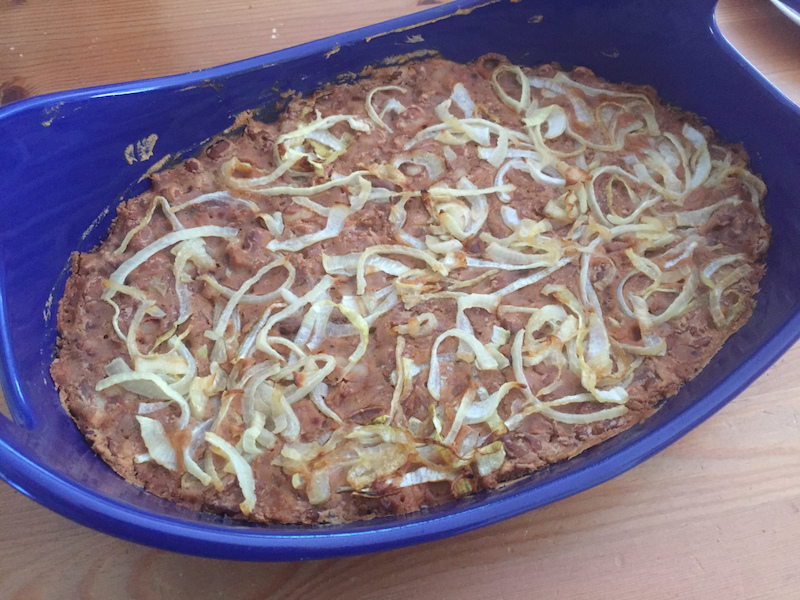
Sweet and Smokey Baked Beans with Caramelized Onions are a perfect side dish for your next BBQ, via Eat the Vegan Rainbow
Grillin’ and chillin’ – that’s what we are all going to be doing for the next couple of months. School is out, summer is here and what better thing to do than to enjoy some grilled foods and outdoor dining. So, if anyone ever asks you “Do vegans (or plant-based eaters) actually grill anything?” all you need to say is “You betcha” and invite them over for a grill and BBQ party. If you are looking for some inspiration, you may want to try these BBQ ribs, or portobello steaks, or grilled tempeh. Besides these you can grill eggplant, lots of other veggies, as well as peaches, pineapple, plums… Grilling is a lovely way to bring intense flavors out and works for a range of fruits and vegetables!
Having the right side dish on your side
Plus, vegetables (and fruit) are essential for making your cookout a really special and memorable treat for everyone. These ingredients get transformed into a lovely array of side dishes, and quite frankly I usually pile up those and completely ignore the “main” course. With things like spicy cole slaw, or corn bread (or corn bread muffins), or Mac’n’Cheese, or delicious collard greens, or potato salad, or… Well, need I say more? Side dishes are what makes these grillin’ and chillin’ cookouts fun!!!
Baked beans are an institution
Although all these side dishes are dear to my heart, none comes even close to baked beans! Baked beans are absolutely an institution, both in the USA where I live, and in the Balkans, where I come from. But we all know that they are more broadly beloved than that, and many countries and cultures across the globe have a very special and prominent place for baked beans. And although many would think that you can’t have an amazing baked beans without some smokey meat component in there, this is far from the truth.
Sweetness and smokey flavors make baked beans special
What makes baked beans really special is a combination of sweetness and smokiness. One way of getting lots of sweetness to your baked beans is to use some dark brown sugar, maple syrup or dark molasses. But, if you are not careful these can quickly overpower the dish. So, I recommend that you go easy on the actual sweetener, and use lots of sweet onion instead for a more subtle sweet flavor. Baked beans are also quite smokey, and here spices like smoked paprika and chili powder, as well as a dash of liquid smoke will go a long way. If you can’t find liquid smoke, ground cumin is an example of a common spice that has a natural smokey flavor, or you could consider adding one or two smoked peppers, whole into the beans and then fishing them out before serving.
Enjoy!!!
Sweet and Smokey Baked Beans with Caramelized Onions
What you’ll need:
1 large sweet onion, finely sliced
3 cups pinto beans, cooked or canned (if using canned rinse and drain the beans first)
Note: to make your own seasoning that’s enough for this recipe mix 1/2 teaspoon of raw sugar or 1/2 teaspoon of dark molasses, 1/4 teaspoon garlic powder, 1/4 teaspoon smoked paprika, 1/4 teaspoon chili powder, 1/4 teaspoon salt, 1/2 teaspoon liquid smoke.
What you’ll do:
Preheat the oven to 375 F (190 C).
Slice the large onion in half than place the cut side down on your chopping board and slice across to create thin onion ribbons. Once the onion is sliced, use your fingers to pull the ribbons apart.
Place a large pan over medium heat and bring to temperature. Add the oil and onion ribbons and caramelize the onions for 5 minutes with frequent stirring. You want the onions to be soft, and partly browned but not fully caramelized.
Add the beans and the spice mix to a large mixing bowl and use your hands or a large fork to mash and mix everything together. Approximately, half of the beans should be mashed and half should stay whole. This will ensure that your baked beans are creamy, yet have an interesting texture.
Spray the bottom of you baking dish with some cooking spray and spread the beans in an even layer. The best size of the dish for this amount of beans is 8 x 8 in (20 x 20 cm), or about 2 QT (approximately 2 L).
Arrange the partly caramelized onions on the top. Don’t mix them in, just let the onions rest on top of the bean mix. You can get creative here and make a pattern or a design, but I went rustic!
Place in the oven and bake for 20-30 minutes. When you see that the edge of your beans is browned, you are done! Serve as a wonderful side dish for you BBQ party, or use the next day to make a yummy breakfast burrito.
Sweet and Smokey Baked Beans with Caramelized Onions, via Eat the Vegan Rainbow – feel free to pin and share!
Gluten-free, Vegan BBQ Ribs, via Eat the Vegan Rainbow
For all of you out there who’s mouths have been watering when you see people share their vegan BBQ ribs recipes but don’t eat gluten, this one is for you! Of course, all of you who are gluten-lovers, I hope you check this recipe out as well – you will not be disappointed!
Big credit for these ribs goes to Linda and Alex Meyerson and their amazing new cookbook “Great Vegan BBQ without a Grill” (read my review here). Their recipe for BBQ ribs (or RIBZ, as they call them!) is amazing and I love it, but my husband has been avoiding gluten so I had to come up with an alternative.
After few trials and errors, I came across couple of recipes that use quinoa as a replacement for gluten. I have been trying to include quinoa into my cooking more often (in a gumbo-jambalaya fusion, as a stuffing for roasted eggplant, and as a perfect side dish for winter holidays), because, although almost impossible for me to pronounce it properly (is it keen-wah or kee-noah or something else?), it is super nutritious. Loads and loads of plant-based protein, fiber, minerals and vitamins!
It also has a subtle flavor which makes many people think of quinoa as bland, while I view it as versatile. This absence of strong flavor means that I can dress quinoa any way I like, and make it come out flavorful and different every time. These BBQ ribs are the proof!
As I said, the real credit goes to Alex and Linda because their idea to bake the rib meat before grilling it further is a real breakthrough. This lets your meat come together, and makes grilling a breeze. These ribs will withstand the indoor and the outdoor grilling so go crazy – and remember that you can prep your “meat” a day or two in advance and store it in the fridge, which can be a real lifesaver if you are having a large party over. All you will need to do is get your “meat” out, cut into the ribs, and grill before serving. This recipe is so fantastic that you can easily serve it to your omni friends and family, and they will not know the difference. Happy grilling!!!
Tip: this is definitely a recipe that you make in stages. You need to cook quinoa, roast some beets, sauté mushrooms, cook the beans (if not using store bought) – all before everything goes into the food processor, so be patient and plan ahead. It will be worth it!
Gluten-free Vegan BBQ Ribs
What you’ll need:
1 cup quinoa
1 1/2 cup vegetable broth
10 oz mushrooms, sautéed
2 tablespoons olive oil
1/2 beet, roasted
2 cups dark red beans (canned or homemade)
2 tablespoons tapioca starch
1 tablespoon tamari
1 tablespoon Worcestershire sauce
1 tablespoon liquid smoke (or less, depending on your taste)
2 teaspoons onion powder
2 teaspoons smoked paprika
1 teaspoon garlic powder
1/4 cup BBQ sauce (homemade or store bought, I love Stubb’s Original)
Oil or cooking spray for preparing the grill or a grill pan
Extra BBQ sauce for serving!
What you’ll do:
Roast the beet – actually, instead of roasting one lonely beet, I recommend roasting a whole bunch of beets at the same time, at 425 F (220 C) for 45 minutes or so, and then using them to make these ribs, as well as eat them in a salad or make them into a hummus. This can be done on the grill too – wrap the beets in some foil and let them hang on the grill for about 45 minutes as you grill other things! You can make the beets in advance and store in the fridge for up to a week, and use in this, and many other recipes as needed. If you are in a tight time crunch you can use canned beets as well, but the roasted ones do add a bit of nice, earthy aroma that the canned ones simply don’t have.
Combine quinoa and vegetable broth into a pot large enough to hold it all, place over high heat, bring to boil, then reduce the heat and simmer for 10-15 minutes until all liquid is absorbed. Set aside.
Preheat the oven to 375 F (190 C).
Place a large frying pan over medium high heat, add the oil then sliced mushrooms, and sauté the mushrooms until nicely browned.
If you have a large food processor, you can combine cooked quinoa, sautéd mushrooms, beans, 1/2 beet, and all the rest of the ingredients – except the BBQ sauce! – in the food processor and process until smooth and homogenous. If you don’t have a large food processor, but have a stick blender you can place everything into a large mixing bowl and then use the stick blender to blend it all together. This is your rib “meat” mix.
Line a 9 x 13 in (23 x 33 cm) baking dish with parchment paper and spray the bottom and the sides with some cooking spray. Pour your rib “meat” mix into the pan, even out and bake for 30 minutes, or until baked through, and browned at the edges. Let the baked rib “meat” cool. This is also a good stopping point, as the “meat” can stay in the fridge overnight and be used the next day.
When you are ready to grill, slice the rib “meat” into strips – they should be roughly the same size as the real ribs, which is about 1 inch or 2-3 cm.
Prepare your grill pan or your outdoor grill as you normally do. For me, this means turning on the heat to high and letting the pan heat up nice and good before brushing with a little bit of oil or spraying with some cooking spray. For the outdoor grill, I turn the burners on to the max (I have a gas grill) and leave the grill covered for 10 minutes, then I use the brush to scrape the grates, oil them with a paper towel dipped into some oil (use your heat proof tongs to handle the towel paper and stay safe), and they are ready (note that the type of a brush you use depends on the kind of the grill grates you have, so follow the manufacturer instruction closely otherwise you may permanently damage your grill!).
Place the ribs on the grill or the grill pan and brush the top with some BBQ sauce. Let them grill for 3-4 minutes on one side then flip over, brush with some BBQ sauce and repeat. I usually flip the ribs three times so that each side has 2 brushes of BBQ sauce and two grilling periods, for a total of about 6 – 8 minutes per side.
Serve hot with the side of your favorite BBQ sauce (I recommend warming the sauce just slightly), and enjoy with your favorite sides, such as grilled corn, spicy cole slaw, or this fantastic arugula and watermelon salad that I just discovered!
Chickpea Burgers with Sun Dried Tomatoes and Walnut Meat, via Eat the Vegan Rainbow
You should get to know walnuts. They are super nutritious because they have a large amounts of polyunsaturated fats, and surprisingly high amounts of protein, fiber, even vitamins B-6.
Walnuts are also fun and funky. They look like large, green balls when young, and their pretty green skin shrivels into dark brown to black husk as they ripen. This husk eventually falls off, revealing the nut. If you do find yourself with a pile of walnuts still wearing their husks on your hands, do use gloves when peeling them. The walnut husks will release dark brown pigments that will color your skin, and the stuff does not come off easily. It’s actually still used as a natural hair dye in some places, and if you ever get a pile of green walnuts stick them into some brandy and make some dark liquor called nocino.
If you are like me, chances are the walnuts you can easily find come nicely cleaned and sometimes even chopped. These days I prefer to get chopped walnuts as that speeds things up in the kitchen. I use walnuts in my desserts, as a quick snack, and as a meat substitute. This recipe here falls into the “walnuts as a meat replacement” category and to boost their meaty flavor I combine them with sun dried tomatoes, caramelized onions, cumin, smoked paprika, and chili powder. This serves as a fantastic flavor add-on to chickpeas, which are the main ingredients in this burger. Having said that, I think chunks chickpeas here are more of a filler and that walnuts and the sundried tomatoes are the stars.
The main binding agents here are flax meal and bread crumbs. Flax meal has to be soaked in hot water for about fifteen minutes, which should be enough to transform it into sticky goo that you can use instead of eggs as a binding agent.
Chickpea Burgers with Sun Dried Tomatoes and Walnut Meat
What you’ll need:
1 onion, diced
1 cup walnuts, chopped
3 oz. (85 g) sun dried tomatoes, sliced
3 tablespoons flax meal
6 tablespoons water, boiling
2 15.5 oz. (439g) cans chickpeas, rinsed and drained
3 tablespoons olive oil
2/3 cup plain bread crumbs
1 teaspoon smoked paprika
1 teaspoon cumin
1 teaspoon chili
Cooking spray
What you’ll do:
In a large cup or a measuring cup mix flax meal and the boiling water. Let the mixture stand for 15-20 minutes.
Spray the bottom of a large frying or sauté pan with cooking spray and place over medium heat. Add the diced onions and sauté for 8-10 minutes until the onions are nicely caramelized.
Add chopped walnuts and let them toast slightly. This will take 3-5 minutes.
Add the sun dried tomatoes, mix well and sauté for another couple of minutes.
Transfer the sautéed mixture into a large mixing bowl. Add the chickpeas that have been carefully washed, drained and half-mashed with either a hand or a fork. Add the soaked flax meal, spices, oil, and bread crumbs and mix well.
Form the burger patties, and place them on the wax paper lined platter. Put the patties in the fridge for at least 30 minutes to firm up.
Grill the burgers using an outside or an inside grill, or a grill pan. These burgers are sturdy and should not fall apart while grilling. They need 3-5 minutes per side to get nice grill marks.
Serve them on a ham burger bun with your choice of toppings and condiments!!!
White Bean Burgers with Chia Seeds, via Eat the Vegan Rainbow
Another veggie burger, another sensation (if you like to see some past examples, there are here, here, here, and here)! And you don’t need to take my word for it, just go ahead and make a batch of these. First of all, they are ultra-cheap. I use dry beans and one pound, approximately half a kilo, of dry beans will make a huge pile of these burgers. At the end, I think my yield from this recipe was about 15 burgers. The burgers store well in the tightly sealed container in a fridge – you can keep them for a week – and reheat easily in the microwave oven, toaster oven or on the stove top. I am not entirely sure they freeze well, but you can try. If you do decide to freeze a batch, I recommend cooking them through, letting them cool, then separating individual burgers with some wax paper, then freezing. In that way you can grab a burger any time you need it!
Chia seeds are the magic ingredient here. I’ve used chia seeds in the past to make puddings, but here I use them as the main binding agent, the same way you would use egg or a flax “egg”. To make chia “egg” all you need to do is soak chia seeds in some water for about 30 minutes or so. By the time half an hour is up you should have a very thick and gooey mixture that looks quite slimy and that is a good sign. It means your chia seeds are ready to use. Chia seeds add not only the cohesiveness to this recipe, but bump up the nutritional value of your burgers because they are rich in polyunsaturated fatty acids.
I used to be afraid of cooking the beans and would get canned ones only. But, I recently started using a pressure cooker and I love it! I soak the beans overnight to speed things up, although I did make the beans without soaking and that works as well – you just need to cook them for a longer time. Once ready for the pressure cooker, I rinse the beans, place them in the pot and cover with water. I use an electric pressure cooker and use a preset bean program which takes about fifteen minutes of pressuraized cooking. Once the program is done and the pressure cooker is safe to open, I drain the beans and use without rinsing. You can save the liquid too, and make it into a soup if you like.
Note: if you are cooking dry chickpeas this water is the actual aquafaba that everybody is raving about, so do keep it and use it as the egg white substitute. I recently made aquafaba meringue and topped my Butter Squash and Cranberry Pie with Praline and Meringue Topping.
Once you have your chia egg and your cooked beans the rest is easy. All the ingredients so into a large mixing bowl or a food processor and get processed together. Once formed, the burger patties need to sit in the fridge or on the kitchen counter for about half an hour to an hour to firm up, and they are ready to go. I made my batch in a non-stick pan sprayed with some cooking spray, but you can grill them or even put them in the oven. They don’t need much cooking really since all the ingredients have already been cooked, so what you are really looking to do is brown the patties nicely on both side and heat them through.
You can serve these veggie burgers through the year and with any condiments you enjoy. I can recommend a piece or two of avocados and a spoonful of Macadamia Nut Queso Fresco with just a spring of cilantro. That out to do the trick!
White Bean Burgers with Chia Seeds
What you’ll need:
1 lbs (450 g) white beans, dry
1/2 cup red pepper paste (or tomato paste, if you don’t have red pepper paste)
2 tablespoons chia seeds
6 oz (3/4 cup) water
1 cup coarse corn meal
1/2 cup fine corn meal
2 tablespoons stake sauce
1 teaspoon cumin powder
1 teaspoon chili lime powder (or regular chili powder)
Cooking spray
What you’ll need:
Cover the beans with water and soak overnight at room temperature.
Rinse the beans before cooking, then cook them in a fresh batch of water until done. If you are using a pressure cooker the total cooking time will likely be about 30 minutes. If you are cooking them in a regular pot they will probably need an hour or an hour and a half. You can also use the canned beans and you probably need 3-4 15 oz (425 g) cans to get the amount equivalent to what you get from a pound of dry beans.
While beans are cooling, start soaking chia seeds in 3/4 cup of water. This will take 30 minutes or so.
By the time chia seeds are ready to use, your beans will be cool. Place the beans, chia seeds, and the rest of the ingredients into a large mixing bowl and process everything together with a stick blender. You can also use a food processor for this step.
For the burger patties and leave them to firm up for about 30 minutes. You can leave them on the kitchen counter or in the fridge. You can also make them a day ahead and leave them in a fridge and finish cooking them the next day.
Preheat the grill, grill pan or a non-stick frying pan to medium-high. I recommend using some cooking spray to help the burgers brown and get them going, but if you do have a good non-stick pan you can probably get away with not using any oil or cooking spray. The burgers need 3-4 minutes per side.
Serve them fresh from the grill/out of the pan and enjoy with your favorite toppings and condiments!
Although it may seem like a mission impossible, recreating meat like appearance, consistency and even the taste with plant-based ingredients is not all that hard. The basis for many of my meatless recipes are mushrooms. I usually use baby portobello mushrooms, also known as the crimini mushrooms, but white button mushrooms would work just as well. Very often I grind the mushrooms into a paste and this also helps with the final meat-like vibe of a dish. Finally, I cook the dish with the same spices and in the same way as someone would a meat version of the same recipe.
The meatless Shepherd’s Pie I made some time ago nicely illustrates these tips. For that recipe I used mushrooms and lentils, as the key umami components, and combined them with herbs that you would typically use in this pie – thyme and plenty of rosemary. What you see and smell will evoke the right memories and experiences, so by the time you have the first bite your brain is already convinced it’s having meat.
Here I use all those strategies to make koftas, which are sort of flat-ish lamb meatballs placed on a skewer and grilled. Minced mushrooms give the right level of umami and TVP (textured vegetable protein) gives the koftas structure. One note on the TVP – instructions usually say that you need to soak the TVP flakes before using which is true for many applications but not for this one. Use dry TVP and mix it with minced mushrooms and the rest of the ingredients to get to the right consistency for the koftas. After all they will need to go on the skewers and need to be robust enough for broiling on high. I did add some bread crumbs to the mix as well, as an extra binding agent. If you are not a fan of bread crumbs, you could add oats, or some corn meal.
Koftas need to be shaped by hand, and the skewers gently threaded through. Ideally, the skewers you are using are long enough to rest on the edges of your broiler pan (see picture below) so that you can turn them midway through broiling and get all sides well browned. I can’t recommend the bamboo skewers I used here – by the end of the broiling they were all black band falling apart – so metal ones seem like a much better idea.
Serve Broiled Vegan Koftas with some Saffron Cauliflower Rice, and with a spoonful of mint chutney, and you will have yourself a great, well-rounded meal.
Broiled Vegan Koftas
What you’ll need:
10 oz (280 g) white button mushrooms
10 oz (280 g) TVP
1 cup bread crumbs, plain, gluten-free
4 cloves garlic
3 tablespoons olive oil
2 teaspoons coriander powder
2 teaspoons ground cumin
2 teaspoons smoked paprika
1 teaspoon crushed red pepper flakes
Cooking spray
What you’ll do:
In a large food processor, mix all the ingredients (except the cooking spray) and pulse to mix and combine. Let this mixture stand for at least 30 minutes and up to one hour.
Start your broiler on “HI” or use the outdoor grill if you like.
Line a broiler pan with some foil. You don’t need the top grate part that broiler pans usually have so leave it aside.
Using your hands take about 1/2 cup worth of koftas’ mix and form an elongated oblong shape about 1 1/2 in (3-4 cm) wide then pierce it with a skewer. These koftas are gentle so handle them with care. You may need to adjust the amount of bread crumbs, or add some flex meal as a blunder. Leaving them in a fridge or freezer to firm up will help them hold their shape. Place the skewers on a broiler pan making sure their ends rest on the pan’s rim and the koftas don’t touch the bottom (see picture above).
Broil on high for 5-8 minutes than turn over to broil on the other side.
Let koftas cool just for a moment then serve with some rice, Saffron Cauliflower Rice, or a mild yogurt, like almond or cashew ones.
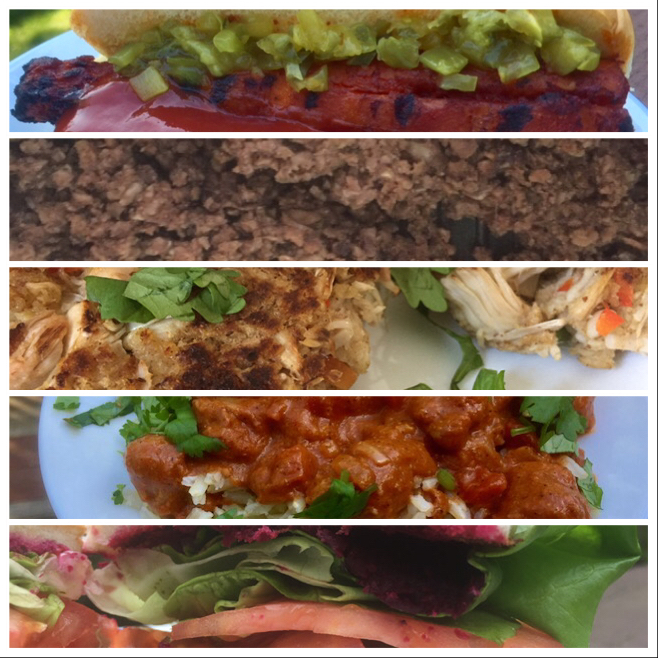
Top 5 Eat the Vegan Rainbow Recipes of 2017, via Eat the Vegan Rainbow
Well, the year came and went. 2017 saw two major changes in my life: I decided to become vegan, and I changed my job after a decade. Both of these changes have helped me rebalance, and regain control of my wellness. The change I made to my diet had profound effects on my energy levels, and gave an incredible boost to my culinary creativity. I’ve have not felt so inspired and motivated to try new things for a long, long time.
On top of wanting to eat and make different food, I also decided to share everything. That’s how this blog was born! It’s been a great adventure because blogging, sharing, and being engaged in social media in many plant-based and vegan groups has been eye-opening. There’s so much creativity, encouragement, and positive energy out there!
I appreciate that many of you may be struggling because a life-style change is never an easy thing, and I also gather from comments and posts that many are surrounded by family, friends or work environment that does not support or even approve of the plant-based and vegan eating and living. The best advice I can give you is to take it one step at a time, and keep reminding yourself of why you decided to make this huge change to begin with. And: keep creating delicious dishes and keep serving them to all you love and care in your lives to spread the well-being and comfort that well-prepared and nutritious food brings.
So, as is customary to do as a year is winding down I took a look at Eat the Vegan Rainbow to see what people enjoyed reading the most. Not surprisingly, the most read post of 2017 is “5 Must-try Recipes for Beginner Vegans” which I put together after being a vegan for about 6 months, to highlight some of the recipes that I found incredibly helpful. And I am glad to see that many of you have found it to be useful as well!
When it comes to my original recipes, there is definitely a clear pattern to the top five. All top five recipes are substitutes to animal-based recipes, and provide a healthier alternative to the types of foods most of us have been exposed to for most of our lives. So, without further ado I give you the Top 5 Eat the Vegan Rainbow Posts of 2017:
Hottest Summer Trend: Carrot Dogs – these “hotdogs” made from marinated carrots that have been grilled are the most amazing thing that I had so far, and it did not surprise me to see that others have loved them too! Since that summer treat, I’ve use similar ingredients to make an incredible Cream of Carrot Soup, which is also a winner in my book and if you have not tried it yet do give it a go!
Homemade Ground Beef Substitute – this was an essential recipe for me to develop since the store-bought ground beef substitutes were just not making me happy. They were either too expensive to really work for me, or had weird ingredients, or spices I did not enjoy, or left a strange aftertaste. So, I developed my own mix that works, and I’ve been using it in tacos, nachos, stuffed peppers, and similar dishes that use ground beef as a filler. It is spot on!!!
Chicken-less Tikka Masala – for those of you who love Indian food, this one is the winner! The blend of spices and nut-based yogurt, with gentle tomato sauce and soya chunks as chicken replacement work incredibly well. You will get all the texture and flavors of the original dish!!! And if you not familiar with Indian cuisine, you should make it one of your New Year’s Resolutions to give it a try. First of all, many of Indian dishes are already vegetarian since India has a huge culture of not eating meat, and many of the traditional dishes are easily veganized. Just take a look at the Vegan Saag Paneer, and Sabudana Khichdi.
Vegan Jackfruit “Crab” Cakes – these “crab” cakes are simply amazing! They deserve quite a few superlatives, because they are super easy to make, super cheap, and super impressive. They will be able to convince even the hard core crab cake lovers that you can have a great crab cake without the crab. You can actually have an excellent New England Clam-free “Clam” Chowder as well, and while we are talking about seafood replacements, you can also have a great Faux-lobster roll, although some have been saying that it just not the same! For me all these recipes are really good, and so close to the original thing that I can not longer tell the difference, and that’s good enough for me.
A Very Beefy Veggie Burger – as it turns out, and perhaps not surprisingly, we all love to grill outdoors during the summer days, and we all enjoy a great burger. The veggie burgers that are out there fall a bit short of delivering that meaty bite and flavor, and the high-tech Beyond Burgers are fantastic but really pricey. So, I’ve been playing around and making all sorts of burgers, like the Avocado Burgers, Black-Eyed Peas Burgers, and Roasted Red Pepper Chickpea Burgers, which were all worth getting excited about. They have different degrees of beefy flavor and texture, and they hold up to grilling to a different extent, and you can’t go wrong with any of them.
I can’t leave without asking you to share some of your favorite recipes. What were your clear winner in 2017? Something similar to what I highlighted above, or something completely different? Let’s share each other’s food and thoughts about eating and well-being, and keep helping each other navigate the world of plant-based foods and flavors. I wish you a Happy and a Healthy New Year!!!
You probably know that veggie burgers are going through somewhat of a revolution, with companies like Beyond Meat and Impossible Foods, leading the way within US in creating plant-based products that taste and look like the real meat. I have not had an Impossible Burger yet, but I can attest to Beyond Burger being everything its creators wanted it to be – a plant-based burger that looks, cooks and tastes like fresh ground beef burger. It is absolutely spot on, thanks to some interesting protein biochemistry and biophysics that transfrorms pea protein into ground beef, as well as the use of plenty of fat for that greasy burger feeling, and a good amount of salt. And fat and salt are likely two components of this burger that, in addition to getting the texture of the protein component just right, make this type of burger so realistic and so delicious and so addictive.
Indulging in one of these burgers as an occasional treat is all fine and good, but making it on a daily basis is almost us unhealthy as eating the beef patty. That’s why I’ve been focusing on creating plant burgers (call them veggie burgers if you like) that can work on a grill or in a grill pan, look very burgery, and taste great without huge amounts of salt and fat. My blog now has the entire section dedicated to Burgers, Hot Dogs & More. Some of the burgers I made taste very much like a beef patty, some less so… At the end, what I discovered is that plant burger needs to pass two tests in order to qualify for being on my plate: it has to hold its shape well and sustain grilling on the grill or in a grill pan, and it has to taste amazing. Any burger that checks those two boxes off deserves to be shared!
The patty I am sharing today has three twists. Twist number one is that I decided to try using avocados as a fat source to add some juiciness to the burgers. Avocados, also known as Alligator Pear – isn’t that awesome? – are not something I ever considered cooking with but we recently had a huge avocado sales in my local grocery store and I got more than I should and there is a limit to how much avocado toasts one can eat in a week, so I was looking for something else to do with them. The idea to try making a burger with avocados was inspired by their high fat content and their creamy consistency (when they are ripe and perfect). I did quite a few internet searchers to see what other have done, but I could not find a single recipe that used avocados inside the actual burger patty. So, off I went to see if Avocado Burgers can be made into reality.
My twist number two is one of my favorite tricks to add umami flavor to just about anything – finely ground mushrooms. They work wonders in a dish like Meatless Shepherd’s Pie, or more generally any time you want to recreate that special “je ne sais quoi” of ground beef.
Final twist to this story is using extra firm tofu that has been frozen for few days than thawed all the way over the course of one to two days in the refrigerator. Freezing and defrosting tofu changes its texture daramatically. The tofu becomes tougher and stronger, and it absorbs the marinades and flavors better. There are no tricks to freezing tofu in my kitchen as I just put the container tofu comes in from the store into the freezer, but if you need a more refined method The Spruce has detailed step by step instructions. Before you use tofu, drain it well and then dig in – use your hands to press and squeeze and get the excess water out. I suppose you could use the tofu press for this or a method where you place tofu slices between paper towels and place a large weight on top for twenty minutes, but because tofu that’s been frozen then defrosted has this tougher and stronger texture, using your hands actually works quite well. Plus, you can easily go from squeezing to crumbling, which is the next step. At the end you will end up with a pile of small tofu crumbles.
To this pile of crumbles you will add mashed avocado, ground mushrooms, tomato paste, and couple of staples when it comes to boosting umami and grilled food flavors: soy sauce or liquid aminos, Worcestershire sauce and liquid smoke. The patties will be soft so it is a good idea to stick them into the fridge or a freezer to firm up before cooking. I felt like pairing only some crispy lattice with this burger but pickles, mustard, ketchup, tomatoes, and all the other common burger fixings will go well with it too!
Avocado Burger, step by step, via Eat the Vegan Rainbow
Avocado Burger
What you’ll need:
1 16 oz. (450 g) block of extra firm tofu, frozen then thawed
8 oz. (225 g) crimini (baby bella) mushrooms
1 large avocado, ripe
2 tablespoon tomato paste
1 tablespoon Worcestershire sauce, vegan
1 tablespoon soy sauce or liquid aminos
1 teaspoon garlic powder
1 teaspoon liquid smoke
Cooking spray (for the pan)
What you’ll do:
Freeze the tofu few days in advance and when completely frozen take it out of the freezer and leave it in refrigerator for a day or two, until completely defrosted. Drain the tofu and using your hands squeeze the water out of tofu. The tofu should feel like a relatively tough sponge soaked with water at the beginning, and at the end it should feel moist but not dripping wet. Crumble the tofu into a large mixing bowl.
Chop the mushrooms using a food processor until they are finely ground. Few chunkier bits here and there will not hurt but try to get the mushrooms to be about the same consistency as your tofu crumbles. Add to the tofu.
Cut and peel the avocado, and scoop out the green flesh into a small bowl and mash with the fork until finely mashed. Ideally the avocado should be as smooth as you can get it, and if you are using a perfectly ripe avocado this should not be a problem. Side note: If you discover that your avocado is tough that means that it is not ripe enough. If your avocado is turning black it means that it is past its prime. Unfortunately, when it comes to avocados only the perfectly ripe, perfectly green and perfectly soft will work, for this or any other recipe. If your avocados are tough to touch it means they need to ripen and you can help them out by putting them in a paper bag, closing it tightly and leaving them on the kitchen counter overnight. That usually helps – and if they are really, really green you can a ripe banana to the bag to help avocados along.
Add the avocado purée to the tofu mix, as well as the rest of ingredients.
Mix well to combine using your hands. You want to work the mix a bit, which means squeezing and mixing at the same time. Once everything is combined together, use your hands to form patties. Place the patties onto a tray lined with wax paper, and put them into the refrigerator for 30-60 minutes or into a freezer for 15 minutes or so.
Heat your grill pan or a cast iron skillet over the medium high heat. Spray with cooking spray and add 2-3 patties at a time. You need to leave enough room around tha patties to be able to flip them so keep that in mind. Cook on one side for 5 minutes then flip over and cook for another 4-5 minutes, until both sides are nice and brown.
Serve on your favorite hamburger bun with your favorite toppings. And in case you have couple of avocados still left over, go wild – slice them up, toss them on top, and have yourself a Double Avocado Burger!
Miso Glazed Grilled Tempeh, via Eat the Vegan Rainbow
If you have not done so already, you should definitely try tempeh. I’ve been hearing about it for some time now, and seeing several different brands and varieties right next to the tofu that I usually get but I only got the first batch of tempeh just the other day. I bought several different varieties to try them out and spent few days reading about what’s tempeh good for and how to best cook with it. Tempeh is related to tofu because both are soy based. But, in terms of flavor and texture (and as far as I can tell in terms of how you actually make the two, based on what Wikipedia says), tofu and tempeh are quite different. Tempeh is firm, much firmer than the firmest tofu, and does not come in liquid. It is actually fermented soy beans mixed with rice [edited after reading comment from Mary S below – thanks Mary S, it’s good to get the facts all squared away. I am still a bit confused since the ingredients’ list of the tempeh I used did include rice; at the end of the day my confusion does not matter change the fact that the food was delicious], so although it is dry, it does feel sticky to touch and just a bit slimy. FYI: I am not saying this to freak you out, rather to forewarn you so that you are not as surprised when you start handling it as I was – I thought my tempeh has gone bad and wanted to throw it out! But, I double-checked the date on the bag, regained my cool and went for it.
I decided to start simple and build from there, so this Miso Glazed Grilled Tempeh is more or less my starting point. The brand of tempeh I got is Lightlife and the two varieties I started with are their Organic Garden Veggie and Organic Soy Tempeh. Each package is half a pound (about 250 g), and the block of tempeh comes in a vacuumed-sealed package, that’s within a sealed plastic bag, so there are two bags to remove! I used both blocks at the same time, since one just did not seem enough to make for the end of the week Friday dinner.
The first thing I did was to fire up the grill. I have a gas grill and it takes it about ten to fifteen minutes to get to be sizzling hot, with burners going at full blast and the lid down. That was just enough time for me to prep the tempeh and the glaze. For tempeh, I placed the pieces into a pan large enough to keep the pieces flat, covered with water, brought to boil and boiled for four to five minutes per side – I did flip the pieces over once since the pan I was using was shallow and the water did not fully cover the tempeh, so if your tempeh is fully covered you will not need to do the flip! After about ten minutes I took the tempeh out, pat dried the pieces, and left them uncovered on some paper towels.
While the tempeh was boiling and the grill was heating up, I mixed together a simple glaze with some soy sauce, Worcestershire sauce, white miso glaze and vegetable oil. I spread the glaze over the tempeh pieces just before placing them on the grill the glazed side down. Then I glazed the top and let it grill for about five to six minutes. By that time the grill marks will be perfect, and the pieces ready to be flipped. I did reglaze both sides again and flipped again, so that at the end each side got two layers of glaze and about eight to ten minutes of grilling, so in total the grilling bit took less than twenty minutes. If you are in a rush, you can definitely skip the reglazing, but if you are outside hanging around the grill with friends and family and enjoying the lovely summer evening, then why not give tempeh extra love, glaze and grill time?
Let grilled tempeh rest for just a second, then slice and serve. You can serve it in a hamburger or a hot dog bun with the usual trimmings, but note that condiments, like mustard and ketchup, are going to overpower the flavor of the grilled tempeh. So, I recommend serving tempeh with a side of coleslaw and baked, or barbecue beans, which is how I had mine. Add to that a glass of cold beverage of choice, and what can be better?
Miso Glazed Grilled Tempeh Sliced, via Eat the Vegan Rainbow
Miso Glazed Grilled Tempeh
What you’ll need:
2 8 oz (227 g) blocks of tempeh (any variety and brand you like)
2 tablespoons soy sauce, reduced sodium
2 tablespoons white miso paste
2 tablespoons vegetable oil
1/2 tablespoon Worcestershire sauce (vegan)
Oil for oiling the grill grates
What you’ll do:
Prepare your grill like you normally do. I recommend getting the grill really hot and letting any bits and pieces from the previous grill session burn off, then scrapping the grates with an appropriate type of a brush (please be careful here because you can really damage your grill grates if you don’t follow the manufactures instructions and recommendations), and then oil them generously with a paper towel dipped in vegetable oil – please use long tongs here to prevent getting burned!
Take tempeh out of the wrapping and palace in a pan large enough to hold it flat and straight. Cover with water, bring to boil and let it boil for 5 to 10 minutes. Make sure you flip the tempeh half way through if your tempeh is not fully submerged in water. If it is, no mid-way flipping is needed!
While tempeh is boiling and the grill is getting hot, mix together the glaze by whisking together soy sauce, vegetable oil, miso paste and Worcestershire sauce. The glaze should be smooth, but even if you have few lumps in there don’t worry about it – it won’t matter at the end.
Place the boiled tempeh onto some paper towels and gently dry.
Using a (silicone) food brush spread the glaze liberally ove the tempeh and place the piece of tempeh glaze side down on the hot grill. Keep the gas grill on medium high heat, or if you are using a charcoal grill keep it as hot as you would when grilling vegetables, veggie burgers, or mushroom or tofu steaks. Grill the glazed tempeh 5 to 6 minutes on one side, and while it is grilling apply the glaze on the other side, flip over, grill for 4 to 5 minutes, glaze, flip, grill, repeat for as long as you like.
Let stand for just a moment or two, slice and serve!!! This Miso Glazed Grilled Tempeh will work as an appetizer, finger food, as well as dinner, especially with some grilled corn, veggies, coleslaw, baked or barbecue beans, or as a salad topping…
Roasted Tofu Steak Tips, via Eat the Vegan RainbowOne of the most frequent questions that I get when I tell people that I am vegan is: “What do you eat?”. And when I explain I eat plants, then the next question is almost without a fail: “Where do you get your protein from?”.
Putting aside the fact that gluten is a protein and that, therefore, you can get protein from eating wheat bread, there are numerous other plant sources of protein. Peas and quinoa come to mind, as well as beans and chickpeas, edamame, nuts and nut butter, tempeh and tofu. This last one, tofu, does raise some eyebrows and comments along the lines of “Tofu is so bland… How do you make it taste any good?”.
Being bland is what makes tofu perfect. It is a blank canvas, ready for you to paint flavors on. I use tofu all the time, and it works in Indian inspired dishes, like Saag Paneer and Mango Chickpea Curry Tofu, in Pad Thai, grilled, as well as Popovers. An eye opening moment for me came when I realized how super easy it is to transform tofu into incredible bacon!
Tofu comes in couple of different consistencies and textures so you can pick and choose from silken to extra firm to match the recipe you are making. Extra firm tofu works well for applications where it is critical that the final product is solid and slightly chewy and that’s why I went with extra firm tofu in this Roasted Tofu Steak Tips recipe.
Most tofu recipes start with tofu pressing and draining. You can go professional and get yourself a tofu press, but I am keeping it low tech (for now) and usually just take a block or two of extra firm tofu, drain it and then leave it in a strainer for couple of hours. That usually does the trick for me. Once pressing and draining is completed, you can slice the tofu any way you like or crumble it if you are making something like a ground beef substitute.
Next comes adding flavors, which usually involves marinating, meaning letting your tofu sit in a mix of species, aromatics, and usually some liquids (oil, vinegar, citrus juice of choice, liquid smoke, or other sauces). I recommend being patient and leaving the tofu to marinate for at least an hour. But, if you are pressed for time you could use the marinade ingredients and cook the tofu in them. You will end up with something really flavorful that way as well, just not necessarily grill or broiling friendly.
These tofu steak tips can be roasted, as I did here, but they can also be made into kebabs and grilled. That was my original plan but rain interfered and I went from outdoor grilling straight into the hot oven. The tofu steak tips did not mind at all and come out absolutely delicious!
Roasted Tofu Steak Tips, Plated via Eat the Vegan Rainbow
Roasted Tofu Steak Tips
What you’ll need:
2 16 oz. block tofu, extra firm
1/3 cup olive oil
1/3 cup Worcestershire sauce (vegan)
1/3 cup soy sauce
1/3 cup balsamic vinegar
3 cloves garlic pressed
1 tablespoon dry basil
1 tablespoon dry oregano
Zest of one lemon
What you’ll do:
Drain the tofu and press it using a method that works for you. I usually leave my blocks of tofu in a strainer for few hours on the kitchen counter or overnight in the refrigerator. You can do whatever your normally do to prep your tofu.
Once drained, cut the tofu into 1 in x 1 in (2.5 x 2.5 cm) cubes.
Combine all the other ingredients in a large freezer or food storage bag (or a large container with a flat bottom) and mix everything together. Add tofu cubes and let the tofu marinate for 1-2 hours.
Preheat the oven to 450 F (230 C).
Line the baking sheet with parchment paper and spread the marinated tofu cubes on it. Make sure to leave some space between them for more even roasting.
Put the tofu into the oven and roast for 15 minutes. Check, turn over if needed and roast for another 10 minutes. The tofu steak tips should be brown, with charred edges. You can adjust the roasting time to fit your taste preference – I like my steak tips charred and blackened!
Take out of the oven and enjoy with a salad, roasted corn, mashed potatoes, coleslaw, corn bread, pasta salad, or anything else you like. These tofu steak tips are versatile and are a great match for many of the summer favorites. And as I already mentioned they can be made into fantastic kebabs and grilled!
“Beef” Veggie Burger, via Eat the Vegan RainbowFor many researching and investing into meat alternatives, making a plant-based burger that looks, cooks and tastes like real beef has become one of the most important goals. Several years ago, I heard Pat Brown, founder and CEO of Impossible Foods, give a talk and one thing Pat mentioned was how incredibly hard it is to re-create a plant-based hamburger. Burgers are such a huge part of American culture, so offering a meatless alternative is unlikely to convince anyone to go meat-free unless that alternative is spot on, juicy and meaty.
But, lets be honest: veggie burgers are definitely not hitting this mark. For the most part, they are a mix of vegetables thrown together and shaped into a patty that usually falls apart as you are grilling it. I know this sounds mean, but it is what it is. I myself have been down the road of trying to figure out how to keep my veggie burgers together while at the same time make them taste authentic many times before. Some attempts have been a total failure, some, like this Roasted Red Peppers and Chickpea Burger, have been a success.
Don’t get me wrong – I love veggie burgers! They have amazing flavors and textures, and they are fun to eat. Also: I am not a fan of hamburgers, but I live in a land of hamburger lovers so I agree with Pat Brown’s general idea that in order to convince people to give up their meat we need to offer them something incredible to sizzle on the grill and stick inside the bun. And just in case you are wondering whether there is any such thing available in retail stores, you should head out to your local Whole Foods Market and get some Beyond Meat‘s The Beyond Burger. I had it few nights ago and it blew my mind!
So although I am most certainly going to be getting those burgers again, they do come with a relatively unfriendly price tag, which means I am where I started: trying to home brew an impossible, incredible and all-around awesome meat-free burger. This recipe for A Very Beefy Veggie Burger is one step closer to achieving that ideal combination of flavor, texture and grillability and the tip top secret of this recipe is to use TVP (Textured Vegetable Protein) without pre-soaking and letting it absorb all the ground mushroom and mashed beans juices. This batch of burgers was cooked in a grill pan because the weather in New England has been very rainy lately and I just could not wait to make these, but the patties are firm enough to withstand the ultimate test of an outdoor grill.
As for condiments, sky is truly the limit. I paired these burgers with some Vegan Herb Mayo, cucumber and tomato slices, butter lettuce and Roasted Red Beets Hummus, but you can use anything you like. The flavor of these patties is very, very similar to what you can expect from a hamburger, but the texture and juiciness does need more work. Still, I will try, try, try again until I develop the recipe for a mouth-watering, and inexpensive, beef-less burger. As Silicon Valley is now funding these types of efforts, perhaps I can re-write the stereotype of “two guys in a garage” into “one woman in the kitchen” story? That would be fun!!!
Very Beefy Plant-Based Burger, via Eat the Vegan RainbowNote: Just in case you are asking yourself why we should go meatless, Bill Gates offered some well-articulated arguments in the Future of Food post few years ago.
Drain and rinse the beans. Pat dry and place in the large mixing bowl.
Use a food processor to grind the mushrooms. Add the mushroom meat to the mixing bowl.
Add TVP and the rest of the ingredients (except the cooking spray) into the bowl and use the immersion blender to blend everything into a mixture that looks like ground beef, with the same type of texture. You can also do this step in the food processor.
Let the mixture stand for 30 to 60 minutes on the kitchen counter, then shape the burgers and leave them in the refrigerator for about an hour to firm up. This will give TVP time to soak up all the juice from mushrooms and bean and soften just enough to give a nice ground beef texture to the burger without making it too soft and crumbly.
Heat the grill or the grill pan on high and make sure that your grill grate or your pan are generously oiled. Reduce the heat to medium before putting your burgers on. Grill for 4 to 5 minutes on one side, then flip over and grill for additional 4 to 5 minutes.
Put your burger buns on the grill for a minute or two to toast them gently, then top with mayo, burger, cucumber slices, tomatoes, lettuce, roasted beet hummus or whatever floats your boat – and bite in!!!
Correction: the original post said “yeast extract” but that’s not correct. I used nutritional yeast so I made the correction now. Thanks to Mary Dion for flagging this to me on Facebook!!!
Grilled Portobello Mushroom Steaks, via Eat the Vegan RainbowIt’s that time of year in New England when we jump out of our winter lairs and onto our no-longer-snow-covered decks to fire up the grill. I love grilling, and if anyone ever told you that grilling is a guy thing, don’t listen to them as grilling is for everyone! There is something very primal that comes to forth when you find yourself outdoors, standing in front of the fire and flames, and you hear the sizzle of delicious food getting caramelized, charred and transformed into the mouth watering delights.
I love using my grill, especially during the summer months, because it gets the food cooked fast without heating the kitchen and makes clean up a breeze. Add to that a delight of summer evenings and eating outside, and it can hardly get better than that. I make piles of grilled vegetables and have even developed an awesome way of making grilled pizza, which I’ll share in another post.
Here I’ll share how to get the perfect Grilled Portobello Mushroom Steaks as grilled steaks are the quintessential example of this type of cooking. For this recipe to work you do need to use very large portobello mushroom caps. The ones I found in our local grocery store are about 4 to 5 in (10 to 12 cm) in diameter, and that’s the size I recommend for a recipe like this as the bigger portobello caps will hold up to grilling much better. Most of the really large portobello mushrooms will come without stems, but if the ones you get include the stems I recommend using the stems to make your own vegan “scallops”.
The recipe is really very simple and the mushroom steaks cook very quickly. The most time consuming step is putting the marinade together and letting the mushrooms soak up some flavors, which will take anywhere between one to two hours. If you are pressed for time you can skip this step and simply apply the same marinade liquid to the mushrooms as they grill.
Are there any tricks to getting a perfect grilled portobello mushroom steak? Yes, there are a couple. The first one is really more of an universal grilling advice than mushroom specific: make sure your grill grate is clean, hot and well oiled (for more on how to prepare your grill for perfect grilling results check this post out). This will help the food go on and not stick to the grates. I recommend using paper towel dipped in oil and a pair of long kitchen tongs to do this. The second trick is mushroom specific as I recommend grilling the mushrooms cap side facing up first in order to allow for all the excess moisture to drip out, before flipping the cap over. Finally, if you are into the grill marks you need to remember to rotate your cap by 90 degrees half way through the cooking.
Following these easy steps will bring delicious grilled mushroom steaks to your plate!
Grilled Portobello Mushroom Steaks Step 1, via Eat the Vegan Rainbow
Grilled Portobello Mushroom Steaks Step 2
Grilled Portobello Mushroom Steaks Step 3
Grilled Portobello Mushroom Steaks Plated
Grilled Portobello Mushroom Steaks
What you’ll need:
(for 4 servings)
4 extra large portobello mushroom caps
2 tablespoons A.1. steak sauce (or any other steak sauce, homemade or store-bought)
2 tablespoons soy sauce
1 tablespoon olive oil
1 teaspoon garlic powder
1 teaspoon onion powder
2 teaspoons smoked paprika
2 teaspoons chili powder
Some oil to brush your grill
What you’ll do:
Wipe the portobello caps with a paper towel to remove any dirt. Set aside.
Whisk together all the rest of the ingredients in a container large enough to hold all four mushroom steaks.
Place the mushroom steaks into the marinade and make sure they are fully coated and covered. Marinate for 30 to 60 minutes. If you decide to skip this step simply coat the mushrooms with the marinade before placing on the grill.
While mushrooms are marinating, prepare your outdoor grill for medium high heat grilling. If you have any questions on how to do this, Whole Foods Market has a post that can help. Don’t have an outdoor grill? You can use the indoor grill or a grill pan for this recipe as well. In that case simply follow whatever steps you usually take when grilling indoors over medium high to high heat.
Place your mushroom steaks on the grill top side up, spread some marinade over the steaks, and grill for 4 to 5 minutes.
Spread some more marinade on top, turn the caps over and grill top side down for 3 minutes, then lift up and rotate by a very rough quarter turn, and grill for another 2 minutes. You can skip this rotating step. It does not change the flavor of the steaks, but it does make for those well-known (and loved) grill marks.
Enjoy the perfect grilled portobello mushroom steak with your favorite sides, like Cauliflower Mash and a field greens salad!