Curried Potato Stew

Curried Potato Stew
Curried Potato Stew, via Eat the Vegan Rainbow

This is it, I suppose! At this time of social distancing (and, yes, there is a pandemic going on and yes, if you are not social distancing as much as you can and making light of all this you are in self-denial; and yes, if you think that COVID-19 cases will magically disappear by Easter you are in double self-denial) it is time to get creative with things you may have in your pantry and things you may be able to get from your grocery store.

So, for the next few months what you’ll get here are recipes that are super simple, mostly one pot, and include ingredients like rice, beans, potatoes, carrots, corn, onions… We are back to basics here, like this Italian cuisine inspired Rice and Beans I shared last week!

I will also keep thing brief and to the point. More cooking, less talking! So, here we go: this week I am sharing a wonderful dish that is really all about potatoes. All you need is some onion, garlic, carrots, potatoes and coconut milk or cream. And if you don’t have coconut milk on hand, your can use coconut oil, or a bit of butter (vegan, if you are vegan, or any other kind if you are not – I am totally non-judgmental of people and their food choices and I hope all can just enjoy the meal) and some milk or cream (again: which kind is up to you). The main point of adding coconut milk is to create a rich stew that’s smooth, silky and dense – something that will fill you up and provide some good old comfort in a bowl.

What makes this dish pop are spices! In this case we will be using curry powder and garam masala, two spices I recommend having on hand at all times! (I’m fresh out of curry powder, so that may be a spot of bother to be honest). If you don’t have these, you may want to add a bit of cumin powder and a bit of paprika, or just a bit of nutmeg, a hint of cinnamon, or a dash of allspice. Any combination of these may work depending on your individual preferences, so if you are improvising the best advice I can give you is to follow your nose!

Lastly, I recommend using a heavy pot for this. My go-to is a Dutch oven, but any heavy pot will do. Take care, eat well, pamper yourself and stay well!
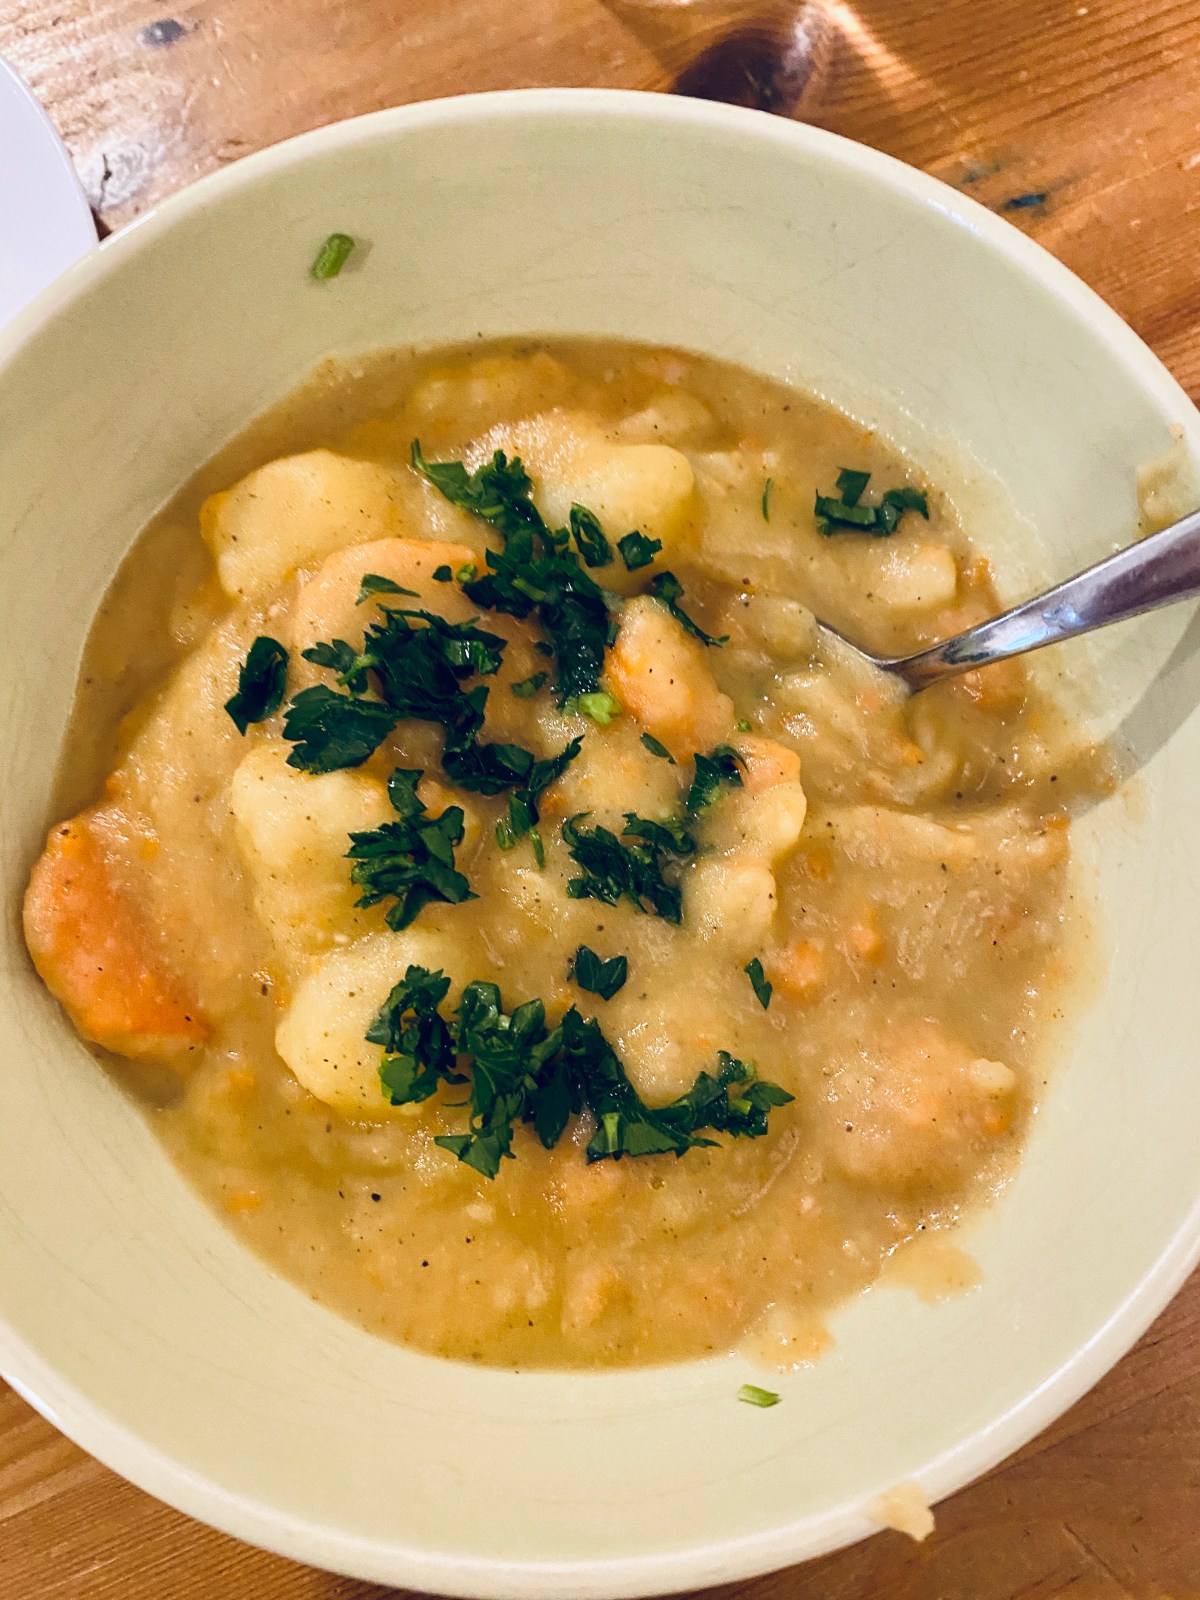
Curried Potato Stew

What you’ll need:

  • 4-5 large potatoes (I prefer Russet, but any more starchy variety will do), washed, peeled and cut into 1 inch (2.5 cm) cubes
  • 4 large carrots, washed and sliced into carrots rings (if you have a 8+ year old kid who needs something to do during this period of no school they can help chop potatoes and carrots)
  • 1 yellow onion, diced
  • 3-4 cloves garlic, minced
  • 1 13.5 – 14 oz (about 400 ml) can coconut milk or cream (alternatively, 1 cup of cream, or 1 cup of milk plus 2 tablespoons of butter will work)
  • 1 tablespoon curry powder
  • 2 teaspoons garam masala powder
  • water – enough to deglaze the pan (see step one below) and cover your vegetables (step 3)
  • optional toppings – freshly chopped cilantro or parsley, freshly squeezed lemon or lime juice (or if lemons or limes are not within an easy reach you may want to add a small amount of clear vinegar (red wine, apple cider, white or rice will all work here, not sure about balsamic), and a drop or two of hot sauce

What you’ll do:

  1. Place your heavy pot over the high heat and add your onions, carrots and garlic to the pot. You may use some oil if you are using, but you don’t really need to. You will be adding lots of fat later (with all that coconut milk/cream or milk/cream/butter alternatives). Stir frequently to prevent veggies from sticking to the bottom of the pan. Add some water (in 1/4 cup increments or so) to deglaze the bottom from time to time. Brown the vegetables for about 5 minutes.
  2. Add the potatoes, coconut milk (or alternatives) and spices. Mix well and let cook like this with frequent stirring for 2-3 minutes.
  3. Add enough water to cover the vegetables well, bring to boil, then lower the heat to a simmer, cover with a lid and let simmer for 20-30 minutes until all the vegetables are cooked through. The exact time will depend on how finely you’ve chopped your vegetables!
  4. Once the veggies are cooked, use a stick blender to blend approximately half of the pot into a smooth, silky mix (you can also use a blender to do this, or even your potato masher).
  5. Serve hot in a bowl, topped with any, all or none of the topping listed above. Enjoy!
COPYRIGHT © EAT THE VEGAN RAINBOW, 2020


Slow Cooker Hodgepodge

Slow Cooker Hodgepodge
Slow Cooker Hodgepodge, via Eat the Vegan Rainbow

A slow cooker, also known as Crock Pot (which is a brand name I think), may seem like one of those kitchen gadgets that you’ll get, use once and forget. Although I use my slow cooker once a month or so, it is absolutely wonderful to have around. There have been many instances when my weekends were busier than my work days (and I do all my cooking on weekends) and slow cooker came to the rescue. I would set the thing up in the morning before I got out the door, and the dinner would be ready by the time I came back in the evening, warm and delicious!

For example, the recipe I am sharing here was the one I made for a dinner party – and everyone walked away with their bellies and taste buds completely happy!!! That’s another reason to get a slow cooker – it can really help with all those dinner parties and pot lucks. The crock pot serves not only to cook food but can hold food warm for hours.

My favorite thing to make in a crock post are sort of stews – hearty dishes with a handful of ingredients that are full of flavors and warmth. This jackfruit stew is a good example (and I also used jackfruit to make a “chicken” tikka masala in a slow cooker as well as BBQ pulled pork), as is this tofu-mango-chickpea curry.

The inspiration for this hodgepodge – which technically means “confused mixture” – was all the great vegetables that were in my weekly CSA share (CSA stands for Community-Supported Agriculture and is a program in the area where I live that supports local farmers and give local folks like me access to farm fresh produce). The recipe uses corn (kernels only), kale, potatoes, carrots, celery, and onion. All these ingredients work together well, and I don’t recommend that you make some sweeping swaps. Things that would likely work are using peas instead of corn, using rutabaga or turnip instead of potatoes, and chard, collard greens or spinach instead of kale.

However, there really is no substitute for the mirepoix – carrots, onions and celery. This makes the base of the dish and I can’t think of the ways to sub these – my apologies for those of you with onion allergies! Usually, mirepoix ingredients are sautéd; however, the slow cooker does not have this function. So, I recommend either sautéing diced carrots, celery and onion in a pan over medium-high heat for 8-10 minutes, or mixing the diced vegetables with some oil and putting them in a microwave oven for about 5 minutes. This will help brown and soften them, and will help with flavors!

Another shortcut that you can take when using a crock pot is to use a liner – this will make your clean up really, really quick! A liner is a special type of plastic bag that you put inside your crock pot and place all ingredients in it. The food cooks as it does normally and you end up with a clean pot afterwards. What’s not to love!!!

In addition to veggies, what makes this an amazing feast are the spices, curry powder and bay leaves, and coconut milk, which gives this stew its creaminess. Serve over rice or couscous, and perhaps with some coarse salt (which is what I topped mine with). Enjoy!

Slow Cooker Hodgepodge

Slow Cooker Hodgepodge

What you’ll need:

  • 1-1.5 lbs (500-800 g) white potatoes
  • 4 ears of corn, just the kernels (or 4 cups frozen corn kernels, defrosted, or about 2 cans (15 oz; 400 g) of whole kernel corn)
  • 1 bunch (6 cups) kale (or chard or collard greens), just sliced leaves, stems removed
  • 4 large carrots, peeled and diced
  • 6 talks celery, sliced
  • 1 onion, diced
  • 1 tablespoon curry powder
  • 3 tablespoons tomato paste
  • 2 cups vegetable stock
  • 1 can (13.66 fl oz; 400 mL) coconut milk
  • 4-5 bay leaves
  • 1 tablespoon vegetable (or olive, or canola) oil
  • OPTIONAL: Rice to serve

What you’ll do:

  1. Wash, peel and chop the potatoes into 1 to 1 1/2 in (2.5 – 3.5 cm) cubes. Place in the crock pot that has been lined with a liner, if using.
  2. If starting from fresh corn, wash the ears, and using a sharp knife go down each ear and get just the kernels. If using frozen corn, it’s best to leave it on the kitchen counter overnight to defrost, but you can start from frozen as well. If using canned whole kernel corn, drain and rinse before using. Place over the potatoes.
  3. Wash, drain and de-vein the kale to remove all the tough stems. Chop the leaves into rough shreds. Place over the corn.
  4. Peel and dice the onions and carrots, and dice the celery. Place onions, carrots and celery into a microwave safe dish, mix with 1 tablespoon of oil, and place in a microwave for 5-6 minutes on high power. You can also sauté on the stove top. Pour over the potatoes, corn and kale.
  5. Place a non-stick frying pan over medium-high heat. Add the curry powder and dry toast for 1-2 minutes, then pour over the veggies in the crock pot.
  6. Pour the coconut milk, vegetable stock and tomato paste into a measuring cup or a mixing bowl large enough to hold everything. Mix together to combine. Don’t worry if there are chunks and clumps, but do give it a good mix. Pour over the vegetables in the crock pot.
  7. Give everything a good mix, tuck the bay leaves throughout the stew, cover with the lid and turn the crock pot on high heat for 6-8 hours.
  8. Serve over rice, or couscous, and sprinkle with salt (Note: this recipe does not use added salt, but you can add as little or as much salt as you like!).

Copyright © Eat the Vegan Rainbow, 2019

Vegan Olivier “Russian” Salad with Toasted Sesame Seed

Vegan Olivier Salad with Toasted Sesame Seeds
Vegan Olivier Salad with Toasted Sesame Seeds, via Eat the Vegan Rainbow

Salads come in many different shapes and forms. Some are light and simple, some are complex and filling. Many don’t even have any greens in them, although most do have vegetables, unless they are a fruit salad. It’s this last requirement for vegetables that makes this next dish technically a salad. Olivier Salad, also known as Russian Salad (Ruska Salata) in the parts of the world I grew up in, is the type of a salad you get to enjoy when you don’t have much access to fresh vegetables but have plenty of frozen, pickled or frozen vegetables on hand. And plenty of potatoes, of course.

Growing up, we used to make large bowls of this salad for every special occasion, and serve it as an appetizer. The traditional recipe uses boiled potatoes, carrots, and peas, as well as boiled ham and even eggs, and pickles – all finely diced and mixed with mayo and a bit of mustard. Serve this concoction with fresh bread, and you don’t need much more!

I’ve spruced up this recipe into an amazing vegan feast below by omitting the ham and eggs and using vegan mayo. My secret ingredients? Toasted sesame seeds and fresh dill!

I served this new take on the old favorite at a party recently and people of Russian, Brazilian and US origin all went crazy for it. I suppose deep down we all find messy flavors of mushy vegetables smeared in mayonnaise with hints of pickle juice comforting and lovable!

I hope you give it a try. Looking for one last insider tip? Try it with some corn bread – you will go bananas, I guarantee it!!!

Vegan Olivier “Russian” Salad with Toasted Sesame Seeds

What you’ll need:

  • 2 15 oz (425g) cans peas and diced carrots (or 1 15 oz (425g) can each of sweet peas and diced carrots); you can also boil your own 1 1/2 cup finely diced carrots and the same amount of peas
  • 3 14 oz (400g) cans whole white potatoes, or peel and boil two large potatoes until done
  • 6-8 large kosher dill pickles (not sweet pickles – those will not work here!)
  • 1 cup mayo (vegan)
  • 1 tablespoon dijon mustard
  • 1 cup toasted sesame seeds (toasted in a toaster oven or on the stove top – if using a stove top method please watch out and use a lid as seeds will start to “jump” out of the pan as they get heated
  • 1 cup fresh dill, finely chopped

What you’ll do:

  1. Chop all the vegetables that need chopping (carrots, potatoes and pickles) finely. Place in a large mixing bowl, add mayo, mustard, toasted sesame seeds, and chopped dill. Mix together until combined and leave in the fridge for at least 3 hours, preferably overnight.
  2. Serve with crackers, bread, corn bread or enjoy as is!

Copyright © Eat the Vegan Rainbow, 2019

Lentil and Pumpkin Meatloaf with Potato-Carrot Mad Mash

img_3570
Lentil and Pumpkin Meatloaf with Carrot-Potato Mash, via Eat the Vegan Rainbow

Meatloaf – that one dish that is universally despised yet it persists against all odds. During my meat eating days, I may have made meatloaf once or twice and it did not make a great impression. This Lentil-loaf is different. It’s full of flavor and lightness, while at the same time a little goes a long way.

The key ingredient are the lentils. They are one of those ingredients that can replace minced or ground meat in almost anything. I used them in Shepherd’s Pie, and in Lasagna, as well burgers, meatballs and in that staple of vegan cooking, Lentil Soup. Lentils are cheap, available, nutritious, and lend themselves to many spice and flavor combinations.

In this meatloaf, lentils are the meat, but meat is not all it takes to make a loaf. So, to bind everything together I use a can of pumpkin. The pumpkin holds things together almost as good as an egg would. If your loaf turns out a bit softer than you like, add some oats or some bread crumbs to it. I also recommend letting the loaf sit for 15 minutes or so after coming out of the oven to firm up before serving.

Finally, what really makes a huge difference is what you do to onions and celery before you mix them all into a loaf. I recommend that you place the diced onions and celery, with a dash of cooking spray or oil, into a microwave for five minutes or so. You want the aromatics to soften and brown as they will not have a real chance to do so while the loaf is baking. This will add a nice sweet and savory tone to the loaf and help lentils and the pumpkin, as neither one has a strong flavor. To help them out even further, you will need to add some more umami-type of components, like the Worcestershire and the tamari sauce.

You can serve this meatloaf with any sides you like. Here, I paired it with mashed carrots and potatoes. Adding some carrots to the plain, white potato mash makes it more colorful, playful and in some ways healthier. Plus, it offers a break from the routine! You can make the mash withou adding any salt or butter (oil), it would taste just fine, especially when served with this lentil and pumpkin loaf which has plenty of flavor itself.

img_3572

Lentil and Pumpkin Meatloaf with Carrot-Potato Mash

What you’ll need:

For the Meatloaf:

1 yellow onion, diced

2 cloves garlic, crushed

4 stalks celery, diced

16 oz (454 g) brown lentils, cooked

1 15 oz (425g) can pumpkin

1/3 cup tamarind sauce

1 tablespoon Worcestershire sauce, vegan

1 tablespoon dried oregano

1 tablespoon dried basil

1 teaspoon chili powder

2 teaspoon smoked paprika

1/4 cup ketchup

Cooking spray

For Carrot-Potato Mash:

6 carrots, peeled and chopped

4 potatoes, white, peeled and chopped

1 tablespoon butter, vegan

1/4 teaspoon salt


What you’ll do:

  1. Bring 4 cups of water to boil and add the lentils that have been washed and sorted. Reduce the heat and simmer for 30 minutes until lentils are fully cooked. Drain the excess liquid and transfer the lentils into a large mixing bowl. Let them cool while you assemble the other ingredients.
  2. Peel, wash and chop the carrots and potatoes into smallish cubes of about similar size. Place in a large pot or a pressure cooker, cover with water, bring to boil and cook for 20 minutes if using a conventional method or 10 minutes in the pressure cooker. Drain from excess liquid, add the salt and butter and mash it with the potato masher. Place into a serving dish and cover with foil to keep warm until the meatloaf is ready. If you like you can even place the mashed carrots and potatoes into an oven safe dish and let the top get crunchy.
  3. Preheat the oven to 375 F (190 C).
  4. While lentils are cooling and carrots and potatoes boiling, dice onions and celery. Place into a microwave safe bowl, spray with cooking spray or with 1/4 teaspoon oil and microwave on high for 5-6  minutes, until soften and slightly browned. Add to the lentils when ready.
  5. Add the rest of the meatloaf ingredients (except ketchup), and using a stick blender form a well blended mixture. You can also use a food processor. In both cases, do leave some lentils whole to add to the texture of the final meatloaf.
  6. Line a large baking sheet, or a loaf pan if you prefer your meatloaf more loaf-y, with a foil, spray with come cooking spray to prevent loaf from sticking, form the loaf with your hands if you are using the baking sheet, and place into the oven (if you are using regular size loaf pans you will have enough of a mixture for two loafs).
  7. Bake for 20 minutes, take the meatloaf out and spread the ketchup across the surface, and bake for another 10 minutes. Take the loaf out and let it rest for 15 minutes before serving.
  8. Serve the meatloaf with the mashed vegetables and enjoy!

Copyright © Eat the Vegan Rainbow, 2018

Bubble and Squeak – Just in Time for the Holiday Leftovers

img_3704
Bubble and Squeak, via Eat the Vegan Rainbow

Don’t worry if you have never heard about Bubble and Squeak – that just means you are not English, you don’t have any friends or family members that are English, and you have never lived in England, all of which is OK. But, if you know what Bubble and Squeak is, you are probably already smiling to yourself and licking your lips in anticipation.

My own links to England are mostly literary, as I adore Agatha Christie and Terry Prachett, and have a special place in my life for J.R.R. Tolkien, Jane Austen, A.A. Milne and Lewis Caroll, although I’ve also ingested a huge amount of TV shows, devouring every episode of Midsomer Murders, Inspector Morse,  Inspector Lewis, Poirot, Miss Marple (with all different lead actresses), and Sherlock Holmes (with Jeremy Brett!) ever made. I also have a few English friends, who enjoy sharing their recipes with me, and that’s how Bubble and Squeak came up. With an adorable name like that I had to go for it.

Now, if I was naming this dish I would call it Leftover Mash, because that’s what it is. It is used in England to revive any leftover from a roast dinner or another large, formal meal that includes potatoes, meat and veggies. The leftovers are chopped up and fried together and apparently if you are using cabbage you will hear bubbling and squeaking.

For me, it was not a large amount of leftover that made me do it, it was my attempt to give way to give Brussels sprouts another chance. I grew up eating huge amounts of cabbage – it’s one of those cultural things mixed with practical where cabbage, and especially fermented cabbage (sauerkraut) can carry you through a rough and long winter at a time when fruits and veggies were a seasonal thing (those days are gone now, by the way, with  year round availability of almost everything!). And I love cabbage, and many of it’s cousins, like cauliflower (which I used here, here), broccoli, kale (like in this soup), radishes, and many, many more. the cruciferous vegetables, as they are collectively known, are numerous and diverse, and include many things I like to eat… and there is the Brussels sprouts.

I tried Brussels sprouts several times before, mostly roasted and once boiled (never again on that one!), and was left unimpressed. But, when Bubble and Squeak was mentioned it sounded like I should give the Brussels another chance. And it worked! At the end, I am not at all sure that what I made qualifies as a traditional Bubble and Squeak, however it is a good dish for anyone looking to jazz up their potatoes, or use leftover cabbage or Brussels sprouts. I think it would probably work with leftover collard greens and spinach as well, and will probably work with leftover sweet potatoes or mashed squash.

Having said all that I did have to add one secret ingredient to make this work. My secret is bacon, or to be more precise Rice Paper Bacon. The recipe for this bacon is very similar to the one for Tofu Bacon, which I loved, so I jumped on the opportunity to give this new thing a try. The rice paper bacon worked well, it delivered on the bacon aroma, and it was very crispy, so perfect for sandwiches or similar. It also worked well with the Bubble and Squeak to add the aroma and a boost the flavor. At the end, I think tofu bacon would have worked better for this dish, but rice bacon gets big thumbs up for being a very good meat-free, homemade bacon alternative.

So with some boiled potatoes, boiled Brussels sprouts, diced onions, and rice paper bacon in hand, you will be ready for the Bubble and Squeak. All you need to do is fry it all together, or if you are a bit more health conscious sauté with only a tiny bit of oil to help everything come together. Although I have not done so myself this time around – I was in a bit of a time pinch – you can finish the dish in the oven. In retrospect, letting Bubble and Squeak sit under a broiler for less than five minutes would have given it a nice look and an interesting crunch. For those of you who are traditionalists, you are supposed to flip the whole thing half way through and brown both sides that way. I’d say, with just a bit of broiling you can skip the flipping. The whole thing is supposed to be able to slide out of the pan, but even if it doesn’t it’s still an interesting dish!

This slideshow requires JavaScript.


Bubble and Squeak

What you’ll need:

1 yellow onion, finely diced

1 red onion, finely diced

4 potatoes, boiled and mashed, or 2 cups of leftover mashed potatoes

2 lbs (900 g) or 1 stalk Brussels sprouts, boiled and chopped, 2-3 cups leftover roasted or boiled Brussels sprouts, chopped

1 cup crumbled rice paper bacon or finely chopped tofu bacon, store-bought or home-made

2 tablespoons oil, vegetable or canola


What you’ll do:

  1. In a heavy pan – oven proof if you plan to finish the dish under a broiler – heat the oil over the medium high heat. Add the onions and let them sauté until fully caramelized. This will take about 10 minutes. Note: if you are using store-bought “bacon”, chop it finely and add it now, so that it had time to render any fat, as well as brown. If you are using rice paper bacon you will add it towards the end of the cooking process.
  2. Add the mashed potatoes. If you are using the leftovers, you don’t need to worry about making mashed potato from scratch. But if you are making this dish de novo then peel, wash, chop into cubes and boil the potatoes for 30 minutes or so, than mash until rustic – no perfect smoothness required here.
  3. Add the finely chopped Brussels sprouts. Same as with the mashed potatoes, if you are using the leftovers just chop and drop, if you are starting from raw boil the sprouts for 15 minutes or so, drain and squeeze the access water out, then chop finely and add to the pan.
  4. Mix well until everything is well-incorporated.
  5. Decrease the heat to medium and let your bottom get crunchy, if not even slightly burned. Add the bacon bits, mix in gently without disturbing your crunchy bottom (no jokes, please!), then flip the Bubble and Squeak so that the top can brown, or stick the whole thing under a broiler without flipping. You can also skip the flipping/broiling and enjoy as is!

Copyright © Eat the Vegan Rainbow, 2017

Spiralized Oven Fries

img_2888
Spiralized Oven Fries, via Eat the Vegan Rainbow

From time to time it’s good to do things just for fun, with no hidden agendas or pretense of deeper meaning attached. This recipe is my example of doing something just for fun and just because.

Few months ago I acquired a spiralizer, one of those machines you hook your vegetables or fruit to and get long, lovely and elegant noodles of various width. I’ve been using it to make great zucchini noodles, and I love it! But, there’s a limit to how much zucchini noodles a person can eat and still remain excited about seeing them on the plate, so I’ve been trying to pace myself and find other things to spiralize. I tried apples – that worked! I tried sweet potatoes and beets – ditto! I tried jicama – thumbs down, and the same goes for celeriac.

One vegetable that did work – meaning it produced a pile of lovely noodles – were baking (Russet) potatoes. So, I decided to have a bit of fun with them and bake them into little piles of potato yarn which we can call Spiralized Oven Fries. All you need to make this recipe happen is a muffin pan, some seasoning of your choice, and a hot oven. What you’ll get is a fun take on oven fries – the fries that look like spaghetti. And that is exactly what I said this post is all about – pure fun!

Spiralized Oven Fries

What you’ll need:

4 medium baking potatoes

Freshly ground black pepper

Freshly ground crushed red pepper flakes

Salt (optional)

Cooking spray, or olive oil

What you’ll do:

  1. Preheat oven to 425 F (220 C).
  2. Wash the potatoes well, and pat them dry.
  3. Spiralize the potatoes without peeling using a fine gauge spiralizer, the same you would use for making zucchini spaghetti.
  4. Season the potato “noodles” with any seasoning you like. I suggested freshly ground black pepper and ground crushed red pepper flakes, making this quite spicy, but you can use any seasoning you like. Let stand for couple of minutes.
  5. Oil the muffin pan with cooking spray or oil.
  6. Take a handful of potato noodles and gently place them into the individual muffin holes. Don’t press them too hard – let the noodles fall where they may, more or less, and try to arrange them so they fit neatly into the space.
  7. Place the muffin pan into the oven and roast for 30 minutes or so, until the tops start to brown. You don’t want them to burn but a bit of browning is nice.
  8. Take the fries out and let them cool for a bit. Then using a fork gently lift them out and plate them. The sort of “muffins” are not really held together by anything so they will fall apart if you are not careful. But if you are you will end up with a serving of fried that had never looked funkier. And that’s worth it!

Copyright © Eat the Vegan Rainbow, 2017