Roasted Asparagus and Spinach Dip

Roasted Asparagus and Spinach Dip, via Eat the Vegan Rainbow

Springtime is party time – I mean, after 6 months of winter we are finally seeing some sunshine and above freezing temperatures. And if you think I live in Alaska, think again – it’s the good ole New England and our snow just melted away two days ago!!!

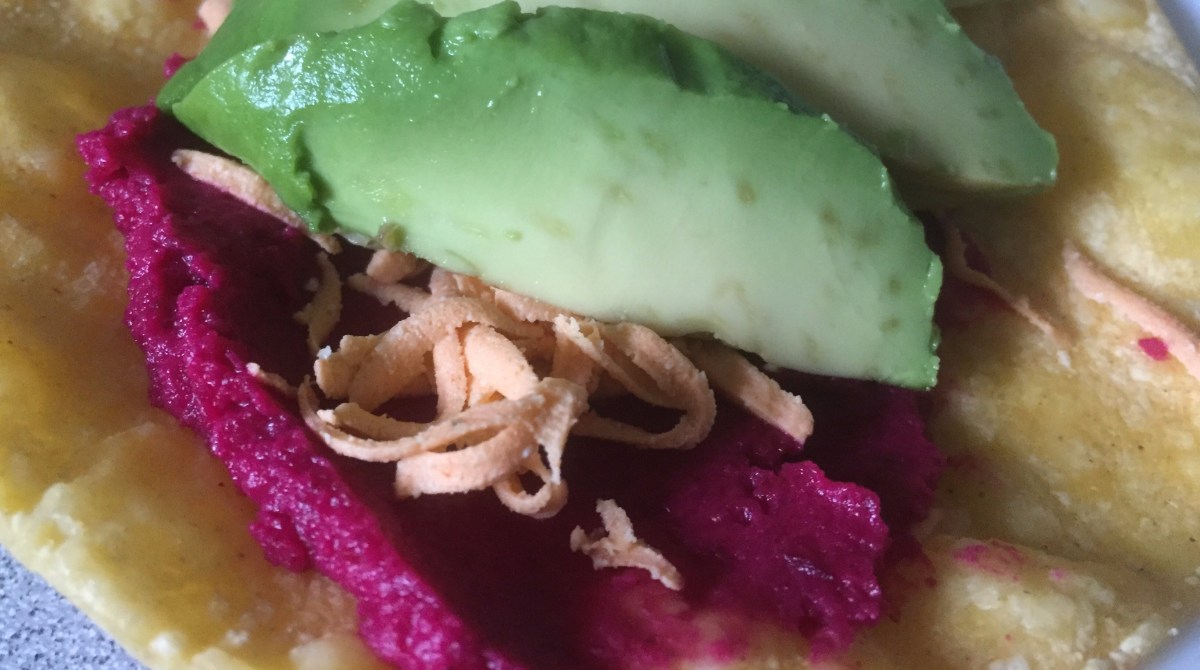
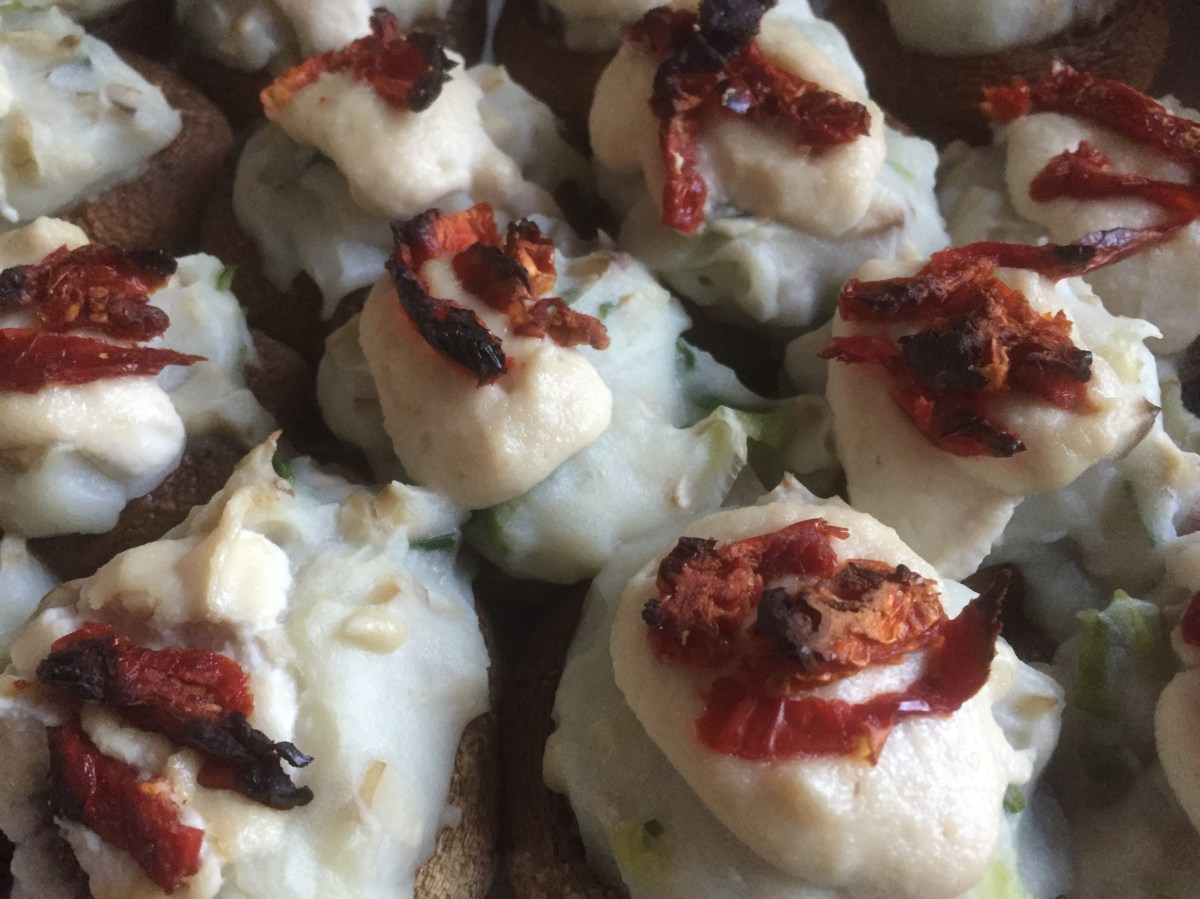
Plus: since the next winter is just six months away, we are now all scrambling to have as many outdoor parties and get togethers as we can, to maximize the fun and the sun. These days, when it comes to parties good, rich dips are a necessity. Salsa and guacamole, many different types of hummus, including one of my favorites – the roasted beet hummus, and even jackfruit “crab” dip are all fantastic and versatile. All you need to do is bring couple of select dips out, and with some crackers (like these amazing seed crackers), or fresh bread, perhaps with some olives thrown in for good measure, and maybe dolmas (I have a thing for dolmas!), you will have an instant feast!

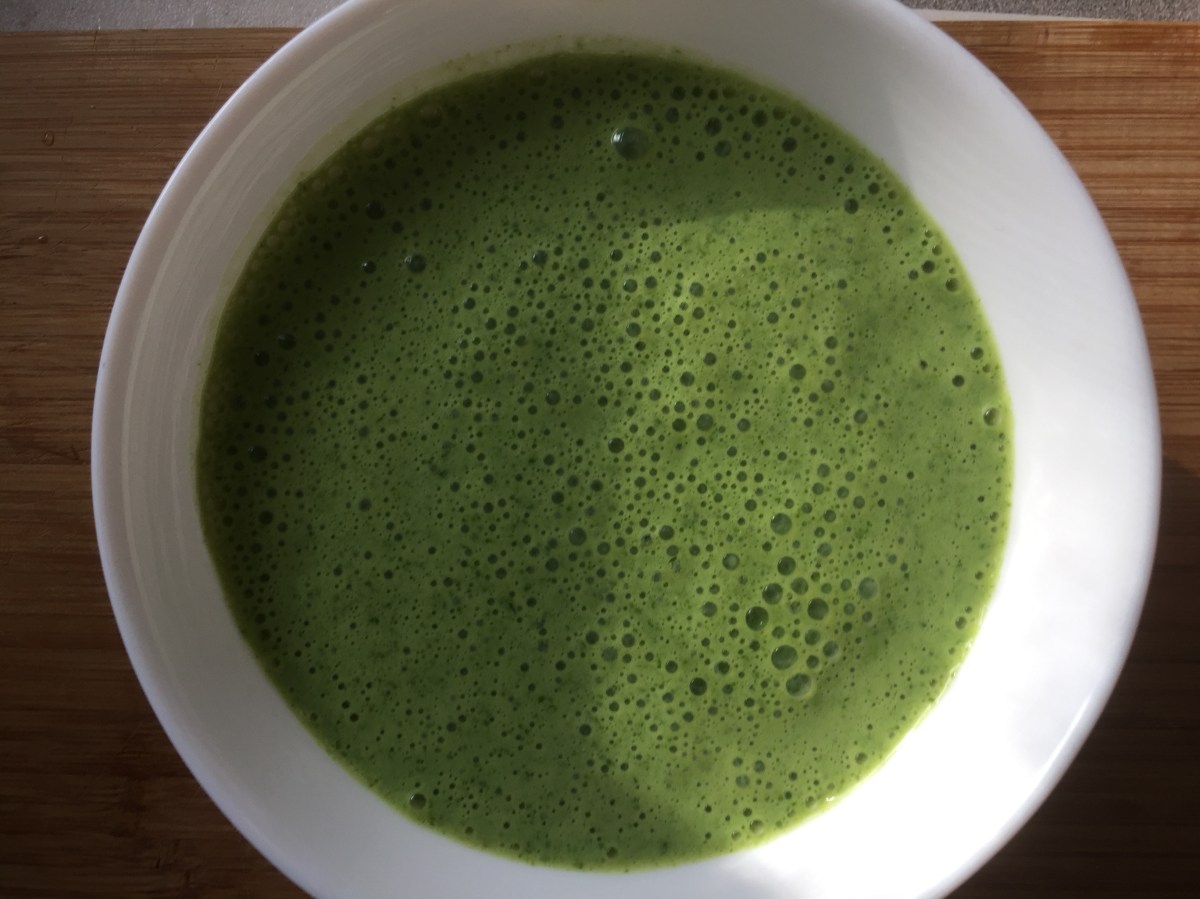
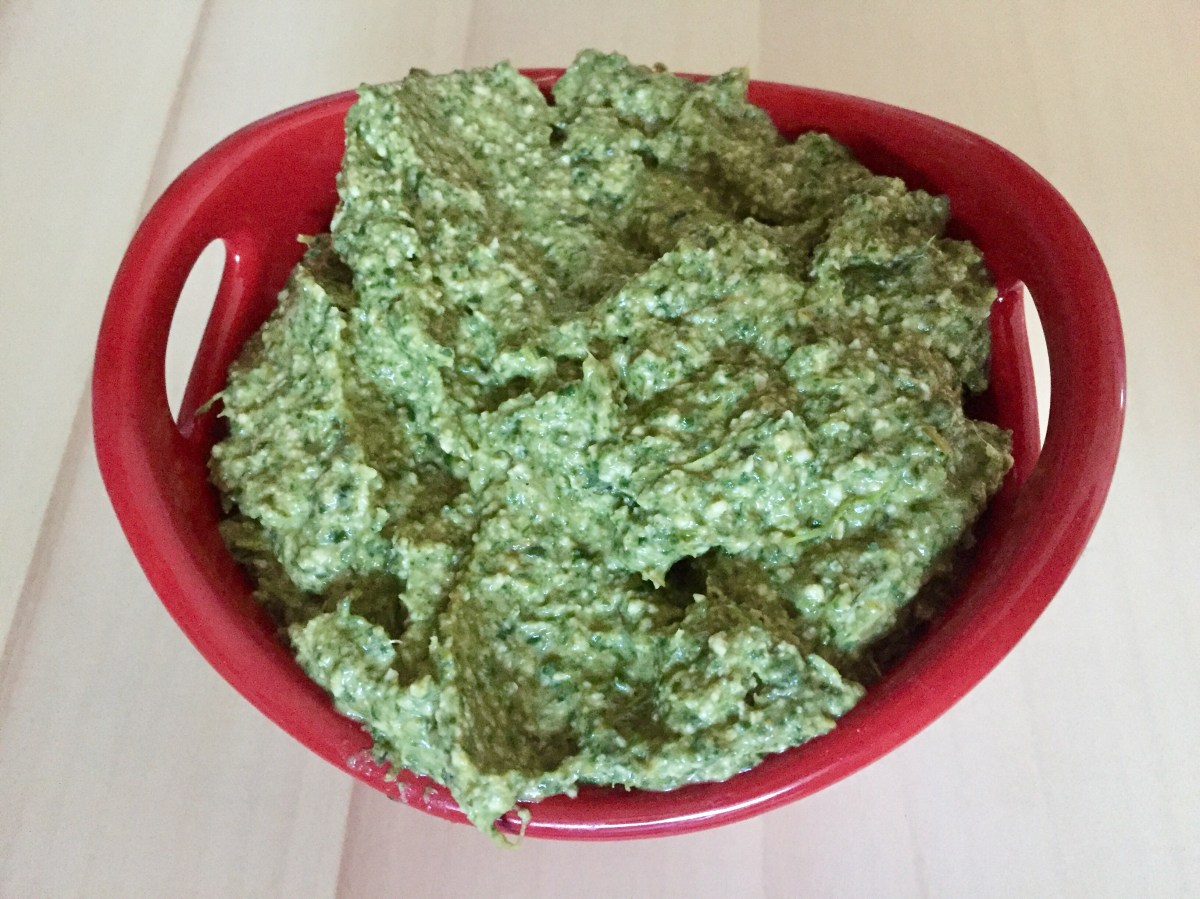
If you are looking for a dip the is a bit out of the ordinary, then look no further. This Roasted Asparagus and Spinach Dip has it all: charred roasted asparagus (you can grill them if you prefer), vibrant green spinach, loads of smoothness from the cashews, and subtle cheesiness from the nutritional yeast.

When you are using cashews to make vegan cheese, creams, sour cream or similar, it is best to use raw cashews and to soak them in cold water overnight – do this in the fridge, please! The soaking softens the tough nut and make cashews much easier to blend into smooth and silky consistency.

Depending on the type of blender you have you may want to start by adding liquids first, than thawed spinach (I find that using frozen spinach that has been thawed out and gently squeezed works well here), then asparagus, nutritional yeast, lemon juice and zest, and finally cashews that have been washed and drained. The stronger the blender, the smoother your dip can get. I like a bit of a texture in the dip, but it is up to you to decide how much blending makes sense based on your preference.

Enjoy this dip immediately, and although it can store for a day or two, you won’t need to worry about that – this dip will be long gone!!!

img_6229


Roasted Asparagus and Spinach Dip

What you’ll need:

  • 1 bunch of asparagus, trimmed (about 1 lbs (454 g))
  • 2 cups frozen spinach
  • 1 cup unsweetened, plain almond milk
  • 1 cup cashews, soaked overnight, then drained and rinsed
  • 1-2 tablespoons nutritional yeast (adjust to taste)
  • 1/2 lemon, juice and zest
  • 1/4 teaspoon salt
  • Cooking spray


What you’ll do:

  1. Preheat oven to 425 F (220 C), or the grill to the same temperature.
  2. Wash and trim the asparagus. Try to remove as much of the wooden part of stems, then spread the spears on the parchment paper lined baking sheet. Spray with cooking spray and roast for 20-30 minutes with occasional stirring. You can also grill the asparagus. Either way you are looking to cook the asparagus through while letting it caramelize and char.
  3. Place all the ingredients into a blender. Nutritional yeast is an acquired taste and you may want to add just a bit (1 teaspoon or so) and check for taste before adding more. Blend until smooth, then serve with your favorite chips, pretzel sticks, bread… The color of this spread is fantastic, and it goes well with Easter, being green and fresh. Enjoy the spring!

Copyright © Eat the Vegan Rainbow, 2018

Oven-fried Jalapeño Tapioca Pearl Fritters with Yogurt Sauce

img_3423
Oven-fried Jalapeño Tapioca Pearls Fritters with Yogurt Sauce, via Eat the Vegan Rainbow

You are probably thinking to yourself “Baked Jalapeño Tapioca Pearl Fritters!? What on Earth is that? And why would anyone want to try it?”. Well, I can’t blame you for feeling that way. I would not have made these ever has it not been for a huge kitchen mistake. What I wanted to do was make a batch of Sabudana Khichdi, but my mind was on autopilot and instead of using cold water, I soaked the tapioca pearls in hot water. Unfortunately, this resulted in a pile of messy and sticky tapioca pearls, definitely not fit for Sabudana Khichdi.

It seemed such a waste to just dump everything out, so I threw in some roasted jalapeño peppers, roasted green chilis, coarse corn meal and some nutritional yeast, with a dash of oregano and garlic, and created little fritters. These went into the oven – no deep frying in my house – and came out fragrant, crunchy and delicious.

They had quite a bit of heat and punch, so I paired them with a yogurt sauce to take the edge off. If you prefer less heat in your food, dial back on the amount of jalapeños you use, or just use more yogurt sauce which has a gentle, soothing effect on the overheated taste buds. Enjoy with the side of a salad for a light meal, or serve as an appetizer with a punch.

66DBC493-49E1-4E11-A444-8BA5EB327C2E

Oven-fried Jalapeño Tapioca Pearl Fritters with Yogurt Sauce

What you’ll need:

2 cups tapioca pearls

4 cups hot water

3 tablespoon nutritional yeast

1 can chilies

1 can jalapeño

1 tablespoon oregano

2 teaspoon garlic

1 cup coarse corn meal

1 cup almond or cashew yogurt

1 tablespoon chopped cilantro

1 tablespoon lime juice

Cooking spray

What you’ll do:

  1. Start by soaking tapioca pearls in hot water for 2-3 hours. The pearls should absorb all the water and be very sticky.
  2. Add all the rest of the ingredients except yogurt, cilantro and lime juice and mix everything well together.
  3. Using your hands, form tapioca pearl balls that are about 2 in (4-5 cm) in diameter and arrange them on a baking sheet lined up with parchment paper. Spray the fritters with some cooking spray and place in the oven that has been preheated to 350 F (175 F). Bake for 20 minutes or so, until the fritters get that nice golden-brown look.
  4. Let the fritters cool before serving, and while they are cooling whisk together the yogurt sauce by mixing yogurt, cilantro and lime juice together. Serve drizzelded over the fritters or as a dipping sauce.

Copyright ©Eat the Vegan Rainbow, 2018

Unbelievably Easy Baked Polenta Sticks

img_3352
Baked Polenta Sticks, via Eat the Vegan Rainbow

I was raised eating polenta with milk and sugar for breakfast. As I grew up and started experimenting with my food, I would add sour cream and even ajvar, the roasted red pepper and eggplant spread many associated with Bulgaria and the South East Balkans. But even with these add-ons, polenta remained a breakfast food.

So, I was quite surprised to discover that fancy Italian restaurants include polenta on their dinner menus. Of course I had to try it, and I liked it! I actually never met a polenta I did not like. And as a cook it’s something that you can whip together in minutes!

Polenta is basically boiled coarse corn meal, so it is in the same food family as grits. And, practically speaking it is as easy as it sounds – you bring a pot of water to boil and you add some corn meal to it while stirring constantly and furiously to prevent clumping. You let the pot boil for five minutes with constant stirring and the polenta is done.

The recipe here is two steps removed from the basic polenta. First, after you make the polenta according to the instructions on the box, you will need to pour it into a deep baking dish which is either lined with some parchment paper or well sprayed with the cooking spray. Spread the polenta into one even and smooth layer and let it set for at least an hour.

Once the polenta has set and hardened you will be able to slide it out of the dish and onto the cutting board. Slice polenta into 1 x 2 in (2.5 x 5 cm) sticks and arrange them on a baking sheet. Spray the tops with a cooking spray.

From here you can take your polenta in any direction you like. You can add fresh or dry spices, nutritional yeast, small bits of cheese or vegan butter that melt well, or sprinkle sugar and cinnamon if you want to make the baked polenta sticks into a dessert. Here, I decided to go two ways and top one set of polenta sticks with some cumin powder, dry basil and oregano. The second batch I spiced up a bit with freshly ground black pepper as well as smokey red pepper flakes. The topped polenta stick are then baked until their surface is nicely browned.

I served the Baked Polenta Sticks with vegan bolognese sauce but you can eat them as is, or serve them with a wide range of dishes. The flavor of polenta sticks is mild, slightly nutty, and depends on the spice combination you used. In general, Baked Polenta Sticks are great with any dish you would serve with corn bread, like chili, Jackfruit Barbacoa, or Bean and Leek Soup. They can also be used as an appetizer, served along side simple marinara dipping sauce and some olives.


Baked Polenta Sticks

What you’ll need:

2 cups polenta (or corn meal)

4 cups water

1/4 teaspoon salt (adjust salt to taste)

Cooking spray

Dried basil

Dried oregano

Cumin powder

Crushed red pepper flakes

(Onion powder, garlic powder, nutritional yeast, freshly ground black pepper, lemon zest,… quite a few toppings will work so feel free to experiment)


What you’ll do:

  1. In a large pot, bring water to boil.
  2. Add the salt and polenta to the boiling water while stirring rapidly to prevent clumps from forming. Decrease the heat to medium/medium low, and keep stirring the polenta for about 5 minutes.
  3. Pour the polenta out into a baking dish that you previously sprayed with cooking spray. I recommend using 9 x 13 in (22 x 33 cm) dish for this amount of polenta – this will give you 1/2 in (1 cm or so) thick sticks – but you can use any other flat bottom container you have on hand. Just note that the thickness of the sticks will vary depending on what you use.
  4. Let the polenta cool and set for at least an hour. The thicker your polenta layer, the longer it will take.
  5. Slide the polenta slab out onto a cutting board. Cut into sticks of regular size.
  6. Arrange your polenta sticks on a parchment paper lined baking sheet. Do leave some space between the stick so they can bake evenly, which means you may need to use two baking sheets or bake in two batches.
  7. Spray the top with some cooking spray and sprinkle the toppings/spices of your choice liberally.
  8. Place into the oven that was preheated to 400 F (205 C). Bake for 15 minutes or until the sticks are golden brown.
  9. Serve as a side dish with a soup, or as an appetizer with marinara sauce, or simply munch on these any time. They are best served fresh from the proven, but couple of minutes in a toaster oven will help the next day!

Copyright © Eat the Vegan Rainbow, 2018

Radish Salad with Apples, Carrots and Toasted Walnuts

img_3783
Radish salad with Carrots, Apples and Toasted Walnuts, via Eat the Vegan Rainbow

Who said salads have to be green? Or soaked in heavy dressing? Salads come in many different shapes and forms, and this is my contribution to the pantheons of salads – a mix of sliced radishes, shredded carrots and apples, toasted walnuts and freshly squeezed lemon juice. I used lemon zest and some cracked black pepper for garnish, and that’s that. With a little help from a food processor with couple of different blades everything came together in less than ten minutes!

img_3780

There isn’t much more to this Salad story. Perhaps a slice of hearty bread, some of the lovely Baked Sunflower Seed Cheese, and you’re done. This salad is so fragrant, full of colors, different shapes and textures with a nice crunch that it is absolutely fit for any winter holiday table. Enjoy!!!

img_3782

Radish Salad with Apples, Carrots and Toasted Walnuts

What you’ll need (for 2-4 servings)

1 bunch red radishes (7-8 large ones), washed

1 Granny Smith or another tart apple, washed

4 carrots, washed and peeled

1/2 cup chopped walnuts, toasted

1 lemon, juice and zest

1/4 teaspoon cracked black pepper (or to taste)


What you’ll do:

  1. Wash the radishes and slice them into thin discs. You can do this by hand by I recommend using a food processor if it has a slicing blade. My food processor has an adjustable slicing blade and I dialed the thickness way down.
  2. Without taking the sliced radishes out, replace the slicing blade with the fine grating blade and grate the carrots.
  3. Using a coarser grating blade, grate the apple. Transfer everything into a large mixing bowl.
  4. Add the juice of one lemon, lemon zest, cracked black pepper, and toasted walnuts and toss to combine.
  5. Serve immediately with a slice of hearty bread, and a side of cheese as a light lunch, a salad course, or as a part of a more elaborate appetizer spread.

Copyright © Eat the Vegan Rainbow, 2017

Spiralized Oven Fries

img_2888
Spiralized Oven Fries, via Eat the Vegan Rainbow

From time to time it’s good to do things just for fun, with no hidden agendas or pretense of deeper meaning attached. This recipe is my example of doing something just for fun and just because.

Few months ago I acquired a spiralizer, one of those machines you hook your vegetables or fruit to and get long, lovely and elegant noodles of various width. I’ve been using it to make great zucchini noodles, and I love it! But, there’s a limit to how much zucchini noodles a person can eat and still remain excited about seeing them on the plate, so I’ve been trying to pace myself and find other things to spiralize. I tried apples – that worked! I tried sweet potatoes and beets – ditto! I tried jicama – thumbs down, and the same goes for celeriac.

One vegetable that did work – meaning it produced a pile of lovely noodles – were baking (Russet) potatoes. So, I decided to have a bit of fun with them and bake them into little piles of potato yarn which we can call Spiralized Oven Fries. All you need to make this recipe happen is a muffin pan, some seasoning of your choice, and a hot oven. What you’ll get is a fun take on oven fries – the fries that look like spaghetti. And that is exactly what I said this post is all about – pure fun!

Spiralized Oven Fries

What you’ll need:

4 medium baking potatoes

Freshly ground black pepper

Freshly ground crushed red pepper flakes

Salt (optional)

Cooking spray, or olive oil

What you’ll do:

  1. Preheat oven to 425 F (220 C).
  2. Wash the potatoes well, and pat them dry.
  3. Spiralize the potatoes without peeling using a fine gauge spiralizer, the same you would use for making zucchini spaghetti.
  4. Season the potato “noodles” with any seasoning you like. I suggested freshly ground black pepper and ground crushed red pepper flakes, making this quite spicy, but you can use any seasoning you like. Let stand for couple of minutes.
  5. Oil the muffin pan with cooking spray or oil.
  6. Take a handful of potato noodles and gently place them into the individual muffin holes. Don’t press them too hard – let the noodles fall where they may, more or less, and try to arrange them so they fit neatly into the space.
  7. Place the muffin pan into the oven and roast for 30 minutes or so, until the tops start to brown. You don’t want them to burn but a bit of browning is nice.
  8. Take the fries out and let them cool for a bit. Then using a fork gently lift them out and plate them. The sort of “muffins” are not really held together by anything so they will fall apart if you are not careful. But if you are you will end up with a serving of fried that had never looked funkier. And that’s worth it!

Copyright © Eat the Vegan Rainbow, 2017

Vegan Caprese Salad in a Sandwich

img_2518
Vegan Caprese Salad in a Sandwich, via Eat the Vegan Rainbow

In my other life, as the editor of two leading journals for chemical and structural biology (I know, sounds intimidating!), I once used Caprese Salad – tomatoes, basil, and fresh mozzarella – as an example of how simple is incredibly powerful, beautiful and irresistible, in an emphatic attempt to convince scientists to implement principles of simplicity when writing their scientific papers.

Here, my interests are purely culinary as I set out to recreate the Caprese salad out of plant based ingredients only. I started from a batch of vegan fresh mozzarella, following a recipe developed by Jules Aron and included in her “Vegan Cheese: Simple, Delicious, Plant-Based Recipes” book.

The path to fabulous vegan fresh mozzarella is long and slippery- meaning that it will take you about two to three days to have ready to eat batch of cheese on your hands, and there are few places along the way where a little mistake can derail your cheese making process. Having said that, I found Jules’s recipe to be clear and helpful, and the final result AMAZING!

I made only some minor adjustments to the recipe, as I used cashew yogurt for fermentation stage of the mozzarella, and agar powder and tapioca starch to firm it up – Jules recommends Kappa carrageenan powder and tapioca flour (which I think is the same thing as tapioca starch but it’s worth mentioning as a point of difference)!

The process starts, as many vegan cheeses do, by soaking some nuts. I usually cover the nuts, in this case cashews, with water and leave them in the fridge overnight. The next step for this cheese is blending the well soaked cashews, that have been drained and rinsed, with some almond milk or water until nice and smooth – I used almond milk.

Then, you add yogurt – here I used an amazing Cashew Yogurt by Forager – cover with cheese cloth and leave on the kitchen counter for a day or so. Make sure that your yogurt contains live cultures as you want the bacteria to start the process of fermentation and acidification, yielding a nice, subtly tangy flavor.

Making of vegan mozzarella, via Eat the Vegan Rainbow

The penultimate step is adding the thickener to the cheese mix, cooking it until it starts to thicken to a consistency of very thick oatmeal, porridge or polenta.


While the cheese was cooking, with frequent stirring, I made the brine. I used tap water and ice cubes, plus a tablespoon of plain kitchen salt since that’s what I had handy, and mixed it all until salt was fully dissolved.

Once the cheese was cooked, I used my measuring spoon (tablespoon size) to measure out cheese balls, formed a bit with hand – watch out here as it may be hot, so you can form the balls using two spoons at the same time. Dump the balls into ice/water/salt mixture, cover with cheese cloth and leave in the fridge overnight. Jules recommends at least 4 hours, so I just left my fresh mozzarella cheese balls to rest until the next day.

img_2513
Vegan Fresh Mozarella Balls in Brine, via Eat the Vegan Rainbow

Waiting wasn’t easy but it was worth it!!! I got some fresh baguette, fresh basil, a ripe tomato, a drizzle of balsamic vinegar, and my homemade vegan fresh mozzarella, and made myself a phenomenal sandwich for lunch.

I transferred the fresh mozzarella with the brine and all into a container with a tight lid, and stored it in the refrigerator. It lasted for about one week, at which point it was all gone!!! I will be making some more soon, but next one from Jules’s book I want to try is an almond-based baked feta!!!

Since this post is all about another person’s recipe, I am not sharing the notes, but encourage you to go visit Jules’s site, and get her book or better still borrow it from your local public library, which is what I did. I am happy to share what my Caprese Salad in a Sandwich looked like – it’s a real feast for your eyes!!!

img_2520
Vegan Caprese Salad in a Sandwich lunch, via Eat the Vegan Rainbow

Copyright ©Eat the Vegan Rainbow, 2017

Roasted Red Beets Hummus

Roasted Red Beets Hummus
Roasted Red Beets Hummus, via Eat the Vegan Rainbow

I am a bit on the roasted beets kick these days. I just shared how I used them in a salad, this post is all about a hummus I put together, and, believe it or not, I have a pile of roasted beets in the fridge that are waiting for me to figure out what to do with them.

Beets Roasting on a Grill
Beets Roasting on a Grill, via Eat the Vegan Rainbow

The batch in the fridge was roasted in the oven, and that method – cranking the heat to 425 F (220 C) and roasting them for about 30 to 45 minutes – will work here as well. But the beets that I used for this hummus were roasted on a grill. I recommend you try this next time you grill your veggies, tofu or try my Portobello Mushroom Steaks. Your grill will already be on so it’s perfect time to wrap your bits in some foil and toss them on!

The rest of this hummus recipe is super easy. You will need a large mixing bowl, two cans of chickpeas, rinsed and pat dried, some lemon juice, and a spoonful or two of almond butter, and all the lovely roasted beets, cooled and peeled. You will also need a hand-held, stick blender, and let it rip until everything is well blended and smooth. You can always use a good processor if you have one or a powerful blender. I have neither so hand-held, stick blender is my tool of choice.

What you’ll end up with is a nice pile of lovely and bright magenta hummus that will keep well in a plastic container with a tight lid for a week in the refrigerator.

Roasted Red Beets Hummus, via Eat the Vegan Rainbow

Roasted Red Beets Hummus

What you’ll need:

3 red beets

2 15.5 oz (439 g) cans chickpeas (garbanzo beans), low sodium

3-4 tablespoons lemon juice

2 tablespoons almond butter

What you’ll do:

  1. Roast the beets, let them cool and peel. You can roast them in the oven or on the grill. Either way I recommend wrapping them in foil. This will minimize the mess and speed up the roasting. Regardless of where you roast them, it will take about 30 to 45 minutes to get the beets roasted all the way through. Please note that you can eat beets raw, so you can actually skip the roasting all together. Roasting does help bring the natural sweetness of beets out more, so in my opinion it’s worth an effort.
  2. Cut the roasted beets into cubes, and place into a food processor or the large mixing bowl.
  3. Place the chickpeas into a strainer, rinse them well and pat dry.
  4. Add chickpeas to the bits, add the rest of the ingredients and blend until smooth. Serve any way you like. For me hummus is one of the best sandwich spreads ever, and this one works like a dream when paired with avocados!!!
  5. Copyright © Eat the Vegan Rainbow, 2017

Mushroom “Scallops” with Cilantro Yogurt Sauce

Mushroom “Scallops” with Cilantro Yogurt Sauce, via Eat the Vegan Rainbow

“Waste not, want not” is how the saying goes, encouraging us to not to waste what we have and conserve resources. Well, I may be extrapolating here, but it is not a bad maxim to cook by, if not live by. I’ve been struggling for number of years now to find use for mushroom stems, especially the big, almost woody stems of large white button mushrooms. The caps are fabulous for stuffing, and I’ve already shared my Mashed Potato Stuffed Mushrooms with Cashew Sour Cream recipe, but stems are a bit trickier. I usually chop them up and combine them into the stuffing, or don’t even bother removing them if I use mushrooms in a soup or stew that will simmer for a while. However, big stems just don’t work well in some of the quicker recipes.

That’s why I got really excited when I found out that mushroom stems can be used as a sort of replacement for large scallops. For example, Cara, the person behind a fabulous blog called Fork & Beans, used king oyster mushrooms to make a “scallop” pasta. That got me thinking: why not use the large stems I got to create a vegan “scallop” dish?

There is one major trick to transforming mushroom stems into scallops – you have to soak them in hot water 1-2 hours to overnight. I soaked my batch overnight, actually for almost 24 hours, which is totally an overkill but I just had other things to do the mushroom stems had to wait happily soaking in the refrigerator. The mushroom stems I had were pretty long so I had to cut each in half, so my scallops were about 1 in (2.5 cm) thick. That worked well in terms of cooking too! Before using, drain and dry your mushroom scallops.

Mushroom “Scallops” Soaking, via Eat the Vegan Rainbow

Another advice I can share is to make mushroom scallops the same way you would make scallops, which in my case means simply browning them on both sides, using a bit of oil or cooking spray and sprinkling with Old Bay Seasoning on one side as the first side is finishing cooking. The cooking itself takes no time at all: three to five minutes per side should do the trick!

If you are serving the mushroom “scallops” as is, I suggest you sprinkle them with some lemon juice. I decided to serve them with a Cilantro Yogurt Sauce which I made from homemade soy yogurt, fresh cilantro, crushed garlic and lime juice. The homemade soy yogurt was simple to make and I recommend you try making your own, but if pressed for time store bought plain soy yogurt will do the trick. Here, the tangier the yogurt, the better the yogurt sauce so choose the brand with more tang – I can’t recommend any here because none of the store bought yogurts I tried were really all that good (thus the decision to make my own!). You can adjust the tang with adding a drop of apple cider vinegar or a bit more lime juice.

You can serve these mushroom “scallops”, and the sauce, with pasta or polenta, but I plated them as an appetizer over some fresh baby spinach leaves. The “scallops” were hot when plated, and their heat wilted the spinach a bit as well. I let them sit for few minutes before layering on cold yogurt sauce and serving immediately!!!

In case you were wondering, these don’t really taste like scallops but they are delicious and I love the idea so I will definitely be trying to get the flavor closer to the original, perhaps by trying a different mushroom variety.

Mushroom “Scallops” with Cilantro Yogurt Sauce

What you’ll need:

20 large white button mushroom, stems only

2-3 teaspoons, Old Bay Seasoning

1 cup plain soy yogurt, homemade

1 cup cilantro leaves (about 1 bunch)

2 teaspoon garlic, crushed

2-3 teaspoons lime juice

Baby spinach for plating

Cooking spray

What you’ll do: 

    1. Cut large white button mushroom stems into 1 in (2.5 cm) pieces. Soak in water overnight, or in hot water for 1-2 hours.
    2. Prepare plain soy yogurt according to the instructions on VegCharlotte site. The method I used takes advantage of a crock pot, slow cooker, but it does take at least 14 hours to make so give yourself enough time, or get a tub of store bought soy yogurt. So this recipe is a bit of an overnight flight and you’ll need to get the mushroom “scallops” and the yogurt going one day ahead.
    3. In a food processor, mix yogurt, cilantro, garlic and lime juice. Your yogurt might be more or less solid, mine was more of a kefir than yogurt, but that really does not matter much in this application. At the end you will have a beautiful, aromatic, vibrant sauce regardless of your yogurt consistency. Put your sauce to the side and proceed to deal with the mushroom “scallops”.
    4. When ready to cook the mushrooms, first drain the liquid and pat the mushroom “scallops” dry with a kitchen towel.
    5. Spray the bottom of a large frying pan with cooking spray and place it over the high heat. Brown the mushroom “scallops” on one side for 3-5 minutes. Sprinkle the top with Old Bay Seasoning then turn over for another 3-5 minutes. Plate on the bed of baby spinach that has been generously topped with cilantro yogurt sauce. Serve and enjoy immediately!

Copyright © Eat the Vegan Rainbow, 2017

Soy Yogurt Cilantro Sauce, via Eat the Vegan Rainbow
Cilantro Yogurt Sauce, via Eat the Vegan Rainbow

Mashed Potato Stuffed Mushrooms with Cashew Sour Cream

Mashed Potato Stuffed Mushrooms with Cashew Sour Cream
Mashed Potato Stuffed Mushrooms with Cashew Sour Cream, via Eat the Vegan Rainbow
Fully loaded vegan mushrooms are finally here! Last time I went grocery shopping large white stuffing mushrooms were on sale and they looked so inviting that I had to have them. For most vegetarians and vegans mushrooms are a common ingredient as they add that elusive umami flavor to dishes. I used them fairly often and have featured them in  my Vegan Stuffed Pepper recipe.

This time around it is the mushrooms that are getting stuffed, and the stuffing I decided to go with is yummy, silky smooth and creamy mashed potatoes. Additionally, just to kick it up a notch I made some Cashew Sour Cream by Oh She Glows to add a bit of flair. Finally, sun dried tomatoes on top are for loveliness, color and for a bit of sweetness.

There are really two tricks here. One is to bake the mushroom caps on their own, and the other is to use a blender to purée the potatoes.

To get your mushrooms going I first remove the stems, but I don’t throw them away  as I use them as a part of the stuffing. I place mushroom caps their open ends up on the parchment paper (or foil) covered baking sheet and put them in the oven for about 20-30 minutes. The point is to get the caps soft and to let the mushrooms release excess water. At the end of the baking each mushroom cap should be filled with brown liquid (see below), and I dumped this liquid out. Transfer your mushroom caps into a greased baking dish with tall sides that will help with making sure no stuffing gets out while baking.

Baked Mushrooms, Ready for Stuffing
Baked Mushroom Caps, Ready for Stuffing, via Eat the Vegan Rainbow
Using a blender to purée the potatoes makes them into a creamy heaven that is perfect for stuffing. I would not recommend using the blender method if your end point is mashed potatoes because what you get is quite smooth, but for topping something like a Vegan Shepherd’s Pie or stuffing these mushrooms this method is perfect.

All in all these Vegan Mashed Potato Stuffed Mushrooms with Cashew Sour Cream are perfect as an interesting appetizer and entertaining, as well as a really great dinner in their own right. The amount of mushrooms I used is huge and it was definitely meant for sharing and enjoying in a large group, so feel free to scale down accordingly!

Vegan Mashed Potato Stuffed Mushrooms with Cashew Sour Cream

What you’ll need (for a 12 servings):

2 24 oz. (680 g) boxes white mushrooms, large

4 medium Russet potatoes

6 scallions

1/4 cup almond milk, plain & unsweetened (or other non-dairy milk)

1 cup of Cashew Sour Cream

1/3 cup sun dried tomatoes, julienned

Cooking spray

What you’ll do:

  1. Preheat oven to 350 F (180 C).
  2. Clean the mushrooms gently with a piece of paper towel. Separate stems from the caps. Keep the stems for later. Place caps, hole side up, on a parchment paper lined baking sheet and bake for 15-20 minutes, until the mushroom caps are soft and full of clear, brown liquid.
  3. Take the mushroom caps out the oven, discard the liquid and place them into a deep baking dish well sprayed with the cooking spray. Put aside.
  4. Peel the potatoes, chop them into small cubes and boil until cooked through which can take 15-30 minutes depending on the size of your cubes. Drain the water and let the potatoes cool for 15 minutes. Add almond milk and blend until potatoes are smooth.
  5. Chop scallions, using both the green and white parts, and mushroom stems finely.
  6. Spray a frying pan with cooking spray and sauté scallions and mushroom stems fro 5-10 minutes. Add sautéd scallion and mushroom stem mixture to the potatoes. Mix well.
  7. Spoon the potato mix into mushroom caps and top with a spoonful of cashew sour cream and few slices of sun dried tomatoes. Return to the oven for another 15 minutes.
  8. Bon appétit!

Copyright © Eat the Vegan Rainbow, 2017