Vegan 15 Bean Chili

Vegan 15 Bean Chili
Vegan 15 Bean Chili, via Eat the Vegan Rainbow

Beans are an essential staple of every vegan kitchen. Beans are rich in fiber, especially soluble fiber, which is taught to lower bad cholesterol, folate, good carbohydrates, and plant protein. That’s what makes beans an essential component of plant-based eating.

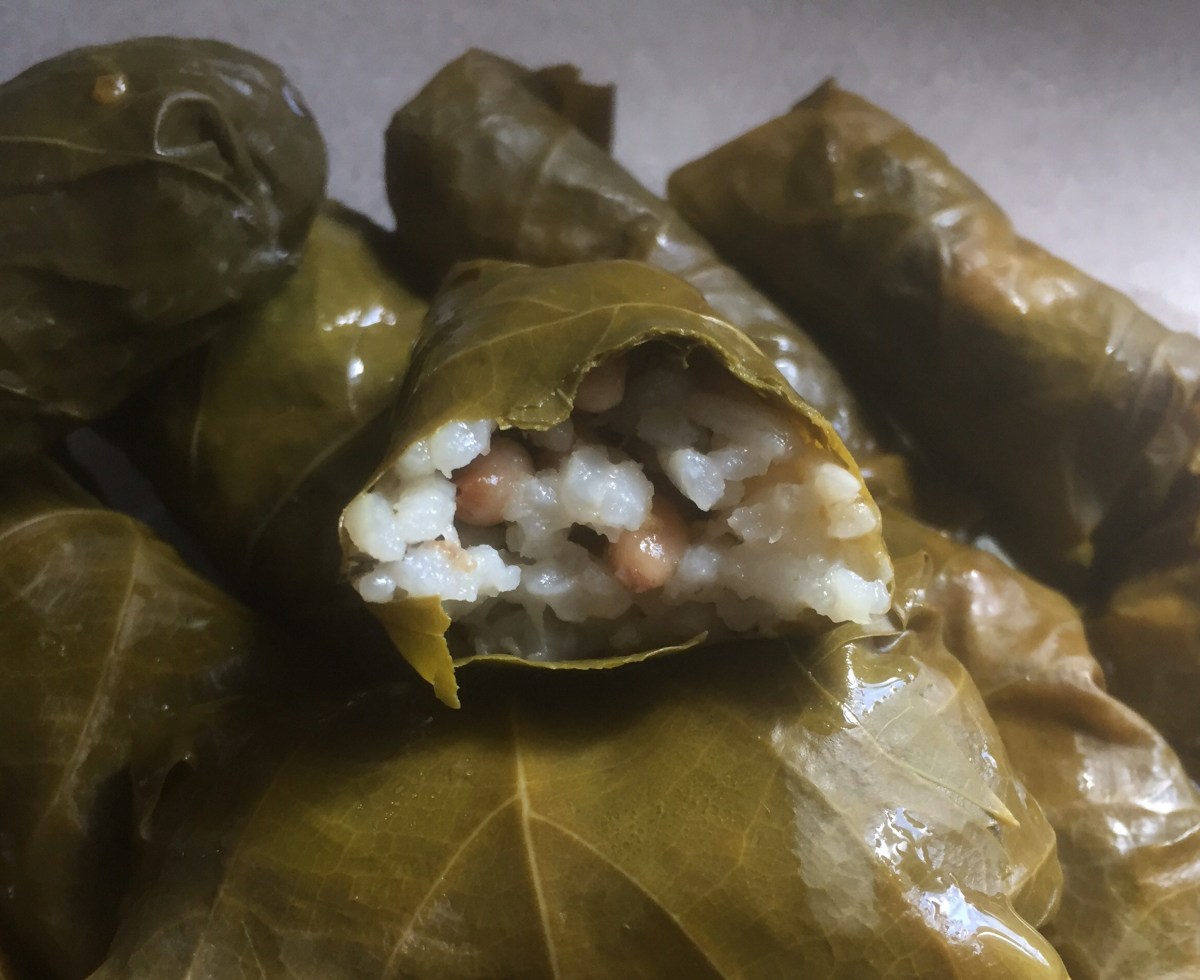
Beans come in many different colors and sizes – they can be white, like northern, lima, and navy beans, pink to dark red almost brown, like light and dark red kidney beans, black, like black beans, or multicolor, like black-eyed peas (which are actually beans) and pinto beans. All these varieties have slight differences – different cooking times, texture and flavor, not to mention appearance.

For example, if you are looking to make a mild dish that is smooth and buttery, you may want to go with navy beans or cannellini, which both work in a dish like this Tuscan-Style cassoulet, and if you are looking for a playful dish, like this Cowboy Caviar, you may want to reach for black-eyed peas.

I use beans all the time, and use both dry beans and canned beans. Canned beans are super quick and convenient, while dry beans are a bit cheaper, plus give you complete control over the amount of salt that goes in. But: dry beans do take a bit of time to make if you are using a traditional, pot on the stovetop method. Even with soaking the beans overnight, it will still take about 2 hours of cooking time to soften the beans. My preferred way to prepare dry beans is to soak them overnight, then cook them in a pressure cooker until done, and then incorporate them into whatever you are making. And although some claim that the pressure cooker will cook your beans quickly even if they have not been soaked, I have not tried this yet, so can’t advise on this here. An alternative is to use a slow cooker – overnight soaked beans should take about 6-8 hours.

Some of my favorite bean recipes are simple baked beans, veggie burgers, like white bean burgers with chia seeds, and a very beefy veggie burgers,  and soups, like this bean and leek soup with soy chorizo. Plus: beans are an essential ingredient for these wonderful BBQ ribs!

Recently, while browsing around in a grocery store, I discovered something new: Hurst Hambeens 15 Bean Soup Mix. This bag included a mix of 15 different legumes: beans (northern, pinto, large lima, blackeye, baby lima, kidney, cranberry, small white, pink, small red, white kidney, black), as well as lentils, yellow split, and green split peas, and chickpeas. And, of course, I had to give this mix a try!

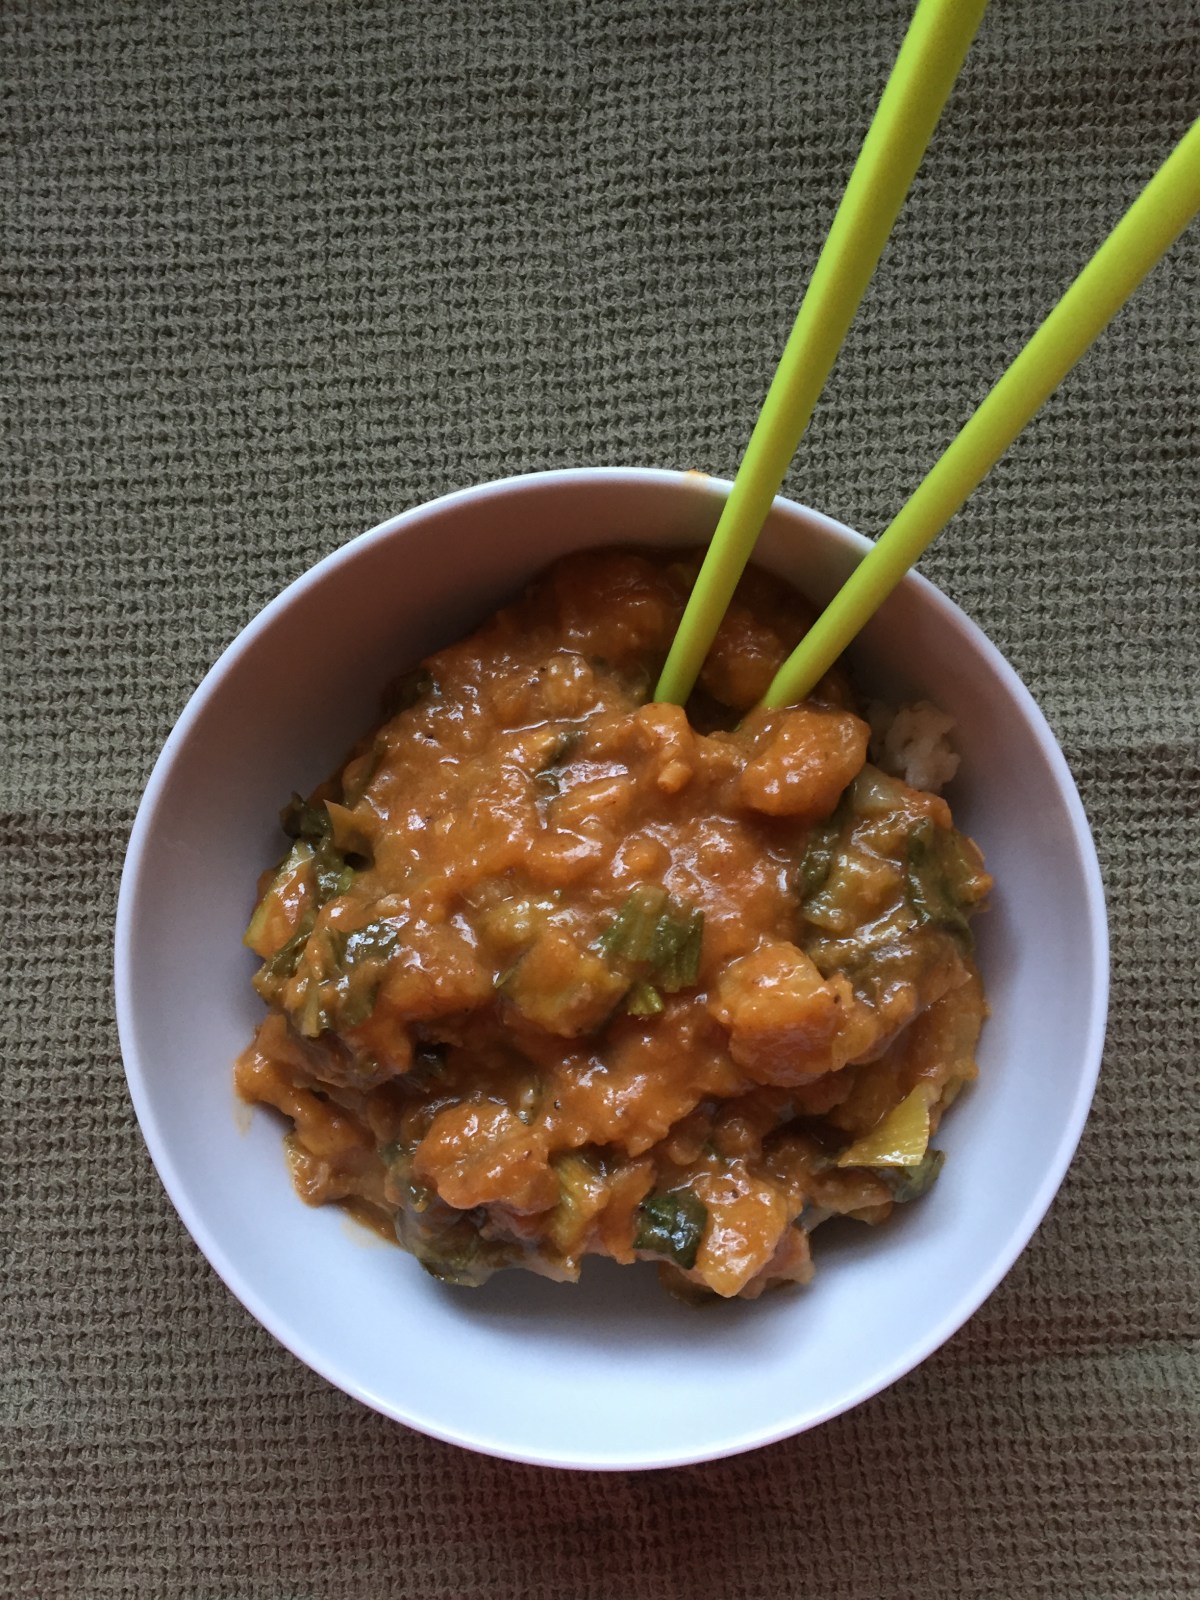
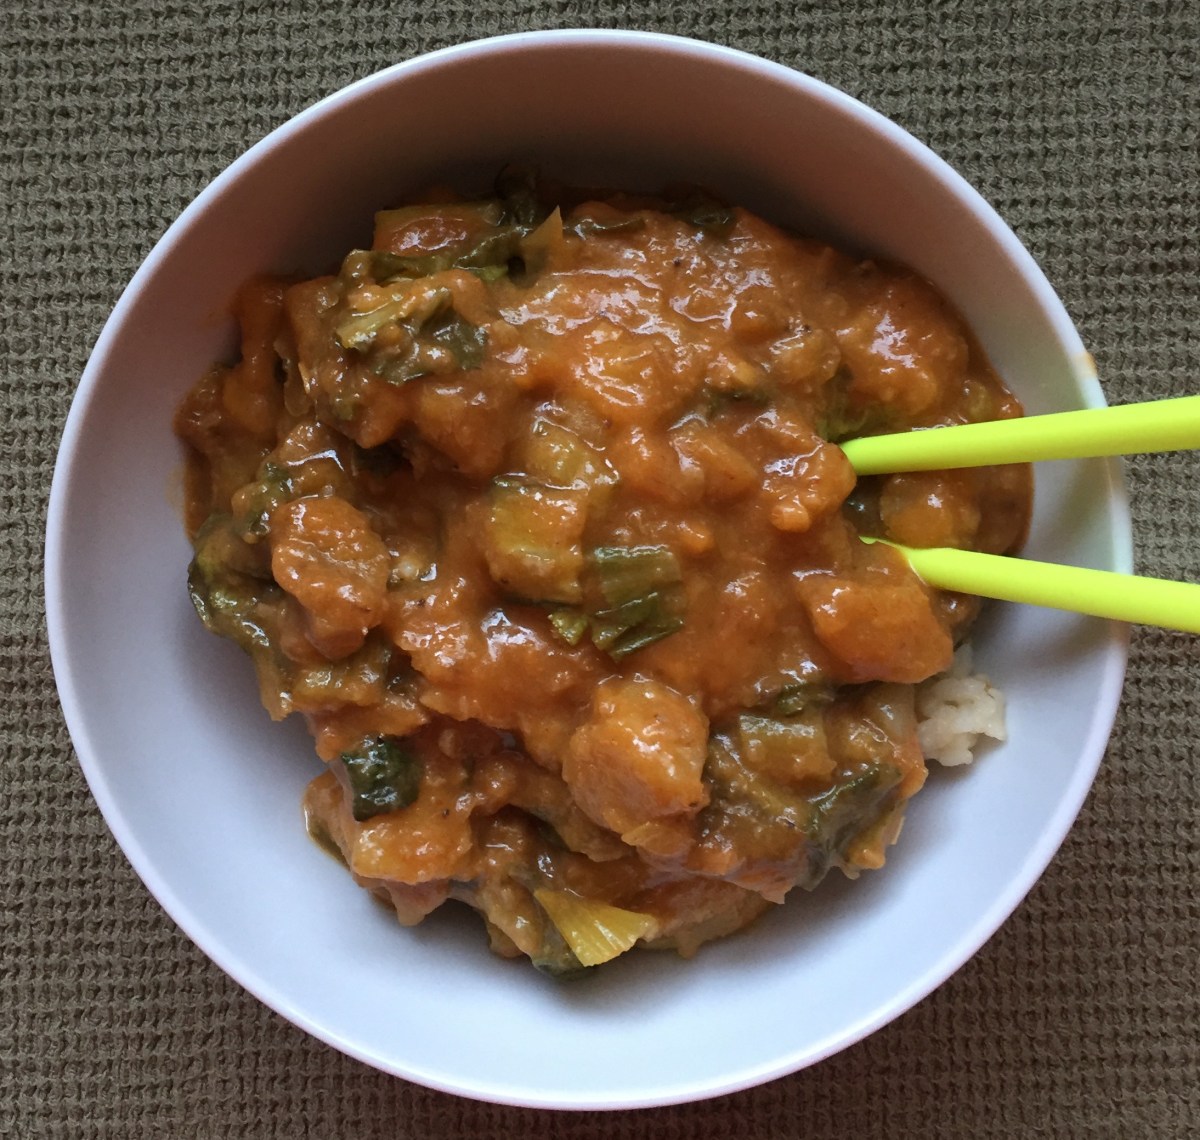
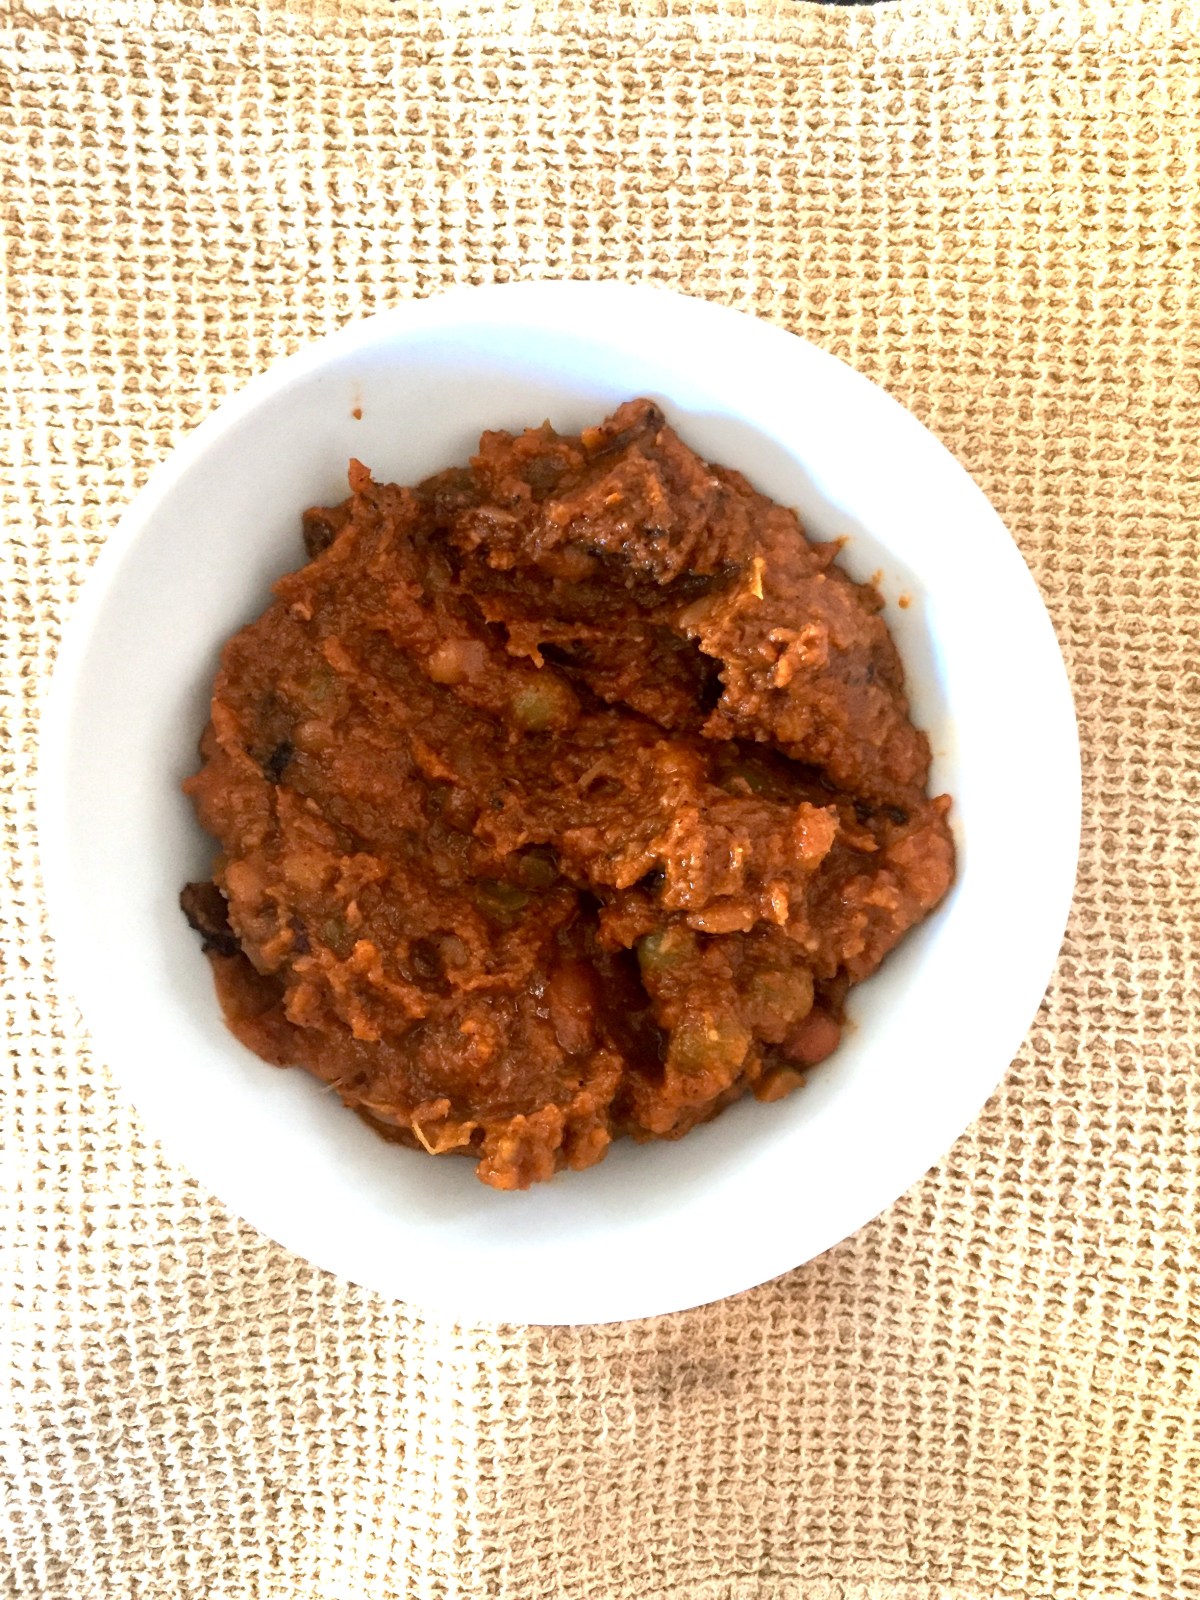
Apparently, this mix is traditionally used for a ham soup and comes with a bag of seasoning included. I decided to take the mix in a different direction and go for a chili. Chili is a rich and thick bean stew, full of smokey flavors, and a bit of heat. It’s usually made small red beans, but I figured the more could be the merrier, so I went for it!

The recipe below uses stovetop cooking method, but you can definitely make this in a slow cooker (crock pot). And if you don’t have this specific bean mix, you can make one yourself by measuring about 1/4 cup of dry pinto, black, red kidney, black-eyed and navy (white) beans, as well as lentils, chickpeas and yellow and green split peas. Although not the full 15 bean range, there is enough variety in this mix that you will still get all the benefits of flavors and textures. Have fun!

IMG_6225

Vegan 15 Bean Chili

What you’ll need:

  • 1 bag (20 oz (about 600 g)) 15 Bean Soup mix (Hurst Hambeens 15 Bean Soup Mix or make your own – see above)
  • 3 stalks celery, roughly diced
  • 1 onion, roughly chopped
  • 2 carrots, roughly sliced
  • 3 cloves garlic, sliced
  • 2 tablespoons oil (canola or olive), divided
  • 1 6 oz (170 g) can tomato paste
  • 2 teaspoons cumin powder
  • 1 teaspoon chili powder
  • 3-4 Bay leaves
  • 2-3 cups vegetable stock, divided


What you’ll do:

  1. Rinse the beans, then cover them with water and soak overnight. If you are in a hurry you can also do a quick soak by: rinsing the beans, placing them in a pot, making sure they are fully covered with water, brining the water to boil, boiling for 5-10 minutes, turning the heat off and leaving the beans in hot water for an hour.
  2. After the beans are done soaking (either overnight or using a quick method) rinse them well and set aside.
  3. Place a large Dutch oven or another sturdy pot over medium high heat, add 1 tablespoon of oil, and onions, garlic and carrots. Let these caramelize, which can take up to 15 minutes. Don’t stir to frequently as you want to let the vegetables get slightly burnt and charred – that will add deeper flavors to the chili.
  4. Add the tomato paste, cumin and chili powder, coat everything well and cook for another 2-3 minutes.
  5. Place 1 cup of vegetable stock into a blender, then add the onion, garlic, carrot and spice mix, and 1 cup of soaked beans. Blend everything until smooth and take care not to burn yourself as the mix will be hot.
  6. Add the rest of the oil to your Dutch oven, pour the mixture from the blender back in, add the rest of the bean mix, another cup of vegetable stock and bay leaves. Mix to combine and bring to boil. Place the lid on, lower the heat to steady low level boil, a bit more than a simmer, and cook for 2 hours, stirring occasionally. Check after about an hour, as you may need to add more vegetable stock.
  7. Serve with some shredded cheese, sour cream, or diced avocados, and definitely with some corn bread, like this basic gluten-free version (nice and crumbly, perfect for chilis), very corn-y corn bread, or the more flavorful corn bread muffins.

Copyright © Eat the Vegan Rainbow, 2019

Vegan Stuffed Peppers with Pistachios and Rice


Pistachios make a great snack! They are a tree nut related to cashews – so not an allergy friendly food. But, if you can enjoy nuts, pistachios are great to add to your nut rotation. As any other kind of nut, pistachios are versatile and work equally well as a simple raw (or slightly roasted, preferably dry roasted, no-salt-added) snack, or as an crunchy ingredient for many savory and sweet dishes. Last Thanksgiving, I made a lovely side dish with quinoa, roasted cranberries, and pistachios – you can’t get healthier and homier than that!

Of course, you can also use pistachios to make nut butter, or upgrade with couple of simple ingredients into a fancier creme spread. If you are using pistachios this way, you will need to soak them in water, preferably overnight. The soaking helps rehydrate the nuts and makes for a creamier and more spreadable butter/dip/spread. If you are watching your salt intake, soaking the pistachios and washing them out can also help remove some of the added salt if the only type of pistachios you can find in your store are the salted (or lightly salted) kind.

At this point you may be wondering what do pistachios have to do with vegan stuffed peppers? That’s a fair question – peppers are usually stuffed with some sort of mix of rice and/or beans, and other vegetables. But: there really is no limit when it comes to what you can use for the stuffing. Mashed potatoes? Sure, why not! Mushrooms and quinoa? Absolutely! Polenta? Sounds interesting! Corn and beans? Yes, of course!

My recipe below takes very traditional stuffing ingredients (rice, celery and carrots) and mixes it with pistachios, for a new take. Plus: this stuffing is versatile and can be used to stuff eggplant, zucchini, grape or cabbage leaves. It is cheap and the amount below will go a long way. Enjoy and have fun!


Vegan Stuffed Peppers with Pistachios and Rice

What you’ll need:

1 cup shelled pistachios

4 bell peppers, split in half lengthwise, with seeds removed

4 stalks celery, finely diced

2 carrots, finely diced

1 teaspoon minced garlic

1 tablespoon paprika (or smoked paprika)

2 teaspoons dried basil

1 teaspoon dried oregano

2 cups cooked rice (Arborio rice or other medium grain variety; I make a large batch of rice to serve as a side dish for the week and take some of that to make other dishes like this one)

2 tablespoon olive oil (optional; if not using oil you can use 2 tablespoons of vegetable broth to sauté the vegetables)

3 tablespoons fresh Italian (flat leaf) parsley, finely chopped

2 cups water, divided

What you’ll do:

  1. Cover pistachios with water, and soak overnight in the refrigerator. The next morning, drain and rinse the pistachios then grind them into a very fine paste. You can do this using a food processor or a hand held stick blender – here are some stick blenders that will give you good results. Set the paste to the side.
  2. Preheat the oven to 350 F (175 C).
  3. In a large pan add the oil (or vegetable stock if not using oil) and place over medium high heat. Add celery and carrots and sauté for 5-8 minutes or so, until softened and slightly browned.
  4. Add garlic, mix well and sauté for another 2-3 minutes.
  5. Add the pistachio paste and 1 cup of water, mix again and cook for another 5 minutes or so.
  6. Next, add the rice, paprika, basil and oregano and mix to combine. Increase the heat to high for just a couple of minutes until the stuffing starts to bubble and combine. Turn the heat off and mix in the parsley.
  7. Arrange the peppers in a large baking dish (I used a Pyrex dish with the following dimension: 15 x 10 in (38 x 26 cm)), and fill each half with the stuffing until all the stuffing is used up. Pour 1 cup of water to the bottom of the dish – make sure not to pour the liquid over the peppers, rather pour the water down the side and let it distribute. Cover the dish with some foil and place in the oven for 35 minutes or so.
  8. When 35 minutes are up, increase the temperature to 430 F (220 C), remove the foil and let the tops crisp up for 10 minutes or so. Take the peppers out the oven and let cool for about 20 minutes before serving. These peppers improve with time, so if you can I recommend making them a day ahead, letting them cool completely before putting them into refrigerator and then serving them the next day.
  9. Stuffed peppers are best enjoyed with a simple salad (think lettuce with just a bit of oil and vinegar), although I do like them with a scoop of yogurt!

Enjoy!

Copyright © Eat the Vegan Rainbow, 2019

Plantain Lasagna with Pinto Beans

img_2828
Plantain Lasagna with Pinto Beans, via Eat the Vegan Rainbow

The first time I tasted plantains, those longer, bigger bananas you sometimes see in your grocery store among other exotic fruits and vegetables, I did not like them. They were fried yet sort of mushy, and tasted very sweet although they were served as a savory side dish. So, for the next fifteen years I stayed away from them.

Few months ago I was watching a cooking show, and they talked about Puerto Rican lasagna – Pastelón – that looked delicious, with layers made of plantains rather than noodles. So I decided to give this lasagna a try. Please note that if you expect to see a traditional Pastelón recipe here, stop reading now and go elsewhere. I took a great deal of liberty here, so you will not find any meat or cheese here. What you will find is lots of beans and salsa. And lots, and lots of plantains.

The plantains you want to use here are very ripe. Some stores sell them ripe, but some carry only green looking plantains. You could get those and keep them in a paper bag until they get ripe – I tried this but it did not work really well. So now I go for off the shelf half-ripe plantains that, by the way, are very yellow with a bit of black. This article will help you navigate the plantains and different stages of their ripeness. For me the green plantains were too tough and the very ripe ones were too sweet so I settled on 75%-ripe.

Instead of frying the plantains, which is the most common way people make them edible, I roasted them. You will need to cut through the skin lengthwise and roast them for about half an hour. Their skin should turn totally black and once cooled they should be easy to peel and slice lengthwise into thin slices.

While your plantains are roasting, prepare your lasagna filling, which in this case is a batch of pinto beans, simmered with onions, roasted green chili peppers and spices.

The base for your lasagna will be salsa, and I just use store bought kind, and what will give this lasagna a slightly meaty feel is a layer of TVP – textured vegetable protein. Although the bag TVP comes in may recommend soaking, please don’t do it. This lasagna is juicy enough and the TVP will soften and cook as the lasagna is baking. After the TVP layer, come the plantain slices, and then the beans. Cover everything with foil, but it in the oven for forty five minutes or so, and that will be that. You will have an out of the ordinary lasagna on your hands to enjoy.


Plantains Lasagna with Pinto Beans

What you’ll need:

4 plantains, almost ripe

2 cups salsa, homemade or store bought

2 cups TVP (textured vegetable protein)

1 onion, diced

2 15.5 oz (440 g) cans pinto beans

1 4 oz (113 g) can fire roasted green chili peppers

1 teaspoon cumin

1 teaspoon chili powder

1 teaspoon smoked paprika

Cooking spray


What you’ll do:

  1. Preheat the oven to 425 F (220 C).
  2. Wash the plantains, cut their end off and cut a slit in their skin lengthways. Arrange on the foil or parchment paper lined baking sheet and put in the oven for 35-45 minutes.
  3. While plantains are roasting, prepare the beans. Spray the bottom of a large pan, I used my cast iron pan but you can use any pan you like, and place over medium heat.
  4. Add the onions and cook until golden, which will take about 5 minutes.
  5. Add the spices, and let the spices toast for a minute or so.
  6. Add the can of fire roasted green chili peppers and stir again.
  7. Finally add the beans and using a potato masher mash the beans while they cook. Don’t mash them all the way through – leave some of the beans whole. Let the beans simmer for 15 minutes or so.
  8. By the time the beans are done,  plantains will be too. The roasted plantains should be soft but not mushy.  Let the plantains cool before handling.
  9. Decrease the oven temperature to 350 F (175 C).
  10. Once cool enough to handle, peel the plantains and cut lengthwise into sheets. Adjust the thickness to your preference.
  11. Spray the bottom and the sides of a deep 9 x 13 in (23 x 33 cm) baking dish with cooking spray. Pour the salsa in and spread to cover the bottom. Distribute the TVP over the salsa to make one even layer. Place the roasted plantain slices over the TVP. Pour the beans over the plantains, cover the dish with some foil and put it in the oven for 30 minutes covered, then uncover and let the top brown for another 10 minutes.
  12. Take the lasagna out of the oven and let it rest for 10 minutes before serving. Serve with plain rice or enjoy as is, perhaps with a sprinkle of cheese alternative or a spoonful of macadamia nut queso fresco. Yum!!!

Copyright © Eat the Vegan Rainbow, 2019

Thai Red Curry with Plantains and Bok Choy

Thai Red Curry with Plantains and Bok Choy, via Eat the Vegan Rainbow

If you have not tried plantains before, now is your time to give them a try. Plantains look like bananas – perhaps slightly bigger than average bananas. But, they are not usually paletable without cooking and are thus often referred to as “cooking bananas“. This starchy fruit is used in number of different dishes all over the tropical world where these plants are cultivated and grown.

Although you can eat plantains when they are still green, it is best to wait for them to get quite ripe. And for plantains that means really quite brown – think bananas that are two days beyond their “use to make a banana bread” date. Most of the time the plantains you find in the store need more ripening and the best way to do this is to leave them in a paper bag for another week or two.

Once they are nice and mostly brown, it’s time to make them into something delicious. You could grill them, boil them, fry them, roast them – and with the right spice combination plantains will not disappoint. I prefer to double cook them. First, I roast them without peeling and then I use them in different applications. For example, this chili was a great combination of beans and plantains, and worked really well.

For the curry recipe below, the plantains were roasted first then diced. In general, roasting brings out flavors that are sometimes hard to get any other way. In the case of plantains, this extra step is definitely worth it since ripe plantains still tend to be pretty tough.

The curry itself is really super easy – it takes only one pot and about 30 minutes to get to a fragrant and rich red curry with a subtle level of heat. If you are looking to increase the heat, you can consider adding some finely chopped red Thai chili peppers, which punch some serious heat!

The basis of the flavor here is the combination of lemongrass and ginger, further fortified by the red curry paste (I used store bought but you can make your own – see below for the link to a great recipe). If you are buying your red chili paste in a store, do check the ingredients to make sure that there is no fish or oyster sauce in there.

Other than the flavor agents and plantains, you will also need bok choy, and if that is hard for you to find where you live, Napa cabbage, spinach, or even kale will work. The final flavors are going to be slightly different but the cooking times and the rest of the recipe will be about the same.

Finally, you can’t make a great curry without some coconut milk. You can use either full fat or low fat versions, just note that the curry with low fat coconut milk may need more simmering to remove access liquid. You may also need to adjust the amount of vegetable broth in that case as well. The final curry should be rich and thick, and goes really well over some simple boiled brown rice!

Thai Red Curry with Plantains and Bok Choy

Thai Red Curry with Plantains and Bok Choy

What you’ll need:

4 super-ripe plantains
1 lemongrass, thinly sliced
2 inch ginger root, peeled and thinly sliced
2 tablespoons red curry paste (store bought or homemade)
3 pieces of bok choy, cut into bite size pieces
2 cups vegetable broth
1 can (15 oz) coconut milk (full fat or lite)
1 tablespoon cooking oil (canola or vegetable)

Rice or quinoa for serving

What you’ll do:

  1. Preheat the oven to 425 F (220 C). Roast the super-ripe (almost brown) unpeeled plantains in a parchment paper covered roasting pan for 45 to 60 minutes. You can do this a day ahead – plantains’ skin will be completely black and the plantains themselves will be softened but not mushy.
  2. Let the plantains cool completely before handling further. Peel the cold, roasted plantains and slice into bite size slices. Set aside.
  3. Wash bok choy, shake off the excess water, then and slice into bite size pieces and set aside.
  4. Place a large pan over medium heat, add the oil and thinly sliced lemongrass and ginger. Let the flavors develop for 1-2 minutes then add the red curry paste. Mix and let combine for another 1-2 minutes.
  5. Add the diced plantains, and let them brown for 5-8 minutes.
  6. Mix in the vegetable stock and the coconut milk, increase the heat and bring to boil.
  7. When the curry is boiling, add box chop, lower the heat down and let simmer for 20 minutes or so. The longer you simmer the thicker the curry. Turn the heat off, and let the curry cool just slightly. As it cools the consistency will thicken further and be perfect for serving over rice or quinoa!

Copyright © Eat the Vegan Rainbow, 2019

Simple Vegetable Stir-Fry with Zucchini Noodles

Simple Vegetable Stir-Fry with Zucchini Noodles, via Eat the Vegan Rainbow

We all love pasta and noodles, right? From tiny little noodles in our alphabet soups, to long and slurpy noodles like spaghetti, we can’t get enough of them. Noodles are cheap, easy to make, and taste fantastic. So what’s not to love?

Well, for those who are trying to cut down carbs, noodles are mostly off limits. And although there are many alternatives to noodles made with gluten, they may be unavailable where you are, or out of your price range, leaving those with gluten sensitivity and allergies with no options. Plus, noodles are processed so not an option for those following whole food plant based diet.

Believe it or not, here vegetables can help. First of all, there is the spaghetti squash that makes – and yes this is true – thin spaghetti. I used this squash to make a really authentic Pad Thai. And then there is a range of vegetables that can be transformed into noodles with a spiralizer, one of my must-have kitchen gadgets. By now I have tested a number of vegetables and my favorite are zucchini noodles.

What are zucchini noodles?

Zucchini noodles, or zoodles for short, are spiralized zucchini that’s been growing in popularity in US so much so that you can now get them from your local grocery store. Next time you are grocery shopping, check our your produce section, more specifically the area where you can find pre-chopped packaged produce. This is where I found my first box of zoodles. I really loved them, so I made a long-term investment and acquired a spiralizer – mine is a KitchenAid attachment and works OK (3 out of 4 stars if I had to rate it; if anyone wants me to elaborate feel free to leave a comment below)!

As a side note: the investment into a spiralizer has been worth it, since I use it frequently to create zoodles and other types of spiralized veggies, like summer squash, potatoes and carrots.

Zucchini are my favorite vegetable to spiralize because they create these nice, long noodles that hold their shape well, taste great and look amazing. They are delicious with meatless meatballs, and thats a fact!

How to cook zucchini noodles?

If you google “zucchini spaghetti” you will find a ton of great recipes. But, you will also find posts and warning that you should not be fooled, and that zucchini ain’t pasta! To that I say – you are right, zoodles are no noodles. What I mean by that is that in order for noodles to come out really great, they can’t be cooked the same way, so no boiling big pots of water allowed. To get to great zoodles, you need to sauté them for just a few minutes. These noodles are soft and gentle, and if you push them to far you will end up with a mushy mess. So, cook them only briefly and handle with care!

And what about using zucchini noodles in a stir-fry?

That’s the question I wanted to answer myself. The recipe below is the result of figuring out how to use zucchini noodles in a stir-fry, as well as how to make gluten-free hoisin sauce. For a great result with zoodles in a dish like stir-fry add the “noodles” last and let them cook for only 2-3 minutes than turn the heat off and let them rest for couple of minutes before serving. This will soften them up but not make them mushy.

The main secret to a perfect stir-fry in general is a great wide and deep pan, like a wok, that allows a nice temperature gradient from the bottom, usually kept really hot, to the top of the sides, that are cooler. For this stir-fry I recommend medium high heat, which allows me better control and decreases the likelihood that something will get burned.

Another tip is to add things gradually, starting from those ingredients that need longer stir-frying times, in this case red and orange pepper sticks, to those things that need just a couple minutes, like the noodles. Taking it step by step will help all the vegetables cook at just the right level of doneness.

Homemade gluten-free hoisin sauce

Another ingredient that makes this stir-fry over the top delicious, is the hoisin sauce. It may come as a surprise to some that most hoisin sauces out there are not gluten-free, so if you are avoiding gluten, you will need to read your labels carefully. Although you can find brands that make gluten-free hoisin sauce, it is actually very easy to make some yourself. All you need is a bit of miso paste (check your miso paste label to make sure it is gluten-free since some may not be depending on what grain was used for fermentation), liquid aminos (or tamari sauce, a gluten-free alternative to soy sauce), dark molasses, and a dash of toasted sesame seed oil – whisk it all together and you are done! Here, I skipped sesame seed oil since I am using actual sesame seeds, but you can change it up as you like.

I recommend adding the sauce, mixed in with some arrowroot powder as a thickening agent, before the zoodles. The arrowroot needs few minutes to start working, so getting the sauce nice and thick before adding the more fragile zucchini noodles helps. At the end, all is left to say is – grab yourself a plate and pile this stir-fry high!

Simple Vegetable Stir-Fry with Zucchini Noodles

What you’ll need:

FOR GLUTEN-FREE HOISIN SAUCE

2 tablespoons white miso paste

1/4 cup tamari sauce (or liquid aminos)

1/4 cup dark molasses

1 teaspoon toasted sesame seed oil (optional)

Plus:

2 tablespoons arrowroot powder

FOR STIR-FRY

2 tablespoons vegetable oil

6 cloves garlic, finely sliced

1 inch (2.5 cm) piece ginger root, thinly sliced

1 red pepper, cut into 2 inch (5 cm) strips

1 orange pepper, cut into 2 inch (5 cm) strips

1/4 cup sesame seeds

1 1/2 cups peas, frozen

4-6 cups spiralized zucchini, store-bought or homemade

What you’ll do:

  1. Spiralize the zucchini – to make 4-6 cups of zoodles you will need to start from 2 medium size zucchini. Set aside.
  2. In a small mixing bowl combine all the ingredients for the hoisin sauce (except arrowroot powder/flour – that is not part of the sauce recipe, it is a thickener for the stir-fry), mix well and set aside. Note: this is a basic hoisin sauce recipe and if you are not gluten-sensitive/intolerant, you can definitely use the store-bought variety, in which case use 3/4 cup of the sauce. Plus: you can use this sauce recipes for any other dishes you are making, like fried rice and similar.
  3. Place a large wok, or a large and deep frying pan with curved sides, over medium high heat. Add thinly sliced garlic and sauté for 1 minutes, then dd thinly sliced ginger and let garlic and ginger release their aromas, about 1-2 more minutes.
  4. Add red and orange pepper strips, and sesame seeds. Mix well and let the peppers sauté for 10 minutes.
  5. Add frozen peas and continue cooking and stirring for 5 minutes or so.
  6. Add the arrowroot powder (flour) into the hoisin sauce and mix well to make sure the mixture is smooth and there are no visible clumps. Note here: if you don’t have arrowroot powder, corn starch will work as well.  
  7. Add the hoisin sauce slurry into the stir-fry, and keep stirring for 1-2 minutes until the sauce thickens slightly.
  8. Add the zucchini noodles last, lower the heat to medium, and using a pair of kitchen tongs fold the zoodles in gently. Let the noodles cook for 2-3 minutes, then turn the heat off and let the stir-fry cool for couple of minutes before serving.

Copyright © Eat the Vegan Rainbow, 2018

SaveSave

Stuffed Portobello Mushrooms with Red Quinoa, Sunflower Seeds, and Sun Dried Tomatoes

ca3f7cb0-2cf1-4415-8293-c08cb1f5def2
Stuffed Portobello Mushrooms with Red Quinoa, Sun Flower Seeds and Sun Dried Tomatoes, via Eat the Vegan Rainbow

Let’s talk about umami. You know, that special kind of taste that tells you something is savory. Not bitter, not salty, not spicy, not sour, but simply and enjoyably savory.

What is behind umami?

We perceive the taste of our food thanks to different kinds of taste receptors, very specialized types of proteins decorating our tongue cells. These receptors recognize molecules in our food, relay what’s in our mouths to the brain, and the result is our perception of different tastes. Although salty, sour, sweet and bitter have been recognized for a very long time (thousands of years), umami has been known for just over a century, and known to western cultures and science for less than two decades being originally discovered by a Japanese scientist, Kikunae Ikeda. The main thing behind umami is glutamate, an amino acid that occurs quite naturally in many food sources.

What are vegan sources of umami?

Although naturally occurring and therefore easily found on many plates, the umami flavors are usually tightly associated with meat. So, it is critical for anyone who is embarking on a vegan culinary voyage to learn about plant-based sources of umami. Here, tomatoes, mushrooms, potatoes, toasted nuts, and soy sauce reign supreme. This means that including one or all of these ingredients into your next savory concoction is a must and the recipe below fully embraces this suggestion!!!

Maximizing vegan umami flavors

Some of my favorite sources of savory deliciousness are portobello mushrooms and sun dried tomatoes. I use these ingredients in many different ways, either by themselves, or when building things like burgers. In the recipe below, large portobello mushrooms become a perfect vessel for a stuffing made of red quinoa, sun dried tomatoes and sunflower seeds. The result is a hearty dinner fare, that when paired with a light salad goes a long way. And did I mention how healthy this food is? With mushrooms, quinoa and seeds, you really can’t go wrong!

Stuffed Portobello Mushrooms with Red Quinoa, Sunflower Seeds, and Sun Dried Tomatoes

What you’ll need:

4 large portobello mushrooms, stems removed

1/2 cup red quinoa

3/4 to 1 cup water

2-3 scallions, trimmed

3 oz. sun dried tomatoes, thinly sliced

1/2 cup sunflower seeds, raw and unsalted, roughly chopped

1 teaspoon dried basil

1 tablespoon olive oil

2 tablespoons fresh flat leaf parsley, chopped

What you’ll do:

  1. Place 3/4 cup of water into a small pot and bring to boil. Add quinoa, stir well, bring back to boil then reduce heat to a gentle simmer. Let quinoa cook for 20 minutes or so. Check for doneness, and add more water, 1/8 cup at a time, letting quinoa soak it up as it simmers. This amount of quinoa should not require more than 1 cup of water and more than 30 minutes of simmering. Let quinoa cool as you prepare the rest of the ingredients.
  2. Turn your oven to broil. Line a baking sheet with parchment paper and arrange the portobello caps, their opening facing down. Broil the mushrooms for 5 minutes, then turn them over and broil for another 3 minutes. By this time, portobello mushrooms should be cooked through. Invert the caps to remove excess liquid, then let the mushrooms cool while you finish making the stuffing.
  3. While mushrooms are broiling, place a large pan over the medium high heat. Add the oil, and finely sliced scallions. When slicing the scallions trim the ends then use both green and white parts.
  4. Let scallions brown for 1-2 minutes then add the finely sliced sun dried tomatoes and dried basil. Mix well and sauté for 2-3 minutes.
  5. Add sunflower seeds that have been roughly chopped and mix well. Let the seeds toast for 2 minutes or so with constant stirring.
  6. Add quinoa, and turn the heat off. Once the heat is off, mix in the parsley and make sure everything is well combined.
  7. Place the portobello mushrooms in a deeper baking dish, spoon the stuffing in, then place the mushrooms back under the broiler to char the tops. This will take 1 minute or so – and you need to pay attention here to prevent burning! If you end up with more staffing than you can fit into your mushrooms, you can serve it separately as a side dish or you can use it as a base for your stuffed mushrooms.
  8. Enjoy these stuffed mushrooms hot, with a side salad and perhaps a slice of fresh bread!

Copyright © Eat the Vegan Rainbow, 2018

SaveSave

Dolmas – Stuffed Grape Leaves

img_4840
Dolmas, Stuffed Grape Leaves via Eat the Vegan Rainbow

Dolmas, stuffed grape leaves, are these delicious savory morsels that you can often find at salad bars, as well as many Greek and Middle Eastern restaurants.

They are one of my favorite appetizers, and although I enjoy them enormously I have not been brave enough to actually make them myself. But, last time I was browsing through my local Indian store I noticed a jar of grape leaves and went for it!

Believe it or not, dolmas are not all that hard to make. They do take time, and lots of hands-on but you end up with a huge batch that can serve a large party so it’s definitely worth the effort. Making dolmas at home will allow you to customize the recipe – in my case that meant less oil, more lemon juice, and adding some pine nuts to diversify the texture.

These dolmas are phenomenal, and will impress your guests to no end! You can eat them warm, you can eat them cold, you can serve them with some hummus or with a dollop of sour cream or yogurt. You can make them into a sandwich with some pita bread or enjoy in your salad the next day if you happen to have leftovers.

If you want to learn the basic “stuffing the leaves” technique, please check my Stuffed Cabbage Rolls post for step-by-step guide!

Stuffed Grape Leaves

What you’ll need:

1 cup rice, medium grain

1 3/4 cup water

6 scallions, finely chopped (green and white parts)

4 cloves garlic, finely sliced

1 cup pine nuts

1/4 cup flat leaf parsley, finely chopped

3 tablespoons fresh mint leaves, finely chopped

1 lemon, zest and juice

1 large jar of grape leaves (2 lbs (1 kg) or similar)

2 tablespoons olive oil

What you’ll do:

  1. Combine medium grain rice with water in a large pot and place over the medium high heat. Bring to boil then turn the heat down to simmer. Cook the rice until fully cooked which takes 15 to 20 minutes. The rice should be soft and sticky.
  2. When the rice is ready, place a large frying pan (or similar) over the medium heat, add oil, scallions, garlic and pine nuts, and let brown for 1-2 minutes. The pine nuts should be well toasted but not burned so keep mixing and keep your eye on the pan.
  3. Add the rice, parsley and mint, and mix well. Let everything cook for another 5 minutes or so.
  4. Turn the heat off, and add lemon juice and lemon zest. Mix everything together and let cool for 1-2 hours.
  5. Open the jar of grape leaves and gently unfold each of the stacks. These will be tightly packed, and you will need to gently peel each grape leaf off. Keep all the leaves, big, small, regular, wacky, ripped and whole because you will use the best ones to make dolmas and the not so great ones to line the pan and create a cozy cooking environment for your stuffed grape leaves.
  6. Use the not so great leaves to completely cover the bottom os a large pot (like a Dutch oven) with grape leaves. I recommend doubling the leaves, so that you have a nice, thick layer at the bottom.
  7. Take bigger leaves, and stuff them. This is actually not that hard – place a leaf on a flat surface and put a tablespoon of stuffing at the bottom of the leaf, where the stem used to be. Use your fingers to form the stuffing into a tight ball – this will help hold everything together. Put the stuffed grape leaf into the pot and continue rolling the dolmas until you run out of the stuffing. If you need to make multiple layers of dolmas in your pot, remember to cover each layer with lots of grape leaves.
  8. Turn the heat to medium high, and simmer dolmas for about 15-20 minutes. Serve cool, at room temperature, and drizzle with some olive oil and freshly squeezed lemon juice just before serving. Enjoy!

Copyright © Eat the Vegan Rainbow, 2018

Stuffed Cabbage Rolls

Stuffed Savoy Cabbage Rolls, via Eat the Vegan Rainbow

Stuffed cabbage rolls, stuffed peppers, stuffed grape leaves – with so many things to stuff how do you decide on what to put in each one and does it really matter? I grew up with stuffed cabbage leaves, the fermented cabbage leaves to be precise, and the result called “sarma” is a bit of a staple, tradition and highlight of the Serbian and other Balkan cuisines.

The most common stuffing ingredient is a mix of rice and meat, with some onions and carrots, all sautéed together. There’s also a tradition to make vegan versions during the weeks of lent that precede both Christmas and Easter. Most vegan versions either skip the meat or replace it with chopped walnuts.

The key to perfect stuffed cabbage rolls is to have nice, large cabbage leaves that are soft and pliable. Traditional recipe uses fermented cabbage leaves that fit these requirements well, but if you don’t have a barrel-full of fermented cabbage heads don’t worry. There’s a way to go around this problem.

The best way to do this is to pick a cabbage with softer leaves to begin with. I recommend savoy but Napa would work.

No. 2: discard 2-3 leaves that are right on the surface as they can be tougher, and then gently peel off 8-10 large leaves without ripping them.

No. 3: bring a large pot of water to boil and blanch the leaves unto softened then rinse under cold water to prevent them from getting too soggy.

Once you have your leaves ready, it’s time to fill them up, and roll them into tight little packages. My stuffing here is simple – I mixed some store-bought ground beef substitute (Trader Joe’s in this case but you can use any kind you like or make your own), and mixed it with some tomato paste to make a stuffing that sticks together.

Place your leaf on a flat surface, spread it out, place about one to two tablespoons of stuffing at the base of the leaf, fold one side over, roll it up, tuck the other side in, and you are done (see pictures below).

Finish rolling the rest, then place your rolled cabbage into a simple tomato sauce – you can find the recipe for my go to tomato sauce below, but you can also use a jar or two of pre-made marinara sauce as well. Let everything simmer for some time, then enjoy!

Stuffed Savoy Cabbage Rolls

What you’ll need:

10-12 leaves (1 large head) Savoy cabbage

24 oz. (680 g) ground beef substitute (homemade or store-bought)

3 tablespoons tomato paste

2 28 oz cans crushed tomatoes, chunky style

4 cloves garlic, finely sliced

2 tablespoons olive oil

1/4 cup parsley, flat leaf, chopped

What you’ll do:

  1. Starting from a large head of Savoy cabbage, remove 2-3 outermost leaves and discard, then carefully remove the next 10-12 leaves. Wash the leaves a pat dry.
  2. Bring 8-12 cups of water to boil in a large pot. Once the water is boiling, submerge the cabbage leaves and boil for 3 minutes or so.
  3. Place the softened yet still not fully cooked leaves into a strainer and quickly rinse with cold water. Leave in a strainer to continue to drain.
  4. In a large mixing bowl, mix the ground beef substitute with the tomato paste.
  5. Taking one leaf at a time, place them on a flat surface, add 1-2 tablespoons of the stuffing, fold one side over, roll into a tight roll, then tuck the other side in to form the tightly packaged roll. Set aside and continue to roll until all the cabbage and stuffing are used up.
  6. Place a large Dutch oven or a heavier pot over the medium high heat. Add olive oil and sliced garlic. Sauté for 1 minute, which should be enough for garlic to start releasing its aroma without burning.
  7. Add tomato sauce, stir well and simmer for 2-3 minutes.
  8. Gently place your cabbage rolls into the tomato sauce. Spread them into a single layer and Bring the sauce to a gentle simmer, cover and let everything cook for 15-20 minutes.
  9. Sprinkle in fresh parsley and serve. Some complementary sides are freshly baked bread, basmati or cauliflower rice, or classic mashed potatoes. Enjoy!

Copyright © Eat the Vegan Rainbow, 2018

Vegan “Chicken” in a Nut Sauce

931d0cf7-f2a2-42db-9b25-e07bd77c6275
Vegan “Chicken” in a Nut Sauce, via Eat the Vegan Rainbow

Creamy, aromatic, and surprisingly sweet – those are just some of the ways to describe this rich dish. Originally made with chicken and cashews, I transformed the recipe into one that uses soya chunks instead of chicken, and walnuts instead of cashews. The result is a nuttier and creamier vegan delight!

What are soya chunks?

Soya chunks are a common meat substitute. According to this Wikipedia page, the ingredient used to make soya chunks is the byproduct of soy oil production, so basically all the protein rich solids left after the fat has been extracted. These solids can be made into many different shapes and sizes and some common products are texturized vegetable protein (TVP), soya curls and soya chunks. All these products usually require some soaking in water or a brief dip in a pot of boiling water to rehydrate them as they are packaged an sold dry.

Where do you find soya chunks?

Most large grocery store chains in the USA don’t carry soya chunks. This is a surprise since we could easily find them in my small home town in Serbia when we visited last summer! But in the US, you either need to order them through Amazon, or visit an South Asian grocery store. The price at my local Indian grocery store is about $2-3 for a 200 g box, which is enough to make a big pot of dinner to feed 6-8 people. Amazing, isn’t it?

Let the food processor do all the work

The recipe calls for a range and of ingredients, and quite a few spices. But the preparation itself is super easy. The sauce comes together in a food processor and then it slowly cooks and simmers with the rest of the ingredients. If you prefer a chunky sauce, dial down the length of processing, and if you prefer a smooth sauce keep processing and add a bit of water as you go for smoother consistency.

This dish is rich and complex, and it’s best served with simple basmati rice. Enjoy!

Vegan “Chicken” in a Nut Sauce

What you’ll need:

200 g soya chunks

2 yellow onions, finely diced

4 cloves garlic, thinly sliced

2 tablespoons sliced ginger

1 cup walnuts

1/4 cup tomato paste

1/4 cup yogurt (almond, cashew or any other one you like)

1/2 lemon, juice only

2 tablespoon vegetable oil

2 teaspoons garam masala

1 teaspoon chili powder

1 teaspoon coriander powder

1/4 teaspoon turmeric

1/4 teaspoon salt

1/4 cup golden raisins (sultanas)

10 oz white mushrooms, quartered

1/2-1 cup water, to taste

2 tablespoons fresh cilantro, and more for garnish


What you’ll do:

  1. Rehydrate soya chunks according to instructions on the box. This will usually require either leaving them in some boiling water for 3-5 minutes or soaking them for a while.
  2. Drain and rinse the soaked chunks. Squeeze them gently to shake a bit of excess liquid off, but don’t squeeze them dry. That will make them rubbery and too chewy. You want the chunks to be soft and moist. Set aside.
  3. Place onions, garlic, ginger, walnuts, tomato paste, spices, oil, lemon juice, and yogurt into a food processor, and process until a smooth sauce forms.
  4. Place a large, heavy pot, like a Dutch oven, over the medium high heat and bring to temperature. Add the sauce and cook for 5 minutes with frequent stirring.
  5. Add the mushrooms and mix well. Cook for another 5 minutes then add the soya chunks. Mix well again, and check if any water is needed. You want the sauce to be dense, but still flowing so adjust the liquid accordingly.
  6. Add the golden raisins and simmer, covered, for another 10-15 minutes.
  7. Serve over some rice and sprinkled with fresh cilantro.

Copyright © Eat the Vegan Rainbow, 2018

Vegan and Gluten-free Baked Eggplant Parmesan

Vegan & Gluten-free Baked Eggplant Parmesan, via Eat the Vegan Rainbow

Eggplant Parmesan – the staple of Italian restaurants in our area, and a frequent favorite of many. Unfortunately, it is so easy to overdo this dish and make it almost inedible. For example, frying the breaded eggplant very often results in a mushy piece of oily eggplant that is far from appetizing. So, to compensate for absence of flavor of a soggy eggplant people usually dump in a whole lot of cheese, usually a mix of ricotta and mozzarella. This makes for a goopy mess of a meal that can be easily avoided by following couple of simple rules. Rule 1: bake your eggplant; Rule 2: make your own tomato sauce; and Rule 3: make the dish 100% plant based.

Prepping the eggplant

Eggplant has a bad reputation for being bitter unless prepared a certain way. However, I don’t remember the last time I had one that was bitter when grilled, or made into a stew. Having said that, for the eggplant parmesan I do recommend that you use the trick that’s supposed to draw the bitterness out. You slice the eggplant, sprinkle with salt and then let drain for 15-30 minutes. The way I did it is to place the eggplant on several layers of paper towels, sprinkle salt, cover with more paper towels, put a baking sheet over the top and weigh with some cans. The amount of liquid that eggplant releases is not enormous but the paper towel should be quite damp.

Breading the eggplant, gluten-free and vegan way

The next step towards your Eggplant Parmesan is breading and baking the eggplant. I don’t recommend frying the eggplant – baking at 425 F (220 C) will give you much better results, and nice crispy eggplant.

To get to a gluten-free version of this classic all you need to do is use gluten-free bread crumbs which are now available in most grocery stores. If you don’t have access to gluten-free breadcrumbs you can use stale and/or roasted gluten-free bread to make your own bread crumbs. Or, if that is not available either, you could use corn flakes and make them into the crumbs! And don’t forget to add some dried oregano and basil to your breading – that just makes everything better!!!

For the breading, you will also need an “egg” mix, in this case some vegan mayo mixed with some plant milk. This mixture gives a nice thick consistency, but if you’d rather skip mayo, you could use just plant milk. The main point of the “egg” mix is to make the surface sticky so that the breading adhere to it well.

Eggplant parmesan breading assembly line

So, your breading assembly line will look something like this – pile of eggplant slices, deep fish (soup plate) with the “egg”, a pie dish with the bread crumbs, and the baking sheet lined with parchment paper sprayed with some cooking spray. An eggplant slice would go from the “egg” mix, to the crumbs, to the pan.

After about 15-25 minutes in the oven the eggplant should be nicely golden and crunchy.

Making the perfect marinara tomato sauce

While the eggplant is baking, you can make your very own amazing tomato (marinara) sauce. The sauce starts with some olive oil and garlic, and includes only five ingredients. You will need olive oil, garlic, crushed and whole peeled tomatoes, and dried oregano and basil.

Vegan eggplant parmesan needs some good cheese

The cheese starts with cashews soaked overnight. It includes nutritional yeast, plant milk, lemon juice and that’s it! As with the tomato (marinara) sauce, this cheese is universally applicable to a range of recipes and dishes. The final consistency is that of a ricotta not mozzarella, but in this case that works great.

Putting the eggplant parmesan together

This magnificent eggplant parmesan starts with a layer of marinara sauce on the bottom, then a layer of breaded eggplant, followed by some tomato sauce then cheese, another layer of eggplant, sauce and cheese, and so on. You can keep layering until you run out of ingredients. Once all the layers are in, put your eggplant parmesan in the oven and let the top and the edges brown. Let the baked dish cool for 15 minutes or so, sprinkle some fresh basil and some freshly ground pepper, then serve with a simple salad. Yummy!

Vegan and Gluten-free Baked Eggplant Parmesan

What you’ll need:

FOR BAKED BREADED EGGPLANT

3 large eggplants, cut across into 1/2 in (1-1.5 cm) rounds

1 teaspoon salt

1/2 cup mayo

1/4 cup milk

1 cup bread crumbs (gluten-free or regular depending on your preference)

1 teaspoon dried oregano

2 teaspoons dried basil

Cooking spray


FOR SIMPLE TOMATO (MARINARA) SAUCE

1 can crushed tomatoes

1 can whole peeled tomatoes, crushed by hand

3 cloves garlic, thinly sliced

2 tablespoon olive oil


FOR SIMPLE RICOTTA CHEESE

1 cup cashews, soaked in water for at least 3 hours (overnight in the fridge is fine)

7 oz. silken tofu

1/2 cup almond milk

1/2 lemon, juice

1 tablespoon nutritional yeast

1/4 teaspoon salt

Fresh basil, finely chopped (optional)

Freshly ground black pepper (optional)


What you’ll do:

  1. Cut the eggplant into rounds, arrange on several layers of paper towel, sprinkle with salt, overlay with several more layers of paper towel, then weight down and leave for 15 minutes. This will draw excess moisture out – your towels should be quite damp, so pat the eggplant dry and set it aside.
  2. Preheat the oven to 425 F (220 C).
  3. Line a large baking sheet with parchment paper and spray with the cooking spray.
  4. In a large soup plate combine mayo and plant milk together. Whisk well. Next, in a separate plate combine bread crumbs and dried oregano and basil. Take a piece of eggplant, dip in the mayo/milk, then move to the breadcrumbs, and lay flat on the parchment paper. Repeat until all the eggplant is used up. You may need two baking sheets for this, so have another one on stand by just in case.
  5. Spray the top with a bit more cooking spray, then bake the eggplant for 15 minutes. Flip it once and bake for 10 more minutes. Take the baked breaded eggplant out and let it cool before handling further.
  6. While the eggplant is baking, prepare the sauce and the cheese. To make the marinara sauce, place a large, heavy pot (I use a Dutch oven) over the medium high heat, add the oil and sliced garlic. After 1-2 minutes, add the can of crushed tomatoes and the can of whole peeled tomatoes that you have smushed with your hands. Let the sauce come to a simmer, lower the heat down, and leave the sauce to simmer with a lid one until needed for the next step.
  7. While the sauce is simmering, combine all the ingredients for the ricotta and blend until smooth using a blender. Set aside.
  8. For the final step you will need a deep baking dish, like the 13 x 9 in (33 x 23 cm) dish. Pour in some tomato sauce, and spread around until the bottom is fully covered. Layer in the eggplant. Top with sauce, then cheese, then add another layer of eggplant, then sauce, and finally cheese. Keep layering until you run out of ingredients. Depending on the size of your baking dish, you may have 2 or 3 layers. If you end up with leftover sauce or cheese, you can store them in the fridge and use for 5 days or so.
  9. Bake the eggplant parmesan for 20-25 minutes, until the dish is bubbling and the top is browned. Let the baked eggplant parmesan rest for 15 minutes before serving and enjoy!

Copyright © Eat the Vegan Rainbow, 2018

Tex-Mex Stuffed Zucchini with Homemade Salsa and Diced Avocado, CSA Week 7

F91E21D6-3357-425B-A336-B18FA5335FAD
Tex-Mex Stuffed Zucchini with Homemade Salsa and Diced Avocado, via Eat the Vegan Rainbow

When life gives you zucchini, there are actually many things you can do with it, grilling and sautéing being my go-tos most of the time. But, doing same thing over over again, no matter how tasty and satisfying they are, does get old. When it comes to zucchini, I have been trying new things, like zucchini lasagna, and zucchini fruitcake – I did also give zucchini cheese a try but that one did not work for me, so I am putting my zucchini cheese making days behind me.

Couple of zucchini’s that came in my CSA (Community Supported Agriculture) share this week from our local Upswing Farm, here in Ashland, Massachusetts where we live, were just the perfect size for stuffing, and that’s what I decided to do.

Getting zucchini ready for stuffing

To me, perfect stuffing zucchini is about 8-9 in (20-25 cm) and what makes this the perfect size is the fact that it matches is the size of my 9 x 13 in (23 x 33 cm) baking dish! Plus, the zucchini in this size range is in the Goldilocks zone – not too big and not too small, yet just right for carrying a good amount of stuffing.

The best way to get the zucchini ready for stuffing is to wash them, cut the ends off (this step is actually optional, you could skip it and leave the ends on – this would give your dish a nice, rustic presentation at the end), then slice the zucchini lengthwise and scoop out the seeds. If the zucchini is old and seeds look well-formed and unappetizing, please feel free to discard them. But, if the inside looks fresh and soft, scoop it out into a bowl and put aside to use as a part of the stuffing.

Par-roasting zucchini

You may have heard about par-boiling, when you boil something only half way through before doing something else with it. Par-roasting is essentially the same thing, just using roasting as a strategy to get the nice, roasted and caramelized flavors going without too much oven time. This can come in handy during hot summer months, for example.

I use par-roasting when prepping most of my stuffed vegetables, be it mushrooms, peppers, eggplant, or zucchini. The method is simple: you turn your oven on high (425 F (220 C) or higher), line a baking sheet with some parchment paper, toss the veggies with some oil, or spray with some cooking spray, or skip the oil altogether if avoiding fat (you can also sprinkle salt on if using, I don’t because the stuffing is usually plenty salty for me), and let the veggies brown for 15 minutes or so, flipping them over once if needed to get them equally browned on both sides.

Why par-roasting?

Well, most stuffing I make is already cooked by the time all is said and done. So, the stuffing itself usually does not need any more cooking time – all it needs to do is go into the oven for 10 minutes or so to get nicely browned on top. Par-roasting is my way of brining whichever vegetable is supposed to hold the stuffing up to speed so that the vehicle is ready for the final oven ride, when the stuffing gets browned and the vehicle finishes baking while absorbing some of the flavors that seep from the stuffing. In this way everything gets harmonized and delicious.

My secret to a perfect (and easy) Tex-Mex flavor

The best way to get the tex-mix flavors going is to start with a good chili powder, then add cumin powder and smoked paprika. These three things combined make for nice smokiness with just a hint of heat, so even with the amount of chili powder I use here the heat will not be overpowering. Having said that, do adjust the chili powder to fit your preferences. Of course, having corn and black beans in this dish is also essential. Here, I used canned corn and canned beans, but you can definitely use frozen corn and cook your beans from scratch. If you are using frozen corn, 1-1/2 cups of frozen corn should be enough, and if you are cooking the beans, 1 cup dry beans will probably be plenty.

Easy homemade salsa

What also helps tex-mix flavors is topping the stuffed zucchini with some freshly made salsa. If you don’t have the time, store-bought is perfectly fine to use here, either freshly made or from a jar – you can pick your own favorite flavor and enjoy! But, if you do want a quick homemade salsa, then follow the instructions below. The main tip here is to cut the tomatoes lengthwise and scoop out the seeds. Don’t throw them out – you can mix them into the tex-mex stuffing! Here, almost everything goes into a food processor for easy chopping. I recommend leaving one cleaned out tomato aside, and dicing it finely by hand to give the final salsa a bit more texture. This salsa takes only a few minutes to make, and you will love the flavor of freshly chopped cilantro and freshly squeezed lime, so it is worth doing it from scratch.

Diced avocado for a final touch

Last but not least is the diced avocado. You actually don’t need the avocado if you can’t stomach it (I know there are some people out there that have trouble with avocado), but it does add a nice, smooth, rich and creamy flavor to the final dish. It’s like a five layer dip right there in your zucchini “boat”!

To pick the best avocado, get those that are still quite hard and then leave them next to some bananas on your kitchen counter for a day or so. The avocado will soften and then you can store it in the fridge until ready to use. In this way you will avoid getting avocados that are too bruised by all the squeezing and poking, and can buy extra avocados on sale and use them 5-7 days later.

After that PSA, back to the Tex-Mex Stuffed Zucchini – to finish the stuffed zucchini, squeeze some fresh lime juice over your avocado and sprinkle some fresh cilantro. If you are using homemade salsa you can skip the cilantro, but if you are using the store-bought  then no cilantro-skipping is allowed!

TexMex_Zucch

Tex-Mex Stuffed Zucchini with Homemade Salsa and Diced Avocado

What you’ll need:

3 zucchini, washed but not peeled

1 15.25 oz (430 g) can yellow corn (whole kernel)

1 29 oz (820 g) can black beans

1 medium yellow onion, finely diced

4 cloves garlic, thinly sliced or crushed if you prefer

2 tablespoons vegetable oil

2 teaspoons chili powder

1 teaspoon cumin powder

1 teaspoon smoked paprika

Freshly ground black pepper and additional salt to taste!* (see Note)

1 avocado, finely diced, for garnish, optional

Fresh cilantro and freshly squeezed lime juice for topping (optional)


SIMPLE HOMEMADE SALSA

4 plum tomatoes, seeded, divided

1/4 – 1/2 jalapeño pepper, deseeded (or more, to taste)

1/4 onion or red onion

3 tablespoons tomato paste

1/2 cup fresh cilantro

1/2 lime, juice

1/4 teaspoon sat (more or less, to taste)

Cooking spray, salt, pepper


What you’ll do:

Tex-Mex_Pin

  1. Preheat the oven to 425 F (220 C).
  2. To make the salsa, cut the tomatoes lengthwise, the use a paring knife to take out the seeds and the middle of the tomato. Reserve the middles for the stuffing. Place all the ingredients, except one tomato into a food processor and buy until finely chopped. Dice the leftover tomato finely and mix in with the rest of pasta. Once mixed, set the pasta to the side.
  3. Wash the zucchini, remove the ends, and cut lengthwise into two pieces (I prefer to remove the ends but you don’t need to do that). Use a teaspoon to scrape out the inside of the zucchini – if full of seeds you can discard, otherwise add to the tomato scrap pieces and put aside.
  4. Line a large baking sheet with parchment paper. Spray with some cooking spray, then place zucchini on, spray the tops and place the zucchinis into the oven. Zucchini will be nicely browned in about 10 minutes. Take the zucchini out and set aside.
  5. Lower the oven temperature to 375 F (190 C).
  6. While the zucchini is par-roasting, get going on the stuffing. Add the oil to a large pan (frying or sauté) and place over the medium-high heat. Add the chopped onions and sliced garlic and let them caramelize for 2 minutes or so. Next add the spices (chili powder, cumin powder, smoked paprika) and let them “bloom” for 1-2 minutes.
  7. Next add the scooped out zucchini and tomato scraps, and mix well. Sauté for couple of minutes, then add corn and black beans. For corn and black beans, I recommend straining them using a large colander, and rinsing them for half a minute under some cold water before using. If you are using frozen corn, or fresh corn, and the beans you cooked yourself this washing and straining step is, of course, not necessary! Mix everything well and sauté for another 8-10 minutes.
  8. Spray a 9 x 13 in (23 x 33 cm) baking dish (or a large casserole pan) with cooking spray, then cover the bottom with a layer of stuffing. Place the par-roasted zucchini boats in and fill them with stuffing. Pile the stuffing high, and press gently in as you fill to make sure you get to all the little nooks and crannies. (You may end up with extra stuffing – if that’s the case you can serve the stuffing itself as a side for another dinner, for example this would be a grate thing to put into a taco shell and enjoy, or serve cold on your next tex-mix salad!).
  9. Put the stuffed zucchini into the oven and bake for about 15 minutes. All you are looking for is some nice caramelization on the top and the sides. Pull the stuffed zucchini out, and let it cool for couple of minutes before serving.
  10. When serving, top each zucchini boat with salsa and diced avocado, freshly chopped cilantro, and a squeeze of lime and you are done!

Copyright © Eat the Vegan Rainbow, 2018


SaveSave

SaveSave

SaveSave

Gluten-free Vegan BBQ Ribs

F3265A16-4525-47CB-BDAF-363E0887C4BE
Gluten-free, Vegan BBQ Ribs, via Eat the Vegan Rainbow

For all of you out there who’s mouths have been watering when you see people share their vegan BBQ ribs recipes but don’t eat gluten, this one is for you! Of course, all of you who are gluten-lovers, I hope you check this recipe out as well – you will not be disappointed!

Big credit for these ribs goes to Linda and Alex Meyerson and their amazing new cookbook “Great Vegan BBQ without a Grill” (read my review here). Their recipe for BBQ ribs (or RIBZ, as they call them!) is amazing and I love it, but my husband has been avoiding gluten so I had to come up with an alternative.

After few trials and errors, I came across couple of recipes that use quinoa as a replacement for gluten. I have been trying to include quinoa into my cooking more often (in a gumbo-jambalaya fusion, as a stuffing for roasted eggplant, and as a perfect side dish for winter holidays), because, although almost impossible for me to pronounce it properly (is it keen-wah or kee-noah or something else?), it is super nutritious. Loads and loads of plant-based protein, fiber, minerals and vitamins!

It also has a subtle flavor which makes many people think of quinoa as bland, while I view it as versatile. This absence of strong flavor means that I can dress quinoa any way I like, and make it come out flavorful and different every time. These BBQ ribs are the proof!

As I said, the real credit goes to Alex and Linda because their idea to bake the rib meat before grilling it further is a real breakthrough. This lets your meat come together, and makes grilling a breeze. These ribs will withstand the indoor and the outdoor grilling so go crazy – and remember that you can prep your “meat” a day or two in advance and store it in the fridge, which can be a real lifesaver if you are having a large party over. All you will need to do is get your “meat” out, cut into the ribs, and grill before serving. This recipe is so fantastic that you can easily serve it to your omni friends and family, and they will not know the difference. Happy grilling!!!

Tip: this is definitely a recipe that you make in stages. You need to cook quinoa, roast some beets, sauté mushrooms, cook the beans (if not using store bought) – all before everything goes into the food processor, so be patient and plan ahead. It will be worth it!

Gluten-free Vegan BBQ Ribs

What you’ll need:

1 cup quinoa

1 1/2 cup vegetable broth

10 oz mushrooms, sautéed

2 tablespoons olive oil

1/2 beet, roasted

2 cups dark red beans (canned or homemade)

2 tablespoons tapioca starch

1 tablespoon tamari

1 tablespoon Worcestershire sauce

1 tablespoon liquid smoke (or less, depending on your taste)

2 teaspoons onion powder

2 teaspoons smoked paprika

1 teaspoon garlic powder

1/4 cup BBQ sauce (homemade or store bought, I love Stubb’s Original)

Oil or cooking spray for preparing the grill or a grill pan

Extra BBQ sauce for serving!

What you’ll do:

  1. Roast the beet – actually, instead of roasting one lonely beet, I recommend roasting a whole bunch of beets at the same time, at 425 F (220 C) for 45 minutes or so, and then using them to make these ribs, as well as eat them in a salad or make them into a hummus. This can be done on the grill too – wrap the beets in some foil and let them hang on the grill for about 45 minutes as you grill other things! You can make the beets in advance and store in the fridge for up to a week, and use in this, and many other recipes as needed. If you are in a tight time crunch you can use canned beets as well, but the roasted ones do add a bit of nice, earthy aroma that the canned ones simply don’t have.
  2. Combine quinoa and vegetable broth into a pot large enough to hold it all, place over high heat, bring to boil, then reduce the heat and simmer for 10-15 minutes until all liquid is absorbed. Set aside.
  3. Preheat the oven to 375 F (190 C).
  4. Place a large frying pan over medium high heat, add the oil then sliced mushrooms, and sauté the mushrooms until nicely browned.
  5. If you have a large food processor, you can combine cooked quinoa, sautéd mushrooms, beans, 1/2 beet, and all the rest of the ingredients – except the BBQ sauce! – in the food processor and process until smooth and homogenous. If you don’t have a large food processor, but have a stick blender you can place everything into a large mixing bowl and then use the stick blender to blend it all together. This is your rib “meat” mix.
  6. Line a 9 x 13 in (23 x 33 cm) baking dish with parchment paper and spray the bottom and the sides with some cooking spray. Pour your rib “meat” mix into the pan, even out and bake for 30 minutes, or until baked through, and browned at the edges. Let the baked rib “meat” cool. This is also a good stopping point, as the “meat” can stay in the fridge overnight and be used the next day.
  7. When you are ready to grill, slice the rib “meat” into strips – they should be roughly the same size as the real ribs, which is about 1 inch or 2-3 cm.
  8. Prepare your grill pan or your outdoor grill as you normally do. For me, this means turning on the heat to high and letting the pan heat up nice and good before brushing with a little bit of oil or spraying with some cooking spray. For the outdoor grill, I turn the burners on to the max (I have a gas grill) and leave the grill covered for 10 minutes, then I use the brush to scrape the grates, oil them with a paper towel dipped into some oil (use your heat proof tongs to handle the towel paper and stay safe), and they are ready (note that the type of a brush you use depends on the kind of the grill grates you have, so follow the manufacturer instruction closely otherwise you may permanently damage your grill!).
  9. Place the ribs on the grill or the grill pan and brush the top with some BBQ sauce. Let them grill for 3-4 minutes on one side then flip over, brush with some BBQ sauce and repeat. I usually flip the ribs three times so that each side has 2 brushes of BBQ sauce and two grilling periods, for a total of about 6 – 8 minutes per side.
  10. Serve hot with the side of your favorite BBQ sauce (I recommend warming the sauce just slightly), and enjoy with your favorite sides, such as grilled corn, spicy cole slaw, or this fantastic arugula and watermelon salad that I just discovered!

Copyright © Eat the Vegan Rainbow, 2018