Mushroom Bourek (or Burek or Börek)

I have not been sharing recipes for a while, but this one reminded me of home and comfort food I grew up with, so I thought why not share it with the world! Bourek or Burek or Börek is one of the most favorite breakfast foods (yes, you heard that right – BREAKFAST) on the Balkans, Eastern Europe, Turkey… Burek is a baked pastry made of very thin layers of dough – in the US this type of dough is known as phyllo. A “pie” filling (traditionally meat, cheese, spinach (or other leafy greens like chard), sautéd mushrooms…) is placed in between the dough layers to create a very rich and amazingly delicious pie. It’s actually quite impossible to describe burek – if you have not tried it, you should, and with the recipe below now you can make one at your home!

Mushroom Bourek

What you’ll need:

  • 20 sheets of phyllo dough (about 8 oz, 250 g)
  • 16 oz (450 g) white mushrooms, diced
  • 1 onion, finely diced
  • 3-4 cloves garlic, minced
  • 1/4 cup nutritional yeast
  • 1 tablespoon olive oil
  • 1/2 teaspoon dried rosemary
  • 1/2 teaspoon crushed red peppers
  • 1/4 cup + 1 tablespoon vegetable oil
  • 1/4 cup water
  • salt and pepper to taste

What you’ll do:

  1. Prepare the phyllo dough according to the instructions on the package. For most of you who live in the US, this means leaving the dough out to thaw either in the fridge or on the kitchen counter following the directions of the manufacturer. This can take anywhere between 4 hours to overnight.
  2. Once the dough is ready, preheat the oven to 375 F (190 C).
  3. Prepare your mushrooms, onion and garlic by: dicing the mushrooms and the onion into small pieces (1/4 inch (0.5 cm) or so), and mincing the garlic.
  4. Add 1 tablespoon of olive oil into a large frying pan and heat over medium high heat. Add the onions and sauté for 3-5 minutes, until golden.
  5. Add garlic and sauté for 1-2 minutes.
  6. Add the mushrooms and cook them through, which will take about 5-8 minutes.
  7. Stir in nutritional yeast, crushed red pepper flakes, rosemary, salt and pepper and sauté for another 1-2 minutes. Turn the heat off and let the mixture cool.
  8. Place 1/4 cup vegetable oil and 1/4 water in a bowl. They will not mix, so you will have to “agitate” aka mix the two each time before applying.
  9. Using a pastry brush, or a spoon, spread 1 tablespoon of vegetable oil around 9 x 13 in (23 x 33 cm) baking dish.
  10. Once the dish is oiled, start layering your phyllo dough sheets into the dish. The sheets are gentle, so treat them with care. Layer a single sheet to cover the bottom (you will likely need to fold it in half to fit into the dish, and that’s ok), then sprinkle with water/oil mix. To do this, use your pastry brush to mix the water/oil well then “paint” the dough layer all over. The dough should not be soaking wet, but it should be moist. Layer another sheet of dough in the same manner, moist with water/oil mixture, and repeat until you’ve used 5 sheets of dough.
  11. Once the 4th (or 5th) sheet of dough is in, you are ready to add 1/3 of your mushroom filling. Spread the filling evenly across the phyllo dough. It should cover the layer thinly. Proceed to layer the phyllo dough, 5 sheets wetted with water/oil mix in between each layer. Top with another third of your mushroom mix, topped with another 5 sheets of phyllo dough and repeat one more time. At the end, you should have a pie with 5 sheets of phyllo – 1/3 of mushroom filling – 5 sheets of phyllo – 1/3 of mushroom filling – 5 sheets of phyllo – 1/3 of mushroom filling – 5 sheet of phyllo. Make sure that the top sheet of phyllo is brushed well with the water/oil mix.
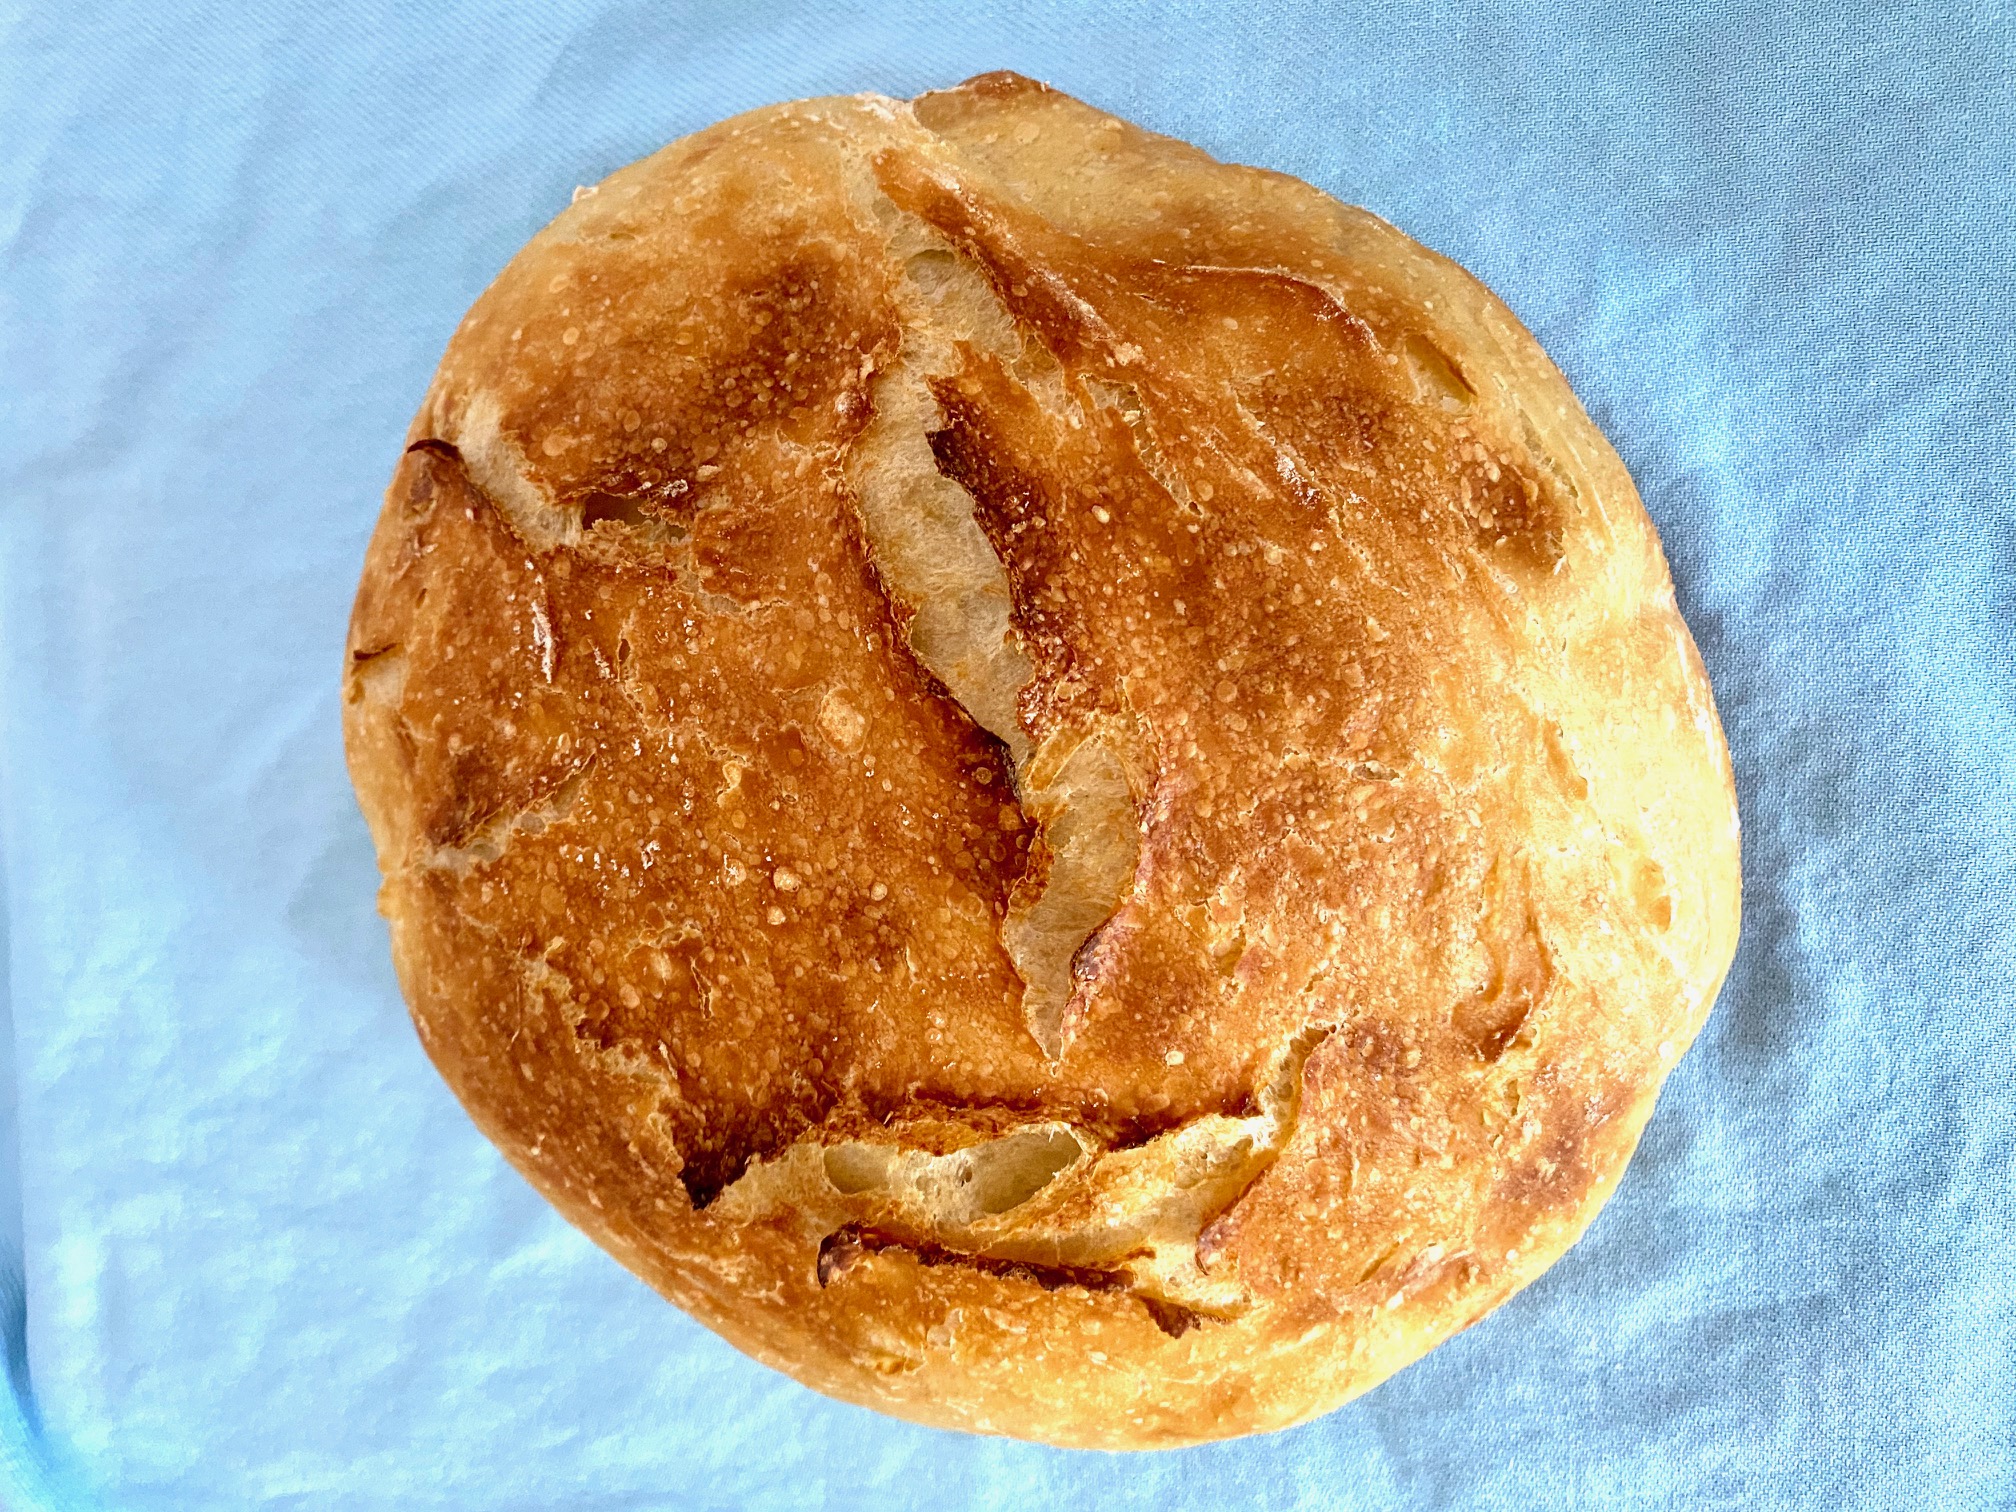
  12. Place the pie into the hot over and bake for 20 minutes then increase the heat to 425 F (220 C) and bake for another 10-15 minutes, until the top layer is crispy and golden brown (see photo). Let cool for 5-minutes before cutting. Enjoy hot for breakfast, lunch, or dinner! I like to add some yogurt on the side – it’s delicious!

Copyright © Eat the Vegan Rainbow, 2021

Perfect Fall Apple and Carrot Smoothie

Fall is in the air – and in the Northeast of the USA, where I currently live, that means apples, lots and lots of apples. We are lucky to have a number of fantastic orchards nearby, and we have made it a bit of a family tradition to go apple picking in October. Although this year is like no other given the current COVID-19 pandemic, we have still made it to an orchard. With our masks on, and social distancing we scored a load of great apples that will last us for few weeks.

Apples are great on their own, fresh and crunchy – I slice them into my oatmeal or just munch on them as a quick snack. My kids like apple and peanut butter sandwiches and enjoy rolling apple slices into a bit of cinnamon sugar. Few years ago, after our annual apple picking trip, I made a fantastic batch of spice-infused apple butter – it’s a slow cooker recipe that I can’t recommend enough! In addition to using apples in desserts, they are also a great ingredient in a Thanksgiving stuffing or in this wonderful fall carrot and apple soup.

Apples are also great in a smoothie. Don’t believe me? Try this one!

Apple and Carrot Smoothie

What you’ll need (for one serving):

  • 1 apple, any variety
  • 1 carrot
  • 1 tablespoon peanut butter powder, or other protein powder of your choice (preferably not chocolate as it may overpower the flavors)
  • 1/4 cup oats
  • 2 – 4 dates, pitted (dates add sweetness, so adjust accordingly; if your protein powder is sweetened, you may want to skip dates altogether; if using a tart apple variety you may want to add an extra date or two)
  • 1/3 – 1/2 cup water or plant-based milk (if you prefer ice in your smoothie add couple of ice cubes instead)
  • 1/4 teaspoon ground cinnamon
  • 1/4 teaspoon cardamom powder

What you’ll do:

  1. Add all the ingredients into a blender. Many blenders recommend you add liquid first than the rest of the ingredients, so that’s what I recommend as well.
  2. Blend until smooth.
  3. Pour into a glass, top with a pinch of cinnamon or nutmeg and enjoy!

Copyright © Eat the Vegan Rainbow, 2020

Pumpkin Pie Oatmeal

It’s that time of the year when we pull out pumpkin spice mix and let them fill our homes. Mmmm….

Here is a super quick and super simple way to start your day right and fill your kitchen with the aroma of the season. Enjoy!

Pumpkin Pie Oatmeal

What you’ll need:

(for one serving)

  • 1/2 cup instant oatmeal (or replace with any time of oats you prefer)
  • 1 cup water (or plant-based milk if you prefer)
  • 1/2 cup pumpkin purée (from a can or homemade)
  • 1 teaspoon maple syrup (or more or less depending on taste preference
  • 1/2 teaspoon ground cinnamon
  • 1/8 teaspoon ground cloves
  • 1/8 teaspoon ground nutmeg
  • Optional: a pinch of ground flax meal to sprinkle on top.

What you’ll do:

  1. Make the oatmeal according to the instructions on the box (or a bag) it came in.
  2. Add the rest of the ingredients and mix well. Enjoy while nice and hot!

Copyright © Eat the Vegan Rainbow, 2020

Tempeh Bolognese Sauce

Tempeh Bolognese Sauce via Eat the Vegan Rainbow

In the spirit of my more recent posts where I cut to the chase and get straight down to business aka the recipe, here we go!

Note on the recipe: the focus here was on recreating umami flavors of the bolognese sauce mixed in with Parmesan cheese. So, what you’ll see is a lot of umami ingredients: tomatoes, mushrooms, and marmite.

(Please note that I still enjoy writing and cooking, but the pandemic had imposed some restrictions on how much writing I can do. I will try to stick to sharing the recipes as they come, and I hope you don’t mind the decreased quality of phots which I don’t have time to stage these days. So, unlike the photos, food remains yummy.)

Tempeh Bolognese Sauce

What you’ll need:

  • 1 large yellow onion, chopped
  • 5-6 cloves garlic, sliced
  • 8 oz white or crimini mushrooms, sliced
  • 2 tablespoons olive oil
  • 2 tablespoons marmite
  • 2 teaspoons chili powder
  • 8 oz (226 g) tempeh
  • 1 28 oz (794 g) can crushed tomatoes
  • Optional: fresh oregano and/or basil

What you’ll do:

  1. Place a large frying pan over mediumhigh heat. Once the pan is hot add the oil and onions. Sauté for 5 minutes, or until onion have softened. Note that onions, garlic and mushrooms don’t need to be finely chopped, rough chop/slicing is ok.
  2. Add garlic, stir well, and sauté for another 1-2 minutes.
  3. Mix in the chili powder and marmite, then add the sliced mushrooms. Toss everything to combine and sauté for another 3-5 minutes, until mushrooms are done.
  4. While onion, garlic and mushroom mix is cooking, crumble the tempeh into rough crumbles into the large food processor (you can also use a hand held blender stick, in which case crumble into a large mixing bowl).
  5. Add the sautéed mix into the tempeh and process until finely chopped and mixed. Please note that the mix will be hot, so handle with care.
  6. Pour the contents of one large can of crushed tomatoes into the same frying pan you used for sautéing and place over medium heat. Add the tempeh mix, and gently fold everything in and combine. Once it starts to bubble, tomato sauce will start to spray all over so cover with the lid to minimize splatter.
  7. Cook for 10 minutes or so with occasional stirring.
  8. Serve immediately over pasta (my latest discovery is lentil and chickpea pasta, including the spaghetti), and sprinkle with fresh basil and/or oregano. Enjoy!

Copyright © Eat the Vegan Rainbow, 2020

Zucchini Casserole

Casserole can be everything and anything. To me, a casserole is a baked dish with a lot of creaminess and goodness, although if one would go by looks only, most casserole could seem quite unexciting and homely.

One of my recent posts described a recipe for quinoa and broccoli casserole, and now it’s time for zucchini to shine. Zucchini is a super versatile vegetable and it’s usually very cheap during the summer months. It’s also easy to grow if you have a plot of land handy, and can yield quite a lot.

My recipes featuring zucchini include raw recipes using spiralized zucchini, zucchini noodles in a string-fry, stuffed zucchini and even zucchini fruitcake. Here, I describe a simple, yet delicious zucchini casserole. Enjoy!

Zucchini Casserole, via Eat the Vegan Rainbow

Zucchini Casserole

What you’ll need:

  • 5-6 medium size zucchinis, sliced
  • 1 cup raw almonds
  • 1/4 cup flex seeds
  • 2 cloves garlic
  • 1/4 cup nutritional yeast
  • 1/4 cup oil
  • 1 teaspoon mustard powder
  • 1 teaspoon rubbed sage
  • 1 teaspoon ground celery seeds

What you’ll do:

  1. Mix raw almonds and flax seeds together in a large bowl, cover with hot (boiling) water and soak for at least one hour. If soaking overnight, store it in the fridge. For soaking that’s less than 2-4 hours, leaving on the kitchen counter will be fine.
  2. Preheat over to 350F (175C).
  3. Slice the zucchini into discs, either by hand or using a food processor. Ideally, you want your slices to be about 3-4 mm, which is about 1/8 of an inch.
  4. Place the sliced zucchini into a large mixing bowl.
  5. Add the rest of the ingredients into a food processor or a blender, and blend until combined and relatively smooth.
  6. Pour the mixture over the zucchini and mix well, then place everything into a 9 x 13 in (33 x 23 cm).
  7. Place the baking dish into the oven and bake for 40-45 minutes.
  8. Let rest for 10 minutes before serving. Enjoy with a side salad!

Copyright © Eat the Vegan Rainbow, 2020

Cauliflower “Rice” with Cherry Tomatoes

Summer is great time for adding more vegetables to your daily cooking. This is an easy recipe that may remind you of risottos, but it is really a dish on it’s own as it is made with cauliflower “rice”. Although you could use rice to this dish, I do recommend you give riced cauliflower a try. Enjoy!

Cauliflower Rice with Cherry Tomatoes, via Eat the Vegan Rainbow

Cauliflower “Rice” with Cherry Tomatoes

What you’ll need:

  • 1 head cauliflower, riced
  • 2 cups cherry tomatoes, washed
  • 1/2 yellow onion, diced
  • 1/2 green pepper, diced
  • 2 teaspoons umami seasoning (this is a mix of salt, mushroom powder, some crushed red pepper and paprika; I get a store-bought seasoning blend, but you can make it yourself)
  • 2 tablespoons olive oil

What you’ll do:

  1. Preheat the oven to 425F (220C).
  2. Add the olive oil to a cast iron pan and place over medium high heat.
  3. When the oil is heated up, add the onions and cook for 2-3 minutes until softened.
  4. Add the diced peppers, stir well and cook for another 5 minutes.
  5. When onions and peppers are soft and browned, add the tomatoes, Mix well, increase the heat and let cook for 8-10 minutes with frequent stirring.
  6. While tomatoes are cooking, prepare the cauliflower. Break the head into smaller pieces and then rice in batches in a food processor. Make sure not to overcrowd the food processor to help the ricing processes. In my food processor, it takes 4-5 pulses of 3-5 seconds each to rice the cauliflower to the size I like.
  7. Add the riced cauliflower to the pan and mix well. Next, add the umami seasoning, and mix to incorporate.
  8. Decrease the heat to medium and let the cauliflower “wilt”. This may take 8-10 minutes. Mix everything from time to time.
  9. Place the cast iron pan into the oven and roast until the top is golden brown. This will take about 15 minutes. Let cool for 10 minutes or so before serving. Enjoy!

COPYRIGHT © EAT THE VEGAN RAINBOW, 2020

Moth Bean Stew with Spinach – Pressure Cooker Recipe

Delicious Moth Beans with Spinach and Indian Spices
Moth Beans with Spinach, via Eat the Vegan Rainbow

Beans come in many different shapes and sizes. Moth beans are probably the smallest bean variety I ever dealt with. But, their nutritional value and taste run large, so I hope you give them a try.

Enjoy!

Moth Bean Stew with Spinach – Pressure Cooker Recipe

What you’ll need:

  • 1/2 yellow onion, diced
  • 3 large carrots, washed, peeled and finely sliced
  • 3 stalks celery, washed and finely sliced
  • 2 cups moth beans, dry, rinsed (if you are using a pressure cooker you can skip pre-soaking; otherwise pre-soak for at least 6 hours, then drain and rinse before cooking)
  • 1 lbs (454 g) spinach, fresh or frozen
  • 4 cups water
  • 1 tablespoon oil (canola, sunflower or similar)
  • 1 tablespoon garlic powder
  • 1 tablespoon dry mango powder, usually found in speciality stores or international food isle (or replace with a tablespoon of lime or lemon juice)
  • 2 tablespoons garam masala (or cumin powder)
  • 1/2 teaspoon of salt (or salt to taste)

What you’ll do:

  1. Turn your electric pressure cooker to Sauté option. If you don’t have a pressure cooker or if your pressure cooker does not have this option, place a pan over medium high heat and sauté onions, celery and carrots for 5-10 minutes, until softened and slightly browned. If you are following oil-free diet, sauté on water. Otherwise, you can use a tablespoon of oil for this.
  2. Next, add the beans, spinach and water. Close the pressure cooker and select Bean/Chili option. If you presoaked the beans, the cooking time will be about 15-20 minutes, if you skipped presoaking the cooking time will be about 30 minutes. If you don’t have a pressure cooker, you can continue to cook the beans on the stove top. It will take 1 hour or so, if working with presoaked bean.
  3. After the pressure cooker cycle is done, let the pot depressurize, them open the lid and mix the beans. To the beans add the toasted spice mix.
  4. To toast the spice mix, bring a frying pan over the high heat. Add the oil, then the spices (garam masala, dry mango powder, and garlic powder). Toast for 1-2 minutes, then add to the bean stew. Add the salt and mix well, to incorporate. Let the beans cool just slightly before serving. These beans are delicious with some rice or quinoa!

COPYRIGHT © EAT THE VEGAN RAINBOW, 2020

Ground “Beef” and Chickpea Stuffed Peppers

Ground “Beef” and Chickpea Stuffed Peppers, via Eat the Vegan Rainbow

Give these stuffed peppers a try – they are easy and simple to make, and very satisfying. I can’t promise that the youngsters in your live will will be thrilled with them, but I hope you’

Ground “Beef” and Chickpea Stuffed Peppers

(serves 2-4)

What you’ll need:

2 large stuffing peppers, split lengthwise, seeds removed

1/2 lbs (225 g) ground beef substitute (store bought or home made)

2 tablespoons tomato paste

1 14.5 oz (411 g) can stewed tomatoes (or diced tomatoes)

1 14.5 oz (411 g) can chickpeas

2 teaspoons fresh, finely chopped (or 1 teaspoon dried) oregano

2 teaspoon fresh, finely chopped (or 1 teaspoon dried) basil

2 tablespoons olive oil, divided

1/2 cup water

Optional: fresh tomato slices for topping.

What you’ll do:

  1. Preheat the oven to 425 F (220 C).
  2. Wash the peppers and split them lengthwise. Remove the seeds and devein the halves, then place in the oven safe baking dish, cut side down. Roast for 10-15 minutes until soft. Edges will be slightly browned. Take out of the oven and let cool just slightly to allow you to handle them.
  3. Lower the heat in the oven to 375 F (190 C).
  4. While the peppers are roasting, place a large pan (cast iron pan preferred but not required) over the medium high heat. Add the oil and the ground beef substitute. Brown the “beef” for 8-10 minutes.
  5. When the “beef” is browned, add the tomato paste, stewed tomatoes, and the chickpeas. Mix well, lower the heat to medium-low and sauté for another 5-10 minutes.
  6. Turn the heat off, then add the chopped oregano and basil, and mix well.
  7. Flip the roasted peppers over, and fill them generously with the ground “beef” and chickpea stuffing. Add any leftover stuffing and the water to the bottom of the baking dish.
  8. Optional: top each pepper with a slice of fresh tomato and perhaps a fresh oregano and/or basil.
  9. Optional: drizzle olive oil on top.
  10. Place the peppers back into a 375 F (190 C) oven and bake for 30-40 minutes, or until the peppers are softened and the top of the stuffing is nice and deeply browned.
  11. Take the stuffed peppers out, let them rest for 10 minutes before serving with your favorite salad, maybe some freshly baked bread, a dollop of sour cream or yogurt… Enjoy!

COPYRIGHT © EAT THE VEGAN RAINBOW, 2020

Vegan Quinoa and Broccoli Casserole

Quinoa Broccoli Casserole
Quinoa Broccoli Casserole, via Eat the Vegan Rainbow

Casseroles are pretty dull, right? I mean: nobody every looks forward to a casserole. Plus: they come in some very weird combinations – tuna casserole, anyone?

Ok, all joking and jabbing aside, casseroles are not my favorite. But: they are super-convenient, one-pot recipes that come together with ease and feed the family. So, they definitely deserve their place on the table, and in busy home cook kitchen and recipe collection.

Usually, casseroles need a lot of eggs, cheese and similar to keep them together. This recipe, on the other hand, uses quinoa – a wonderful grain-like, protein rich ingredient. If quinoa you are using is not processed in any way, you will need to rinse it really well to remove bitter compounds called saponins that cover its surface. As their name suggests, saponins are soap-like compounds, so you need to rinse quinoa out until it stops foaming. Once quinoa is rinsed, cook it using 1 1/2 cups of water per 1 cup of quinoa. You can also use stock, but water works just as well!

The casserole recipe below was inspired by Alton Brown and his Quinoa and Broccoli Casserole – but I took a lot of liberties to adjust for my current pantry and vegan style of cooking. Those of you who are not vegan, you may want to check Mr. Brown’s recipe!


Quinoa Broccoli Casserole

What you’ll need:

  • 1 tbsp olive oil
  • 1 onion, finely diced
  • 1 tbsp Garlic paste or 3 cloves garlic, crushed
  • 1 tbsp Dijon mustard
  • 1/4 teaspoon cayenne pepper
  • 1/4 teaspoon ground black pepper
  • 1/4 teaspoon ground white pepper
  • 1 lbs frozen and defrosted broccoli (or 1 lbs fresh broccoli florets, steamed)
  • 1 14 oz (400 g) can artichoke hearts, sliced
  • 1/4 cup nutritional yeast
  • 2 cup cooked quinoa
  • 3 tbsp tapioca starch
  • Optional: cooking spray


What you’ll do:

  1. Preheat the oven to 350 F (175 C).
  2. Place a heavy, oven-safe pan (I prefer cast iron pan) over the medium-high heat. Add the oil and onion, and sauté until onions are lightly browned. This will take about 5 minutes
  3. Add the garlic and sauté for about a minute.
  4. Mix in the mustard and the spices. Stir well, and continue to sauté for 2-3 minutes.
  5. In a large mixing bowl, mix the cooked quinoa, sliced artichoke hearts, steamed or defrosted broccoli florets, nutritional yeast and tapioca starch. Add the sautéd onion, garlic and spice mix, and stir everything together. Pour back into the cast iron pan, spread around to even the mixture, and spray the top with some cooking spray if using.
  6. Place in the oven, and bake for 30-40 minutes.
  7. Take the casserole out of the oven, and let rest for 15 minutes before serving. Enjoy!
COPYRIGHT © EAT THE VEGAN RAINBOW, 2020

Unbelievably Creamy Oatmeal

Unbelievably Creamy Oatmeal
Unbelievably Creamy Oatmeal, via Eat the Vegan Rainbow

Water or milk? Apparently, when it comes to oatmeal there are two warring ideologies out there, with one side proclaiming that oatmeal can only be made with water and the other declaring that oatmeal with milk is the only way to be. Although I understand why people may prefer milk, I put myself firmly in the water camp on this one. And I am not alone: even bon appétit, a renowned food magazine, seems to agree that if you want to some creamy and delicious oatmeal, cooking it with water is the way to go!

Having said that, I recently discovered to way to kick it up a notch and create an incredibly creamy oatmeal, that’s silky, smooth, rich, and packed with protein. The secret to my newfound success is adding some protein powder to the oats.

I use quick cooking oats, those are oats that have been specially processed to decrease the cooking time. I prepare them in the microwave and they are done in about 2 minutes. But: if you prefer steel-cut oats, or rolled oats – go for it! The recipe below will work with any oat variety, and you don’t need to change anything about how you normally cook your oatmeal. All you need to do is mix in one scoop of your favorite protein powder with your oats before adding water (1/4 cup more than you would otherwise) and then cook the way you usually do.

This small amount of protein powder will add incredible creaminess and smooth texture. As I said, you can add any protein powder you like. I used unsweetened, unflavored pea protein powder, but vanilla flavored varieties will work, as will peanut butter protein powder – although in that case you better like peanut butter flavored oatmeal!

Lastly, don’t forget the toppings – you can use anything you have on hand. In the case of my recent breakfast, I had some bananas, coconut flakes and freeze dried strawberries. Some others topping you may want to try are raisins, or other dried fruit, chopped walnuts, slivered almonds, brown sugar, maple syrup, fresh fruit of any kind (well, maybe not citrus fruit, but you get the idea), some spices, like cinnamon or cardamom…

Or, if you are feeling adventurous (and you used unsweetened and unflavored protein powder) you may want to try savory oatmeal and add sour cream, perhaps some hummus, or some diced olives and similar types of toppings. I can see how this may sound strange, but oatmeal is really almost like polenta or grits, so it’s worth playing around with savory side of oatmeal as well.

Enjoy!

Unbelievably Creamy Oatmeal

Note: serves 1

What you’ll need:

  • 1/2 cup quick cooking oats (or any other type of oats you like)
  • 1 scoop pea protein powder (or any other type of protein powder you enjoy)
  • 1 1/4 cup water (use the amount of water you usually use to cook oatmeal + 1/4 cup extra)
  • optional: toppings of any kind you prefer (fresh fruit (bananas, berries…), dried fruit (raisins, chopped dates…), nuts (chopped walnuts, slivered almonds…), sweeteners (maple syrup, brown sugar…), coconut flakes, spices (cinnamon, vanilla, cardamom….)

What you’ll do:

  1. Note: this is a recipe for quick cooking oats prepared in the microwave. You will need to make adjustments if you are using other types of oats or other cooking methods. In a microwave safe bowl, mix the oats and protein powder. Pour the water in, and mix again. Cook on high for 2 to 3 minutes (this will depend on your microwave so stick to the time you usually use; if this is your first time making oatmeal, please note that oatmeal has a tendency to boil over very quickly and make a sticky mess that’s pain to clean. I recommend you place your ingredients in a deep bowl to avoid spills. Also: place a paper towel or something similar under the bowl, to help soak up the mess in case the spill over happens). Mix the oatmeal and return to the microwave for another 20-30 seconds.
  2. Serve the hot oatmeal with as many of your favorite toppings as you like. Keep it simple or go wild – you can’t go wrong with oatmeal!
COPYRIGHT © EAT THE VEGAN RAINBOW, 2020


Roasted Turnips Recipe

Roasted Turnip Recipe
Roasted Turnip Recipe, via Eat the Vegan Rainbow

Turnips are one of those neglected vegetables – or at least I tend to neglect them. If you are not familiar with turnips they look like really really big radishes bleached by sun expect perhaps a bit of purple left on top. Their texture is in between potatoes and radish, not as dense as a potato and not as airy as a radish. Their taste is also somewhere in between those two – a bit starchy and a bit bite-y! They have quite a bit of vitamins A and K, so great to include into your cooking rota. Plus: they are a low-waste food – meaning that they need to be peeled only lightly and if you buy them with their greens still on, you can use turnip greens the same way you would beet greens or spinach.

My first experience with them was really all thanks to our summer CSA (Community Supported Agriculture) share, resulting in this favorite, Balsamic Vinegar Glazed Beets and Turnips recipe. They are also delicious roasted, as in the recipe below. Enjoy!


Roasted Turnip Recipe

What you’ll need:

  • 1 bunch of purple top turnips (if you can’t find purple top turnips, you can use a bunch of any other type of turnip that’s available where you are, or 4 turnips or so, if not in a bunch. Note: rutabaga is not turnip, although they are closely related. Confusingly, rutabaga is commonly labeled as turnip in the US stores and can be found next to potatoes. The big clue that what you are looking at is not a turnip but a rutabaga is that rutabaga will be pretty large and a bit waxy on the surface (and very hard to peel if you do buy it). Don’t get that one for this recipe, but feel free to explore it for other things as it is delicious as well.
  • 2 tablespoons canola (or other vegetable) oil, divided
  • 1 tablespoon BBQ spice mix, store bought or homemade (this is the one I like, to make you own you need a 1/4 teaspoon smoked paprika, 1/4 teaspoon chili powder, 1/4 teaspoon salt, 1/4 teaspoon brown sugar, 1 teaspoon onion powder (or onion flakes if you have them), and 1 teaspoon garlic powder (or fresh crushed garlic))

What you’ll do:

  1. Wash and peel the turnips. Slice them into thin round slices – about 1/8 in (2-3 mm) thickness works well.
  2. Spread 1 tablespoon of oil over your cast iron pan or another heavy and oven safe pan) bottom.
  3. Arrange sliced turnip in a circle, almost as if you were building a rose using turnip slices as petals.
  4. Sprinkle another tablespoon of oil over the top and sprinkle the spices.
  5. Preheat the oven to 425 F (220 C).
  6. While oven is preheating, place the cast iron pan over high heat to sear the turnip. Let the bottom edge of the turnip slices brown, and get slightly crunchy. This should take only a couple of minutes.
  7. Decrease the heat and, working with kitchen tongs, turn the turnip slices upside down, 4-5 at the time, until they are all flipped and ready to sear on the other edge.
  8. Increase the heat and sear the second edge. Once that’s done, turnips are ready for roasting.
  9. Place them into the oven and roast for 20-30 minutes. – note: if you don’t have a cast iron pan, you can use any other heavy pan that is oven safe.
  10. Take the turnips out, cool slightly and enjoy!
COPYRIGHT © EAT THE VEGAN RAINBOW, 2020

Quick No-Knead Artisan Bread

Quick No-Knead Artisan Bread
Quick No-Knead Artisan Bread, via Eat the Vegan Rainbow

Would you like to be able to make an artisan loaf of bread in your own house in less than 4 hours with no kneading and almost no effort? I knew you would!

This recipe was inspired by several things: (1) impatience; (2) dislike of kneading; (3) internet; and (4) Twitter. I am not a baker, and have very little patience for recipes that ask me to knead the dough for 15 minutes, then wait for 3-4 hours, then pound the dough and knead more, then wait for another 1-2 hours, then pound again and then bake (and don’t even start me on sourdough starter which is this magical thing that is handed down through generation and treasured… enough said!). It’s a lot of work and it’s not much fun, at least not for me.

But: I do love bread! And I love freshly baked bread which is easy to get your hands on in Serbia where I grew up, but almost impossible to find in the US where I live now. To try to fix this disconnect between wanting fresh bread and not wanting to spend ages making, it I bought a bread machine some time ago. Bread machines work well and they are really easy to use (see my bread machine bread recipes here and here). However, the loafs you get are very much of an industrial looking kind, so if you are craving something more rustic and artisan the bread machine will not be able to help you – I will!

The recipe below came to me in a flash. I guess because of the COVID-19 pandemic that’s destroying the world at the moment mostly due to the lack of leadership and gross incompetence, there has been a major increase in random bread making videos and tutorials in my social media feeds. One of them showed how to make something called No-Knead Bread (and yes, this type of bread has it’s on Wikipedia page while many female scientists are not considered important enough to have one). That was intriguing enough – a bread that requires only 4-5 ingredients, is cooked in the Dutch oven and looks like something from a magazine? Sign me up!

What spurred me into action was a random tweet by Nigella Lawson that someone in my feed retweeted that said that using pasta water, instead of simply water, will make the bread have better texture and rise. Below is the recipe that combines the two – the quick no-knead bread strategy and the pasta water tip. Results will amaze you!

Quick No-Knead Artisan Bread

What you’ll need:

  • 3 cups flour (all-purpose)
  • 2 teaspoons sugar
  • 1 teaspoon salt
  • 1 teaspoon instant quick-rise yeast
  • 1 cup pasta water (when left in the fridge, pasta water can gel because it has a lot of starch. Don’t worry about it – measure 1 cup and carry on)
  • 3/4 cup water
  • extra flour for dusting


What you’ll do:

  1. In a large mixing bowl combine flour, sugar, salt and yeast.
  2. Measure out pasta water and water and combine into a microwave safe bowl. Heat up for about 1 minute or until water feels hot to touch. (I take a drop or two of water out using a spoon and then drip it onto the inside of my wrist – same way you would check the temperature of the baby’s bottle.) The water should be hot, but not boiling.
  3. Pour the liquid into the bowl and mix with a wooden spoon until everything is well combined. The dough will be sticky, but don’t worry about it. Cover with a plastic wrap and let stand on the kitchen counter for 3-4 hours.
  4. After about 3-4 hours, take the dough out onto your working surface. I line my kitchen counter with some wax paper, which helps with the clean up. The dough should have doubled in volume and be ready to be transferred into a large Dutch oven lined with some parchment paper (or another oven-safe heavy pot with a lid). Dust your working surface with some flour, as well as your hands and sides of your bowl. The dough will be soft and sticky so you will need to use flour to help you scoop the dough out onto your working surface. Use your hands to form a nice round loaf – this is a no-knead bread, so don’t knead! Just move the dough gently into a rounded shape.
  5. Place the dough into the Dutch oven and cover with a moist kitchen towel and let stand while the oven pre-heats. (Please note that some of the recipes I’ve seen suggest that you preheat the Dutch oven with the lid on while you leave your loaf to rise covered with a moist kitchen towel on your working surface. This may make the transfer of the loaf into a really hot Dutch oven tricky and potentially dangerous, so I recommend placing the dough into the cold pot and skipping the pot preheating step).
  6. Preheat the oven to 450 F (230 C), with a rack place in the middle 1/3 of the oven (more of less).
  7. Once preheated, remove the moist towel from your Dutch oven, put the lid on and place the pot into the oven. Bake for 25-30 minutes covered, then remove the lid and finish baking the bread uncovered for 15 minutes. This will help crisp up the top.
  8. Take the loaf out of the Dutch oven and onto a cutting board. Let the bread cool for at least 30 minutes before cutting – this is a very hot loaf and even after 30 minutes the inside may still be warm. Enjoy!!!
COPYRIGHT © EAT THE VEGAN RAINBOW, 2020