Spaghetti Squash Pad Thai

Spaghetti Squash Pad Thai, via Eat the Vegan Rainbow

Basic Pad Thai is a simple noodle dish, where wide rice noodles are mixed with eggs and chopped peanuts, then sprinkled with crushed red pepper flakes, lime juice and chopped scallions (green onions) and sometimes fresh cilantro. The whole dish comes together in five to ten minutes and can be eaten as is, or customized with a range of toppings so it is definitely a very popular dish found in every Thai restaurant.

Although it is relatively straightforward to find the right type of rice noodles that are typically used in Pad Thai, I decided to explore whether spaghetti squash would work. Spaghetti squash is a squash that, as the name suggests, has a stringy flesh structure that can be forked into a noodle-like structures. The texture of these noodles is softer than the regular pasta, and they are usually shorter but the flavor is rich and delicious, and the nutritional facts are definitely on the side of the squash when compared to either rice noodles that one would use in Pad Thai or any other pasta.

One down side to using spaghetti squash in a recipe like Pad Thai is that squash needs to be roasted first, which means that a five to ten minute recipe all of a sudden becomes a sixty to ninety minute recipe. Still, I recommend you give it a try especially as the hands on time is not as intense.

Are there any tricks to spaghetti squash? No, not really. The only two tips that are worth mentioning is to roast the squash cut side down on a parchment paper lined baking sheet, and to let the roasted squash cool as it will help with handling the squash as well help the squash noodles come out better defined.

To make this into vegan Pad Thai, I recommend using extra firm tofu instead of eggs. You don’t need to press it, but do let it drain for just a bit. Otherwise it may make your Pad Thai too mushy.

One final modification to the traditional Pad Thai recipe I made is using peanut butter in the sauce and some chopped cashews for the topping. Reason for this? I ran out of peanuts!

Spaghetti Squash Pad Thai

What you’ll need:

1 medium spaghetti squash, 1 to 1.5 lbs (about 500 to 700 g)

2 tablespoons garlic, crushed

2 tablespoons peanut butter

2-3 tablespoons lime juice

14 oz. (400 g) extra firm tofu

7 scallions (green onions), finely sliced

1/3 cup cashews, chopped

Cooking spray

What you’ll do:

    1. Preheat your oven to 425 F (220 C).
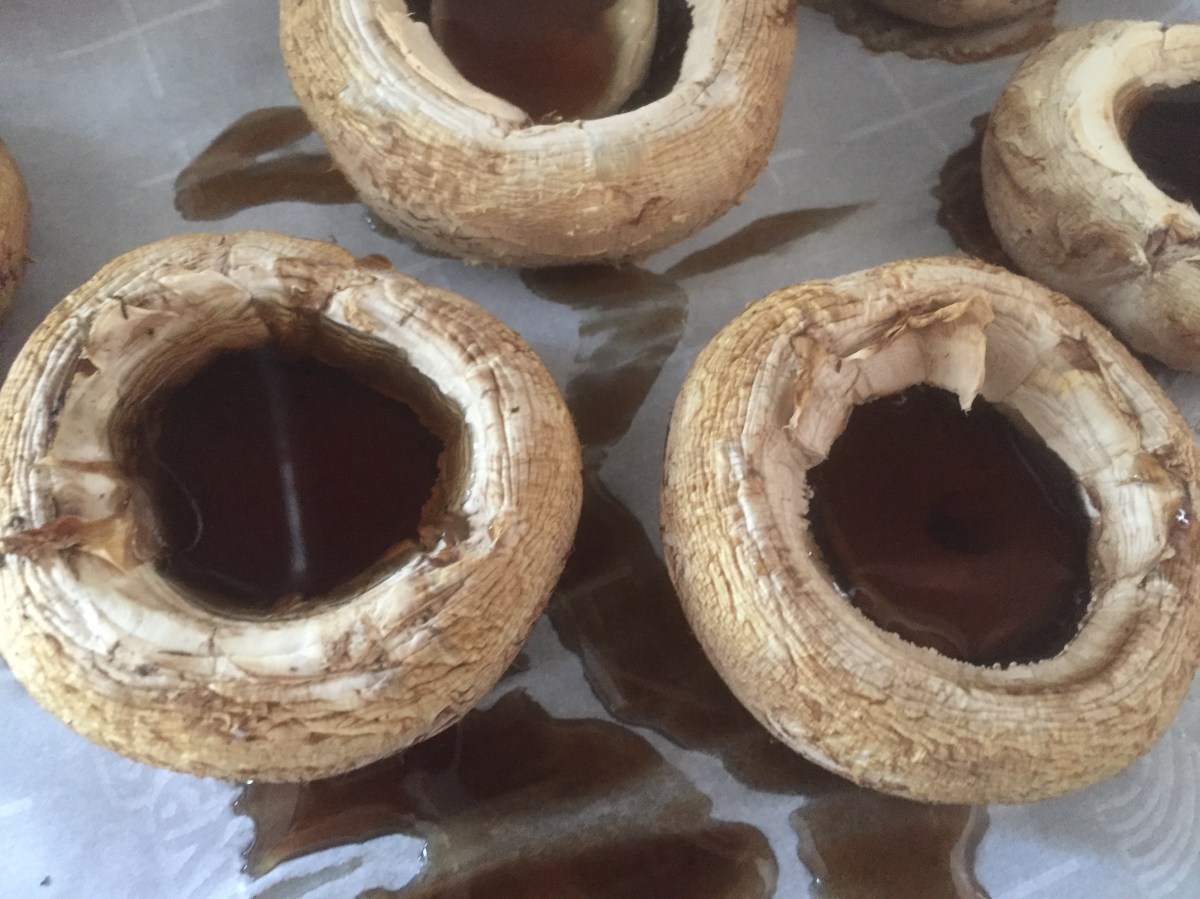
    2. Wash the spaghetti squash, wipe dry and cut in half lengthwise. Use a spoon to clean out the seeds.
    3. Line a large baking sheet with parchment paper. Place spaghetti squash on the parchment paper, cut side down. Place in the oven and let roast for 25 to 30 minutes. Check with a knife and it goes in without resistance your squash is done. Take it our of the oven and let cool for at least 30 minutes. Be patient because the squash needs to be cool to handle.
    4. Once cool, take half of the squash, flip over and using a large fork go in and pull the flesh to make the “spaghetti”.
    5. Spray the bottom of a large pan or wok with cooking spray and place it over medium-high heat. Add garlic and let the garlic aroma develop, which will take about 1-2 minutes.
    6. Add soy sauce and peanut butter. Stir well and cook for 1-2 minutes.
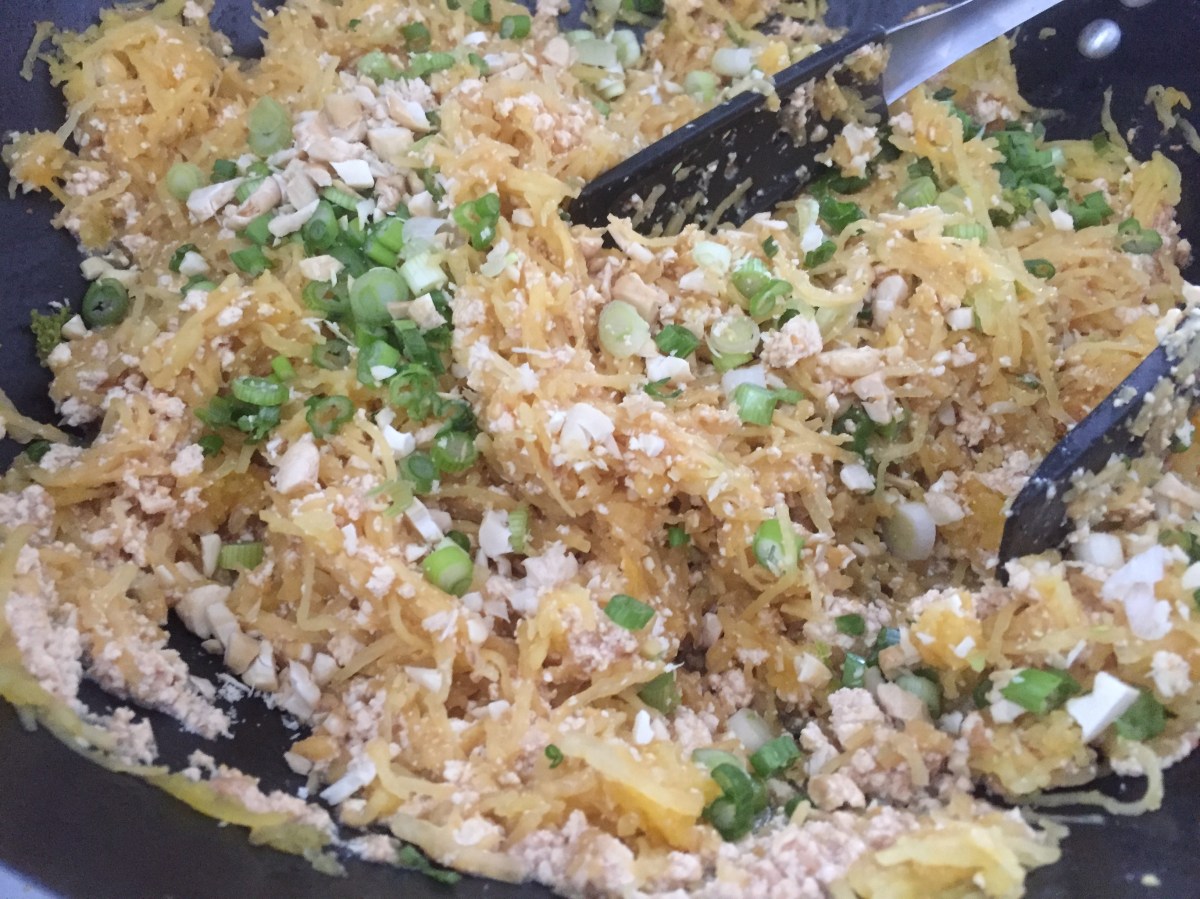
    7. Add spaghetti squash and mix with the sauce. Here, I recommend using a pair of tongs to gently fold the squash into the sauce. Once the two are well incorporated add tofu that you have crumbled to small bits that look like scrambled eggs.
    8. Mix everything well together and cook for another 4-5 minutes.
    9. Turn the heat off, add the lime juice, scallions and cashews.
    10. If you like to add some heat you can use crushed red pepper flakes, or a dash of sriracha sauce. You can also top with fresh cilantro for some added freshness.

Copyright © Eat the Vegan Rainbow, 2017

Clams-free “Clam” Sauce

Jackfruit Clam Sauce with Black Bean Pasta
Jackfruit Clam Sauce with Black Bean Pasta, via Eat the Vegan Rainbow

Cooking is in many ways similar to doing experiments in a research lab. In a lab we start from a protocol, or a recipe (oh, yes… we use recipes in science big time!), and more often than not we change things up to see what happens to our experimental results under a new set of parameters or conditions. We make observations and jot them down. The main and the biggest, actually a life and death, difference between cooking and science is that you don’t taste results of your science experiments, while tasting cooking experiments is recommended.

Why do I mention experiments? Well, although seldom talked about most experiments actually give negative results or even fail. Now this happens in cooking too, but I have to say at this point in my life not very often. So, it is with a bag of mixed emotions that I am jotting down this recipe – the Clam-free Clam Sauce with Black Bean Pasta – as this did not turn out the way I was hoping it would.

The sauce itself is actually spot on, creamy and delicious. It uses jackfruit as a stand in for clams, similar to what I’ve done in my New England “Clam” Chowder, and a batch of homemade vegan mozzarella, recipe for which I found on a fun vegan cooking blog site it doesn’t taste like chicken. This vegan mozzarella, combined with the jackfruit, some almond milk, lemon juice, and a dash of Old Bay Seasoning gave a beautiful, rich, and creamy sauce.

The main problem was that I decided to pair this delicious sauce with black bean pasta, instead of more traditional linguine pasta, and this DID NOT work at all. The black bean pasta had a strong flavor that interfered with the subtle flavors of the Clam-free Clam Sauce so the final dish was definitely very far from authentic pasta with the clam sauce.

Conclusion of this experiment? When in possession of the clam sauce, even if it is a vegan version of it, just go with linguini, which is exactly what I’ll do next time!

Clam-free Clam Sauce

What you’ll need:

1 can (10 oz, 280 g) young green jackfruit in brine

1 tablespoon Old Bay Seasoning

2 tablespoons garlic, crushed

1/2 cup vegan mozzarella

1 cup almond milk

1 tablespoon corn starch

2 tablespoon lemon juice

1 teaspoon dry basil

1 teaspoon dry oregano

Cooking spray

Fresh flat leave (Italian) parsley

What you’ll do:

    1. Prepare the vegan mozzarella according to instructions on it doesn’t taste like chicken site.
    2. Prepare the jackfruit by draining the brine out and washing the jackfruit off from access brain to make sure that most of the salt is washed off. Pull jackfruit apart into smaller pieces, about the size of clam “meat”.
    3. Spray the bottom of your pot with cooking spray and turn the heat on medium-high. Add jackfruit and sauté for 3-4 minutes.
    4. Add Old Bay seasoning, mix well and sauté for 1-2 minutes.
    5. Add garlic and sauté for another minute, until the garlic releases its aroma.
    6. Next add the vegan mozzarella and mix everything together. Let it simmer for 2-3 minutes.
    7. Add almond milk and decrease the heat to medium to medium-low. Let the sauce come to simmer.
    8. In a small bowl, mix corn starch and couple of tablespoons of sauce to temper the corn starch. Then add it to the sauce and mix well. Let the sauce simmer for 10-15 minutes.
    9. Add lemon juice, oregano and basil. That ought to do it. But remember: no matter what don’t pair this sauce with the black bean pasta, it’s not worth it!

Copyright © Eat the Vegan Rainbow, 2017

Healthy Asparagus Risotto

Asparagus Risotto, via Eat the Vegan Rainbow
Healthy Asparagus Risotto, via Eat the Vegan Rainbow
Spring is in the air, although perhaps not yet on the ground, and when it comes to spring vegetables asparagus is it! If you haven’t enjoyed asparagus before, do give it a try. Asparagus is very easy to make as it tastes really good roasted, or in a soup. It is also one of those risotto-friendly ingredients that blends well with creamy rice to add crunch and earthy flavor.

The path to a really lovely risotto goes through picking the right rice and cooking it with patience and with a lot of stirring. My go-to rice for risottos, as well as for sushi and other rice dishes that need a stickier rice variety, is medium grain rice. This is a point of difference with most risotto recipes out there as they recommend using short grain rice variety called arborio rice. Arborio rice will work really well in this recipe too, so if you have it on hand go for it. The kinds of rice that may not work well here are the long grain variety, like Jasmine or Basmati rice.

Cooking risotto does require lots of stirring, and one trick that I use is to add the liquid in batches to let the rice absorb it before adding more. It takes time, but at the end your risotto will be rich and creamy without needing any butter, cream or parmesan, all common risotto ingredients.

My risotto recipe does use on less-common ingredient, nutritional yeast. If you will be preparing vegan recipes often nutritional yeast is definitely worth getting because it is a common add-on that mimics dairy. In the case of this risotto nutritional yeast acts as a substitute for parmesan cheese.

Healthy Asparagus Risotto

What you’ll need:

1 pound (500 g) green asparagus, chopped

1 yellow onion, diced

1 cup medium grain or short grain rice

2 tablespoons nutritional yeast

2-3 cups vegetable stock or water

Cooking spray

Lemon zest, lemon juice (optional)

What you’ll do:

  1. Wash and trim the asparagus. I don’t peel it because I try to get spears that are thin and less woody, but if your asparagus is thick it will need peeling. Cut into approximately 1/2 in (1 to 1.5 cm) bits. You don’t need to be precise here but just think about what your final spoonful will look like and make sure your asparagus bits are small enough to be in harmony with the rice.
  2. Dice the onion into fine dice.
  3. Spray the bottom of a wide and shallow pan with cooking spray. Turn the heat to medium high. Add onions and cook until they soften and start to brown. This will take 4-5 minutes.
  4. Add asparagus and let cook for another 4-5 minutes with occasional stirring.
  5. Add the rice and stir well. Let cook for 1-2 minutes.
  6. Lower the heat down to medium low. Add 1 cup of liquid. Stir well and let the rice soak up the liquid. Give it time and repeat with more liquid. Risotto is definitely one of those dishes that people fear to approach and many articles and posts have been written about how to get to the perfect bowl of risotto and avoid mistakes. Fear not, because all you really need to do is hang around your pot, watch your rice and add the liquid when the rice tells you its thirsty. The amount of rice in this recipe can take anywhere between 2 and 4 cups of liquid. You also might want to start by adding one cup at a time for first 2 cups and then decrease to 1/4 cup of liquid at a time. Keep going until the rice is soft but not mushy, a shade softer than al dente.
  7. Turn the heat off and sprinkle with nutritional yeast. Mix everything together and let stand for 5 minutes.
  8. Sprinkle with lemon zest and a dash of lemon juice just before serving!
  9. Copyright © Eat the Vegan Rainbow, 2017

Roasted Red Peppers Chickpea Burgers

Roasted Red Pepper Chickpea Burger
Roasted Red Pepper Chickpea Burgers, via Eat the Vegan Rainbow

There are many things that every time I make then turn out perfect and exactly as I want them. Well, veggie burgers ain’t that! I’ve tried many veggie burger recipes and had failure after failure to reckon with.

The main issue with most of the veggie burger recipes I tried (and failed at) is that the burger consistency is just so delicate that they fall apart as they are cooked. One way to make the veggie burgers sturdier is to use a grain or a flour based binder, like bread crumbs, which I use in my Vegan Jackfruit “Crab” Cakes, or oats, which I used in my Meatless Meatballs. But, I really wanted to see if I can skip using those in a burger.

The recipe I came up with uses chickpeas – in all honestly because I bought one too many cans of chickpeas at a recent sale – and some roasted red peppers, for color and flavor. It also uses sunflower seeds that add a different texture, a bit of crunch, good amount of healthy fats and a good amount of iron, which is something that I keep in mind when cooking given that meat, a great source of dietary iron, is off my table. Additionally, a key ingredient that glues the burgers together is “flax egg”, which is flax meal soaked in water which turns it gooey and slimy, just like egg!  The mix comes together really quickly and all you need will be a stick (hand-held) blender or a food processor.

Roasted Red Pepper Chickpea Burger Mix
Roasted Red Pepper Chickpea Burgers Mix, via Eat the Vegan Rainbow

The rest of the preparation does take a bit of time but really not much effort because you will let the fridge or a freezer do some work for you. Placing formed patties into a fridge or a freezer to firm up is officially the greatest tip ever. It helped my Jackfruit “Crab” Cakes, and I can now say it most certainly helped these Roasted Red Pepper Chickpea Burgers. I recommend keeping the patties in the freezer for quite a bit, until they are almost frozen on the edges, because these burgers are still gentle and soft while they cook. They do come together as they cool off and they will be great when you serve them, but you will need to be gentle and careful when you flip them so give the patties plenty of room.

Roasted Red Peppers Chickpea Burgers in the Pan
Roasted Red Peppers Chickpea Burgers in the Pan, via Eat the Vegan Rainbow

Leave the burgers to cool just for couple of minutes. As I mentioned, they will come out of the pan pretty soft and they will get firmer as they cool. You can serve these burgers any way you like your burgers served, in a bun or without. They have a delicious, just slightly sweet flavor from the roasted red peppers and the lovely browning they get as they cook.

Could you bake or broil these? I think that would work. Could you form patties, freeze them and then cook them a week later? I don’t see why not. But in that case I recommend thawing for a bit before letting them hit the griddle. Could these be grilled? Well, sorry to disappoint you but I don’t think so. But, this is not to say that I am not going to try. After all, experimenting is half the fun…

Roasted Red Pepper Chickpea Burger
Roasted Red Pepper Chickpea Burgers, via Eat the Vegan Rainbow

Roasted Red Pepper Chickpea Burgers

What you’ll need:

3 15.5 oz (439 g) cans chickpeas (garbanzo beans), low sodium

1/2 cup roasted red peppers, homemade or store bought (jarred in water)

1/4 cup sunflower seeds, roasted and unsalted

1 tablespoon tomato paste

1 teaspoon onion powder

1 teaspoon garlic powder

1 teaspoon chili powder

1 teaspoon smoked paprika

1 teaspoon soy sauce

2 tablespoon flax meal

4 tablespoons hot water

Cooking spray

What you’ll do:

    1. In a mixing/measuring cup mix flax meal and hot water. Stir well and let stand for 15-30 minutes.
    2. Place the chickpeas in a large colander or a strainer. Rinse well and drain.
    3. Put chickpeas, roasted red peppers, sunflower seeds, “flax eggs”, and all the spices in a large and deep mixing bowl (or the food processor if that’s what you are using instead of the stick blender) and blend until mostly blended. I like some texture to the burgers so I do leave some bigger chunks around, but follow your taste buds and preferences here.
    4. Line a flat serving platter or a tray with wax paper. Using your hands shape the burgers and place them on the tray. This amount of the burger mix makes about 8 good size burgers. Put the burgers in the freezer for 30-45 minutes of refrigerator for 2-3 hours. If using the freezer method make sure the patties are not frozen through but still soft in the middle and mostly solid at the edges. If you are using the refrigerator, the patties need to give some resistance when you poke them.
    5. Spray the bottom of your frying pan with cooking spray and heat over high heat. Put 3-4 burgers in at a time, how many depends on the size of your pan and it’s important to keep in mind that these burgers are on a softer side so need some extra space around them to help with moving around and flipping. Cook for 4-5 minutes on one side, carefully flip around and cook for another 3-4 minutes.
    6. Let the cooked burgers rest for 5 minutes or so, then serve!

Copyright © Eat the Vegan Rainbow, 2017

No-fumble Apple Crumble

Apple Crumble with Vegan Ice Cream
Apple Crumble with Vegan Ice Cream, via Eat the Vegan Rainbow
Mmmmm, apple crumble! Need I say more? This sort of pie, sort of pudding, sort of fruit bowl has been my go to dessert for some time now for couple of simple reasons. First of all, it does not require much careful measuring and weighing as dough and batter based desserts do if the cake or cookies are to come out just right. Second, it comes together very quickly and uses ingredients that I have on hand almost all the time. So, in the words of the American football jargon from the title of this post, it is practically impossible to fumble this recipe. But just to make it even more error-proof I simplified the recipe further.

Apple crumble goes under another name that you may be familiar with and that’s apple crisp, because the characteristic topping this dessert has is crispy and crumbly at the same time. The classic recipe starts with tart apples, like Granny Smith, and then uses lots and lots of sugar to sweeten things up, some flour to bind things together, and lots and lots of butter to get the topping, made of nuts and oats, crunchy. So basically you star from delicious fruit said to keep the doctor away, and add reasons that will in the long run likely lead you to pay your doctor a visit.

Apple Crumble Apples
Apple Crumble Starts with Apples, via Eat the Vegan Rainbow
In my recipe I removed the flour to make it gluten-free (I used corn starch instead) and removed the need for butter by adding some walnuts and almonds to my topping. Walnuts excel in the amount of polyunsaturated fat they have and are a great substitute for butter here, and almonds add more monounsaturated fat and some extra fiber. Needless to say, both walnuts and almonds taste more interesting than butter so the crumble/crisp flavor will blow you away!

When it comes to keeping things sweet without adding sugar, I decided to use raisins as natural sweeteners and to get them to their juicy magnificence I soaked them in hot water for 30 minutes, then drained, before use.

Apples, Raisins and Cinnamon
Apples, Raisins and Cinnamon on Their Way to Apple Crumble, via Eat the Vegan Rainbow
One last note is that I used some lime juice and lime zest and at the end I think that this small amount of very aromatic citrus made a huge difference. The crumble was delicious and had a wonderful aroma, so much so that we ate the whole crumble in one sitting. So much for portion control!

Apple Crumble

What you’ll need:

4 large tart apples (Granny Smith or other)

1 cup raisins

1/2 cup walnuts, raw

1/2 cup almond, raw

1/2 cup oats

2 tablespoons corn starch

1 lime, juice and zest

1 tablespoon cinnamon, ground

Cooking spray

What you’ll do:

  1. Preheat the oven to 375 F (190 C)
  2. Soak the raisins in 2 cups of warm water for 30 minutes.
  3. Cut the apples into slices and place in a large bowl. Squeeze the lime juice over the apple slices as you go and mix the juice in to keep your apples from oxidizing (turning brown) while you work.
  4. Drain the raisins and pat them dry. Add them to the sliced apples. Add lime zest, corn starch and cinnamon. Stir well to coat and combine.
  5. Spray the bottom and the sides of a square 8 x 8 in (20 x 20 cm) baking dish with cooking spray. Add the apple mix and spread around. Cover with foil and bake for 25 minutes.
  6. While the apple mix is baking prepare the crumble. In a food processors chop roughly the walnuts, almond and oats. You don’t want to make a fine meal, rather pulse the food processor and stop at a point where some of it is very fine but there are still plenty of chunky pieces left.
  7. Remove the foil from the baking apple mix and sprinkle the crumble on top. Don’t mix!
  8. Put the apple crumble back to the oven for another 15 minutes.
  9. Take it out of the oven and let it sit for 10 minutes to cool just slightly.Enjoy the Apple Crumble warm or cold!

Note on serving suggestions: I realize it is customary to serve warm apple crumble with cold vanilla ice cream, and that is swell! But give this crumble a try on its own – it is fantastic!

Note on peeling apples: I prefer not to peel my apples as peeling takes time and the peel adds a nice texture to the crumble. But if you like the crumble to be smoother then do peel them.

Note on the featured image: The featured image on the home page includes two small scoops of green ice cream. This is homemade coconut milk ice cream that owes its green color to food coloring – sorry for not coming up with something more natural… yet!

Copyright © Eat the Vegan Rainbow, 2017

New England “Clam” Chowder

Bowl of New England “Clam” Chowder, via Eat the Vegan Rainbow

A week ago New England was thrown into a March snow storm that dumped 1-2 feet (30 – 60 cm) of fresh powder all over the region. Schools were closed, businesses advised people to work from home if they can, and by the time late afternoon rolled around we were all outside digging ourselves out.

As we all know, when it comes to the cold weather and snow storms nothing works faster to melt the chills away than a bowl of hot soup, so given the success of my Jackfruit “Crab” Cakes I decided to veganize a seafood classic, the New England Clam Chowder and see if jackfruit would work in this recipe as well.

For those of you not familiar with the New England Clam Chowder it is a creamy soup built from butter, heavy cream, celery, onions, potatoes, clam juice and clam meat. I had past success in making creamy soups using potato or corn starch as gluten-free thickening agents, and I was pretty sure that they will work here as well. I was interested to see how jackfruit will do as a stand in for clams and felt confident that it will turn out OK.

But how to make vegan clam juice, which is clam broth and a key ingredient in this soup that adds unique flavor evocative of sea and shell fish posed and interesting challenge. I decided to use some Old Bay Seasoning because it worked so well in my “crab” cakes, and for some extra sea flavor I used some seaweed broth. What I did is to soak two sushi nori seaweed sheets in some warm water for 30 minutes, and then pass the mix through a strainer to remove the seaweed and keep just the liquid. That was my “clam juice”, and it worked!

Beside that little neat trick, my one general recommendation is to use a Dutch oven or a similar heavy post with a lid, as the soup does need to simmer for a while. When the soup is done, it is best served fresh with a squeeze of lemon, coarsely ground (cracked) black pepper, a sprinkle of dry basil or fresh parsley, and a piece of bread. There’s nothing better to help you recover from all that snow shoveling!

New England “Clam” Chowder, Gently Simmering, via Eat the Vegan Rainbow

New England “Clam” Chowder

What you’ll need:

1.5 lbs (700 g) potatoes, peeled and diced

1 can (10 oz, 280 g) young green jackfruit in brine

6 stalks of celery

1 large yellow onion

2 tablespoons garlic, crushed

1 tablespoon Old Bay Seasoning

3 tablespoons corn starch

2 tablespoons lemon juice

3 bay leaves

2 sheets of sushi nori seaweed

2 cups hot water

3 cups almond milk

Cooking spray

What you’ll do:

  1. Soak seaweed sheets in 2 cups of hot water for 15-30 minutes.
  2. While seaweed is soaking rinse and drain the jackfruit and pull the pieces apart to create smaller chunks, roughly the size and shape of chopped clams. Set aside.
  3. Peel and dice potatoes, onions and celery.
  4. Spray the bottom of a large Dutch oven, or other heavy pot, with cooking spray and bring up to medium high heat.
  5. Add onions, garlic and celery and sauté for 3-5 minutes.
  6. Add potatoes and continue sautéing for another 3-5 minutes.
  7. Add jackfruit, sprinkle with Old Bay Seasoning, mix well and sauté for another 5-7 minutes.
  8. While the vegetables are sautéing, run the seaweed through a strainer to remove as much seaweed as possible. You should end up with 2 cups of water that is slightly brown and smells like seaweed. That’s your “clam” juice
  9. Mix in the starch into the vegetables, and add the “clam” juice, bay leaves, and lemon juice. Bring the soup to gentle boil, mixing occasionally.
  10. Add almond milk, and keep the soup on gentle simmer for 20-30 minutes. Serve hot, with a squeeze of lemon and a piece of bread.

Copyright © Eat the Vegan Rainbow, 2017

Mashed Potato Stuffed Mushrooms with Cashew Sour Cream

Mashed Potato Stuffed Mushrooms with Cashew Sour Cream
Mashed Potato Stuffed Mushrooms with Cashew Sour Cream, via Eat the Vegan Rainbow
Fully loaded vegan mushrooms are finally here! Last time I went grocery shopping large white stuffing mushrooms were on sale and they looked so inviting that I had to have them. For most vegetarians and vegans mushrooms are a common ingredient as they add that elusive umami flavor to dishes. I used them fairly often and have featured them in  my Vegan Stuffed Pepper recipe.

This time around it is the mushrooms that are getting stuffed, and the stuffing I decided to go with is yummy, silky smooth and creamy mashed potatoes. Additionally, just to kick it up a notch I made some Cashew Sour Cream by Oh She Glows to add a bit of flair. Finally, sun dried tomatoes on top are for loveliness, color and for a bit of sweetness.

There are really two tricks here. One is to bake the mushroom caps on their own, and the other is to use a blender to purée the potatoes.

To get your mushrooms going I first remove the stems, but I don’t throw them away  as I use them as a part of the stuffing. I place mushroom caps their open ends up on the parchment paper (or foil) covered baking sheet and put them in the oven for about 20-30 minutes. The point is to get the caps soft and to let the mushrooms release excess water. At the end of the baking each mushroom cap should be filled with brown liquid (see below), and I dumped this liquid out. Transfer your mushroom caps into a greased baking dish with tall sides that will help with making sure no stuffing gets out while baking.

Baked Mushrooms, Ready for Stuffing
Baked Mushroom Caps, Ready for Stuffing, via Eat the Vegan Rainbow
Using a blender to purée the potatoes makes them into a creamy heaven that is perfect for stuffing. I would not recommend using the blender method if your end point is mashed potatoes because what you get is quite smooth, but for topping something like a Vegan Shepherd’s Pie or stuffing these mushrooms this method is perfect.

All in all these Vegan Mashed Potato Stuffed Mushrooms with Cashew Sour Cream are perfect as an interesting appetizer and entertaining, as well as a really great dinner in their own right. The amount of mushrooms I used is huge and it was definitely meant for sharing and enjoying in a large group, so feel free to scale down accordingly!

Vegan Mashed Potato Stuffed Mushrooms with Cashew Sour Cream

What you’ll need (for a 12 servings):

2 24 oz. (680 g) boxes white mushrooms, large

4 medium Russet potatoes

6 scallions

1/4 cup almond milk, plain & unsweetened (or other non-dairy milk)

1 cup of Cashew Sour Cream

1/3 cup sun dried tomatoes, julienned

Cooking spray

What you’ll do:

  1. Preheat oven to 350 F (180 C).
  2. Clean the mushrooms gently with a piece of paper towel. Separate stems from the caps. Keep the stems for later. Place caps, hole side up, on a parchment paper lined baking sheet and bake for 15-20 minutes, until the mushroom caps are soft and full of clear, brown liquid.
  3. Take the mushroom caps out the oven, discard the liquid and place them into a deep baking dish well sprayed with the cooking spray. Put aside.
  4. Peel the potatoes, chop them into small cubes and boil until cooked through which can take 15-30 minutes depending on the size of your cubes. Drain the water and let the potatoes cool for 15 minutes. Add almond milk and blend until potatoes are smooth.
  5. Chop scallions, using both the green and white parts, and mushroom stems finely.
  6. Spray a frying pan with cooking spray and sauté scallions and mushroom stems fro 5-10 minutes. Add sautéd scallion and mushroom stem mixture to the potatoes. Mix well.
  7. Spoon the potato mix into mushroom caps and top with a spoonful of cashew sour cream and few slices of sun dried tomatoes. Return to the oven for another 15 minutes.
  8. Bon appétit!

Copyright © Eat the Vegan Rainbow, 2017

Red Curry with Sweet Potatoes & Zucchini

VeganRedCurry_04
Vegan Red Curry with Sweet Potatoes and Zucchini, via Eat the Vegan Rainbow
I do like strong and bold spices, and food that is full of flavors yet not overpowering. So I gravitate towards Indian cuisine as you may have been able to tell given that I’ve already shared my vegan take on Chicken Tikka Masala and Saag Paneer. Another style of food that I enjoy comes from Southeast Asia, and I’ve been experimenting with Thai and Vietnamese recipes in the past. Most of those recipes do involve some animal ingredients so I wanted to try my hand at testing out the idea that Thai can be vegan.

My first stop on this journey is this Red Curry. You can make your own curry paste but Thai Kitchen Red Curry Paste is inexpensive, gluten free and vegan. It worked really well in this recipe so for now I am sticking with it!

In my view the secret to a great Red Curry is to go bold and diverse with your vegetables, and chop them in different ways so that your curry has some interesting color as well as texture. Here I use several different kinds of peppers, sweet potatoes and zucchini. You can use any kind of pepper you have handy. On this day in my kitchen I had a bag of mini sweet peppers that came in two colors, red and orange. I also got some shishito peppers that I’ve never used before but I figured it’s OK to be adventures. At the end, the shishitos turned out to be mild and did not overpower the flavors but I did remove all their seeds before using, which may have reduced any heat they would have brought in. If you do like your curry’s hot, you can use chili peppers, or other varieties with more heat.

VeganRedCurry_02
Peppers and Zucchini for Vegan Red Curry, via Eat the Vegan Rainbow
Final tip that I think makes a big difference is cooking the sweet potatoes almost all the way through before adding them to the curry. I cooked mine, skin on in the microwave and they came out perfectly sweet and delicious. What also makes a huge difference is using fresh basil and adding it at the very end so that it has just enough time to release its aroma without getting cooked.

Vegan Red Curry with Sweet Potatoes and Zucchini

What you’ll need:

2 large sweet potatoes, skin on

2 large zucchini, unpeeled

6 mini peppers, orange

6 mini peppers, red

4 shishito peppers

1 13.5 oz (400 mL) can light coconut milk

3 tablespoons shredded coconut, unsweetened

2 tablespoons red curry paste (like Thai Kitchen)

10 basil leaves, fresh

Cooking spray

What you’ll do:

  1. Wash the sweet potatoes and put them in a large, microwave safe dish with 1/2 cup of water. Put the lid on, but don’t close all the way. Cook on high in the microwave for 10 minutes. Let stand for 15-20 minutes. Make sure sweet potatoes are cool enough to handle before you peel them. Chop the potatoes into 1 in x 1 in (2.5 cm x 2.5 cm) cubes. Set aside.
  2. While sweet potatoes are cooking and resting, chop the zucchini and the peppers. You want zucchini chopped into small dice, and red and orange mini peppers into thin matchsticks. Clean the seeds out the shishito peppers and chop them very finely.
  3. Spray the bottom of a large pan with cooking spray and heat on medium-high. Add all the peppers into the pan at once. Sauté for 10-15 minutes, until peppers are soft and their edges start to get brown.
  4. Add diced zucchini and sauté for another 5 minutes, until zucchini is cooked about half way through.
  5. Add curry paste, stir well and let sauté for another 5 minutes.
  6. Add coconut milk and coconut shreds, and cook for another 5 minutes.
  7. Add sweet potatoes. Mix well, lower the heat and simmer for 15-20 minutes. Turn the heat off, add fresh basil, and let stand for 5 minutes.
  8. Serve with rice, like the Saffron Brown Basmati Rice, or without it!

Copyright © Eat the Vegan Rainbow, 2017

Gluten-free Vegan Spaghetti & Meatballs

VeganMeatballs_withZucchiniSpaghetti_DONE
Gluten-free Vegan Spaghetti & Meatballs, via Eat the Vegan Rainbow
Can gluten-free, vegan cooking be budget friendly, healthy, feed the whole family, and yet leave everyone feeling they are getting away with something? The answer is yes, and this recipe is my evidence. I use no fancy ingredients, and no fancy techniques.

How did I end up here? Well, as they say “Necessity is the mother of invention”. What happened is that I found myself facing a large bag of frozen vegetable mix, which I have cooked with many times before never to any great success. This is a classic item you can find in any grocery store – a bag that includes unspecified amounts of frozen peas, corn, green beans, carrots, and lima beans. The price on these is usually too hard to resist, and they keep really well if kept frozen so I usually have a couple in my freezer in case of an emergency where all other options dry up.

So one of those emergency situations came up and this time around, perhaps because of all this blogging I’ve been doing recently, I had a real brain wave. I decided to transform the relatively amorphous tasting vegetable mix into really incredible vegan meatballs, or should I say veggie balls?

VeganMeatballs_01
Frozen Vegetable Mix, thawed, via Eat the Vegan Rainbow
There are couple of simple tips that when put together make this recipe work. First of all, thaw your vegetables don’t cook them! Depending on the amount of veggies you use this may take 5-10 minutes in the microwave on high. Once the veggies are thawed and soft all through, use a stick (immersion) blender, or a food processor to make a thick paste out of it all. This will be a base for your “meatballs”.

Another thing that you will need to do is add flavor to the mix. Although each one of these veggies is lovely on their own and when fresh, put all together and after freezing and thawing they do lose some of their flavor. My secret ingredient in this recipe is definitely a dash of Trader Joe’s Chile Lime Seasoning Bland. If you don’t live in the area with a handy Trader Joe’s store near by, you can use regular chili powder and add some lime or lemon zest – that will do the trick!

You will have to be a bit patient with this recipe as it does take a bit of time. First of all, I use oats to help the meatballs stick together. I did not leave the oats whole, rather I blended them all into the veggie mix using a stick blender, added the spices, and left the mix to sit for about 15 minutes. That gives oats some time to absorb the liquid and make the mix stick together better, which helps for the next step – forming the “meatballs” and browning them. I recommend using a Dutch oven to brown the “meatballs”, as well as simmering the rich tomato sauce.

VeganMeatballs_03
Vegan “Meatballs” Browned in a Dutch Oven, via Eat the Vegan Rainbow
One word of advice is not to overcrowd your Dutch oven, and keep some room in between the “meatballs”. This helps them cook, and helps you maneuver them around. Once the “meatballs” are nicely browned set them aside and use the same Dutch oven for putting your tomato sauce together. I kept my recipe simple and my cost down by using canned crushed tomatoes and using some crushed garlic, dried oregano and dried basil to flavor the sauce. The sauce does not need to cook for long, and once it starts to simmer nicely and gently you can add the “meatballs” back.

VeganMeatballs_05
Vegan Meatballs in Tomato Sauce, via Eat the Vegan Rainbow
Don’t forget to lower the heat , bring the post to a very gentle simmer, and put the lid on! Without the lid you will soon end up with tomato sauce all over the stove top and the floor as this sauce does erupt in tiny little tomato sauce geysers.

To keep the recipe ultra healthy and gluten-free, I paired the meatballs with simple Zucchini Spaghetti.

Gluten-free Vegan Spaghetti & Meatballs

What you’ll need:

2 lbs (1 kg) bag of classic frozen vegetable mix

2 cups oats

1 tablespoon tomato paste

1 tablespoon soy sauce, reduced sodium

1 teaspoon garlic powder

1 teaspoon onion powder

1 teaspoon chili powder

1 teaspoon Trader Joe’s Chile Lime Seasoning Bland

1 1/2-2 28 oz (800 g) can crushed tomatoes

2 tablespoons crushed garlic

1 teaspoon dried oregano

1 teaspoon dried basil

Cooking spray

Fresh basil for serving

What you’ll do:

  1. Place the frozen vegetable into a microwave safe dish and microwave on high for 5-10 minutes to thaw the vegetables and slightly heat them through.
  2. Place the vegetables into a large mixing bowl. Use the stick blender to grind the vegetables into a relatively fine paste.
  3. Add oats and blend again.
  4. Add tomato paste, soy sauce, as well as onion, garlic, chili and lime chili powder. Mix well and let stand for 15 minutes or so.
  5. Spray the bottom of a large Dutch oven with cooking spray and bring to medium high heat. Use 1/4 cup or the ice cream scoop to scoop out the “meatball” mix and form the balls. Place them into the hot Dutch oven and let brown for 2-3 minutes. Turn the “meatballs” over and brown on the other side. Take them out of the Dutch oven and set aside. Spray with more cooking spray if needed and add another batch of “meatballs”. Continue until all your “meatballs” have been browned.
  6. Bring the heat up to high, add more cooking spray, and add crushed garlic and dried oregano and basil. Let it bloom, develop & release the aroma for 1-2 minutes. Add crushed tomatoes. Depending how much tomato sauce you’d like to have you may need to adjust the amount of crushed tomatoes you add. Bring the tomato sauce to a simmer and let it simmer for 5-10 minutes.
  7. Turn the heat way down and add back the “meatballs”. You will likely have two layers of meatballs which is fine, but it’s a good idea to keep in mind that they are relatively soft so treat them gently! Make sure they are nicely snuggled and covered by the sauce. Put the lid on and let the “meatballs” and sauce simmer for 15 – 20 minutes.
  8. When you are ready to serve, start with a generous amount of Zucchini Spaghetti, add couple of vegan meatballs, spread some sauce, and top with fresh basil. Enjoy!

Update: Few days ago I used the same “meatball” mix and made a “meatloaf” out of it. It worked really well!!! Here are couple of pictures to show you what it all looks like. One tip: bake the “meatloaf” on 375 F (190 C) for 25-30 minutes first, before putting on the tomato paste, then bake for 15 minutes more. Let the “meatloaf” stand for 15 minutes before cutting – the loaf will be soft when it comes out of the oven but it will firm up!

Copyright © Eat the Vegan Rainbow, 2017

Gluten-free Vegan Carrot Cake Muffins

GlutenfreeCarrotCakeMuffins_DONE
Gluten-free Vegan Carrot Cake Muffins, via Eat the Vegan Rainbow
Baking does not come easy to me and gluten-free vegan baking is even more difficult. But, creating a recipe for carrot cake muffins that fits into my philosophy of vegan cooking with minimal amount of added sugar was hard to resist. This recipe is simple and uses simple ingredients like carrots, apples, walnuts, and raisins. It also uses couple of ingredients that make this gluten-free and vegan, like flex meal, rice flour, and tapioca starch.

The result is a recipe that is fun to make, and works well as a family activity that can teach very young children about measurements and mixing, as well as using some basic kitchen equipment. Because the recipe uses ingredients that don’t require cooking to be edible (like carrots, apples, raisins) and don’t pose any health risk, unlike common muffin recipes that use eggs, the recipe is very worry-free when it comes to licking the bowl and spatula, putting messy hands in the mouth, or other types of ad hoc tasting that young chefs gravitate to.

One tip for making this into a smooth sailing assembly line is to use the food processor to do most of the work, and start by chopping carrots, followed by apple, then move to walnuts. Additionally, starting the flex meal vegan egg mix prior to all the chopping is a good idea as well. Finally, the mix will be sticky so do spray your muffin tin liners with some cooking spray. It will help peel the wraps off, and has minimal impact on fat content or the baking process.

This recipe makes 12 large muffins, and each muffin is very filling so you may want to start here and scale up if you find the muffins irresistible (which you will!). Do these muffins need frosting? I don’t think so, but if you’d like some then a frosting with a hint of orange zest would work really well and build on a bit of orange juice that I use in the batter.

Gluten-free Vegan Carrot Cake Muffins

What you’ll need (makes 12 muffins):

3 large carrots

1 Granny Smith apple

2/3 cup walnuts

2/3 cup raisins

2/3 cup shredded coconut flakes, unsweetened

2 teaspoons cinnamon, ground

1/2 teaspoon nutmeg, ground

1 teaspoon baking powder

1 teaspoon baking soda

1/2 cup orange juice

1/2 cup rice flour

1/2 cup tapioca starch

2 tablespoons flex meal

6 tablespoons warm water

Cooking spray

What you’ll do:

  1. Preheat oven to 350 F (175 C).
  2. Mix flax meal with warm water and set aside for 15 minutes.
  3. Wash and peel the carrots. Using a food processor grind the carrots to a fine grind. Put the ground carrots in a large mixing bowl. Core (but don’t peel) the apple. Grind it to a fine grind and add to the carrots. Next, grind walnuts to a fine meal. Add to carrots and apple mix.
  4. Add the flex meal that has by now become a very gooey and viscous to the carrot-apple-walnut mix. Continue to add the rest of the ingredients except the orange juice. Mix well and check for consistency. The mix should be soft and wet, but not so fluid that it runs from the spoon. Use orange juice to adjust and go easy as you may discover that you need to use more or less than 1/2 cup I list here. The total amount will depend a bit on how large and juicy your apple is!
  5. Leave the mix to rest for 10-15 minutes.
  6. Line the bottom of your muffin tin with liners and spray with cooking spray. Fill them with 1/2 cup to 3/4 cup of the mix.
  7. Bake for 45-50 minutes then check for doneness using a toothpick. If the inserted toothpick comes out dry, you are done. If not, proceed for another 10-15 minutes.
  8. Take out of the oven and let rest for at least 30 minutes. If you plan to frost them let them cool completely before taking the next step. For a good vegan frosting recipe you can try one that uses coconut oil and add some orange zest for add kick!

Copyright © Eat the Vegan Rainbow, 2017

Vegan Zucchini Moussaka

zucchinimousaka_done
Vegan Zucchini Moussaka, via Eat the Vegan Rainbow
Growing up moussaka was probably one of my least favorite dishes. Somehow, layers of potato and ground meat, cooked in rich Béchamel-type of sauce just did not work for me. The version that used zucchini instead of potatoes worked a little bit better, especially when paired up with plain yogurt, but even then the dish was too bland yet to heavy for me.

I decided to give the moussaka of my youth a vegan make-over and I’m happy to report that veganizing this traditional recipe worked! I used rainbow carrots, yellow onion, celery, vegan ground “beef”, all the zucchini ends that are not quite right shape or size to make good layers, and a generous amount of tomato paste for my stuffing.

zucchini-mousaka-ingredients
Zucchini Moussaka ingredients, via Eat the Vegan Rainbow
For Béchamel sauce, which usually uses flour, butter and milk, I used almond milk, nutritional yeast and corn starch to make the sauce vegan and gluten free. My moussaka starts with a well oiled deep baking dish, a layer of zucchini slices, stuffing, another layer of zucchini slices and finishes with the vegan Béchamel sauce.

zucchini-mousaka-step-2
Zucchini Moussaka with Vegan Béchamel sauce, via Eat the Vegan Rainbow
The assembled moussaka goes into the oven to cook covered for 30 minutes and uncovered for another 15 minutes. The vegan Béchamel sauce gives this dish great thickness and richness, without making the moussaka heavy. Your taste buds and your tummy will thank you for taking it lightly!

Vegan Zucchini Moussaka

What you’ll need:

4 zucchinis

4 rainbow carrots, diced

6 stalks celery, diced

1 yellow onion, diced

1 cup of vegan ground “beef”, store bought or homemade

2 tablespoons tomato paste

1 teaspoon smoked paprika

2 cups unsweetened, plain almond milk

3 tablespoons corn starch

1 tablespoon nutritional yeast

Cooking spray

What you’ll do:

  1. Preheat the oven to 350 F (175 C).
  2. Spray the bottom and sides of your 13 x 9 in (33 x 23 cm) baking dish with cooking spray. Set aside.
  3. Wash and slice zucchini lengthwise to make 16 to 18 slices that are about 1/4 in (6 mm) thickness. Don’t throw out the left over and edge pieces – dice them to medium size dice and put them in a large mixing bowl.
  4. Add diced onions, carrots and celery to the mixing bowl, as well as vegan ground “beef”, tomato paste, and smoked paprika. Mix well.
  5. Line the bottom of the baking dish with zucchini slices. Pour the filling into the dish. Top with another layer of zucchini slices.
  6. Separately, mix the almond milk, corn starch and nutritional yeast together. Make sure the mix is smooth and lump free. Pour over the moussaka.
  7. Cover the moussaka with foil and bake for 30 minutes. Remove the foil and bake for additional 15 – 20 minutes, until the top is nicely browned.
  8. Take out the oven and let stand for 5-10 minutes before serving.

Copyright © Eat the Vegan Rainbow, 2017

Pizza Supreme, Gluten-free & Vegan

gluten-free pizza with roasted veggies
Gluten-free Vegan Pizza Supreme, via Eat the Vegan Rainbow

Friday night is pizza night, and making this gluten-free version has become part of regular easing into the weekend and unwinding ritual. Quite honestly, developing the perfect gluten-free pizza crust has not been easy. I tried many different recipes, from scratch and store-bought baking mixes, and many different techniques and none really worked. I would end up with a pizza crust that was either too thick or too soggy or too different from a nice thin and crunchy pizza crust that I prefer.

But, all this trial and error has not been a waste, since it led me slowly but steadily to my current recipe that is incredibly simple and works like a charm. Result is a thin and crispy pizza crust that is as close to the real thing as I think I can get. I start from three ingredients: rice flour, baking soda and baking powder. I mix rice flour and water in same amounts (1 cup rice flour to 1 cup water) and the dough I get is nice and smooth, yet slightly sticky. I let the dough sit for 20 to 30 minutes which is just enough time to get my roasted vegetable topping done, and other toppings and sauce organized, and I use a special technique to spread the dough as thin as I like it.

pizzadough_riceflour
Gluten-free Pizza Crust Starts from Rice Flour Dough, via Eat the Vegan Rainbow

What I do to transform this sticky dough into a pizza crust that will bake well and hold the filling is to place a piece of parchment paper on the pizza peel, add enough dough to form one pizza pie, cover the dough with another piece of parchment paper and use fingers to spread the dough out by pressing over the parchment paper. This really help and if you are to try to do this without the second piece of parchment paper you would end up with sticky fingers and mess – trust me on this, I’ve been there! Once the dough is as thin as needed, peel off the top parchment paper, spray the top with cooking spray and the pie is ready for the oven.

There are also two tricks to baking the perfect gluten-free pizza. Trick number one is to give the dough a chance to bake on its own for 10-15 minutes at 425 F (220 C) on a pizza stone. Technically you can use any baking pan or cookie sheet but if you are into making lots of pizza getting a pizza stone is a wise investment – they are pretty much indestructible and one will last you forever! This will help both your top and the bottom get nice and crunchy, browned and caramelized.

The second trick is to pre-cook your toppings. My Gluten-free Vegan Pizza Supreme uses roasted red onions and roasted red peppers, which I slice and roast at 425 F (220 C) for 15-20 minutes while my dough is resting, and couple of other toppings that don’t require pre-cooking like sliced black olives, vegan ground beef substitute, and vegan shredded cheese. Why pre-cook? The assembled pizza will not stay in the oven long enough for toppings like peppers and onions to really brown and soften, and I do prefer them slightly charred. But if you like your veggies on a raw side you can skip this step.

The rest is really a breeze. Cover your half-baked pizza crust with good amount of sauce – on this occasion I used nothing fancier than marinara sauce from a jar – and top with roasted red peppers and red onions, sliced black olives, vegan ground beef substitute, homemade cashew ricotta, store-bought shredded vegan “mozzarella” cheese, or both, sprinkle with dry or fresh basil and oregano, and return to oven for another 12-15 minutes. Take out of the oven and let it rest for 2-3 minutes… or not!

Happy pizza time!!!

glutenfreeveganpizza_whole
Gluten-free Vegan Pizza Supreme on the Menu Tonight, via Eat the Vegan Rainbow

Gluten-free Vegan Pizza Supreme

What you’ll need (for 2 x 12 inch (30 cm) thin-crust pizzas):

2 cups rice flour

2 cups water

1 teaspoon baking powder

1 teaspoon baking soda

1/2 red onion, large

1 red bell pepper

1/2 cup vegan ground beef substitute

1/2 cup sliced black olives

1/2 cup Cashew Ricotta

1/2 cup shredded vegan mozzarella cheese

Cooking spray

What you’ll do:

  1. Preheat oven to 425 F (220 F) with your pizza stone (if using) inside.
  2. In a large mixing bowl, mix rice flour, baking powder, baking soda and add water. Mix everything well until the dough forms. The dough will be soft and relatively sticky, but should still hold its shape. Let stand for 15-20 minutes.
  3. Slice the red pepper and red onion thinly, spread on the cookie sheet covered with aluminum foil, spray with cooking spray and put in the preheated oven for 15-20 minutes, to brown, caramelize and slightly soften.
  4. Place parchment paper on your pizza peel (if not using pizza peel and pizza stone, you would place the parchment paper on your cookie sheet or other baking pan you will be using), put half of your dough in the middle, cover with another piece of the parchment paper and use your fingers to spread the dough out to the size and thickness that you like. Peel the top parchment paper off with care – the dough may stick but the top parchment paper should come off relatively easily. Spray the top of your pizza dough with cooking spray and put in the oven for 12-15 minutes.
  5. Take your pizza crust out of the oven. The top should be slightly golden and the edges should have gotten slightly browned. Spread the tomato sauce and all the toppings you like, and put the assembled pizza pie back in the oven for another 10-15 minutes. Enjoy!

Copyright © Eat the Vegan Rainbow, 2017