Cream of Carrot Soup


Cream of carrot? How can that be? Well, it can, and it is, and you will not believe how great this soup is. Carrots are the star, to be sure, but what gives the soup its rich creaminess (without any cream) are the white potatoes, and you want to pick nice, starchy potato variety, like the Russets.  The starchier the potato, the creamier the final soup. Usually, the really starchy potatoes don’t hold well to boiling and tend to fall apart. In this case that really does not matter because everything will go into a blender at the end. I do recommend you chop your carrots and potatoes into smaller chunks to speed up the cooking process, but they don’t need to be finely diced.

The potatoes and the carrots cook together with flavor agents, like soy sauce and the Worcestershire sauce, and the spices, like smoked paprika or smoked paprika flakes, garlic powder and ground mustard.  I also suggest you use vegetable stock and not water, because a really great stock will extend the richness of your flavors, while water will dilute them out. In terms of what stock to use exactly, you’ll have to try it out and see what you like. Reduced sodium options are probably the best starting point, and you can always taste a bit of the stock before dumping it into the pot. If the stock is not pleasant to drink, it will probably not make for a pleasant soup to eat. I would stay away from roasted garlic infused or very heavy on spices stocks and go with mild almost bland stocks that you can build on and that will not interfere with all the other ingredients you are using.

This soup is in many ways an extension of me using carrots for as many things as possible, including the summer hit – carrot dogs – and some of my baking, like cookies and muffins.

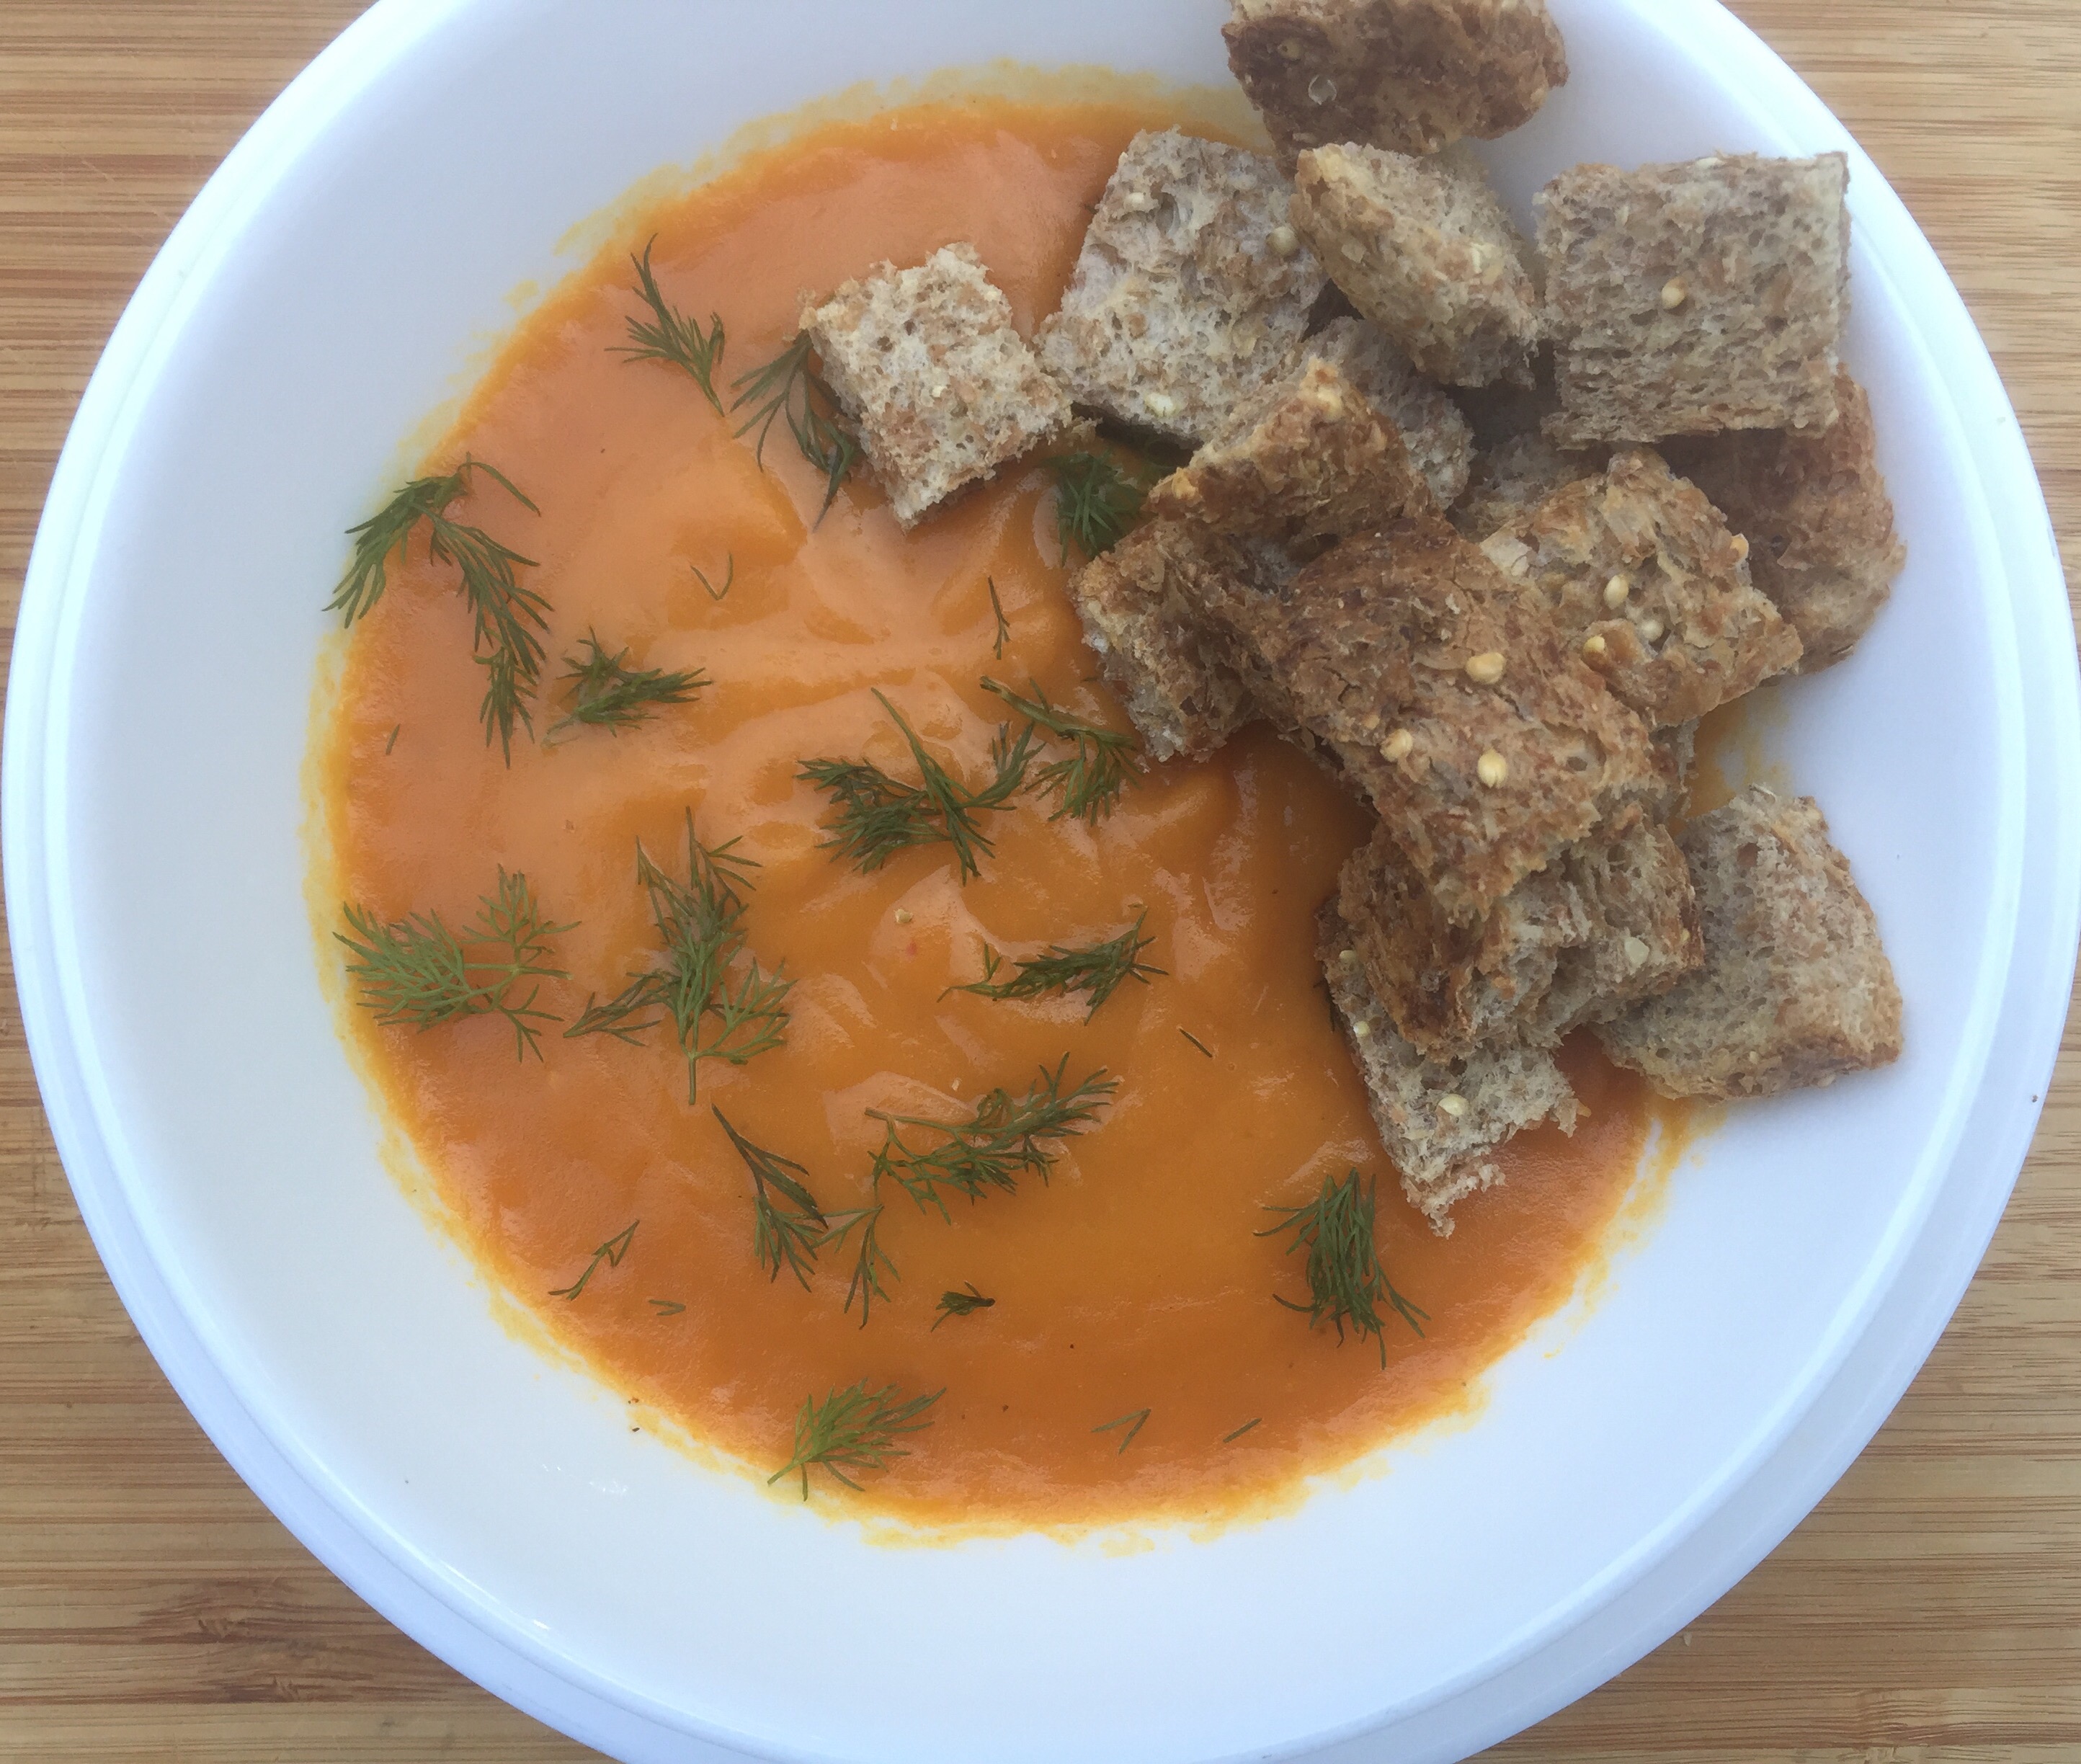
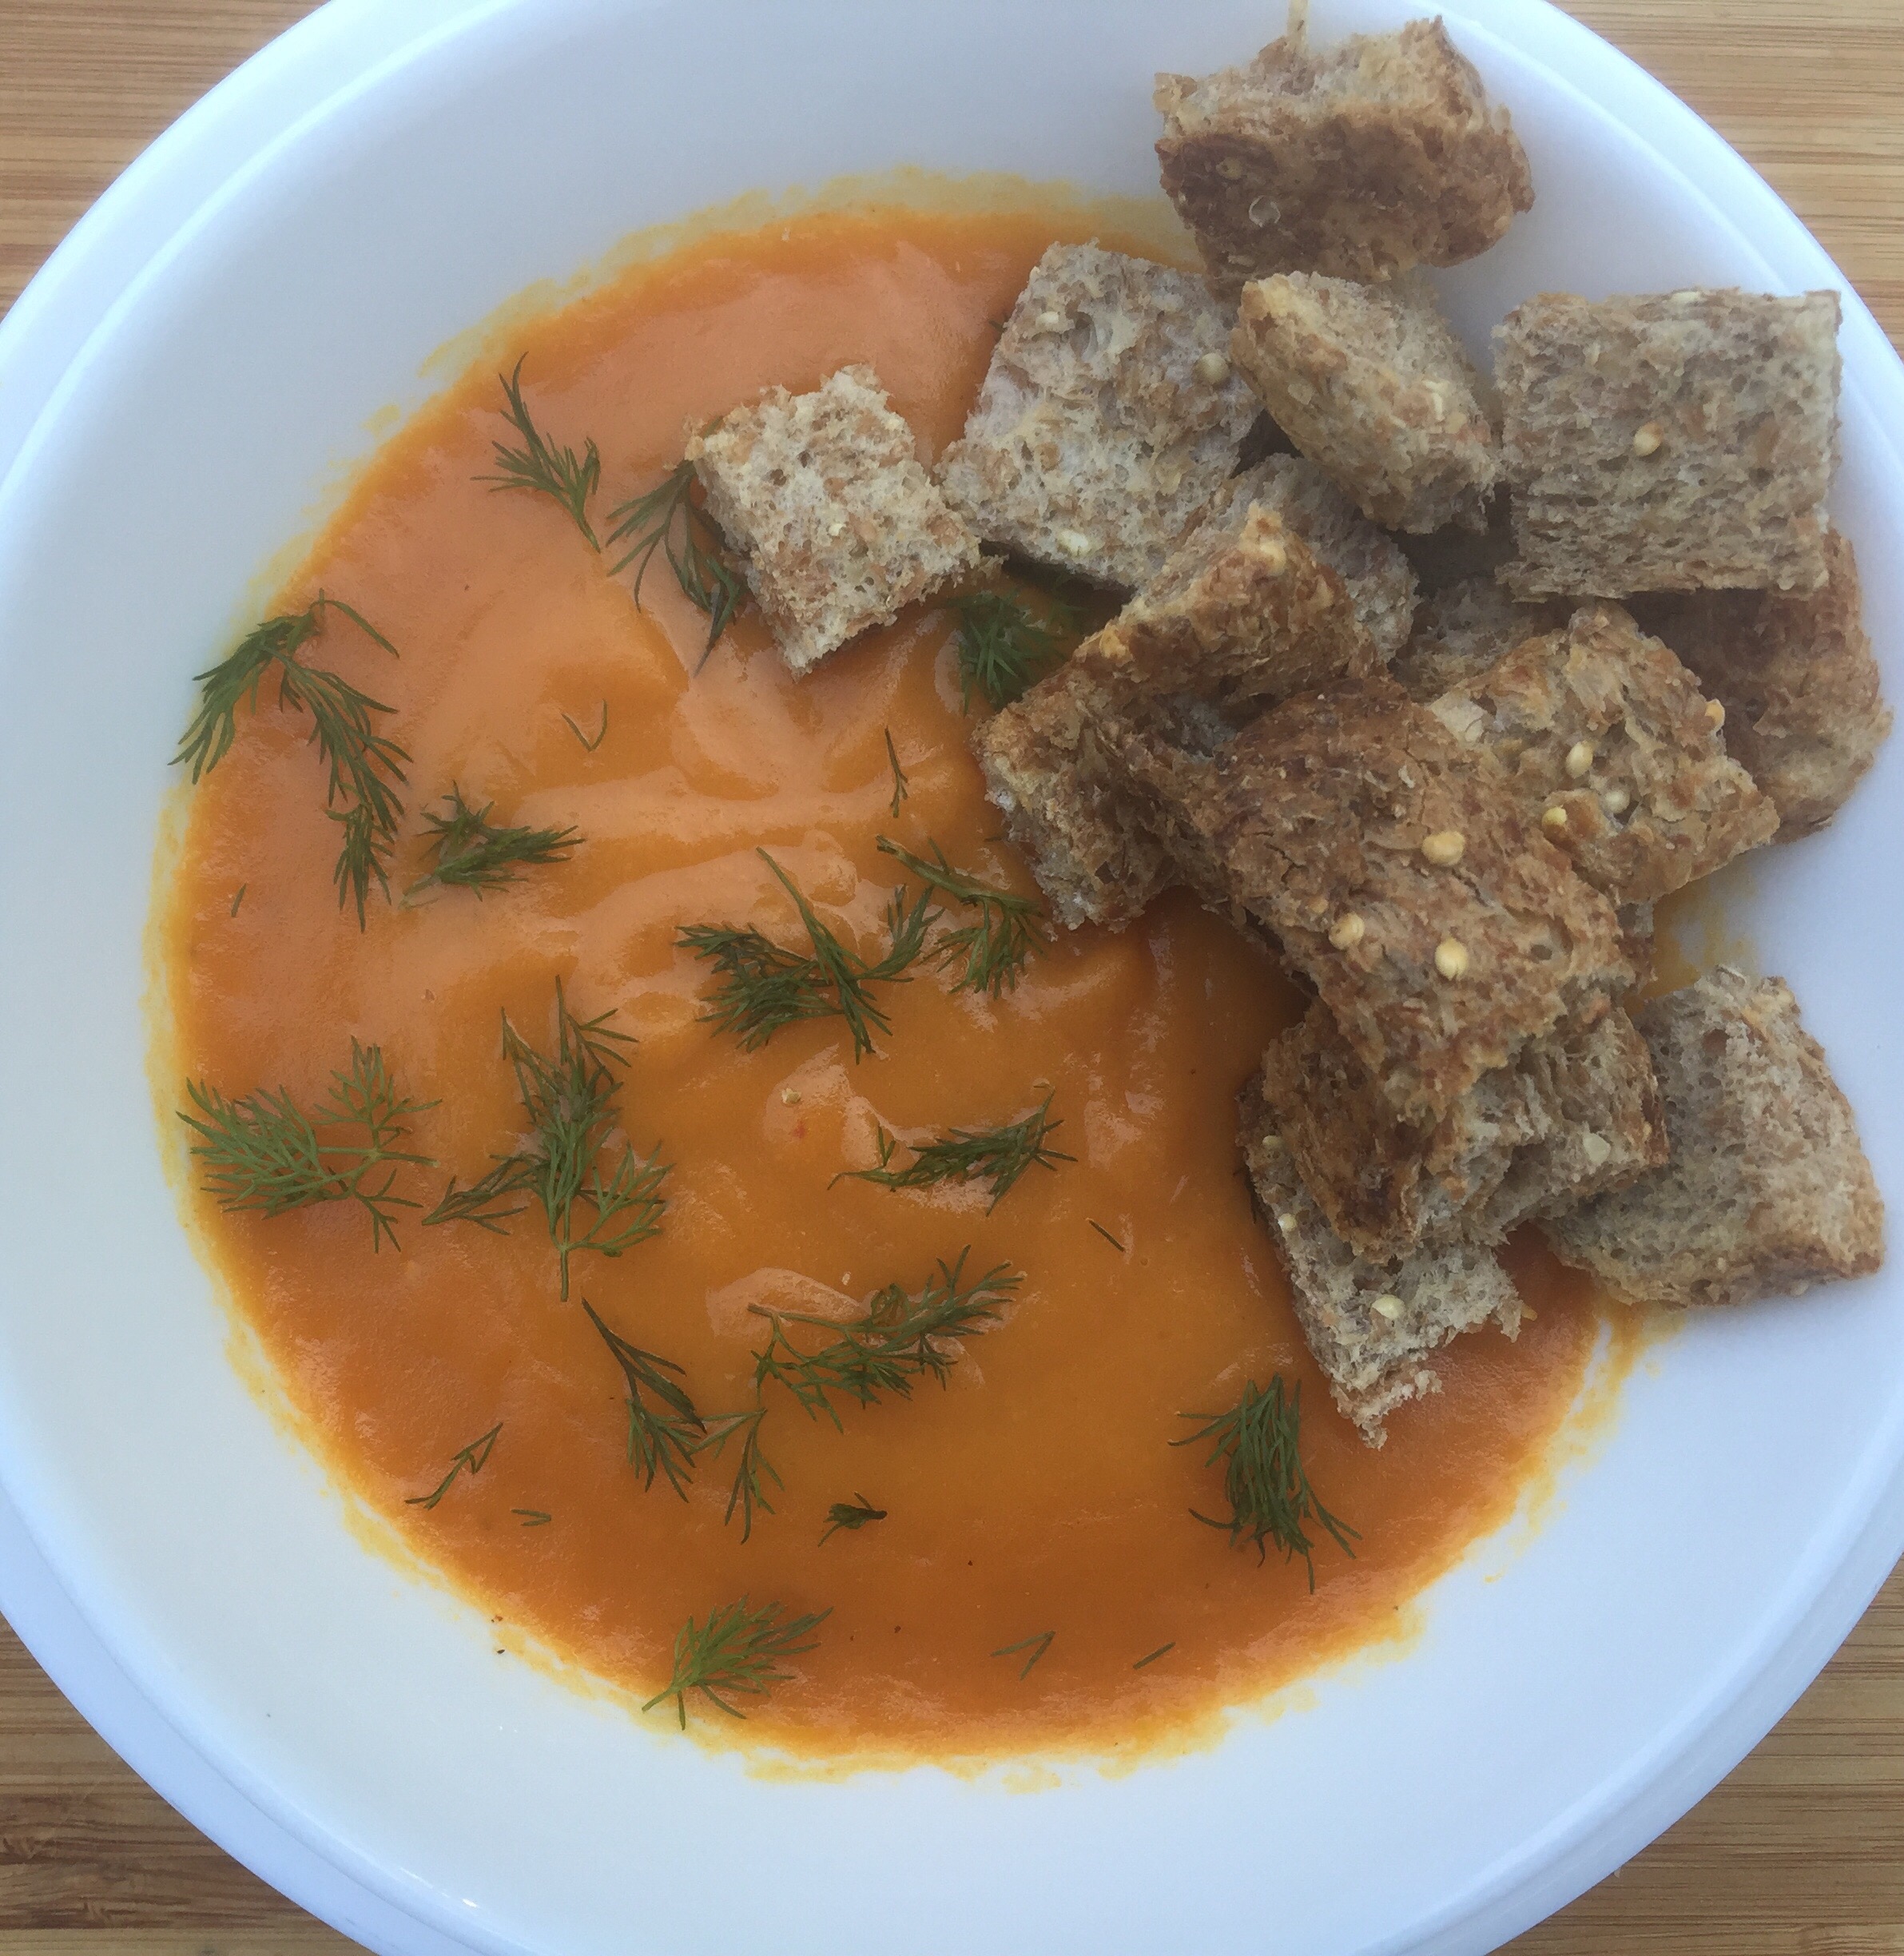
What helps put this soup over the top is just a sprinkle of fresh dill at the end, and a handful of freshly toasted croutons. With all that in place all that’s left to do is grab a spoon and dig in!

Cream of Carrot Soup

What you’ll need:

6 large carrots

2 potatoes, Russet or white

2 tablespoon oil

2 teaspoon ground mustard powder

1 tablespoon soy sauce

1 teaspoon Worcestershire sauce (vegan)

1 teaspoon steak sauce

1 teaspoon garlic powder

1 teaspoon smoked paprika flakes

4 cups vegetable stock

2 tablespoons dill, fresh


What you’ll do:

  1. Wash, peel and cube carrots and potatoes. Place in a pot, cover with water and boil for about 15 minutes, until vegetables are just soft but not falling apart.
  2. Drain the vegetables, pat dry to absorb as much of the access water as you can, and place in a large mixing bowl.
  3. Add the oil, spices and sauces and mix well. Let marinade for 30-60 minutes.
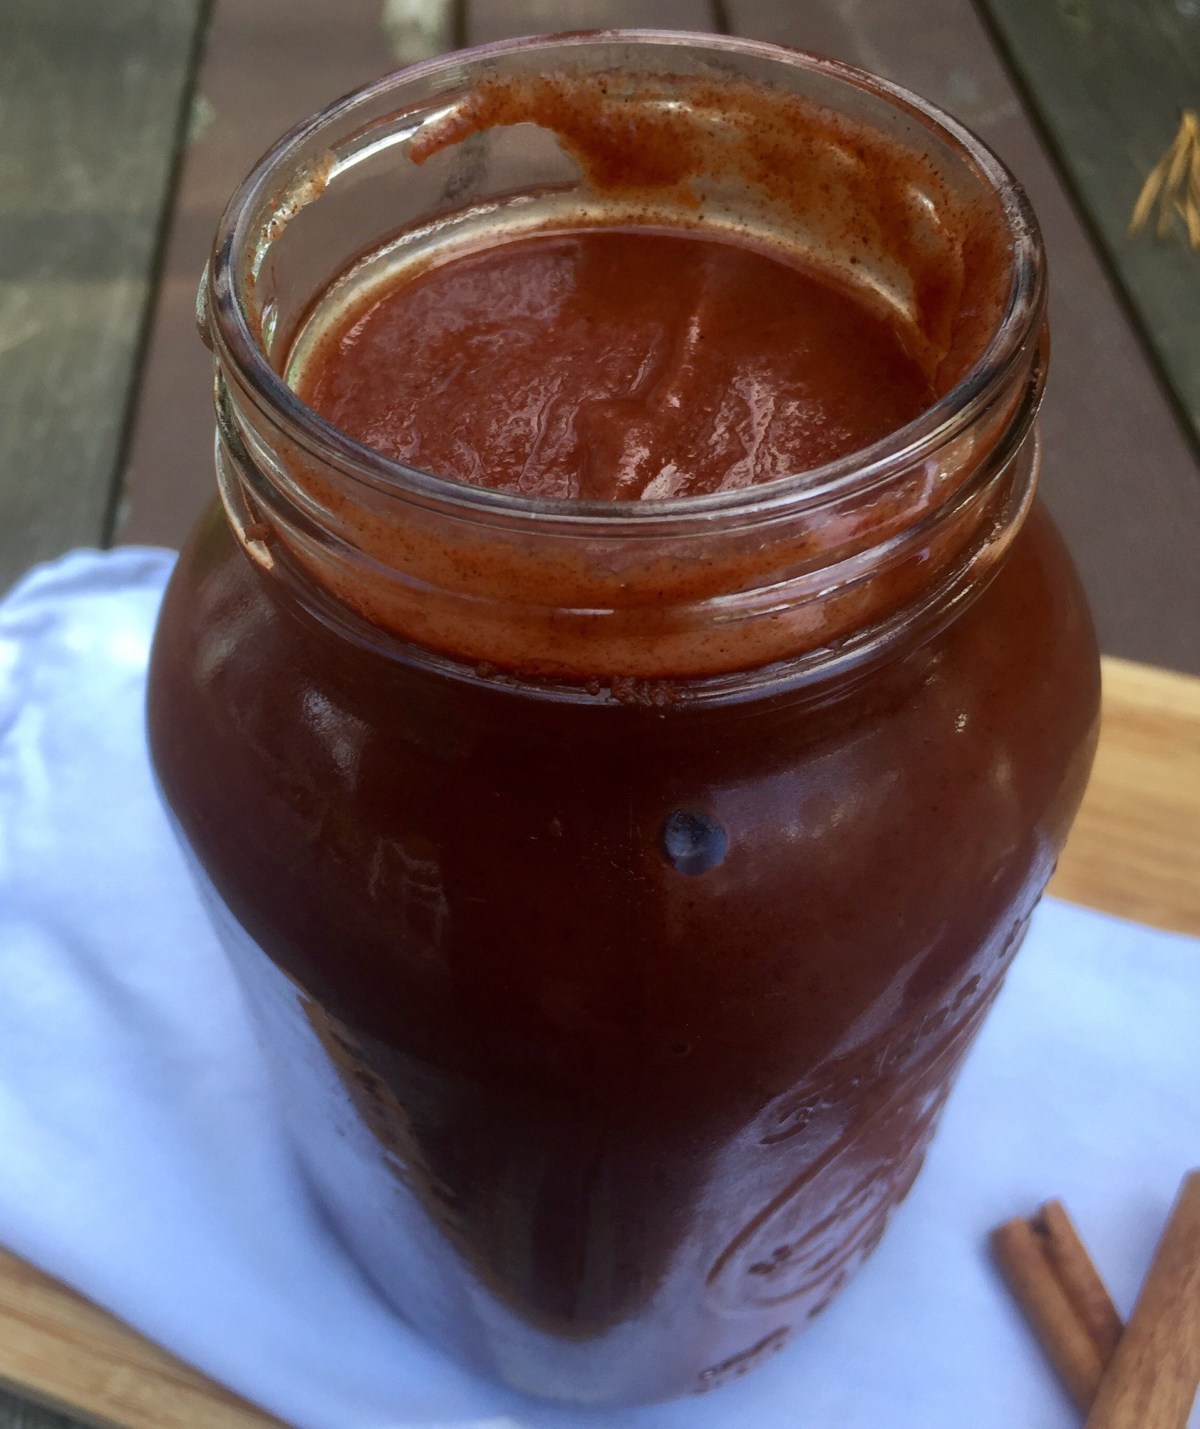
  4. Place all the vegetables and the marinade into a blender and add the vegetable stock. Blend until smooth and silky. You can do this step in the mixing bowl with an immersion blender but I think the regular upright blender produces smoother consistency.
  5. Pour back into the pot and bring to simmer. Let the soup simmer gently for 10 to 20 minutes.
  6. While the soup is simmering you can toast some bread, or make some croutons.
  7. Serve the soup with a sprinkle of fresh dill, and some toast, croutons, bread or even tortilla chips on the side. Mmmmm… good!!!

Copyright © Eat the Vegan Rainbow, 2017

Quinoa with Roasted Cranberries and Pistachios

img_3592
Quinoa with Roasted Cranberries and Pistachios, via Eat the Vegan Rainbow

Like a fabulous supporting actor in a movie, the perfect side dish for a rich, holiday meal is subtle and complementary to the lead actors laid out on the festive table, yet able to make a lasting impression of its own.

This Holiday Quinoa with Cranberries and Pistachios is just that – visually pleasing, with layers of complexity in terms of texture and flavors, yet not overwhelming. Additionally, for anyone putting together a vegan, fully plant-based feast this side dish will add lots of protein to your plate.

Quinoa, just in case you are not familiar with it, is a grain, not a cereal, like wheat, but more like rice, and you would cook it like rice as well. When cooked it actually looks like couscous, and you will need to fork it up the same way. Although quinoa is fine served by itself, given that we are in the midst of fall/winter holiday season I decided to add just a bit to it, by adding some chopped pistachios and some oven-roasted cranberries.

One note on cranberries: fresh cranberries are very tart, and almost impossible to eat without adding a huge amount of sugar to them. I decided to try roasting and that worked to a point. Roasted cranberries are still tart, but a bit of tartness in this dish is actually a nice thing. If you prefer something with less bite, toss your cranberries with some sugar or a sweetener of choice, or simply chop some dried cranberries up – those are most certainly sweet.

Quinoa with Roasted Cranberries and Pistachios

What you’ll need:

1 cup quinoa

1 1/2 cup water or vegetable stock

1 shallot, finely diced

1 cup pistachios, chopped

1 1/2 cup fresh cranberries – this will yield about 3/4 cup roasted

Cooking spray

What you’ll do:

  1. Preheat the oven to 425 F (220 C).
  2. Wash and sort the cranberries. Place them on a baking sheet lined with foil and roast them for 20-25 minutes. Once soft and slightly browned, take the cranberries out the oven and set aside to cool for a bit.
  3. While cranberries are roasting, cook your quinoa. Mix 1 cup quinoa with 1 1/2 cups water, bring to boil, decrease the heat to a gentle simmer and let quinoa cook for about 20 minutes. Turn the heat off and let quinoa stand for another 10 minutes. Use the fork to fluff up quinoa before using in the next step.
  4. Spray the bottom of a skillet with some cooking spray and place over medium heat. Add finely chopped shallots and let them sauté for 5-8 minutes.
  5. Once shallots are done, add chopped pistachios and let them toast just slightly, for 2-3 minutes.
  6. Add the fluffed up quinoa, mix well, and sauté for 5 more minutes or so.
  7. Turn the heat off and mix in the roasted cranberries. Go gently as they will be very soft and falling apart.
  8. Serve warm, and enjoy with some White Wine Gravy!

Copyright © Eat the Vegan Rainbow, 2017

Pumpkin Truffles – Two Ways

img_3517-e1510705062190.jpg
Pumpkin Truffles, Traditional and Dark Chocolate, via Eat the Vegan Rainbow

Thanksgiving desserts are all about pies, most often pumpkin, apple, sweet potato, or pecan. Those are the big four, with pumpkin pie being the gold standard. I am not a baker – I mean I do bake, and I have made pies, including the pumpkin variety, in the past, but these pies are a bit too much for me to handle if I am making a big holiday feast.

So, this year I am trying out a no-bake route to a dessert offering that captures the spirit of winter holidays but does not require any oven real estate or lengthy prep work. With this in mind I developed these Spicy Pumpkin Truffles and I did them two ways – Dark Chocolate Covered and the Traditional, which means rolled in cocoa powder.

No baking, a handful of simple ingredients, and your holidays feast will be complete! The only trick, which by the way I am yet to master, is getting an even coat of chocolate. This batch turned out just a bit too irregular but that did not make them any less irresistible – the treats disappeared in a blink of an eye.

The truffles themselves are very easy to mix together and they are inspired by the pumpkin pie recipes. I used some canned pumpkin and mixed it with almond meal, almost flour, and coconut flour. I added some maple syrup to sweeten things up because the pumpkin I was using was not sweet at all. But before you add the sweetener of your choice do try your mix and adjust to taste. Keep in mind that your chocolate is sweet as well, unless you are using bitter kind, so you may need to play around a bit to achieve the right level of sweetness for your taste.

What pulls these truffles over the top are actually the spices. I used ground cinnamon, ground nutmeg and ground cloves. Those three spices blended well with the pumpkin, maple syrup and the almond/coconut flour mix and gave these yummy treats a real winter holidays flair. Bite in, and you’ll forget all about baking and enjoy the no-bake holiday desserts!!!

Pumpkin Truffles

What you’ll need:

1 15 oz. (425 g) can pumpkin

1 1/2 cup almond meal

1 1/2 cup almond flour

1/2 cup coconut flour

2 tablespoons maple syrup

1 teaspoon ground cinnamon

1/2 teaspoon ground nutmeg

1/4 teaspoon ground cloves

12 oz (g) vegan dark chocolate (chunks, chips, or blocks)

3 tablespoons cocoa powder

What you’ll do:

  1. In a large mixing ball combine all your ingredients except cocoa powder and the chocolate – those will come later.
  2. Mix everything well and using your hands for the dough into balls that are approximately 2 in (5 cm) in diameter. Place the preformed truffle balls on a platter and set aside.
  3. Melt the chocolate using either a microwave oven or a double boiler.
  4. Dip half of your truffles into the melted chocolate and place on the platter or a plate that’s lined up with wax paper.
  5. Put your chocolate covered pumpkin truffles in a refrigerator so that the chocolate coating hardens.
  6. Pour the cocoa powder in a flat dish and roll the rest of the pumpkin truffles in cocoa powder.
  7. Arrange the two kinds of Pumpkin Truffles any way you like. You may want to place couple of pieces of cloves in the bottom of your serving dish, or line your serving dish with some finely pulled orange peel. None of this will change the fantastic flavor of the truffles but it will make your dessert tray more festive! Enjoy!!!

Copyright © Eat the Vegan Rainbow, 2017

Creamy Cauliflower Winter Soup

img_3504
Creamy Cauliflower Winter Soup, via Eat the Vegan Rainbow

This soup is pure gold, and by gold I mean absolutely a light delight, and by light delight I mean that it uses none of the usual suspects you can find in a creamy soup. So, on the side of ingredients that this soup does not use you will find cream, butter, and flour, and on the side of ingredients that this soup does use you will find cauliflower, green peas, yellow corn, vegetable bouillon cube, fresh thyme and almond yogurt. Yes, you read that right – six ingredients and you will be done!

The soup comes together in less than an hour and serves four to six people, and if you include on your holiday menu where lots of other goodies are being served as well, this recipe can easily be served to eight people! So, one head of cauliflower with couple of extras can really go a very long way.

All you need to do is wash and chop one large head of cauliflower, put the pieces into a large pot, pour in 3 cups of water, add the bouillon cube, cover, bring to boil and cook the cauliflower for fifteen minutes or so, until cooked through. Let the soup cool a bit – it does not need to be completely cold but you do need to be able to handle cauliflower and the broth safely. Purée the broth and the cooked cauliflower until completely smooth, with either an immersion blender or using a standing blender. I highly recommend getting an immersion (stick) blender, if you don’t already have one. This is a kitchen gadget I use all the time for soups, burgers, even cookies, so I am getting a lot of mileage out of mine.

Place the soup back on the stove top, add green peas and corn, and bring to gentle simmer. You can use either fresh or frozen peas and corn, or even canned. If using the canned vegetables do check the salt content and buy “no salt added” variety. The soup should simmer for about twenty minutes. Turn it off, and then stir in fresh thyme and plain, unsweetened almond yogurt. Serve warm, with a squeeze of lemon if you like (I do!!!), and a handful of oyster crackers or freshly toasted bread.

Creamy Cauliflower Winter Soup

What you’ll need:

1 large head of cauliflower

3 cups water

1 vegetable bouillon cube

1 1/2 cup green peas, frozen

1 1/2 cup yellow corn, frozen

1/2 cup almond yogurt, plain and unsweetened

10 springs of fresh thyme

What you’ll do:

  1. Cut the cauliflower florets out, wash them and chop roughly into bits. Place in a large pot, add water and the bouillon cube, cover with a lid, and bring to boil.
  2. Boil the cauliflower for 15 minutes or until fully cooked – cauliflower should be soft and falling apart.
  3. Purée the cauliflower together with the broth it cooked in with a stick (immersion) blender until smooth.
  4. Add frozen (fresh, or canned) peas and corn. If you are using canned vegetables make sure you use “no salt added” and make sure you drain the veggies well before adding them in.
  5. Bring the soup to gentle simmer, and leave it for 20 minutes or so. If you are using canned vegetables you can simmer for less, and 10 to 15 minutes should be plenty.
  6. Turn the heat off, then add thyme and yogurt, mix well and serve. This soup can be a meal on its own, with some freshly toasted bread, or a nice start for your next three course, festive winter holiday dinner!!!

Copyright © Eat the Vegan Rainbow, 2017

Spice Infused Apple Butter

fullsizerender-11
Spice Infused Apple Butter, via Eat the Vegan Rainbow


There is nothing better than freshly picked fruit. I love PYO – Pick Your Own – events at our local farms. They are a perfect activity for friends and family that gets everyone outside and into the nature. These PYO activities support local farms, and provide a cheaper access to perfectly ripe fresh fruit. I also love them for one selfish reason – I am shameless when it comes to taste tasting as I pick and can’t resist biting into an amazing piece of fruit I just picked. Honestly, who could?

The last PYO days are slowly unfolding around me, and I grabbed an opportunity to go pick some apples. The loot included six different varieties, Granny Smith, Jonagold, McIntosh, Pink Lady, Fuji and Empire, and was destined for couple of different things, including a huge batch of apple butter. For the apple butter I used couple of Granny Smith’s, Fuji’s, and Jonagolds. I used my slowcooker (crockpot) to cook the butter since it is really totally hands of – you plug it and forget it for about 10-12 hours. The best time to start cooking is the evening, because your butter can cook overnight and you will wake up to a house that is full of rich aromas.

Those aromas are mostly due to a nice mix of spices that’s make the flavor of this butter. I combined lots of ground cinnamon, some allspice and a bit of nutmeg. There are a lot of apples in this recipe so they drop need lots of spice to make the flavors rich and deep. You could change the spice makeup if you like. Alternative spices to try would be ground ginger, ground cloves, vanilla beans, and/or orange peel.

If you are reading this and wondering to yourself “What is apple butter?”, first of all thank you for being patient, and second, apple butter is sort of apple marmalade or apple jam. It’s thick – thicker than apple sauce – and smooth. It is a perfect breakfast item, for toast, pancakes or waffles, and although I have not tried it I bet it can work great as an ice cream topping! It can be made much sweeter depending on the variety of apples you use, and by adding sugar to it. This recipe does not use any sugar and adding Granny Smith to the mix of apples I used makes the final product just slightly tart.

Spice Infused Apple Butter

What you’ll need:

(If using a 6 QT (5.7 L) crockpot – adjust the amount depending on the size of your crock!!!)

6 lbs (2.5-3 kg) apples

2 tablespoons ground cinnamon

2 teaspoon allspice

1 teaspoon ground nutmeg

What you’ll do:

  1. Wash, dry, peel and core your apples. This will be quite a project so arm yourself with patience, enlist help of your friends and family, or get a peeler/corer/slicer device. I can recommend the KitchenAid standing mixer attachment that does all this for you, but it comes with a high price tag. It’s not essential, but it does help a great deal.  Whether you peel the apples it is actually up to you. I wanted a really smooth butter texture so decided to peel them this time around.
  2. Slice the apples and put them a really large mixing bowl. Add the spices and mix well, so that the spices are evenly distributed all over your apples.
  3. Line the crockpot with the crockpot liner (if using – I use it becasue it make cleanup a breeze, but it is not essential). Arrange the apples, put the lid on and turn your slow cooker to 10 to 12 hours. If you have a slow cooker that allows you to select the level of heat, I recommend cooking the apple butter on high.
  4. Let the apples cool before handling further. Transfer the cooked apples into a large bowl and use a stick (immersion) blender to purée the apples into a smooth apple butter. If you don’t have an immersion blender, your regular blender will work but you will have to blend in batches.
  5. Since I am not an expert in canning, I packed my apple butter in two nice big jars, one to give away one to keep. I store my apple butter in the fridge but if you do know how to can things I bet you can make the apple butter, can it and keep it for months.

Copyright © Eat the Vegan Rainbow, 2017

Coconut Bread Pudding: So Yummy, Good for the Tummy

Easy Coconut Bread Pudding
Easy (and Vegan) Coconut Bread Pudding, via Eat the Vegan Rainbow

A lovely dessert is always a welcome ending for a great meal. I have a major sweet tooth, but I am not a great baker and cake maker. So, my desserts are usually no-bake, like the Chocolate Bon Bons and the Blueberry Cheesecake, or simple cookies, muffins and crumbles that are full of fruit and really forgiving when it comes to exact measurements.

Still, none of those come even close to the simplicity and versility of my Coconut Bread Pudding. This bread pudding requires no prior knowledge of baking techniques, and uses plant-based ingredients. The final product is deliciously sweet, comforting and satisfying, so you can eat it as a dessert, as well as breakfast or brunch.

In terms of the skills required to make this wonder bread pudding happen, you only need how to mix and soak. The recipe starts with a super easy wet mix which you can whisk in a flash. Then comes bread which you can cut up or break into chunks by hand. The best type of bread to use here is a spongy one, because the main thing the bread needs to do is soak up the wet ingredients. One trick people sometimes use is to leave a loaf of bread on the kitchen counter for a day or so, and use this, slightly stale bread, to make the bread pudding. In my opinion there’s no reason to do this on purpose, but if you have stale bread on your hands then transforming it into a bread pudding is the way to go! Regardless whether you use fresh or stale bread, you should give your bread chunks time to soak up all the juices before taking the next step, so leave them in the wet mix for at least fifteen minutes.

Once the bread is ready, add raisins and shredded coconut, mix gently, pour into a baking dish and about half an hour later you will have a kitchen that smells like heaven and a bread pudding that tastes like paradise!

Coconut Bread Pudding

What you’ll need:

6 slices of bread, cubed (or about 1/2 of a large bread loaf)

1 cup almond milk

1/4 cup orange juice

1/4 cup brown sugar

1/4 cup coconut flakes, unsweetened

1/4 cup raisins

1 tablespoon cinnamon

1/2 teaspoon nutmeg

Cooking spray


What you’ll do:

  1.  Preheat the oven to 400 F (205 C).
  2. Chop the bread into 1 x 1 in (2.5 x 2.5 cm). Note that these are approximate measures and you don’t have to go crazy here. The point is to have bread chunks that can hold their shape yet have enough surface area to soak up all the liquid. If you are using stale bread you can go smaller. If you like your bread pudding to maintain more of your bread dough texture go bigger! Place the bread chunks into a large mixing bowl.
  3. In a separate mixing bowl (or a large soup plate, which is my preferred way) mix the wet ingredients, everything except raisins and coconut flakes.
  4. Pour over the bread chunks and gently fold everything together. Be gentle here if your bread is very soft because you don’t want to end up with a mushy mess. Larger bread chunks and more rustic bread can take a bit more beating but do proceed with caution. Let the mix rest for at least 15 minutes.
  5. When the bread has soaked up (almost all) the liquid, add raisins and coconut flakes and mix gently. At this point your bread chunks will be fragile and mushy so you want to preserve their structural integrity as much as possible so give your pudding a more interesting texture.
  6. Spray a bottom of a deep 8 x 8 in (20 x 20 cm) baking dish with cooking spray and pour the bread mix in.
  7. Put in the oven and bake for 25 to 35 minutes. Keep an eye on your oven, as you want the top of your bread pudding to be nice and brown. Let it cool for a moment or two and dig in. You can sprinkle powdered sugar on top of you like, or add some fresh fruit if you are feeling adventurous!

Enjoy for breakfast, brunch, snack, dessert… Sky is the limit!

Copyright ©Eat the Vegan Rainbow, 2017

Vegan Caprese Salad in a Sandwich

img_2518
Vegan Caprese Salad in a Sandwich, via Eat the Vegan Rainbow

In my other life, as the editor of two leading journals for chemical and structural biology (I know, sounds intimidating!), I once used Caprese Salad – tomatoes, basil, and fresh mozzarella – as an example of how simple is incredibly powerful, beautiful and irresistible, in an emphatic attempt to convince scientists to implement principles of simplicity when writing their scientific papers.

Here, my interests are purely culinary as I set out to recreate the Caprese salad out of plant based ingredients only. I started from a batch of vegan fresh mozzarella, following a recipe developed by Jules Aron and included in her “Vegan Cheese: Simple, Delicious, Plant-Based Recipes” book.

The path to fabulous vegan fresh mozzarella is long and slippery- meaning that it will take you about two to three days to have ready to eat batch of cheese on your hands, and there are few places along the way where a little mistake can derail your cheese making process. Having said that, I found Jules’s recipe to be clear and helpful, and the final result AMAZING!

I made only some minor adjustments to the recipe, as I used cashew yogurt for fermentation stage of the mozzarella, and agar powder and tapioca starch to firm it up – Jules recommends Kappa carrageenan powder and tapioca flour (which I think is the same thing as tapioca starch but it’s worth mentioning as a point of difference)!

The process starts, as many vegan cheeses do, by soaking some nuts. I usually cover the nuts, in this case cashews, with water and leave them in the fridge overnight. The next step for this cheese is blending the well soaked cashews, that have been drained and rinsed, with some almond milk or water until nice and smooth – I used almond milk.

Then, you add yogurt – here I used an amazing Cashew Yogurt by Forager – cover with cheese cloth and leave on the kitchen counter for a day or so. Make sure that your yogurt contains live cultures as you want the bacteria to start the process of fermentation and acidification, yielding a nice, subtly tangy flavor.

Making of vegan mozzarella, via Eat the Vegan Rainbow

The penultimate step is adding the thickener to the cheese mix, cooking it until it starts to thicken to a consistency of very thick oatmeal, porridge or polenta.


While the cheese was cooking, with frequent stirring, I made the brine. I used tap water and ice cubes, plus a tablespoon of plain kitchen salt since that’s what I had handy, and mixed it all until salt was fully dissolved.

Once the cheese was cooked, I used my measuring spoon (tablespoon size) to measure out cheese balls, formed a bit with hand – watch out here as it may be hot, so you can form the balls using two spoons at the same time. Dump the balls into ice/water/salt mixture, cover with cheese cloth and leave in the fridge overnight. Jules recommends at least 4 hours, so I just left my fresh mozzarella cheese balls to rest until the next day.

img_2513
Vegan Fresh Mozarella Balls in Brine, via Eat the Vegan Rainbow

Waiting wasn’t easy but it was worth it!!! I got some fresh baguette, fresh basil, a ripe tomato, a drizzle of balsamic vinegar, and my homemade vegan fresh mozzarella, and made myself a phenomenal sandwich for lunch.

I transferred the fresh mozzarella with the brine and all into a container with a tight lid, and stored it in the refrigerator. It lasted for about one week, at which point it was all gone!!! I will be making some more soon, but next one from Jules’s book I want to try is an almond-based baked feta!!!

Since this post is all about another person’s recipe, I am not sharing the notes, but encourage you to go visit Jules’s site, and get her book or better still borrow it from your local public library, which is what I did. I am happy to share what my Caprese Salad in a Sandwich looked like – it’s a real feast for your eyes!!!

img_2520
Vegan Caprese Salad in a Sandwich lunch, via Eat the Vegan Rainbow

Copyright ©Eat the Vegan Rainbow, 2017

Shiitake Mushroom Stroganoff 

Shiitake Mushroom Stroganoff, via Eat the Vegan Rainbow

Mushrooms come in many different shapes and sizes. They also range a lot in terms of their availability and price. The kind I find readily available in my local supermarket are white button mushrooms. They tend to be affordable and versatile, and use them in many of my recipes. Those with bigger caps are easy to stuff, and I’ve experimented with couple of different types of stuffing, like the mashed potatoes and corn tortilla, Mexican-flavor inspired stuffing. Small and imperfect mushrooms are great for chopping up, and using for recipes like a quiche or a stews. White button mushrooms are also a common ingredient in my burgers and my homemade ground beef substitute, where I grind them and add to the burgers for color, texture and flavor.

In many aspects, white button mushrooms and baby portobello (crimini) mushrooms are interchangeable, and I may use one or the other or both depending on which variety looked best at the store that day. Crimini mushrooms had a more woody, deep and rich flavor than white button mushrooms, but the differences are not major, so they tend to cook and taste about the same. They also cost about the same as well, and tend to be on sale at the same time!

Once in a while I lay my hands on really large portobello mushrooms, and those I like to grill and transform into portobello steaks. They look and taste amazing, and make for an easy and healthy dinner. The price tag on these is a bit larger, and you do have make more of them to feed the crowd, because one portobello steak is usually not enough. But, they are absolutely irreplaceable if you need to make a great grilled steak vegan style.

What makes mushrooms an essential staple of any vegetarian, vegan and plant-based kitchen is their flavor, and a large amount of umami, the flavor associated with perception of meatiness. The naturally occurring chemicals behind this umami flavor are glutamate and guanylate (plus couple of others), and mushrooms have large amounts of them, none more than shiitakes. Shiitakes are native to Southeast Asia and have been used in local cuisines for centuries, either fresh or dried. They are also now becoming more commonly available in US supermarkets, although they tend to be more expensive.

Luckily for me, I recently ran into a pile of loose shiitake mushrooms in my store that were plump, fresh, large and reasonably priced. I bought about a pound (half a kilo) of shiitake mushrooms and decided to try making a Shiitake Mushroom Stroganoff. I am sure this recipe would work with other types of sturdier mushrooms but shiitakes, becasue of their sweeper umami flavor, work exceptionally well.

I paired Shiitake Mushroom Stroganoff with some spaghetti for a satisfying dinner. You can make the dish gluten free if you need to by the right kind of pasta. Alternatively, you can serve with quinoa for a higher protein meal.


Shiitake Mushroom Stroganoff

What you’ll need:

1 lbs (454 g) shiitake mushrooms

5-6 cloves garlic

1 cup raw cashews, unsalted

3/4 cup almond milk, plain & unsweetened

2 tablespoons tapioca starch

1 tablespoon olive oil

freshly ground black pepper, to taste (optional)

fresh basil (for garnish, optional)

crushed red pepper (for garnish, optional)

1/2 pound spaghetti, cooked according to instruction on the box


What you’ll do:

  1. Cover the cashews with water and let them soak for at least 30 minutes, best overnight.
  2. The next day, rinse the cashews and place them into a blender. Add almond milk and tapioca starch, and blend until creamy. Set aside.
  3. Clean the shiitake mushrooms to remove the stems and any signs of visible dirt. Rinse them with water, pat dry with some paper towel and slice the caps intro strips.
  4. Peel the garlic cloves and slice them very thinly.
  5. Place a large pan over the medium heat and add olive oil to it.
  6. When the oil is hot, add mushrooms and garlic to the pan. Stirring frequently sauté the two for 5 to 10 minutes, until mushrooms have softened.
  7. Mix in the freshly ground black pepper to taste, then add cashew cream sauce and fold everything together.
  8. Simmer for another 10 to 15 minutes, until the sauce is rich and thick.
  9. Pour over your favorite pasta, quinoa or polenta, and enjoy with a sprinkle of crushed red peppers and fresh basil!

Copyright ©Eat the Vegan Rainbow, 2017

Simple Summer Pasta Salad

img_2143
Simple Summer Pasta Salad, via Eat the Vegan Rainbow

For me, pasta salad is a conceptually hard thing to swallow since I equate salads with (mostly) green leafy vegetables. Growing up, there was a clear separation between salads and pastas in my mother’s cooking and our family meals. But, after living in US for almost two decades, I’ve come around and appreciate that pasta salads have a place on my plate, especially if I am holding that plate during a large summer cookout or a potluck.

Having said that, I still think that many pasta salads leave a lot to be desired as they tend to be overloaded with mayonnaise, meat or even cheese. So, I decided to develop a pasta salad recipe that is simple and light, yet full of flavors and surprising textures.

The recipe below really blew me away! It’s super simple, uses only six ingredients, it takes less than twenty minutes to make, and it is a perfect pasta salad for big get togethers because it is super inexpensive.

The recipe is very simple and self-explanatory. Few tips here are: don’t cook your pasta for too long, drain it well but don’t rinse; mix the pasta with the rest of ingredients while it’s still hot, and then let it cool while the flavors are developing and merging; and if using kalamata olives in oil, scale back on the amount of olive oil you actually add – otherwise you’ll end up with something that’s too oily, which will be too bad!

And speaking of olives – kalamata olives that I get come with a nice level of acidity so I don’t feel like I need to use extra vinegar when I’m using them. This means that my recipe below does not include vinegar. Now, if you like a bit more tang, feel free to add some lemon juice or a dash of red wine vinegar to adjust the acidity level in this salad to your personal taste.

Finally, if you don’t have a box of penne rigate on hand, don’t worry. You can use any spoon friendly pasta for this – meaning not long pasta. Why do I recommend NOT using long pasta? Well, if you are thinking of this salad as picnic, pot luck, sharing-with-friends-and-family friendly, then help your friends and family help themselves by not having to wrestle with long pasta. I also think that tubular pastas work better for this recipe than flat ones – think penne, ditalini, macaroni as better, and farfalle as perhaps less suitable for this recipe – as tubular pastas have a bit more surface area to absorb the subtle flavors. And among the tubular pastas, those with ridges will work just slightly better because of the same surface area availability principle I mentioned. Having said all this, and having dragged you through likely totally unnecessary details on how to choose just the right pasta for this recipe, I’d like to stress again – just grab a box of pasta you have on hand and it will be just fine!

STOP: I just remembered – I would not recommend black bean pasta for this. I did not like the flavor of that one when I paired it with my Clams-free “Clam” Sauce and can’t recommend it for this application either. 😦

Simple Summer Pasta Salad

What you’ll need:

12 oz (340 g) penne rigate pasta

1 cup kalamata olives, pitted and chopped

1 cup slivered almonds

1/4 cup olive oil, extra virgin

1 teaspoon garlic powder

3 tablespoons fresh basil

What you’ll do:

  1. Cook the pasta following the instructions on the box. Don’t overcook it – the pasta will be ready when it is slightly chewy to the bite.
  2. While pasta is cooking, chop the olives and the fresh basil leaves. Put to the side.
  3. Drain the pasta well and place in a large mixing bowl. Add oil, chopped kalamata olives, garlic powder, and mix well.
  4. Toast the almonds in a toaster oven or on the stove top in a heavy skillet. Watch the almonds constantly as they do burn quickly.
  5. Add the toasted almonds to the rest of the pasta salad, mix well and leave for an hour or so.
  6. Add fresh basil just before serving, toss everything together and enjoy. The result is fragrant, complex in flavors and textures, yet simple and cheap to make, perfect summer pasta salad.


Copyright ©Eat the Vegan Rainbow, 2017

Good Morning, Sunshine! Smoothie

Good Morning, Sunshine! Smoothie, via Eat the Vegan Rainbow

It’s a bit ridiculous to share a smoothie recipe like it is a thing. After all, smoothie is nothing more than throwing couple of things in a blender and pressing a button. But, I’ve now made this version a few times, never straying from the original recipe and it is a keeper. Even people who usually refuse to drink almond milk were able to get behind this one, so I decided to share it with the world.

The recipe is super fast, super easy, super cheap, super convenient – all in a real superlative fest! All you need is a banana, five frozen strawberries, some almond milk, preferably unsweetened and vanilla flavored, a dash of unsweetened coconut flakes and a sprinkle of vegan mini chocolate chips. These last two ingredients are completely optional but they do elevate this smoothie to the seventh heaven.

I do recommend using frozen whole strawberries. First of all, they have great flavor all year round as most brands use the best looking whole strawberries for freezing. Note that you should stay away from chopped frozen strawberries because I am not so sure that you can tell what those looked likes before they were chopped, and you should definitely check that strawberries are the only ingredient in the bag, just to be on the safe side. Frozen whole strawberries are usually cheaper than fresh, and they are really handy to have on hand in your freezer to use for smoothies, or other recipes. For the purpose of this recipe you can definitely use fresh strawberries if you have some. In that case you may want to add an ice cube or two, if you like your smoothie cold. The benefit of using frozen strawberries is that no extra ice is needed – they give this smoothie a nice, subtle chill that is just fabulous for summer breakfast at home or on the go.

Final note for those who like a sturdier breakfast. This smoothie is light, has no added sugar and a minimal amount of fat that comes from the almond milk, coconut flakes and the mini chocolate chips. If you want to make this smoothie thicker and more filling, you can simply add two to three spoonfuls of rolled oats. If you are adding oats, I recommend you letting the smoothie rest for five minutes or so before enjoying to let the oats soften just a smidge.

Good Morning, Sunshine! Smoothie

What you’ll need:

1 banana

5 frozen whole strawberries (fresh will work too!)

1/2 cup almond milk, unsweetened, vanilla flavor

1 tablespoon unsweetened coconut flakes (optional)

1 tablespoon mini chocolate chips, vegan (like Enjoy Life) (optional)

2-3 tablespoons rolled oats (optional)

What you’ll do:

  1. Place chopped banana, strawberries and almond milk into a blender. If you are using oats add them now. Blend until smooth and to consistency you like.
  2. Pour into a glass or a travel jug if you are taking it on the road.
  3. Sprinkle coconut flakes and chocolate chips and walk into the sunlight, figuratively and/or literally!

Copyright ©Eat the Vegan Rainbow, 2017

Miso Glazed Tempeh, From the Grill!

Miso Glazed Grilled Tempeh, via Eat the Vegan Rainbow

If you have not done so already, you should definitely try tempeh. I’ve been hearing about it for some time now, and seeing several different brands and varieties right next to the tofu that I usually get but I only got the first batch of tempeh just the other day. I bought several different varieties to try them out and spent few days reading about what’s tempeh good for and how to best cook with it. Tempeh is related to tofu because both are soy based. But, in terms of flavor and texture (and as far as I can tell in terms of how you actually make the two, based on what Wikipedia says), tofu and tempeh are quite different. Tempeh is firm, much firmer than the firmest tofu, and does not come in liquid. It is actually fermented soy beans mixed with rice [edited after reading comment from Mary S below – thanks Mary S, it’s good to get the facts all squared away. I am still a bit confused since the ingredients’ list of the tempeh I used did include rice; at the end of the day my confusion does not matter change the fact that the food was delicious], so although it is dry, it does feel sticky to touch and just a bit slimy. FYI: I am not saying this to freak you out, rather to forewarn you so that you are not as surprised when you start handling it as I was – I thought my tempeh has gone bad and wanted to throw it out! But, I double-checked the date on the bag, regained my cool and went for it.

I decided to start simple and build from there, so this Miso Glazed Grilled Tempeh is more or less my starting point. The brand of tempeh I got is Lightlife and the two varieties I started with are their Organic Garden Veggie and Organic Soy Tempeh. Each package is half a pound (about 250 g), and the block of tempeh comes in a vacuumed-sealed package, that’s within a sealed plastic bag, so there are two bags to remove! I used both blocks at the same time, since one just did not seem enough to make for the end of the week Friday dinner.

The first thing I did was to fire up the grill. I have a gas grill and it takes it about ten to fifteen minutes to get to be sizzling hot, with burners going at full blast and the lid down. That was just enough time for me to prep the tempeh and the glaze. For tempeh, I placed the pieces into a pan large enough to keep the pieces flat, covered with water, brought to boil and boiled for four to five minutes per side – I did flip the pieces over once since the pan I was using was shallow and the water did not fully cover the tempeh, so if your tempeh is fully covered you will not need to do the flip! After about ten minutes I took the tempeh out, pat dried the pieces, and left them uncovered on some paper towels.

While the tempeh was boiling and the grill was heating up, I mixed together a simple glaze with some soy sauce, Worcestershire sauce, white miso glaze and vegetable oil. I spread the glaze over the tempeh pieces just before placing them on the grill the glazed side down. Then I glazed the top and let it grill for about five to six minutes. By that time the grill marks will be perfect, and the pieces ready to be flipped. I did reglaze both sides again and flipped again, so that at the end each side got two layers of glaze and about eight to ten minutes of grilling, so in total the grilling bit took less than twenty minutes. If you are in a rush, you can definitely skip the reglazing, but if you are outside hanging around the grill with friends and family and enjoying the lovely summer evening, then why not give tempeh extra love, glaze and grill time?

Let grilled tempeh rest for just a second, then slice and serve. You can serve it in a hamburger or a hot dog bun with the usual trimmings, but note that condiments, like mustard and ketchup, are going to overpower the flavor of the grilled tempeh. So, I recommend serving tempeh with a side of coleslaw and baked, or barbecue beans, which is how I had mine. Add to that a glass of cold beverage of choice, and what can be better?

Miso Glazed Grilled Tempeh Sliced, via Eat the Vegan Rainbow

Miso Glazed Grilled Tempeh

What you’ll need:

2 8 oz (227 g) blocks of tempeh (any variety and brand you like)

2 tablespoons soy sauce, reduced sodium

2 tablespoons white miso paste

2 tablespoons vegetable oil

1/2 tablespoon Worcestershire sauce (vegan)

Oil for oiling the grill grates


What you’ll do:

  1. Prepare your grill like you normally do. I recommend getting the grill really hot and letting any bits and pieces from the previous grill session burn off, then scrapping the grates with an appropriate type of a brush (please be careful here because you can really damage your grill grates if you don’t follow the manufactures instructions and recommendations), and then oil them generously with a paper towel dipped in vegetable oil – please use long tongs here to prevent getting burned!
  2. Take tempeh out of the wrapping and palace in a pan large enough to hold it flat and straight. Cover with water, bring to boil and let it boil for 5 to 10 minutes. Make sure you flip the tempeh half way through if your tempeh is not fully submerged in water. If it is, no mid-way flipping is needed!
  3. While tempeh is boiling and the grill is getting hot, mix together the glaze by whisking together soy sauce, vegetable oil, miso paste and Worcestershire sauce. The glaze should be smooth, but even if you have few lumps in there don’t worry about it – it won’t matter at the end.
  4. Place the boiled tempeh onto some paper towels and gently dry.
  5. Using a (silicone) food brush spread the glaze liberally ove the tempeh and place the piece of tempeh glaze side down on the hot grill. Keep the gas grill on medium high heat, or if you are using a charcoal grill keep it as hot as you would when grilling vegetables, veggie burgers, or mushroom or tofu steaks. Grill the glazed tempeh 5 to 6 minutes on one side, and while it is grilling apply the glaze on the other side, flip over, grill for 4 to 5 minutes, glaze, flip, grill, repeat for as long as you like.
  6. Let stand for just a moment or two, slice and serve!!! This Miso Glazed Grilled Tempeh will work as an appetizer, finger food, as well as dinner, especially with some grilled corn, veggies, coleslaw, baked or barbecue beans, or as a salad topping…

Copyright ©Eat the Vegan Rainbow, 2017

Grilled Portobello Mushroom Steaks

Grilled Portobello Mushroom Steaks
Grilled Portobello Mushroom Steaks, via Eat the Vegan Rainbow
It’s that time of year in New England when we jump out of our winter lairs and onto our no-longer-snow-covered decks to fire up the grill. I love grilling, and if anyone ever told you that grilling is a guy thing, don’t listen to them as grilling is for everyone! There is something very primal that comes to forth when you find yourself outdoors, standing in front of the fire and flames, and you hear the sizzle of delicious food getting caramelized, charred and transformed into the mouth watering delights.

I love using my grill, especially during the summer months, because it gets the food cooked fast without heating the kitchen and makes clean up a breeze. Add to that a delight of summer evenings and eating outside, and it can hardly get better than that. I make piles of grilled vegetables and have even developed an awesome way of making grilled pizza, which I’ll share in another post.

Here I’ll share how to get the perfect Grilled Portobello Mushroom Steaks as grilled steaks are the quintessential example of this type of cooking. For this recipe to work you do need to use very large portobello mushroom caps. The ones I found in our local grocery store are about 4 to 5 in (10 to 12 cm) in diameter, and that’s the size I recommend for a recipe like this as the bigger portobello caps will hold up to grilling much better. Most of the really large portobello mushrooms will come without stems, but if the ones you get include the stems I recommend using the stems to make your own vegan “scallops”.

The recipe is really very simple and the mushroom steaks cook very quickly. The most time consuming step is putting the marinade together and letting the mushrooms soak up some flavors, which will take anywhere between one to two hours. If you are pressed for time you can skip this step and simply apply the same marinade liquid to the mushrooms as they grill.

Are there any tricks to getting a perfect grilled portobello mushroom steak? Yes, there are a couple. The first one is really more of an universal grilling advice than mushroom specific: make sure your grill grate is clean, hot and well oiled (for more on how to prepare your grill for perfect grilling results check this post out). This will help the food go on and not stick to the grates. I recommend using paper towel dipped in oil and a pair of long kitchen tongs to do this. The second trick is mushroom specific as I recommend grilling the mushrooms cap side facing up first in order to allow for all the excess moisture to drip out, before flipping the cap over. Finally, if you are into the grill marks you need to remember to rotate your cap by 90 degrees half way through the cooking.

Following these easy steps will bring delicious grilled mushroom steaks to your plate!

Grilled Portobello Mushroom Steaks

What you’ll need:

(for 4 servings)

4 extra large portobello mushroom caps

2 tablespoons A.1. steak sauce (or any other steak sauce, homemade or store-bought)

2 tablespoons soy sauce

1 tablespoon olive oil

1 teaspoon garlic powder

1 teaspoon onion powder

2 teaspoons smoked paprika

2 teaspoons chili powder

Some oil to brush your grill

What you’ll do:

  1. Wipe the portobello caps with a paper towel to remove any dirt. Set aside.
  2. Whisk together all the rest of the ingredients in a container large enough to hold all four mushroom steaks.
  3. Place the mushroom steaks into the marinade and make sure they are fully coated and covered. Marinate for 30 to 60 minutes. If you decide to skip this step simply coat the mushrooms with the marinade before placing on the grill.
  4. While mushrooms are marinating, prepare your outdoor grill for medium high heat grilling. If you have any questions on how to do this, Whole Foods Market has a post that can help. Don’t have an outdoor grill? You can use the indoor grill or a grill pan for this recipe as well. In that case simply follow whatever steps you usually take when grilling indoors over medium high to high heat.
  5. Place your mushroom steaks on the grill top side up, spread some marinade over the steaks, and grill for 4 to 5 minutes.
  6. Spread some more marinade on top, turn the caps over and grill top side down for 3 minutes, then lift up and rotate by a very rough quarter turn, and grill for another 2 minutes. You can skip this rotating step. It does not change the flavor of the steaks, but it does make for those well-known (and loved) grill marks.
  7. Enjoy the perfect grilled portobello mushroom steak with your favorite sides, like Cauliflower Mash and a field greens salad!
  8. Copyright © Eat the Vegan Rainbow, 2017