Meat-less Keema Matar

img_2947
Meat-less Keema Matar, via Eat the Vegan Rainbow

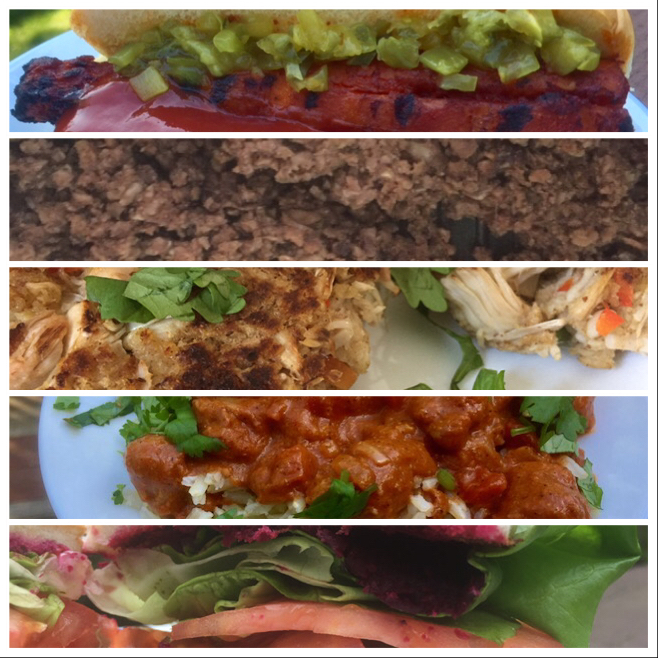
By now you probably figured out that I am a huge fan of Indian cuisine. Perhaps it’s the spices, perhaps it’s the long and slow simmering, perhaps is the whole culture of not eating meat that produced an abundance of vegan-friendly recipes and ingredient combinations [EDIT: I was alerted that current facts suggest that India may not be as vegetarian as previously thought; it seems that it’s a myth that India is mostly vegetarian]. Whatever it is, Indian cuisine has always been a huge inspiration for me, and I’ve been sharing some of the results on this blog. Past successes include Jackfruit Tikka Masala, as well as Chicken-less Tikka Masala made with soya chunks, and my version of Sabudana Khichdi.

This recipe is a vegan version of a minced lamb dish called Keema Matar. The recipe uses minced soya chunks that give the final dish the same consistency and appearance as the original recipe. You could use TVP (textured vegetable protein) but note that the food will probably have a softer, less chewy bite to it.

What makes this recipe work are, of course, the spices. I use some pretty standard spices like garlic powder, freshly grated ginger, chili powder, a cinnamon stick, some more specialized spices like turmeric, coriander powder and coriander pods, and some spices that you can only find in an Indian grocery store, like Indian bay leaves and matar masala.  Fear not if you don’t have easy access to these last two spices because you can use regular bay leaves and some cumin powder instead.

The best way to ensure that your soya chunks absorb all the flavors is to cook them according to instructions, which usually say “boil in water for 5 minutes”, rinse, drain, gently squeeze to remove some of the excess water, and mince them – I use a food processor for mincing – and then mix the minced chunks with spices and let them marinate for a while. (Note: if you are using TVP, you will not need to mince since the TVP flakes are already about the right size once they are fully soaked. Although hard to remove access water from TVP once it’s fully soaked, I do suggest you give it a gentle squeeze before marinating!)

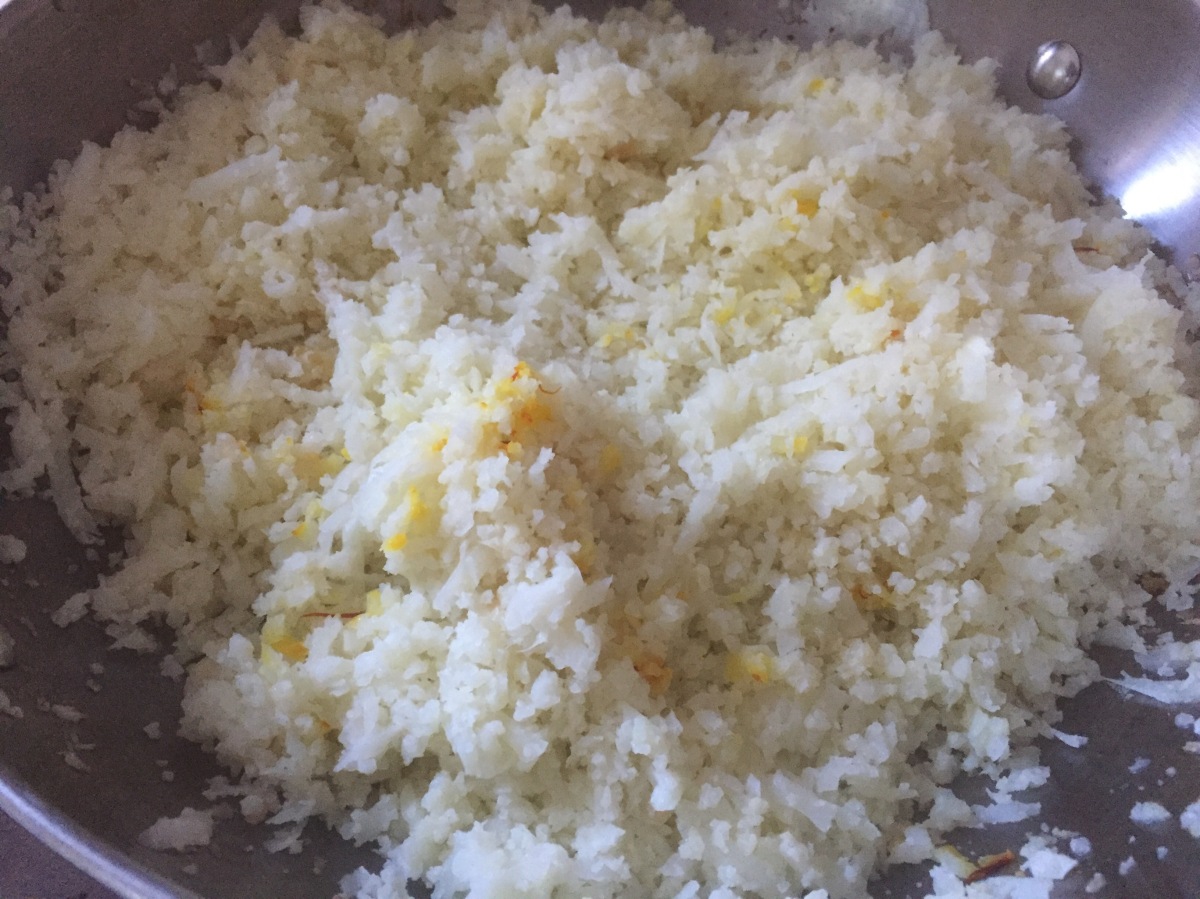
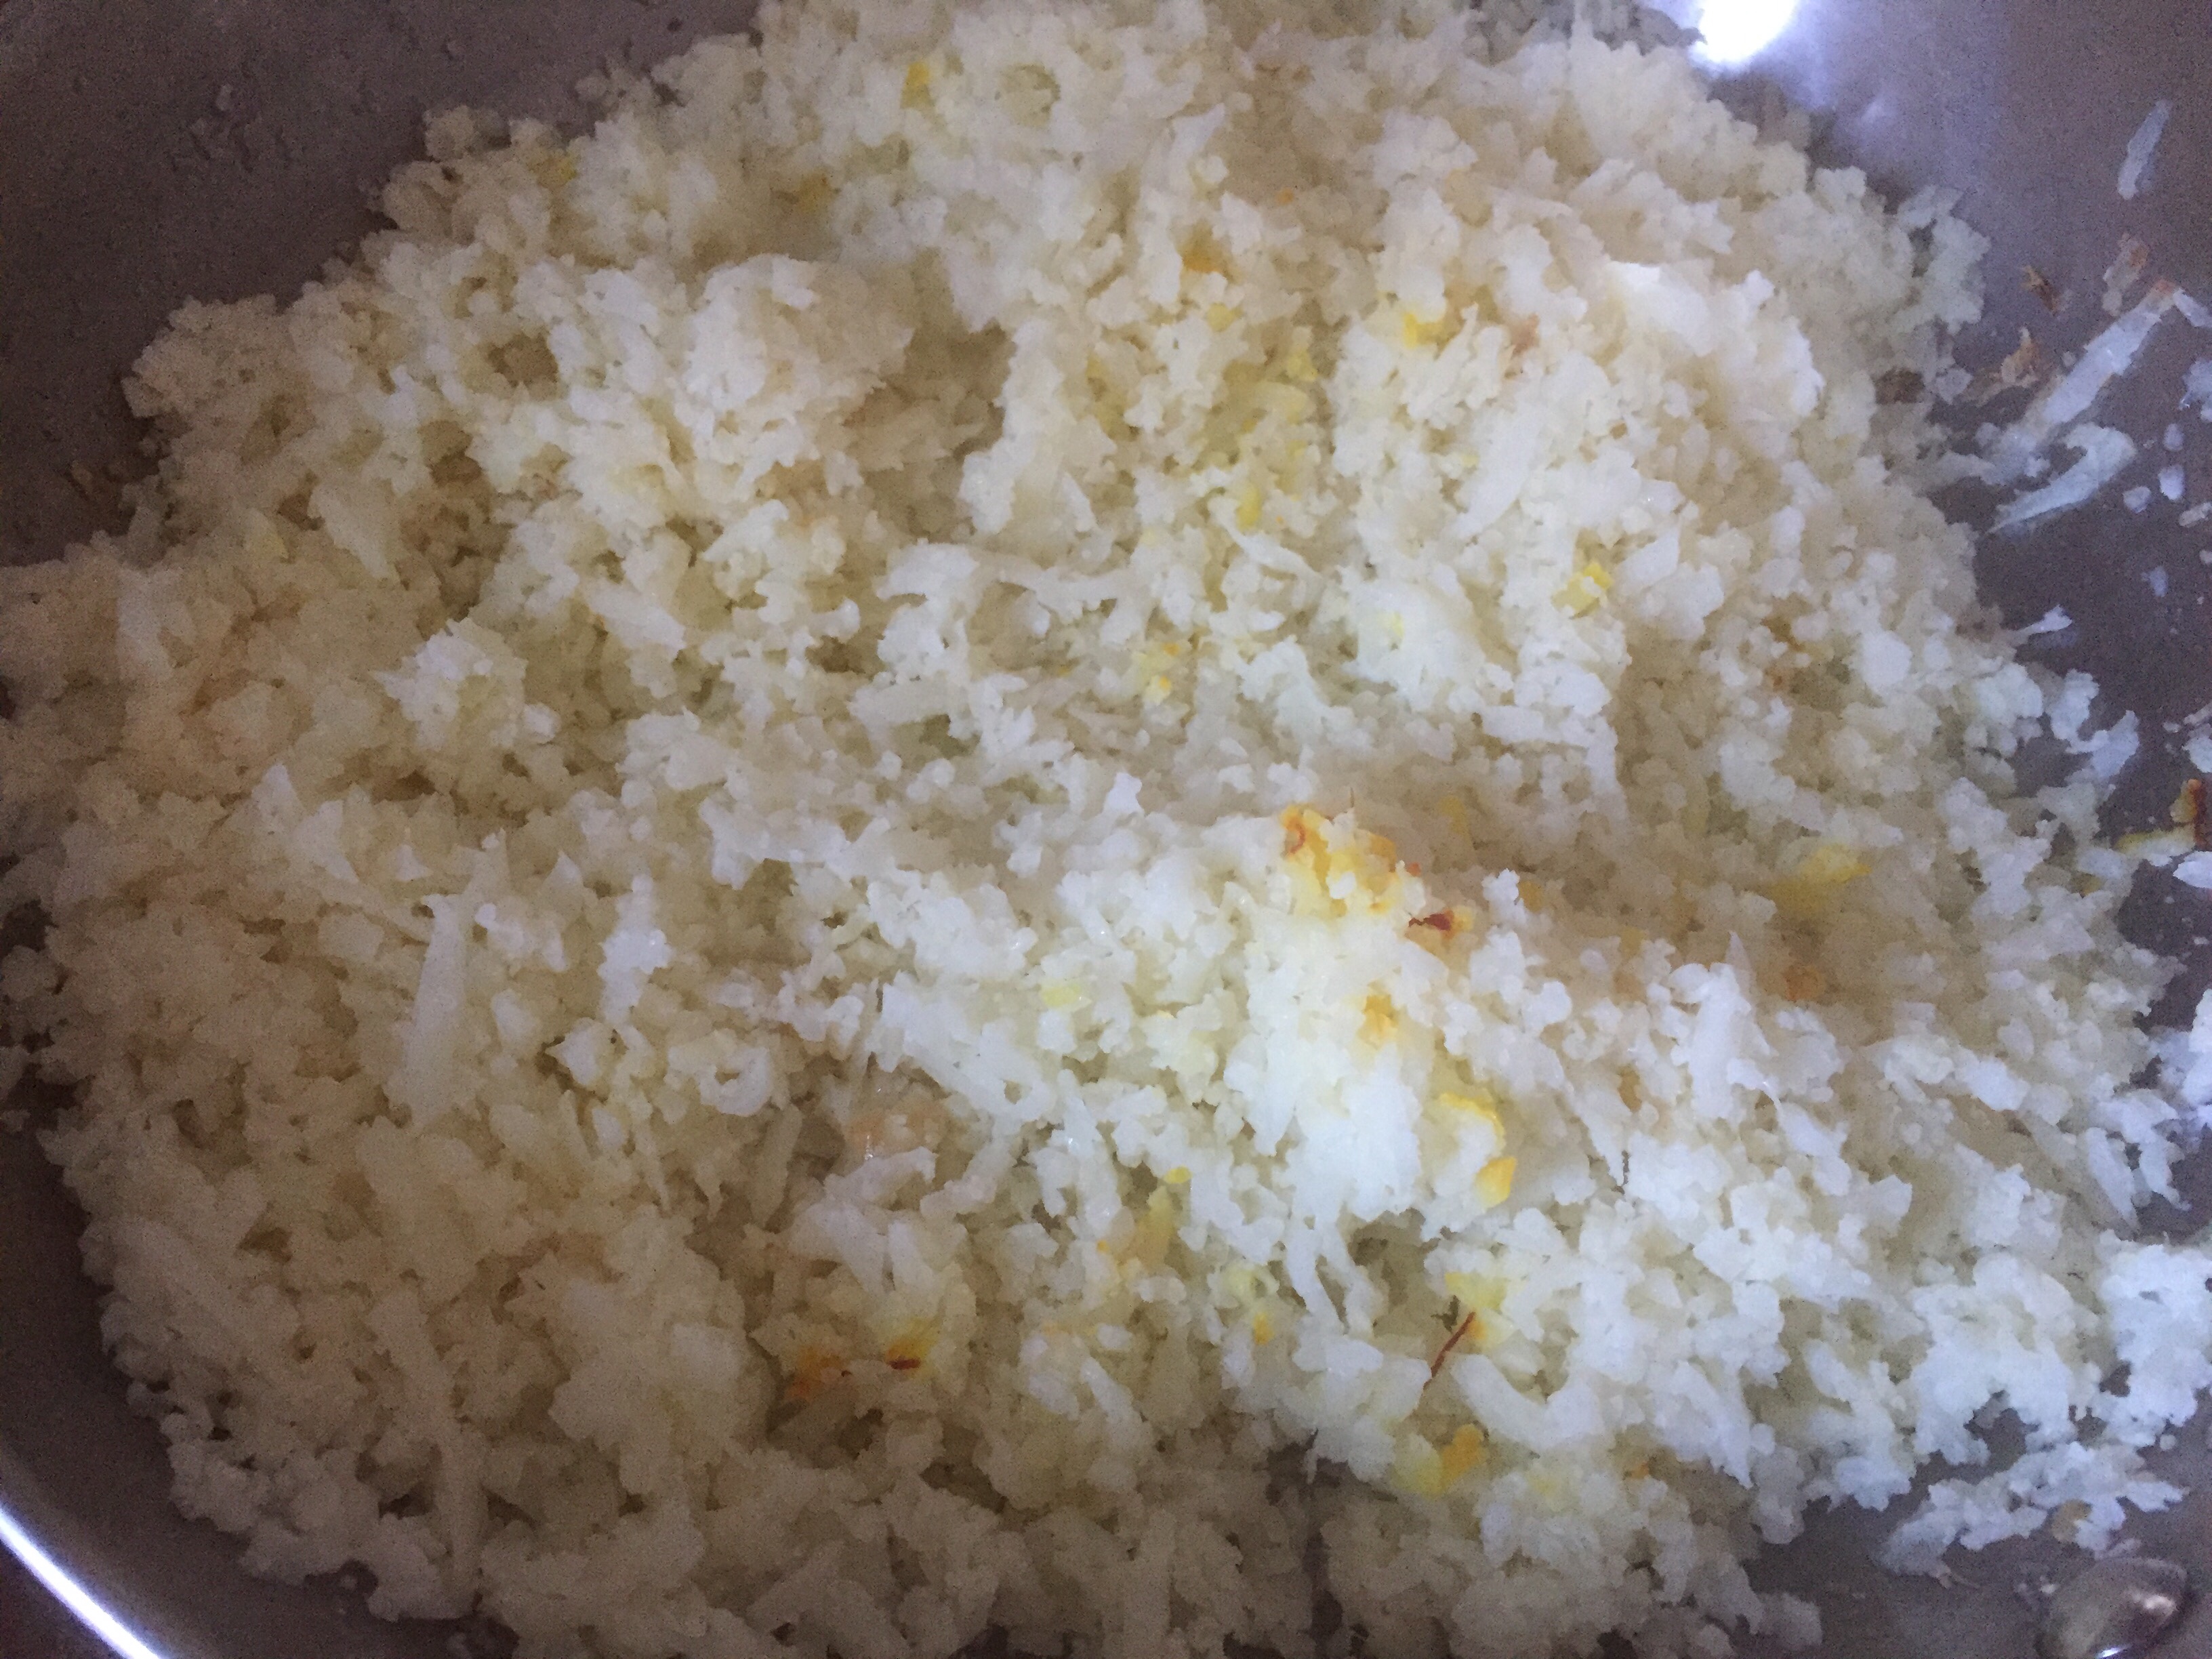
Another ingredient that is needed for this dish are green peas. I use frozen peas, and I don’t bother with defrosting – just mix them into the simmering minced soya chunks and they’ll be fine. Once done, serve over  some Basmati Rice, sprinkle with some fresh cilantro and add a side of raita (yogurt sauce with chopped cucumbers and mint – I make mine with cashew yogurt and it comes out great!) or even a piece of naan and you will have an unbelievable restaurant-style dinner right in the comfort of your home.

img_2947

Meatless Keema Matar

What you’ll need:

200 g soya chunks

2 teaspoon coriander powder

2 teaspoon chili powder

2 teaspoon mattar masala

1 tablespoon grated ginger, fresh

1 teaspoon garlic powder

1 teaspoon turmeric

2-3 tablespoon oil

3-4 Indian bay leaves

1 cinnamon stick

10-15 cardamom pods

4 cloves garlic, sliced

1 onion, diced

1 tablespoon tomato paste

1 15 oz can petit diced tomatoes

1 1/2 cup green peas, frozen

Fresh cilantro for garnish

What you’ll do:

  1. Place soya chunks in a large pot, cover with water, bring to boil, and cook for 5 minutes, or according to the instructions on the box. Drain and rinse with cold water. Squeeze the soya chunks gently to remove some of the excess water, them place in the food processor.
  2. Add all the spices up to the oil and bay leaves, and process until soya chunks get a consistency of minced meat. Let the minced soya chunks and spices marinate for an hour or so on the kitchen counter at room temperature.
  3. In a heavy pot, like a Dutch oven, heat the oil over medium high heat then add the Indian bay leaves, cinnamon stick and the cardamom pods and let the aromas bloom for a minute.
  4. Add the onions and garlic, and sauté them for 5-6 minutes.
  5. Add the tomato paste, mix well and continue sautéing for another minute to brown the tomato paste just slightly.
  6. Add the minced soya chunks with all the spices they have been combined with as well as the diced tomatoes and simmer for 10-15 minutes.
  7. Add the peas, mix well and simmer for another 10 minutes. By this point, your food will be ready and your kitchen will smell fantastic. Serve and enjoy with Basmati Rice, and/or naan, and/or raita.

Copyright © Eat the Vegan Rainbow, 2018

Chickpea Burgers with Sun Dried Tomatoes and Walnut Meat

img_2974
Chickpea Burgers with Sun Dried Tomatoes and Walnut Meat, via Eat the Vegan Rainbow

You should get to know walnuts. They are super nutritious because they have a large amounts of polyunsaturated fats, and surprisingly high amounts of protein, fiber, even vitamins B-6.

Walnuts are also fun and funky. They look like large, green balls when young, and their pretty green skin shrivels into dark brown to black husk as they ripen. This husk eventually falls off, revealing the nut. If you do find yourself with a pile of walnuts still wearing their husks on your hands, do use gloves when peeling them. The walnut husks will release dark brown pigments that will color your skin, and the stuff does not come off easily. It’s actually still used as a natural hair dye in some places, and if you ever get a pile of green walnuts stick them into some brandy and make some dark liquor called nocino.

If you are like me, chances are the walnuts you can easily find come nicely cleaned and sometimes even chopped. These days I prefer to get chopped walnuts as that speeds things up in the kitchen. I use walnuts in my desserts, as a quick snack, and as a meat substitute. This recipe here falls into the “walnuts as a meat replacement” category and to boost their meaty flavor I combine them with sun dried tomatoes, caramelized onions, cumin, smoked paprika, and chili powder. This serves as a fantastic flavor add-on to chickpeas, which are the main ingredients in this burger. Having said that, I think chunks chickpeas here are more of a filler and that walnuts and the sundried tomatoes are the stars.

The main binding agents here are flax meal and bread crumbs. Flax meal has to be soaked in hot water for about fifteen minutes, which should be enough to transform it into sticky goo that you can use instead of eggs as a binding agent.

Chickpea Burgers with Sun Dried Tomatoes and Walnut Meat

What you’ll need:

1 onion, diced

1 cup walnuts, chopped

3 oz. (85 g) sun dried tomatoes, sliced

3 tablespoons flax meal

6 tablespoons water, boiling

2 15.5 oz. (439g) cans chickpeas, rinsed and drained

3 tablespoons olive oil

2/3 cup plain bread crumbs

1 teaspoon smoked paprika

1 teaspoon cumin

1 teaspoon chili

Cooking spray

What you’ll do:

  1. In a large cup or a measuring cup mix flax meal and the boiling water. Let the mixture stand for 15-20 minutes.
  2. Spray the bottom of a large frying or sauté pan with cooking spray and place over medium heat. Add the diced onions and sauté for 8-10 minutes until the onions are nicely caramelized.
  3. Add chopped walnuts and let them toast slightly. This will take 3-5 minutes.
  4. Add the sun dried tomatoes, mix well and sauté for another couple of minutes.
  5. Transfer the sautéed mixture into a large mixing bowl. Add the chickpeas that have been carefully washed, drained and half-mashed with either a hand or a fork. Add the soaked flax meal, spices, oil, and bread crumbs and mix well.
  6. Form the burger patties, and place them on the wax paper lined platter. Put the patties in the fridge for at least 30 minutes to firm up.
  7. Grill the burgers using an outside or an inside grill, or a grill pan. These burgers are sturdy and should not fall apart while grilling. They need 3-5 minutes per side to get nice grill marks.
  8. Serve them on a ham burger bun with your choice of toppings and condiments!!!

Copyright © Eat the Vegan Rainbow, 2018

Free and Beautiful – Flourless Double Chocolate Brownies with Chickpeas and Oats

Just how free and beautiful are these brownies? On the “free” side they are vegan, so dairy-free and egg-free, they are also gluten-free and nut-free, plus they are no-added sugar! So, what on Earth do they have? They have plenty of chocolate, cocoa powder, and cocoa nibs, which gives them their chocolate richness.

They are also full of ingredients that you will not find in your regular brownies, like a banana I use here for sweetness and a egg replacement, and oats and chickpeas, which I use as the key flour-like components. Chickpeas and the chickpea water – the miraculous aquafaba – are essential here. They add the protein needed to help give the brownies a bit of structure and texture. They combine well with oats so that the result is not chocolate oatmeal but a real double chocolate brownie with a bite and a chew.

For this and other baking projects, like my meatloaf and my marshmallow topping, I suggest you try making your own chickpeas. They do need some work – you soak them overnight in lots of water, then you rinse them and boil them in double the amount of water to get soft chickpeas and very useful aquafaba. I cook them in an electric pressure cooker on the “beans” setting. To help aquafaba along, I recommend letting the liquid that chickpeas were cooked in sit in the refrigerator for a day or so before using.

Other than cooking the chickpeas that’s a bit elaborate, everything else is smooth sailing. You will need a large food processor, pile everything in, and pulse to mix and combine. The baking is a standard deal, using a 350 F (175 C) oven and taking somewhere between 20 and 25 minutes. Let your brownies rest for at least 15 minutes before serving, then cut and plate. They’d be great with some vanilla nicecream, if you’d like to make them fancy. They are also great as is or with some orange zest on top.

Flourless Double Chocolate Brownies with Chickpeas and Oats

What you’ll need:

2 cups oats, gluten-free

2 cups chickpeas, cooked

1 banana

3/4 cup aquafaba

1/2 cup cocoa powder

1/3 cup chocolate chips or chunks, vegan

2 tablespoons cocoa nibs

2 teaspoons vanilla

1 teaspoon baking powder

What you’ll do:

  1. Preheat the oven to 350 F (175 C).
  2. Place cooked chickpeas, oats, roughly chopped banana, and all the rest of the ingredients except chocolate chips and cocoa nibs into a food processor, and process until you form a dough.
  3. Add the cocoa nibs and chocolate chips and mix everything together.
  4. Pour the mix into a square, 8 x 8 in (20 x 20 cm) baking dish and put your brownies to bake for 20 minutes.
  5. Take the brownies out and let them rest for at least 15 minutes before cutting and serving. Enjoy with some vegan ice cream or as is!

Copyright © Eat the Vegan Rainbow, 2018

Broiled Vegan Koftas

img_3533
Broiled Vegan Koftas, via Eat the Vegan Rainbow

Although it may seem like a mission impossible, recreating meat like appearance, consistency and even the taste with plant-based ingredients is not all that hard. The basis for many of my meatless recipes are mushrooms. I usually use baby portobello mushrooms, also known as the crimini mushrooms, but white button mushrooms would work just as well. Very often I grind the mushrooms into a paste and this also helps with the final meat-like vibe of a dish. Finally, I cook the dish with the same spices and in the same way as someone would a meat version of the same recipe.

The meatless Shepherd’s Pie I made some time ago nicely illustrates these tips. For that recipe I used mushrooms and lentils, as the key umami components, and combined them with herbs that you would typically use in this pie – thyme and plenty of rosemary. What you see and smell will evoke the right memories and experiences, so by the time you have the first bite your brain is already convinced it’s having meat.

Here I use all those strategies to make koftas, which are sort of flat-ish lamb meatballs placed on a skewer and grilled. Minced mushrooms give the right level of umami and TVP (textured vegetable protein) gives the koftas structure. One note on the TVP – instructions usually say that you need to soak the TVP flakes before using which is true for many applications but not for this one. Use dry TVP and mix it with minced mushrooms and the rest of the ingredients to get to the right consistency for the koftas. After all they will need to go on the skewers and need to be robust enough for broiling on high. I did add some bread crumbs to the mix as well, as an extra binding agent. If you are not a fan of bread crumbs, you could add oats, or some corn meal.

Koftas need to be shaped by hand, and the skewers gently threaded through. Ideally, the skewers you are using are long enough to rest on the edges of your broiler pan (see picture below) so that you can turn them midway through broiling and get all sides well browned. I can’t recommend the bamboo skewers I used here – by the end of the broiling they were all black band falling apart – so metal ones seem like a much better idea.

Serve Broiled Vegan Koftas with some Saffron Cauliflower Rice, and with a spoonful of mint chutney, and you will have yourself a great, well-rounded meal.

Broiled Vegan Koftas

What you’ll need:

10 oz (280 g) white button mushrooms

10 oz (280 g) TVP

1 cup bread crumbs, plain, gluten-free

4 cloves garlic

3 tablespoons olive oil

2 teaspoons coriander powder

2 teaspoons ground cumin

2 teaspoons smoked paprika

1 teaspoon crushed red pepper flakes

Cooking spray

What you’ll do:

  1. In a large food processor, mix all the ingredients (except the cooking spray) and pulse to mix and combine. Let this mixture stand for at least 30 minutes and up to one hour.
  2. Start your broiler on “HI” or use the outdoor grill if you like.
  3. Line a broiler pan with some foil. You don’t need the top grate part that broiler pans usually have so leave it aside.
  4. Using your hands take about 1/2 cup worth of koftas’ mix and form an elongated oblong shape about 1 1/2 in (3-4 cm) wide then pierce it with a skewer. These koftas are gentle so handle them with care. You may need to adjust the amount of bread crumbs, or add some flex meal as a blunder. Leaving them in a fridge or freezer to firm up will help them hold their shape. Place the skewers on a broiler pan making sure their ends rest on the pan’s rim and the koftas don’t touch the bottom (see picture above).
  5. Broil on high for 5-8 minutes than turn over to broil on the other side.
  6. Let koftas cool just for a moment then serve with some rice, Saffron Cauliflower Rice, or a mild yogurt, like almond or cashew ones.

Copyright © Eat the Vegan Rainbow, 2018

Saffron Cauliflower Rice

img_3510
Saffron Cauliflower Rice, via Eat the Vegan Rainbow

Is there a more gorgeous looking vegetable than cauliflower? This is, of course, a rhetorical question because the answer to anyone who has ever held a perfect head of cauliflower in their hands should be an obvious “No!”.

Cauliflower florets are a perfect ingredient for things like vegan Buffalo wings – if you haven’t tried those yet drop whatever you are planning to make, and prepare the Buffalo wing right now! Cauliflower is also great for soups, pickled, and in curries.

In addition to all that, cauliflower can also be made into rice. Yes, you read that right – cauliflower = rice. It may strike you as strange but do follow along and you’ll thank me later. The cauliflower rice is something that was invented to fit the whole paleo eating craze – an alternative to rice that’s carb-friendly. I had it as a sort of cauliflower “risotto” and that was OK. I’ll make it again one day, and share here once I work out the ways to improve it.

The recipe here, on the other hand, is great as is, which may be hard to believe given that it’s just cauliflower with some saffron in it. The inspiration for Saffron Cauliflower Rice was my recipe for basmati rice, one of the favorite side dishes I serve with most of my Indian-inspired dishes, like Chicken-less Tikka Masala, Jackfruit Tikka Masala, Creamy Mango & Chickpea Curry Tofu, or Tofu Saag.

I was looking for something to serve with my meatless Koftas, and since I had a lovely head of cauliflower on my hands I went for it. All you need to do to make the rice is to run your cauliflower through a food processor. I used relatively closely chopped florets but you can use as much of the stems as you like. Depending on the size of your food processor you may need to do the zapping in batches. The ricing itself takes only a couple of 2-5 second pulses. At the end your cauliflower should be the size of rice grains. For basmati rice texture, the grains should be a bit larger than for risotto. But, the size of cauliflower rice “grains” will have no impact on cooking, it’s for esthetic quality only, so use your judgment to decide whether you need to be that nit picky.

Making of cauliflower rice takes less time and is more hands off then making rice, so all in all once you are done grating, using a food processor or a grater, the cauliflower rice will be ready in about ten minutes. You can serve this saffron as a side with any Indian, North African or Middle Eastern recipe, like the lovely koftas I already mentioned!

Saffron Cauliflower Rice

What you’ll need:

1 large head of cauliflower

1/4 cup water (if needed)

3-5 springs of saffron

Cooking spray or olive oil


What you’ll do:

  1. Wash the cauliflower, cut the florets and place them into a food processor. Process the cauliflower into rice grain size pieces.
  2. Spray the bottom of a large pan with cooking spray, or use a tablespoon of oil. Place over the medium heat and add the cauliflower rice. Let the cauliflower sauté for 10 minutes, stirring occasionally.
  3. Add the water to help scrape any cauliflower rice that’s stuck to the bottom off, stir well, than place saffron on top, put the lid on the pan, lower the heat and let the cauliflower rice simmer for another 5 minutes. The saffron will release its magic yellow-orange color and the cauliflower rice will be done. Don’t stir it too much – I like the non-uniform color and it makes for a striking plate presentation!

Copyright © Eat the Vegan Rainbow, 2018

Baked Summer Squash Noodles with Pumpkin Seed Pesto

img_3654
Summer Squash Noodles with Pumpkin Seed Pesto, via Eat the Vegan Rainbow

A sunny day in late November is a real treat. It sends strong reminders of the summer that’s gone, and that, as well as too much root vegetables on the plate over the Thanksgiving holiday, made me reach out for summer squash.

Summer squash is not something I routinely make. I prefer zucchini and Italian squash, but this time around it was the summer squash that looked the freshest so that’s what I got. I used my spiralizer to make some summer squash noodles – if you don’t know what spiralizer is, it’s a kitchen gadget that you’d think you can totally live without but in reality you really can’t.

Joking aside, spiralizer is a gadget that makes long, amazing noodles from all sorts of vegetables and fruit. Initially, I thought I can get by with a mandoline slicer – and that worked fine couple of times. But, after buying spiral cut zucchini from the store few times – and paying through the roof for it – I finally broke down and bought an actual spiralizer. The gadget paid off for itself already, and I’ve enjoyed spiralizing zucchini, summer squash, sweet potatoes, apples and beets.

I paired summer squash with a simple oil-free pumpkin seed pesto, which has four ingredients only: raw pumpkin seeds, roasted garlic, fresh parsley and nutritional yeast. The pesto comes together in a food processor in less than two minutes and it’s ready to use immediately. Plus, the pesto uses pumpkin seeds so in a way builds on all the pumpkin craziness of the season, which I kicked off with my Pumpkin Truffles.

You can make this dish completely oil free, but I did use some cooking spray to oil the baking dish. It helps brown the pesto and the squash, and it does help with cleaning up. This baked summer squash “pasta” goes well with a side of chopped roasted red peppers, some shredded vegan cheese, ripe avocado slices, or a squeeze of lemon. It’s easily customizable, but it’s also a meal on its own.

Note: this same recipe would work with spiralized zucchini or spiralized Italian squash!!!

Baked Summer Squash Noodles with Pumpkin Seed Pesto

What you’ll need:

5 pieces of summer squash, spiralized

2 cups pumpkin seeds, raw

1/2 cup flat leaf parsley

3 cloves garlic, roasted

2 tablespoon nutritional yeast

Cooking spray

What you’ll do:

  1. Preheat the oven to 350 F (175 C).
  2. Spray the bottom and sides of a large and deep baking dish with cooking spray.
  3. Place your spiralized summer squash in a large mixing bowl.
  4. In a food processor combine pumpkin seeds, roasted garlic, fresh parsley and nutritional yeast. Pulse until a fine pesto forms.
  5. Pour the pumpkin seed pesto over the summer squash noodles and toss to combine.
  6. Pour everything into the baking dish and bake uncovered for 15-20 minutes.
  7. Cover the baking dish with foil and bake covered for another 15 minutes or so. Serve hot, or cold as a salad with a drizzle of balsamic vinegar!!!

Copyright © Eat the Vegan Rainbow, 2018

Best 10-Minute No-Sugar Added Blueberry Jam

img_4338
10-Minute No-Sugar Added Blueberry Jam, via Eat the Vegan Rainbow

Let me try to make this post as short as the recipe itself. It’s probably already too long because, amazingly, you will need less than ten minutes to go from frozen blueberries to this instant blueberry jam!

The jam is sweet, spreadable and full of pure blueberry flavor. You can use it on anything you would normally put the jam on, and you can store it in the fridge for a week or so, although it will probably not last that long.

What’s the secret? Not much really. It all comes down to mixing frozen blueberries with tapioca starch in a large, microwave safe bowl and letting you microwave oven take care of the rest. You can have some warm jam on you pancakes but I recommend patience and letting the jam cool completely before enjoying!

10-Minute No-Sugar Added Blueberry Jam

What you’ll need:

3 cups blueberries, frozen

2 tablespoons tapioca starch

What you’ll do:

  1. In a microwave safe bowl, mix together blueberries and tapioca starch. Mix well until the blueberries are well covered with starch.
  2. Place in the microwave and microwave on full power for 5 minutes.
  3. Take the bowl out, mix well again and put back into the microwave oven for another 5 minutes.
  4. When the second 5 minutes are up, mix again and check that jam is starting to become dense.
  5. You can use both the warm and the cold blueberry jam on pancakes, toast, oatmeal…

You see… I told you it was short and it is absolutely sweet!!!

Copyright © Eat the Vegan Rainbow, 2018


Vegan Onion and “Bacon” Tart

img_2394
Vegan Onion and “Bacon” Tart, via Eat the Vegan Rainbow

Savory tarts are a great source of comfort during long, and cold, winter months, so fall seems like a perfect time to stock pile great savory tart recipes. One of the favorite topping combinations for this type of tart is onions and bacon. There can be little mystery about why this is so. Caramelized onions are sweet and juicy, and browned bacon is crispy and salty. Putting those two together makes for a sweet, salty, juicy yet crispy topping. Add to that a thin tart crust – and you get the picture!

In this recipe I wanted to recreate a bit of that onion-bacon dichotomy, by combining thinly sliced onions caramelized to perfection with marinated, thinly sliced, tempeh that has been browned until crispy on the outside. The trick with onions is to slice them into thin strips and then let them caramelize for a long time over medium heat. If you are counting calories and trying to stay as oil-free as possible, you can use just a bit of cooking spray to get your onions going – I did it, and it works just fine! But if you regularly use oil, starting with a tablespoon of olive oil will work well here. I recommend using a well-seasoned cast iron skillet here – not only will it help caramelize the onions and brown the tempeh bacon, it will also go straight from the cooktop to the oven, making this a one pot dish.

To prep the tempeh, first boil it for couple of minutes, pat dry it, cut into thin strips, and let it marinate for couple of hours. I used the same basic marinade that The Buddhist Chef used for his Tofu Bacon. It’s made of oil, maple syrup (I did skip maple syrup in this case since caramelized onions are plenty sweet), soy sauce,  liquid smoke, and nutritional yeast. I prepped the tempeh ahead of the onions, so when the onions were done I could remove them from the skillet and cook the “bacon” immediately afterwards.

My version of the tart is crustless, so there is no fancy pastry making required. What holds the tart together is the mix of almond milk and corn starch that comes in last, as the veggies are finishing cooking. And speaking of veggies, one other ingredient here is jackfruit. I use canned jackfruit and for this tart you will want to rinse it out well, drain it, then shred with your fingers, and remove any tough core bits. I can’t comment on using raw jackfruit since I’ve never done it, but I am guessing that it would be better since canned food does come with a bit of that canned taste/flavor.

The tart will spend some time in the oven, and to finish it off I recommend turning on the broiler at the end for five minutes or so to crisp up and brown the top. Let the tart cool for about ten to fifteen minutes before serving, and enjoy as is, or with some yogurt – I used a drizzle of cashew yogurt and a sprinkle of thyme. The tart is rich, fragrant and fantastic!

Vegan Onion and “Bacon” Tart

What you’ll need:

2 large onions

8 oz (225 g) tempeh

2 tablespoons soy sauce

2 tablespoons oil

1 tablespoon nutritional yeast

1 teaspoon liquid smoke (or more, depending on your taste)

2 20 oz (570 g) can young green jackfruit in brine

3/4 cup almond milk (plain, unsweetened)

2 tablespoons corn starch

1 teaspoon dry thyme

Cooking spray


What you’ll do:

  1. Bring 2 cups of water to gentle boil in a pan that’s large enough to hold the entire piece of tempeh flat without cutting. Lower the tempeh into the boiling water and let it boil for couple of minutes.
  2. While the tempeh is boiling mix together the marinade by combining oil, soy sauce, liquid smoke, and nutritional yeast.
  3. Take the tempeh out and pat dry. Let it cool for a moment, until it feels ok to handle. My heat tolerance is pretty high so I usually wait only a few minutes, but depending on your comfort zone when it comes to handling hot things you may want to wait longer before slicing the tempeh into relatively thin slices. Lower the slices down into the marinade and let it stand for an hour or two.
  4. While tempeh is marinating, prepare the jackfruit. Rinse the canned jackfruit well and let the excess water drain. Using a fork or fingers, pull the jackfruit into shreds. Discard the hard core, if present. Set aside.
  5. Slice the onions thinly into fine strips.
  6. Turn the oven to 400 F (200 C).
  7. Heat a heavy skillet, like a cast iron skillet, over medium high heat. Spray with cooking spray (or add a tablespoon of olive oil if using), and add the onions. After about 5 minutes at medium high heat, reduce the heat to medium to medium low and cook for another 10 minutes, until onions are soft and golden brown. Transfer the onions into a separate dish.
  8. Increase the heat to high and add tempeh “bacon” strips. Let the side brown then turn over and brown on the other side.
  9. Add back the onions, and jackfruit, mix the “bacon”, onions and jackfruit well, and continue to brown.
  10. In a small mixing bowl combine almond milk and corn starch. Whisk them together so that there are no clumps. Pour over the rest of the ingredients and let it start to bubble.
  11. Sprinkle the thyme and nutmeg, mix again and place the skillet into the oven for 20 minutes.
  12. To brown the top, turn the broiler on and broil for 5 minutes, until the top is browned and crispy.
  13. Take the tart out of the oven and let it rest for 10 to 15 minutes. Serve with a side of salad, or drizzle some yogurt over the top for a delicious meal.

Copyright © Eat the Vegan Rainbow, 2018

Cauliflower Ricotta and Spinach Stuffed Shells

img_3467
Cauliflower Ricotta and Spinach Stuffed Shells, via Eat the Vegan Rainbow

Ever since I’ve decided to transition into 100% plant-based eating, I’ve been going easy on pasta mostly because it is yummy and enjoyable, yet not really all that great for you given the calories and starch. I’ve tried some replacements, like spaghetti squash, which made a great Pad Thai, and black bean pasta, which made an awful base for my “Clam” Sauce.

Of all the things I’ve tried, zucchini noodles are simply the best! They work really well with meatballs or even lighter veggie toppings that I’m thinking of ditching spaghetti all together.

But, there are some dishes that are hard to imagine without pasta, like a very simple yet incredibly delicious pasta salad I made at the height of summer season, and these stuffed jumbo shells right here.

The shells are stuffed with cauliflower “ricotta” and spinach mirroring a very traditional ricotta cheese and spinach stuffed shell recipe. The shells I use here are the “jumbo” kind, and their name is well-deserved. Two or three of these makes a solid serving size, so the recipe below ought to serve four people easy.

The main departure I took from the traditional recipe, which is vegetarian, is to skip the tomato sauce, usually a simple marinara, and to use my own creation, a cauliflower “ricotta” cheese, which makes this recipe dairy-free, vegan, and plant-based.

The cauliflower “ricotta” is inspired by cashew ricotta that I’ve made in the past. I was very curious about whether cauliflower can help the basic cashew ricotta recipe (some great examples here and here), and retain all the creaminess while cutting down the cost (frozen cauliflower is cheaper than raw cashews), and the calories and fat (cauliflower has far less calories than cashews and no fat!).

The cauliflower “ricotta” works well here, and it’s a useful cheese alternative to have for other pasta dishes, or a lasagna. Amazingly, what puts this entire dish over the edge is actually a tiny bit of nutmeg. Just a pinch goes a long way, so be careful not to overdo it.

Cauliflower Ricotta and Spinach Stuffed Shells

What you’ll need:

16 jumbo shells, boiled

1 bag (1 lbs; 454 g) frozen chopped spinach

1 bag (1 lbs; 454 g) frozen cauliflower

1 cup cashews, soaked overnight

1 tablespoon white miso paste

1 teaspoon yellow mustard

1 teaspoon onion powder

1 teaspoon garlic

1/2 teaspoon ground nutmeg

Cooking spray

What you’ll do:

  1. Bring a large pot of water to boil, add the shells and let them boil for 8-10 minutes. Take the shells out, rinse with cold water, and place them aside.
  2. Preheat the oven to 350 F (175 C).
  3. Cook the cauliflower and spinach according to the instructions on the bag. You can use a microwave or a stove top method and you don’t need to thaw the vegetables but I recommend that you squeeze the access water out before using. Keep the cauliflower and the spinach in separate bowls. Cauliflower should take about 10-15 minutes to cook, and spinach about 5 minutes.
  4. Place the cooked cauliflower, soaked cashews, and the rest of the ingredients into a food processor and process until you reach the consistency of ricotta cheese.
  5. Spray the bottom of 8 x 8 in (20 x 20 cm) with cooking spray and pour in 1/2 cup of cauliflower “ricotta” and spread around to cover the bottom.
  6. Using a tablespoon, spoon some cauliflower cheese into a shell, then some spinach, and place into the baking dish. Continue with the rest of the ingredients until all the shells have been filled.
  7. Spread any leftover spinach and/or cauliflower ricotta over the top, spray with a bit more cooking spray, cover with foil and bake for 20 minutes. Uncover and bake for 10-15 minutes more until the top is golden and sides are slightly browned.
  8. Let the stuffed shells rest for 5 minutes before serving then enjoy!

Copyright © Eat the Vegan Rainbow, 2018

10 Recipes I Could Enjoy Over and Over Again

img_4156
My favorite recipes of 2017, via Eat the Vegan Rainbow

As 2017 was wrapping up, I took a look at the most popular posts on this blog, and the results were not really all that surprising. People liked Carrot Dogs, which continue to be popular, as well as jackfruit “crab” cakes, chicken-less tikka masala, a meaty veggie burger, and homemade ground beef substitute.

But, believe it or not, although I loved all of them, I loved some other recipes more. So, here is the list of 10 recipes I developed last year which I simply adore. I could make and enjoy each one of them over and over again, and I do make them every chance I have. The list below is organized from breakfast to dessert, and as you will see shows that I prefer things like soups and sandwiches, grilling and roasting, and really like the simplicity of a no-bake desserts. Simple, affordable, and delicious – these recipes really capture these three guiding principles of my cooking and eating style.

img_4158

  1. Gluten-free Sweet Potato Pancakes – these pancakes are an easy weekend breakfast or brunch that get all their sweetness from the roasted sweet potatoes. No eggs, no butter, no milk required! Making pancakes is a fun activity for the entire family and one of the best ways to fill your kitchen with inviting aromas and signal to the whole household that weekend is off to a great start. You can make these with all purpose flour as well, and use any topping you like – for me it’s usually sliced bananas and a drizzle of nut butter softened in the microwave for 30 seconds or so.
  2. New England Clam-less Chowder – this chowder is simply amazing and with the flavor and texture that matches the original extremely well. I discovered that jackfruit works really well is some of the dishes that traditionally use seafood, and I used it for the Chowder, together with potatoes and a dash of potato starch to give it that chowder texture. My secret ingredient here? Some seaweed wraps which I soaked to create a seafood tasting broth! With a squeeze of lemon and a dash of Old Bay Seasoning, there’s nothing better to put in your bowl except maybe…
  3. Creamy Cauliflower Winter Soup. If the chowder is complex, this soup is simple yet incredibly creamy. It is my favorite soup I’ve made thus far! The soup is nothing more than fresh cauliflower, boiled and creamed using a blender until smooth and silky. What completes the soup is some peas and corn, which I always have on hand in the freezer. The entire pot of soup is inexpensive and filling, cozy and perfect for the winter month, thus the name.
  4. DIY Sushi – I’d never felt brave enough to make my own sushi before, but I finally gave it a go about 6 months ago, and I loved it. My favorite sushi fillers are carrots, avocado and cucumber with a sprinkle of black sesame seeds, so veggie rolls for the win! But you can as reactive as you like. For example, I made a batch with mushy peas and pickled red cabbage, as well as with Seaweed Pearls -aka vegan caviar -from IKEA (!), and tomato “tuna”, which I still need to work on to make it come out perfect
  5. Faux-lobster Rolls – My love of seafood and fish alternatives does not stop at sushi and chowder, as these faux-lobster rolls prove. Some of you who tried were sold on this idea, some though they don’t even come close to the real deal. They work for me with heart of palms or artichoke hearts, both are yummy. What gives these rolls their lobster-y flavor is the seasoning, and to me nothing says “seafood” as much as the already mentioned Old Bay Seasoning, but you can adjust to match your flavor expectations and make them truly your own.
  6. Grilled Tofu Sandwich – I love sandwiches, which explains my selection of both the faux-lobster rolls and the grilled tofu sandwich where a spicy coleslaw completes the ensemble. Plus both of these are light and summer-field recipes that can bring sunshine to your plate even in the dead of winter! For best results you do need to drain and press the tofu – you don’t need to go wild here but
  7. Grilled Portobello Steaks – Grilling is one of the most powerful ways to maximize the umami flavors, and these portobello steaks are a great example of what grilling can do! Although you could grill most of the heartier vegetables and mushrooms as is, I think that marinating in a rich marinade that hits all the main tastes (sweet, sour, bitter, umami (savory), and salty) is a great strategy to get the most of your grilling. It definitely makes these hefty portobellos a stand out!
  8. Simple Summer Pasta Salad – this is absolutely the favorite pasta salad I’ve ever tried. There’s really nothing special about the ingredients – pasta, toasted almonds, olive oil, onion powder and fresh basil get tossed together and that’s that. But I could eat this one by the bucketful. Unlike many pasta salads that can be overwhelming, this one is light yet elegant, and you can serve it warm or cold. It also makes a great contribution to any pot luck!
  9. Shepherd’s Pie – this is the only more serious meal on this list, which is telling. The food I enjoy most is the one that comes together quickly without much fuss, but once in a while there’s an occasion to go wild and elaborate. This Shepherd’s Pie is a fantastic meal to make for a large family gathering. It will be a hit with both herbivores and omnivores in your lives, and it makes a lovely looking centerpiece. The meat replacement strategy here is to combine brown lentils with mushrooms and cook them with lots of rosemary and thyme for that amazing flavor.
  10. Dark Chocolate Almond Butter Cups – no round-up of favorite dishes is complete without some chocolate, and these dark chocolate cups full of creamy almond butter are a perfect treat. They are no-bake, and hassle-free, yet look and taste amazing. If you are looking for a way to impress your guests, these will do the trick. The almond butter filling is super-complementary to the dark chocolate exterior and balances the crunchy chocolate shell out well. If you are trying to avoid nuts, you could try using a nut butter alternatives. Those will work as well.

I hope you enjoy this list, and give these recipes a try. As I said, they were my very favorite!

Copyright © Eat the Vegan Rainbow, 2018

Top 5 Eat the Vegan Rainbow Posts of 2017

F1597261-7190-4781-9AF9-17F04368D991
Top 5 Eat the Vegan Rainbow Recipes of 2017, via Eat the Vegan Rainbow

Well, the year came and went. 2017 saw two major changes in my life: I decided to become vegan, and I changed my job after a decade. Both of these changes have helped me rebalance, and regain control of my wellness. The change I made to my diet had profound effects on my energy levels, and gave an incredible boost to my culinary creativity. I’ve have not felt so inspired and motivated to try new things for a long, long time.

On top of wanting to eat and make different food, I also decided to share everything. That’s how this blog was born! It’s been a great adventure because blogging, sharing, and being engaged in social media in many plant-based and vegan groups has been eye-opening. There’s so much creativity, encouragement, and positive energy out there!

I appreciate that many of you may be struggling because a life-style change is never an easy thing, and I also gather from comments and posts that many are surrounded by family, friends or work environment that does not support or even approve of the plant-based and vegan eating and living. The best advice I can give you is to take it one step at a time, and keep reminding yourself of why you decided to make this huge change to begin with. And: keep creating delicious dishes and keep serving them to all you love and care in your lives to spread the well-being and comfort that well-prepared and nutritious food brings.

So, as is customary to do as a year is winding down I took a look at Eat the Vegan Rainbow to see what people enjoyed reading the most. Not surprisingly, the most read post of 2017 is “5 Must-try Recipes for Beginner Vegans” which I put together after being a vegan for about 6 months, to highlight some of the recipes that I found incredibly helpful. And I am glad to see that many of you have found it to be useful as well!

When it comes to my original recipes, there is definitely a clear pattern to the top five. All top five recipes are substitutes to animal-based recipes, and provide a healthier alternative to the types of foods most of us have been exposed to for most of our lives. So, without further ado I give you the Top 5 Eat the Vegan Rainbow Posts of 2017:

  1. Hottest Summer Trend: Carrot Dogs – these “hotdogs” made from marinated carrots that have been grilled are the most amazing thing that I had so far, and it did not surprise me to see that others have loved them too! Since that summer treat, I’ve use similar ingredients to make an incredible Cream of Carrot Soup, which is also a winner in my book and if you have not tried it yet do give it a go!
  2. Homemade Ground Beef Substitute – this was an essential recipe for me to develop since the store-bought ground beef substitutes were just not making me happy. They were either too expensive to really work for me, or had weird ingredients, or spices I did not enjoy, or left a strange aftertaste. So, I developed my own mix that works, and I’ve been using it in tacos, nachos, stuffed peppers, and similar dishes that use ground beef as a filler. It is spot on!!!
  3. Chicken-less Tikka Masala – for those of you who love Indian food, this one is the winner! The blend of spices and nut-based yogurt, with gentle tomato sauce and soya chunks as chicken replacement work incredibly well. You will get all the texture and flavors of the original dish!!! And if you not familiar with Indian cuisine, you should make it one of your New Year’s Resolutions to give it a try. First of all, many of Indian dishes are already vegetarian since India has a huge culture of not eating meat, and many of the traditional dishes are easily veganized. Just take a look at the Vegan Saag Paneer, and Sabudana Khichdi.
  4. Vegan Jackfruit “Crab” Cakes – these “crab” cakes are simply amazing! They deserve quite a few superlatives, because they are super easy to make, super cheap, and super impressive. They will be able to convince even the hard core crab cake lovers that you can have a great crab cake without the crab. You can actually have an excellent New England Clam-free “Clam” Chowder as well, and while we are talking about seafood replacements, you can also have a great Faux-lobster roll, although some have been saying that it just not the same! For me all these recipes are really good, and so close to the original thing that I can not longer tell the difference, and that’s good enough for me.
  5. A Very Beefy Veggie Burger – as it turns out, and perhaps not surprisingly, we all love to grill outdoors during the summer days, and we all enjoy a great burger. The veggie burgers that are out there fall a bit short of delivering that meaty bite and flavor, and the high-tech Beyond Burgers are fantastic but really pricey. So, I’ve been playing around and making all sorts of burgers, like the Avocado Burgers, Black-Eyed Peas Burgers, and Roasted Red Pepper Chickpea Burgers, which were all worth getting excited about. They have different degrees of beefy flavor and texture, and they hold up to grilling to a different extent, and you can’t go wrong with any of them.

I can’t leave without asking you to share some of your favorite recipes. What were your clear winner in 2017? Something similar to what I highlighted above, or something completely different? Let’s share each other’s food and thoughts about eating and well-being, and keep helping each other navigate the world of plant-based foods and flavors. I wish you a Happy and a Healthy New Year!!!

Copyright © Eat the Vegan Rainbow, 2017


Bubble and Squeak – Just in Time for the Holiday Leftovers

img_3704
Bubble and Squeak, via Eat the Vegan Rainbow

Don’t worry if you have never heard about Bubble and Squeak – that just means you are not English, you don’t have any friends or family members that are English, and you have never lived in England, all of which is OK. But, if you know what Bubble and Squeak is, you are probably already smiling to yourself and licking your lips in anticipation.

My own links to England are mostly literary, as I adore Agatha Christie and Terry Prachett, and have a special place in my life for J.R.R. Tolkien, Jane Austen, A.A. Milne and Lewis Caroll, although I’ve also ingested a huge amount of TV shows, devouring every episode of Midsomer Murders, Inspector Morse,  Inspector Lewis, Poirot, Miss Marple (with all different lead actresses), and Sherlock Holmes (with Jeremy Brett!) ever made. I also have a few English friends, who enjoy sharing their recipes with me, and that’s how Bubble and Squeak came up. With an adorable name like that I had to go for it.

Now, if I was naming this dish I would call it Leftover Mash, because that’s what it is. It is used in England to revive any leftover from a roast dinner or another large, formal meal that includes potatoes, meat and veggies. The leftovers are chopped up and fried together and apparently if you are using cabbage you will hear bubbling and squeaking.

For me, it was not a large amount of leftover that made me do it, it was my attempt to give way to give Brussels sprouts another chance. I grew up eating huge amounts of cabbage – it’s one of those cultural things mixed with practical where cabbage, and especially fermented cabbage (sauerkraut) can carry you through a rough and long winter at a time when fruits and veggies were a seasonal thing (those days are gone now, by the way, with  year round availability of almost everything!). And I love cabbage, and many of it’s cousins, like cauliflower (which I used here, here), broccoli, kale (like in this soup), radishes, and many, many more. the cruciferous vegetables, as they are collectively known, are numerous and diverse, and include many things I like to eat… and there is the Brussels sprouts.

I tried Brussels sprouts several times before, mostly roasted and once boiled (never again on that one!), and was left unimpressed. But, when Bubble and Squeak was mentioned it sounded like I should give the Brussels another chance. And it worked! At the end, I am not at all sure that what I made qualifies as a traditional Bubble and Squeak, however it is a good dish for anyone looking to jazz up their potatoes, or use leftover cabbage or Brussels sprouts. I think it would probably work with leftover collard greens and spinach as well, and will probably work with leftover sweet potatoes or mashed squash.

Having said all that I did have to add one secret ingredient to make this work. My secret is bacon, or to be more precise Rice Paper Bacon. The recipe for this bacon is very similar to the one for Tofu Bacon, which I loved, so I jumped on the opportunity to give this new thing a try. The rice paper bacon worked well, it delivered on the bacon aroma, and it was very crispy, so perfect for sandwiches or similar. It also worked well with the Bubble and Squeak to add the aroma and a boost the flavor. At the end, I think tofu bacon would have worked better for this dish, but rice bacon gets big thumbs up for being a very good meat-free, homemade bacon alternative.

So with some boiled potatoes, boiled Brussels sprouts, diced onions, and rice paper bacon in hand, you will be ready for the Bubble and Squeak. All you need to do is fry it all together, or if you are a bit more health conscious sauté with only a tiny bit of oil to help everything come together. Although I have not done so myself this time around – I was in a bit of a time pinch – you can finish the dish in the oven. In retrospect, letting Bubble and Squeak sit under a broiler for less than five minutes would have given it a nice look and an interesting crunch. For those of you who are traditionalists, you are supposed to flip the whole thing half way through and brown both sides that way. I’d say, with just a bit of broiling you can skip the flipping. The whole thing is supposed to be able to slide out of the pan, but even if it doesn’t it’s still an interesting dish!

This slideshow requires JavaScript.


Bubble and Squeak

What you’ll need:

1 yellow onion, finely diced

1 red onion, finely diced

4 potatoes, boiled and mashed, or 2 cups of leftover mashed potatoes

2 lbs (900 g) or 1 stalk Brussels sprouts, boiled and chopped, 2-3 cups leftover roasted or boiled Brussels sprouts, chopped

1 cup crumbled rice paper bacon or finely chopped tofu bacon, store-bought or home-made

2 tablespoons oil, vegetable or canola


What you’ll do:

  1. In a heavy pan – oven proof if you plan to finish the dish under a broiler – heat the oil over the medium high heat. Add the onions and let them sauté until fully caramelized. This will take about 10 minutes. Note: if you are using store-bought “bacon”, chop it finely and add it now, so that it had time to render any fat, as well as brown. If you are using rice paper bacon you will add it towards the end of the cooking process.
  2. Add the mashed potatoes. If you are using the leftovers, you don’t need to worry about making mashed potato from scratch. But if you are making this dish de novo then peel, wash, chop into cubes and boil the potatoes for 30 minutes or so, than mash until rustic – no perfect smoothness required here.
  3. Add the finely chopped Brussels sprouts. Same as with the mashed potatoes, if you are using the leftovers just chop and drop, if you are starting from raw boil the sprouts for 15 minutes or so, drain and squeeze the access water out, then chop finely and add to the pan.
  4. Mix well until everything is well-incorporated.
  5. Decrease the heat to medium and let your bottom get crunchy, if not even slightly burned. Add the bacon bits, mix in gently without disturbing your crunchy bottom (no jokes, please!), then flip the Bubble and Squeak so that the top can brown, or stick the whole thing under a broiler without flipping. You can also skip the flipping/broiling and enjoy as is!

Copyright © Eat the Vegan Rainbow, 2017