Good Morning, Sunshine! Smoothie, via Eat the Vegan Rainbow
It’s a bit ridiculous to share a smoothie recipe like it is a thing. After all, smoothie is nothing more than throwing couple of things in a blender and pressing a button. But, I’ve now made this version a few times, never straying from the original recipe and it is a keeper. Even people who usually refuse to drink almond milk were able to get behind this one, so I decided to share it with the world.
The recipe is super fast, super easy, super cheap, super convenient – all in a real superlative fest! All you need is a banana, five frozen strawberries, some almond milk, preferably unsweetened and vanilla flavored, a dash of unsweetened coconut flakes and a sprinkle of vegan mini chocolate chips. These last two ingredients are completely optional but they do elevate this smoothie to the seventh heaven.
I do recommend using frozen whole strawberries. First of all, they have great flavor all year round as most brands use the best looking whole strawberries for freezing. Note that you should stay away from chopped frozen strawberries because I am not so sure that you can tell what those looked likes before they were chopped, and you should definitely check that strawberries are the only ingredient in the bag, just to be on the safe side. Frozen whole strawberries are usually cheaper than fresh, and they are really handy to have on hand in your freezer to use for smoothies, or other recipes. For the purpose of this recipe you can definitely use fresh strawberries if you have some. In that case you may want to add an ice cube or two, if you like your smoothie cold. The benefit of using frozen strawberries is that no extra ice is needed – they give this smoothie a nice, subtle chill that is just fabulous for summer breakfast at home or on the go.
Final note for those who like a sturdier breakfast. This smoothie is light, has no added sugar and a minimal amount of fat that comes from the almond milk, coconut flakes and the mini chocolate chips. If you want to make this smoothie thicker and more filling, you can simply add two to three spoonfuls of rolled oats. If you are adding oats, I recommend you letting the smoothie rest for five minutes or so before enjoying to let the oats soften just a smidge.
Good Morning, Sunshine! Smoothie
What you’ll need:
1 banana
5 frozen whole strawberries (fresh will work too!)
Miso Glazed Grilled Tempeh, via Eat the Vegan Rainbow
If you have not done so already, you should definitely try tempeh. I’ve been hearing about it for some time now, and seeing several different brands and varieties right next to the tofu that I usually get but I only got the first batch of tempeh just the other day. I bought several different varieties to try them out and spent few days reading about what’s tempeh good for and how to best cook with it. Tempeh is related to tofu because both are soy based. But, in terms of flavor and texture (and as far as I can tell in terms of how you actually make the two, based on what Wikipedia says), tofu and tempeh are quite different. Tempeh is firm, much firmer than the firmest tofu, and does not come in liquid. It is actually fermented soy beans mixed with rice [edited after reading comment from Mary S below – thanks Mary S, it’s good to get the facts all squared away. I am still a bit confused since the ingredients’ list of the tempeh I used did include rice; at the end of the day my confusion does not matter change the fact that the food was delicious], so although it is dry, it does feel sticky to touch and just a bit slimy. FYI: I am not saying this to freak you out, rather to forewarn you so that you are not as surprised when you start handling it as I was – I thought my tempeh has gone bad and wanted to throw it out! But, I double-checked the date on the bag, regained my cool and went for it.
I decided to start simple and build from there, so this Miso Glazed Grilled Tempeh is more or less my starting point. The brand of tempeh I got is Lightlife and the two varieties I started with are their Organic Garden Veggie and Organic Soy Tempeh. Each package is half a pound (about 250 g), and the block of tempeh comes in a vacuumed-sealed package, that’s within a sealed plastic bag, so there are two bags to remove! I used both blocks at the same time, since one just did not seem enough to make for the end of the week Friday dinner.
The first thing I did was to fire up the grill. I have a gas grill and it takes it about ten to fifteen minutes to get to be sizzling hot, with burners going at full blast and the lid down. That was just enough time for me to prep the tempeh and the glaze. For tempeh, I placed the pieces into a pan large enough to keep the pieces flat, covered with water, brought to boil and boiled for four to five minutes per side – I did flip the pieces over once since the pan I was using was shallow and the water did not fully cover the tempeh, so if your tempeh is fully covered you will not need to do the flip! After about ten minutes I took the tempeh out, pat dried the pieces, and left them uncovered on some paper towels.
While the tempeh was boiling and the grill was heating up, I mixed together a simple glaze with some soy sauce, Worcestershire sauce, white miso glaze and vegetable oil. I spread the glaze over the tempeh pieces just before placing them on the grill the glazed side down. Then I glazed the top and let it grill for about five to six minutes. By that time the grill marks will be perfect, and the pieces ready to be flipped. I did reglaze both sides again and flipped again, so that at the end each side got two layers of glaze and about eight to ten minutes of grilling, so in total the grilling bit took less than twenty minutes. If you are in a rush, you can definitely skip the reglazing, but if you are outside hanging around the grill with friends and family and enjoying the lovely summer evening, then why not give tempeh extra love, glaze and grill time?
Let grilled tempeh rest for just a second, then slice and serve. You can serve it in a hamburger or a hot dog bun with the usual trimmings, but note that condiments, like mustard and ketchup, are going to overpower the flavor of the grilled tempeh. So, I recommend serving tempeh with a side of coleslaw and baked, or barbecue beans, which is how I had mine. Add to that a glass of cold beverage of choice, and what can be better?
Miso Glazed Grilled Tempeh Sliced, via Eat the Vegan Rainbow
Miso Glazed Grilled Tempeh
What you’ll need:
2 8 oz (227 g) blocks of tempeh (any variety and brand you like)
2 tablespoons soy sauce, reduced sodium
2 tablespoons white miso paste
2 tablespoons vegetable oil
1/2 tablespoon Worcestershire sauce (vegan)
Oil for oiling the grill grates
What you’ll do:
Prepare your grill like you normally do. I recommend getting the grill really hot and letting any bits and pieces from the previous grill session burn off, then scrapping the grates with an appropriate type of a brush (please be careful here because you can really damage your grill grates if you don’t follow the manufactures instructions and recommendations), and then oil them generously with a paper towel dipped in vegetable oil – please use long tongs here to prevent getting burned!
Take tempeh out of the wrapping and palace in a pan large enough to hold it flat and straight. Cover with water, bring to boil and let it boil for 5 to 10 minutes. Make sure you flip the tempeh half way through if your tempeh is not fully submerged in water. If it is, no mid-way flipping is needed!
While tempeh is boiling and the grill is getting hot, mix together the glaze by whisking together soy sauce, vegetable oil, miso paste and Worcestershire sauce. The glaze should be smooth, but even if you have few lumps in there don’t worry about it – it won’t matter at the end.
Place the boiled tempeh onto some paper towels and gently dry.
Using a (silicone) food brush spread the glaze liberally ove the tempeh and place the piece of tempeh glaze side down on the hot grill. Keep the gas grill on medium high heat, or if you are using a charcoal grill keep it as hot as you would when grilling vegetables, veggie burgers, or mushroom or tofu steaks. Grill the glazed tempeh 5 to 6 minutes on one side, and while it is grilling apply the glaze on the other side, flip over, grill for 4 to 5 minutes, glaze, flip, grill, repeat for as long as you like.
Let stand for just a moment or two, slice and serve!!! This Miso Glazed Grilled Tempeh will work as an appetizer, finger food, as well as dinner, especially with some grilled corn, veggies, coleslaw, baked or barbecue beans, or as a salad topping…
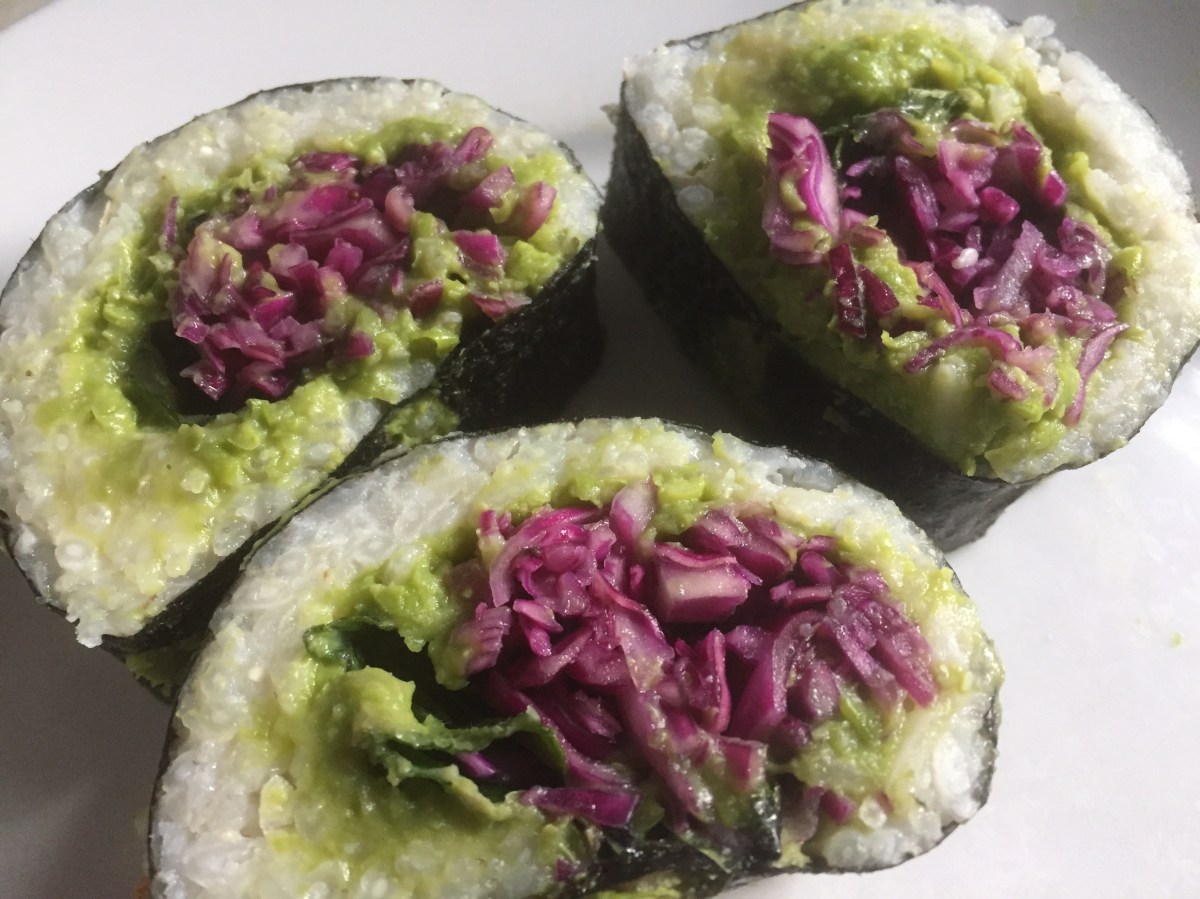
Best DIY Sushi Rolls with Minty Peas & Red Cabbage, via Eat the Vegan Rainbow
If you think that making sushi requires hours of practice, one-on-one instruction from a sushi master chef and special equipment… well, you may be right if your goal is to make sushi that contains fish or seafood, especially given health risks involved. But, if you want to explore the wonderful and delightful world of plant-based sushi, all you need is about an hour or two, and some imagination.
I made my first vegan maki sushi, the kind where filling and rice are wrapped in sea weed, few months ago, and I really enjoyed the process and the flavors. I got inspired to start thinking about what ingredients would work together well, and whether there are any dipping sauces I could use to complement the sushi.
The results of this brainstorming are before you: Green & Orange Sushi Rolls and Peas & Cabbage Sushi Rolls, with Peanut Dipping Sauce and Sour Lemongrass Dipping Sauce.
The basic requirement for a great sushi is plenty of sticky rice. You can get special sushi rice but you can also use any short and medium grain variety of rice. For sushi, I use the same rice I use for risottos. The trick is to add the rice to boiling water, reduce the heat and let the rice gently simmer with occasional mixing.
Finally, leaving the rice to cool will help you handle it as well as help the rice get nice and very sticky. I recommend dipping your hands in water before handling the rice and then keep wetting them as you spread and press the rice.
One other thing you need to pay attention to is what side of seaweed sheet you pile your rice on. It should be the one that feels slightly rough, so that your outside is nice a smooth. What I discovered is that you don’t really need the bamboo sushi rolling mat or any special equipment. The main thing to remember is to go easy on the stuffing so your rolls don’t end up to full. This will make them hard to roll and more likely to rip. I hope you go for these vegan versions of sushi, or create your own. There really is no limit and no rules!
Bring 2 cups of water to boil and add the rice. Lower the heat to gentle simmer and cook the rice, stirring occasionally, until all the water is absorbed, and the grains are soft. Set to the side and let it cool.
In another pot bring 2 cups of water to boil and add frozen peas. Cook until well done for about 15 minutes.
While rice and peas are cooking, put together the dipping sauces. In a medium size bowl, combine all the peanut sauce ingredients, except panko, and mix well to combine. Toast panko in the toaster oven, or in a pan over high heat, for 1-2 minutes. Top the peanut dipping sauce with toasted panko.
In another bowl, combine all the ingredients for the lemongrass dipping sauce and set aside.
Prepare your roll stuffers, like cucumbers, carrots, avocados or anything else you like. The trick is to make your veggie sticks long and thin.
To make the red cabbage, place finely shredded red cabbage in a bowl and add all the rest of the ingredients except mint leaves. Mix everything well using your hands. Squeezing the cabbage as you mix will help soften it and make it absorb flavors better. Let the cabbage “marinate” for 30 to 60 minute.
When peas are fully cooked drain and purée them.
Once the rice is cool it is safe to handle. Place a piece of the seaweed sheet on the flat kitchen surface rough surface up. Place 1/2 cup of sticky rice on the sheet. Spread the rice to cover most of the seaweed sheet using your wet hands. Next, place the topping on 3/4 of the way towards one end of the sheet, and start rolling from that edg, slowly and gently. The roll should come together nicely.Cut the roll into sushi piece. One note on peas and cabbage rolls: spread the pea purée across entire rice and the pickled cabbage and mint leaves in a single line, 2/3 of the way from the edge.
Serve the sushi with the two dipping sauces, some pickled ginger and wasabi paste. Enjoy!
Puffy Popovers of the Vegan Kind, via Eat the Vegan Rainbow
If you never had a popover before let me try to describe it to you: it is light as a feather and hollow, not actually fried dough but tasting as if the fried dough has decided to leave the deep frier and take a yoga breathing class to fill itself with air and become almost weightless. Popovers are a special breakfast treat to rejoice and enjoy, sprinkled with powdered sugar, with a spoonful of jam, or a handful of sliced fruit. Anyway you cut it they are amazing!
Popovers get their fluffy structure from lots of eggs, milk and butter, and their final elevated shape from a specially designed popover pan. Although popover pan may remind you of a muffin pan, which may lead you to believe that you can just your muffin pan to make popover, it’s best not to go there. I tried it, and it did not end well. So, you will need to get a real popover pan if you want to make the puffiest of popovers and there is not substitution for it!
But, is there a substitution for eggs, milk and butter? Of course there is! At first I was very skeptical that I can make popovers work by replacing basically the three quarters of ingredients that make popovers with vegan alternatives, but I did and it does!!!
My vegan, plant-based version is also very simple, with three main ingredients only: silken tofu, white wheat flour and unsweetened vanilla almond milk. To that you can add things like maple syrup, agave nectar or sugar, a bit more vanilla extract, a sprinkle of lemon, lime or orange zest, or cinnamon, for a sweet version, or stick with plain almond milk, a dash of salt and a sprinkle of dry basil and oregano for a more savory version. The basic batter is flexible and customizable, so feel free to make these popovers your own. Of course, you can always stick with the basic batter and add layers of flavors with condiments like jam, nuts, fruit, cashew sour cream, or macadamia nut queso fresco.
The main trick to making perfect, puffy popovers is to preheat the popover pan by itself before pouring in the batter, and then add the batter when pan is scorching hot and sizzling. Then bake the popovers at high temperature for a short period of time, lower it down and leave them to make for a while. I add an extra step where I decrease the temperature gradually so my popovers spend fifteen minutes at 425 F (220 C), then 20 minutes at 375 F (190 C) and finally another 10 minutes at 350 F (175 C). This helps them puff up and then cook through to their final glorious heights.
Puffy Popovers all in the Row, Eat the Vegan Rainbow
Puffy Popovers
What you’ll need:
16 oz (454 g) silken tofu
1 1/2 cup unsweetened vanilla almond milk
1 1/2 cup flour
1 tablespoon vanilla extract
1 teaspoon turmeric (optional; for color only)
Salt, to taste (h/t to Pamela who left a helpful comment re adding a pinch of salt)
Cooking spray
What you’ll do:
Preheat the oven to 425 F (220 C). Once preheated, place the popover pan in for 15 minutes to get sizzling hot.
Drain excess liquid from tofu but don’t press. Place the tofu, almond milk and vanilla extract into a blender and blend on high until smooth.
Add flour 1/2 cup at a time and blend well. Add turmeric if you like to give your batter a bit of a yellow tint and make it visually more egg-like. Mix everything well. The batter consistency should be similar to American pancakes (a bit denser than crapes).
Wearing good oven mittens, take the popover pan out, spray with cooking spray, and pour the batter in, about 2/3 of the way. Place the popover pan on the baking sheet (to minimize splatter) and put it in the oven.
Bake at 425 F (220 C) for 15 minutes, then lower the heat to 375 F (190 C) for 20 minutes and finish at 350 F (175 C) for an additional 10 minutes.
Take out the oven and let cool for 10 minutes. The finished popovers should slide out the pan with ease.
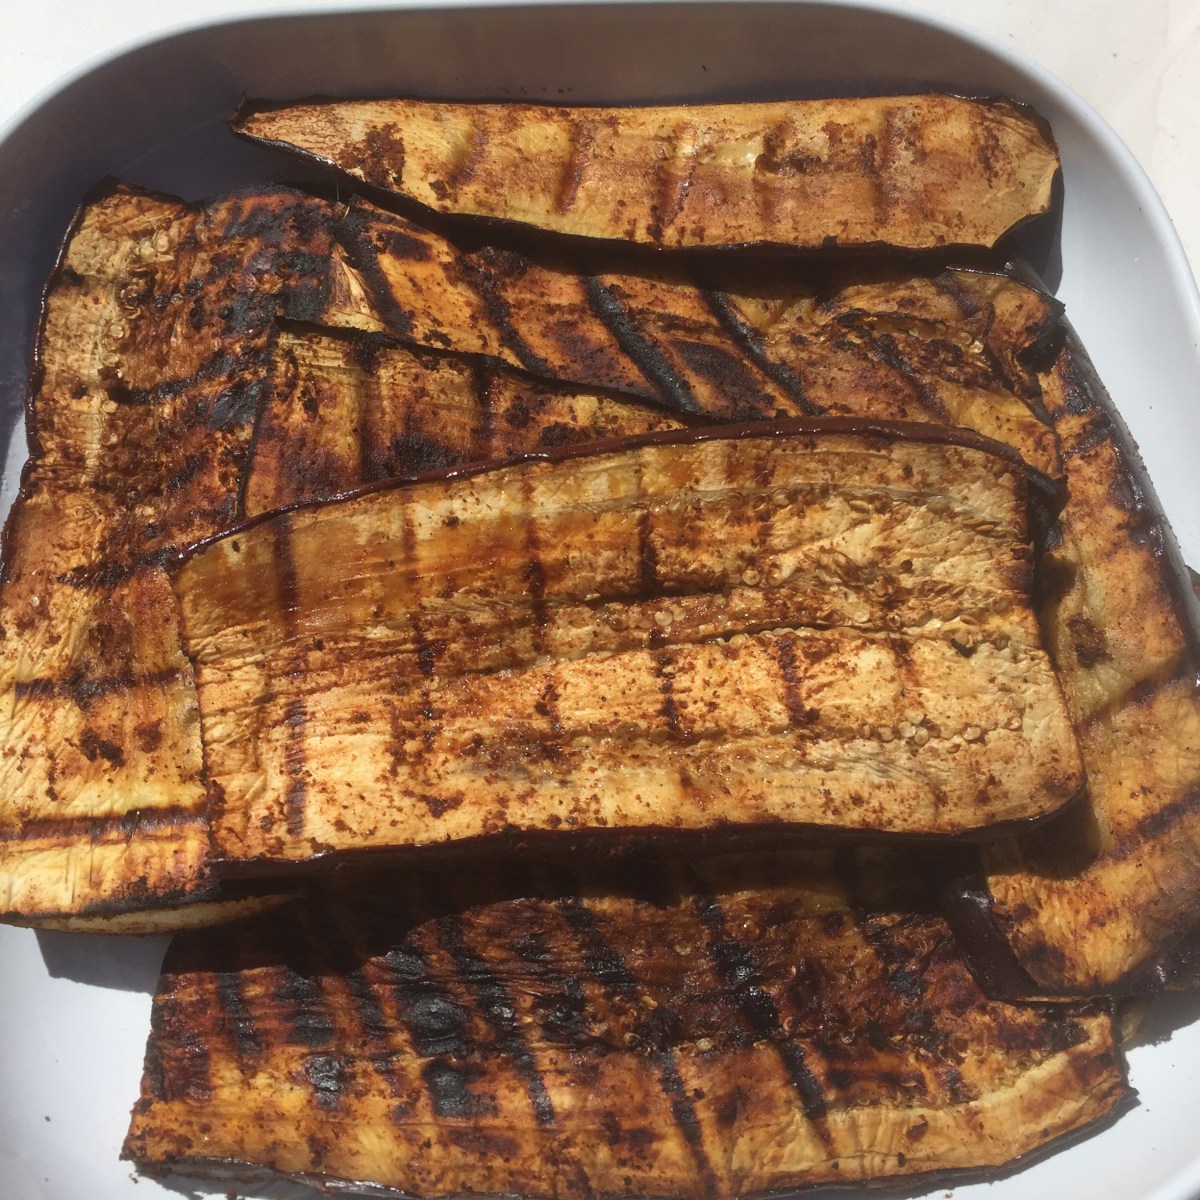
Grilled Eggplant, via Eat the Vegan RainbowSummertime and the grilling is easy… Well, that’s me paraphrasing the George Gershwin classic, but the statement is spot on. Grilling is easy, and it is my favorite way of preparing food during the hot summer months. Over the years I figured out how to grill quite a few different things, and at the end of the day grilling is really easy and with a little practice you can get really good at grilling almost anything. My Grilled Portobello Steaks recipe was just the beginning of “From the Grill” section of this blog and in addition to that recipe and the Roasted Red Beets Hummus, there’s much more to come.
Today I am sharing a quick and easy way to make perfect grilled eggplant. Eggplant is a tricky vegetable to make because of its spongy texture that absorbs oil like crazy making almost every commonly encountered eggplant dish too oily and too rich. In the past I tried the trick where you sprinkle salt on the eggplant slices and let it sit between the paper towels, which does help but it adds salt and it takes time. More recently I started skipping all this and either simply cubing the eggplant, skin and all, or roasting the eggplant before stuffing.
Now this Grilled Eggplant recipe couldn’t be easier and does not require any special eggplant handling. Actually, the simple marinade I make, which includes couple of smokey spices, like smoked paprika, chili powder, liquid smoke and allspice, mixed with lemon juice and zest, can work well for summer squash, zucchini, or even tofu.
Grilled Eggplant, via Eat the Vegan Rainbow
Grilled Eggplant
What you’ll need:
2 large eggplants
1/2 lemon, juice and zest
2 tablespoons soy sauce
2 tablespoons liquid smoke
1 teaspoons smoked paprika
1 teaspoons allspice
1 teaspoons chili powder
1 teaspoons onion powder
1 teaspoons garlic powder
Vegetable oil
Cooking spray
What you’ll do:
In a large plastic container with a tight fitting lid, mix lemon juice and zest, soy sauce, liquid smoke and all the spices to make a pasty marinade.
Wash and dry the eggplant. Cut lengthwise into 1/4 in (2.5 cm) thick slices.
Place the eggplant into the marinade. Cover every piece well (use your fingers to help spread it out) and stack ghee eggplant slices. Cover with the lid and let stand for 30 to 60 minutes on the kitchen counter.
Prepare your outdoor grill as you normally do. For me this means turning all the burners on high (I have a gas grill) with the lid down for 10 minutes, turning the flames down to low then using a steel brush to clean the grill grate. Finally, before placing food on the grill, I oil the grill well. I use a pair of long tongs and a paper towel dipped in vegetable oil.
Bring the heat up to medium. Spray each eggplant slice with a bit of cooking spray before placing on the grill. Leave it to grill on one side for about 4 to 5 minutes. Depending on how hot your grill is this may take a bit longer.
Spread the leftover marinade over the top of the eggplant slices before turning over. Grill for another 3 to 5 minutes.
Take off the grill and serve. The grilled eggplant works well as a topping for couscous, rice or polenta. It also works really well in sandwiches and salads. My serving suggestion would be to wrap it in a grilled pita topped with plain hummus and sprinkled with kalamata olives.
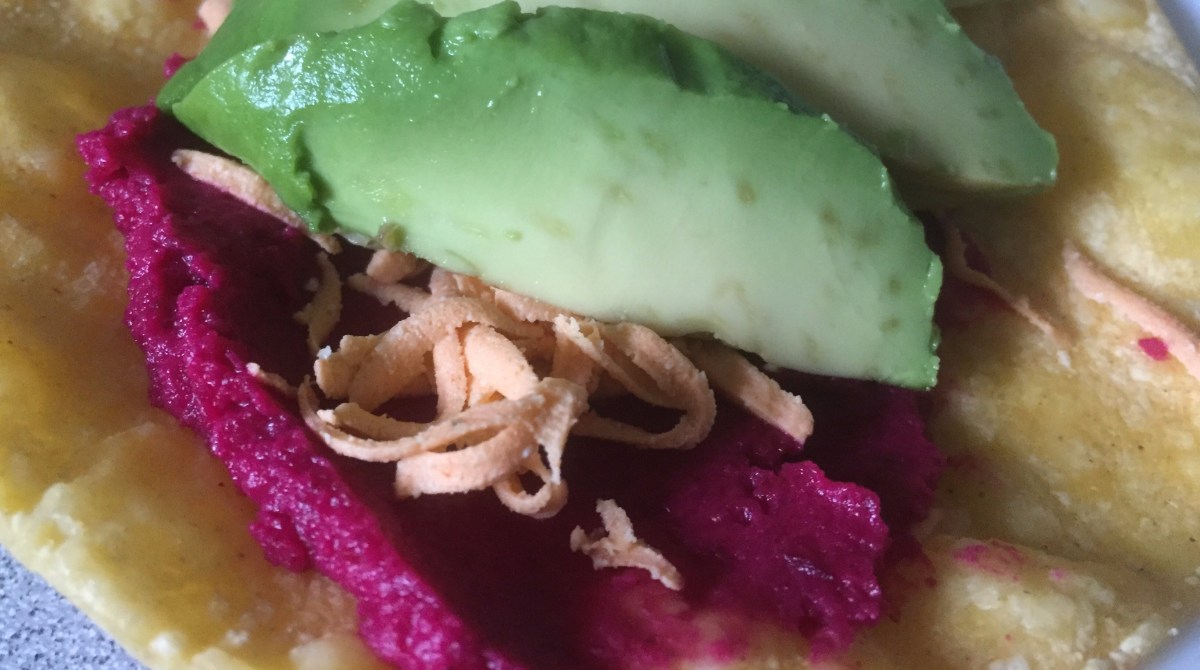
Roasted Red Beets Hummus, via Eat the Vegan Rainbow
I am a bit on the roasted beets kick these days. I just shared how I used them in a salad, this post is all about a hummus I put together, and, believe it or not, I have a pile of roasted beets in the fridge that are waiting for me to figure out what to do with them.
Beets Roasting on a Grill, via Eat the Vegan Rainbow
The batch in the fridge was roasted in the oven, and that method – cranking the heat to 425 F (220 C) and roasting them for about 30 to 45 minutes – will work here as well. But the beets that I used for this hummus were roasted on a grill. I recommend you try this next time you grill your veggies, tofu or try my Portobello Mushroom Steaks. Your grill will already be on so it’s perfect time to wrap your bits in some foil and toss them on!
The rest of this hummus recipe is super easy. You will need a large mixing bowl, two cans of chickpeas, rinsed and pat dried, some lemon juice, and a spoonful or two of almond butter, and all the lovely roasted beets, cooled and peeled. You will also need a hand-held, stick blender, and let it rip until everything is well blended and smooth. You can always use a good processor if you have one or a powerful blender. I have neither so hand-held, stick blender is my tool of choice.
What you’ll end up with is a nice pile of lovely and bright magenta hummus that will keep well in a plastic container with a tight lid for a week in the refrigerator.
Roasted Red Beets Hummus, via Eat the Vegan Rainbow
Roast the beets, let them cool and peel. You can roast them in the oven or on the grill. Either way I recommend wrapping them in foil. This will minimize the mess and speed up the roasting. Regardless of where you roast them, it will take about 30 to 45 minutes to get the beets roasted all the way through. Please note that you can eat beets raw, so you can actually skip the roasting all together. Roasting does help bring the natural sweetness of beets out more, so in my opinion it’s worth an effort.
Cut the roasted beets into cubes, and place into a food processor or the large mixing bowl.
Place the chickpeas into a strainer, rinse them well and pat dry.
Add chickpeas to the bits, add the rest of the ingredients and blend until smooth. Serve any way you like. For me hummus is one of the best sandwich spreads ever, and this one works like a dream when paired with avocados!!!
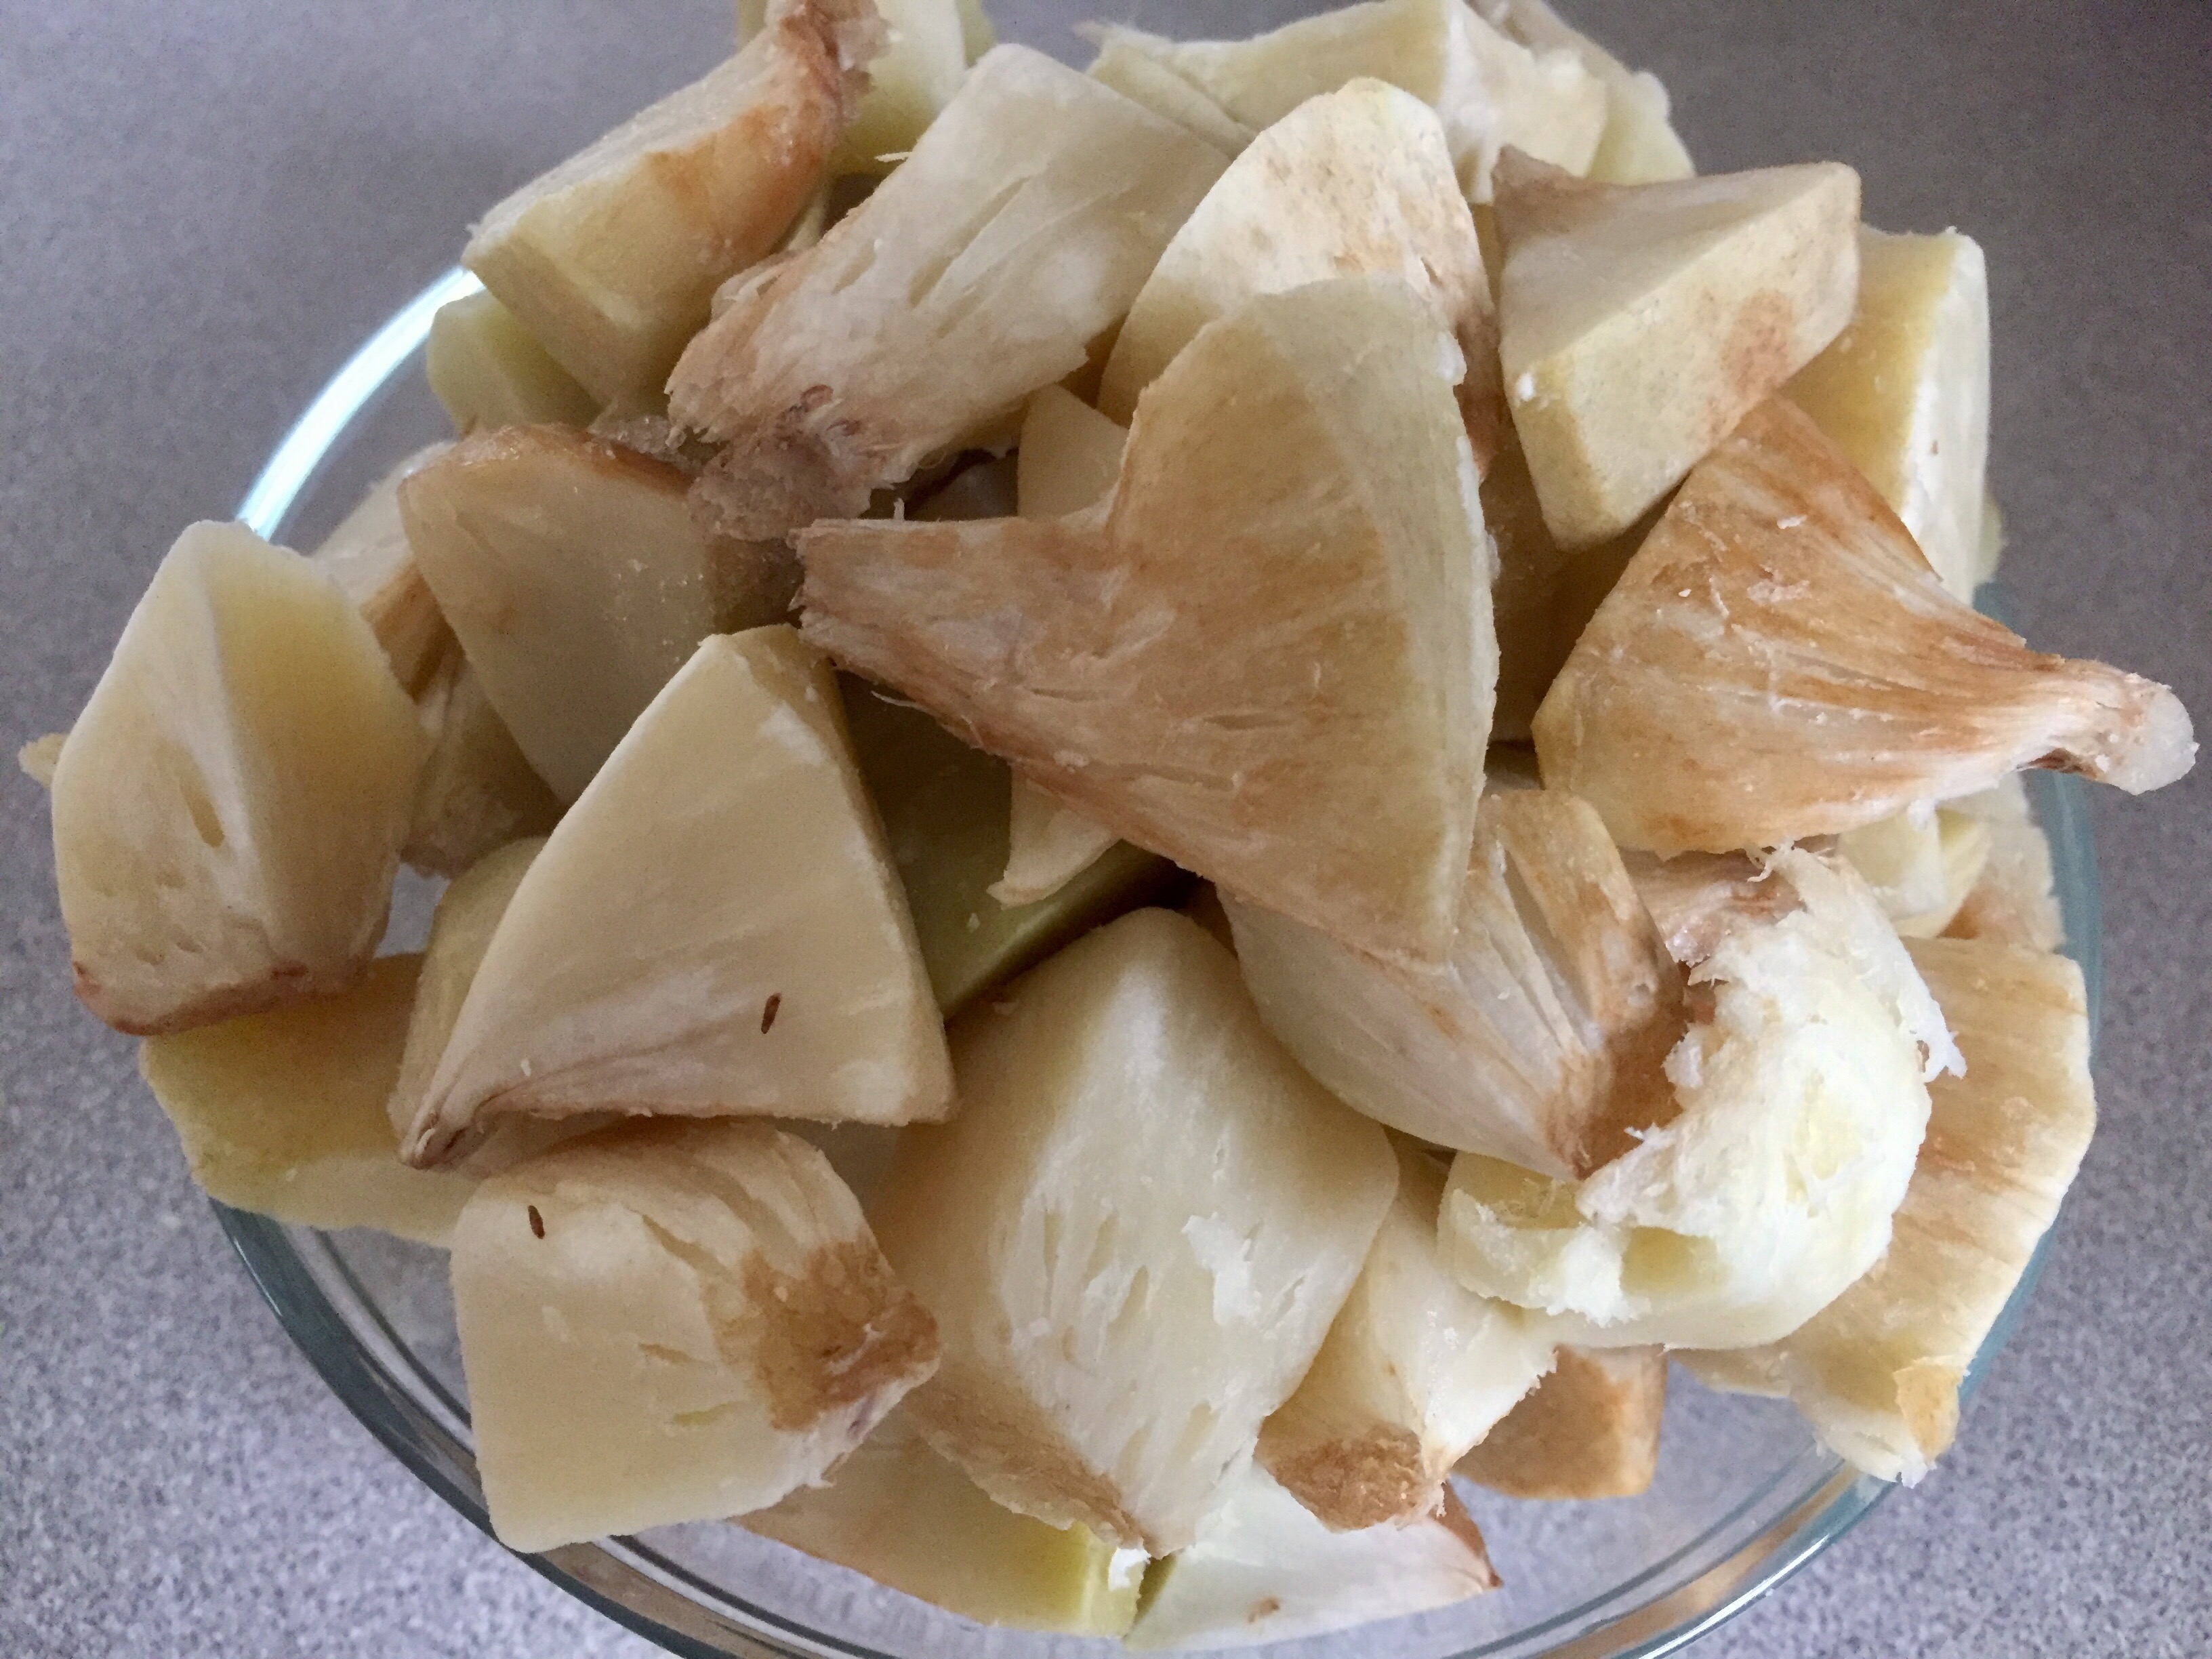
Easy Breadfruit Curry, via Eat the Vegan RainbowBreadfruit is not something that you can find in your local grocery store unless you live in one of the tropical countries where it’s been a staple food for millennia. Yet, it’s a fruit, or maybe I should say a vegetable, that has been taking the fancy of historians, writers, artists and the silver screen perhaps because of its poetic name, breadfruit, that suggest ability to pick your loaf of a branch! Or perhaps because it hails from exotic regions of our planet that one could reach only by taking an epic journey, like the one taken by the “Bounty“, a ship whose voyage and its mutiny is part of actual and the movie making history.
To be quite honest all my knowledge of breadfruit comes from watching different versions of the mutiny on the Bounty movies so I got quite excited when I saw it in my local Indian supermarket. I was looking for some frozen jackfruit and the breadfruit was right next to it. So I grabbed a bag and decided to give breadfruit a try!
Texture-wise, breadfruit is not unlike jackfruit, and they do belong to the same plant family. But, breadfruit is a bit softer, at least in my hands, and less chewy. It worked really well in this simple curry, and pairs really well with simple Basmati Rice.
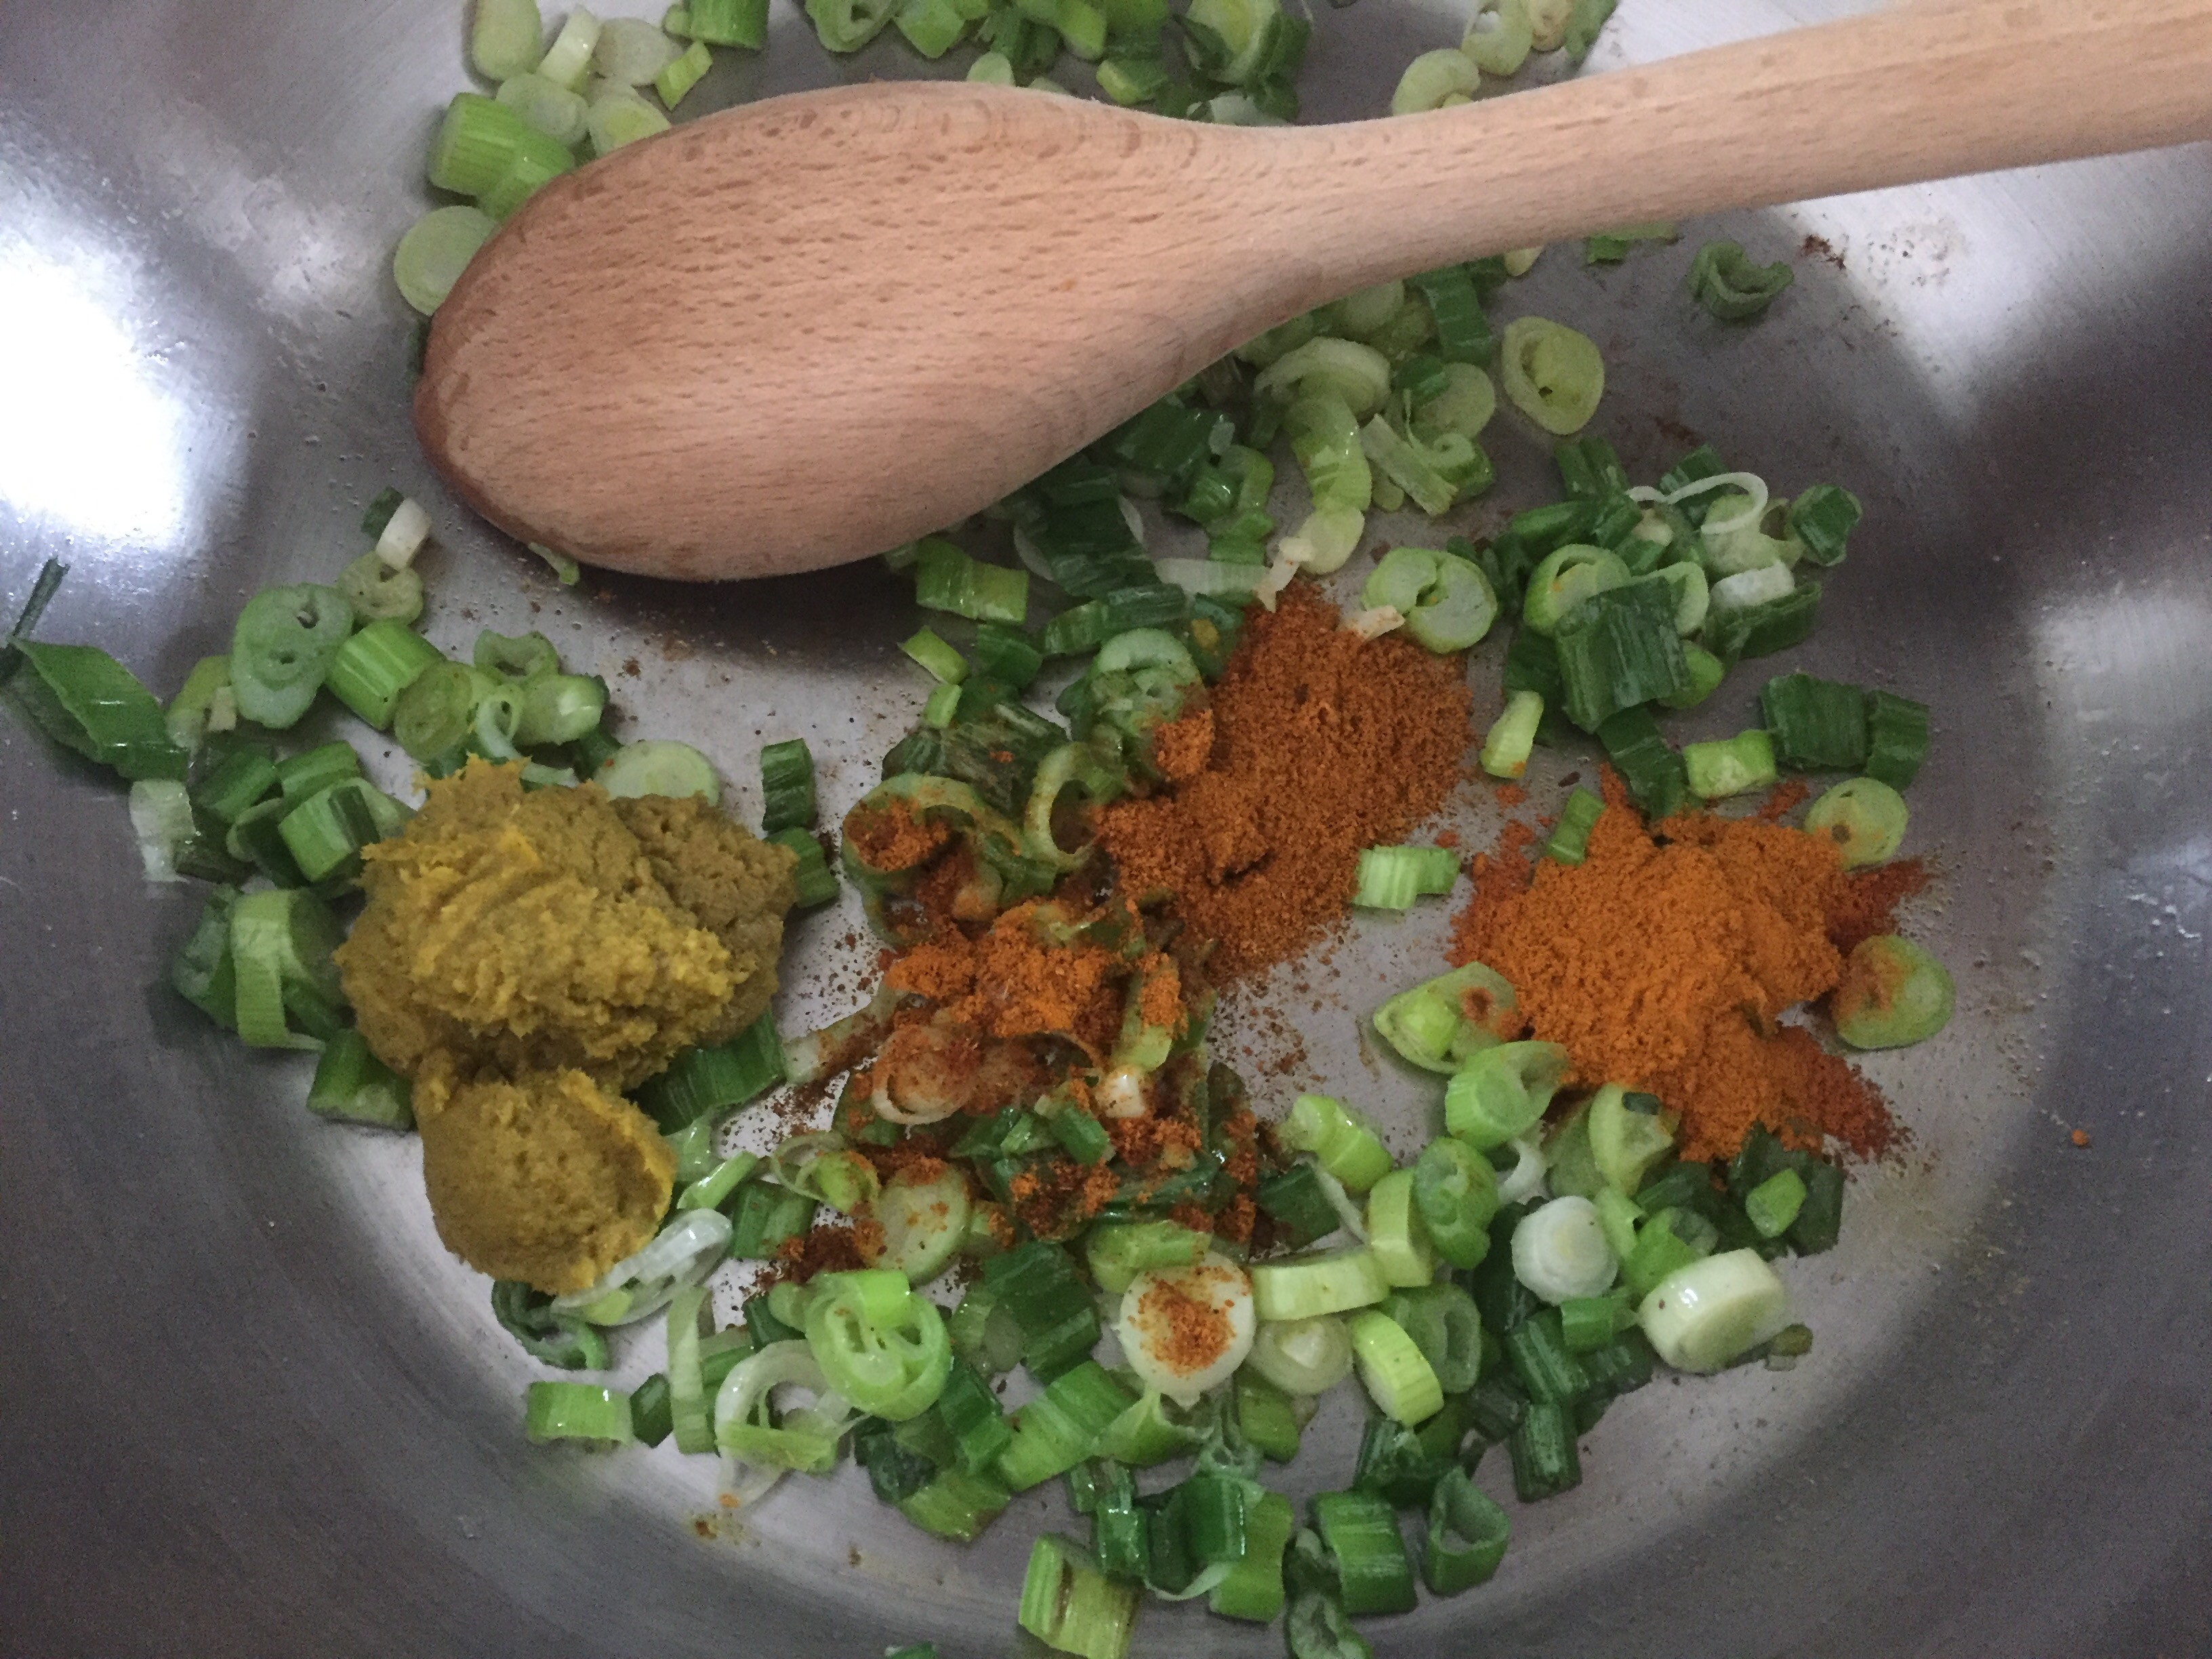
The recipe is really simple and starts with frozen breadfruit, scallions (green onions), curry powder, green curry and turmeric, and finishes with some rich coconut cream. The dish comes together into a fragrant curry that tastes almost decadent.
Easy Breadfruit Curry
What you’ll need:
14 oz (400 g) bread fruit frozen
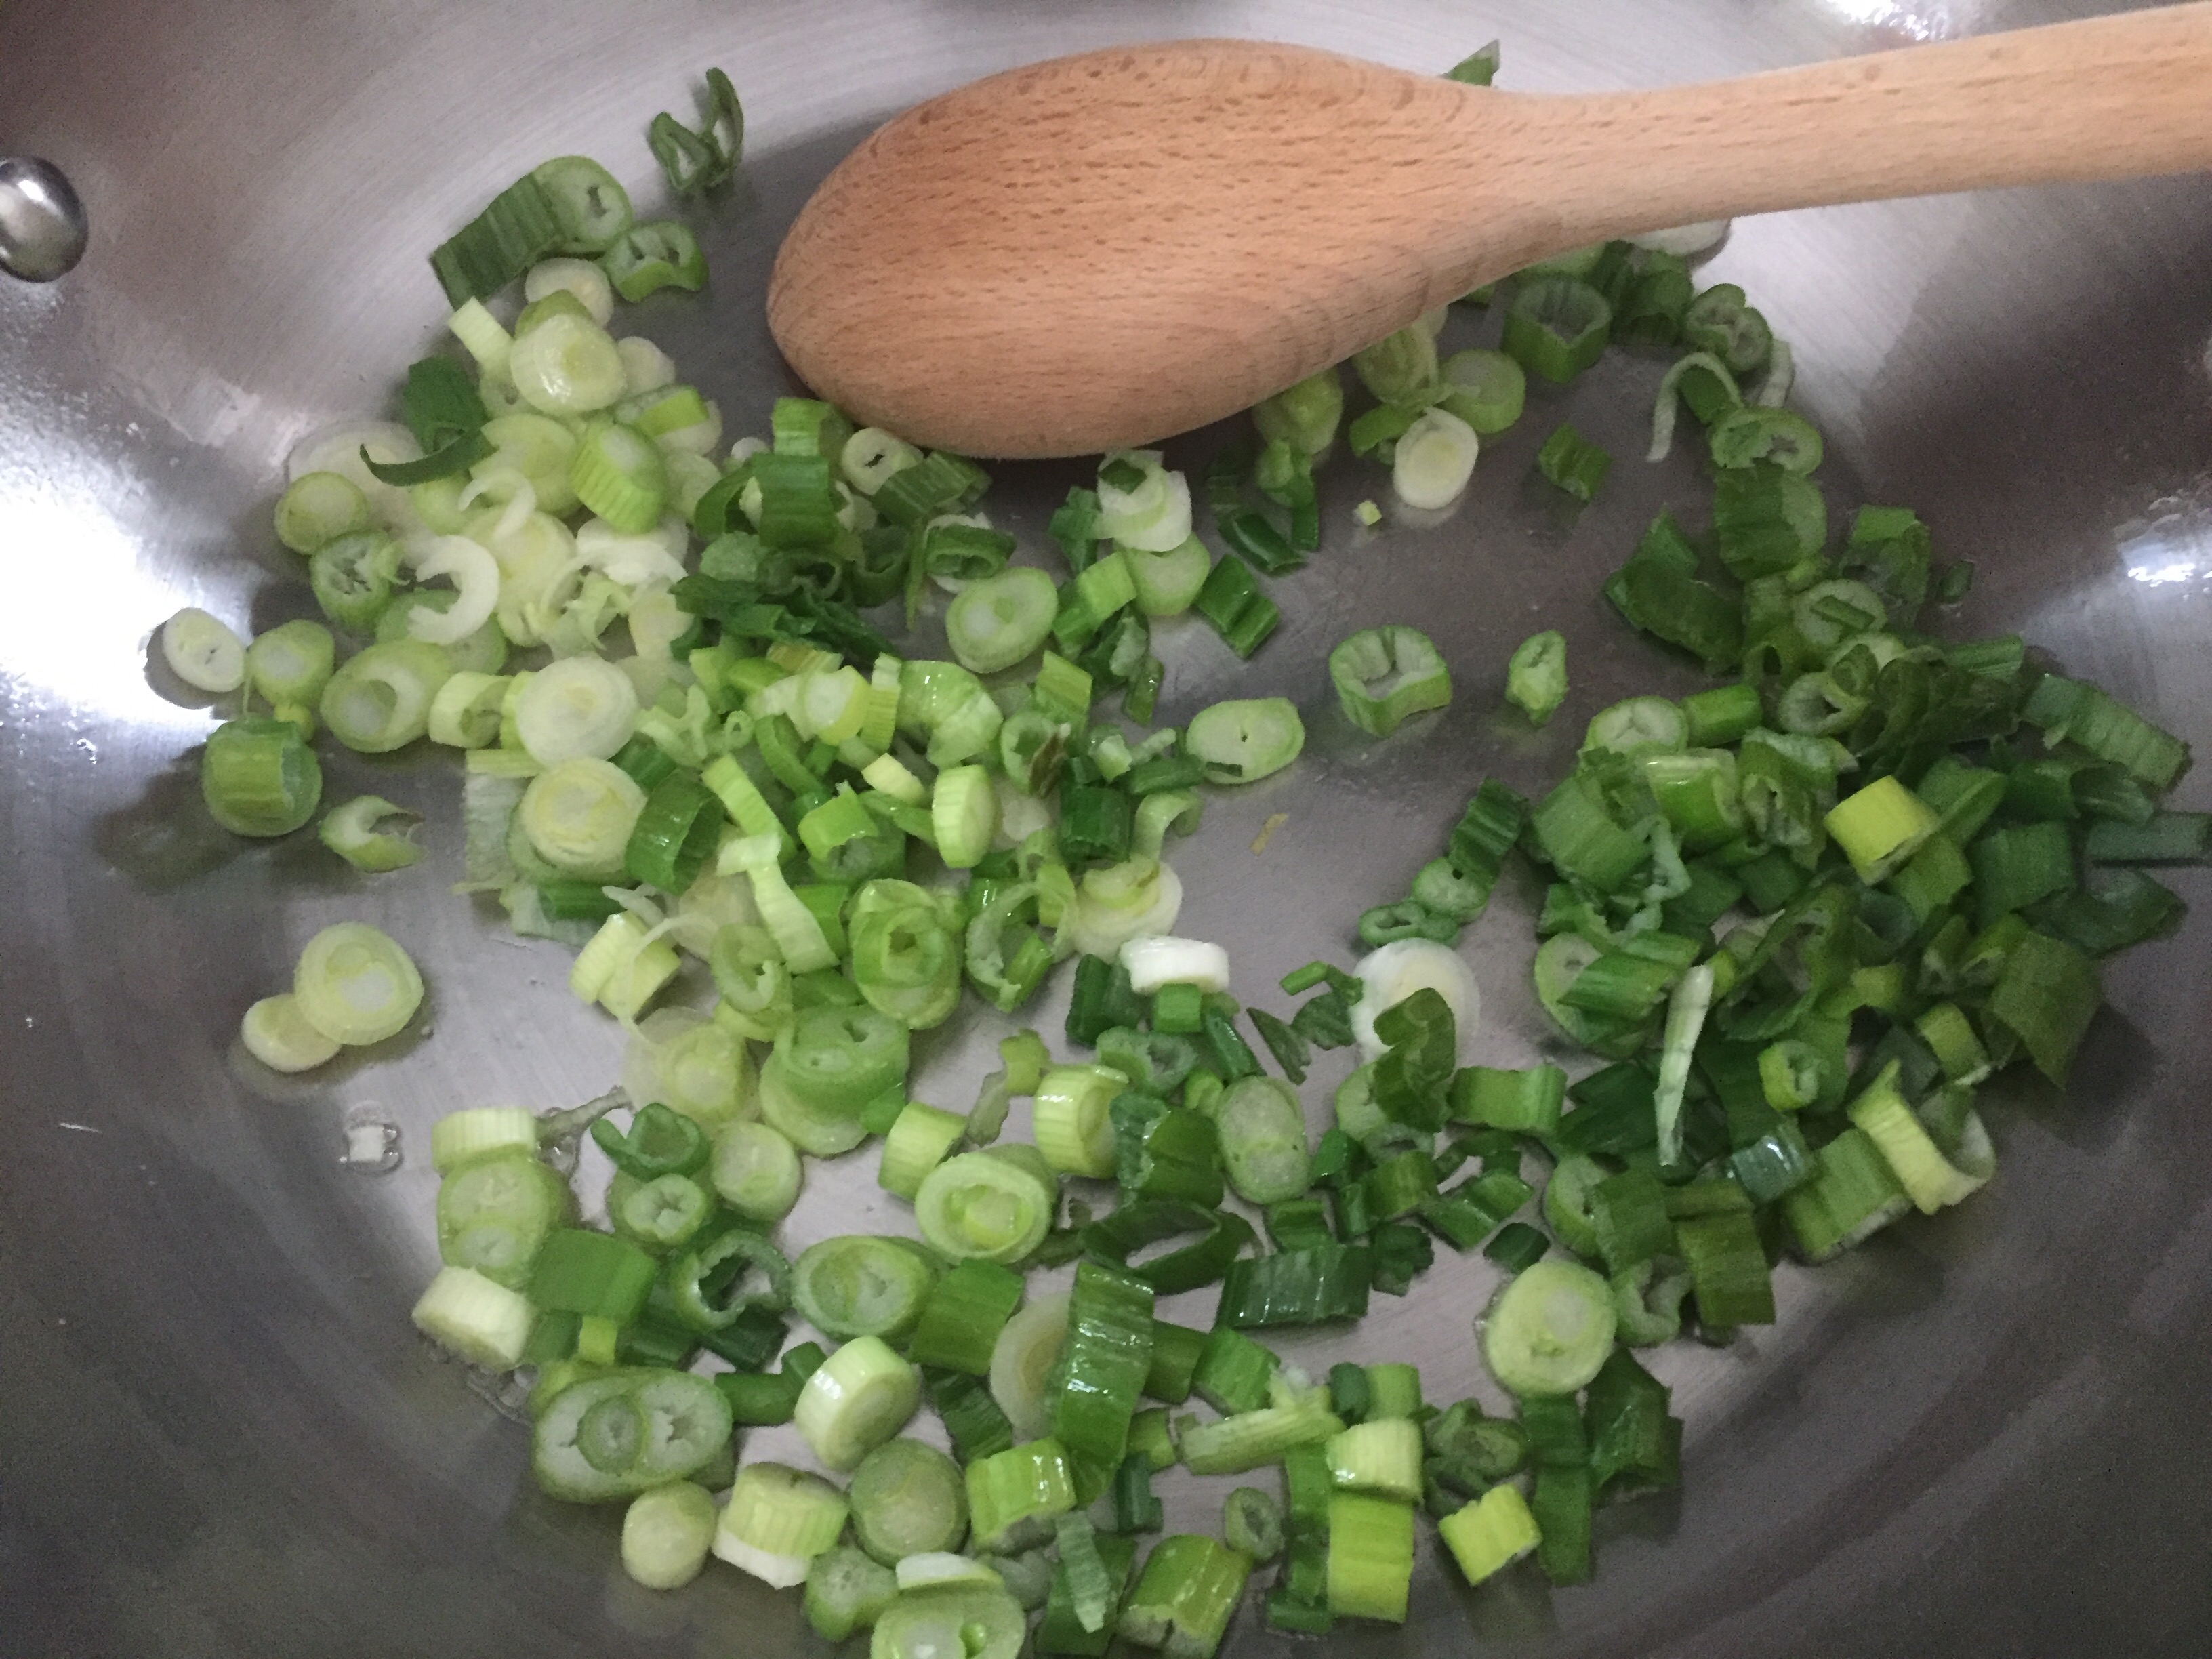
6 scallions (green onions)
1 teaspoon turmeric
1 teaspoon curry powder
1 tablespoon green curry paste, like Thai Kitchen (or make your own)
13.5 oz (400 ml) coconut cream
Cooking spray
What you’ll do:
Spray a large pan with cooking spray and place over medium high heat.
While the pan is heating up chop scallions, both white and green parts. Add to the pan and sauté for 3-5 minutes.
Add the green curry paste, turmeric and curry powder. Mix everything together and sauté for another minute or two.
Add the breadfruit. You can add it frozen or defrost in a microwave. Mix well, and let sauté for 10 minutes or so until breadfruit is soft, covered in spices and starts to brown.
Pour in the coconut milk and deglaze the bottom, which means use your wooden spoon and coconut milk to lift all the brown bits of caramelized scallions and spices of the bottom of the pan and incorporate them into the sauce.
Decrease the heat to low and let simmer for 15 to 20 minutes.