Mashed Potato Stuffed Mushrooms with Cashew Sour Cream, via Eat the Vegan RainbowFully loaded vegan mushrooms are finally here! Last time I went grocery shopping large white stuffing mushrooms were on sale and they looked so inviting that I had to have them. For most vegetarians and vegans mushrooms are a common ingredient as they add that elusive umami flavor to dishes. I used them fairly often and have featured them in my Vegan Stuffed Pepper recipe.
This time around it is the mushrooms that are getting stuffed, and the stuffing I decided to go with is yummy, silky smooth and creamy mashed potatoes. Additionally, just to kick it up a notch I made some Cashew Sour Cream by Oh She Glows to add a bit of flair. Finally, sun dried tomatoes on top are for loveliness, color and for a bit of sweetness.
There are really two tricks here. One is to bake the mushroom caps on their own, and the other is to use a blender to purée the potatoes.
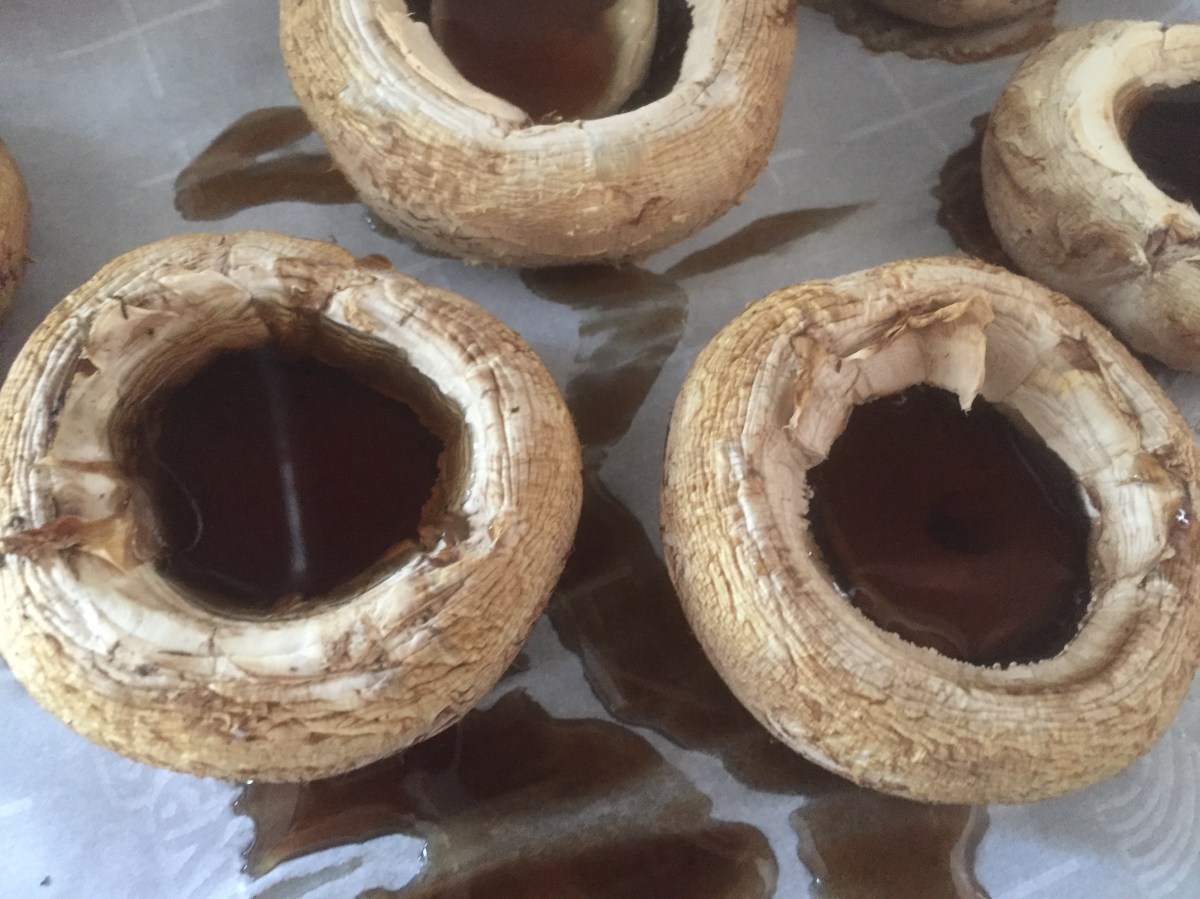
To get your mushrooms going I first remove the stems, but I don’t throw them away as I use them as a part of the stuffing. I place mushroom caps their open ends up on the parchment paper (or foil) covered baking sheet and put them in the oven for about 20-30 minutes. The point is to get the caps soft and to let the mushrooms release excess water. At the end of the baking each mushroom cap should be filled with brown liquid (see below), and I dumped this liquid out. Transfer your mushroom caps into a greased baking dish with tall sides that will help with making sure no stuffing gets out while baking.
Baked Mushroom Caps, Ready for Stuffing, via Eat the Vegan RainbowUsing a blender to purée the potatoes makes them into a creamy heaven that is perfect for stuffing. I would not recommend using the blender method if your end point is mashed potatoes because what you get is quite smooth, but for topping something like a Vegan Shepherd’s Pie or stuffing these mushrooms this method is perfect.
All in all these Vegan Mashed Potato Stuffed Mushrooms with Cashew Sour Cream are perfect as an interesting appetizer and entertaining, as well as a really great dinner in their own right. The amount of mushrooms I used is huge and it was definitely meant for sharing and enjoying in a large group, so feel free to scale down accordingly!
Vegan Mashed Potato Stuffed Mushrooms with Cashew Sour Cream
Clean the mushrooms gently with a piece of paper towel. Separate stems from the caps. Keep the stems for later. Place caps, hole side up, on a parchment paper lined baking sheet and bake for 15-20 minutes, until the mushroom caps are soft and full of clear, brown liquid.
Take the mushroom caps out the oven, discard the liquid and place them into a deep baking dish well sprayed with the cooking spray. Put aside.
Peel the potatoes, chop them into small cubes and boil until cooked through which can take 15-30 minutes depending on the size of your cubes. Drain the water and let the potatoes cool for 15 minutes. Add almond milk and blend until potatoes are smooth.
Chop scallions, using both the green and white parts, and mushroom stems finely.
Spray a frying pan with cooking spray and sauté scallions and mushroom stems fro 5-10 minutes. Add sautéd scallion and mushroom stem mixture to the potatoes. Mix well.
Spoon the potato mix into mushroom caps and top with a spoonful of cashew sour cream and few slices of sun dried tomatoes. Return to the oven for another 15 minutes.
Gluten-free Vegan Spaghetti & Meatballs, via Eat the Vegan RainbowCan gluten-free, vegan cooking be budget friendly, healthy, feed the whole family, and yet leave everyone feeling they are getting away with something? The answer is yes, and this recipe is my evidence. I use no fancy ingredients, and no fancy techniques.
How did I end up here? Well, as they say “Necessity is the mother of invention”. What happened is that I found myself facing a large bag of frozen vegetable mix, which I have cooked with many times before never to any great success. This is a classic item you can find in any grocery store – a bag that includes unspecified amounts of frozen peas, corn, green beans, carrots, and lima beans. The price on these is usually too hard to resist, and they keep really well if kept frozen so I usually have a couple in my freezer in case of an emergency where all other options dry up.
So one of those emergency situations came up and this time around, perhaps because of all this blogging I’ve been doing recently, I had a real brain wave. I decided to transform the relatively amorphous tasting vegetable mix into really incredible vegan meatballs, or should I say veggie balls?
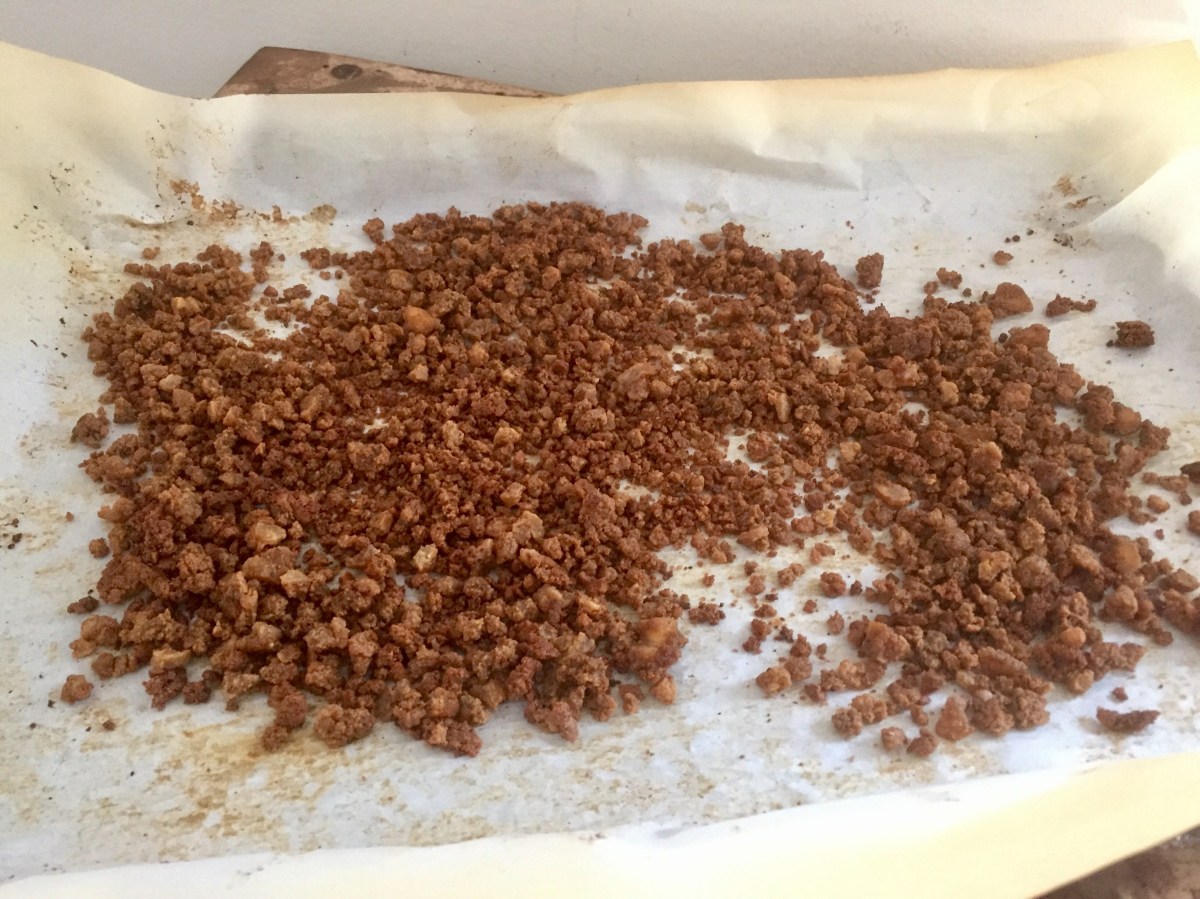
Frozen Vegetable Mix, thawed, via Eat the Vegan RainbowThere are couple of simple tips that when put together make this recipe work. First of all, thaw your vegetables don’t cook them! Depending on the amount of veggies you use this may take 5-10 minutes in the microwave on high. Once the veggies are thawed and soft all through, use a stick (immersion) blender, or a food processor to make a thick paste out of it all. This will be a base for your “meatballs”.
Another thing that you will need to do is add flavor to the mix. Although each one of these veggies is lovely on their own and when fresh, put all together and after freezing and thawing they do lose some of their flavor. My secret ingredient in this recipe is definitely a dash of Trader Joe’s Chile Lime Seasoning Bland. If you don’t live in the area with a handy Trader Joe’s store near by, you can use regular chili powder and add some lime or lemon zest – that will do the trick!
You will have to be a bit patient with this recipe as it does take a bit of time. First of all, I use oats to help the meatballs stick together. I did not leave the oats whole, rather I blended them all into the veggie mix using a stick blender, added the spices, and left the mix to sit for about 15 minutes. That gives oats some time to absorb the liquid and make the mix stick together better, which helps for the next step – forming the “meatballs” and browning them. I recommend using a Dutch oven to brown the “meatballs”, as well as simmering the rich tomato sauce.
Vegan “Meatballs” Browned in a Dutch Oven, via Eat the Vegan RainbowOne word of advice is not to overcrowd your Dutch oven, and keep some room in between the “meatballs”. This helps them cook, and helps you maneuver them around. Once the “meatballs” are nicely browned set them aside and use the same Dutch oven for putting your tomato sauce together. I kept my recipe simple and my cost down by using canned crushed tomatoes and using some crushed garlic, dried oregano and dried basil to flavor the sauce. The sauce does not need to cook for long, and once it starts to simmer nicely and gently you can add the “meatballs” back.
Vegan Meatballs in Tomato Sauce, via Eat the Vegan RainbowDon’t forget to lower the heat , bring the post to a very gentle simmer, and put the lid on! Without the lid you will soon end up with tomato sauce all over the stove top and the floor as this sauce does erupt in tiny little tomato sauce geysers.
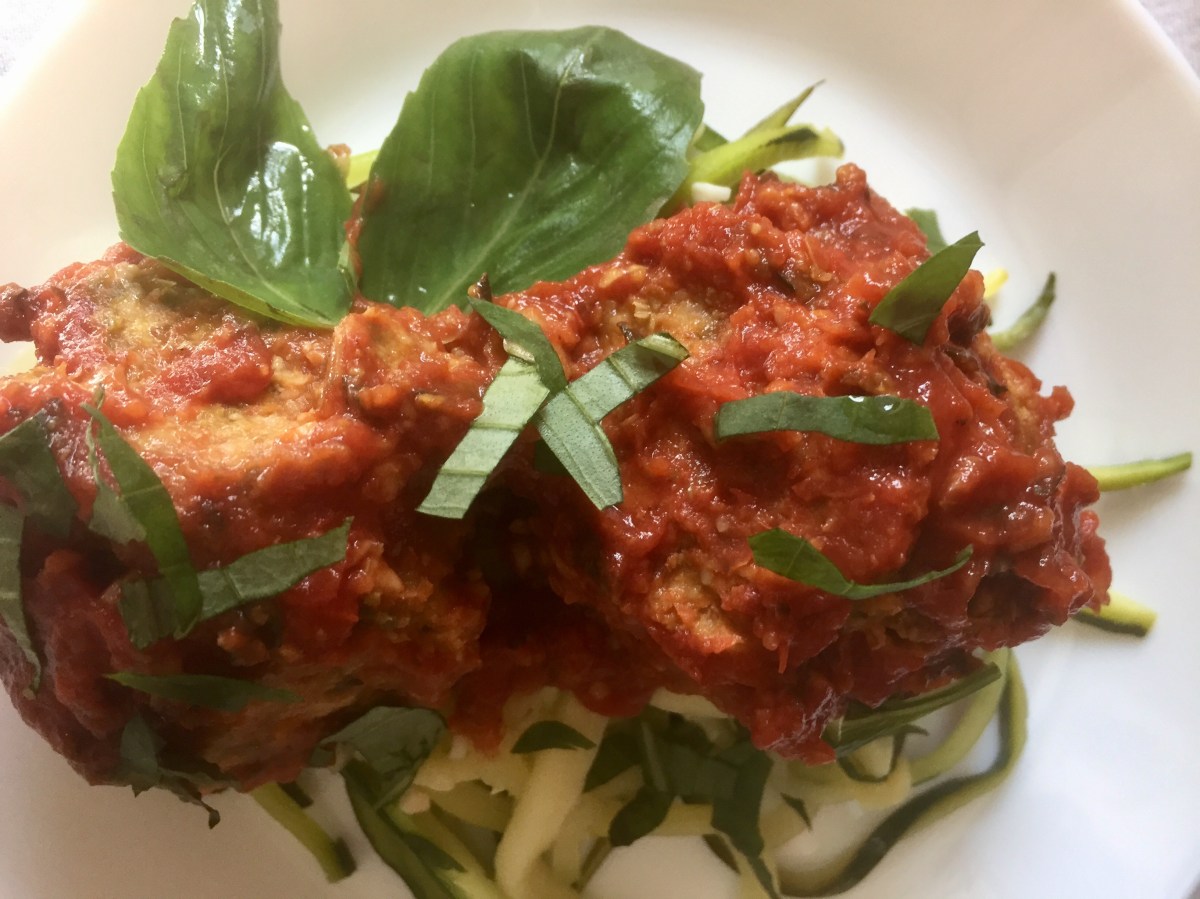
To keep the recipe ultra healthy and gluten-free, I paired the meatballs with simple Zucchini Spaghetti.
Place the frozen vegetable into a microwave safe dish and microwave on high for 5-10 minutes to thaw the vegetables and slightly heat them through.
Place the vegetables into a large mixing bowl. Use the stick blender to grind the vegetables into a relatively fine paste.
Add oats and blend again.
Add tomato paste, soy sauce, as well as onion, garlic, chili and lime chili powder. Mix well and let stand for 15 minutes or so.
Spray the bottom of a large Dutch oven with cooking spray and bring to medium high heat. Use 1/4 cup or the ice cream scoop to scoop out the “meatball” mix and form the balls. Place them into the hot Dutch oven and let brown for 2-3 minutes. Turn the “meatballs” over and brown on the other side. Take them out of the Dutch oven and set aside. Spray with more cooking spray if needed and add another batch of “meatballs”. Continue until all your “meatballs” have been browned.
Bring the heat up to high, add more cooking spray, and add crushed garlic and dried oregano and basil. Let it bloom, develop & release the aroma for 1-2 minutes. Add crushed tomatoes. Depending how much tomato sauce you’d like to have you may need to adjust the amount of crushed tomatoes you add. Bring the tomato sauce to a simmer and let it simmer for 5-10 minutes.
Turn the heat way down and add back the “meatballs”. You will likely have two layers of meatballs which is fine, but it’s a good idea to keep in mind that they are relatively soft so treat them gently! Make sure they are nicely snuggled and covered by the sauce. Put the lid on and let the “meatballs” and sauce simmer for 15 – 20 minutes.
When you are ready to serve, start with a generous amount of Zucchini Spaghetti, add couple of vegan meatballs, spread some sauce, and top with fresh basil. Enjoy!
Update: Few days ago I used the same “meatball” mix and made a “meatloaf” out of it. It worked really well!!! Here are couple of pictures to show you what it all looks like. One tip: bake the “meatloaf” on 375 F (190 C) for 25-30 minutes first, before putting on the tomato paste, then bake for 15 minutes more. Let the “meatloaf” stand for 15 minutes before cutting – the loaf will be soft when it comes out of the oven but it will firm up!
Vegan Stuffed Peppers with Homemade Beef Substitute, via Eat the Vegan Rainbow
My mom is the queen of stuffed bell peppers. Her peppers have been well-known within our extended family, and frequently requested by friends and family when they visit. What I am saying is that stuffed bell peppers should be in my DNA, but it took me years to transform what I learned in my mom’s kitchen to a dish that will be a crowd pleaser.
The first major breakthrough in my pursuit to a perfect stuffed bell pepper recipe came when I realized that cutting the peppers in half lengthwise makes my life so much easier than cutting just the top off. Cutting peppers lengthwise makes cleaning out the seeds and the spines a breeze, plus helps distribute the stuffing and helps the stuffing stay put. It also helps peppers cook faster. Another thing that I found through many round of experimentation is that it helps if you pre-cooks peppers just a bit before stuffing them. I tried parboiling and it helps but it changes the flavor of peppers in a direction that I don’t really like. So, I recommend par-roasting, which means letting your peppers roast for 10-15 minutes, until they just start to soften and get browned on the surface. This is a great way to jump start cooking your papers and add some flavor.
Pre-roasted Bell Peppers, via Eat the Vegan Rainbow
The second breakthrough came when I discovered that the stuffing does not need to include a starch component. You can have lovely stuffed bell peppers without filling them with rice, or potatoes, or quinoa, or barley, or any of that stuff. I am not saying these are bad things to use, but most recipe use them as space fillers more than anything else. But for me in this recipe, a mix of yellow onion, red onion, white mushrooms, and baby bella (crimini) mushrooms. One tip here is to chop all these to pretty small pieces so that they match the size of ground meat chunks you would usually find in a stuffed bell pepper recipe. Another tip: for a recipe like this you can use both the mushroom tops and stems, and minimize the waste!
Vegan Stuffed Peppers with Homemade Ground Beef Substitute, via Eat the Vegan Rainbow
This brings me to my most recent breakthrough: vegan substitute for ground meat. I followed this recipe I found on Glow Kitchen, with only one modifications – I did not add olive oil and used cooking spray on my baking sheet instead. The recipe produces amazing ground beef substitute and uses tofu and a handful of pantry staples. The prep time is a bit on a longer side, as it takes about 1 hour in the oven with frequent stirring, but it is worth it!!! I think you will love this so much that I recommend doubling the recipe right off the bat.
Vegan Ground Beef Substitute, recipe via Glow Kitchen, execution via Eat the Vegan Rainbow
Finally, I did use some vegan cheese to top the stuffed peppers, but you can definitely skip that step or top them with fresh Italian (flat leaf) parsley. Or both!
Vegan Stuffed Peppers with Homemade Beef Substitute
What you’ll need:
4 bell peppers (red, orange, yellow, green – any color will do)
8 oz. (225 g) white mushrooms, finely diced
8 oz. (225g) baby bella (crimini) mushrooms, finely diced
Prepare the ground beef substitute according to instructions here. You can make this a day ahead, which is what I did. Also, you can use any store bought ground beef substitute you like.
Preheat oven to 425 F (220 C).
Wash and dry the peppers, then cut lengthwise and clean out the seeds and spines. Put them into a roasting pan and spray gently with cooking spray. Par-roast for 15 minutes or so. Take them out of the oven and remove any liquid that peppers released during roasting. Set aside.
Lower the oven temperature to 350 F (175 C).
Sauté onions and mushrooms on medium heat with a bit of cooking spray for 5-8 minutes. Stir in beef substitute and sauté for another 5 minutes. Turn the heat off and mix in smoked paprika. Your stuffing is ready for the next step!
Pour the can of crushed tomatoes into your baking dish. Place par-roasted peppers in, and fill them with the stuffing. Cover the baking dish with foil and put in the oven for 15-20 minutes. Remove the foil and bake uncovered for 10 minutes.
Sprinkle the cheese on top and let it melt which will take another 5 minutes. And that is it. You are ready to enjoy!
Vegan Saag Paneer with Saffron Brown Basmati Rice, via Eat the Vegan Rainbow
Few days ago, I shared my recipe for Vegan Chicken Tikka Masala that uses young jackfruit as a substitute for chicken, and slow cooker as a substitute for using ghee to enhance the flavor, as well as huge time and effort saver. Since then I decided to tackle another jewel of Indian cuisine, Saag Paneer. Saag is a traditional Indian dish made of leafy green vegetables, which is a vegan friendly part of this equation, and paneer is soft, white cheese very common in South Asia, a vegan less friendly ingredient. Putting green leafy vegetables, like spinach, together with cheese, spices and cream is a no-brainer, so it is no surprise that Saag Paneer is very popular.
In order to build a vegan version of Saag Paneer, I focused on transforming extra firm tofu into paneer. This turned out to be easier than I expected. First of all, texture of extra firm tofu and your average paneer are very similar. Additionally, they both have mild flavors and creamy consistency. So far so good!
You do need some time and patience with this one though. I prepped tofu the way I usually do by leaving it in the sieve in the fridge overnight. You can use any other method of getting rid of the excess moisture – I prefer the sieve because it requires no work, cans and paper towels are tedious and a bit wasteful, and I am yet to invest in the tofu press. The next morning I cubed the tofu, and let it “marinate” in the dry spice mix for 4-6 hours.
Vegan Paneer, via Eat the Vegan Rainbow
Even after sitting in the spice mix, the tofu paneer is not quite ready. Although you can use it, I strongly recommend that you first roast the tofu for 20-30 minutes. This roasting step locks in the spices and adds slight crunchiness that makes every bite a treat.
Few additional tips that will help you put this dish together are to do with spinach. I use frozen chopped spinach, as it is ready to go. The traditional Saag Paneer recipe uses quite a bit of cream to make the spinach nice and creamy. I use coconut milk to add a bit of creaminess to it, and the coconut milk adds a bit of its own nutty flavor that I enjoy. But, I don’t rely on coconut milk alone and have discovered some time ago that stick (also known as hand or immersion) blender is indispensable for creating spinach that’s beyond creamy! If you don’t have a stick blender, you can use a blender or a food processor to purée your spinach.
Once the spinach is puréed, it is ready to meet the tofu paneer, and after about 15 minutes of simmering the Vegan Saag Paneer will be ready to meet your taste buds!
Vegan Saag Paneer, before the final mix. Via Eat the Vegan Rainbow
Vegan Saag Paneer
What you’ll need:
For tofu paneer
14 oz. (400 g) extra firm tofu
1 tablespoon garam masala
1 tablespoon ground cumin
1 teaspoon garlic powder
For creamed spinach
2 lbs (1 kg) frozen, chopped spinach
1 tablespoon garlic, minced
2 tablespoons tomato paste
7 fl. oz. (200 mL) coconut milk, reduced fat
Cooking spray
What you’ll do:
Place tofu into a strainer and leave in the refrigerator to drain overnight. Then pat dry with a towel and cut into 1 in/2.5 cm cubes.
In a ziplock bag mix dry spices (garam masala, ground cumin and garlic powder) and add tofu cubes to it. Zip the bag and toss gently to coat the tofu pieces evenly. Leave in refrigerator for 4-6 hours.
Heat the oven to 425 F (220 C). Line a baking sheet with parchment paper and space tofu cubes evenly with some room between the cubes. Don’t brush the spice mix off, just roast the tofu pieces as is for 10-12 min, then go in and flip them over and put them back for another 10-12 min, so that they roast on all sides and get golden brown.
On the stove top, spray the bottom of your pan with cooking spray and heat to medium high. Add minced garlic (I prefer the jar variety that taste great in a dish like this and requires no work), and let it start to develop the aroma for about 1-2 minutes. Next add the tomato paste, and let it mature for 1-2 minutes.
Add frozen spinach. Cook with occasional stirring for 15-20 minutes. Let cool for 15-20 minutes, add coconut milk, and then purée with a stick blender until smooth.
Add roasted tofu and mix gently until tofu is well incorporated. Simmer for 15 minutes. Enjoy with a piece of naan bread, or with Saffron Brown Basmati Rice.
Note: please note that unlike most Saag Paneer recipes I do not add spices to spinach. The flavor intensity comes from tofu paneer, so it is important that your tofu is well coated with the spice mix and nicely roasted until golden brown.
Bean & Leek Soup with Soy Chorizo, via Eat the Vegan Rainbow
One of my recent impulse buys was Trader Joe’s Soy Chorizo. This chorizo is vegan, as well as smokey and very spicy so a little goes a long way. I enjoyed it as a topping for an otherwise simple tomato and lettuce sandwich, but I also wanted to experiment a bit and see what else I can use soy chorizo for.
Chorizo and beans usually make for an excellent combination, but I wanted something more adventures than a pot of chili. I decided to mix several types of beans, to diversify the texture of the soup I was building, and in addition to soy chorizo use leeks to expand the range of flavors. The three different types of beans I used are small white beans, black-eyed peas, and dark kidney beans, and I used a canned variety of all three because cooking beans from scratch is not my idea of fun. One thing to keep in mind when using canned vegetables is to rinse them well before use to remove excess salt.
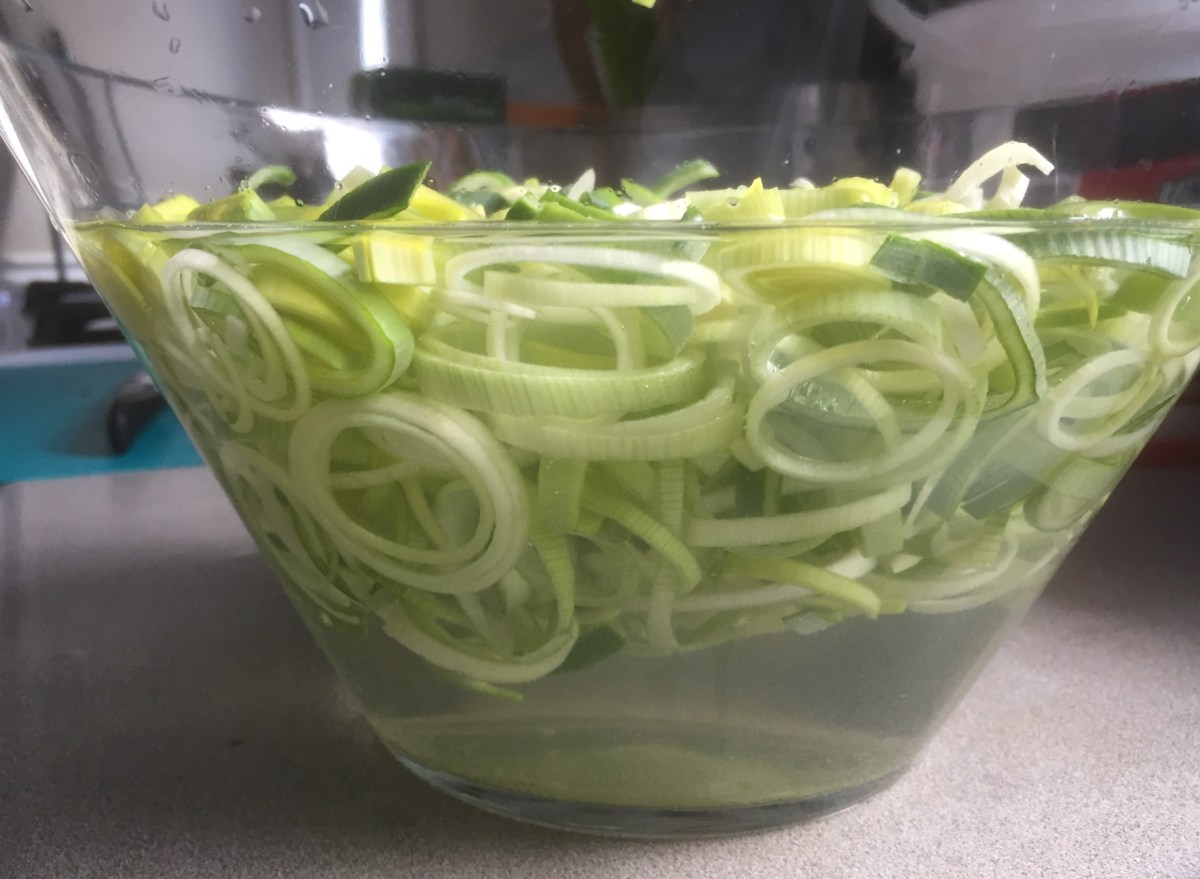
The time I saved on beans, I used to deal with leeks. For those of you who are new to leek, it belongs to the onion family and shares a lot of similarities when it comes to flavor with spring onions (scallions) and spring garlic, which unfortunately is not often found in large supermarket chains. Although I do enjoy leek flavor, I don’t really cook with it often mostly because it does need extensive washing to ensure that all the traces of dirt are removed. The method I use to deal with this is something I’ve seen on Food Network, where you slice the leek and submerge the slices in water. You need to leave chopped leek in for few minutes to let the sediment and dirt fall to the bottom of the bowl, then scoop, rinse and dry the leek slices. They are now ready to go!
Cleaning Leeks, via Eat the Vegan Rainbow
Bean & Leek Soup with Soy Chorizo
What you’ll need:
2 leeks
1 15.5 oz (439g) can small white beans
1 15.5 oz (439g) can black-eyed peas
1 15.5 oz (439g) can dark kidney beans
1/2 soy chorizo
32 oz (907 g) vegetable cooking stock
3 bay leaves
Cooking spray
What you’ll do:
Slice leeks across into thin rounds, then separate each round into individual circles. Fill a large bowl with water and submerge leek circles in it. Let them sit for 5-10 minutes. Using a skimmer spoon to remove the leek without disturbing the sediment that has collected at the bottom of the bowl. Give leek one more rinse, then pat dry with the cloth towel.
Spray the bottom of a large pot with the cooking spray and turn the heat on to medium high. Add leek and let caramelize for 5 minutes or so.
Add soy chorizo and stir to mix. If you are using Trader Joe’s brand please make sure that you remove the casing as this is not edible. Break the chorizo to small pieces and brown leek and chorizo mix for 3-5 minutes.
Add well-rinsed beans to the pot and stir. Cook for another 5 minutes, mixing frequently.
Add vegetable stock and bay leaves to the post. Bring the soup to boil, then decrease the heat to low and let the soup simmer for 15-20 minutes.
Serve the soup with some toast, corn chips or freshly baked bread. If you are feeling very decadent, you can top this soup with some Cashew Cream, or vegan shredded cheese of your choice. Some lime juice would work well, too!
Note for those using Trader Joe’s Soy Chorizo: I used only half of Trader Joe’s Soy Chorizo, which added just enough flavor and spiciness to this soup as far as I am concerned. If you prefer more kick, go ahead and use the whole thing. If you are more on a cautious side, save the other half and transform it into my Vegan Mexican Lasagna.
Vegan Chicken Tikka Masala with Saffron Brown Basmati Rice, via Eat the Vegan RainbowChicken Tikka Masala has been on the menu of all Indian restaurants that I ever went to. But the origins of this dish are far from clear, some claiming that the dish was created in Glasgow, while others claim it originates from Punjab. Regardless of its origin and history, every Chicken Tikka Masala recipe I ever tasted had five things in common: juicy and tender chicken,a yogurt marinade, fragrant tomato simmer sauce, cream, and lots and lots of ghee (clarified butter). These five things make Chicken Tikka Masala incredibly tasty, as well as elaborate to make, as well as very heavy on saturated fat and calories.
Well, I think the dish is overdue for a makeover, and there are many that agree with this view. While researching, I found many recipes that explore using tofu, meatless chicken strips, cauliflower, chickpeas, or other things as a chicken substitute, and I bet these all taste great. But, what I wanted to do here is take my new favorite ingredient, jackfruit, which I recently transformed into a fabulous Jackfruit Tacos, and see if it works in an Indian dish.
I also wanted to make a lengthy prep into something more manageable, so my recipe uses a slow cooker to do all the work of bringing jackfruit, spices and the tomato simmer sauce together. This also helps with the fat content, which I cut way, way down while maintaining the intensity of the flavors. The resulting recipe is straightforward but there are couple of tricks and tips to it.
First tip is to use a slow cooker liner. I am not sure if there are other brands out there, but I found that Reynolds Slow Cooker Liners work really well. The food gets cooked perfectly and the clean up is a breeze!
Second tip is to quick pre-cook your aromatics. In this case I use onions and garlic, and apply a method that I found in one of the America’s Test Kitchen cookbooks where you mix your aromatics with a bit of oil and microwave them for 5-6 minutes before adding them to the slow cooker. I’ve been using this method for more than a year now and apply it to get the aromatics (onions, garlic, carrots, celery,…) going, because I found that the slow cooker just can’t get them to develop the slightly caramelized flavor that a stow top cooking will do for you. However, microwaving with a bit of oil takes care of that and works perfectly!
Third tip is to rinse, drain and dry your jackfruit, assuming that you are starting from the canned version, and chopped it into small pieces. Do make sure that jackfruit is well rinsed and drained. Otherwise you will end up with Vegan Chicken Tikka Masala that may be too salty and too soupy.
So, once you have your jackfruit and your aromatics ready, it’s time to get cooking!
Vegan Chicken Tikka Masala in a slow cooker, via Eat the Vegan Rainbow
Vegan Chicken Tikka Masala
What you’ll need:
2 cans (10 oz, 280 g) young jackfruit in brine
1 can (28 oz, 800 g) crushed tomatoes, no salt added
1 yellow onion, diced
2 tablespoons garlic, crushed
2 tablespoons tomato paste
2 teaspoons ginger, freshly grated
2 teaspoons garam masala
2 teaspoons ground cumin
1/2 cup cashews, raw
1/4 cup almond milk
cooking spray
fresh cilantro
What you’ll do:
Place diced onions, garlic (I use the one from the jar, as I shared in my Oh My! It’s Vegan Shepherd’s Pie! post) and tomato paste in a microwave safe bowl. Spray the aromatics with cooking spray, mix well and microwave on high for 5-6 minutes. Be careful when you handle the bowl, it will be hot so I recommend using oven mittens.
Line your slow cooker with the liner, and add the can of crushed tomatoes, jackfruit that has been rinsed, dried and chopped to small pieces, as well as all the spices and the microwaved aromatics. Mix well. Cover and turn your slow cooker on “HIGH” for 4 hours.
While the slow cooker is going, start soaking the cashews in water. Let them sit for 4 hours in the refrigerator and once your slow cooker is done take the cashews out, dump the water out and place the cashews and almond milk in a blender. What you are doing here is making vegan Cashew Cream, and this amount of cashews should give you more than enough to make this Vegan Chicken Tikka Masala into a creamy perfection. However, do take it easy when adding Cashew Cream and what I usually do is add the cream one tablespoon at the time, mix Vegan Chicken Tikka Masala well, and check for flavor. I keep adding the Cashew Cream until I am happy with the flavor, color and consistency. Don’t worry if you discover that you made a bit too much Cashew Cream, you can always use it to top your backed potatoes, or turn it into Vegan Herb Mayo.
When ready to serve, plate your Vegan Chicken Tikka Masala, or should I call it Jackfruit Tikka Masala?, with some Saffron Brown Basmati Rice and top it with fresh cilantro.
Note: Cilantro does tend to go flat in few days from purchase so one way to keep it fresh for longer is to rinse it out soon after you get back from the grocery store, put them in a glass jar like you would a bunch of flowers, and keep them on your kitchen counter top – which is a trick I picked up watching Rachel Ray. Also when it comes to cilantro, basil and parsley, I prefer to use my kitchen scissors to cut them up!