Hello! My name is Milka.
I like to think of myself as the Goddess of Fruit and Veg, and an Occasional Nut!
For me, one of the most important things is to have fun preparing the food, and sharing the joy with those who you are feeding. My blog's name was inspired by my daughter's love of rainbows, and serves as a daily reminder of the important things in life, like vegan rainbows and well-fed unicorns.
Pumpkin Brownies with Chocolate Avocado Frosting, via Eat the Vegan Rainbow
The magic of chocolate is real – just ask anyone who has ever had a piece of delicious, rich, dark chocolate goodness. Of course, that makes desserts like brownies so addictive. But: they don’t need to be such a guilty pleasure if you take the time to add couple of things that are good for you, like fruit and veggies, and take away couple of things that are not so good, like added sugar and eggs. And the best thing about this strategy is that, guess what? – nobody will know your secret.
I recently profiled a Veggie Patch Brownie recipe from a recently published cook book, and that inspired me to experiment on my own. My concoction includes lots of vegan chocolate – Enjoy Life is the brand I can find around where I live but any semi-sweet vegan chocolate chips or baking chocolate will work – and some vegan butter which you could likely omit if going for a really healthy version. But, if you are making these brownies for a special occasion like Valentine’s Day, Thanksgiving, St. Patrick’s Day, New Year’s Eve, graduation…, being a bit indulgent seems justified to me. In a need of healthier option? These brownies full of oats and chickpeas may do the trick!
Another thing to note is that you don’t need to use pumpkin purée if not available. You can replace it with sweet potato or butternut squash purée. Even carrots would work here – all you need is a dense purée made of somewhat sweet vegetable and you should be fine. I usually recommend roasting (not boiling) the vegetables, as roasting brings out more sweetness and makes the veggies less mushy.
One final tip? Oh, yes: let the brownies cool completely before frosting and after you frost them it’s best to give them some time for the frosting to firm up a bit before biting in. Happy eating!
Pumpkin Brownies with Chocolate Avocado Frosting
What you’ll need:
FOR THE BROWNIES:
4 tablespoons golden flax meal (other flax meal will work as well)
1 cup hot water
1 stick butter, softened (vegan, or if making vegetarian version regular butter will work)
10 oz dark chocolate chips (vegan brand I like is Enjoy Life)
1 15 oz (425 g) can pumpkin purée
2 cups flour (all-purpose gluten-free if needed)
2 teaspoons baking powder
1 teaspoon baking soda
1 teaspoon cinnamon
1/2 teaspoon nutmeg
1/4 teaspoon clover
1 tablespoon lemon juice
FOR THE FROSTING
1 cup dark chocolate chips, melted
1 avocado
2 tablespoons butter, softened
(Optional toppings): Sprinkle with crushed freeze-dried strawberries and/or raspberries for a Valentine’s Day version; or chopped shelledpistachios for St. Patrick’s Day; or top with chopped walnuts or shredded coconut for an extra special winter holiday spread.
What you’ll do:
Preheat the oven to 350 F (175 C).
Pour 1 cup of boiling water over the flax meal, mix really well and set aside to soak for 5-10 minutes. Flax meal should become gooey and dense, almost like a gel.
Place the chocolate chips into a microwave safe bowl or a double boiler. If using a double boiler, bring water to boil then add the chocolate chips, and mix until about 75% melted. Take off the double boiler and continue mixing until all chocolate is melted, smooth and combined. You will need to do the same if using microwave oven. Microwave on high in 30 second increments. After each 30 second period, check the chocolate and mix. Stop when about 75% of chips are melted, but continue to mix. Your bowl and the chocolate will have enough residual heat to melt the rest.
Add softened butter, melted chocolate chips, pumpkin purée, and soaked flax meal into the food processor and combine until smooth.
In a large mixing bowl, combine the dry ingredients: flour, baking soda, baking powder and all the dry spices.
Add the wet ingredients as well as the lemon juice and mix well.
Pour the batter into a 9 x 13 in (23 x 33 cm) slightly greased pan. Even the top out then bake for 25 minutes or so. Your brownies are done when the top looks baked and the sides look as they are starting to come loose. Please note that these brownies have lots of chocolate so the toothpick may not come out dry. But, it should still be fairly dry, with perhaps some melted chocolate on it.
Take the brownies out of the oven and let them cool completely. They should be room temperature before frosting.
To make the frosting, mix the softened butter with avocado using a hand held mixer, a stick blender or a blender. Add melted chocolate and mix until creamy. Spread the frosting over the brownies, decorate as desired (the wiggles on my photo above were done using a fork), and let the frosting firm up (30-60 minutes should do it!). You can sprinkle any or all of the optional toppings or leave as is.
Cut into square and serve! These brownies are very rich, without being very sweet and you will likely not need ice cream or whip cream to go with them – but if that’s how you roll, then just roll with it!!!
Cilantro and Lime Grilled Corn, via Eat the Vegan Rainbow
Corn is amazing for many reasons. It’s incredibly sweet and delicious, it is easy to make, and it is super cheep during summer months while in season. Outside that window, fresh corn is still really affordable and you can enjoy it year round.
Corn requires minimal preparation, can be ready in no time and it’s naturally gluten-free. Moreover, if you can’t get fresh corn you can always youse frozen corn because it will work almost as good as fresh one.
Let me illustrate some of what I just said with a very simple corn side dish. I developed this recipe as a side for summer cook-outs and burgers (some of my favorite burgers that this corn goes really well with are Chickpea Burgers with Sun Dried Tomatoes and Walnut Meat – YUM!), but it can definitely be made year-round. Although you could steam your corn and then follow the steps below, for best results I recommend grilling. You can grill the corn on your outdoor grill, or using a grill pan – exact method does not matter. What matter are those lovely grill marks and getting some charring on the corn, which really adds a lot of flavor.
Other than getting those lovely grill marks, the rest of this recipe is super quick and easy. All you need to do is toss the chopped corn with couple of flavoring agents, lime juice for a bit of acidity, lime zest for a bit of crispness, some fresh cilantro for a bit of freshness, some fire roasted green chiles for some spiciness, and a bit of oil that helps all these flavors stick to the corn and each other better.
You can serve the corn immediately after tossing it with the rest of the ingredients, but I recommend that you stay patient and wait for 10-15 minutes for all the flavors to come together and infuse the corn. Then you can dig in!
Grilled Corn with Cilantro and Lime
What you’ll need:
4 ears of corn, grilled
1 lime, juice and zest
2 tablespoons olive oil
1 tablespoon fire roasted chile peppers (from the can)
¼ fresh cilantro, finely chopped
Salt, to taste (optional)
What you’ll do:
Grill the corn using an outdoor grill. If none is available, you can cook your corn in the microwave oven, then add grill marks using a grill pan, or go directly to the grill pan. Usually, it takes 3-5 minutes per side, and you do need to stay close and keep an eye on the corn so that it doesn’t burn. Let the corn cool just slightly, so that you can handle it, then chop each ear of the grilled corn into 4 pieces.
In a large bowl, combine the rest of ingredients (lime juice and zest, jalapeños, olive oil, and cilantro; you can also add salt to taste – I don’t use much salt, and I don’t think this corn needs any, but you can decide for yourself). Toss the corn with the mix and set aside for 10-15 minutes to allow the flavors to mix and mingle. Serve with burgers, salads (like this Coleslaw), ribs, beans, or other goodies!
Reprinted with permission from The Vegan Slow Cooker, Revised and Expanded by Kathy Hester.
When I first switched to plant-based cooking and vegan diet I thought that I would never need to use my beloved slow cooker again. For those of you who are not familiar with this kitchen gadget, slow cooker, also called a crock-pot, is a handy kitchen tool for those recipes that require long cooking times, and is usually used to slow cook tougher pieces of meat, or bean dishes, like chilis. The key part of the slow cooker is a heavy ceramic of porcelain pot, that sits in a heater element that provides constant low heat. The gadget is especially handy for busy families since you can set everything up, turn it on, and come back to a cooked meal within four to eight (sometimes twelve) hours.
Having said this, why did I think my slow cooker using days were over when I transitioned into the vegan diet? Well, I started eating more raw or gently cooked vegetables, and did not quite see the point of cooking something for hours on end if I can get it done in less than half an hour using traditional methods. However, I soon realized that cooking food low and slow has an added benefit of infusing lots of flavor into things that would otherwise taste bland or for dishes that just need plenty of aroma to carry them over and through the taste buds.
So I was excite to see “The Vegan Slow Cooker, Revised and Expanded“, a recently released cookbook by Kathy Hester, a blogger behind Healthy Slow Cooking. Building on the success of “The Vegan Slow Cooker“, Kathy is now offered a refreshed cookbook that includes everything from a chapter that provides some vegan slow cooker basics, to soups, stews, casseroles, as well as many, many great main dish recipes. The most surprising, at least to me, was to see chapters focused on breads, desserts and breakfast!
This cookbook is rich with recipes, ideas, tips and tricks that will help you get the most out of your slow cooker, or the slow cooker mode on an advanced pressure cooker. No matter what you choose to try, slow cooking is the method you should definitely add to your arsenal of strategies of getting the home cooked meals on your family table with the least amount of effort. Enjoy!
Recipe reprinted with permission from The Vegan Slow Cooker, Revised and Expanded by Kathy Hester.
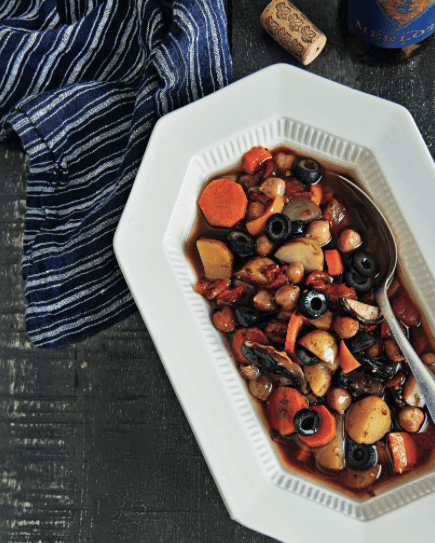
Chickpea Cacciatore with Potatoes
DISCLAIMER: Recipe reprinted with permission from The Vegan Slow Cooker, Revised and Expanded: Simply Set It and Go with 160 Recipes for Intensely Flavorful, Fuss-Free Fare Fresh from the Slow Cooker or Instant Pot® by Kathy Hester.
Here’s a completely plant-based one-pot meal that will satisfy the hungriest at your table. The potatoes and chickpeas are filling and full of nutrients. The sauce and the rest of the veggies make a sauce that packs a flavor punch.
gluten-free soy-free no oil added
1 bag (24 ounces, or 680 g) baby potatoes, quartered
2 cans (15 ounces, or 425 g each) chickpeas, drained (save liquid to use as aquafaba in other recipes)
1 pound (504 g) mushrooms, sliced (can use all white, baby bella, or a combo)
2 cups (300 g) chopped bell pepper (use multiple colors if you can)
3 carrots, cut into coins
SAUCE INGREDIENTS
1 can (28 ounces, or 784 g) crushed tomatoes
¼ cup (60 ml) red wine (or 2 tablespoons [30 ml] balsamic vinegar)
1 teaspoon minced garlic
1 teaspoon dried marjoram
1 teaspoon dried basil
½ teaspoon salt
¼ teaspoon ground rosemary
SERVING INGREDIENTS
½cup (50 g) pitted black olives (optional)
yield: 6 servings
equipment: 5-to 6-quart slow cooker
cooking time: 7 to 9 hours on low
the night before: cut up the veggies. Add veggies and drained chickpeas to a sealable container, and mix. You can mix all the sauce ingredients together now, or wait until morning. Store everything in the fridge.
in the morning: mix the sauce and veggie-chickpea mixture together in your slow cooker. Cook on low 7 to 9 hours.
Garnish with pitted black olives, if desired.
Recipe Notes
Recipe reprinted with permission from The Vegan Slow Cooker, Revised and Expanded: Simply Set It and Go with 160 Recipes for Intensely Flavorful, Fuss-Free Fare Fresh from the Slow Cooker or Instant Pot® by Kathy Hester.
If you have not tried plantains before, now is your time to give them a try. Plantains look like bananas – perhaps slightly bigger than average bananas. But, they are not usually paletable without cooking and are thus often referred to as “cooking bananas“. This starchy fruit is used in number of different dishes all over the tropical world where these plants are cultivated and grown.
Although you can eat plantains when they are still green, it is best to wait for them to get quite ripe. And for plantains that means really quite brown – think bananas that are two days beyond their “use to make a banana bread” date. Most of the time the plantains you find in the store need more ripening and the best way to do this is to leave them in a paper bag for another week or two.
Once they are nice and mostly brown, it’s time to make them into something delicious. You could grill them, boil them, fry them, roast them – and with the right spice combination plantains will not disappoint. I prefer to double cook them. First, I roast them without peeling and then I use them in different applications. For example, this chili was a great combination of beans and plantains, and worked really well.
For the curry recipe below, the plantains were roasted first then diced. In general, roasting brings out flavors that are sometimes hard to get any other way. In the case of plantains, this extra step is definitely worth it since ripe plantains still tend to be pretty tough.
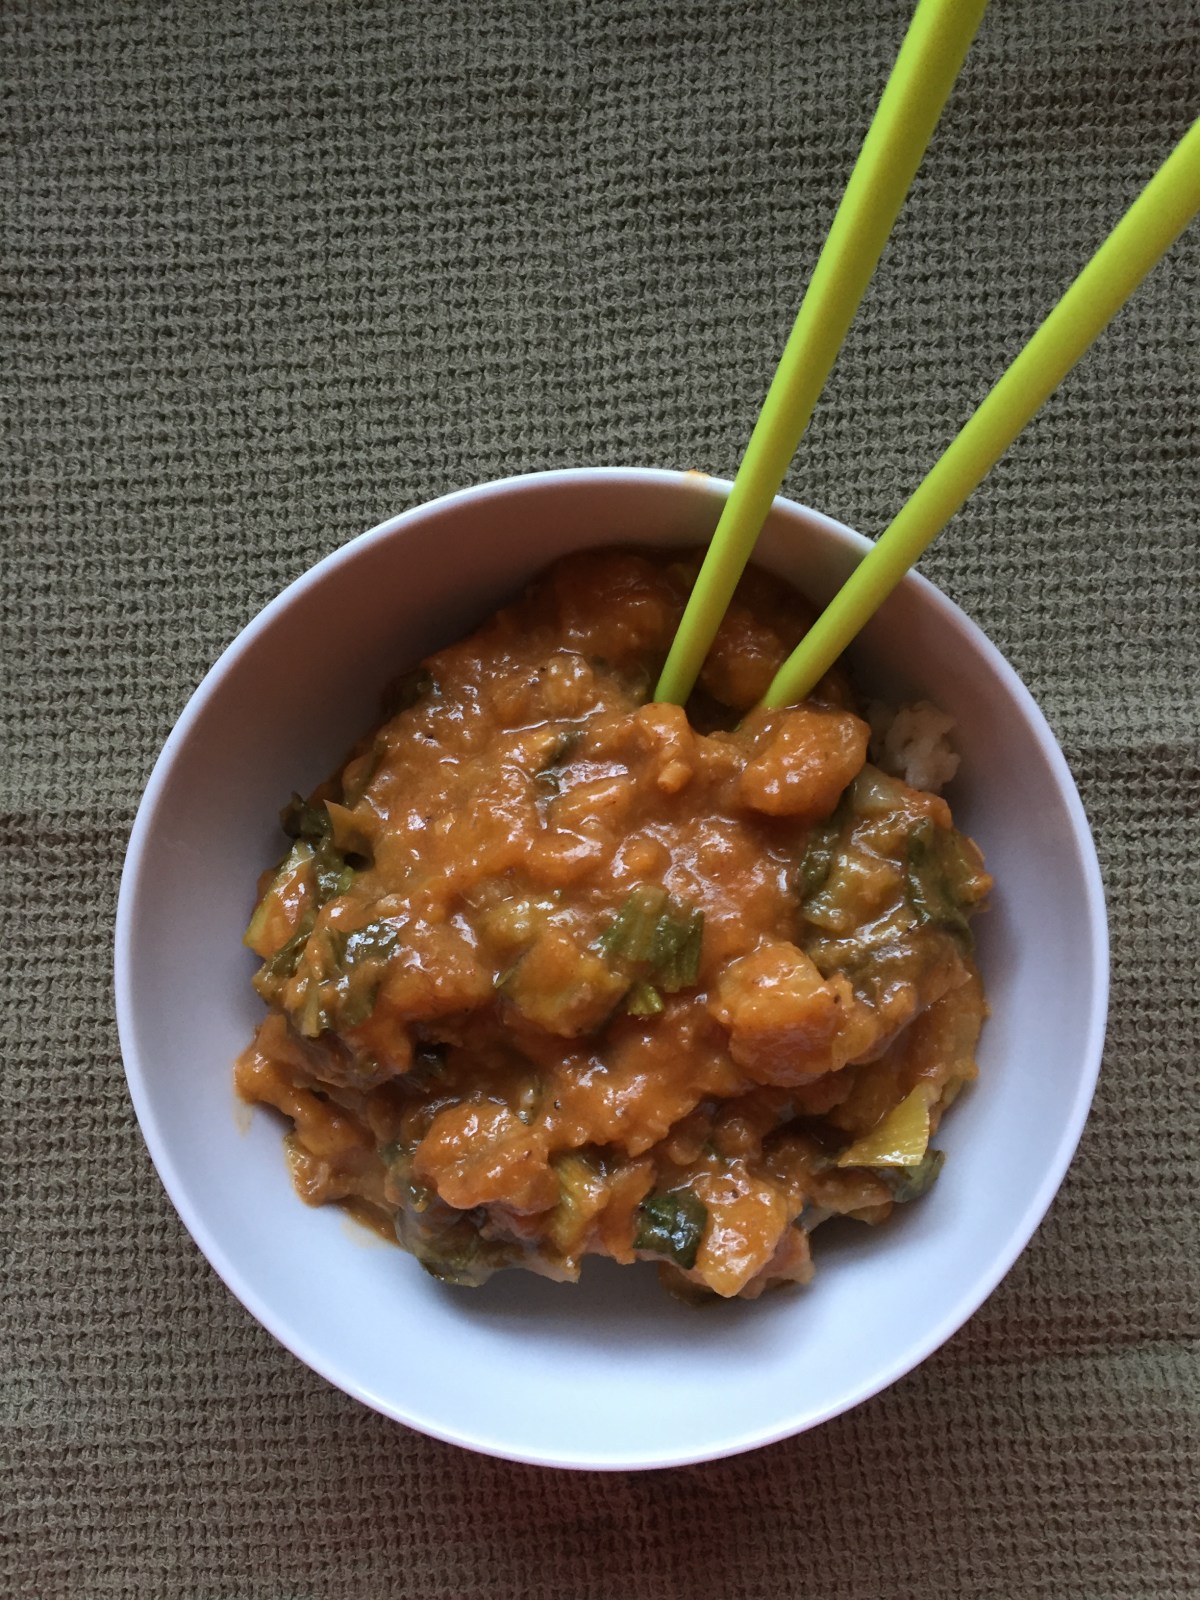
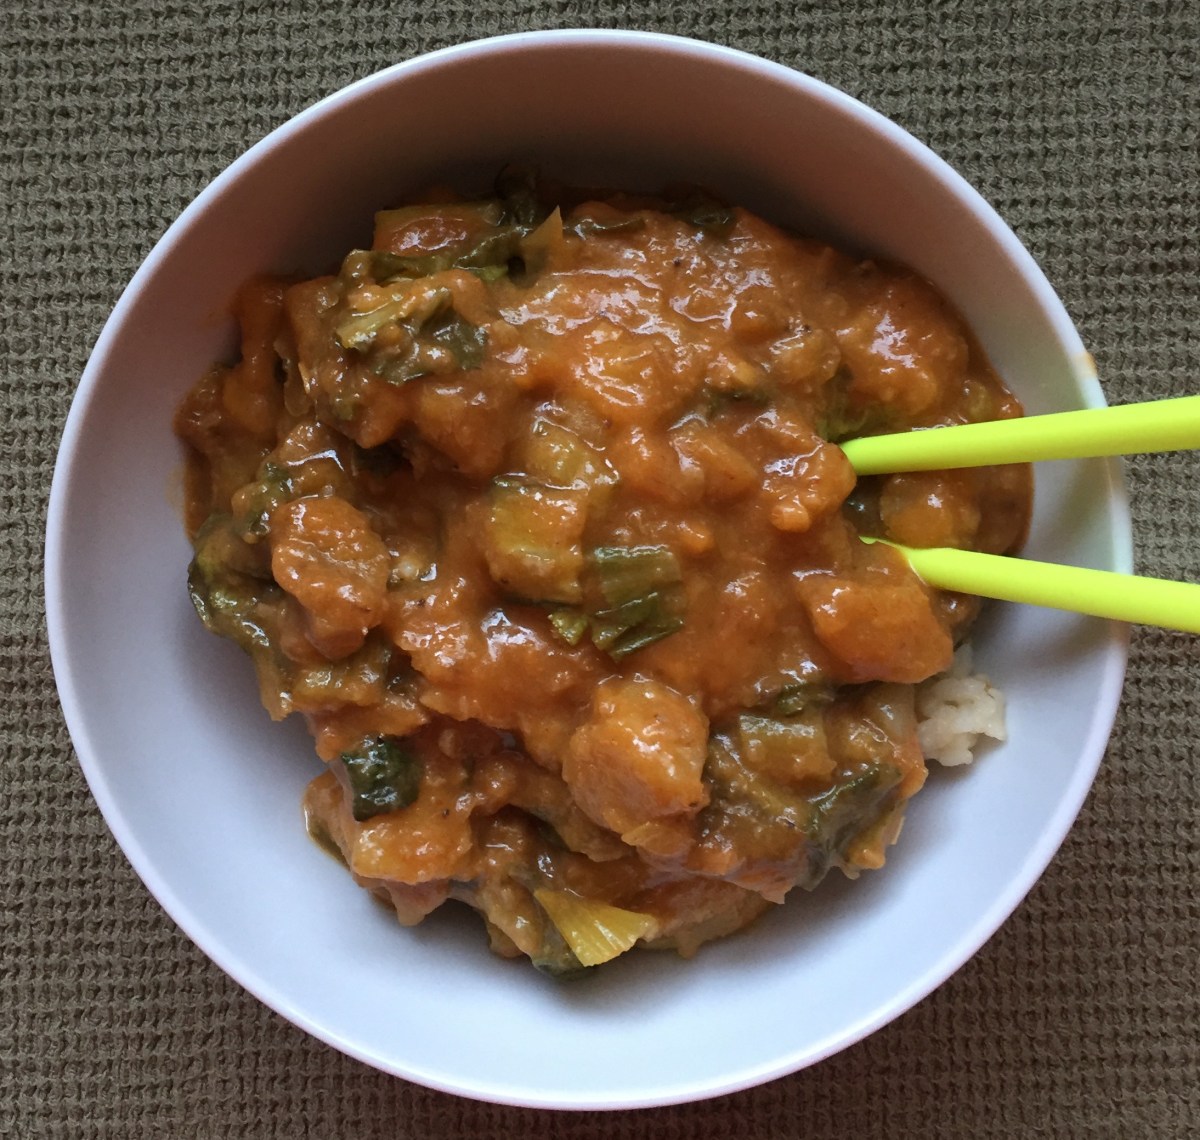
The curry itself is really super easy – it takes only one pot and about 30 minutes to get to a fragrant and rich red curry with a subtle level of heat. If you are looking to increase the heat, you can consider adding some finely chopped red Thai chili peppers, which punch some serious heat!
The basis of the flavor here is the combination of lemongrass and ginger, further fortified by the red curry paste (I used store bought but you can make your own – see below for the link to a great recipe). If you are buying your red chili paste in a store, do check the ingredients to make sure that there is no fish or oyster sauce in there.
Other than the flavor agents and plantains, you will also need bok choy, and if that is hard for you to find where you live, Napa cabbage, spinach, or even kale will work. The final flavors are going to be slightly different but the cooking times and the rest of the recipe will be about the same.
Finally, you can’t make a great curry without some coconut milk. You can use either full fat or low fat versions, just note that the curry with low fat coconut milk may need more simmering to remove access liquid. You may also need to adjust the amount of vegetable broth in that case as well. The final curry should be rich and thick, and goes really well over some simple boiled brown rice!
Thai Red Curry with Plantains and Bok Choy
What you’ll need:
4 super-ripe plantains
1 lemongrass, thinly sliced
2 inch ginger root, peeled and thinly sliced
2 tablespoons red curry paste (store bought or homemade)
3 pieces of bok choy, cut into bite size pieces
2 cups vegetable broth
1 can (15 oz) coconut milk (full fat or lite)
1 tablespoon cooking oil (canola or vegetable)
Rice or quinoa for serving
What you’ll do:
Preheat the oven to 425 F (220 C). Roast the super-ripe (almost brown) unpeeled plantains in a parchment paper covered roasting pan for 45 to 60 minutes. You can do this a day ahead – plantains’ skin will be completely black and the plantains themselves will be softened but not mushy.
Let the plantains cool completely before handling further. Peel the cold, roasted plantains and slice into bite size slices. Set aside.
Wash bok choy, shake off the excess water, then and slice into bite size pieces and set aside.
Place a large pan over medium heat, add the oil and thinly sliced lemongrass and ginger. Let the flavors develop for 1-2 minutes then add the red curry paste. Mix and let combine for another 1-2 minutes.
Add the diced plantains, and let them brown for 5-8 minutes.
Mix in the vegetable stock and the coconut milk, increase the heat and bring to boil.
When the curry is boiling, add box chop, lower the heat down and let simmer for 20 minutes or so. The longer you simmer the thicker the curry. Turn the heat off, and let the curry cool just slightly. As it cools the consistency will thicken further and be perfect for serving over rice or quinoa!
High Protein Noodle Soup, via Eat the Vegan Rainbow
Winter wonderland is all around us – at least for those of us who live in the Northern hemisphere somewhere above 30 to 40 degrees North. Unfortunately, in addition to all the fun stuff that winter brings, there are also the dreaded colds or even worse full on flus that get around. Just around the Christmas time as was waylaid by a serious cold – I call it a cold but it was more of a full body weakness and loss of energy with some minor runny nose and sore throat. I stayed in bed for a day, drank loads of fluids, and all was better in about 48 hours.
One things that really helped me power through is a soup I made, full of protein as well as mushrooms. It perked me right up, and kept me coming for more at a time when my appetite was not all that great. The main reason why I went for some soup at the time like this is thanks to the well-known, and scientifically slightly supported, power of the hot bowl of chicken noodle soup to make the cold go away.
The power of the soup resides to some extent to the fact that it is served hot – the steam helps with decongestion and is commonly recommended to get your nasal passages work again. Plus: soup, and other warm liquids, are easy to swallow and therefore usually gentle for the painful throat. And: when you are under weather, down with a cold, one of the best thing you can do is stay hydrated, something any soup will help you with.
But a soup like your old fashioned chicken noodle soup that you may have been chased around as a kid, have more hidden secrets. They are full of protein, as well as vitamins and minerals that come with those great vegetables hiding in there.
So, in my attempt to recreate the richness of flavors, level of protein, and intense apparent healing powers of the chicken noodle soup I went for, well, pure protein – pea protein powder and peanut butter powder, which is really almost all protein (but do check a label before buying to be sure and stay away from some of the products out there that add sugar!).
I also went for mushroom broth as it is deeper in flavor than a vegetable stock. I used store bought, but you can definitely make some on your own especially if you are looking for ways to use up all those mushroom scraps (this recipe is a great start). And to deepen the flavors further I recommend using soba noodles. These noodles are earthy, nutty and I simply love them! I use them in stir fries and soups, and always have them on hand in my pantry.
By the time this soup is ready, which is very quick indeed, you will be holding in your hand something that will make you feel better and go “mmmmmmm…”.
High Protein Noodle Soup
What you’ll need:
32 FL oz (1 L) mushroom broth (or vegetable stock if mushroom broth unavailable; homemade broth also a great option)
32 FL oz (1L) water
1/4 cup pea protein powder
1/4 cup peanut butter powder
1 tablespoon ground ginger
1 tablespoon curry powder
4 cups frozen or fresh broccoli florets
6.4 oz (180 g) soba noodles
1/4 cup Italian parsley, finely chopped
Freshly squeezed lime juice to taste
What you’ll do:
Combine mushroom broth, water, pea protein powder, peanut butter powder, ginger and curry powder in a large pot. Mix well to combine and remove any lumps that may form. You can also use a blender or a whisk.
Place the pot over the medium high heat and bring to boil.
Once the soup is boiling, add broccoli and the noodles, lower the heat and let simmer for 5-7 minutes. This should be enough time for noodles and broccoli to be cooked al dente – so soft but not mushy.
Turn the heat off, mix in the fresh parsley, and some lime juice for a bit of acidity, and serve. You can always serve with lime wedges, and let people add lime to taste themselves.
Veggie Patch Brownies, via Marisa Alvarsson with permission
For many people transitioning into plant-based eating comes with a bit of dessert and sweet treat anxiety. This is totally understandable and relatable – after all, almost all cakes, cookies, pies, puddings we know are made with loads of dairy products (cream, butter, milk, …) and, of course, eggs. So, vegan desserts may seem as unreal as unicorns!
The big secret, which is actually not as big as it used to be few years ago, is that you can have your vegan cake and eat it too. And the best part is that with embracing vegan and naturally sweetened cake and dessert making you get to leave all your less than healthy habits behind. What do I mean by that? Well, most if not all desserts are sweet and that usually means heaps of pure, refined sugar.
But, if you take a step back and offload all that added sugar what you’ll find is that there are plenty of naturally sweet ingredients out there. Different types of fruit may have immediately jumped to your mind, but the fruit is just the top of the iceberg. Natural sugars are in everything of plant origin since plants make sugars through a process of photosynthesis. So, we can trust plants to deliver lots of sweetness on their own, and the best thing we can do is learn how to let their natural sweetness shine through.
A new cookbook by Marisa Alvarsson, the blogger behind Miss Marzipan, achieves just that – letting fruits and vegetables shine through as key ingredients of desserts ranging from breakfast items, like pancakes, breads, puddings and porridges, to cookies and cakes, loads and loads of cakes. The new cookbook is called “Naturally Sweet Vegan Treats” and features more than 85 sweet treat recipes that offer lots of different strategies for those of us born with a major sweet tooth.
One of my favorite sweetener is roasted sweet potato, and I used it for a lovely chocolate mousse pie. I also experimented with using zucchini in baking which resulted in an amazing fruit cake. So, when I saw a recipe for “Veggie Patch Brownies” that includes both sweet potatoes and zucchini I had to give it a try. The recipe was super easy to make and it’s fun enough for the kids to get involved. The brownies were moist and full of chocolate, which is exactly as brownies should be! And those pesky veggies? You would not know they were there, so here is something you can offer to your picky eater and still feel great about your parenting skills. It’s win-win for everybody! These brownies are easy and delicious, and are definitely something that I look forward making again.
I followed the recipe below as given with one modification – I used roasted sweet potato purée as I think that roasting just brings the best out of the sweet potato. But, I am pretty sure you can use boiled, or canned sweet potatoes here as well.
REPRINTED WITH PERMISSION FROM “Naturally Sweet Vegan Treats” by Marisa Alvarsson
Veggie Patch Brownies
Oil-free with nut-and gluten-free options | Makes 12–16 brownies
½ cup (100 g) sweet potato purée
½ cup (75 g) grated zucchini, excess liquid squeezed out
1 cup (240 ml) almond milk or oat milk
⅓cup (50 g) coconut sugar
8 pitted medjool dates, soaked in boiled water for 10 minutes
1½ tsp (8 ml) pure vanilla extract
¾ cup (100 g) organic whole wheat pastry flour
¾ cup (75 g) pure unsweetened cocoa powder
1 tsp baking powderPinch of salt
½ cup (60 g) chopped walnuts
¼ cup (37 g) chopped dark chocolate, optional (but recommended)
Preheat the oven to 350°F (180°C).
Line a 9 × 9 inch (23 × 23 cm) square cake pan with parchment paper.
Blitz the sweet potato, zucchini, milk, sugar, drained dates and vanilla together in a food processor or blender until the mix is a smooth, soup-like consistency.
Tip this mixture into a large mixing bowl. Sift in the flour, cocoa powder, baking powder and salt. Gently fold to combine.
Add the walnuts and chocolate (if using). Fold in, but do not overmix.
Pour the brownie batter into the lined pan and smooth over the surface with a silicone spatula or the back of a large metal spoon.
Place on the center rack of the oven and bake for 20 to 25 minutes.
Allow to cool completely before frosting, if desired. Slice into squares to serve.
Recipe Notes: To make these brownies nut-free, use oat milk and omit the walnuts. To make the brownies gluten-free, use a gluten-free all-purpose flour and baking powder.
RECIPE AND IMAGES REPRINTED WITH PERMISSION FROM “Naturally Sweet Vegan Treats” by Marisa Alvarsson. NO FURTHER RE-PUBLISHING ALLOWED WITHOUT EXPLICIT PERMISSION OF THE ORIGINAL CONTENT CREATORS.
Disclosure: I received a free copy of this cookbook through a community of vegan bloggers. This did not influence my views about the recipes I tried thus far and mentioned above.
“Where do you get your protein from?” is probably the most detested question that those enjoying plant-based (vegan) diet get asked all the time. Of course, we know that this is an easy question to answer because plants are full of protein.
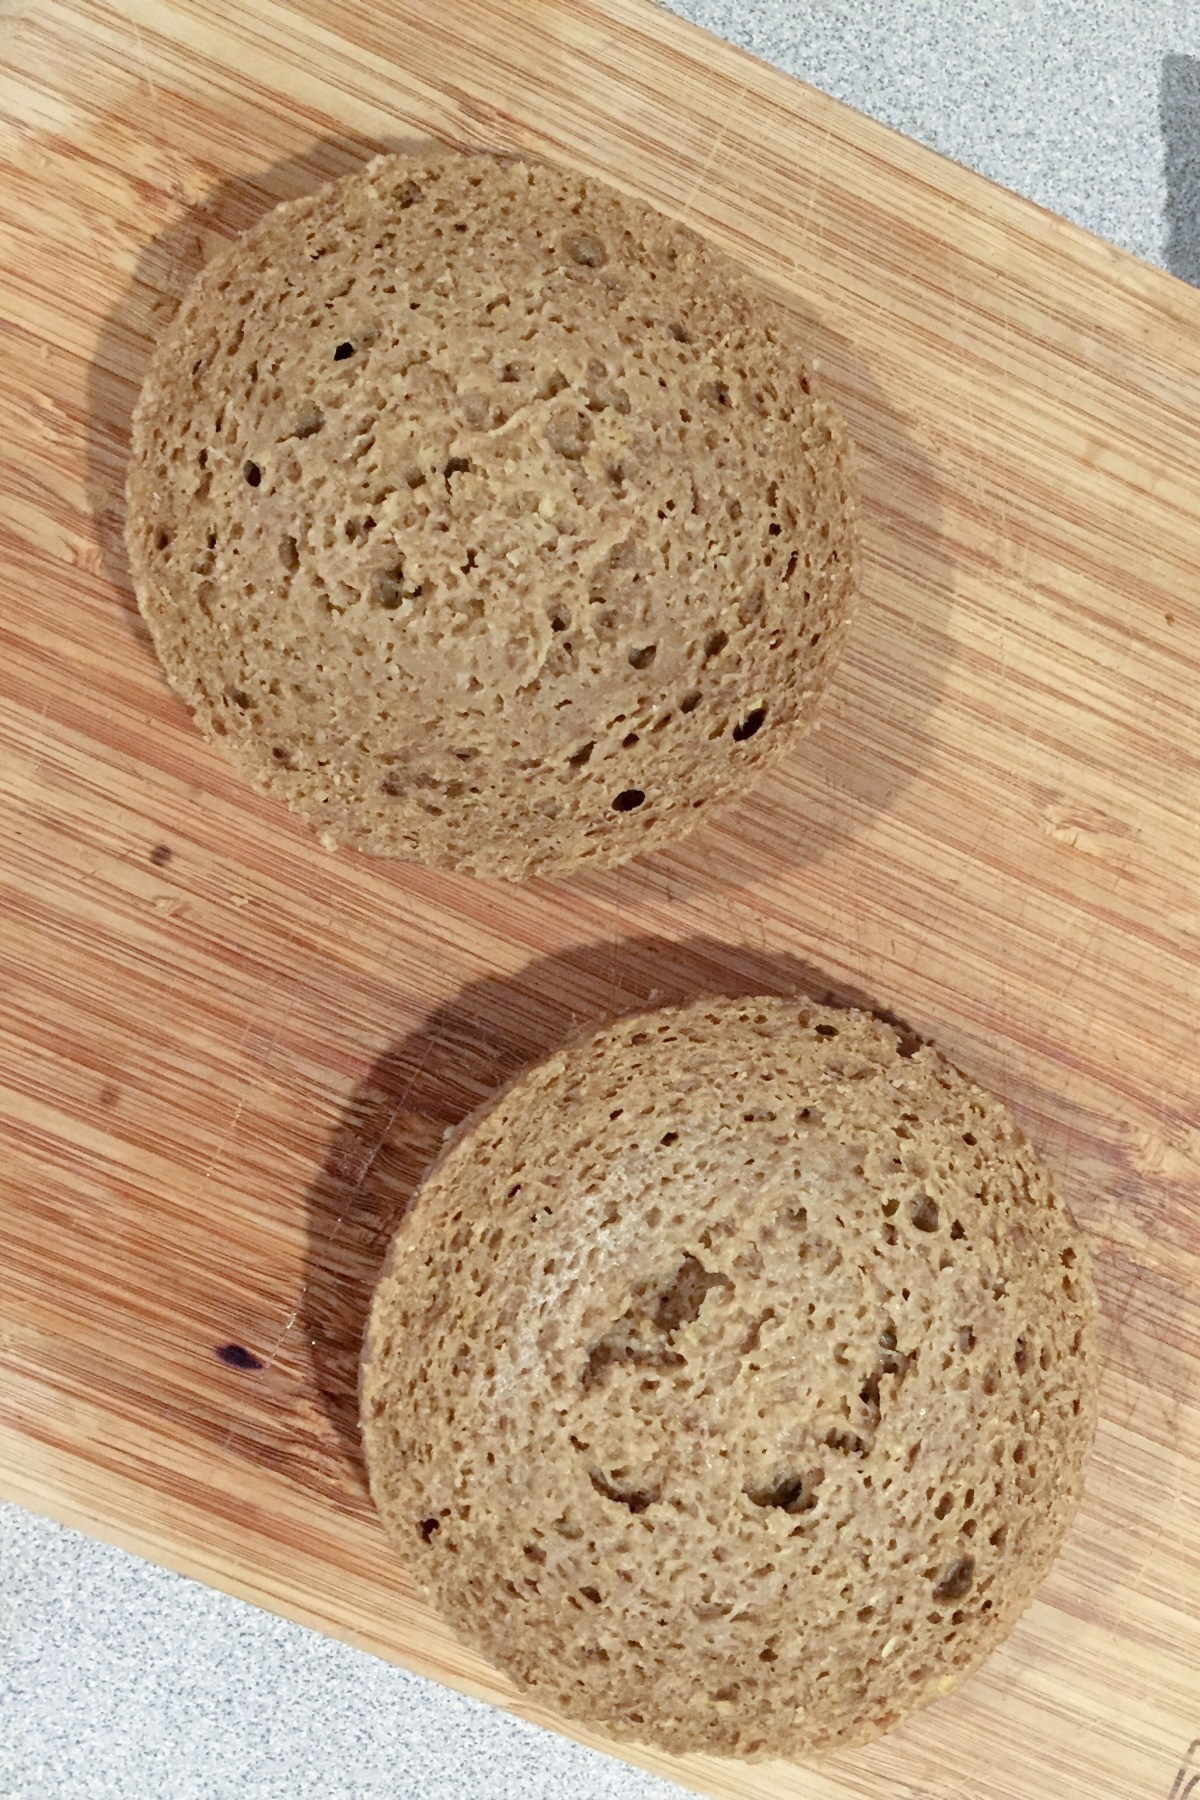
But just in case you feel that you need an extra protein boost, especially when it comes to breakfast, I have a perfect solution for you. How about some protein packed English muffins? Actually, these are not oven-baked; rather they are done within a few minutes using a microwave.
Perhaps you’ve seen recipes for mug cakes? Or you may have seen new “mug cake” product lines in your local supermarket? The idea is that you whip up your ingredients in a mug, mix them together and after 3-5 minutes in a microwave you have your single-serve cake or a muffin ready to enjoy.
I use the same basic idea here except that instead of eggs and flour I use pea protein powder, peanut butter powder (which is really peanut protein powder), some flax meal, baking soda, a dash of vinegar (or lemon juice) and water or plant milk of choice. Believe it or not, after 3 minutes in the microwave on high power you get a nice little muffin. I recommend slicing the muffin across horizontally, then toasting it for some extra crunch. Yummy!
So, how does this work? I don’t know for sure but I do have a working theory that the carbon-dioxide released when baking soda meets a splash of vinegar or lemon juice is enough to lift the “dough”, and once up the protein molecules have sufficient strength to support the structure.
The main trick here is not to make the mix too wet. When you mix your ingredients together, you will have something that looks more like a paste than a muffin batter. Don’t worry, this is as it should be. The best dish to microwave the muffin in is a 3-4 inch (8-10 cm) ramekin, and I recommend that you grease it with either a bit of butter or some cooking spray. A little will go a long way to help your muffin slide out.
Lastly: a note about microwaves. They are all different and have moods of their own. I recommend you start on high power, and check how things are doing after about 2 minutes. You should look for a dry looking top and sides that are coming away from the ramekin. At the end, the muffin should slide out of the ramekin without much resistance, usually after you run a butter knife around the edges to release the muffin.
Gluten-free and Vegan Protein-Packed No-Bake English Muffins
What you’ll need:
2 tablespoons pea protein powder
2 tablespoons peanut protein powder
1 tablespoon ground flax meal (golden is preferred)
1/2 teaspoon baking soda
1/4 cup and 1 tablespoon almond milk or water
1 teaspoon apple cider vinegar
Vegan butter (optional)
What you’ll do:
Place all the ingredients into a small bowl, and mix to combine. I recommend adding a splash of acid (vinegar or lemon juice) last. The batter will be dense and sticky, just FYI.
Pour the batter into a microwave safe ramekin or a mug that’s about 3-4 in (8-10 cm) in diameter and that has been greased with butter or sprayed gently with some cooking spray.
Microwave on high for 3 minutes or so. The top should be dry and look baked, and the sides should be coming of. If all is well, the muffin will slide out of the ramekin without much resistance after you run a knife around the edges. If not, it means that the bottom is still moist, and the mix needs to go back for another 30-60 seconds.
Enjoy the muffin as is, or toast if you prefer things a bit crunchier. You can top the muffin with butter, jam, hummus, avocado, fruit, or anything else you like. The muffin itself is neither sweet nor salty so lends itself to utmost customization!
Citrus Infused Pan-Seared Eggplant with Black Olives, via Eat the Vegan Rainbow
Simple may not always be better, but it is absolutely true that when it comes to vegetable side dishes keeping things simple and letting the vegetables speak for themselves goes a very long way. For example, grilling is one of the best ways to add a lot of flavor without any extra ingredients of complicated prep procedures. And eggplant is probably one of the most grill-friendly vegetables out there!
But, before the eggplant hits the grill (or a pan) it is important to soften it and let some of the bitterness drain out. Very often that means salting the sliced eggplant and letting it sit in between paper towels to absorb the moister that the salted eggplant will release. Doing this removes some of the bitterness that eggplant can sometimes have as well as make the eggplant less like a sponge.
This recipe does have one important trick that really elevates the flavors – rubbing the grilled eggplant slices with a clove or garlic to add that great garlic flavor! This is a trick that you often see used for making garlic bread to infuse garlic aroma into toasted bread – it avoids having to deal with raw garlic pieces, and it is very effective.
Finally, what makes this simple side dish come together is the lemon juice and lemon zest. This small amount of acidity and the freshness that lemon zest contributes really bring the simplicity to a new level. You can serve this elegant vegetable dish warm, as a side, or cold as a salad. Either way, give this a try and see whether you are with me when I say that simple is the way to go!!!
Citrus Infused Pan-Seared Eggplant with Black Olives
What you’ll need:
2 large Italian eggplants, sliced into rounds
1 clove of garlic, peeled
1 lemon, juice and zest
1 cup black olives, sliced
2-3 teaspoons coarse salt
Cooking spray (or olive oil)
What you’ll do:
Wash the eggplant, and slice into round slices (about 1/4 in (5 mm) in thickness). Place on the two layers of paper or kitchen towel, sprinkle with salt, then cover with another layer of towels, and let stand for 20-30 minutes. The salt will draw out some of the extra moisture out of the eggplant, and with it some of natural bitterness that eggplant sometimes has. Remove the paper towels, and pat dry the eggplant slices.
Put a large grill pan over the high heat to make the pan really hot. Reduce the heat to medium, then spray with some cooking spray or brush with some olive oil. Place eggplant slices on and grill on both sides in batches until all the eggplant is grilled. You can also use an outdoor grill or a regular pan. The point is to blacken and cook the eggplant through, which will take 3-5 minutes per side.
Use the garlic clove and rub the eggplant slices, so that they are infused with garlic aroma. Place the garlic rubbed eggplant into a large mixing bowl, add lemon juice, lemon zest, and sliced black olives. Mix well and you are done! If you like to add a bit more flavors to this simple side dish, you can drizzle some olive oil, sprinkle fresh parsley, or add a dash of crushed red pepper flakes if you are open to turning on the heat!
I transitioned to eating only plant-based food almost two years ago. At that time, I was not aware of the richness of plant-based cooking landscape and that this decision will be a major boost for my culinary creativity. Switching to vegan (plant-based) eating has been revolutionary!
How to transition to vegan (plant-based) eating?
Everyone has their own individual transition path, and it may take some time to recalibrate your taste buds to enjoy all the different flavors of vegan food. Also: it does take some time to learn some basic cooking strategies that elevate your plant-based home cooked meals to a status of scrumptious feast.
My personal mental transition took about two years. I’m a scientist so I looked at data based arguments that have been collecting around the scientific literature, and finally came to a conclusion that the best thing I can do for the health of the planet and my own health is to start eating a plant-based diet. Once I was mentally ready, the actual transition from eating non-vegan to eating vegan happened overnight.
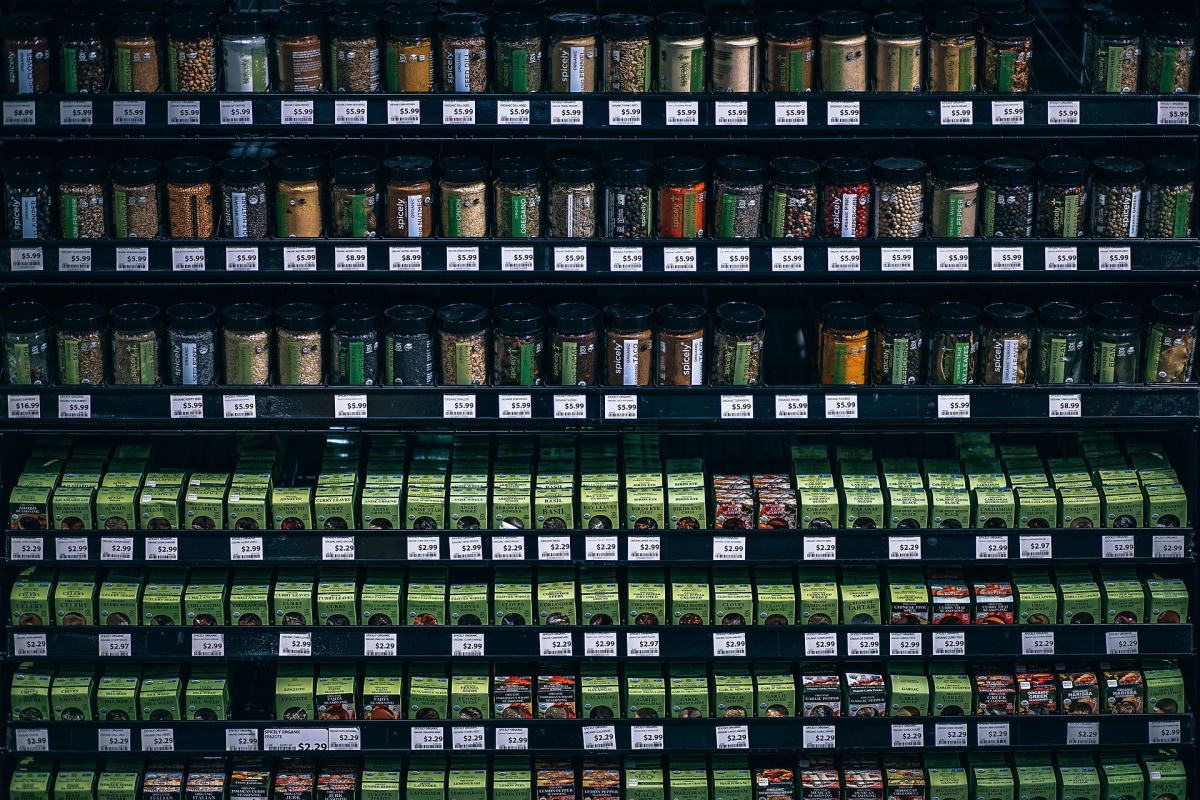
Basic Spice Collection, Image via Pixabay
How to maximize the deliciousness of your plant-based cooking?
No matter which path you take to get here, and no matter if you practice plant-based eating once a week, or 24-7-365, one key cooking skill that you should try to acquire is working with spices. Fruits and vegetables are delicious on their own, of course, but if you are cooking for picky eaters, or omni family and friends, or simply enjoy multidimensional flavors yourself, spices are your secret weapon. They become even more important if you want to minimize the amount of salt, fat (oil) and sugar (sweeteners of any kind) that you use in your cooking.
The selection below includes couple of items that are technically herbs (dried basil, and dried oregano) and liquids (vanilla and liquid smoke), but for every day simplicity (and against culinary books and schools), I call “spice” everything I can find in the spices isle in the supermarket. Also note that I actually have and use more spice than this and continue to discover new flooring agents all the time, but these are some of my favorites that I always have on hand for my everyday cooking as well as entertaining and holidays.
Finding the best deals on spices
Spices can be expensive, so here is a pro-tip: get your spices like cumin, curry powder, Garam Masala, turmeric, and cinnamon in an Indian store if you have one close by. If not, look for store brand, or the international isle in your supermarket. Spices that you can find there are usually half the price as those in the spice isle while being just as good. Trader Joe’s (if you have one in your neck of the woods) also has excellent prices, including on things like saffron. Having said all this, sometimes you will just have to be prepared to pay the premium price. My most expensive spice purchase was a batch of rubbed sage at the height of Thanksgiving shopping when all the cheaper options were gone!
Without further ado, let’s dive in into some essential spices and how to use them:
Dried basil and oregano
Fresh basil and oregano are great to have on hand, and if you are into gardening you can easily grow them, even indoors. But if you are like me – not born with a green thumb – then your next best thing is to have dried basil and oregano on hand at all times. Plus, there are some recipes where fresh herbs just don’t work, like these Roasted Tofu Steak Tips. The recipe I make almost weekly and which in turn uses lots of dried basil and oregano is a very basic marinara sauce (canned crushed tomatoes, garlic, dried oregano and basil, and olive oil – done in 10-15 minutes). Some other yummy food featuring dried oregano and basil are things like Basic Lentil Bolognese and Lentil and Pumpkin Meatloaf. One tip when using dried basic and oregano is to rub the herbs with the palms of your hands before using – that releases more of their fragrancy.
Garlic powder and onion powder
Summer’s hottest trend: Carrot Dogs, via Eat the Vegan Rainbow
There are many recipes that can’t be made without some good garlic powder and onion powder. And, in the same way dried oregano and basil go hand in hand, so do garlic powder and onion powder. These two powders are essential ingredients for any recipe that at the end of the day needs all the flavor but none of the chunkiness that even the finest mincing will not produce if you start from actual garlic and onion. Also, both garlic and especially onion have lots of moisture, and the powders are ideal for adding all the flavor without any added moisture. Recipes you often find these two powders in are many marinades, where they help transform a thing like plain old carrot into a Carrot Dog. Additionally, onion powder and garlic powder add a bit of their power to many mind bending recipes like Vegan Nacho Cheese, and Ground Beef Substitute!
Paprika
It is said that the best paprika comes from Hungary, and that may very well be true because, although peppers that are ground up to make paprika have originated from the area now known as Mexico, they have been cultivated into their sweet variety in Hungary. Having said all that you do not need to hunt for paprika labeled as “Hungarian” – all you need to pay attention to when picking paprika is to get the one that does not say HOT as paprika does come in a hot (very hot) version as well! Paprika you want is sweet and subtle, and you will love it in rich dishes like these Hungarian Lentils from a new The Vegan 8 cookbook, or this Jackfruit Barbacoa. Any time you want deep, rich flavor without the heat you would reach for some paprika!
Ground cumin, chili powder and smoked paprika
Cumin, chili powder and smoked paprika are three very different things, and you experiment and use them individually. But, their combined effect is much more than a simple sum of their parts especially for adding depth to veggie burgers. You can often find them in things like spice rubs as well, so if you are looking to add extra flavor to your grilled corn or other veggies I recommend you try brushing some of the cumin, chili powder and smoked paprika mix (1:1:1 works well, but you can play around and adjust to your taste). In a way this is a universally applicable spice combo for whenever you want that nice tex-mex flavor, like in these great stuffed zucchinis or for breakfast in this tofu scramble, or whenever you are craving a great bowl of chili.
Curry powder, garam masala and turmeric
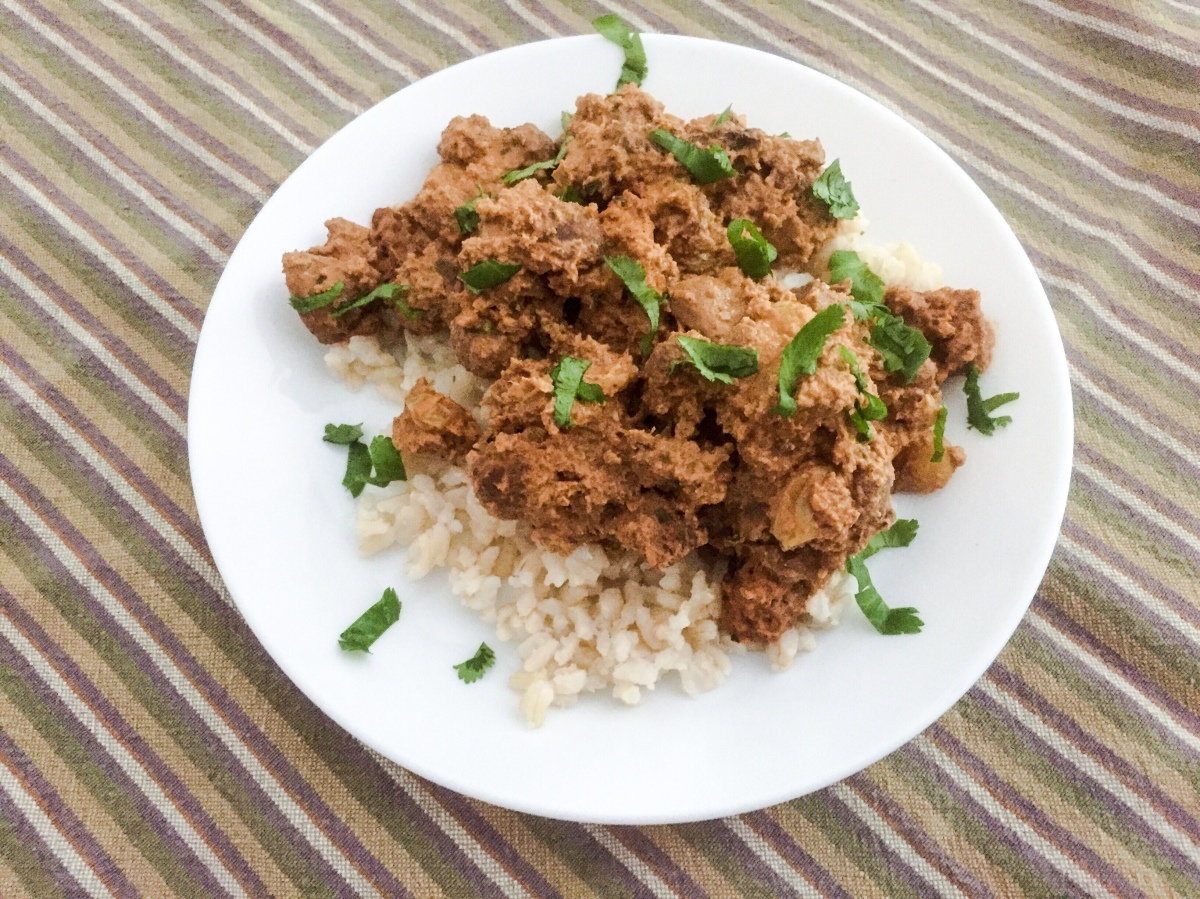
Vegan “Chicken” in a Nut Sauce, via Eat the Vegan Rainbow
Unlike cumin, chili powder and smoked paprika above, I combined curry powder, garam masala and turmeric into a single bullet point not because I recommend you use them all at the same time (although that could be done!), but rather because the three spices are essential for anyone interested in exploring Indian cuisine. Indian cuisine and flavors are varied and rich, and the number of spices the traditional Indian dishes use is much, much broader than just the three I mention. However, curry powder, garam masala and turmeric (together with already mentioned cumin) are the basics that go a long way towards dishes like Chicken-less Tikka Masala, “Chicken” in Nut Sauce, and Vegan Saag Paneer. Turmeric has another special role it sometimes play – it gives things a bright yellow color and can be used to give an appearance of eggs, like in these popovers.
Old Bay seasoning
Jackfruit “Crab” Cake, via Eat the Vegan Rainbow
Old Bay seasoning is a must-have for anyone craving fish and sea food. The seasoning is off-the-shelf blend that is quite salty so if you are watching salt intake or you can’t find this seasoning where you live, here is a great recipe for a homemade blend (LINK EDITED Sept-13-2020 as the old one stopped working) that comes very close to the original. Add Old Bay seasoning to your Crab-less Crab Cakes, New England “Clam” Chowder, Faux Lobster Rolls, and Tofu Fish Cakes or any other time you want to recreate that special flavor of the coastal cooking.
Liquid smoke
Liquid smoke is definitely not something that I ever thought I would be using, let alone recommending. However, it is essential when you are making recipes like BBQ Ribs, Grilled Tofu, or different kinds of smoked cheese, like this gouda. And: no bacon can ever be imagined without the liquid smoke, and there are many bacons out there. If you have not made “bacon” before, I recommend that you start with tofu bacon, tempeh bacon or coconut bacon, and if you are a bit more adventurous, rice paper bacon. Many also enjoy adding liquid smoke to their vegetable marinades or to things like meatloaf!
Ground cinnamon, ground nutmeg, and ground cloves
Pumpkin Truffles, via Eat the Vegan Rainbow
Not everything vegans eat is savory – there are lots of vegan sweets and treats out there as well! I kick my dessert making into high gear around the end of the year holidays, so for me ground cinnamon, ground nutmeg and ground cloves are essential. I usually use all three of them at the same time and usually in 1 teaspoon: 1/2 teaspoon : 1/4 teaspoon amounts from cinnamon (the most) to cloves (the least). This trends with the intensity of their flavor as well. To me nutmeg and cloves extend and expand the cozy flavor of cinnamon, so next time when you are baking a pie or making cookies that ask for cinnamon try adding the other two as well. Looking for inspiration? This zucchini fruitcake and these pumpkin truffles can be a good starting point.
Vanilla extract (and vanilla bean)
Of course no baking or other dessert making can be imagined without vanilla. When buying vanilla extract, look for “pure” on the label and stay away from imitation stuff. If you have a bit more funds to invest, then do get some vanilla bean. But: unless you plan to make things like nice cream, or raw cheesecake, vanilla extract is all you need because in my experience baking really removes the edge from vanilla beans and the uniqueness of their flavor gets completely lost.
No matter where you start with your spices, remember that spices are supposed to be experimented with, mixed and matched and that more often then not it is the mix of spices that creates an amazing flavor rather than a single spice alone. Enjoy!
Winter squash – they come in what seems to be an endless number of varieties. If you ever find yourself wondering whether you have a summer or a winter squash, all you have to do is take a look at the seeds. All summer squash are picked before their seeds are fully formed and mature, while the winter squash is left on a vine to ripen until seeds are fully formed. So when you cut winer squash, you will find a bunch of seeds that you can often enjoy in their own right, usually roasted.
The types of squash that I can easily find in New England (USA) are acorn, butternut, buttercup, hubbard, and spaghetti squash, which makes lovely Pad Thai among other things. And, of course, pumpkin, which reigns supreme among others in terms of availability and easy of use given that I go straight for the can. Canned pumpkin purée (note: not the pie filling!), is a nice addition to many recipes, including meatloaf, as well as truffles. Actually, all winter squash are quite versatile and can be made into both savory dishes and main courses, as well as dessert.
Winter Squash, image via Pixabay
One of my favorite way to prepare winter squash is roasting. Roasted squash is delicious, and does not require much work to get the roasting going. After it cools, you can enjoy roasted squash as is, or cube it, or purée it for use in number of different recipes, including the risotto below.
The inspiration for this risotto came from my search for ultimate comfort food. It struck me that combining soft and creamy rice, like the one you get in a well-cooked risotto, with slightly sweet and earthy winter squash is likely to deliver. And: I was right! What helps this risotto come together is nutritional yeast, which I use quite liberally, and bay leaf and thyme, two herbs that infuse the risotto with flavor. Here, I used vegetable stock, but you could use water, or mushroom stock if you like. The texture will not change, but the flavors will. Also: the recipe below does not include salt, so use as much or as little as you like.
The most important thing you need when cooking the risotto is patience, and adding the cooking liquid gradually and in small increments to allow the rice to absorb all the liquid bit by bit. At the end, I always find that risotto uses more liquid then what I expect, so here I recommend having a quart (about 1 L) of stock ready, but add it in small increments. Another thing that a good risotto needs is lots of stirring, so get ready!
Rich Risotto with Roasted Winter Squash
What you’ll need:
1 onion, finely diced
4 stalks celery, diced
2 cups winter squash (or pumpkin) purée (see below)
1 cup medium or short grain rice (for example Arborio)
1/3 cup nutritional yeast
up to 4 cups (1 L) vegetable stock, divided
4 bay leaves
6-8 springs of thyme, laves only
1 tablespoon olive oil
What you’ll do:
I recommend using homemade roasted winter squash for this and any other recipes. Which means that your first step would be to clean and roast the squash until soft and fully roasted. This usually takes about 45-60 minutes at 425F (220 C) oven. You only need 2 cups of puréed squash for this risotto, so you will have some leftover for other things, like soups, pies or even hummus. If you are short on time but still want to enjoy this risotto, go for canned pumpkin. One 15 oz (425g) can of plain pumpkin (NOT pumpkin pie filling!) will do the trick here.
Place a large high-sided skillet over medium to medium-high heat. Add oil, diced onion and celery and let sauté for 5-8 minutes until done. Add puréed squash, mix well and sauté for another 3-4 minutes.
Add the rice (without rinsing it, so that you retain all the sticky starch that will make the final risotto extra creamy), mix well and let the rice brown just a little bit on its own, for about 3 minutes.
Add 2 cups of vegetable stock, bay leaves and thyme leaves and mix well. Bring the risotto to boil then lower the heat down to simmer. Check every 3-5 minutes, mix again and add more stock in 1/2 cup intervals as needed.
After about 15 minutes, mix in all the nutritional yeast, and continue to simmer. Continue to check every 3-5 minutes and add more stock gradually. Any risotto needs lots of attention, and adding the liquid in small increments. So, be patient! The rice should be fully cooked in about 25-30 minutes (fully cooked here means that the rice will not be completely mushy and give sort of al dente resistance when you bite into it.
Serve your risotto warm and enjoy with a nice glass of wine, some olives, or perhaps some nice Giardiniera (Italian pickled vegetables), which I love. That little bit of nice acidity complements the creaminess of this risotto really well.
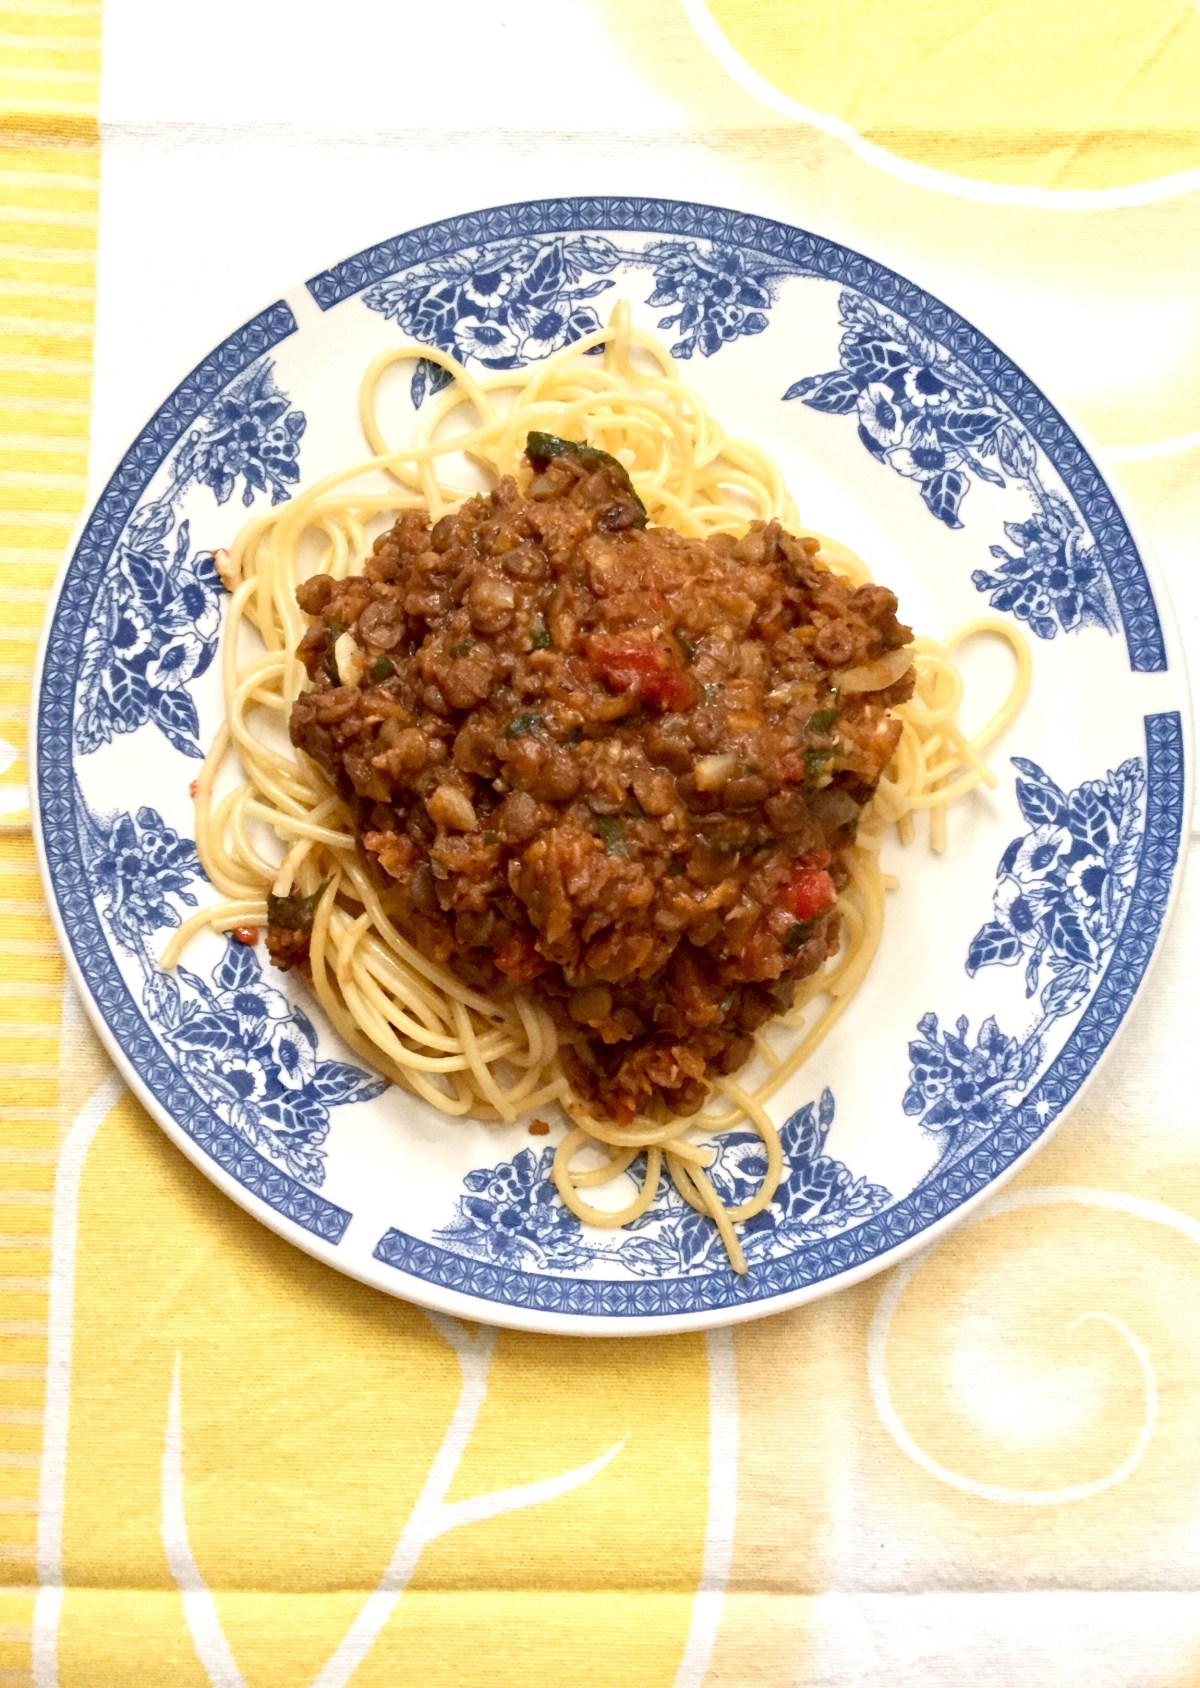
When I was a college student, one of the most despised items served in the campus cafeteria was lentil stew. I can’t even remember the flavor now, but I remember that nobody really liked it so there was always plenty of it left over. So, every time I would run late from a class to lunch, I would end up with a bowl of lentil stew!
Things have, of course, changed quite dramatically since my college days, and I now make lentils almost every week and really enjoy them as a healthy, cheap and tasty ingredient. They are a great source of protein and they are versatile. Once cooked, they can be made into soups, burgers, or delicious Shepherd’s Pie, which I recommend you make and serve to everyone questioning your plant-based (vegan) diet and lamenting that they would never be able to give up meat!
Because of their texture and size, they are often used as a substitute for minced meat. That’s why they work really well in this simple Lentil Bolognese sauce. I hope you enjoy it and share with friends and family, neighbors and the world!!!
Basic Lentil Bolognese
What you’ll need:
200 g brown lentils, cooked
4 carrots, grated
1 yellow onion, diced
4 cloves garlic, thinly sliced
1 can (14.5 oz; 411 g) diced tomatoes
1 tablespoon dried basil
1 tablespoon dried oregano
1/4 cup fresh Italian (flat leaf) parsley, chopped
Freshly ground black pepper to taste
Salt to taste (optional)
Regular or gluten-free pasta to serve, cooked according to the instructions on the packaging
What you’ll do:
Wash the lentils and check them for any non-lentil bits – sometimes little stones and bits can end up in the lentil bag so it is always a good idea to check. Place lentils into a pressure cooker, cover with water, and cook for 10-25 minutes once the pot is fully pressurized. Please note that the time may vary depending on your pressure cooker and you actually can cook your lentils in a pot and skip the pressure cooker all together. You are aiming for lentils that are soft but not mushy.
Place a large pot over medium high heat, add oil, grated carrots, diced onions, and sliced garlic and cook for 5-8 minutes, mixing frequently. Next add the cooked lentils, basil and oregano, and finally diced tomatoes. Lower the heat down to low and let the sauce simmer for 15 minutes or so.
Turn the heat off, then mix in fresh parsley, freshly ground pepper and salt to taste. Serve over pasta or over mashed potatoes!
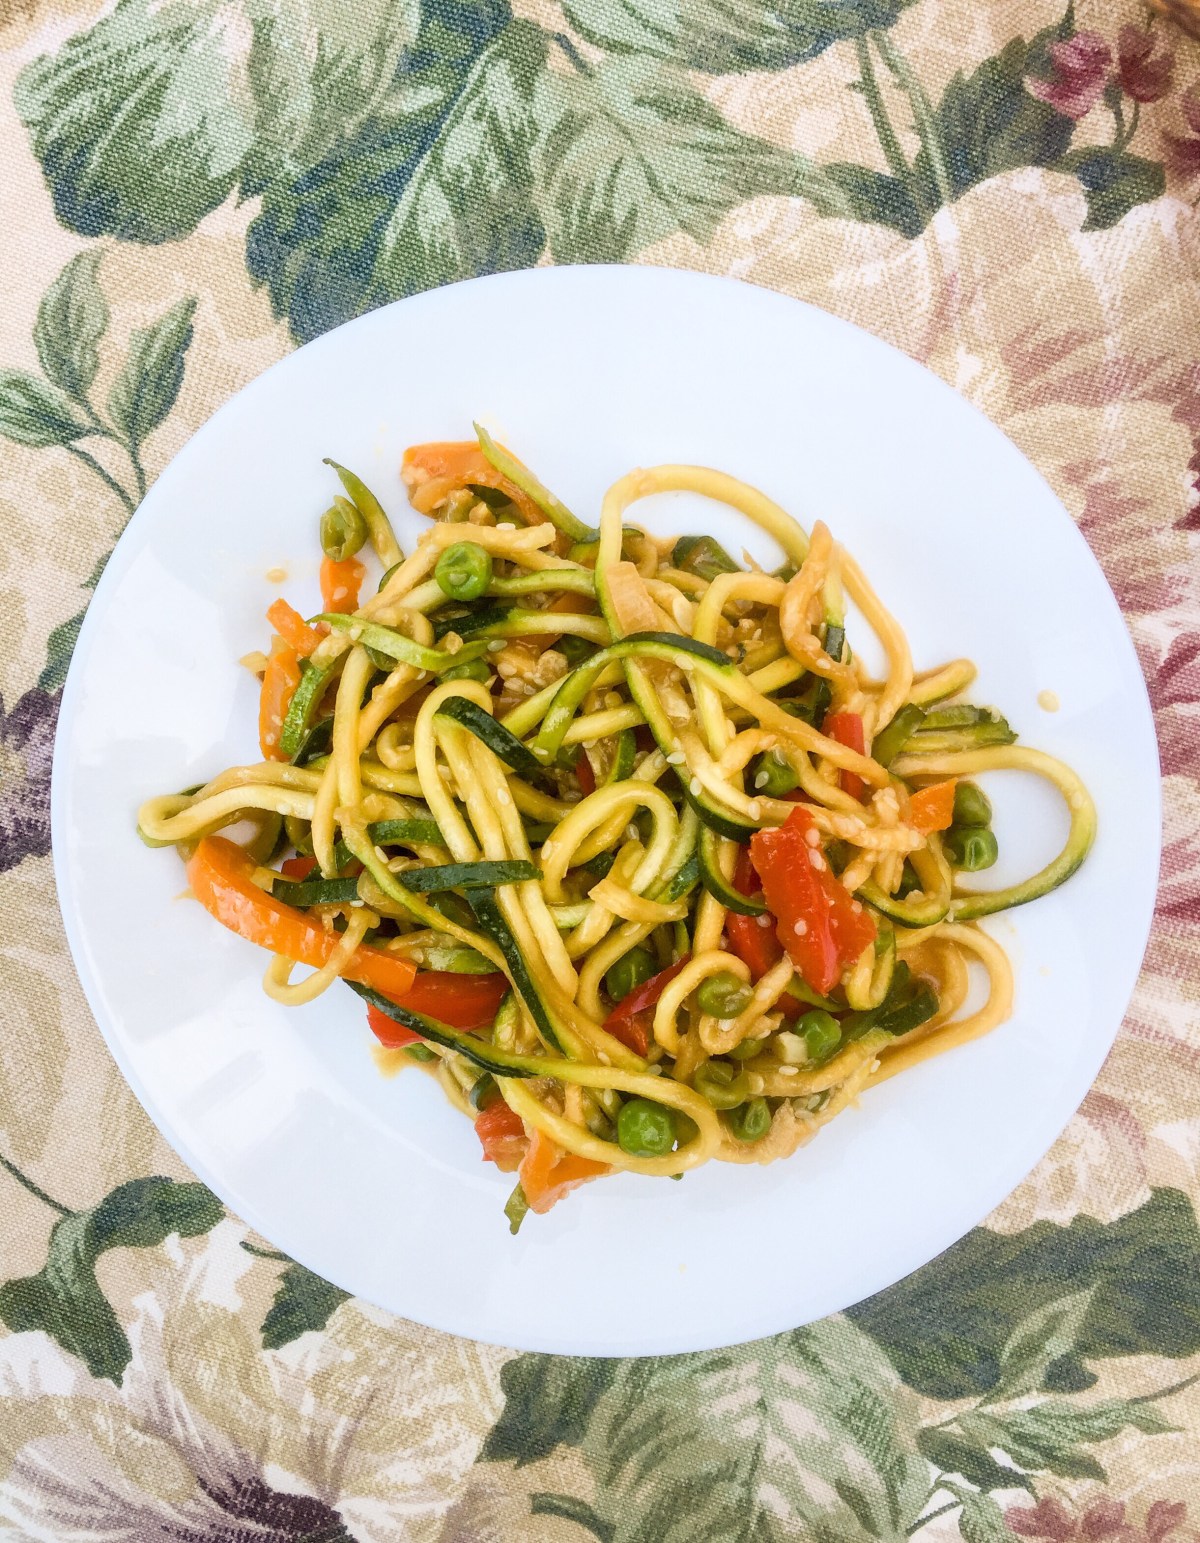
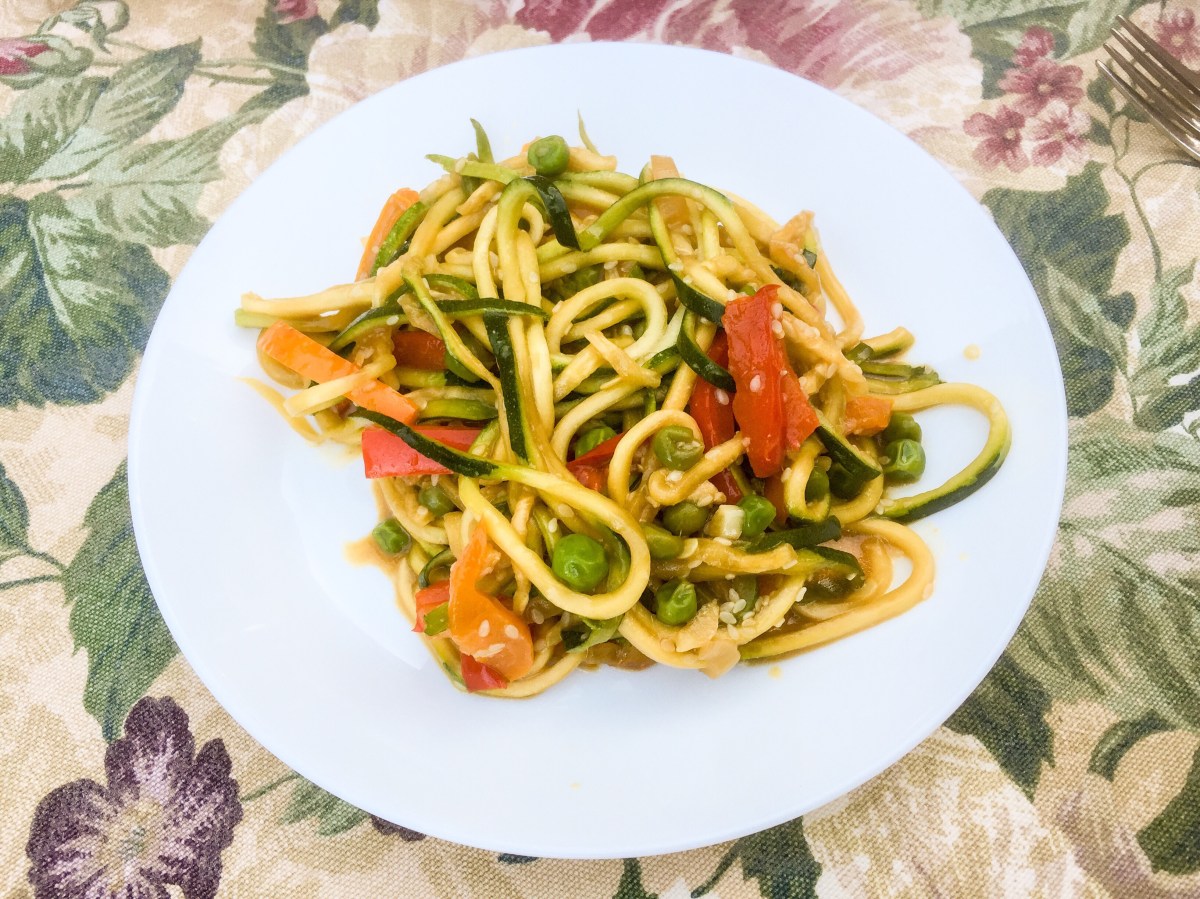
Simple Vegetable Stir-Fry with Zucchini Noodles, via Eat the Vegan Rainbow
We all love pasta and noodles, right? From tiny little noodles in our alphabet soups, to long and slurpy noodles like spaghetti, we can’t get enough of them. Noodles are cheap, easy to make, and taste fantastic. So what’s not to love?
Well, for those who are trying to cut down carbs, noodles are mostly off limits. And although there are many alternatives to noodles made with gluten, they may be unavailable where you are, or out of your price range, leaving those with gluten sensitivity and allergies with no options. Plus, noodles are processed so not an option for those following whole food plant based diet.
Believe it or not, here vegetables can help. First of all, there is the spaghetti squash that makes – and yes this is true – thin spaghetti. I used this squash to make a really authentic Pad Thai. And then there is a range of vegetables that can be transformed into noodles with a spiralizer, one of my must-have kitchen gadgets. By now I have tested a number of vegetables and my favorite are zucchini noodles.
What are zucchini noodles?
Zucchini noodles, or zoodles for short, are spiralized zucchini that’s been growing in popularity in US so much so that you can now get them from your local grocery store. Next time you are grocery shopping, check our your produce section, more specifically the area where you can find pre-chopped packaged produce. This is where I found my first box of zoodles. I really loved them, so I made a long-term investment and acquired a spiralizer – mine is a KitchenAid attachment and works OK (3 out of 4 stars if I had to rate it; if anyone wants me to elaborate feel free to leave a comment below)!
As a side note: the investment into a spiralizer has been worth it, since I use it frequently to create zoodles and other types of spiralized veggies, like summer squash, potatoes and carrots.
Zucchini are my favorite vegetable to spiralize because they create these nice, long noodles that hold their shape well, taste great and look amazing. They are delicious with meatless meatballs, and thats a fact!
How to cook zucchini noodles?
If you google “zucchini spaghetti” you will find a ton of great recipes. But, you will also find posts and warning that you should not be fooled, and that zucchini ain’t pasta! To that I say – you are right, zoodles are no noodles. What I mean by that is that in order for noodles to come out really great, they can’t be cooked the same way, so no boiling big pots of water allowed. To get to great zoodles, you need to sauté them for just a few minutes. These noodles are soft and gentle, and if you push them to far you will end up with a mushy mess. So, cook them only briefly and handle with care!
And what about using zucchini noodles in a stir-fry?
That’s the question I wanted to answer myself. The recipe below is the result of figuring out how to use zucchini noodles in a stir-fry, as well as how to make gluten-free hoisin sauce. For a great result with zoodles in a dish like stir-fry add the “noodles” last and let them cook for only 2-3 minutes than turn the heat off and let them rest for couple of minutes before serving. This will soften them up but not make them mushy.
The main secret to a perfect stir-fry in general is a great wide and deep pan, like a wok, that allows a nice temperature gradient from the bottom, usually kept really hot, to the top of the sides, that are cooler. For this stir-fry I recommend medium high heat, which allows me better control and decreases the likelihood that something will get burned.
Another tip is to add things gradually, starting from those ingredients that need longer stir-frying times, in this case red and orange pepper sticks, to those things that need just a couple minutes, like the noodles. Taking it step by step will help all the vegetables cook at just the right level of doneness.
Homemade gluten-free hoisin sauce
Another ingredient that makes this stir-fry over the top delicious, is the hoisin sauce. It may come as a surprise to some that most hoisin sauces out there are not gluten-free, so if you are avoiding gluten, you will need to read your labels carefully. Although you can find brands that make gluten-free hoisin sauce, it is actually very easy to make some yourself. All you need is a bit of miso paste (check your miso paste label to make sure it is gluten-free since some may not be depending on what grain was used for fermentation), liquid aminos (or tamari sauce, a gluten-free alternative to soy sauce), dark molasses, and a dash of toasted sesame seed oil – whisk it all together and you are done! Here, I skipped sesame seed oil since I am using actual sesame seeds, but you can change it up as you like.
I recommend adding the sauce, mixed in with some arrowroot powder as a thickening agent, before the zoodles. The arrowroot needs few minutes to start working, so getting the sauce nice and thick before adding the more fragile zucchini noodles helps. At the end, all is left to say is – grab yourself a plate and pile this stir-fry high!
Simple Vegetable Stir-Fry with Zucchini Noodles
What you’ll need:
FOR GLUTEN-FREE HOISIN SAUCE
2 tablespoons white miso paste
1/4 cup tamari sauce (or liquid aminos)
1/4 cup dark molasses
1 teaspoon toasted sesame seed oil (optional)
Plus:
2 tablespoons arrowroot powder
FOR STIR-FRY
2 tablespoons vegetable oil
6 cloves garlic, finely sliced
1 inch (2.5 cm) piece ginger root, thinly sliced
1 red pepper, cut into 2 inch (5 cm) strips
1 orange pepper, cut into 2 inch (5 cm) strips
1/4 cup sesame seeds
1 1/2 cups peas, frozen
4-6 cups spiralized zucchini, store-bought or homemade
What you’ll do:
Spiralize the zucchini – to make 4-6 cups of zoodles you will need to start from 2 medium size zucchini. Set aside.
In a small mixing bowl combine all the ingredients for the hoisin sauce (except arrowroot powder/flour – that is not part of the sauce recipe, it is a thickener for the stir-fry), mix well and set aside. Note: this is a basic hoisin sauce recipe and if you are not gluten-sensitive/intolerant, you can definitely use the store-bought variety, in which case use 3/4 cup of the sauce. Plus: you can use this sauce recipes for any other dishes you are making, like fried rice and similar.
Place a large wok, or a large and deep frying pan with curved sides, over medium high heat. Add thinly sliced garlic and sauté for 1 minutes, then dd thinly sliced ginger and let garlic and ginger release their aromas, about 1-2 more minutes.
Add red and orange pepper strips, and sesame seeds. Mix well and let the peppers sauté for 10 minutes.
Add frozen peas and continue cooking and stirring for 5 minutes or so.
Add the arrowroot powder (flour) into the hoisin sauce and mix well to make sure the mixture is smooth and there are no visible clumps. Note here: if you don’t have arrowroot powder, corn starch will work as well.
Add the hoisin sauce slurry into the stir-fry, and keep stirring for 1-2 minutes until the sauce thickens slightly.
Add the zucchini noodles last, lower the heat to medium, and using a pair of kitchen tongs fold the zoodles in gently. Let the noodles cook for 2-3 minutes, then turn the heat off and let the stir-fry cool for couple of minutes before serving.