Sunday Morning Cookbook Review “Modern Raw”

Modern Raw cover.jpg
Reprinted with permission from Modern Raw by Rachel Carr, Page Street Publishing Co. 2019. Photo credit: Rachel Carr.

Most of us have been raised on cooked food. My family always had a not only cooked but warm meal for lunch – the largest meal of the day in the culture I grew up in – and I don’t remember ever not having at least two courses, usually a soup to start with, followed by a main course accompanied with a salad. So, needless to say, my mind was pretty much conditioned to think that cooking food is essential and that even most vegetables have to be cooked first before you can eat them.

I’ve learned later, when I started making my own food and venturing out into new culinary areas, that you can actually eat most of the fruits and vegetables raw. That insight did not necessarily changed by cooking habits – I still use heat to prepare food I eat – but it did open me up to raw options. I am currently actively trying to get as much raw food into my diet as possible, mostly because raw food is extremely easy to make. You only have to peel a banana, or rinse some tomatoes, and bite in!

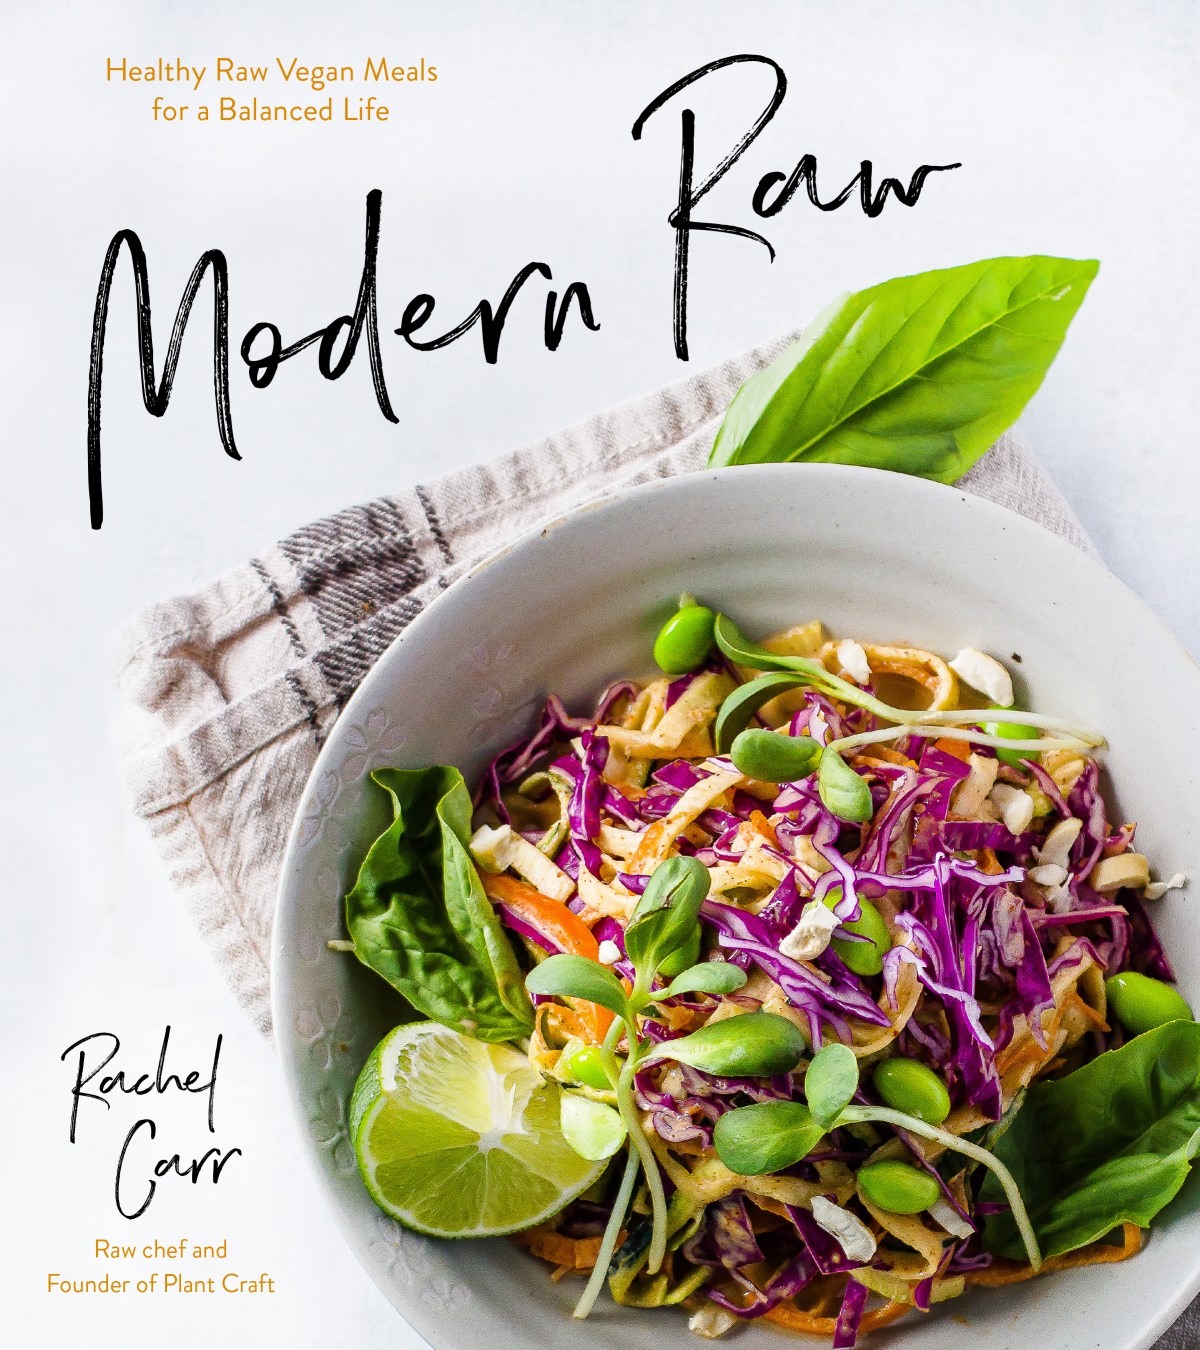
So, I was excited to receive a copy of a new cookbook called “Modern Raw” by Rachel Carr. Rachel has put together a great collection of recipes that provide options for breakfast, lunch, dinner and dessert that require no cooking. And Rachel also provides some great practical advice for those of us for whom exclusively raw diet maybe a bit too much to handle. Her approach is down to earth and practical: try to incorporate as much raw food into your diet every day but don’t stress over it. Plus: be open to trying something new by exploring some old time favorites with a raw twist.

The recipe below is an example of that. It’s taking a lasagna recipe and making it raw – with fresh tomatoes, basil, zucchini and some rich cashew “ricotta”. This type of food pre and eating means that you are eating the freshest ingredients at their peak. So, in many ways eating raw is the celebration of farm-to-table culture and eating local.

One surprising thing I learned from Rachel is the idea of preparing some of the food at low temperatures, not higher than 118F (48C). I was not aware of this option – gently heating and softening some of the produce to make them more palatable or making “bread”-like things, like pizza crusts. Rachel uses a dehydrator for maintaining low temperature for hours, and although I have not tried this (and don’t currently own a dehydrator) it sounded like an interesting idea to me.

All in all, this is a useful cookbook for anyone interested in vegan raw, and simplifying some of their everyday cooking.
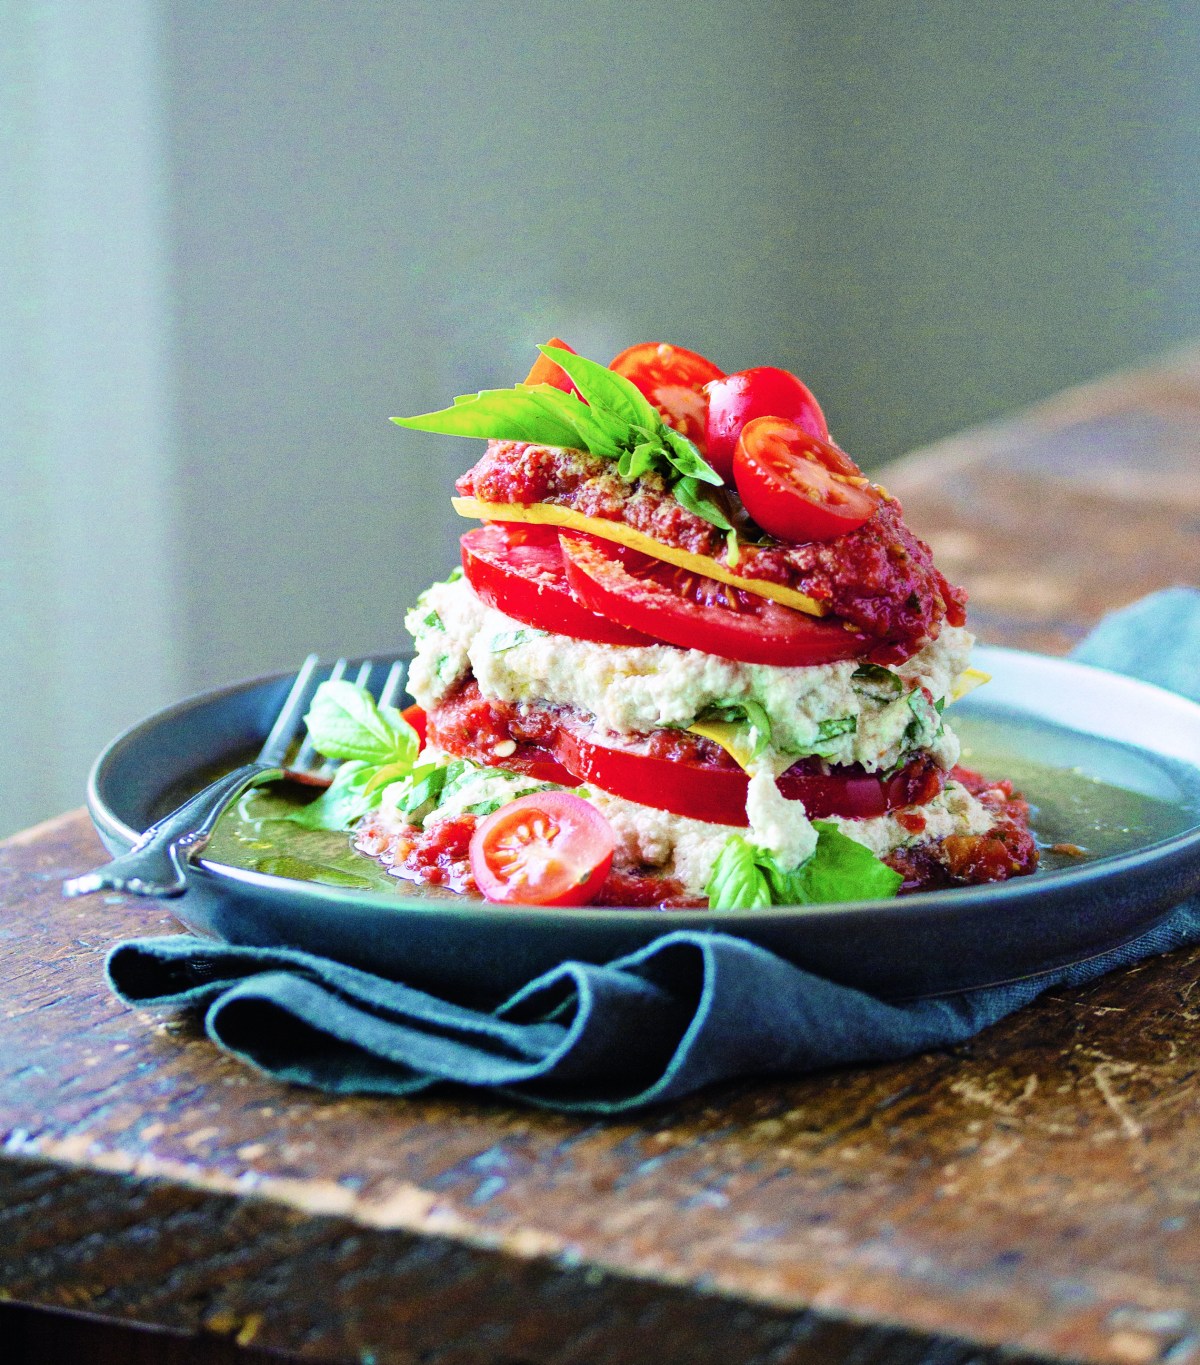
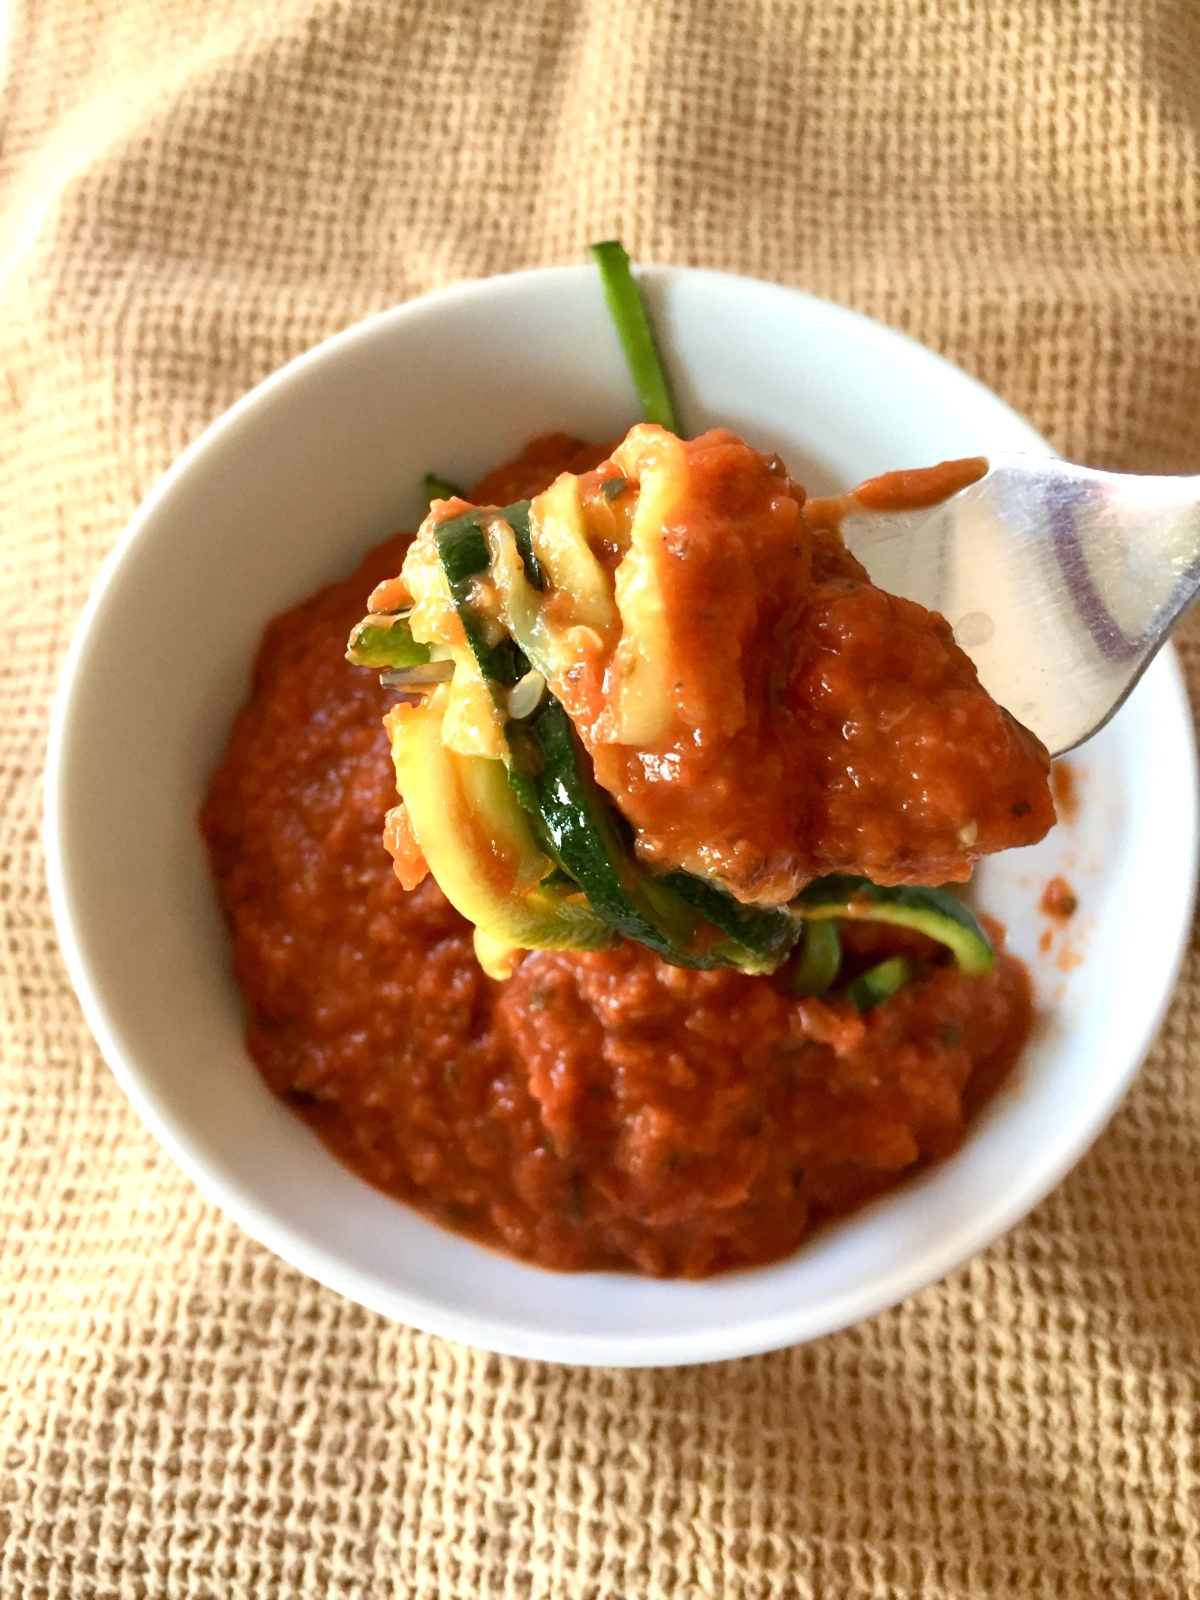
Modern Raw Zucchini Lasagna
Reprinted with permission from Modern Raw by Rachel Carr, Page Street Publishing Co. 2019. Photo credit: Rachel Carr.

Zucchini Lasagna

Layered dishes like lasagna make a stunning presentation perfect for entertaining but are actually quite easy and fast to make. This version of lasagna is simply made with a hearty cashew ricotta layered with fresh basil, sliced zucchini and tomato, plus a raw tomato sauce for a genuine Italian flavor. It just takes a few minutes to throw together if you have your sauce and cheese prepped in advance. Sometimes I like to add marinated kale and mushrooms to the dish in the wintertime, but you can stick with tomatoes and zucchini in the summer when they are at their seasonal best.

Serves 2 to 4

Marinara Sauce

1½ medium vine-ripe tomatoes

1 tbsp (15 ml) olive oil

¼ tsp salt

Pinch of freshly ground black pepper

1½ tsp (4 g) nutritional yeast

⅛ tsp garlic powder

⅛ tsp onion powder

1½ tsp (2 g) chopped fresh parsley

½ sun-dried tomato


Raw Lasagna

1 medium zucchini, washed and sliced lengthwise

1 cup (248 g) Cashew Ricotta (page 61)

1 cup (24 g) fresh basil leaves, washed and stemmed, plus more for garnish

2 medium tomatoes, sliced into ¼” (6-mm)-thick slices

1 cup (178 g) cherry tomatoes, sliced

2 tbsp (16 g) nutritional yeast, for garnish (optional)

Extra virgin olive oil, for garnish (optional)


To make the marinara sauce, wash and seed the vine-ripe tomatoes, chop them roughly and place in a food processor. Pulse until a chunky sauce is formed. Add the rest of the sauce ingredients and pulse a few more times. Set aside until ready to use.

For the lasagna, wash and slice the zucchini lengthwise either on a mandoline slicer or very carefully by hand to make sure the slices are even thickness, less than ¼ inch (6 mm). Cut them into 4-inch (10-cm) lengths. Then, slice the tomatoes into ¼-inch (6-mm)-thick slices and set aside.

To build the lasagna, lay down 2 slices of the zucchini side by side on a plate. Spread some of the cashew ricotta onto the prepared zucchini slices. Top with some basil, sliced tomatoes and marinara. Lay another layer of zucchini on top and repeat with more cashew ricotta, basil, tomato slices and marinara. Top with a final layer of zucchini, marinara and some cherry tomatoes. Garnish with some pretty pieces of fresh basil and a sprinkle of nutritional yeast, if using. Drizzle with olive oil, if desired.

note: This dish should be served very soon after assembling, as it will start to get runny if left to sit for any length of time. Instead, try making the individual components ahead of time and building the lasagna right before serving.

Reprinted with permission from Modern Raw by Rachel Carr, Page Street Publishing Co. 2019. Photo credit: Rachel Carr. 

Disclaimer: I received a free copy of Modern Raw via the publisher; however the opinions above are my own!


Vegan Take on Smokey Shredded Pork and Beans

Vegan Smokey Pork and Beans
Vegan Take on Smokey Shredded Pork and Beans, via Eat the Vegan Rainbow

If you Google “Pork and Beans” the first thing that pops up is the Weezer‘s music video for their “Pork and Beans” hit made more than ten years ago. Armed with YouTube celebrities of the day and a pile of erupting Diet Coke + mentos experiments, it is a site to behold!

This, on the other hand, is a story of actual pork and beans, well not the actual pork part of it, but the vegan version that works. But, the final dish is a real team effort as was the crazy Weezer’s video. What do I mean by that? Well, none of the ingredients below would work on their own to re-created deep flavors of smoked meat. Put them together (and treat them right!) and they will deliver.

The base for this concoction are onions, carrots, and celery, which you will need to chop and slice relatively finely, then let caramelize, and even burn, over medium-high heat until cooked. And when I say burn, I mean burn – you definitely don’t want to end up with a black mess but I want you to let some of your base vegetables get a bit black. The char will help the sauce get it’s final deep flavor. The best way to accomplish this is to stop mixing the veggies towards the end and let some of them stick to the bottom of either the Dutch oven, or a large cast iron pan – I recommend using either one of those here.

Additional things that will help the flavor are liquid smoke and/or mesquite powder and chipotle chiles in adobo sauce. There is lots of heat in the chilis so unless you are a real lover of hot food, I recommend you go easy and you use only the sauce. You can store the leftover chilis and the sauce in the air tight container in the fridge for a month and use in other dishes. If you don’t have any of these on hand, some smoked paprika and chili powder will probably work – I have not tried this substitution but I’m guessing you’ll be fine.

You will also need plenty of beans, and although I used red kidney beans you can use any variety of beans you have on hand, except maybe butter beans as they are huge and your final texture will probably be a bit weird. You can used canned beans or, as I did here, start from dry beans, which I soaked overnight, and cooked in a pressure cooker.

You will also need jackfruit, and if you are unfamiliar with that ingredient you should probably get to know it. Jackfruit is this magnificent beast of a fruit that’s huge and looks really unwieldy – so I stay away from getting it raw and buy canned young (green) jackfruit in brine. This type of jackfruit can be used for many savory dishes and I love it in vegan versions of crab cakes, clam chowder, stews, barbacoa, and pulled pork. What makes jackfruit perfect for dishes like these is it’s appearance more than anything else – when pulled apart, it looks like shredded meat or lumps of crab.


Vegan Smokey Shredded Pork and Beans

What you’ll need:

  • 1 onion, finely chopped
  • 2 cups carrots, finely chopped
  • 6 stalks celery, finely chopped
  • 6 cloves garlic, thinly sliced
  • 1-2 tablespoons chipotle chiles in adobo sauce (I prefer to use just the sauce)
  • 1 tablespoon mesquite powder and/or liquid smoke
  • 1 can (6 oz, 170g) tomato paste
  • 3-4 cups mushroom stock (store bought or homemade)
  • 1 lbs (450 g) dry red kidney beans, fully cooked or 2 29 oz. (822g) canned beans, divided
  • 2 cans green (young) jackfruit in brine
  • Cooking spray


What you’ll do:

  1. Spray the Dutch oven (or any other heavy and deep pot you are using) with a good amount of cooking spray – enough to cover the bottom and the sides. Place over medium high to high heat, add chopped onions, carrots, celery and garlic. Mix well and cook for about 10-12 minutes. You want the vegetables to be fully browned, even slightly burned, so you don’t need to stir very frequently but you do need to keep an eye on them so they don’t become a burnt mess!
  2. Add the next three ingredients (adobo sauce, tomato paste and liquid smoke or mesquite powder), stir well, and cook for another 1-2 minutes.
  3. Add a cup of mushroom stock to deglaze the bottom. You want to make sure that you loosen all the flavorful bits and pieces that have been stuck to the bottom of the Dutch oven. If you need more that 1 cup of the stock to deglaze the bottom, add more! Once you are done deglazing, turn the heat off.
  4. Caution – you will be working with hot ingredients so be careful! Add 2 cups of mushroom stock into the blender, then spoon your hot ingredients in, and add 2 cups of cooked beans. Cover the blender, and blend until smooth. If you don’t have large enough blender to do this all at once, blend in batches. If you have a stick blender, you can transfer everything into a large bowl and blend with the stick blender. Set the blended sauce aside.
  5. Prepare the jackfruit by draining the cans into a strainer and rinsing the brine of under some cold water. Shake the access water off and pat dry if needed. Pull the jackfruit apart, discarding any very tough core pieces (there will likely be a few of those and if you can’t get your fingers through it means it’s best to get rid of them as they will be hard to chew).
  6. Spray the Dutch over with more cooking spray, bring back to high heat and add the pulled apart jackfruit pieces. Let the jackfruit burn a bit before stirring. You want pieces to get browned and slightly charred on at least one side. This can take 5-10 minutes.
  7. Add the rest of the beans, and mix well. Cook for another 2-3 minutes, then add the sauce and mix well. Lower the heat down and simmer for an additional 10 minutes or so with the lid on.
  8. Serve over rise, couscous, as a burrito, or as a taco. Enjoy with a wedge of lime, chopped avocado or with a scoop of sour cream.

Copyright © Eat the Vegan Rainbow, 2019


Vegan Baked Feta (no fat and no salt added)

Vegan Baked Feta no fat and no salt added
Vegan Baked Feta no fat and no salt added, via Eat the Vegan Rainbow

For many transitioning into plant-based diet and/or vegan life style, giving up cheese may be the most difficult thing to do. Although commercially available dairy-free cheese alternatives are getting better, they still tend to be pricier and, let’s be honest, they do take some getting used to. Plus: many of these cheeses are still not necessarily something to overindulge in – they usually come with a high fat and salt content. So, when it comes to dairy-free cheese you still need to proceed with caution.

One of the best ways to know exactly what you are getting is to get into DIY (do-it-yourself). Making your own cheese can sound intimidating. And some recipe do sound quite complicated and time consuming! But, there are quite a few vegan cheese recipes that you can do yourself and be happy with results.

For example, making a gooey nacho cheese or a cheese sauce for Mac’n’Cheese can’t be easier. Also, making homemade fresh mozzarella, although it takes time, is simple enough really. And if you want to impress guests, baked mini cheeses are your friends!

Vegan cheese making, including artisan plant-based cheese making, is now becoming very popular and there are quite a few really good cookbooks out there that you may want to take a look at. Before buying any of them, I encourage you to check out your local library! If you are looking for a good place to start, I think either “Artisan Vegan Cheese” by Miyoko Schinner, or “This Cheese is Nuts!” by Julie Piatt will give you plenty to work with.

The baked feta recipe below was created to make my life easier – it includes only 4 ingredients which I usually have on hand anyways, and uses the oven to do most of the work. Plus, it includes no added fat and no added salt, while being rich in protein, which makes it almost an essential ingredient for a healthy salad or sandwich lunch! The cheese stores well for about one week, so you may want to make a fresh batch every 7 days or so. Enjoy!

Vegan Baked Feta

What you’ll need:

  • 1 block (14 oz, 400 g) extra firm tofu, drained
  • 1/2 lemon, juice
  • 2 tablespoons apple cider vinegar
  • 1-2 tablespoons nutritional yeast

What you’ll do:

  1. Preheat the oven to 300 F (150 C).
  2. While the oven is preheating, place 1 block of tofu – drained but not pressed – into a food processor and add the rest of the ingredients. Pulse until everything is smooth and combined.
  3. Line an 8 x 8 in (20 x 20 cm) baking dish with some parchment paper. If you don’t have this specific size baking dish don’t worry – you can use any oven safe dish that will make your baked cheese block have about 1 in (2.5 cm) thickness.
  4. Pour your tofu cheese mix into the baking dish, even the surface out and put it in the oven for 45 minutes. Depending on your oven, you may want to check half way through. If your top and bottom are baking at a different rate you may want to flip the cheese, which can be tricky since it will still be went and fragile, or move the rack up or down. The main point is to allow both the top and the bottom to dry out as evenly as possible.
  5. After about 45 minutes, when the cheese looks more or less dried out on the surface, increase the heat to 425 F (220 C) to finish the baking. This step will produce a nicely roasted crust and add just a bit of caramelization. But keep it short, no longer than about 15 minutes!, because you still want your cheese to stay soft inside so it can crumble well!
  6. Take the baked feat out, cool it completely, then store it in the refrigerator for up to 7 days. I recommend you let it cool in the fridge for at least 2 hours before using for the first time as this will help with the crumbling and/or slicing. Enjoy!

Note on the salt: feel free to add salt to taste if you like, since this no-salt added version will be on a bland tasting side of things. Alternatively, you can simply add a pinch of salt to your salad or sandwich as you are putting them together. I will leave the answer to the question “To salt, or not to salt” to you!

Copyright © Eat the Vegan Rainbow, 2019

Sunday Morning Cookbook Review: 30-minute Frugal Vegan Recipes

30-Minute Frugal Vegan cover
With permission from 30-Minute Frugal Vegan Recipes by Melissa Copeland

Vegan way of eating comes with a bad reputation when it comes to cost. I’ve heard many people wonder about whether they would be able to afford to eat only plants, perhaps because many plant-based products that are substitutes for dairy (milk, yogurts, cheese, ice cream…) or meat (different cold cuts, sausages, burgers, bacon…) do come with a higher price tag. But leaving those types of items aside, cooking with plants is actually more affordable than any other kind of cooking. There are a number of social media groups and bloggers (including myself) that really embrace the philosophy that plant-based eating does not need to break your bank.

One of the prominent bloggers in this area is Melissa Copeland, a person behind The Stingy Vegan. Melissa has now assembled some of her recipes into a new cookbook published recently – “30-minute Frugal Vegan Recipes”. As the title suggests, the focus of this cookbook is not only on cheap, but also on quick. And her recipes deliver!

They are convenient and use ingredients that are easily found in regular grocery stores. Having said that, Melissa offers some tips on scoring great prices on some of the items. One of my favorite, and the one I recommend all the time, is going to your local “ethnic food” stores – East Asian, Indian, Russian, Brazilian, Mexican, Caribbean… These stores are great places to get excellent prices on produce as well as spices. The local Indian grocery store I go to frequently also has fantastic prices on rice, quinoa, nuts, dry beans, as well as many gluten-free flours (corn, rice, chickpea, and others). Some of these stores may be a bit out of your way, but a trip once in a while can help you can stock up. For example, I go to the Indian store once every 2-3 months!

One other tip Melissa offers that I recommend all the time is using frozen fruits and vegetables. I love frozen – they come pre-chopped and they come cheaper than fresh, so what’s not to like? Of course, for some recipes you need fresh and some vegetables and fruits just lose a lot when frozen, but things like peas, green beans, broccoli, corn, edamame, spinach, squash, carrots, and even jackfruit are great frozen. When using frozen vegetables, it is important to remember to get them unseasoned. Otherwise, you may be getting things you don’t need and should avoid, like extra salt or fat!

Overall, I liked the flavors that Melissa’s recipes offer and the simplicity of the recipes she put together. The Black Bean Salsa Burgers below are a great illustration of her approach. They are yummy, they come together in a snap, and they work! The one modification I made just because I had no salsa on hand is to use canned fire roasted tomatoes instead. It worked well, and I bet any type of salsa would work as well.

30-Minute Frugal Vegan black bean salsa burger
With permission from 30-Minute Frugal Vegan Recipes by Melissa Copeland

Black Bean Salsa Burgers

Salsa goes right in the burger patties rather than on top, to bring loads of flavor and texture to these plant-based burgers. Choose your favorite salsa; just be sure that it’s really chunky. Straining the salsa to get just the flavorsome chunks prevents the burgers from being too wet and falling apart.

Makes 4 or 5 burgers

  • 2 tbsp (30 ml) oil, for pan, plus more for cooking burgers
  • 1 small onion, diced
  • 2 cloves garlic, finely chopped
  • 1 cup (70 g) chopped button mushrooms (can be quite chunky as they will reduce when browned)
  • 1 cup (80 g) rolled oats
  • 1½ cups (258 g) cooked black beans, or 1 (15.5-oz [439-g]) can, drained and rinsed
  • 1 cup (260 g) chunky salsa
  • 1 tsp smoked paprika
  • 1 tsp salt
  • Freshly ground black pepper
  • 4 or 5 vegan hamburger buns
  • Your favorite hamburger fixings


If you’re baking the burgers, preheat the oven to 375°F (190°C).

In a skillet, heat 1 tablespoon (15 ml) of the oil over medium-high heat. Add the onion and fry, stirring from time to time, for 5 to 7 minutes, or until soft and translucent, then add the garlic and fry for another 30 seconds, or until fragrant. Transfer to a large bowl.

Heat the remaining tablespoon (15 ml) of oil in the same skillet. Add the mushrooms and leave them for a minute to brown on one side before stirring and continuing to fry. Once browned all over, transfer to the bowl with the onion.

In a food processor, pulse the oats until you have mostly oat flour with some whole oats remaining, for texture. Transfer to the bowl. Put the black beans in the food processor and blend until mostly pureed with some whole beans remaining, also for texture. Transfer to the bowl.

Put the salsa in a strainer and stir to remove the excess tomato sauce, until you have mostly chunks remaining. Measure ½ cup (130 g) of this super chunky salsa and add it to the bowl along with the paprika, salt and pepper. Mix well to incorporate everything.

Form the mixture into 4 or 5 patties, depending on the size of your buns. The mix is a bit wet but should not be unmanageable. I take a ball in my hands, flatten it out into a patty on a plate, then use a spatula to transfer it to a baking pan or skillet when ready to cook. They may need a bit of reshaping once in the pan. If you’re having trouble, you can add a bit more oat flour so that they hold together better.

To bake, lightly oil a baking pan, transfer the patties to the pan and bake for 20 minutes, flipping at 10 minutes. To fry, heat a large skillet over medium heat and add a tablespoon (15 ml) of oil. Fry the patties for 3 to 4 minutes per side, or until browned.

Once cooked, transfer the patties to a wire rack and let cool for a few minutes. They will firm up a bit as they cool. Serve on the buns with your favorite hamburger fixings.

Credit line:
Reprinted with permission from 30-Minute Frugal Vegan Recipes by Melissa Copeland, Page Street Publishing Co. 2019. Photo credit: Melissa Copeland.


Simple Bean Salad

Simple Bean Salad via Eat the Vegan Rainbow
Simple Bean Salad, via Eat the Vegan Rainbow

Summer time, outdoor eating, picnics – what they all need is great, yet simple salads, especially those that don’t require constant refrigeration and come together in a jiffy!

This is exactly what this bean salad is all about. It uses four different types of canned beans – and you can mix and march any way you like! – as well as a nice combo of spices, including a bit of garam masala. If you are not familiar with garam masala, it is a spice mix commonly found in Indian cuisine, and it usually contains cumin, coriander, cardamom, cloves, cinnamon, pepper, and perhaps a bit of nutmeg or mace. All this makes for a very fragrant and please spice mix that you can use to make a plain old bean salad just a bit more adventurous. And don’t worry about having lots of garam masala leftover after you make this salad because it is a spice you can use to boost the flavor of rice, as well as to make Chicken-less Tikka Masala (one of my very favorites), Saag Paneer, or “Chicken” in Nut Sauce and it will be used up before you know it. It is one of the spices I can’t go without!

If you can’t find garam masala, you can use your favorite curry powder instead – it will work and you will have a bean salad with an elevated flavor. One other recommendation I’d like to make is to toast your spices using just a bit of oil and a very hot frying pan. This will help deepen the aroma and add just a bit of smokiness. If you are looking to cut out the oil you can toast your spices in a dry nonstick pan. Either way, you will have to be there and keep the spices moving as they toast. The toasting is fast, no longer than 2 minutes, and the spices can easily burn if you are not careful. So keep a close eye on your spices!

Finally, definitely use both the juice and the zest of the lime. The zest will do it’s zesty magic and add an exotic dimension to your salad. Enjoy!

Simple Bean Salad

What you’ll need:

  • 1/2 red pepper, deseeded and finely diced
  • 1/2 green pepper, deseeded and finely diced
  • 1/2 red onion, finely diced
  • 1 15.5 oz (440 g) can black beans
  • 1 15.5 oz (440 g) can red kidney beans
  • 1 15.5 oz (440 g) can black eyed peas
  • 1 15.5 oz (440 g) can small white beans
  • 1 4 oz (113g) can fire roasted green chilis
  • 1 tablespoon curry powder or garam masala
  • 1 tablespoon chili powder (or lime chili if on hand)
  • 1 tablespoon oil
  • 1 lime, juice and zest
  • 1/4 cup fresh cilantro, chopped

What you’ll do:

  1. Wash the peppers, half them lengthwise, and set the two halves you are not going to use aside (don’t through them out; there are many recipes you can use them for, or simply slice them into sticks and much on them as a snack!). Remove all the seeds and veins, then cut into a small dice. Do the same with the red onion. Place all your diced vegetables into a large mixing bowl.
  2. Rinse and drain all your canned beans, shake the access water off as much as you can, pat dry if needed and add to the mixing bowl together with the entire can of fire roasted green chilis. Note: If you don’t have these fire roasted green chilis where you live, you can use raw chili (spicy) pepper of your choosing. Or you can fire roasted a pepper yourself, let it cool, peel the skin, remove the seeds and chop finely. Regardless of what you decide to do, be careful about the heat and add the amount that tastes right to you. Using the amount listed in this recipe you will end up with a mild bean salad, so dial the heat up or down to taste.
  3. Place a small sauté or frying pan over medium-high heat, add the oil, then add the garam masala (or curry powder) and chili powder. Toast the spices for 1-2 minutes then immediately add to the mixing bowl. If you are trying to avoid oil, you can dry toast the spices in a non-stick pan, or skip toasting altogether. Without toasting the flavors will not be as rich, but milder may be better for some.
  4. Add the rest of the ingredients, mix well and you are done! You can serve this salad immediately, but for best results I recommend that you let it sit for 2-4 hours on the kitchen counter. You can also make this salad a day ahead, store in the fridge, then take it out and let come to room temperature before serving. Enjoy!

Copyright © Eat the Vegan Rainbow, 2019

Sunday Morning Cookbook Review: Vegan Comfort Cooking

Vegan Comfort Cooking cover
Reprinted with permission from Vegan Comfort Cooking by Melanie McDonald, Page Street Publishing Co. 2019. Photo credit: Melanie McDonald. 

How many cookbooks does one person need? I would say probably all of them because I am yet to meet a cookbook that did not teach me something new, different, interesting, and useful. This is especially true for vegan (plant-based) cookbooks, given that vegan cooking is a special type of skill set (and mind set) that you need to continue to work on.

For those of you who are not 100% plant-based eaters, and feel on the fence about it all because you are worried that you may not be able to enjoy rich and flavorful type of food we often call comfort food, this new cookbook may help. “Vegan Comfort Cooking” is the first cookbook by a successful vegan food blogger and recipe developer Melanie McDonald, the person behind A Virtual Vegan. Part of Melanie’s, or Mel’s (as her friends and family call her) philosophy is that she only posts recipes that have been thoroughly tested and vetted by her taste testers. Moreover, Mel is fully committed to transforming recipes that include non-plant ingredients into vegan ones without sacrificing any flavor – if the recipe can’t be made to taste good, it’s not worth making.

I can definitely relate to that, and have enjoyed Mel’s new cookbook very much! In 75 recipes this cookbook covers all main areas of cooking, from breakfast to dessert. It also includes lots of great bread recipes (and a recipe for english muffins!), as well as how to make awesome pantry staples, like vegan butter – yes, I know you can easily get vegan butter in the store, but if you do have a moment making your own butter is fun and delicious!

For me, several recipes stand out – and you can get them all in Mel’s cookbook which has now been published: Black Forest Breakfast Crêpes, where basic crêpe recipe is combined with a tasty cherry sauce and a drizzle of chocolate sauce; Down ‘n Dirty Taco Fries (oven-baked fries with chickpea topping and lime crema), and the Smokey Tomato and White Bean Soup (recipe and photo below).

Those who say that vegan food can’t be comforting or have loads of great flavor need to be invited to a dinner party featuring recipes like these. I’ll bet their view of great tasting food will be completely transformed!

Vegan Comfort Cooking Smoky Bean & Tomato Soup
Reprinted with permission from Vegan Comfort Cooking by Melanie McDonald, Page Street Publishing Co. 2019. Photo credit: Melanie McDonald.


Smoky Tomato and White Bean Soup

Serve this brimming with flavor soup in deep bowls that you can cozily wrap your hands around on a chilly evening. It’s easy to make, easy to eat and one of those recipes that gets even more flavorful with time, so it is perfect for making ahead. It even freezes well.
yield: 4 or 5 servings

  • 1 tbsp (15 ml) olive oil or water
  • 1 large onion, finely chopped
  • 2 celery ribs, finely chopped
  • 5 cloves garlic, finely chopped
  • 1 tsp smoked paprika or chipotle powder
  • ½ tsp ground cumin
  • ¼ cup (60 g) tomato paste
  • 27 oz (765 g) canned chopped fire-roasted tomatoes
  • 2 tsp (10 g) salt, plus more to taste
  • ½ tsp freshly ground black pepper
  • 3 cups (720 ml) vegetable stock
  • 1 tbsp (12 g) cane or granulated white sugar
  • 4½ cups (1.2 kg) white kidney, cannellini or lima beans, drained and rinsed


In a large skillet, heat the olive oil or water (for oil free cooking) over medium heat. Sauté the onion and celery for about 10 minutes, until they are starting to go gold
en brown. If you are using water to sauté, you will need to add a little more water every few minutes to prevent the onion and celery from sticking.

Add the garlic, smoked paprika and cumin and continue to cook for another 2 minutes, stirring constantly.

Then add all the other ingredients. Stir well to combine, allow to come to a simmer
and cook for another 20 minutes. Add a little water to adjust the consistency to your liking, check the seasoning and adjust to taste; then serve. I like the soup chunky,
but you can use an immersion blender right in the pan to make it smoother and creamier, if you want to.

tips: Make this soup with only 11/2 to 2 cups (360 to 480 ml) of stock instead of 3 cups (720 ml), so it’s more like a thick stew, and serve it over rice, quinoa or couscous.

Credit line:
Reprinted with permission from Vegan Comfort Cooking by Melanie McDonald, Page Street Publishing Co. 2019. Photo credit: Melanie McDonald.

BBQ Pulled Eggplant

BBQ Pulled Eggplant via Eat the Vegan Rainbow
BBQ Pulled Eggplant, via Eat the Vegan Rainbow

There’s something magical about barbecue or BBQ as we often call it. I am not sure that it can be put into words, and the best you can do is to try it. Perhaps you can start with the recipe below, which is, technically, not a BBQ; but it successfully recreates what using smoke and cooking low and slow (at low temperatures for prolonged periods of time – typical BBQ setup) results in. Or: you can take a look at a very inspirational cookbook in this area “Great Vegan BBQ without a Grill”.

Regardless of what you decide to do, I don’t think you will be disappointed. The basic idea behind a dish like the BBQ Pulled Eggplant below is to take advantage of the natural eggplant texture, which allows it to be pulled into long strips, and to use a rich marinade.   Like any great BBQ recipe, this one also takes time. And although there is no need for low and slow cooking here, there is a need for long marinating, which will help add an incredible amount of flavor to the eggplant.

If you are still hesitant, don’t be! The recipe is super simple. You will need to roast the eggplant, which can’t be easier. You will leave the skin on, wash the eggplant, and put it in the hot oven to roast for about an hour. Once eggplant is full roasted, you’ll leave it to cool, then open it up and scoop all the meat out. Some eggplants have quite a lot of seeds in them, and these may look unappetizing – if they do seem unappetizing to you, chuck them out (preferably on your compost pile!). They are actually completely edible and will not change the final flavor at all – so I suggest you keep them in. All the eggplant that you pull ad scoop out goes into the marinade for an hour or more (overnight in the fridge is fine too).

One time and resource saving tip you’ll like is that I use the marinade as a sort of BBQ sauce. As you will see below, the last step is dumping the pulled eggplant and the sauce it’s been marinading in into a hot pan which will help eggplant brown and caramelize, and the marinade thicken into a rich BBQ sauce. So, you will be hitting two birds with one stone!


BBQ Pulled Eggplant

What you’ll need:

  • 3 whole eggplants, washed and dried (do not peel)
  • 3 tablespoons canola (or other vegetable) oil
  • 3 tablespoon reduced-sodium soy sauce (or reduced-sodium tamari sauce for gluten-free option)
  • 3 tablespoons chili powder
  • 3 tablespoons dry chopped onion (for example these), or 1 tablespoon onion powder
  • 2 tablespoons smoked paprika
  • 1 tablespoon agave nectar or maple syrup

What you’ll do:

  1. Preheat the oven to 425 F (220 C).
  2. Wash and pat dry the eggplant. Place it on a baking sheet lined with some foil or parchment paper and roast for 50-60 minutes. The eggplant should be cooked all the way through.
  3. Take the eggplant out and let it cool. It does not need to be cooled all the way, but it needs to be cool enough to handle by hand.
  4. While the eggplant is cooling mix all the rest of the ingredients in a large container big enough to hold the pulled eggplant while it marinates. Set aside.
  5. When eggplant has cooled of, split the eggplant in half then using a fork start pulling the meat out by sliding the fork lengthwise. Some trips will be shorter, some longer. You can decide which length makes most sense to you – I personally keep it irregular. If your eggplant has a lot of seeds and you rather not use them, pull them out and set them aside to use for something else or compost. At the end of this process, all that will be left will be the eggplant skin. Discard the skin!
  6. Place all the pulled eggplant into the marinade, cover and marinate for at least an hour – overnight in the fridge works well!
  7. Final step: bring a large cast iron pan or a heavy frying pan or a skillet over high heat. Let the pan get really hot, lower the heat to medium to medium high, then dump all your marinated eggplant with the marinade into the pan and let it sizzle. The main purpose here is to get some browning going and thicken up the marinade. Keep stirring things around for about 5 minutes, then turn the heat off and serve as sliders (on mini hamburger buns), or as pulled BBQ sandwich on a large buns. Pickles, pickled onions, and/or coleslaw are all great sides to have on hand here. Enjoy!

Copyright © Eat the Vegan Rainbow, 2019


Vegan Taco Salad with Homemade Beef Crumbles

Vegan Taco Salad with Homemade Beef Crumbles
Vegan Taco Salad with Homemade Beef Crumbles, via Eat the Vegan Rainbow

Taco Tuesdays – they are the best! Actually, tacos are great any day of the week, and especially handy when hosting a party. The reason why they work so well is that with 5-6 different toppings like shredded iceberg lettuce, diced tomatoes, guacamole, salsa, sour cream, beans, perhaps some pickled jalapeños, and some “beef” crumbles the food spread will look like a feast! Plus, everyone can go around and make their own tacos their way. What fun!!!

Plus: you can get almost everything from the store, and have the taco night done in no time. If you do have a bit of extra time on your hands, I do recommend that you make your own “beef” crumbles. It is cheaper, and you will be in control of additives and spices. There are many ways to make your own beef crumbles, and I shared the tofu-based as well as quinoa-based recipes before.

Both of those recipes required some time in the oven. Here, I have an easier option for you that is made entirely on the stove top. The recipe uses tempeh, and chopped walnuts to give it richness and protein. It also calls for quite a few spices, to infuse the crumble with umami flavors and smokiness. All you need to do really is crumble the tempeh, chopped the walnuts relatively finely, and sauté for a bit.

Although great, tacos can also be a bit frustrating. For example, I can never get enough lettuce and tomatoes into my taco shell before things start to fall apart. That’s why I decided to ditch the shell and go with a combination which I call taco salad. It starts with a load of shredded iceberg lettuce, and a good amount of tomatoes, beans and avocado (or guacamole). I added a bit of tortilla chips for some crunch, and a nice helping of the beef crumble. Final touch for this salad, as is for any other one, is a bit of acidity – lime juice works great here, and a bit of oil. The salad is pretty rich so you can skip oil if you like. Finally, if you have some fresh cilantro handy, go for it – it will add nice freshness to your salad.

By the way, this salad is a big meal. You will have plenty on your plate if you follow my measurements below – so you can certainly cut things in half if you are looking for a quick/small lunch!

IMG_8034


Vegan Taco Salad with Homemade Beef Crumbles

What you’ll need:

FOR BEEF CRUMBLE
  • 1 10 oz package of tempeh
  • 1 cup finely chopped walnuts
  • 1 tablespoon tomato paste
  • 1 tablespoon tamari sauce
  • 1 tablespoon canola oil (or any oil you like; you can also skip if on oil-free diet)
  • 2 teaspoons cocoa powder
  • 1 teaspoon cumin powder
  • 1 teaspoon chili powder
  • 1 teaspoon smoked paprika
FOR SERVING (per serving)
  • 8-10 tortilla chips
  • 1/2 cup diced plum (Roma) tomatoes
  • 1-2 cups shredded iceberg lettuce
  • 1 tablespoon vegan sour cream
  • 1/4 cup diced avocados
  • 1/4 cup canned black beans
  • 1/2 cup beef crumbles (recipe above)
  • freshly squeezed lime juice
  • 1/2 teaspoon olive oil


What you’ll do:

  1. Check your tempeh to figure out whether the tempeh can be used as is, or does it need to boiled first – some do! If boiled, let the tempeh cool for couple of minutes. Using a fork, crumble the tempeh by pulling it apart until the size of crumbles resembles what you may usually see in taco filling. Set aside.
  2. Chop the walnuts to about the same size as your tempeh crumbles. My tip for keeping the costs down when making something like this is to by walnut pieces, not halves, since they tend to be cheaper!
  3. Place a large skillet over medium high heat, add the oil, and the spices – cumin and chili powder and smoked paprika. Let them toast for 1 minute, then add the walnuts and let them roast for 2-3 minutes, until slightly browned. Mix in the tempeh and let caramelize for few minutes, 3-5 minutes should be sufficient. Add the tomato paste and cocoa powder, mix well and let the flavors develop over medium heat for another 5-10 minutes. Turn the heat off and let cool for 15 minutes or so.
  4. To assemble the salad, start with a large heap of shredded iceberg lettuce (or other type of shreds like kale shreds or romain), top with chopped tomatoes, black beans, taco “meat”, avocado, sour cream, tortilla chips, lime juice and olive oil (if using). Dig in!

Copyright © Eat the Vegan Rainbow, 2019

Fish-like Cakes with Chickpeas and Artichoke Hearts

Fish-like Cakes with Chickpeas and Artichoke Hearts
Fish-like Cakes with Chickpeas and Artichoke Hearts, via Eat the Vegan Rainbow

I was debating whether I should call these crab cakes or fish cakes – I suppose at the end of the day the name does not matter as much as the flavor. And the flavor here is fresh, citrusy, and the texture is flaky. So, to me these are more like fish cakes than crab cakes, but not matter what you decide to call them these will be your new favorites.

These are fantastic appetizer bites, suitable for any party, and they come together in no time at all. All you need is two cans of artichoke hearts and a can of chickpeas, plus a bit of seasoning and filler stuff (like breadcrumbs and/or corn meal), and a healthy amount of lemon – and you will be cruising.

The recipe is also flexible – if you don’t like corn meal you can just double the panko (but I do suggest you give corn meal a try because the flavors are just a bit different and more nutty, and the surface gets a bit crustier). And if you need to keep things gluten-free, go with gluten-free panko that now seems to be widely available in grocery stores.

I used Old Bay Seasoning as the main flavoring ingredient because I associate it with seafood and fish – but you can use other spices, like dill (fresh or dried), celery seed powder (or celery salt), and customize according to your preferences. I also added a bit of mild heat by using a small can of fire roasted green chili peppers. Here, you also have an option to replace with jalapeños, for more heat, or skip heat altogether and add a bit of sweet roasted red peppers. What ever you decide to do, you only need a small amount of it – you are going for just a bit of a surprise here; otherwise flavors can get overwhelming quickly.

If you are counting calories and fat, you can also skip the mayo. I use it as a binder, but a spoonful of mustard or a spoonful of unsweetened plain nut milk or yogurt, or even water will do the trick as well.

So, by now you are thinking that you can probably replace absolutely everything and still be OK. Well, you should not, and I repeat not, compromise on lemon. Lemon juice and especially the lemon zest will add so much to these cakes that you must include them.

Another two things that you must do is mash the chickpeas with your hands or the potato masher (but do leave some whole), and then, when all the ingredients are in, let the mix rest for a while. This will help all the flavors come together, as well as the mix bind, so you will be able to make the cakes more easily.

Why use sliced artichoke hearts? That gives the whole thing the flaky texture (you can use jackfruit here, as well as banana blossom – but I bet that for most of you artichoke hearts are much easier to find!). Why use chickpeas? To add structure and protein, so if you don’t like chickpeas you could use white beans. In that case you probably will not need to add extra mayo as suggested in the recipe, since beans tend to add more moisture.

With all these options, and dos and don’ts, hopefully the last part will be easy. The rest is easy – make the cakes by using about a quarter of a cup at a time, and brown nicely in some oil or cooking spray. If you have an exceptionally good non-stick pan, you may get away without using any oil, but these are still delicate fish cakes, so they need to be handled with care.

The best way to enjoy them is with a spoonful of tartar sauce, or just pickle relish, or chopped fresh parsley.


Fish-like Cakes with Chickpeas and Artichoke Hearts

What you’ll need:

  • 2 14.1 oz (400 g) cans of artichoke hearts, drained and sliced
  • 1 15.5 oz (440 g) chickpeas, drained and rinsed
  • 3 scallions, white and green sections, thinly sliced
  • 1 teaspoon Old Bay Seasoning
  • 1 teaspoon celery powder
  • 1 cup corn meal
  • 1 cup panko Japanese-style bread crumbs (gluten-free if desired)
  • 1/4 cup vegan mayo
  • 1 4 oz (113 g) can fire roasted green chiles, completely drained
  • 1/2 lemon, juice and zest
  • Cooking spray

What you’ll do:

  1. Drain the artichoke hearts, squeeze the excess liquid out of them, then slice thinly.
  2. Place chickpeas into a large mixing bowl and mash until most of the chickpeas are fully smashed.
  3. Add sliced artichoke hearts, sliced scallions, and the rest of the ingredients and mix well until everything is well combined. Leave the mixture to soak for 30-45 minutes.
  4. Using your hands, scoop about 1/3 cup of the mixture and make it into a patty, about 1/2 in (1 cm) thick. Place the patties on a plate – this mixture makes about 10-12 patties.
  5. Place a large pan over high heat, spray with cooking spray and add 4-5 patties at a time. Cook for about 4-5 minutes per side, until golden brown.
  6. Serve with some lemon juice, vegan tartar sauce, and/or fresh parsley!

Version note: this post has been updated to correct some spelling/writing errors. One of the readers noted that in several instances word “panko” was autocorrected into the word “panic”. And although some panic while cooking is unavoidable, I have now corrected this mistake. Cheers!

Copyright © Eat the Vegan Rainbow, 2019

Mushroom Pâté

Nut-free Mushroom Pâté, via Eat the Vegan Rainbow
Mushroom Pâté, via Eat the Vegan Rainbow

I grew up eating pâté and loving it. Some pâté, on a piece of freshly baked bread with a glass of yogurt (yes, the liquid kind you drink like they do in Middle East!) was one of my go to breakfasts. And the pâté I ate was not a fancy French kind made with duck fat. At some point I learned that it was actually made of who know what, random bits and pieces of an animal all ground up. Whether you eat meat or not, I hope we can all agree that that’s pretty unappetizing when you think about it!

But: if you don’t think about it and just go with your taste buds, pâtés are really tasty. They are full of umami, savory flavors that we all crave, they are silky and smooth, they are nicely spreadable, and they are an excellent add-on to a nice piece of bread. So, how can we re-create the perfect savoriness with just a small number of ingredients, and make a healthy and satisfying pâté that will keep you coming back for more?

Well, we start with mushrooms, the well-known source of umami. You can use white button mushrooms here or baby bella (cremini) mushrooms as well. I do not recommend some of the mushrooms that have distinct flavors, like shiitakes; however, other mild mushrooms may work. Still, white button mushrooms are readily available, affordable and work!

Another important umami component is tomato paste. Here, you can use any tomato paste you have on hand and you can adjust the amount – anywhere between a tablespoon or two will do the trick.

To make the dip smooth and rich in protein, I recommend adding canned beans. White beans work best (cannellini, great Northern or navy), but any other variety will probably be OK. If you cook your own beans, I recommend that you keep them slightly undercooked for this application, or at least squeeze some of the excesses liquid out before blending to avoid ending with a pâté that’s more of a soup than a rich and dense spread.

The main flavoring agent here is Herbes de Provence, a mixture of dried herbs that usually includes thyme, rosemary, oregano, marjoram and lavender. I use Trader Joe’s version, and they carry it only as a seasonal item in the fall, but any other mix with the same name will do. Alternatively, you can add a pinch of thyme, rosemary, oregano, and other herbs (including basil) that you may have on hand.

Finally, what also adds a lot to this pâté is sautéing and caramelizing onions, garlic and mushrooms before blending everything together. This will help the flavor deepen and develop!

Looking for serving suggestions? You can use it as a spread or a dip, as a pizza “sauce” and topping (why not?), in your quesadillas (let’s be adventurous!), for your baked potatoes, or for any other dish where you feel the need to add rich, yet smooth flavors. Enjoy!

Mushroom Pâté

What you’ll need:

8 oz white button mushrooms (or cremini mushrooms if you like stronger mushroom flavor), sliced

1/2 large, white onion, diced

4 cloves garlic, sliced

2 tablespoons olive oil

2 tablespoons tomato paste

2 teaspoons Herbes de Provence

1 15 oz (425 g) can white beans

Salt to taste


What you’ll do:

  1. Place a large sauté pan over medium high heat. Heat up than add the oil and onions. Sauté for 2-3 minutes, then add the garlic. Let garlic start to release its aroma – this usually takes a minute.
  2. Add the mushrooms and , increase the heat to high, mix well and sauté until mushrooms are browned. This will take about 4-5 minutes.
  3. While the mushrooms are cooking, drain and rinse the can of beans. Shake access water off and place into a food processor or a large mixing bowl if you rather use a stick blender (this is an incredibly useful kitchen gadget and it’s what I used here).
  4. Pour the sautéed mushrooms over the beans and blend until smooth and combined. Leave in the refrigerator until ready to serve.
  5. Serve cold as a spread for sandwiches or as a dip for chips or crackers. This pâté is excellent addition to your menu and it offers a healthy and humane alternative.


Copyright © Eat the Vegan Rainbow, 2019

Tex-Mex Stir Fry with Crispy Tofu

Tex-Mex Stir Fry with Crispy Tofu via Eat the Vegan Rainbow
Tex-Mex Stir Fry with Crispy Tofu, via Eat the Vegan Rainbow

Tofu seems to be an ingredient that many would like to use more often but don’t know where to start. It is also something that seems to taste so much better when you get it at a restaurant. I’ve seen a lot of people that complain about never getting tofu to be quite as crispy and quite as crunchy or quite as flavorful as when they have it in their take-outs or at the favorite Asian place.

I love making tofu – and I do it without any tofu presses or other special tofu preparing equipment. My favorite way to eat tofu is as a crunchy snack – I take a block of extra firm tofu (extra firm is my go-to kind of tofu for most of my recipes), drain the liquid out, leave in a colander to drain for about 30 minutes, then slice into cubes that are about 2 cm (3/4 in) long. For a block of tofu that you find in US-based supermarkets (14 oz or so), this means cutting it into 48 cubes – you slice the block of tofu in half, then each half into three slices, which gives you 6 mini blocks of tofu. Each mini block is then sliced in half, and each stick of tofu then divided into 4 cubes, giving you 12 x 4 = 48 cubes. If all this is too complicated math-wise, don’t worry, just cube into whichever number works. Remember to keep the chunks, well chunky!

Next, I lay the tofu cubes onto a baking sheet lined with some parchment paper, and spread them out, so that they don’t touch each other. They go into a hot oven (425 F (220 C)), and after about 15 minutes I check them, flip them around and roast for another 10 minutes. What this gives you at the end is tofu that’s crunchy on the outside and soft on the inside. I eat these as a snack, as is!

This, of course, is not the end of the story, and you can use the roasted tofu to make number of other dishes. For example, you can use it to make Saag Paneer. You can also toss tofu with your favorite dressing and use in a salad. And: you can use your roasted tofu to make a wonderful stir-fry, like the one I will share with you here.

This stir-fry is actually a sort of Mexican-Chinese fusion recipe, and it is sweet from all the caramelized onions and sweet red, yellow and orange peppers, as well as a bit of agave nectar that goes into the tofu marinade. I kept it sweet to encourage my kids to eat it – they are not big fans of hot spices at the moment. Having said all that, you can definitely spice things up and adding a bit of Sriracha into the tofu marinade, and/or sprinkling some crushed red pepper flakes will add some serious spice punch!

I recommend that you serve this stir-fry with simple rice or, even you are counting carbs, this cauliflower rice recipe will definitely work for you. If you are looking for something totally different, this stir-fry will also go well with polenta, or even baked polenta. Enjoy!

Tex-Mex Stir Fry with Crispy Tofu

What you’ll need:

  • 2 blocks (14 oz, 400 g) extra firm tofu, drained
  • 1 tablespoon agave nectar
  • 1 tablespoon toasted sesame seed oil
  • 1 tablespoon low-sodium soy sauce (or tamari sauce, if gluten-free)
  • 1/2 yellow or white onion, finely diced
  • 4 scallions, white and green bits, finely sliced
  • 2 tablespoon grated ginger (or pickled ginger, diced very finely)
  • 2 tablespoon canola oil
  • 3 cups finely sliced yellow, orange and/or red peppers sticks
  • 2 cups yellow corn kernels (I used frozen, but fresh or canned would work as well)

What you’ll do:

  1. Preheat the oven to 425 F (220 C).
  2. Take the blocks of tofu out of its packaging and leave in the sieve or a colander to drain for 30 minutes or so. Slice the tofu into 3/4 in-1in (2 cm) cubes (each block should give about 40-48 cubes). Line the baking sheet with some parchment paper and spread the tofu cubes around, so they are not touching each other. Roast the tofu for 15 minutes, check and flip the cubes, then roast for another 10 minutes.
  3. Place agave nectar, toasted sesame seed oil and soy sauce into a large mixing bowl and whisk together.
  4. Slide the hot tofu into the marinade, mix together and set aside.
  5. Place a large wok, or a deep trying pan, over high heat. Add the canola oil, diced onions, sliced scallions, and grated ginger and fry for 2-3 minutes with frequent stirring.
  6. Add sliced peppers and continue to fry at high heat for 10 minutes or so.
  7. Add frozen corn, and fry for another 5-8 minutes.
  8. Finally, add the tofu and the marinade in and stir well. Leave on high heat for another couple of minutes, then turn the heat off. Serve hot over some rice, or polenta – and don’t forget to add some Sriracha to the marinade if you are into spicy!

Copyright © Eat the Vegan Rainbow, 2019


Easy Garden Vegetable Pasta Sauce

Easy Garden Vegetable Pasta Sauce
Easy Garden Vegetable Pasta Sauce, via Eat the Vegan Rainbow

It’s not quite summer yet, but it does not hurt to line up few new recipes to try when the vegetable gardens start to yield the wonderful, delicious produce. Of course, with modern day supermarkets, the produce in my Easy Garden Vegetable Pasta Sauce is on hand any time of the year!

The recipe is easy, because you only need a handful of ingredients: eggplant, zucchini, garlic, crushed tomatoes, olive oil, and a bit of salt, dried basil and dried oregano. You also need an ingredient that you may have hard time finding – pomegranate molasses. I found mine in a local Indian grocery store, and started experimenting with it recently. This molasses is thick and sticky, like the more common molasses made as a byproduct of refining sugar from sugar cane or sugar beets, but it is not sweet – actually it is quite tart. That’s why you will not find this molasses in many desserts, but you will in savory dishes.

If you are now thinking to yourself “I’n not buying yet another ingredient that I’ll never use again”, no worries – just use balsamic vinegar, especially the one that’s rich, sweet and dark. That will work just as well to add a bit of acidity and sweetness to the sauce.

Enjoy!


Easy Garden Vegetable Pasta Sauce

What you’ll need:

  • 1 eggplant, cubed
  • 1 zucchini, cubed
  • 3 cloves garlic, sliced
  • 1 28 oz (800 g) can crushed tomatoes
  • 2 tablespoons pomegranate molasses (or use balsamic vinegar)
  • 1 teaspoon basil, dried
  • 1/2 teaspoon oregano, dried
  • 1/4 teaspoon salt
  • 2 tablespoons olive oil


What you’ll do:

  1. Place a sturdy pot (I like my Dutch oven) over a medium high heat. Add olive oil and garlic. Sauté for a minute, to allow garlic to start releasing its aroma.
  2. Add the eggplant and zucchini, mix well and sauté for 10-15 minutes, until vegetables are fully cooked.
  3. Mix in the molasses (or balsamic vinegar), and all the herbs (basil and oregano), then pour in the crushed tomatoes. Bring to simmer, cover with a lid, lower the heat down all the way, and let cook for another 10 minutes.
  4. Using a stick blender or a regular kind, blend the sauce until rich and dense. Use on your favorite pasta, or spiraled vegetables, like zoodles, which are my personal favorite.

Copyright © Eat the Vegan Rainbow, 2019