Berry Bliss Breakfast Balls on a Roll

IMG_6481 (1)
Berry Bliss Breakfast Balls, via Eat the Vegan Rainbow

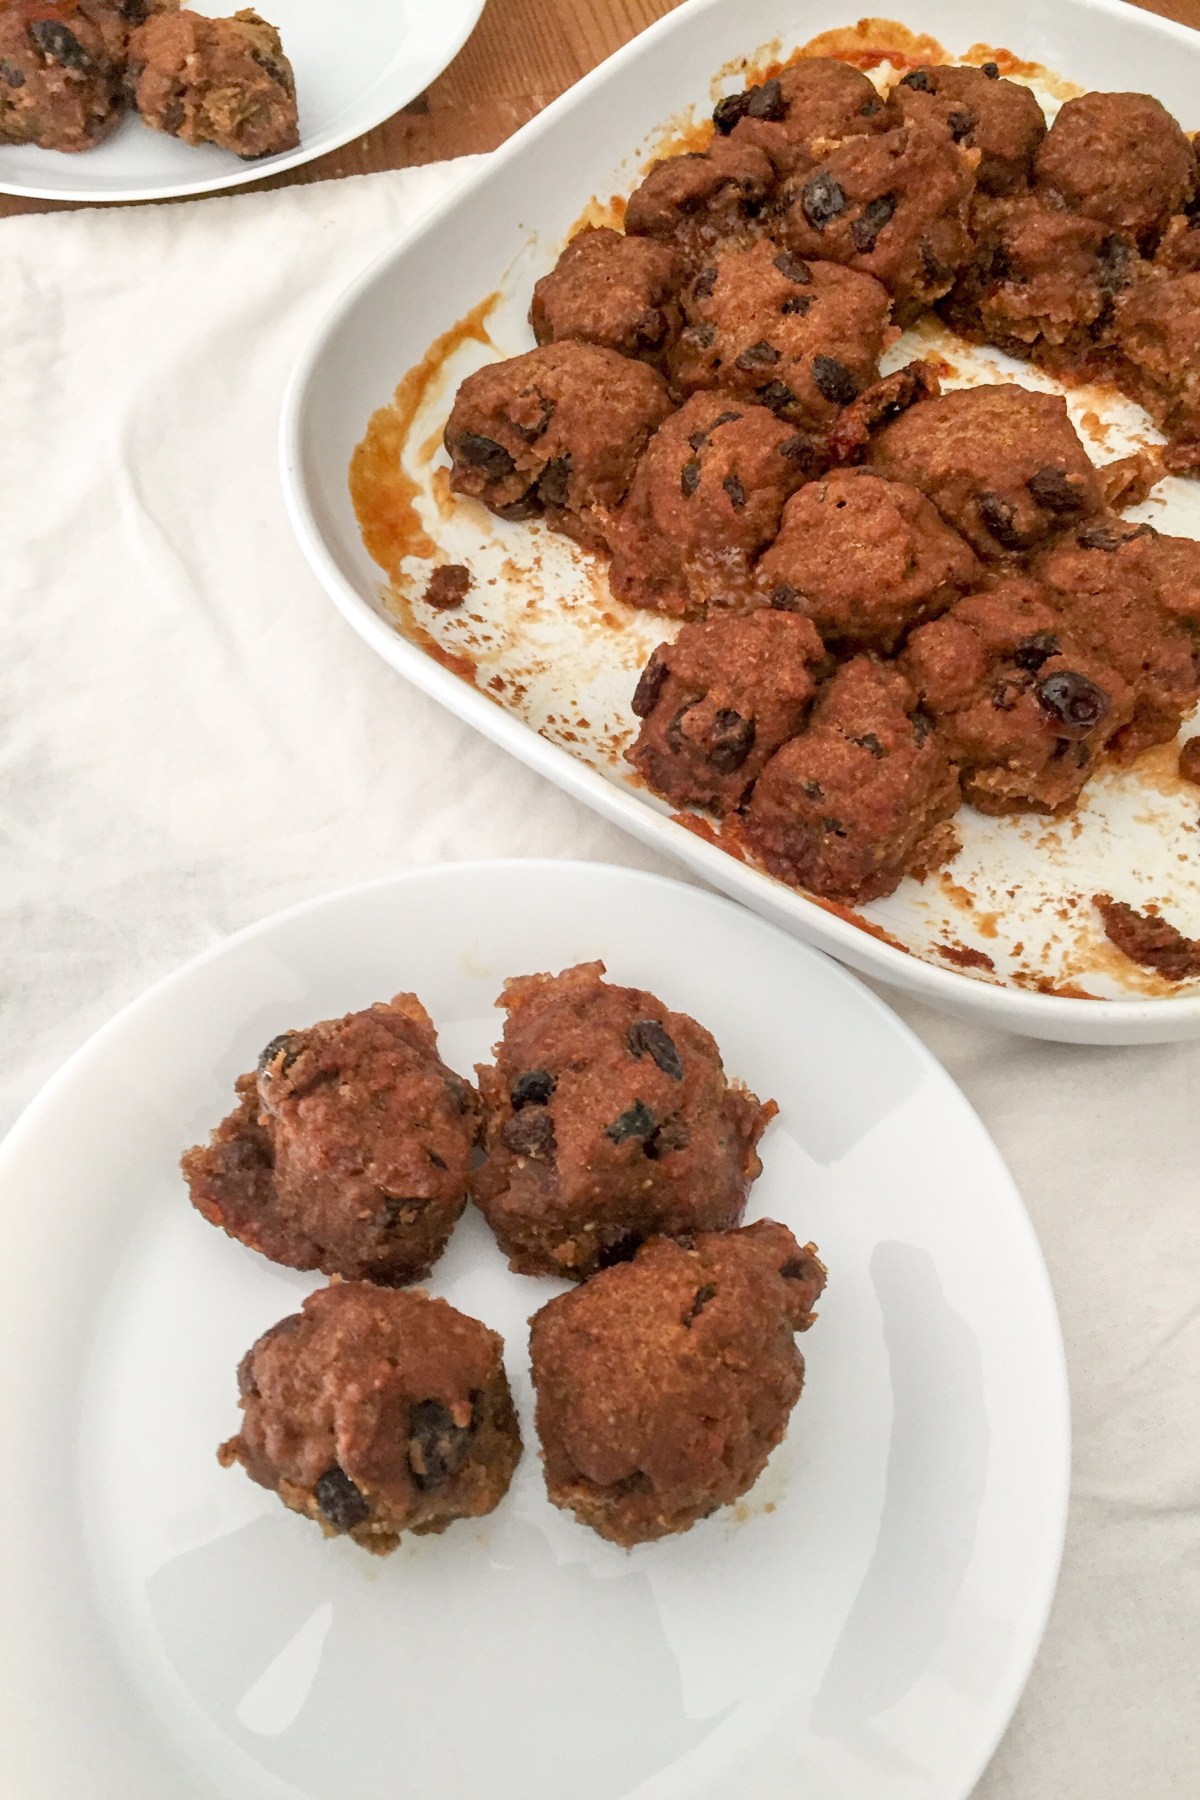
Never skip your breakfast – at least that’s what everyone keeps telling you! But: breakfast can be hard to fit in, and quite honestly sometimes I just need to get going. For those mornings when you want to be out the door as quickly as you can, it’s good to have something to grab on your way out. And these delicious breakfast balls pack all you need!

These breakfast treats are definitely make ahead – you will not be able to just whip them together if you are in a real hurry. That said, they are not that hard to make. All you need is a food processor and nothing more. The recipe below lists frozen berry mix, but you could use fresh berries or your choice. In that case, you may need to scale up the amount of dry ingredients to keep everything well glued together.

When working with frozen berries in this recipe, it is important to let them thaw completely, and drain the excess liquid out. You don’t need to squeeze them dry but I recommend using a strainer or a slotted spoon to get just the berries. For defrosting, you could use the microwave or you can leave the berries in your fridge for a day or so and they should be ready to go.

To make these breakfast calls sweeter, I recommend that you use same dried medjool dates. These are ultra-sweet dates that can be used instead of sugar. If you don’t have them on hand, you could go with raisins, or skip altogether, depending on how sweet is your fruit.

What makes these balls real breakfast items is the combination of ground hemp seeds, wheat germ, almond meal, and coconut flour. All these add the body to these and will keep you full and going for hours.

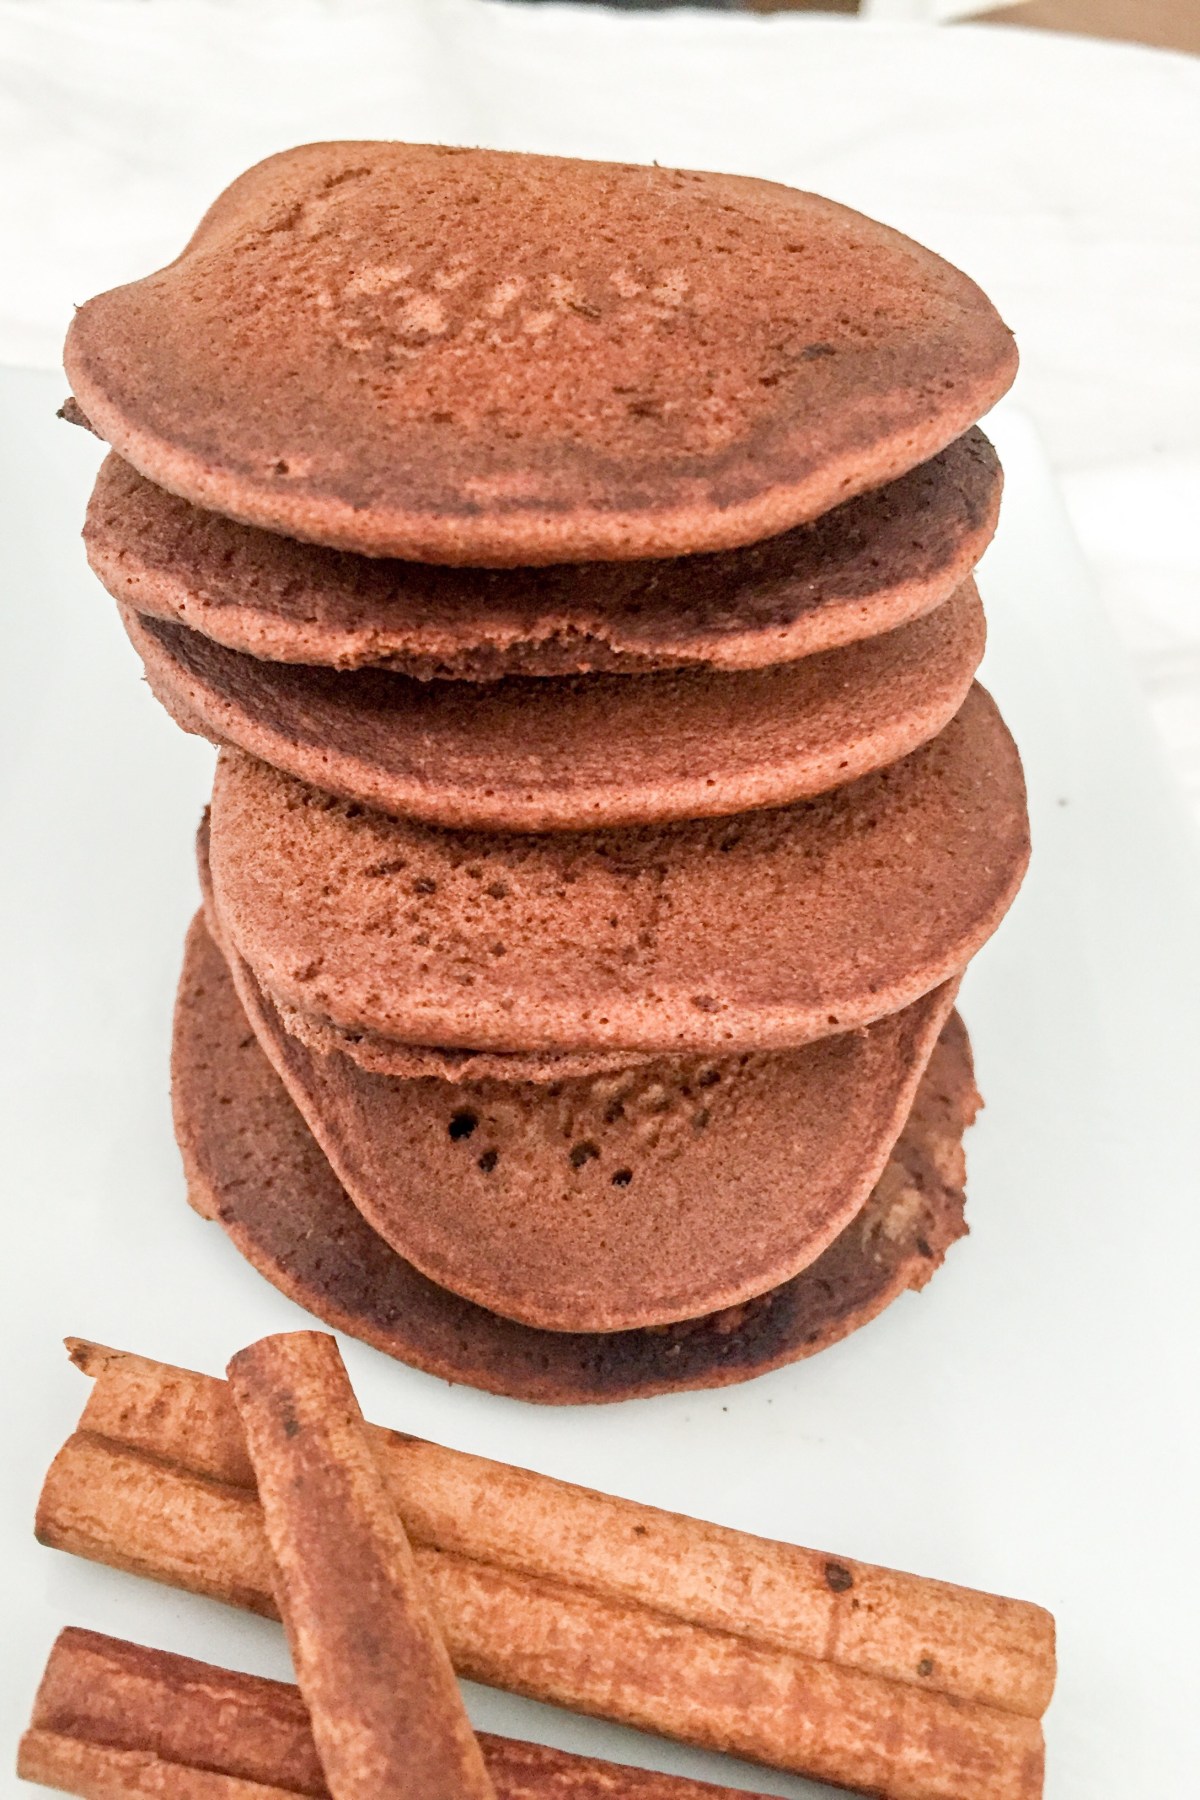
The final touch here is just a pinch of ground cardamom in the almond meal that I recommend that you roll your balls in after you form them. You can, of course, customize the spice (cinnamon, nutmeg or even clover come to mind as things that would work), but cardamom just adds something a bit unusual that you may enjoy. If you are looking for additional make-ahead or raw breakfast ideas, here are two versions of muffins for you – a baked one (gluten-free carrot cake muffin), and a raw one. Enjoy!


Berry Bliss Breakfast Balls

What you’ll need (4-6 servings):

  • 2 cups frozen berry mix, defrosted and access liquid decanted
  • 6 medjool dates, pits removed
  • 1/2 cup hulled hemp seed hearts
  • 1/2 cup wheat germ
  • 1/2 + 1/4 cup almond meal, divided
  • 1/2 cup coconut flour
  • 1/4 teaspoon ground cardamom


What you’ll do:

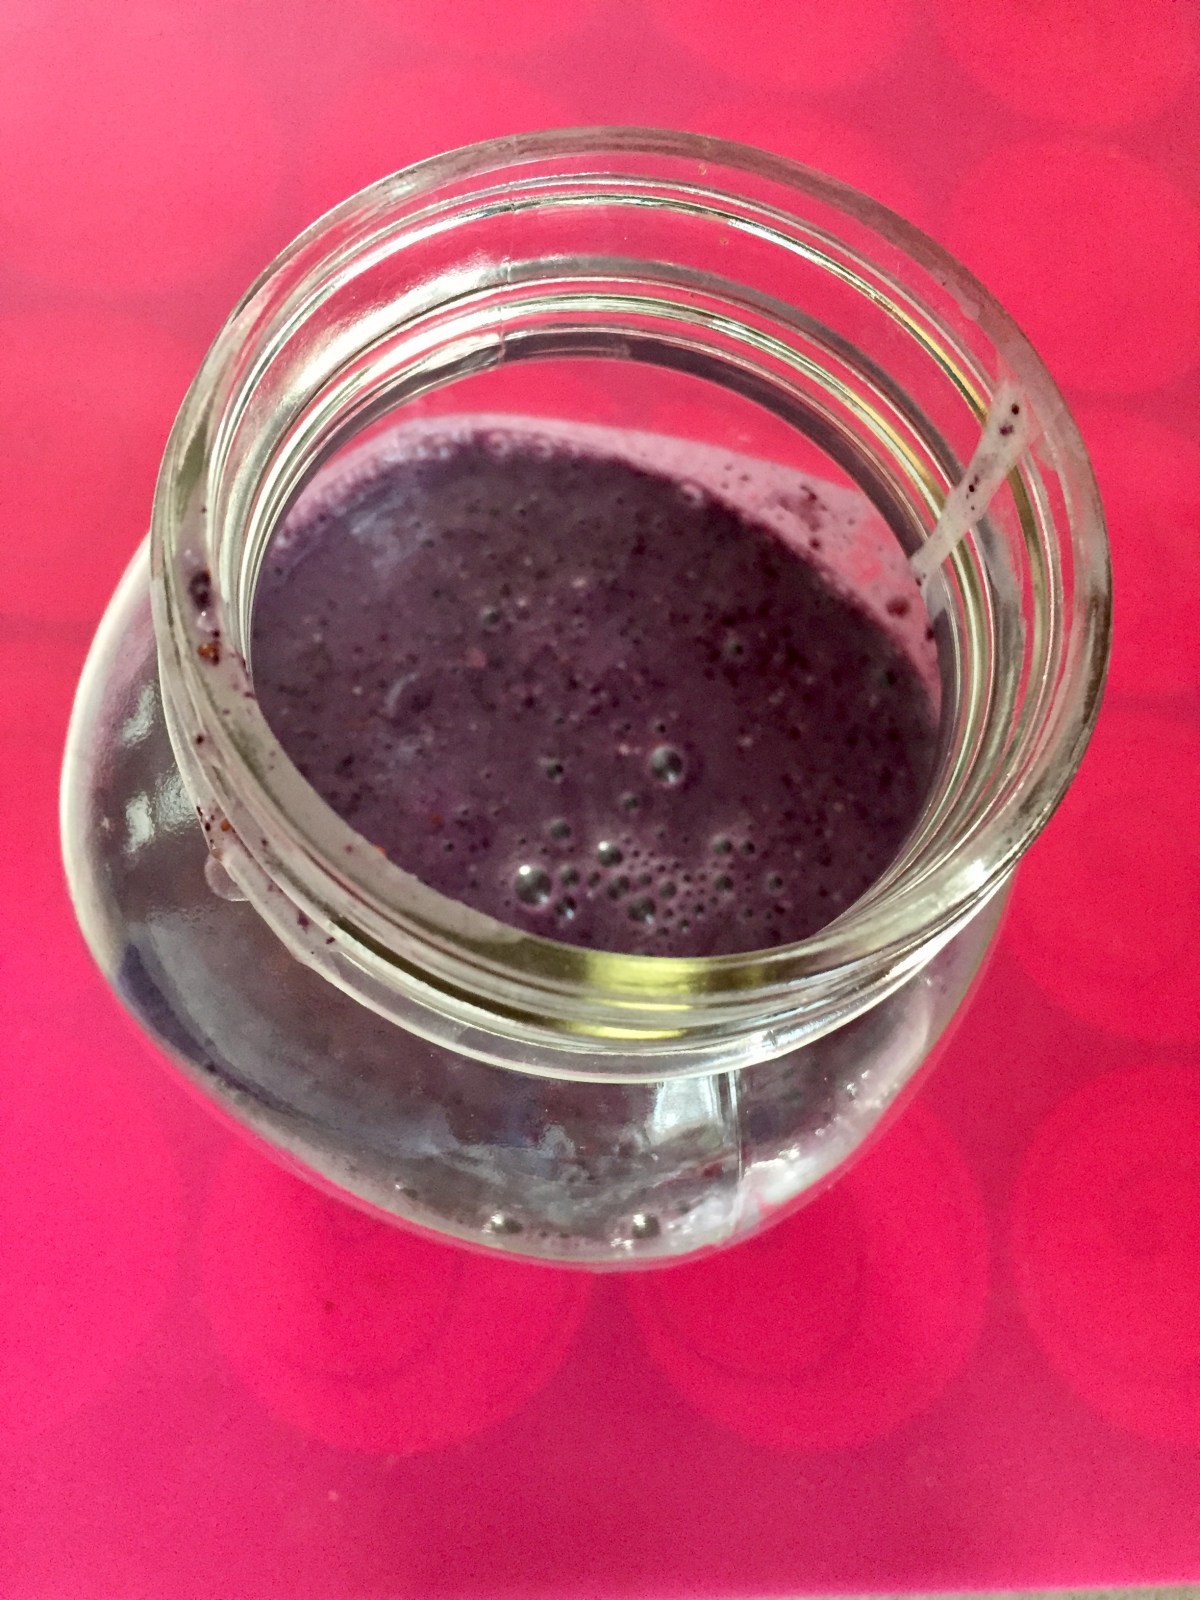
  1. Defrost the berry mix in the microwave or overnight in the fridge, then decant the access liquid and reserve for a smoothie or something else.
  2. Place the defrosted berries, dates, and the rest of the ingredients except 1/4 cup almond meal and cardamom, into a food processor and process for 3-5 minutes, until the mix is smooth and combined.
  3. Using a quarter cup measure or an ice cream scoop, scoop out part of the mix, roll it into a ball using your hands, and eat as is, or roll it into the 1/4 cup almond meal mixed with 1/4 teaspoon ground cardamom powder. Enjoy for breakfast, or as a dessert. You can also drizzle some melter chocolate for real dessert flavor. The balls keep well for 2-3 days in the fridge, in an air tight container. They are raw, so best to consume them as quickly as you can!

Copyright © Eat the Vegan Rainbow, 2019

Raw Energy Oatmeal Raisin Muffins

Raw Energy Oatmeal Raisin Muffins
Raw Energy Oatmeal Raisin Muffins, via Eat the Vegan Rainbow

Few Sundays ago, I shared with you my impressions of a new cookbook on the vegan block – “Modern Raw: Healthy Raw Vegan Meals for a Balanced Life” by Rachel Carr. I’ve been wanting to cut down on cooking for some time, and especially during the summer, so this cookbook came to me in just the right moment. You can read more about my views and check out a recipe kindly provided by the publisher here.

Needless to say, inspired by the raw vegan strategy Rachel outlined, I jumped at the opportunity to start making my own raw experiments. I started with a breakfast item, and a pasta recipe, mostly because many people trying to follow plant-based eating find breakfast to be the most challenging meal, and because I couldn’t imagine that you can have pasta without cooking!

The muffins below are great – sweet without any added sugar, and ready without baking. If you told me that this is possible, I would have rejected your suggestion. Now, of course, I know better, and these muffins – although not having a texture of any muffin you ever tried before – are packed with good-for-you energy and will carry you through your morning.

They are made of carrots, apples, raisins and rolled oats – four ingredients only! And need a bit of help from cinnamon and nutmeg! You need a food processor to make them, since there’s lot of grating and I don’t recommend you undertake this process by hand. And there is also a bit of waiting for these muffins to firm up and come together, so it’s best to make them an evening ahead and them enjoy them for breakfast the next day!


Raw Energy Oatmeal Raisin Muffins

What you’ll need:

  • 2 apples, cored (Granny Smith, MacIntosh, Pink Lady work best)
  • 3 extra-large carrots, peeled
  • 1 cup raisins
  • 2 cups rolled oats, divided
  • 2 teaspoons cinnamon
  • 1/2 teaspoon nutmeg
  • 12 walnut halves, optional

What you’ll do:

  1. Using a fine shredding attachment on your food processor or hand-held grater, grate the apples and carrots. Transfer them into a large mixing bowl.
  2. Change the food processor’s attachment to S-blade, then combine 1 cup of rolled oats and raisins. Pulse until finely ground.
  3. Combine with the grated carrots and apples, add the rest of the ingredients (all except walnut halves), and mix well using your hands to help the juices release and combine. Don’t worry if the mix feels wet – oats will absorb some of the excess moisture later. Depending on the exact variety of apples you use, you may end up with a bit too wet of a dough. In that case add 1/4 – 1/2 cup more oats.
  4. Line the muffin pan with the same baking liners you would use for your muffins or cupcakes. Scoop about 1/4 cup of the mix into each muffin holder. Pack in the dough by pressing with your fingers. Top each muffin with a walnut half, or top with rolled oats, or couple of raisin. You can also skip the topping or mix-and-match.
  5. Leave the muffins in the fridge for couple of hours to form up. Before serving take them out and let them come to room temperature – this will take 15 minutes or so. The muffins should slide out of the wrappers with easy and hold well together. If they don’t, you may want to add a bit more ground rolled oats into your dough next time. However, if they do, you will have a delicious, no-bake muffin on your hands – a great way to start your day. Enjoy!

Copyright © Eat the Vegan Rainbow, 2019


Mushroom Pâté

Nut-free Mushroom Pâté, via Eat the Vegan Rainbow
Mushroom Pâté, via Eat the Vegan Rainbow

I grew up eating pâté and loving it. Some pâté, on a piece of freshly baked bread with a glass of yogurt (yes, the liquid kind you drink like they do in Middle East!) was one of my go to breakfasts. And the pâté I ate was not a fancy French kind made with duck fat. At some point I learned that it was actually made of who know what, random bits and pieces of an animal all ground up. Whether you eat meat or not, I hope we can all agree that that’s pretty unappetizing when you think about it!

But: if you don’t think about it and just go with your taste buds, pâtés are really tasty. They are full of umami, savory flavors that we all crave, they are silky and smooth, they are nicely spreadable, and they are an excellent add-on to a nice piece of bread. So, how can we re-create the perfect savoriness with just a small number of ingredients, and make a healthy and satisfying pâté that will keep you coming back for more?

Well, we start with mushrooms, the well-known source of umami. You can use white button mushrooms here or baby bella (cremini) mushrooms as well. I do not recommend some of the mushrooms that have distinct flavors, like shiitakes; however, other mild mushrooms may work. Still, white button mushrooms are readily available, affordable and work!

Another important umami component is tomato paste. Here, you can use any tomato paste you have on hand and you can adjust the amount – anywhere between a tablespoon or two will do the trick.

To make the dip smooth and rich in protein, I recommend adding canned beans. White beans work best (cannellini, great Northern or navy), but any other variety will probably be OK. If you cook your own beans, I recommend that you keep them slightly undercooked for this application, or at least squeeze some of the excesses liquid out before blending to avoid ending with a pâté that’s more of a soup than a rich and dense spread.

The main flavoring agent here is Herbes de Provence, a mixture of dried herbs that usually includes thyme, rosemary, oregano, marjoram and lavender. I use Trader Joe’s version, and they carry it only as a seasonal item in the fall, but any other mix with the same name will do. Alternatively, you can add a pinch of thyme, rosemary, oregano, and other herbs (including basil) that you may have on hand.

Finally, what also adds a lot to this pâté is sautéing and caramelizing onions, garlic and mushrooms before blending everything together. This will help the flavor deepen and develop!

Looking for serving suggestions? You can use it as a spread or a dip, as a pizza “sauce” and topping (why not?), in your quesadillas (let’s be adventurous!), for your baked potatoes, or for any other dish where you feel the need to add rich, yet smooth flavors. Enjoy!

Mushroom Pâté

What you’ll need:

8 oz white button mushrooms (or cremini mushrooms if you like stronger mushroom flavor), sliced

1/2 large, white onion, diced

4 cloves garlic, sliced

2 tablespoons olive oil

2 tablespoons tomato paste

2 teaspoons Herbes de Provence

1 15 oz (425 g) can white beans

Salt to taste


What you’ll do:

  1. Place a large sauté pan over medium high heat. Heat up than add the oil and onions. Sauté for 2-3 minutes, then add the garlic. Let garlic start to release its aroma – this usually takes a minute.
  2. Add the mushrooms and , increase the heat to high, mix well and sauté until mushrooms are browned. This will take about 4-5 minutes.
  3. While the mushrooms are cooking, drain and rinse the can of beans. Shake access water off and place into a food processor or a large mixing bowl if you rather use a stick blender (this is an incredibly useful kitchen gadget and it’s what I used here).
  4. Pour the sautéed mushrooms over the beans and blend until smooth and combined. Leave in the refrigerator until ready to serve.
  5. Serve cold as a spread for sandwiches or as a dip for chips or crackers. This pâté is excellent addition to your menu and it offers a healthy and humane alternative.


Copyright © Eat the Vegan Rainbow, 2019

Basic Vegan Waffles

Basic Vegan Waffles via Eat the Vegan Rainbow
Basic Vegan Waffles, via Eat the Vegan Rainbow

If you are looking to add some sunshine to your plate, look no further! The waffles are here, and they are egg-free and dairy-free, and they can very easily be made gluten-free and nut-free as well. So, these waffles are allergy friendly, yet satisfying – they will please absolutely everyone because they use only simple ingredients and don’t require fussing with egg replacements or similar.

The key to these waffles (as well as any other type of waffles) is a really good waffle iron, that you want to keep at medium high heat. And: you also want to keep it well oiled to help the waffles crisp up and reach that beautiful golden-brown stage without sticking!

Another crucial ingredient here is lemon juice – since you are not using eggs, lemon juice is essential to get the baking soda working. Remember that baking soda and vinegar volcano experiment you did in elementary school? Yes, the principle here is the same – you need some acid to give baking soda a bit of a nudge and release all that gas (carbon-dioxide) that will make your waffles puff up. I you don’t have lemons handy, a bit of apple cider vinegar or plain vinegar will also do the trick.

One tricky step here is adding the right amount of liquid. The amount will vary depending how you measure your flour and what type of four you use. Not all gluten-free flours are the same – the ingredients vary and how those ingredients mix with liquids vary. And gluten-free flours will behave differently from plain all-purpose wheat flour – so, I’m afraid, this is not one-size-fits-all type of recipe and you will need to pay attention!

After you’ve mixed (or whisked) the first cup of liquid in (milk or water), make sure all the liquid is incorporated well before adding more. And, add the rest in 1/4 cup increments, making sure all is incorporated before adding more. You want the waffle batter to be pourable but dense – so just slightly thicker than a pancake batter, a a shade thiner than cake batter. If you have not given up by now – and I hope you haven’t – once you’ve mixed the batter to the right consistency let it sit for 5-10 minutes before using.

These waffles freeze well, and can be reheated in the microwave, or a toaster oven. My favorite thick here is to get them defrosted in the microwave for 30-45 seconds and then transfer to the toaster oven to crisp up!

Happy breakfast time!!!


Basic Vegan Waffles (with gluten-free and nut-free options)

Serves 4 (2-3 waffles depending on the size of your waffle iron)

What you’ll need:

  • 2 cups all-purpose gluten-free flour, I like King Arthur Flour (or all-purpose white flour)
  • ¼ cup raw sugar (vegan)
  • ¼ cup vegetable (or canola) oil
  • 1 tablespoon peanut butter powder (skip if concerned about allergies)
  • 1 tablespoon lemon juice
  • 1 tablespoon vanilla extract (or dial down the amount if you prefer less vanilla)
  • 1 teaspoon baking soda
  • 1 teaspoon baking powder
  • 2 cups unsweetened vanilla almond milk (or oat milk, soy milk, or water for nut-free version), divided
  • Cooking spray or some extra vegetable oil for brushing the waffle iron

What you’ll do:

  1. Place all the ingredients except milk into a large mixing bowl, in the order they were mentioned in. Mix well.
  2. Add 1 ½ cup of milk and mix, check for consistency than add ¼ cup of milk more, mix, check the consistency and add more milk if needed. The best waffle batter should pour out without resistance, but still be dense. Let the batter stand while you prepare the waffle iron.
  3. Heat the waffle iron, spray with the cooking spray if needed (my waffle iron is old and sticky so cooking spray helps a lot), then pour ¾ of a cup of the batter in (please note that this amount will depend on the size of the waffle iron you are using). The waffles should be done in 2-3 minutes – my waffle iron comes with a handy light that turns green when a waffle is done!
  4. Serve your waffles hot with butter, maple syrup, chopped nuts, strawberries, blueberries, and/or whipped cream, or if you are looking for something new: chopped pineapple and coconut for a piña colada waffles!

Copyright © Eat the Vegan Rainbow, 2019

Reboot Smoothie with Blueberries, Bananas, Oatmeal and Peanut Butter

Reboot smoothie with blueberries, peanut butter powder, and oatmeal
Reboot Smoothie with Blueberries, Peanut Butter Powder, and Oatmeal, via Eat the Vegan Rainbow

Some of you may know that I am not a real food blogger – and by real I mean a person who does food blogging, recipe development, food photography and cookbook writing full time. I started blogging about two years ago as a way to share some of the recipes I’ve been enjoying. For me, this was a way to combine my love for cooking and my love for writing. But: I do have another huge love in my life, one that overshadow all else, and it is love of science, especially the kind of science done at the interface of chemistry and biology. So, my real job is guiding one of the best chemical biology programs on the planet.

This job comes with an opportunity to travel to meet other scientists in the field, so we can share and learn from each other. Recently, I went on a trip which scientifically I enjoyed very much! However, the plane rides were bumpy, and they were delays, and stress, and long flights, and really limited food options at the airports. Which means that for couple of days my diet was OK, but not great. Plus: I tend to eat too much when I travel. Snacking helps pass the time, and although I know it is not healthy, it is what I do.

By the time I get back home, I am usually beyond exhausted sometimes due to the trip itself, but oftentimes because the amounts of salt, fat and sugar I consumed. That’s why I developed this wonderful smoothie to help me reboot and rebalance myself.

The smoothie comes together in a snap, like they all do, and uses blueberries, bananas, oatmeal and peanut butter powder. The peanut butter powder is something that you can now find in your local grocery store. It is made from roasted peanuts after all the oil haas been removed, which means that it has less calories and less fat, but more protein per serving than peanut butter. This powder retains all of the peanut aroma, and you can use it for smoothies, baking and even cooking things like Pad Thai. I like using it in this smoothie because it adds a nice punch of protein to it.

Bananas are an essential smoothie ingredient, no matter what. They add sweetness and creaminess to it, and make the smoothies rich, so much so that you will think you are getting spoiled. If you do not like bananas, this smoothie can be made with roasted sweet potatoes (yummy!), and even canned pumpkin purée. Bananas are full of vitamin B6, which is the essential cofactor of many enzymes that regulate our metabolism, and when it comes to vitamin B6 one banana goes a long way (more than 30% of your daily value)!

Blueberries are also key to the final flavor, and I recommend that, if you can, get frozen wild blueberries, preferably from Maine. This, of course may not be possible where you live so you can use any blueberries you have on hand, or strawberries, raspberries, blackberries or sweet cherries for that matter. The fruit you use can certainly be bought frozen, and I do this all the time as it ensures I have perfect fruit ready to go for whenever I need a smoothie. You can also use fresh in which case you may want to add a couple of ice cubes into your smoothie mix before blending if you prefer your smoothies icy cold.

Finally, just a bit of oatmeal will enhance the creaminess, and add more sustaining power to the smoothie. One serving will fuel you for a while!

One note on the blenders and the order in which you add the ingredients. Some of you may have industrial strength blenders that can handle anything. The one I have is good, but not fantastic and for my blender to work well I have to add liquids first, then things that are softer, then things that are harder. The order below is based on this principle, and you don’t need to follow it unless you have the kind of finicky blender I have.

Reboot Smoothie with Blueberries, Bananas, Oatmeal and Peanut Butter

What you’ll need for one very generous single serving or two smaller ones

1 cup almond milk (unsweetened, vanilla flavor or plain)

1 banana

1 cup frozen blueberries

1/4 cup oatmeal

2 tablespoons peanut butter powder


What you’ll do:

  1. Place the almond milk, chopped banana, blueberries, oatmeal and peanut butter powder into a blender. Close the lid and blend until smooth. Let the blended mix sit for about 10 minutes to allow the oatmeal to soak and soften. Then pour it out and enjoy!

Copyright © Eat the Vegan Rainbow, 2019

Gluten-free Cinnamon Raisin Monkey Bread

Gluten-free Cinnamon Raisin Monkey Bread, via Eat the Vegan Rainbow

Have you ever heard of monkey bread? Well, neither have I until recently when I started thinking about an easy breakfast type of a bread that can be made quickly and without much fuss. Monkey bread, a pull apart sticky bread full of cinnamon and drenched in a sticky syrup, is one such option.

Most recipes for monkey bread out there start with a pre-made biscuit dough of some sort – this is fine, especially when you are in a rush, but most of these doughs are not gluten-free. Also: if you are paying attention to what you eat and how much salt and fat you consume, these products are probably not for you although most of them are actually vegan.

The recipe below is my attempt at making monkey bread that is gluten-free, relatively low on oil (and you can skip oil if you want an oil-free version), and full of lovely fruit and vegetable. To boost the flavors and sweetness, I am using pumpkin purée and raisins, and too boost healthy fats and provide a binder for the bread dough I am using chia seeds. Lastly, I am not using a great deal of sticky syrup – but just enough agave syrup to make this slightly over the top. This means that unlike monkey breads you may have had in the past this one is not dripping with gooey syrup, although it is sticky (and finger licking’ good!).

You can play with arrangements of the small dough pieces when you start to lay them out, and create any pattern you like. Traditional monkey bread is made in the Bundt pan. If you would like to experiment with that you will need to make several adjustments to the recipe below. First of all, you will need to prepare a different sticky sauce that is made from brown sugar and butter, and if you don’t want to use butter (vegan or otherwise), you may want to use a bit of corn or tapioca starch as a thickener. The sticky sauce would go to the bottom of your pan and dough chunks are layered one on top of each other. In that case, you will need to double the amount of dough from the recipe below and follow the instructions on how to assemble the bread here.

Gluten-free Cinnamon Raisin Monkey Bread

What you’ll need:

1 cup raisins

1/2 cup chia seeds

1 cup hot water

1 cup rice flour

1/2 cup arrowroot flour

1/4 cup glutinous rice flour (or corn/tapioca starch)

1 teaspoon baking powder

1 teaspoon baking soda

1 tablespoon cinnamon 

3/4 cup  pumpkin purée

3 tablespoons oil (canola or vegetable; you can skip if oil-free)

1 tablespoon apple cider vinegar 

1/3 cup agave nectar (or maple syrup), divided

Butter or oil for greasing the baking dish (optional)


What you’ll do:

  1. Cover the raisin with some water and leave them to soak overnight. If you are in a pinch and need them sooner, you can soak them in hot water and they should be ready to use within 15-30 minutes.
  2. When ready to make the monkey bread, turn the oven on to 350 F (175 C).
  3. Soak chia seeds in a cup of boiling water until gel-like substance forms. This usually takes 10-20 minutes.
  4. While chia seeds are soaking, mix together all the dry ingredients (flours and spices).
  5. In a separate bowl, mix together the wet ingredients: pumpkin puree, soaked chia seeds, oil, and vinegar. Mix well.
  6. Pour the wet ingredients into the dry ones, mix well, then add the raisins and mix again.
  7. Grease the bottom and the sides of a baking dish (8 x 8 in (20 x 20 cm)). You can skip this step if you are using a high quality non-stick pan. Pinch smaller chunks of the dough (roughly 1/4 cup), form into a ball by gently rolling (don’t pack too tightly, the dough should feel loose but not falling apart), and start arranging the monkey bread by placing the balls next to each other. Let them touch but don’t press the balls together. If you can’t squeeze them all in, start another layer and continue until all the dough is used up.
  8. When all the dough balls are all arranged, brush one half of the agave nectar over the top, and bake for 20-30 minutes. The monkey bread is done when the surface is completely brown.
  9. Take the monkey bread out of the oven, brush the rest of the agave nectar over, and leave to soak and cool for 15 minutes or so before digging in!

Copyright © Eat the Vegan Rainbow, 2019


Gluten-free and Vegan Protein-Packed No-Bake English Muffins

Gluten-free Protein-Packed Mug English Muffins, via Eat the Vegan Rainbow

“Where do you get your protein from?” is probably the most detested question that those enjoying plant-based (vegan) diet get asked all the time. Of course, we know that this is an easy question to answer because plants are full of protein.

But just in case you feel that you need an extra protein boost, especially when it comes to breakfast, I have a perfect solution for you. How about some protein packed English muffins? Actually, these are not oven-baked; rather they are done within a few minutes using a microwave.

Perhaps you’ve seen recipes for mug cakes? Or you may have seen new “mug cake” product lines in your local supermarket? The idea is that you whip up your ingredients in a mug, mix them together and after 3-5 minutes in a microwave you have your single-serve cake or a muffin ready to enjoy.

I use the same basic idea here except that instead of eggs and flour I use pea protein powder, peanut butter powder (which is really peanut protein powder), some flax meal, baking soda, a dash of vinegar (or lemon juice) and water or plant milk of choice. Believe it or not, after 3 minutes in the microwave on high power you get a nice little muffin. I recommend slicing the muffin across horizontally, then toasting it for some extra crunch. Yummy!

So, how does this work? I don’t know for sure but I do have a working theory that the carbon-dioxide released when baking soda meets a splash of vinegar or lemon juice is enough to lift the “dough”, and once up the protein molecules have sufficient strength to support the structure.

The main trick here is not to make the mix too wet. When you mix your ingredients together, you will have something that looks more like a paste than a muffin batter. Don’t worry, this is as it should be. The best dish to microwave the muffin in is a 3-4 inch (8-10 cm) ramekin, and I recommend that you grease it with either a bit of butter or some cooking spray. A little will go a long way to help your muffin slide out.

Lastly: a note about microwaves. They are all different and have moods of their own. I recommend you start on high power, and check how things are doing after about 2 minutes. You should look for a dry looking top and sides that are coming away from the ramekin. At the end, the muffin should slide out of the ramekin without much resistance, usually after you run a butter knife around the edges to release the muffin.

Gluten-free and Vegan Protein-Packed No-Bake English Muffins

What you’ll need:

2 tablespoons pea protein powder

2 tablespoons peanut protein powder

1 tablespoon ground flax meal (golden is preferred)

1/2 teaspoon baking soda

1/4 cup and 1 tablespoon almond milk or water

1 teaspoon apple cider vinegar

Vegan butter (optional)

What you’ll do:

  1. Place all the ingredients into a small bowl, and mix to combine. I recommend adding a splash of acid (vinegar or lemon juice) last. The batter will be dense and sticky, just FYI.
  2. Pour the batter into a microwave safe ramekin or a mug that’s about 3-4 in (8-10 cm) in diameter and that has been greased with butter or sprayed gently with some cooking spray.
  3. Microwave on high for 3 minutes or so. The top should be dry and look baked, and the sides should be coming of. If all is well, the muffin will slide out of the ramekin without much resistance after you run a knife around the edges. If not, it means that the bottom is still moist, and the mix needs to go back for another 30-60 seconds.
  4. Enjoy the muffin as is, or toast if you prefer things a bit crunchier. You can top the muffin with butter, jam, hummus, avocado, fruit, or anything else you like. The muffin itself is neither sweet nor salty so lends itself to utmost customization!

Copyright © Eat the Vegan Rainbow, 2019

Basic gluten-free vegan crêpes

Oui, oui… we all love crêpes! Savory or sweet these flat wraps are easy to make and delightful. Of course, those in the business of crêpes making may lead you to believe that crêpes are beyond your capabilities. And even if you are brave to venture into the crêpes land, you may hesitate to accept the vegan crêpes challenge. Yet, there’s nothing to worry about as crêpes can be not only vegan but gluten-free as well.

Choosing the right crêpes pan

The pan you use makes a huge amount of difference when making crêpes. You need a good, preferably non-stick, shallow frying pan with large surface area. The pan should also not be too heavy because there is a fair bit of pan handling (lifting, tilting, swirling) that will need to take place. I use IKEA but you can use any pan the fits this description – roughly.

Preparing the pan

I recommend getting the pan nice and hot before adding a batch of batter. Also, remember to oil the pan before each crêpes. I place my oil in a small bowl which I keep on the stove for easy access and use a silicone brush to brush the oil over the pan’s bottom just before pouring in a batch of batter. And keep doing this each time!

The first crêpe is always the worst!

One dirty little secret of crêpe making is that the first crêpe is always the worst!!! So, although this first crêpe will be nerve wracking and make you feel like a total crêpe disaster, please do persevere and things will get better. This phenomenon seems to be all down to improperly oiled and insufficiently heated pan – and following the instructions here or in this very helpful post will ensure that your second, third, fourth, and so on crêpe all come out perfect. What helps is keeping the heat up, oiling the surface and using a really long and thin spatula to gently peel the crêpe off and flip over. What also help is being stingy with a batter. You are going for a very, very thin pancake here and the pictures below show you what my crêpes looked like.

Finishing crêpe touches

There are many different ways to enjoy the crêpes. You can use light spreads, like jams, chocolate syrup or nut butters, or simply sprinkle with some sugar and cinnamon, or go for the classic combination of butter and maple syrup. Chopped up fruit and/or nuts, as well as walnut and almond meal also work. If you are want to totally impress your guests you may want to make a crêpe cake, and if you made a batch of savory crêpes you can definitely use them in the same way as tortillas or other thin, unleavened breads. If you are wondering what savory crêpes are all about, I previously shared an easy to make scallion crêpe recipe with a sesame dipping sauce.

All in all, this recipe is perfect for a Sunday brunch, or a nice family breakfast around the Holidays. It is something that you could make ahead and bring to a pot luck, but the best way to enjoy crêpes is straight out of the pan, while they are still hot and soft. Incredible – oh là là!!!

Basic Gluten-free Vegan Crêpes

What you’ll need:

2 cups chickpea flour

1 cup corn starch

2 tablespoon agave syrup (omit if you plan on savory toppings)

1 teaspoon baking powder

1 teaspoon baking soda

1/4 teaspoon salt

1 tablespoon vanilla paste

1 teaspoon maple flavor

2 cups almond milk

1 cup water

2-3 tablespoons vegetable oil


What you’ll do:

  1. Combine all the ingredients as listed in a large mixing bowl, and whisk them all together. Let the batter rest for 15-20 minutes.
  2. Place a large pan with a flat surface over high heat. Let the pan heat up then using a silicon brush spread some oil uniformly over the entire surface. Pour just enough batter to cover the surface with a thin layer – for my 9 in (23 cm) pan I use about 3/4 cup. Pour the batter gradually towards the middle and keep pouring as you twirl the pan around.
  3. Place the crêpe over high heat for 2 minutes or so, then lower the heat just a tad and let the crêpe finish cooking on the first side. The way you can tell the crêpe is ready to be flipped is by looking at the surface – once the surface starts looking dry you are ready to flip.
  4. If you have a very good pan and have done everything right your crêpe will not be tightly attached to the bottom and you may even be able to flip it through the air. But if your crêpe is not loose then use your spatula to gently loosen the crêpe and flip it over. The flipping needs some practice, so be patient.
  5. The crêpe needs to cook on the other side for just 1-2 extra minutes. Slide the crêpe out, then increase the heat, leave the pan on for a minute to get it back to being really hot, spread some oil and repeat. Your friends and family may want to start eating the crêpes are they come out of the pan, and I say let them! Crêpes are the best when fresh, so it makes total sense to jump right in!!!

Copyright © Eat the Vegan Rainbow, 2018

Snickerdoodled Gluten-free Pancakes

Snickerdooled Gluten-free Vegan Pancakes, via Eat the Vegan Rainbow

Autumn and winter are both better with some cinnamon. This spice, which is actually a tree bark, fills our homes and kitchens with calm and coziness comes colder weather and can often be found in all the delicious food that surrounds our harvest and winter holidays. For example, cinnamon was the key spice that I used for my Spice Infused Apple Butter, and has made a significant appearance in Pumpkin Truffles, Buttercup Squash Pie, and Pecan Apple Baklava!

But, I don’t want to leave you with an impression that cinnamon is only good for sweets and treats. Actually, this rich spice can add a lot to Sweet Potato Burgers and Meatless Keema Matar, both lovely main dishes with complex flavor structure.

Having said that, these “snickerdoodled” pancakes are probably the recipe with the most cinnamon powder I ever used! If 1/4 cup of cinnamon seems like a lot you could start with less, but for the full snickerdoodle flavor on your breakfast plate I recommend going full blast ahead into the cinnamon bliss.

Because these pancakes are so rich in flavor you really don’t need to fuss too much about condiments and toppings. These are great with a splash of maple or agave syrup, or a dollop of a plant-based vanilla yogurt, or a simple Vanilla Sauce. I hope you give these a try – your kitchen will smell fantastic and your tummy will be happy!

If you prefer regular flour, this recipe can be made following same steps below using 1 cup white wheat flour, 1 cup whole wheat flour, omitting corn starch, and going from there. In this case, please go easy with adding water, and start with 1 1/2 cups – that might be enough.

Snickerdoodled Gluten-free Pancakes

What you’ll need:

1 cup fine corn flour

1 cup chickpea flour

1/2 cup corn starch

2 teaspoons baking soda

1/4 cup cinnamon powder

1/4 cup sugar (vegan)

1/4 cup vegetable oil

2-3 tablespoons lemon juice (juice of 1/2 lemon)

1 1/2 to 2 cups water

What you’ll do:

  1. Combine all dry ingredients in a large mixing bowl. Mix well, then add oil, lemon juice and 1 1/2 cup water. Whisk the pancake batter together, making it smooth and lump-free. The batter should be dense yet flowing, and you can add up to an additional 1/2 cup of water if needed. Please do add this last bit of liquid gradually to avoid adding too much. The mixing can be done in a blender, in which case you will need to add liquid ingredients first (1 1/2 cup water + oil + lemon juice) and then dry ingredients. Mix everything well before deciding whether any additional water is needed.
  2. Let the batter rest for 5-10 minutes.
  3. Heat a non-stick pan (or a non-stick griddle) until very hot. I usually crank the heat on my burner to the maximum for 1-2 minutes than lower down to medium-high before pouring in the batter. Please note that if you are using a cooking surface that is far from non-stick you will need to brush on some oil to prevent the pancakes from sticking.
  4. Ladle 1/4 cup of batter for each pancake. Let them cook on one side until bubbles stop to form (2-4 minutes), then flip the pancake over and cook on the second side for an additional 2 minutes.
  5. Serve hot with maple syrup or a simple Vanilla Sauce.

Copyright © Eat the Vegan Rainbow, 2018

SaveSave

Quick Protein Power Balls with Apples, Hazelnut Meal and Oats

Quick Protein Power Balls with Apples, Hazelnut Meal and Oats, via Eat the Vegan Rainbow

This recipe is as quick as lightning and perfect for those crazy and hectic mornings. I made it as we were heading out for a day at a beach, as a healthy snack that packs lots of protein, fiber and general goodness.

All you need really is a food processor, and you’ll be done in no time. All ingredients get added one by one, in the order they appear on the recipe list. I recommend switching your cutting blade with the kneading blade once you are done processing oats and apples. Or you can dump your oat/apple mix into a large bowl and continue to combine everything by hand.

To form the balls, scoop out a tablespoon of the mix at a time, then roll the dough around until tightly together. These snacks held up well to the car ride and beach time when kept in a plastic box. They also store well in the fridge and you can enjoy them for several days.

With oats, apple, pea protein powder and hazelnut meal, these balls can also be a quick breakfast as well as the afternoon pick-me-up.

Quick Protein Power Balls with Apples, Hazelnut Meal and Oats

What you’ll need:

1 cup oats

1/2 cup hazelnut meal

1 Granny Smith (or another tart) apple, peeled, cored and processed

1/2 cup pea protein powder

1/4 cup agave syrup

1 tablespoon vanilla bean paste

1 tablespoon cocoa nibs

What you’ll do:

  1. Place the oats into a food processor and process into a fine meal.
  2. Add the apple and process until fully chopped and incorporated.
  3. Replace the chopping blade with a kneading one, then add the rest of the ingredients, and pulse until everything is smooth and incorporated ( you can do this without a kneading blade, by using a mixing bowl and your hands to mush and mesh).
  4. Scooping 1 tablespoon at a time, form balls and arrange on a baking sheet, covered with wax paper, or another type of platter.
  5. Enjoy immediately, pack for a trip, have for lunch or snack – yummy!

Copyright © Eat the Vegan Rainbow, 2018

Gluten-free and Vegan Scones with Chia and Coconut

IMG_5069
Gluten-free and Vegan Scone with Chia and Coconut, via Eat the Vegan Rainbow

I recently had a pleasure of teaching an evening plant-based cooking class at our local technical and vocational school. I enjoyed the experience immensely and in addition to having a really very pleasant evening  I have also learned about some of the things that people who are relatively new to plant-based cooking wonder and care about.

For example, I had several conversations about vegan breakfast items and whether it is possible to make vegan pancakes (yes!) and vegan crêpes (also yes!). And based on many conversations online, people are just having hard time figuring out what their plant-based breakfast options are.

What’s for vegan breakfast?

Breakfast is not as limited as people usually think. After all oatmeal, cereal with nut milk, fruits, vegetables, toast (including with avocado), smoothies, muffins, cauliflower tofu burritos, vegan “scrambled eggs”, and many, many more options are currently available. Some require a bit more hands on preparation but the offerings are as diverse as for people that eat meat, eggs and cheese. For me, a roasted sweet potato is a great breakfast that keeps me going well into the afternoon!

How about vegan baked breakfast treats?

Of course the number of options increases vastly on those days when you find yourself with extra time to do some baking. Vegan baking is actually not all that difficult. There are quite a few vegan options when it comes to replacing eggs, and nut milks usually work just as well as dairy. Plus: there are now a couple of vegan butters on the market so if the recipe asks for butter there are now alternatives to be used (including the dreaded margarine, but I don’t recommend you go there!)

Are gluten-free vegan treats possible?

Having said all that, if you are trying to be vegan and gluten-free you may be out of luck. In gluten-free baking, gluten, a protein that makes some people unhappy yet provides baked goods with their lovely structure, is usually replaced by extra eggs to keep the levels of protein high. Unfortunately, finding a plant-based replacement for eggs in this context is not easy because most options, like flax meal, bananas, apple sauce, and various starches are not protein rich; they are mostly carb heavy.

Chia seeds as an egg replacer for gluten-free vegan baking

Enter chia seeds! These little seeds are one of my current favorites. Chia seeds can be made into a pudding and they are an excellent binding agent for making seed crackers – and in this category nothing compares to Oh She Glows Endurance Crackers, so give them a try! Amazingly, they also work in these super easy and quick scones. A critical step in this recipe is soaking chia seeds for 15-30 minutes in some warm water. This will transform them into a gel like substance that will keep your scone batter together. And that’s more than half a battle won! The rest is all about mixing things together, adding the right leavening agents to helps things rise high, and some flavors in.

Vegan buttermilk trick

A common way to help a leavening agent like baking powder and baking soda is to add some buttermilk. Acidity is what makes buttermilk so special, and what provides an extra push for the baking powder and baking soda. The easiest way to make a vegan buttermilk is to add some lemon juice or lime juice to your plant-based milk, mix it together and let it stand for 5 minutes or so. And, if you don’t have any sour citrus on hand, you can also use some apple cider vinegar as well. If you are using milk with lots of protein, like soy or pea protein milk, you may see quite a bit of curdling – that’s normal.

These delicious scone will please your entire household – so you may want to make a double batch. So, next time when someone asks you what’s for breakfast you can tell them: freshly baked scones. Enjoy!


Gluten-free and Vegan Scones with Chia and Coconut

What you’ll need:

3 tablespoon chia seeds
6 tablespoon warm water

1/3 cup almond milk, unsweetened (vanilla flavor or plain)
1 teaspoon lime juice

1 cup brown rice flour
1/3 cup corn starch
1/3 cup almond flour
1/3 cup shredded coconut unsweetened
1/6 cup tapioca starch
1 teaspoon psyllium powder
1 teaspoon baking soda
1 teaspoon baking powder
1/4 teaspoon salt
1/3 cup agave syrup
1/3 cup coconut oil, melted
Unsweetened coconut flakes and raw sugar, for sprinkling on top

ChiaSeedsCoconutScones_2018


What you’ll do:

  1. Preheat the oven to 375 F (190 C).
  2. Mix chia seeds and warm water together and set it aside for 15-30 minutes until a sticky gel-like substance forms.
  3. Measure out the almond milk and add the lime juice to it. Let that stand for 5 minutes before using.
  4. In a large mixing bowl measure out and mix all your dry ingredients.
  5. Mix your wet ingredients (almond buttermilk, agave syrup, soaked chia seeds, and melted coconut oil), then add to your dry ingredients. Combine everything together. The batter will be sticky but not falling apart.
  6. Line a large baking sheet with some parchment paper. Place your batter in the middle of the sheet, and form a round, domed structure. Using a thin and sharp knife, cut your dough into six even pieces. Use your knife to separate the cur pieces out just a bit, but you don’t need to pull them apart. The scones will bake well and break of easily when they are done.
  7. Top the scones with some extra coconut flakes and sugar, then place in the oven for 20-25 minutes. Let the scones cool for 15 minutes or so before serving, then enjoy with some butter and/or jam, like his 10 minute, no sugar added blueberry jam I shared some time ago.

Copyright © Eat the Vegan Rainbow, 2018

Easy, Soy-free Vegan Scrambled “Eggs”

Soy-free Vegan Scrambled Eggs, via Eat the Vegan Rainbow

Most of us grew up eating eggs for breakfast, and some of us (me included) have also used eggs as a quick lunch or dinner. Going vegan did not come with simple instructions on how to replace eggs. Although there are some great online resources on how to replace eggs in baked goods, it is less clear how to make a simple egg-based breakfast without eggs. There are couple of products on the market and Follow Your Heart‘s VeganEgg is pretty decent, but could do with some optimization.

I have also been seeing people commenting that tofu scramble just does not do it for them, or that they really miss their breakfast eggs or burritos, and that they are getting bored with all the oatmeal or smoothies, which all of us with plant-based diets seem to be converging on as go-to breakfast items. So, I embarked on a bit of experimentation and I think I struck gold!

Or to be more specific struck a chickpea flour-based scrambled egg substitute that works relatively well. My special “egg” mix also includes flax meal, as well as tapioca starch as two ingredients that add a bit of stretchiness to the final scramble. I also added just a pinch of turmeric because it gives these eggs a nice, bright yellow color that is very close to the original – however you can skip it if you dislike the taste.

Many egg replacers include some Himalayan black salt, which owes its color to the presence of iron sulfide, and sulfides have that well-known rotten egg smell. So, adding them to egg replacers sends a strong “egg” signal to our receptors. However, it is the smell of rotten eggs, and I prefer my eggs not in state of any decay so I recommend against it. But if you liked your nostrils being tickled by the sulfide aroma, feel free to replace the plain salt below with the black one.

Although the “egg” mix will look a bit weird and have a thick, sort of custard-like consistency that’s OK. You will need to keep stirring the scramble as it cooks to get that nice scrambled egg look and feel. One down side of this recipe is that the “egg” mix needs some help since it is pretty bland tasting on its own. Here, I add some scallions and sun dried tomatoes, which really add a lot of flavor to the scramble. The add-ons are fully customizable and you can use onions, mushrooms, pesto, asparagus, peppers, hot sauce, vegan cheese, nutritional yeast, or any combination of these.

Hopefully, this recipe will bring the scrambled eggs back to your breakfast menu!

Soy-free Vegan Scrambled “Eggs”

What you’ll need:

1/2 cup chickpea flour

1 tablespoon flax meal

1 tablespoon tapioca starch

1/4 teaspoon salt

1/8 teaspoon turmeric (optional, for color only)

1 1/2 cup hot water

6 scallions (green onions), trimmed

1/2 cup (50 g) sun dried tomatoes, finely sliced

2 teaspoons olive oil

What you’ll do:

  1. Combine the first five ingredients (chickpea flour, tapioca starch, flax meal, salt and optionally turmeric) in a mixing bowl and whisk together. Add hot water in 1/2 cup increments and gradually, whisking as you add to avoid clumping. You may need to adjust the amount of liquid so do add the last 1/2 cup slowly. The mixture should have pudding-like consistency.
  2. Let the “scrambled egg” mix sit for 5 minutes or so.
  3. While the mix is resting, chop the scallions, both green and white bits, and the sun dried tomatoes.
  4. Place a large frying pan over the medium high heat, add the oil, and the chopped scallions and tomatoes. Brown the vegetables for few minutes.
  5. Pour the egg mix in, and stir occasionally allowing the mix to slightly brown.
  6. Serve with a slice of freshly toasted bread, an English muffin, a bagel, or wrap in a tortilla for a breakfast burrito. If you are serving with toast, use your fork to fluff the scramble up and give it a more of a scrambled egg look!

Copyright © Eat the Vegan Rainbow, 2018