Quick Quiche with Caramelized Onions, Mushrooms and Tofu

Quick Quiche with Tofu and Mushrooms
Quick Quiche with Tofu and Mushrooms, via Eat the Vegan Rainbow

Eating pie for lunch sounds so decadent, doesn’t it? And that’s what makes quiche so appealing. I usually stay away from making quiche because I can’t deal with making my own crust. The crust takes time and effort that is beyond my capacity. Luckily for me, and I am guessing many of you, stores carry pre-made pie crusts that are ready to use.

My quiche recipe uses one of those and that really makes it come together relatively quickly. One tip when using the store bought frozen pie crust is to bake the crust by itself first for ten to fifteen minutes while you are mixing and preparing the other ingredients. This pre-baking will help make the crust nice and crunchy and help it hold the filling.

Filling is definitely the star of any quiche and it is traditionally made of eggs and cheese, often with mushrooms, ham, spinach, artichokes or other meat and vegetable components thrown into it. So, the result is usually light in texture but heavy on your stomach and very calorie dense.

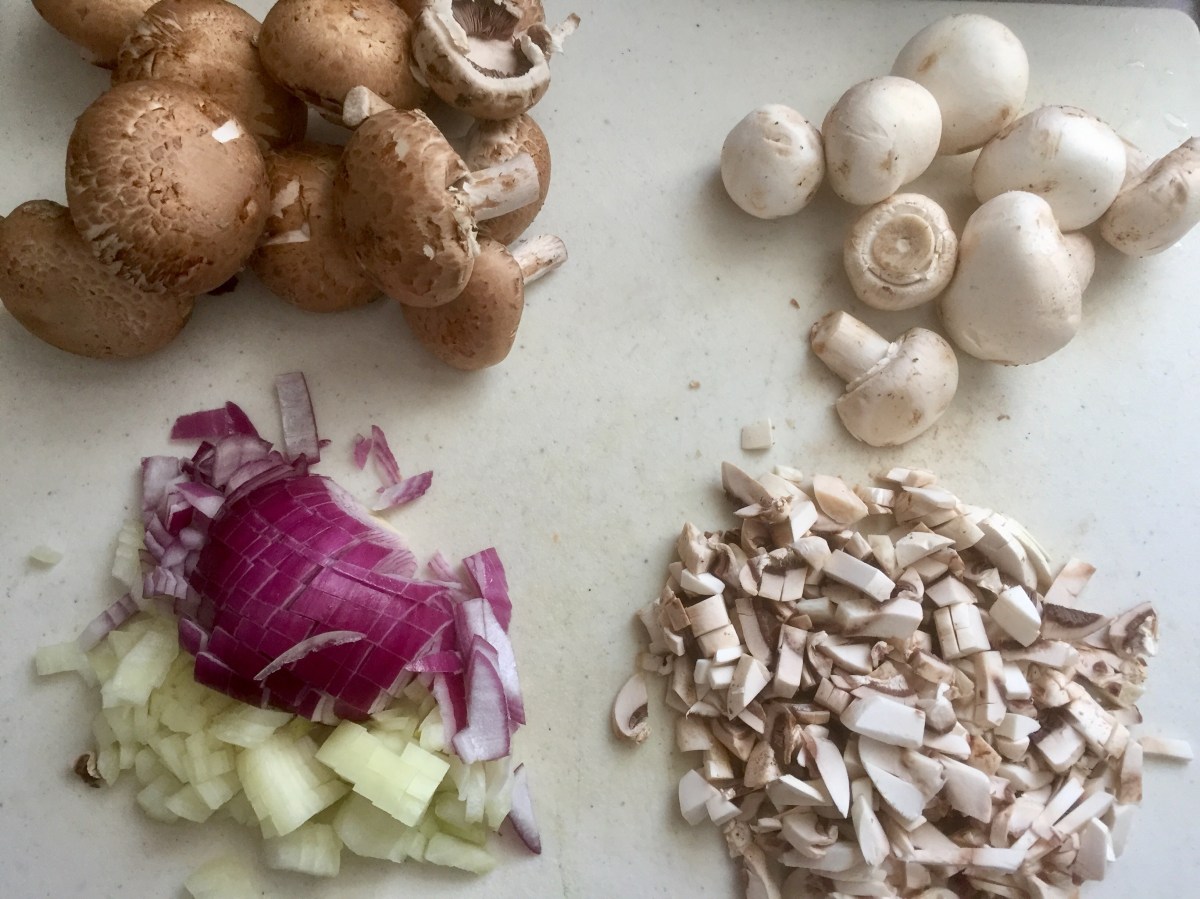
In my first attempt to veganize quiche I decided to keep it simple and start with mushrooms, red onions and tofu as main ingredients. Most of the cooking actually takes place in a pan on the stove top as both red onions and mushrooms need to be fully cooked before they hit the pie crust. I recommend taking the time to caramelize the onions nice and slow, as well as let the mushrooms cook most of the way before adding tofu. In this case, the tofu needs to be drained and crumbled but you can skip the “pressing tofu” step that almost all tofu recipes have making this a really quick dish!

Quick Quiche with Caramelized Onions, Mushrooms and Tofu

What you’ll need:

1 store bought pie crust, vegan

1 red onion

10 oz (300 g) white mushrooms

14 oz (400 g) extra firm tofu, drained

2 tablespoons nutritional yeast

1 tablespoon corn starch

1 teaspoon dry basil leaves

1 teaspoon dry oregano leaves

Cooking spray

What you’ll do:

    1. Preheat oven to 350 F (180 C). Once ready, put the pie crust in to pre-bake for 15 minutes.
    2. Cut the onion into fine, thin slices.
    3. Spray the bottom and sides of a frying pan with cooking spray and place it over medium high heat. Add the onion and let caramelize for 5 to 10 minutes. The onion should be nicely browned and soft.
    4. While the onion is caramelizing, clean and slice the mushrooms, or you can always buy sliced mushrooms and skip this step.
    5. Add sliced mushrooms to the onion mix and cook until mushrooms soften, which will take another 5 minutes or so.
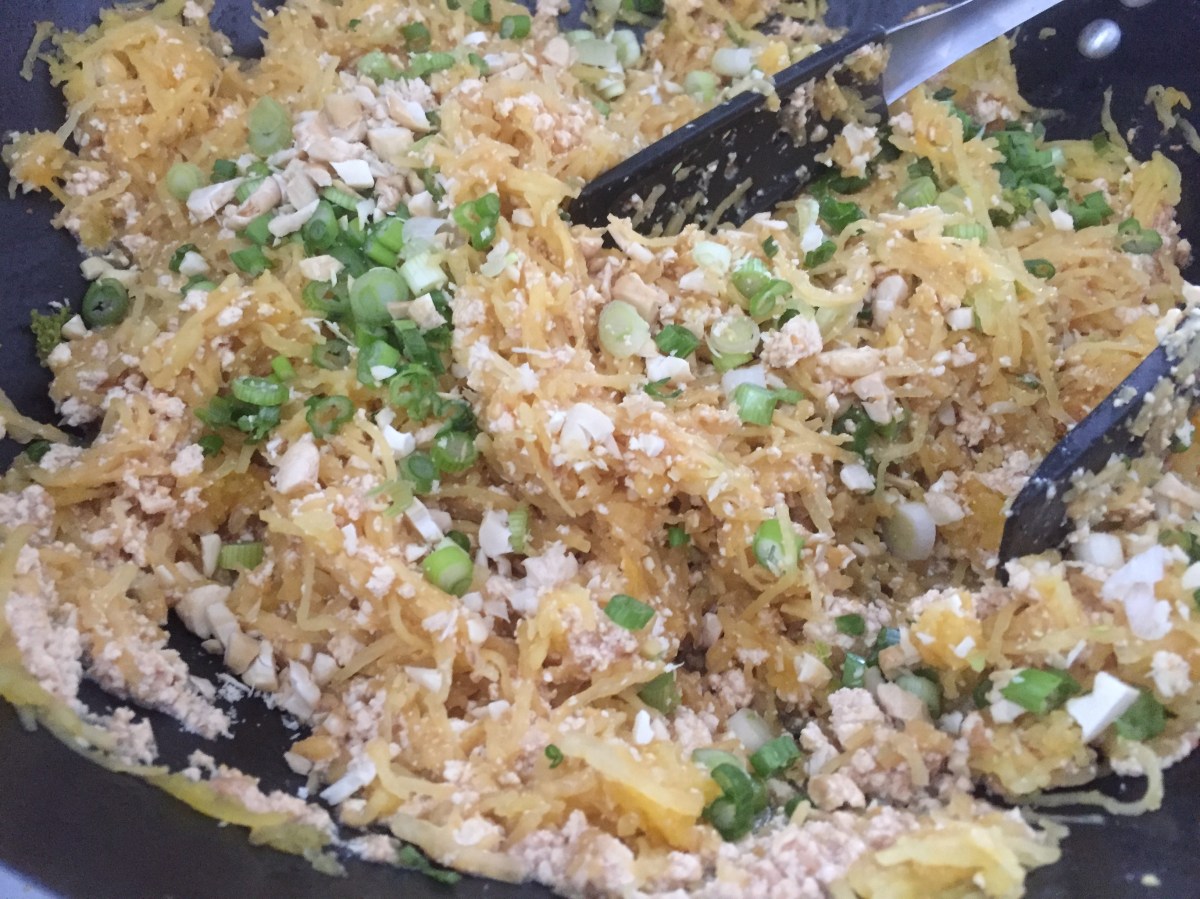
    6. Drain tofu and crumble it into small crumbles with a fork or with your hand. The size of the crumbles should be similar to scrambled egg.
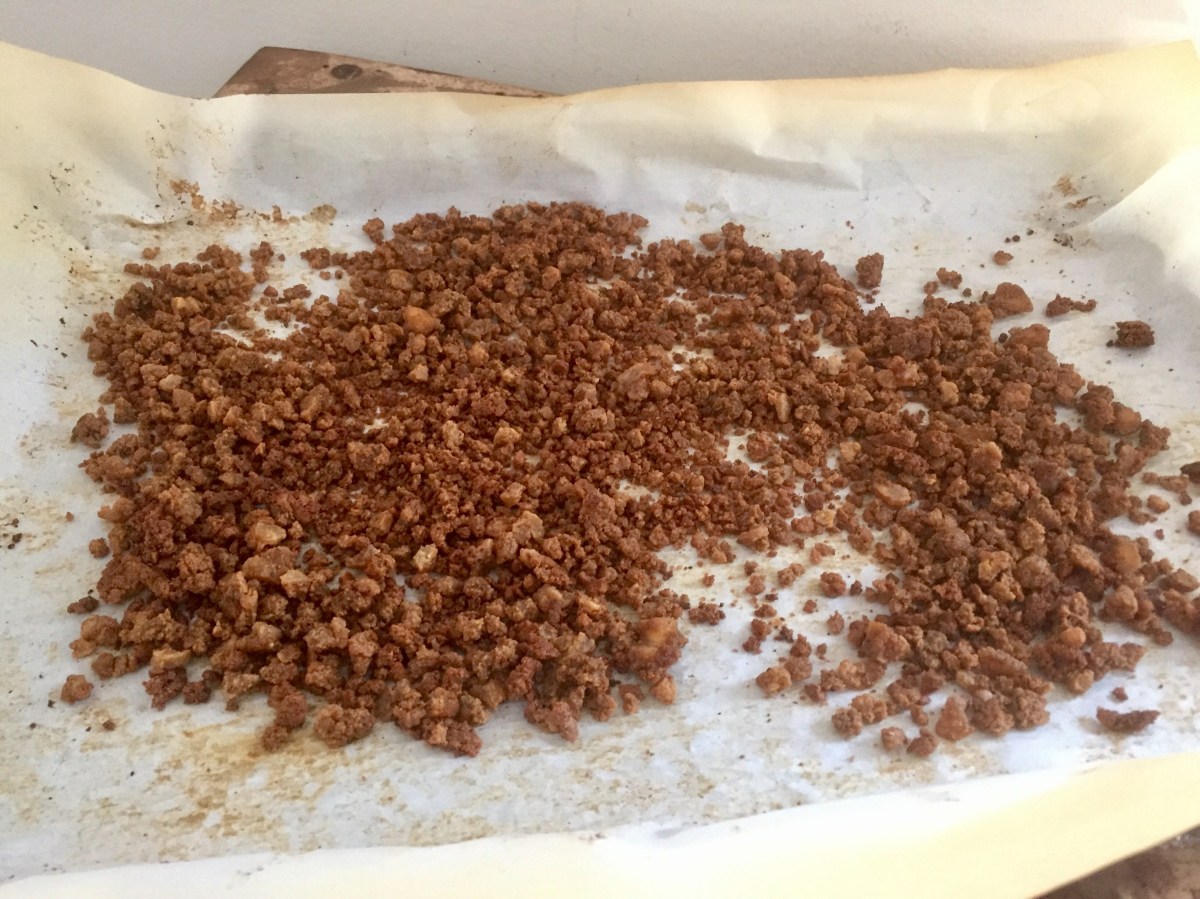
    7. Add crumbled tofu, nutritional yeast, corn starch, basil and oregano. Stir well the quiche filling, let brown for another 1 to 2 minutes, then turn the heat off and let sit until your pie crust is done pre-baking.
    8. Pour the filling into the crust, spray the top with some cooking spray and return to oven for another 20 to 25 minutes, until the top is golden brown.
    9. Take the quiche out, let stand for 5 minutes then serve with your favorite salad or top with some sun dried tomato shreds like I did on this occasion.

Copyright © Eat the Vegan Rainbow, 2017

Spaghetti Squash Pad Thai

Spaghetti Squash Pad Thai, via Eat the Vegan Rainbow

Basic Pad Thai is a simple noodle dish, where wide rice noodles are mixed with eggs and chopped peanuts, then sprinkled with crushed red pepper flakes, lime juice and chopped scallions (green onions) and sometimes fresh cilantro. The whole dish comes together in five to ten minutes and can be eaten as is, or customized with a range of toppings so it is definitely a very popular dish found in every Thai restaurant.

Although it is relatively straightforward to find the right type of rice noodles that are typically used in Pad Thai, I decided to explore whether spaghetti squash would work. Spaghetti squash is a squash that, as the name suggests, has a stringy flesh structure that can be forked into a noodle-like structures. The texture of these noodles is softer than the regular pasta, and they are usually shorter but the flavor is rich and delicious, and the nutritional facts are definitely on the side of the squash when compared to either rice noodles that one would use in Pad Thai or any other pasta.

One down side to using spaghetti squash in a recipe like Pad Thai is that squash needs to be roasted first, which means that a five to ten minute recipe all of a sudden becomes a sixty to ninety minute recipe. Still, I recommend you give it a try especially as the hands on time is not as intense.

Are there any tricks to spaghetti squash? No, not really. The only two tips that are worth mentioning is to roast the squash cut side down on a parchment paper lined baking sheet, and to let the roasted squash cool as it will help with handling the squash as well help the squash noodles come out better defined.

To make this into vegan Pad Thai, I recommend using extra firm tofu instead of eggs. You don’t need to press it, but do let it drain for just a bit. Otherwise it may make your Pad Thai too mushy.

One final modification to the traditional Pad Thai recipe I made is using peanut butter in the sauce and some chopped cashews for the topping. Reason for this? I ran out of peanuts!

Spaghetti Squash Pad Thai

What you’ll need:

1 medium spaghetti squash, 1 to 1.5 lbs (about 500 to 700 g)

2 tablespoons garlic, crushed

2 tablespoons peanut butter

2-3 tablespoons lime juice

14 oz. (400 g) extra firm tofu

7 scallions (green onions), finely sliced

1/3 cup cashews, chopped

Cooking spray

What you’ll do:

    1. Preheat your oven to 425 F (220 C).
    2. Wash the spaghetti squash, wipe dry and cut in half lengthwise. Use a spoon to clean out the seeds.
    3. Line a large baking sheet with parchment paper. Place spaghetti squash on the parchment paper, cut side down. Place in the oven and let roast for 25 to 30 minutes. Check with a knife and it goes in without resistance your squash is done. Take it our of the oven and let cool for at least 30 minutes. Be patient because the squash needs to be cool to handle.
    4. Once cool, take half of the squash, flip over and using a large fork go in and pull the flesh to make the “spaghetti”.
    5. Spray the bottom of a large pan or wok with cooking spray and place it over medium-high heat. Add garlic and let the garlic aroma develop, which will take about 1-2 minutes.
    6. Add soy sauce and peanut butter. Stir well and cook for 1-2 minutes.
    7. Add spaghetti squash and mix with the sauce. Here, I recommend using a pair of tongs to gently fold the squash into the sauce. Once the two are well incorporated add tofu that you have crumbled to small bits that look like scrambled eggs.
    8. Mix everything well together and cook for another 4-5 minutes.
    9. Turn the heat off, add the lime juice, scallions and cashews.
    10. If you like to add some heat you can use crushed red pepper flakes, or a dash of sriracha sauce. You can also top with fresh cilantro for some added freshness.

Copyright © Eat the Vegan Rainbow, 2017

Vegan Stuffed Peppers with Homemade Beef Substitute

veganstuffedpeppers
Vegan Stuffed Peppers with Homemade Beef Substitute, via Eat the Vegan Rainbow

My mom is the queen of stuffed bell peppers. Her peppers have been well-known within our extended family, and frequently requested by friends and family when they visit. What I am saying is that stuffed bell peppers should be in my DNA, but it took me years to transform what I learned in my mom’s kitchen to a dish that will be a crowd pleaser.

The first major breakthrough in my pursuit to a perfect stuffed bell pepper recipe came when I realized that cutting the peppers in half lengthwise makes my life so much easier than cutting just the top off. Cutting peppers lengthwise makes cleaning out the seeds and the spines a breeze, plus helps distribute the stuffing and helps the stuffing stay put. It also helps peppers cook faster. Another thing that I found through many round of experimentation is that it helps if you pre-cooks peppers just a bit before stuffing them. I tried parboiling and it helps but it changes the flavor of peppers in a direction that I don’t really like. So, I recommend par-roasting, which means letting your peppers roast for 10-15 minutes, until they just start to soften and get browned on the surface. This is a great way to jump start cooking your papers and add some flavor.

pepperrainbow
Pre-roasted Bell Peppers, via Eat the Vegan Rainbow

The second breakthrough came when I discovered that the stuffing does not need to include a starch component. You can have lovely stuffed bell peppers without filling them with rice, or potatoes, or quinoa, or barley, or any of that stuff. I am not saying these are bad things to use, but most recipe use them as space fillers more than anything else. But for me in this recipe, a mix of yellow onion, red onion, white mushrooms, and baby bella (crimini) mushrooms. One tip here is to chop all these to pretty small pieces so that they match the size of ground meat chunks you would usually find in a stuffed bell pepper recipe. Another tip: for a recipe like this you can use both the mushroom tops and stems, and minimize the waste!

stuffedpepperswithmushroom
Vegan Stuffed Peppers with Homemade Ground Beef Substitute, via Eat the Vegan Rainbow

This brings me to my most recent breakthrough: vegan substitute for ground meat. I followed this recipe I found on Glow Kitchen, with only one modifications – I did not add olive oil and used cooking spray on my baking sheet instead. The recipe produces amazing ground beef substitute and uses tofu and a handful of pantry staples. The prep time is a bit on a longer side, as it takes about 1 hour in the oven with frequent stirring, but it is worth it!!! I think you will love this so much that I recommend doubling the recipe right off the bat.

vegangroundbeef
Vegan Ground Beef Substitute, recipe via Glow Kitchen, execution via Eat the Vegan Rainbow

Finally, I did use some vegan cheese to top the stuffed peppers, but you can definitely skip that step or top them with fresh Italian (flat leaf) parsley. Or both!

Vegan Stuffed Peppers with Homemade Beef Substitute

What you’ll need:

4 bell peppers (red, orange, yellow, green – any color will do)

8 oz. (225 g) white mushrooms, finely diced

8 oz. (225g) baby bella (crimini) mushrooms, finely diced

1/2 large yellow onion, finely diced

1/2 red red onion, finely diced

1 batch of Vegan Substitute for Ground “Beef”

15 oz. (425 g) crushed tomatoes, can

1 teaspoon smoked paprika

1/4 cup vegan cheese, shredded

Cooking spray

What you’ll do:

  1. Prepare the ground beef substitute according to instructions here. You can make this a day ahead, which is what I did. Also, you can use any store bought ground beef substitute you like.
  2. Preheat oven to 425 F (220 C).
  3. Wash and dry the peppers, then cut lengthwise and clean out the seeds and spines. Put them into a roasting pan and spray gently with cooking spray. Par-roast for 15 minutes or so. Take them out of the oven and remove any liquid that peppers released during roasting. Set aside.
  4. Lower the oven temperature to 350 F (175 C).
  5. Sauté onions and mushrooms on medium heat with a bit of cooking spray for 5-8 minutes. Stir in beef substitute and sauté for another 5 minutes. Turn the heat off and mix in smoked paprika. Your stuffing is ready for the next step!
  6. Pour the can of crushed tomatoes into your baking dish. Place par-roasted peppers in, and fill them with the stuffing. Cover the baking dish with foil and put in the oven for 15-20 minutes. Remove the foil and bake uncovered for 10 minutes.
  7. Sprinkle the cheese on top and let it melt which will take another 5 minutes. And that is it. You are ready to enjoy!

Copyright © Eat the Vegan Rainbow, 2017

Vegan Saag Paneer

vegansaagpaneer_saffronrice
Vegan Saag Paneer with Saffron Brown Basmati Rice, via Eat the Vegan Rainbow

Few days ago, I shared my recipe for Vegan Chicken Tikka Masala that uses young jackfruit as a substitute for chicken, and slow cooker as a substitute for using ghee to enhance the flavor, as well as huge time and effort saver. Since then I decided to tackle another jewel of Indian cuisine, Saag Paneer. Saag is a traditional Indian dish made of leafy green vegetables, which is a vegan friendly part of this equation, and paneer is soft, white cheese very common in South Asia, a vegan less friendly ingredient. Putting green leafy vegetables, like spinach, together with cheese, spices and cream is a no-brainer, so it is no surprise that Saag Paneer is very popular.

In order to build a vegan version of Saag Paneer, I focused on transforming extra firm tofu into paneer. This turned out to be easier than I expected. First of all, texture of extra firm tofu and your average paneer are very similar. Additionally, they both have mild flavors and creamy consistency. So far so good!

You do need some time and patience with this one though. I prepped tofu the way I usually do by leaving it in the sieve in the fridge overnight. You can use any other method of getting rid of the excess moisture – I prefer the sieve because it requires no work, cans and paper towels are tedious and a bit wasteful, and I am yet to invest in the tofu press. The next morning I cubed the tofu, and let it “marinate” in the dry spice mix for 4-6 hours.

veganpaneer
Vegan Paneer, via Eat the Vegan Rainbow

Even after sitting in the spice mix, the tofu paneer is not quite ready. Although you can use it, I strongly recommend that you first roast the tofu for 20-30 minutes. This roasting step locks in the spices and adds slight crunchiness that makes every bite a treat.

Few additional tips that will help you put this dish together are to do with spinach. I use frozen chopped spinach, as it is ready to go. The traditional Saag Paneer recipe uses quite a bit of cream to make the spinach nice and creamy. I use coconut milk to add a bit of creaminess to it, and the coconut milk adds a bit of its own nutty flavor that I enjoy. But, I don’t rely on coconut milk alone and have discovered some time ago that stick (also known as hand or immersion) blender is indispensable for creating spinach that’s beyond creamy! If you don’t have a stick blender, you can use a blender or a food processor to purée your spinach.

Once the spinach is puréed, it is ready to meet the tofu paneer, and after about 15 minutes of simmering the Vegan Saag Paneer will be ready to meet your taste buds!

img_1315
Vegan Saag Paneer, before the final mix. Via Eat the Vegan Rainbow

Vegan Saag Paneer

What you’ll need:

For tofu paneer

14 oz. (400 g) extra firm tofu

1 tablespoon garam masala

1 tablespoon ground cumin

1 teaspoon garlic powder

For creamed spinach

2 lbs (1 kg) frozen, chopped spinach

1 tablespoon garlic, minced

2 tablespoons tomato paste

7 fl. oz. (200 mL) coconut milk, reduced fat

Cooking spray

What you’ll do:

  1. Place tofu into a strainer and leave in the refrigerator to drain overnight. Then pat dry with a towel and cut into 1 in/2.5 cm cubes.
  2. In a ziplock bag mix dry spices (garam masala, ground cumin and garlic powder) and add tofu cubes to it. Zip the bag and toss gently to coat the tofu pieces evenly. Leave in refrigerator for 4-6 hours.
  3. Heat the oven to 425 F (220 C). Line a baking sheet with parchment paper and space tofu cubes evenly with some room between the cubes. Don’t brush the spice mix off, just roast the tofu pieces as is for 10-12 min, then go in and flip them over and put them back for another 10-12 min, so that they roast on all sides and get golden brown.
  4. On the stove top, spray the bottom of your pan with cooking spray and heat to medium high. Add minced garlic (I prefer the jar variety that taste great in a dish like this and requires no work), and let it start to develop the aroma for about 1-2 minutes. Next add the tomato paste, and let it mature for 1-2 minutes.
  5. Add frozen spinach. Cook with occasional stirring for 15-20 minutes. Let cool for 15-20 minutes, add coconut milk, and then purée with a stick blender until smooth.
  6. Add roasted tofu and mix gently until tofu is well incorporated. Simmer for 15 minutes. Enjoy with a piece of naan bread, or with Saffron Brown Basmati Rice.

Note: please note that unlike most Saag Paneer recipes I do not add spices to spinach. The flavor intensity comes from tofu paneer, so it is important that your tofu is well coated with the spice mix and nicely roasted until golden brown.

Copyright © Eat the Vegan Rainbow, 2017