Hottest Summer Trend: Carrot Dogs

fullsizerender-4
Hottest Summer Trend: Carrot Dogs, via Eat the Vegan Rainbow

There are many ways for plant-based and vegan eaters to enjoy one of the summer food staples, the hot dog. Most grocery store (supermarket) chains in US now carry plant-based hot dogs, and I tried a few. They are OK, and some are really, really good! This makes dinner really quick and easy – from fridge to plate in less than 15 minutes, but the store bought vegan hot dogs are not cheap, and depending on the brand they may not taste all that great.

Enter a super cheap, super easy, super cute and super hero hot dog alternative: carrot dog! If you have not seen or tried these you are missing out. Carrot Dogs are what they are – carrots made into a hot dog. Now, some of you may think that carrot is a carrot and it’s perfect the way it is. I agree: carrots are perfect as they are, and joy to munch any time. But, we all now carrots have always led a secret agent life as a sweet vegetable that can be made into a cake, a muffin, a cookie or in many other things. So why not a hot dog?

I started seeing posts on Carrot Dogs few months ago and had to admit it to myself: Carrot Dogs are an IT items this summer. So, I went for it and boy or boy do I like the results. I made carrots dogs couple of times now and they made the rounds: to the beach, to the back yard BBQ party, to the laid back late summer dinner outdoors. Trust me: they are absolutely worth it!

One thing to keep in mind is the thickness of your carrots. They should be relatively evenly cylindrical and about the diameter of a regular hotdog. Take some time to eyeball your carrots and pick those that look they fit the part. Also, keep in mind that they should fit nicely into your hot dog bun, so cut them accordingly. If you want to get really realistic, you can shape their ends into a hot dog looking end lobes, but I didn’t. All this is purely cosmetic and at the end of the day will not change the taste. But, if you are entertaining and want to go for a real WOW factor, take some time to fine tune the look of your carrot dogs. You may want to do this final fine sculpting step after your carrot dogs are cooked, as they will be softer and easier to carve.

Speaking of cooking carrot dogs, there is one major trick to a perfect carrot dog: boiling the carrots just enough to make them as soft as a regular hot dog would be. This is a bit tricky because that level softness in a carrot is only a step or two removed from when the carrots start to fall apart when handled with a fork or a pair of grill tongs. The exact time will depend on how thick your carrrots are, and what variety they are. I started with boiling the carrots for 11 minutes and that turned out not to be enough, so I went up to about 15 to 16 minutes which was much better. I also tried the pressure cooker – that was way too much!

Once you have your perfectly shaped and perfectly cooked carrot dogs, they will need to spend some time marinating in a mix of oil, vinegar, and spices which all work together to add a layer of hot dogginess to the carrots. The marinating step can take anywhere between half an hour to couple of hours. Longer is fine, and you can make your carrots a day ahead and leave them to marinate overnight in the refrigerator. Less than half an hour is probably not going to be long enough.

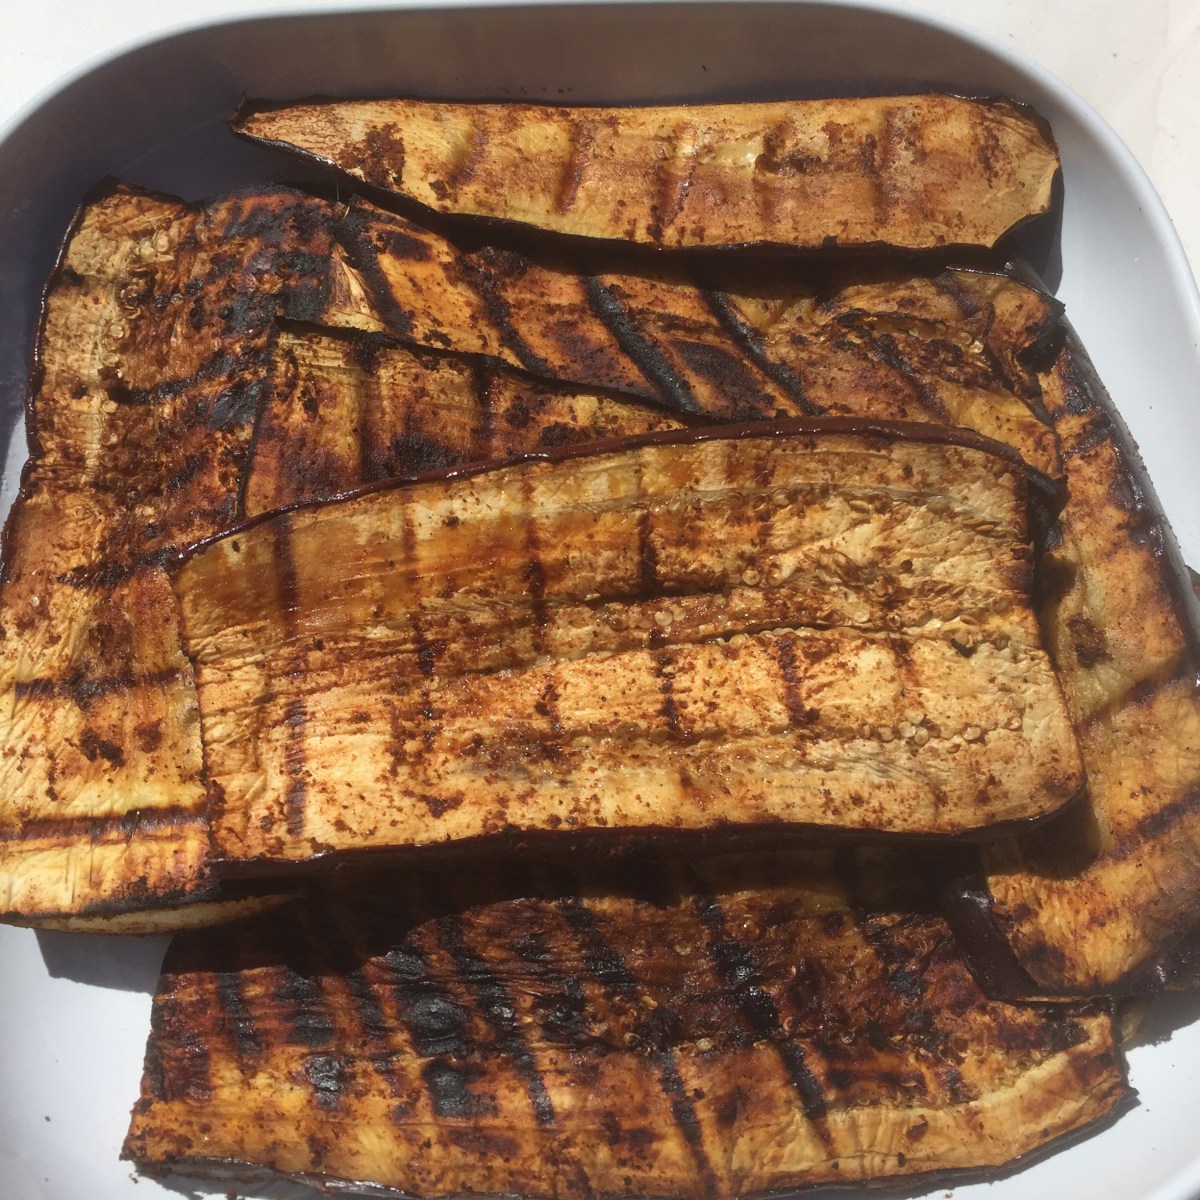
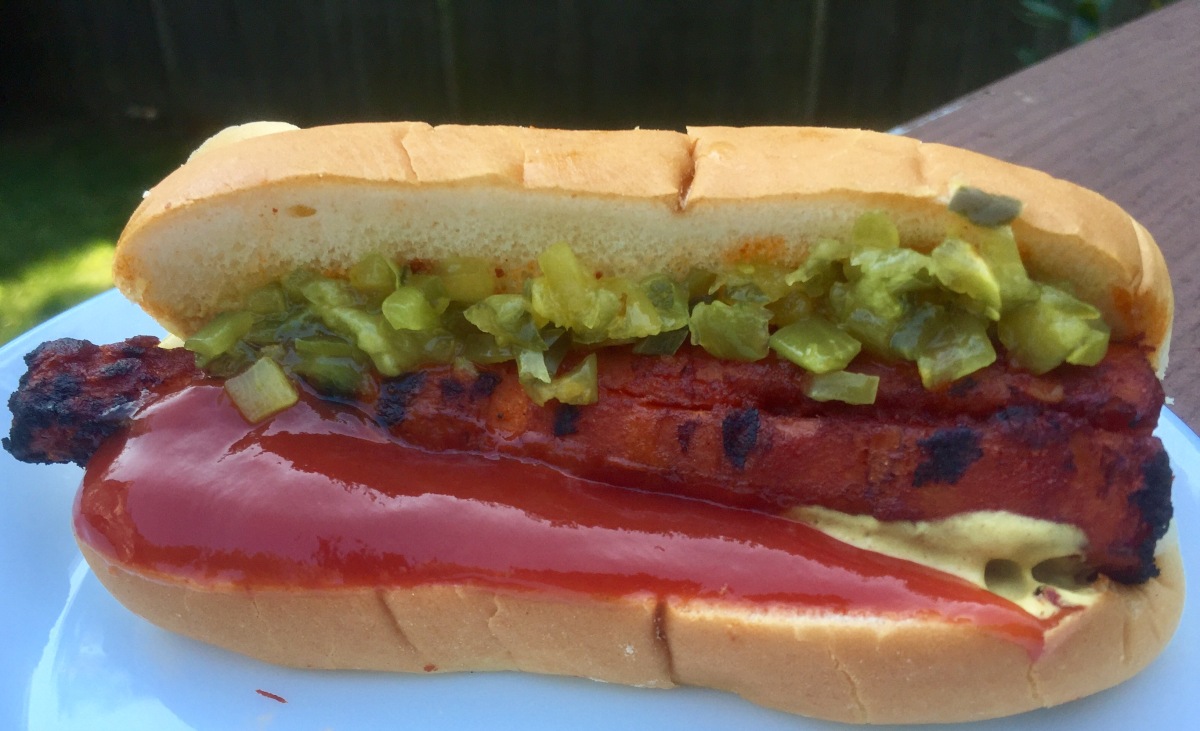
The second to last thing that remains to be done is grilling, and that takes only a few minutes per side. The dogs are fully cooked so all you really want to do here is add some grill marks and get some caramelization going. If you like your hot dog buns warm, you can put them on the grill once your carrot dog is a minute away from being done. So, the very last thing is to put the dog into the bun and top it with your favorite hot dog topping. I go a bit wild with my condiments and pile on ketchup, yellow mustard, and dill relish but really anything goes. Bite in, and be amazed at how great carrot dogs taste. Believe me, you will immediately understand why people are raving about these!!!

Carrot Dogs

What you’ll need:

8-12 carrots (or as many as you like)

1/2 cup vegetable broth

1/3 cup apple cider vinegar

3 tablespoons vegetable oil

3 tablespoons soy sauce (reduced sodium)

1 tablespoon smoked paprika

2 teaspoons garlic powder

2 teaspoons onion powder

1 teaspoon ground yellow mustard

Cooking oil (for oiling the grill)

Hot dog buns, mustard, ketchup, relish, sauerkraut, chili – anything else you like – for serving!!!


What you’ll do:

  1. Peel and cut your carrots to be about the length of your hot dog buns. You don’t need to be super precise but do try to pick carrots that are more or less cylindrical, and about the same diameter as this will help them cook more evenly.CarrotDog
  2. Place carrots into a pot – I use the pot with large bottom so the carrots can lay flat – and cover with water. Bring water to boil, and boil carrots for 10 to 16 minutes. You will need to keep an eye on your carrots and check from time to time as the exact time will vary from a carrot variety to a carrot variety, and depend on how thick your carrot dogs are.
  3. While carrots are cooking, whisk together the marinade by mixing together vegetable broth, vinegar, oil, soy sauce, smoked paprika, garlic powder, onion powder and ground mustard.
  4. Run the hot carrots under the cold water to stop the cooking, drain, pat dry, and add to the marinade. Marinate for about 30 to 60 minutes at room temperature or overnight in the refrigerator.
  5. Prepare the outdoor grill for grilling as you would normally do. I have a gas grill and turn all my burners on full blast for 5 minutes, with the lid down to burn off any leftovers from last time. Then I dial them back and use my brush to clean off any remaining bits and pieces from the grill grates. Once that’s done I dip a paper towel in some oil and using a pair of long tongs pass the oiled paper towel over the grill grates. Now we are ready!
  6. Place your carrot dogs on the grill over medium high heat and grill for couple of minutes on each side, or until nice grill marks form. You could brush the carrot dogs with the marinade as they cook to prevent them from drying out, but the process is quite quick and this may not be necessary. One tip: if you marinated your carrot dogs in the refrigerator, take them out a hour before you plan to grill them to let them come to room temperature. That will help with flavors and the grilling.
  7. Enjoy the carrot dogs the way you would any ole’ hot dog!

Copyright © Eat the Vegan Rainbow, 2017

Miso Glazed Tempeh, From the Grill!

Miso Glazed Grilled Tempeh, via Eat the Vegan Rainbow

If you have not done so already, you should definitely try tempeh. I’ve been hearing about it for some time now, and seeing several different brands and varieties right next to the tofu that I usually get but I only got the first batch of tempeh just the other day. I bought several different varieties to try them out and spent few days reading about what’s tempeh good for and how to best cook with it. Tempeh is related to tofu because both are soy based. But, in terms of flavor and texture (and as far as I can tell in terms of how you actually make the two, based on what Wikipedia says), tofu and tempeh are quite different. Tempeh is firm, much firmer than the firmest tofu, and does not come in liquid. It is actually fermented soy beans mixed with rice [edited after reading comment from Mary S below – thanks Mary S, it’s good to get the facts all squared away. I am still a bit confused since the ingredients’ list of the tempeh I used did include rice; at the end of the day my confusion does not matter change the fact that the food was delicious], so although it is dry, it does feel sticky to touch and just a bit slimy. FYI: I am not saying this to freak you out, rather to forewarn you so that you are not as surprised when you start handling it as I was – I thought my tempeh has gone bad and wanted to throw it out! But, I double-checked the date on the bag, regained my cool and went for it.

I decided to start simple and build from there, so this Miso Glazed Grilled Tempeh is more or less my starting point. The brand of tempeh I got is Lightlife and the two varieties I started with are their Organic Garden Veggie and Organic Soy Tempeh. Each package is half a pound (about 250 g), and the block of tempeh comes in a vacuumed-sealed package, that’s within a sealed plastic bag, so there are two bags to remove! I used both blocks at the same time, since one just did not seem enough to make for the end of the week Friday dinner.

The first thing I did was to fire up the grill. I have a gas grill and it takes it about ten to fifteen minutes to get to be sizzling hot, with burners going at full blast and the lid down. That was just enough time for me to prep the tempeh and the glaze. For tempeh, I placed the pieces into a pan large enough to keep the pieces flat, covered with water, brought to boil and boiled for four to five minutes per side – I did flip the pieces over once since the pan I was using was shallow and the water did not fully cover the tempeh, so if your tempeh is fully covered you will not need to do the flip! After about ten minutes I took the tempeh out, pat dried the pieces, and left them uncovered on some paper towels.

While the tempeh was boiling and the grill was heating up, I mixed together a simple glaze with some soy sauce, Worcestershire sauce, white miso glaze and vegetable oil. I spread the glaze over the tempeh pieces just before placing them on the grill the glazed side down. Then I glazed the top and let it grill for about five to six minutes. By that time the grill marks will be perfect, and the pieces ready to be flipped. I did reglaze both sides again and flipped again, so that at the end each side got two layers of glaze and about eight to ten minutes of grilling, so in total the grilling bit took less than twenty minutes. If you are in a rush, you can definitely skip the reglazing, but if you are outside hanging around the grill with friends and family and enjoying the lovely summer evening, then why not give tempeh extra love, glaze and grill time?

Let grilled tempeh rest for just a second, then slice and serve. You can serve it in a hamburger or a hot dog bun with the usual trimmings, but note that condiments, like mustard and ketchup, are going to overpower the flavor of the grilled tempeh. So, I recommend serving tempeh with a side of coleslaw and baked, or barbecue beans, which is how I had mine. Add to that a glass of cold beverage of choice, and what can be better?

Miso Glazed Grilled Tempeh Sliced, via Eat the Vegan Rainbow

Miso Glazed Grilled Tempeh

What you’ll need:

2 8 oz (227 g) blocks of tempeh (any variety and brand you like)

2 tablespoons soy sauce, reduced sodium

2 tablespoons white miso paste

2 tablespoons vegetable oil

1/2 tablespoon Worcestershire sauce (vegan)

Oil for oiling the grill grates


What you’ll do:

  1. Prepare your grill like you normally do. I recommend getting the grill really hot and letting any bits and pieces from the previous grill session burn off, then scrapping the grates with an appropriate type of a brush (please be careful here because you can really damage your grill grates if you don’t follow the manufactures instructions and recommendations), and then oil them generously with a paper towel dipped in vegetable oil – please use long tongs here to prevent getting burned!
  2. Take tempeh out of the wrapping and palace in a pan large enough to hold it flat and straight. Cover with water, bring to boil and let it boil for 5 to 10 minutes. Make sure you flip the tempeh half way through if your tempeh is not fully submerged in water. If it is, no mid-way flipping is needed!
  3. While tempeh is boiling and the grill is getting hot, mix together the glaze by whisking together soy sauce, vegetable oil, miso paste and Worcestershire sauce. The glaze should be smooth, but even if you have few lumps in there don’t worry about it – it won’t matter at the end.
  4. Place the boiled tempeh onto some paper towels and gently dry.
  5. Using a (silicone) food brush spread the glaze liberally ove the tempeh and place the piece of tempeh glaze side down on the hot grill. Keep the gas grill on medium high heat, or if you are using a charcoal grill keep it as hot as you would when grilling vegetables, veggie burgers, or mushroom or tofu steaks. Grill the glazed tempeh 5 to 6 minutes on one side, and while it is grilling apply the glaze on the other side, flip over, grill for 4 to 5 minutes, glaze, flip, grill, repeat for as long as you like.
  6. Let stand for just a moment or two, slice and serve!!! This Miso Glazed Grilled Tempeh will work as an appetizer, finger food, as well as dinner, especially with some grilled corn, veggies, coleslaw, baked or barbecue beans, or as a salad topping…

Copyright ©Eat the Vegan Rainbow, 2017

Black-Eyed Peas Burgers

Black-Eyed Pea Burgers
Black-Eyed Pea Burgers, via Eat the Vegan Rainbow
Still hunting for that perfect meat-free burger? I’m with you and I’m still searching. But in the meantime my Roasted Red Peppers Chickpea Burgers I shared recently, and these Black-Eyed Peas Burgers here are really close to where I want my burgers to be.

As with the chickpea burgers, the big secret to getting the burgers to stick together is to let the patties firm up in the fridge or the freezer. The rest is really easy and requires a large mixing bowl, a stick (immersion) blender (or a food processor), and couple of easy to find ingredients. These are really simple and I’d say they qualify as a quick mid-week dinner.

Black-Eyed Peas Burgers

What you’ll need:

2 15.5 oz (439 g) cans black-eyed peas

3 large carrots

1/2 cup pumpkin seeds

2 tablespoons almond butter

2 tablespoons flax meal

1 teaspoon smoked paprika

1 teaspoon onion powder

1 teaspoon garlic powder

1 tablespoon sesame seeds

Cooking spray

What you’ll do:

  1. In a small mixing bowl combine flax meal with 4 tablespoons of hot water to make Flax Egg.
  2. Place black-eyed peas in a strainer and rinse well. Drain to remove excess water and pat dry. Place in a large mixing bowl.
  3. Use a food processor to chop the carrots very finely. Add to the mixing bowl.
  4. Add the rest of the ingredients, including the Flax Egg, and blend everything together using an immersion (stick) blender. If you don’t have a stick blender you can also use a food processor. The mix should be relatively smooth, but some chunkiness is OK.
  5. Line the large tray with wax paper. Use your hands to form the burger patties. They should be about 1/8 in (1 cm) thick. Arrange the patties on the tray, cover with another sheet of wax paper and put in the freezer for about 30 minutes. If you leave them in the refrigerator you will need to give them couple of hours.
  6. Place a large pan over medium-high heat and let it get nice and hot. Spray the bottom with the cooking spray and add burgers to the pan in small batches. Cook for about 5-6 minutes on one side then flip over and finish cooking for another 4-5 minutes on the other side.
  7. Serve as you would any other burger, perhaps with some Fat Free Roasted Potato Medallions on the side as a healthy alternative to French fries.
  8. Copyright © Eat the Vegan Rainbow, 2017

Grilled Tofu Sandwich with Spicy Coleslaw


Grilled Tofu & Spicy Cole Slaw Sandwich
Grilled Tofu and Spicy Coleslaw Sandwich, via Eat the Vegan Rainbow

Let’s face it: if you don’t enjoy some grilled food during the fleeting late spring, you are totally missing out. And even if you are a committed vegan or a plant-based eater you should not stay grill deprived.

I’ve already showed you how to make phenomenal grilled portobello mushroom steaks, and flavorful grilled eggplant. Today is the day when we cross the Rubicon of vegan grilling with a Grilled Tofu recipe. Trust me: once you try it, you will not be going back!

Before I dive into the details, I have to give credit where credit is due. In this case it all comes down to a fabulous Tofu Bacon recipe developed by The Buddhist Chef. I made that bacon quite a few times and it is absolutely amazing. That recipe inspired me to look for other ways to cook tofu and get it taste and look in a way you would never expect. So here I decided to see whether I can optimize tofu for grilling.

What I discovered is that for successful grilled tofu you do need to cut thicker slices, so I recommend slices that are about 1/2 in (1.5 cm) in thickness. What you’ll need to do is start from extra firm tofu and drain it really well. I left my block of tofu in a strainer and put a heavy can on top to help the draining. Let it sit for one to two hours then pat dry and slice.

The sliced tofu goes into a marinade, and this is a critical step because no matter how good your grilling skills are, tofu is so subtle tasting that grilling it as is will not produce a rich flavor.  The marinade I use builds on the Tofu Bacon recipe by using liquid smoke, smoked paprika, chili powder, and cumin, which all work together towards giving tofu the extra smoky aroma. You will need a bit of oil in this marinade, as well as a bit of steak sauce or vegan Worcestershire sauce. Let the tofu marinate for about an hour, then grill it on high and enjoy with your favorite add-ons.

On this occasion I went with a simple steamed corn on the cob, toasted bread, and vegan spicy coleslaw. For this coleslaw you can use any vegan mayo you like, including store bought one. I recommend adding some ground mustard for extra punch. The coleslaw and grilled tofu work incredibly well – they are match made in heaven!

Grilled Tofu Tray
Grilled Tofu, via Eat the Vegan Rainbow

Grilled Tofu Sandwich with Spicy Coleslaw

What you’ll need:

FOR GRILLED TOFU

2 14 oz. (400 g) extra firm tofu

2 tablespoons soy sauce

2 tablespoons vegetable oil

1 tablespoon vegan Worcestershire sauce

1 tablespoon liquid smoke

1 teaspoon garlic powder

1 teaspoon onion powder

1 teaspoon smoked paprika

1 teaspoon chili powder

Vegetable oil (to oil grill grates)

Bread for serving

FOR SPICY COLESLAW

16 oz (454 g) bag of Coleslaw mix (or 2 cups shredded green cabbage plus 1 cup shredded carrots)

1/2 cup vegan mayo

3 tablespoons white vinegar

1 tablespoon Dijon mustard

2 teaspoons ground mustard seeds

1 teaspoon ground black pepper

1/4 teaspoon salt


What you’ll do:

  1. In a large bowl, mix all the Spicy Coleslaw ingredients together, cover with plastic wrap and set aside for couple of hours. Coleslaw needs some time to “mature”, mostly because cabbage needs a bit of time to soften and become smooth and more palatable.
  2. Drain the tofu and leave in the strainer for 2-3 hours. You can do this overnight in which case leave the tofu blocks in the refrigerator, or you can use any other method of pressing tofu you are used to.
  3. Once the tofu is pressed/drained, slice each block into 8 slices. Arrange in a single layer, in a deep baking dish or any other type of a container with a flat bottom that will allow your tofu slices to rest flat and absorb the marinade.
  4. To make a marinade mix all the ingredients (except bread and oil you need for the grill grate). Mix well and pour over the tofu slices.
  5. Marinate tofu slices for 1-2 hours.
  6. When ready to grill, prepare your grill as you usually do. In my case this means turning all the burners on (I have a gas grill) to full blast, closing the lid and letting any bits and pieces of food from last time burn off for 10 minutes. Then, I turn down the flames, scrape the grill grates well, and oil them with fresh batch of vegetable oil.
  7. For grilling tofu I recommend medium high to high flames, so bring the flame up and place the tofu pieces on. Grill for 5-10 minutes on one side, brush on the marinade, flip them over and grill for another 5-8 minutes. If you like the classical grill marks, you will need to rotate your tofu by about 45 degrees and let it grill some more. If doing that, I suggest you keep brushing on the marinade so your tofu does not dry out.
  8. Keep your grilled tofu tightly wrapped in some foil, to keep it hot while you grill or toast the bread. Once the bread is ready, place a good amount of spicy coleslaw on and top with grilled tofu. I like my sandwiches open faced by you can definitely make this into a standard sandwich, or a wrap. Serve with some grilled or boiled corn for a summer meal worth sharing!


Copyright © Eat the Vegan Rainbow, 2017

A Very Beefy Veggie Burger

"Beef" Veggie Burger
“Beef” Veggie Burger, via Eat the Vegan Rainbow
For many researching and investing into meat alternatives, making a plant-based burger that looks, cooks and tastes like real beef has become one of the most important goals. Several years ago, I heard Pat Brown, founder and CEO of Impossible Foods, give a talk and one thing Pat mentioned was how incredibly hard it is to re-create a plant-based hamburger. Burgers are such a huge part of American culture, so offering a meatless alternative is unlikely to convince anyone to go meat-free unless that alternative is spot on, juicy and meaty.

But, lets be honest: veggie burgers are definitely not hitting this mark. For the most part, they are a mix of vegetables thrown together and shaped into a patty that usually falls apart as you are grilling it. I know this sounds mean, but it is what it is. I myself have been down the road of trying to figure out how to keep my veggie burgers together while at the same time make them taste authentic many times before. Some attempts have been a total failure, some, like this Roasted Red Peppers and Chickpea Burger, have been a success.

Don’t get me wrong – I love veggie burgers! They have amazing flavors and textures, and they are fun to eat. Also: I am not a fan of hamburgers, but I live in a land of hamburger lovers so I agree with Pat Brown’s general idea that in order to convince people to give up their meat we need to offer them something incredible to sizzle on the grill and stick inside the bun. And just in case you are wondering whether there is any such thing available in retail stores, you should head out to your local Whole Foods Market and get some Beyond Meat‘s The Beyond Burger. I had it few nights ago and it blew my mind!

So although I am most certainly going to be getting those burgers again, they do come with a relatively unfriendly price tag, which means I am where I started: trying to home brew an impossible, incredible and all-around awesome meat-free burger. This recipe for A Very Beefy Veggie Burger is one step closer to achieving that ideal combination of flavor, texture and grillability and the tip top secret of this recipe is to use TVP (Textured Vegetable Protein) without pre-soaking and letting it absorb all the ground mushroom and mashed beans juices. This batch of burgers was cooked in a grill pan because the weather in New England has been very rainy lately and I just could not wait to make these, but the patties are firm enough to withstand the ultimate test of an outdoor grill.

As for condiments, sky is truly the limit. I paired these burgers with some Vegan Herb Mayo, cucumber and tomato slices, butter lettuce and Roasted Red Beets Hummus, but you can use anything you like. The flavor of these patties is very, very similar to what you can expect from a hamburger, but the texture and juiciness does need more work. Still, I will try, try, try again until I develop the recipe for a mouth-watering, and inexpensive, beef-less burger. As Silicon Valley is now funding these types of efforts, perhaps I can re-write the stereotype of “two guys in a garage” into “one woman in the kitchen” story? That would be fun!!!

Very Beefy Plant-Based Burger
Very Beefy Plant-Based Burger, via Eat the Vegan Rainbow
Note: Just in case you are asking yourself why we should go meatless, Bill Gates offered some well-articulated arguments in the Future of Food post few years ago.


A Very Beefy Veggie Burger

What you’ll need:

2 15.5 oz (439 g) cans of Roman (cranberry) beans

1 cup TVP (Textured Vegetable Protein; I used Bob’s Red Mill TVP)

8 oz. (227 g) baby bella mushrooms

2 tablespoons almond butter

2 tablespoons nutritional yeast

1 tablespoon soy sauce, reduced sodium

1 tablespoon Worcestershire sauce, vegan

1 teaspoon onion powder

1 teaspoon garlic powder

Cooking spray


What you’ll do:

  1. Drain and rinse the beans. Pat dry and place in the large mixing bowl.
  2. Use a food processor to grind the mushrooms. Add the mushroom meat to the mixing bowl.
  3. Add TVP and the rest of the ingredients (except the cooking spray) into the bowl and use the immersion blender to blend everything into a mixture that looks like ground beef, with the same type of texture. You can also do this step in the food processor.
  4. Let the mixture stand for 30 to 60 minutes on the kitchen counter, then shape the burgers and leave them in the refrigerator for about an hour to firm up. This will give TVP time to soak up all the juice from mushrooms and bean and soften just enough to give a nice ground beef texture to the burger without making it too soft and crumbly.
  5. Heat the grill or the grill pan on high and make sure that your grill grate or your pan are generously oiled. Reduce the heat to medium before putting your burgers on. Grill for 4 to 5 minutes on one side, then flip over and grill for additional 4 to 5 minutes.
  6. Put your burger buns on the grill for a minute or two to toast them gently, then top with mayo, burger, cucumber slices, tomatoes, lettuce, roasted beet hummus or whatever floats your boat – and bite in!!!

Correction: the original post said “yeast extract” but that’s not correct. I used nutritional yeast so I made the correction now. Thanks to Mary Dion for flagging this to me on Facebook!!!

Copyright © Eat the Vegan Rainbow, 2017

Grilled Eggplant

Grilled Eggplant
Grilled Eggplant, via Eat the Vegan Rainbow
Summertime and the grilling is easy… Well, that’s me paraphrasing the George Gershwin classic, but the statement is spot on. Grilling is easy, and it is my favorite way of preparing food during the hot summer months. Over the years I figured out how to grill quite a few different things, and at the end of the day grilling is really easy and with a little practice you can get really good at grilling almost anything.  My Grilled Portobello Steaks recipe was just the beginning of “From the Grill” section of this blog and in addition to that recipe and the Roasted Red Beets Hummus, there’s much more to come.

Today I am sharing a quick and easy way to make perfect grilled eggplant. Eggplant is a tricky vegetable to make because of its spongy texture that absorbs oil like crazy making almost every commonly encountered eggplant dish too oily and too rich. In the past I tried the trick where you sprinkle salt on the eggplant slices and let it sit between the paper towels, which does help but it adds salt and it takes time. More recently I started skipping all this and either simply cubing the eggplant, skin and all, or roasting the eggplant before stuffing.

Now this Grilled Eggplant recipe couldn’t be easier and does not require any special eggplant handling. Actually, the simple marinade I make, which includes couple of smokey spices, like smoked paprika, chili powder, liquid smoke and allspice, mixed with lemon juice and zest, can work well for summer squash, zucchini, or even tofu.

Grilled Eggplant
Grilled Eggplant, via Eat the Vegan Rainbow

Grilled Eggplant

What you’ll need:

2 large eggplants

1/2 lemon, juice and zest

2 tablespoons soy sauce

2 tablespoons liquid smoke

1 teaspoons smoked paprika

1 teaspoons allspice

1 teaspoons chili powder

1 teaspoons onion powder

1 teaspoons garlic powder

Vegetable oil

Cooking spray

What you’ll do: 

  1. In a large plastic container with a tight fitting lid, mix lemon juice and zest, soy sauce, liquid smoke and all the spices to make a pasty marinade.
  2. Wash and dry the eggplant. Cut lengthwise into 1/4 in (2.5 cm) thick slices.
  3. Place the eggplant into the marinade. Cover every piece well (use your fingers to help spread it out) and stack ghee eggplant slices. Cover with the lid and let stand for 30 to 60 minutes on the kitchen counter.
  4. Prepare your outdoor grill as you normally do. For me this means turning all the burners on high (I have a gas grill) with the lid down for 10 minutes, turning the flames down to low then using a steel brush to clean the grill grate. Finally, before placing food on the grill, I oil the grill well. I use a pair of long tongs and a paper towel dipped in vegetable oil.
  5. Bring the heat up to medium. Spray each eggplant slice with a bit of cooking spray before placing on the grill. Leave it to grill on one side for about 4 to 5 minutes. Depending on how hot your grill is this may take a bit longer.
  6. Spread the leftover marinade over the top of the eggplant slices before turning over. Grill for another 3 to 5 minutes.
  7. Take off the grill and serve. The grilled eggplant works well as a topping for couscous, rice or polenta. It also works really well in sandwiches and salads. My serving suggestion would be to wrap it in a grilled pita topped with plain hummus and sprinkled with kalamata olives.

Copyright © Eat the Vegan Rainbow, 2017

Grilled Portobello Mushroom Steaks

Grilled Portobello Mushroom Steaks
Grilled Portobello Mushroom Steaks, via Eat the Vegan Rainbow
It’s that time of year in New England when we jump out of our winter lairs and onto our no-longer-snow-covered decks to fire up the grill. I love grilling, and if anyone ever told you that grilling is a guy thing, don’t listen to them as grilling is for everyone! There is something very primal that comes to forth when you find yourself outdoors, standing in front of the fire and flames, and you hear the sizzle of delicious food getting caramelized, charred and transformed into the mouth watering delights.

I love using my grill, especially during the summer months, because it gets the food cooked fast without heating the kitchen and makes clean up a breeze. Add to that a delight of summer evenings and eating outside, and it can hardly get better than that. I make piles of grilled vegetables and have even developed an awesome way of making grilled pizza, which I’ll share in another post.

Here I’ll share how to get the perfect Grilled Portobello Mushroom Steaks as grilled steaks are the quintessential example of this type of cooking. For this recipe to work you do need to use very large portobello mushroom caps. The ones I found in our local grocery store are about 4 to 5 in (10 to 12 cm) in diameter, and that’s the size I recommend for a recipe like this as the bigger portobello caps will hold up to grilling much better. Most of the really large portobello mushrooms will come without stems, but if the ones you get include the stems I recommend using the stems to make your own vegan “scallops”.

The recipe is really very simple and the mushroom steaks cook very quickly. The most time consuming step is putting the marinade together and letting the mushrooms soak up some flavors, which will take anywhere between one to two hours. If you are pressed for time you can skip this step and simply apply the same marinade liquid to the mushrooms as they grill.

Are there any tricks to getting a perfect grilled portobello mushroom steak? Yes, there are a couple. The first one is really more of an universal grilling advice than mushroom specific: make sure your grill grate is clean, hot and well oiled (for more on how to prepare your grill for perfect grilling results check this post out). This will help the food go on and not stick to the grates. I recommend using paper towel dipped in oil and a pair of long kitchen tongs to do this. The second trick is mushroom specific as I recommend grilling the mushrooms cap side facing up first in order to allow for all the excess moisture to drip out, before flipping the cap over. Finally, if you are into the grill marks you need to remember to rotate your cap by 90 degrees half way through the cooking.

Following these easy steps will bring delicious grilled mushroom steaks to your plate!

Grilled Portobello Mushroom Steaks

What you’ll need:

(for 4 servings)

4 extra large portobello mushroom caps

2 tablespoons A.1. steak sauce (or any other steak sauce, homemade or store-bought)

2 tablespoons soy sauce

1 tablespoon olive oil

1 teaspoon garlic powder

1 teaspoon onion powder

2 teaspoons smoked paprika

2 teaspoons chili powder

Some oil to brush your grill

What you’ll do:

  1. Wipe the portobello caps with a paper towel to remove any dirt. Set aside.
  2. Whisk together all the rest of the ingredients in a container large enough to hold all four mushroom steaks.
  3. Place the mushroom steaks into the marinade and make sure they are fully coated and covered. Marinate for 30 to 60 minutes. If you decide to skip this step simply coat the mushrooms with the marinade before placing on the grill.
  4. While mushrooms are marinating, prepare your outdoor grill for medium high heat grilling. If you have any questions on how to do this, Whole Foods Market has a post that can help. Don’t have an outdoor grill? You can use the indoor grill or a grill pan for this recipe as well. In that case simply follow whatever steps you usually take when grilling indoors over medium high to high heat.
  5. Place your mushroom steaks on the grill top side up, spread some marinade over the steaks, and grill for 4 to 5 minutes.
  6. Spread some more marinade on top, turn the caps over and grill top side down for 3 minutes, then lift up and rotate by a very rough quarter turn, and grill for another 2 minutes. You can skip this rotating step. It does not change the flavor of the steaks, but it does make for those well-known (and loved) grill marks.
  7. Enjoy the perfect grilled portobello mushroom steak with your favorite sides, like Cauliflower Mash and a field greens salad!
  8. Copyright © Eat the Vegan Rainbow, 2017