Sunday Morning Cook Book Review: The Vegan Slow Cooker, Revised and Expanded

the_vegan_slow_cooker_hi-res_cover
Reprinted with permission from The Vegan Slow Cooker, Revised and Expanded by Kathy Hester.

When I first switched to plant-based cooking and vegan diet I thought that I would never need to use my beloved slow cooker again. For those of you who are not familiar with this kitchen gadget, slow cooker, also called a crock-pot, is a handy kitchen tool for those recipes that require long cooking times, and is usually used to slow cook tougher pieces of meat, or bean dishes, like chilis. The key part of the slow cooker is a heavy ceramic of porcelain pot, that sits in a heater element that provides constant low heat. The gadget is especially handy for busy families since you can set everything up, turn it on, and come back to a cooked meal within four to eight (sometimes twelve) hours.

Having said this, why did I think my slow cooker using days were over when I transitioned into the vegan diet? Well, I started eating more raw or gently cooked vegetables, and did not quite see the point of cooking something for hours on end if I can get it done in less than half an hour using traditional methods. However, I soon realized that cooking food low and slow has an added benefit of infusing lots of flavor into things that would otherwise taste bland or for dishes that just need plenty of aroma to carry them over and through the taste buds.

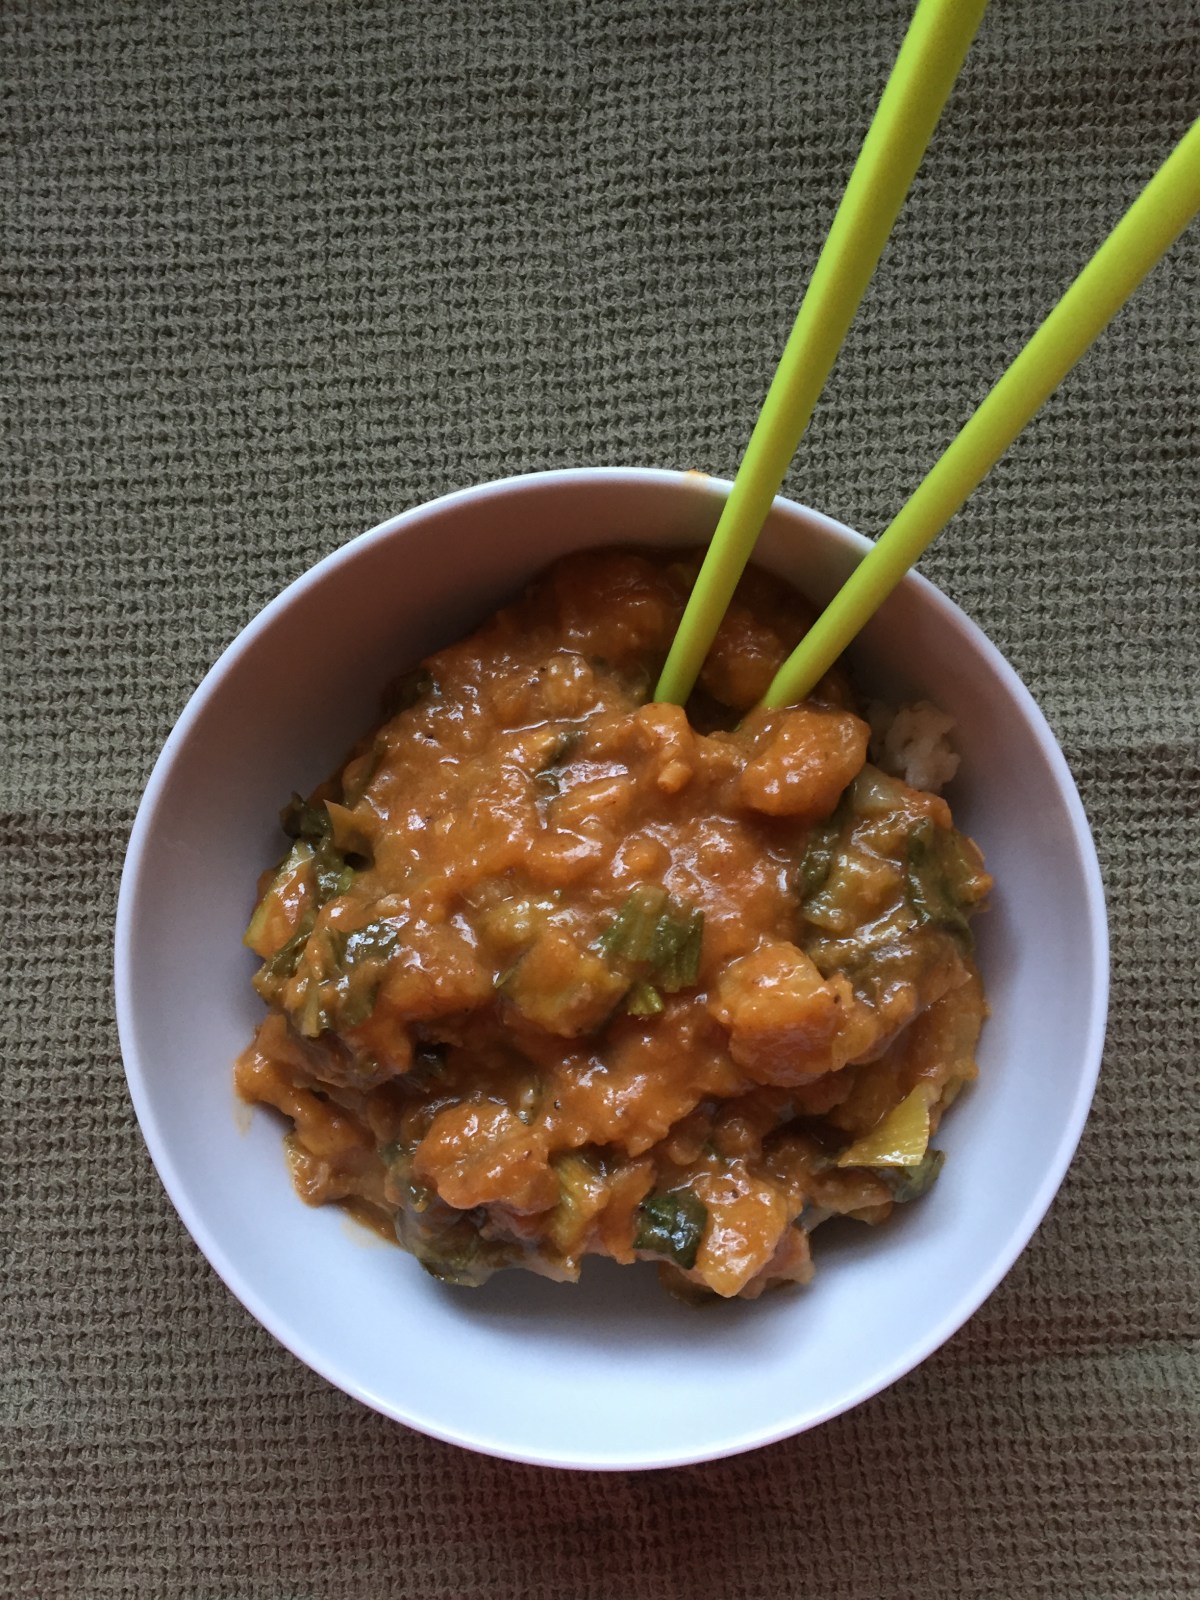
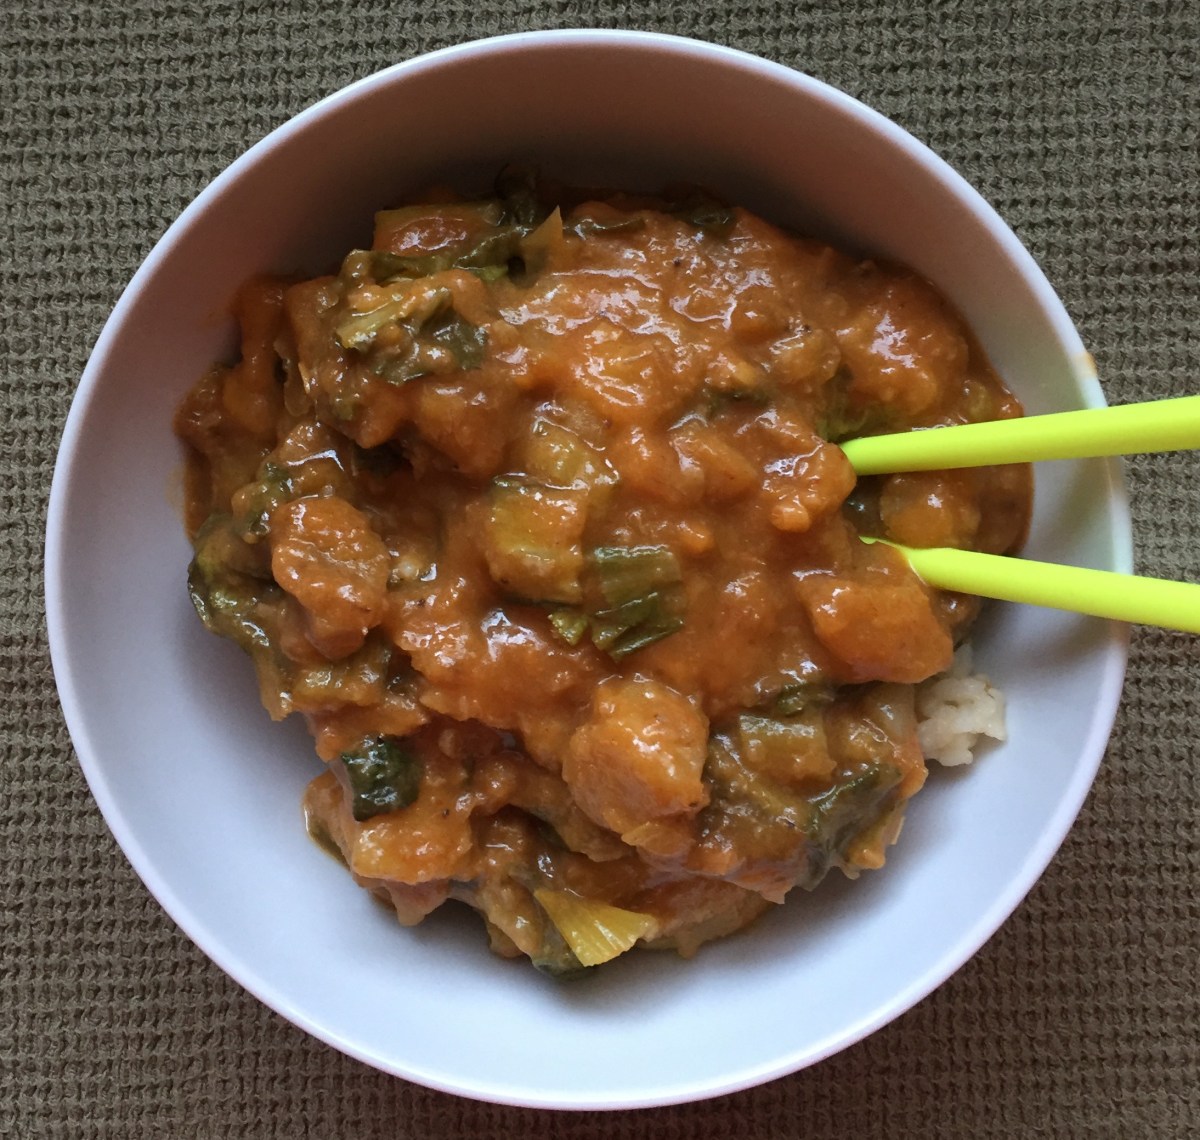
Once I realized that, the beloved slow cooker was back and I’ve been using for stews, BBQ flavor infused dishes, and things like chicken-less tikka masala and curries. Oh, and my newest discovery has been an amazing spice-infused apple butter!

So I was excite to see “The Vegan Slow Cooker, Revised and Expanded“, a recently released cookbook by Kathy Hester, a blogger behind Healthy Slow Cooking. Building on the success of “The Vegan Slow Cooker“, Kathy is now offered a refreshed cookbook that includes everything from a chapter that provides some vegan slow cooker basics, to soups, stews, casseroles, as well as many, many great main dish recipes. The most surprising, at least to me, was to see chapters focused on breads, desserts and breakfast!

This cookbook is rich with recipes, ideas, tips and tricks that will help you get the most out of your slow cooker, or the slow cooker mode on an advanced pressure cooker. No matter what you choose to try, slow cooking is the method you should definitely add to your arsenal of strategies of getting the home cooked meals on your family table with the least amount of effort. Enjoy!

chickpea cacciatore_image.jpg
Recipe reprinted with permission from The Vegan Slow Cooker, Revised and Expanded by Kathy Hester.

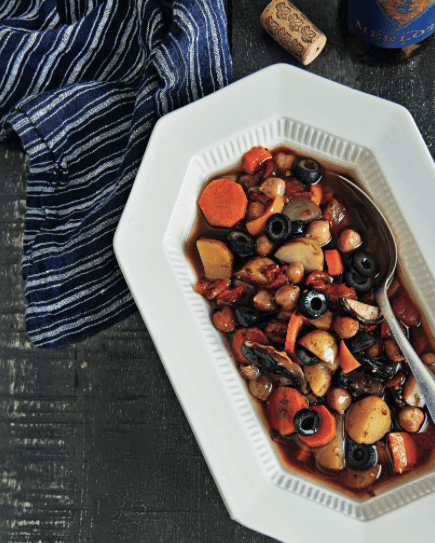
Chickpea Cacciatore with Potatoes

DISCLAIMER: Recipe reprinted with permission from The Vegan Slow Cooker, Revised and Expanded: Simply Set It and Go with 160 Recipes for Intensely Flavorful, Fuss-Free Fare Fresh from the Slow Cooker or Instant Pot® by Kathy Hester.

Here’s a completely plant-based one-pot meal that will satisfy the hungriest at your table. The potatoes and chickpeas are filling and full of nutrients. The sauce and the rest of the veggies make a sauce that packs a flavor punch.

gluten-free soy-free no oil added

1 bag (24 ounces, or 680 g) baby potatoes, quartered

2 cans (15 ounces, or 425 g each) chickpeas, drained (save liquid to use as aquafaba in other recipes)

1 pound (504 g) mushrooms, sliced (can use all white, baby bella, or a combo)

2 cups (300 g) chopped bell pepper (use multiple colors if you can)

3 carrots, cut into coins

SAUCE INGREDIENTS

1 can (28 ounces, or 784 g) crushed tomatoes

¼ cup (60 ml) red wine (or 2 tablespoons [30 ml] balsamic vinegar)

1 teaspoon minced garlic

1 teaspoon dried marjoram

1 teaspoon dried basil

½ teaspoon salt

¼ teaspoon ground rosemary

SERVING INGREDIENTS

½cup (50 g) pitted black olives (optional)

yield: 6 servings

equipment: 5-to 6-quart slow cooker

cooking time: 7 to 9 hours on low

the night before: cut up the veggies. Add veggies and drained chickpeas to a sealable container, and mix. You can mix all the sauce ingredients together now, or wait until morning. Store everything in the fridge.

in the morning: mix the sauce and veggie-chickpea mixture together in your slow cooker. Cook on low 7 to 9 hours.

Garnish with pitted black olives, if desired.

Recipe Notes
Recipe reprinted with permission from The Vegan Slow Cooker, Revised and Expanded: Simply Set It and Go with 160 Recipes for Intensely Flavorful, Fuss-Free Fare Fresh from the Slow Cooker or Instant Pot® by Kathy Hester.


Thai Red Curry with Plantains and Bok Choy

Thai Red Curry with Plantains and Bok Choy, via Eat the Vegan Rainbow

If you have not tried plantains before, now is your time to give them a try. Plantains look like bananas – perhaps slightly bigger than average bananas. But, they are not usually paletable without cooking and are thus often referred to as “cooking bananas“. This starchy fruit is used in number of different dishes all over the tropical world where these plants are cultivated and grown.

Although you can eat plantains when they are still green, it is best to wait for them to get quite ripe. And for plantains that means really quite brown – think bananas that are two days beyond their “use to make a banana bread” date. Most of the time the plantains you find in the store need more ripening and the best way to do this is to leave them in a paper bag for another week or two.

Once they are nice and mostly brown, it’s time to make them into something delicious. You could grill them, boil them, fry them, roast them – and with the right spice combination plantains will not disappoint. I prefer to double cook them. First, I roast them without peeling and then I use them in different applications. For example, this chili was a great combination of beans and plantains, and worked really well.

For the curry recipe below, the plantains were roasted first then diced. In general, roasting brings out flavors that are sometimes hard to get any other way. In the case of plantains, this extra step is definitely worth it since ripe plantains still tend to be pretty tough.

The curry itself is really super easy – it takes only one pot and about 30 minutes to get to a fragrant and rich red curry with a subtle level of heat. If you are looking to increase the heat, you can consider adding some finely chopped red Thai chili peppers, which punch some serious heat!

The basis of the flavor here is the combination of lemongrass and ginger, further fortified by the red curry paste (I used store bought but you can make your own – see below for the link to a great recipe). If you are buying your red chili paste in a store, do check the ingredients to make sure that there is no fish or oyster sauce in there.

Other than the flavor agents and plantains, you will also need bok choy, and if that is hard for you to find where you live, Napa cabbage, spinach, or even kale will work. The final flavors are going to be slightly different but the cooking times and the rest of the recipe will be about the same.

Finally, you can’t make a great curry without some coconut milk. You can use either full fat or low fat versions, just note that the curry with low fat coconut milk may need more simmering to remove access liquid. You may also need to adjust the amount of vegetable broth in that case as well. The final curry should be rich and thick, and goes really well over some simple boiled brown rice!

Thai Red Curry with Plantains and Bok Choy

Thai Red Curry with Plantains and Bok Choy

What you’ll need:

4 super-ripe plantains
1 lemongrass, thinly sliced
2 inch ginger root, peeled and thinly sliced
2 tablespoons red curry paste (store bought or homemade)
3 pieces of bok choy, cut into bite size pieces
2 cups vegetable broth
1 can (15 oz) coconut milk (full fat or lite)
1 tablespoon cooking oil (canola or vegetable)

Rice or quinoa for serving

What you’ll do:

  1. Preheat the oven to 425 F (220 C). Roast the super-ripe (almost brown) unpeeled plantains in a parchment paper covered roasting pan for 45 to 60 minutes. You can do this a day ahead – plantains’ skin will be completely black and the plantains themselves will be softened but not mushy.
  2. Let the plantains cool completely before handling further. Peel the cold, roasted plantains and slice into bite size slices. Set aside.
  3. Wash bok choy, shake off the excess water, then and slice into bite size pieces and set aside.
  4. Place a large pan over medium heat, add the oil and thinly sliced lemongrass and ginger. Let the flavors develop for 1-2 minutes then add the red curry paste. Mix and let combine for another 1-2 minutes.
  5. Add the diced plantains, and let them brown for 5-8 minutes.
  6. Mix in the vegetable stock and the coconut milk, increase the heat and bring to boil.
  7. When the curry is boiling, add box chop, lower the heat down and let simmer for 20 minutes or so. The longer you simmer the thicker the curry. Turn the heat off, and let the curry cool just slightly. As it cools the consistency will thicken further and be perfect for serving over rice or quinoa!

Copyright © Eat the Vegan Rainbow, 2019

High Protein Noodle Soup – the Best Thing for Colds Since the Chicken Noodle

img_6046
High Protein Noodle Soup, via Eat the Vegan Rainbow

Winter wonderland is all around us – at least for those of us who live in the Northern hemisphere somewhere above 30 to 40 degrees North. Unfortunately, in addition to all the fun stuff that winter brings, there are also the dreaded colds or even worse full on flus that get around. Just around the Christmas time as was waylaid by a serious cold – I call it a cold but it was more of a full body weakness and loss of energy with some minor runny nose and sore throat. I stayed in bed for a day, drank loads of fluids, and all was better in about 48 hours.

One things that really helped me power through is a soup I made, full of protein as well as mushrooms. It perked me right up, and kept me coming for more at a time when my appetite was not all that great. The main reason why I went for some soup at the time like this is thanks to the well-known, and scientifically slightly supported, power of the hot bowl of chicken noodle soup to make the cold go away.

The power of the soup resides to some extent to the fact that it is served hot – the steam helps with decongestion and is commonly recommended to get your nasal passages work again. Plus: soup, and other warm liquids, are easy to swallow and therefore usually gentle for the painful throat. And: when you are under weather, down with a cold, one of the best thing you can do is stay hydrated, something any soup will help you with.

But a soup like your old fashioned chicken noodle soup that you may have been chased around as a kid, have more hidden secrets. They are full of protein, as well as vitamins and minerals that come with those great vegetables hiding in there.

So, in my attempt to recreate the richness of flavors, level of protein, and intense apparent healing powers of the chicken noodle soup I went for, well, pure protein – pea protein powder and peanut butter powder, which is really almost all protein (but do check a label before buying to be sure and stay away from some of the products out there that add sugar!).

I also went for mushroom broth as it is deeper in flavor than a vegetable stock. I used store bought, but you can definitely make some on your own especially if you are looking for ways to use up all those mushroom scraps (this recipe is a great start). And to deepen the flavors further I recommend using soba noodles. These noodles are earthy, nutty and I simply love them!  I use them in stir fries and soups, and always have them on hand in my pantry.

By the time this soup is ready, which is very quick indeed, you will be holding in your hand something that will make you feel better and go “mmmmmmm…”.

img_6048

High Protein Noodle Soup

What you’ll need:

32 FL oz (1 L) mushroom broth (or vegetable stock if mushroom broth unavailable; homemade broth also a great option)
32 FL oz (1L) water
1/4 cup pea protein powder
1/4 cup peanut butter powder
1 tablespoon ground ginger
1 tablespoon curry powder
4 cups frozen or fresh broccoli florets
6.4 oz (180 g) soba noodles
1/4 cup Italian parsley, finely chopped
Freshly squeezed lime juice to taste

What you’ll do:

  1. Combine mushroom broth, water, pea protein powder, peanut butter powder, ginger and curry powder in a large pot. Mix well to combine and remove any lumps that may form. You can also use a blender or a whisk.
  2. Place the pot over the medium high heat and bring to boil.
  3. Once the soup is boiling, add broccoli and the noodles, lower the heat and let simmer for 5-7 minutes. This should be enough time for noodles and broccoli to be cooked al dente – so soft but not mushy.
  4. Turn the heat off, mix in the fresh parsley, and some lime juice for a bit of acidity, and serve. You can always serve with lime wedges, and let people add lime to taste themselves.

Copyright © Eat the Vegan Rainbow, 2019

Sunday Morning Cookbook Review: Naturally Sweet Vegan Treats

naturally sweet vegan treats veggie patch brownies
Veggie Patch Brownies, via Marisa Alvarsson with permission

For many people transitioning into plant-based eating comes with a bit of dessert and sweet treat anxiety. This is totally understandable and relatable – after all, almost all cakes, cookies, pies, puddings we know are made with loads of dairy products (cream, butter, milk, …) and, of course, eggs. So, vegan desserts may seem as unreal as unicorns!

The big secret, which is actually not as big as it used to be few years ago, is that you can have your vegan cake and eat it too. And the best part is that with embracing vegan and naturally sweetened cake and dessert making you get to leave all your less than healthy habits behind. What do I mean by that? Well, most if not all desserts are sweet and that usually means heaps of pure, refined sugar.

But, if you take a step back and offload all that added sugar what you’ll find is that there are plenty of naturally sweet ingredients out there. Different types of fruit may have immediately jumped to your mind, but the fruit is just the top of the iceberg. Natural sugars are in everything of plant origin since plants make sugars through a process of photosynthesis. So, we can trust plants to deliver lots of sweetness on their own, and the best thing we can do is learn how to let their natural sweetness shine through.

A new cookbook by Marisa Alvarsson, the blogger behind Miss Marzipan, achieves just that – letting fruits and vegetables shine through as key ingredients of desserts ranging from breakfast items, like pancakes, breads, puddings and porridges, to cookies and cakes, loads and loads of cakes. The new cookbook is called “Naturally Sweet Vegan Treats” and features more than 85 sweet treat recipes that offer lots of different strategies for those of us born with a major sweet tooth.

One of my favorite sweetener is roasted sweet potato, and I used it for a lovely chocolate mousse pie. I also experimented with using zucchini in baking which resulted in an amazing fruit cake. So, when I saw a recipe for “Veggie Patch Brownies” that includes both sweet potatoes and zucchini I had to give it a try. The recipe was super easy to make and it’s fun enough for the kids to get involved. The brownies were moist and full of chocolate, which is exactly as brownies should be! And those pesky veggies? You would not know they were there, so here is something you can offer to your picky eater and still feel great about your parenting skills. It’s win-win for everybody! These brownies are easy and delicious, and are definitely something that I look forward making again.

I followed the recipe below as given with one modification – I used roasted sweet potato purée as I think that roasting just brings the best out of the sweet potato. But, I am pretty sure you can use boiled, or canned sweet potatoes here as well.

REPRINTED WITH PERMISSION FROM “Naturally Sweet Vegan Treats” by Marisa Alvarsson

Veggie Patch Brownies

Oil-free with nut-and gluten-free options | Makes 12–16 brownies

½ cup (100 g) sweet potato purée

½ cup (75 g) grated zucchini, excess liquid squeezed out

1 cup (240 ml) almond milk or oat milk

⅓cup (50 g) coconut sugar

8 pitted medjool dates, soaked in boiled water for 10 minutes

1½ tsp (8 ml) pure vanilla extract

¾ cup (100 g) organic whole wheat pastry flour

¾ cup (75 g) pure unsweetened cocoa powder

1 tsp baking powderPinch of salt

½ cup (60 g) chopped walnuts

¼ cup (37 g) chopped dark chocolate, optional (but recommended)

Preheat the oven to 350°F (180°C).

Line a 9 × 9 inch (23 × 23 cm) square cake pan with parchment paper.

Blitz the sweet potato, zucchini, milk, sugar, drained dates and vanilla together in a food processor or blender until the mix is a smooth, soup-like consistency.

Tip this mixture into a large mixing bowl. Sift in the flour, cocoa powder, baking powder and salt. Gently fold to combine.

Add the walnuts and chocolate (if using). Fold in, but do not overmix.

Pour the brownie batter into the lined pan and smooth over the surface with a silicone spatula or the back of a large metal spoon.

Place on the center rack of the oven and bake for 20 to 25 minutes.

Allow to cool completely before frosting, if desired. Slice into squares to serve.

Recipe Notes: To make these brownies nut-free, use oat milk and omit the walnuts. To make the brownies gluten-free, use a gluten-free all-purpose flour and baking powder.


RECIPE AND IMAGES REPRINTED WITH PERMISSION FROM “Naturally Sweet Vegan Treats” by Marisa Alvarsson. NO FURTHER RE-PUBLISHING ALLOWED WITHOUT EXPLICIT PERMISSION OF THE ORIGINAL CONTENT CREATORS.

Disclosure: I received a free copy of this cookbook through a community of vegan bloggers. This did not influence my views about the recipes I tried thus far and mentioned above.

Gluten-free and Vegan Protein-Packed No-Bake English Muffins

Gluten-free Protein-Packed Mug English Muffins, via Eat the Vegan Rainbow

“Where do you get your protein from?” is probably the most detested question that those enjoying plant-based (vegan) diet get asked all the time. Of course, we know that this is an easy question to answer because plants are full of protein.

But just in case you feel that you need an extra protein boost, especially when it comes to breakfast, I have a perfect solution for you. How about some protein packed English muffins? Actually, these are not oven-baked; rather they are done within a few minutes using a microwave.

Perhaps you’ve seen recipes for mug cakes? Or you may have seen new “mug cake” product lines in your local supermarket? The idea is that you whip up your ingredients in a mug, mix them together and after 3-5 minutes in a microwave you have your single-serve cake or a muffin ready to enjoy.

I use the same basic idea here except that instead of eggs and flour I use pea protein powder, peanut butter powder (which is really peanut protein powder), some flax meal, baking soda, a dash of vinegar (or lemon juice) and water or plant milk of choice. Believe it or not, after 3 minutes in the microwave on high power you get a nice little muffin. I recommend slicing the muffin across horizontally, then toasting it for some extra crunch. Yummy!

So, how does this work? I don’t know for sure but I do have a working theory that the carbon-dioxide released when baking soda meets a splash of vinegar or lemon juice is enough to lift the “dough”, and once up the protein molecules have sufficient strength to support the structure.

The main trick here is not to make the mix too wet. When you mix your ingredients together, you will have something that looks more like a paste than a muffin batter. Don’t worry, this is as it should be. The best dish to microwave the muffin in is a 3-4 inch (8-10 cm) ramekin, and I recommend that you grease it with either a bit of butter or some cooking spray. A little will go a long way to help your muffin slide out.

Lastly: a note about microwaves. They are all different and have moods of their own. I recommend you start on high power, and check how things are doing after about 2 minutes. You should look for a dry looking top and sides that are coming away from the ramekin. At the end, the muffin should slide out of the ramekin without much resistance, usually after you run a butter knife around the edges to release the muffin.

Gluten-free and Vegan Protein-Packed No-Bake English Muffins

What you’ll need:

2 tablespoons pea protein powder

2 tablespoons peanut protein powder

1 tablespoon ground flax meal (golden is preferred)

1/2 teaspoon baking soda

1/4 cup and 1 tablespoon almond milk or water

1 teaspoon apple cider vinegar

Vegan butter (optional)

What you’ll do:

  1. Place all the ingredients into a small bowl, and mix to combine. I recommend adding a splash of acid (vinegar or lemon juice) last. The batter will be dense and sticky, just FYI.
  2. Pour the batter into a microwave safe ramekin or a mug that’s about 3-4 in (8-10 cm) in diameter and that has been greased with butter or sprayed gently with some cooking spray.
  3. Microwave on high for 3 minutes or so. The top should be dry and look baked, and the sides should be coming of. If all is well, the muffin will slide out of the ramekin without much resistance after you run a knife around the edges. If not, it means that the bottom is still moist, and the mix needs to go back for another 30-60 seconds.
  4. Enjoy the muffin as is, or toast if you prefer things a bit crunchier. You can top the muffin with butter, jam, hummus, avocado, fruit, or anything else you like. The muffin itself is neither sweet nor salty so lends itself to utmost customization!

Copyright © Eat the Vegan Rainbow, 2019

Citrus Infused Pan-Seared Eggplant with Black Olives


Citrus Infused Pan-Seared Eggplant with Black Olives, via Eat the Vegan Rainbow

Simple may not always be better, but it is absolutely true that when it comes to vegetable side dishes keeping things simple and letting the vegetables speak for themselves goes a very long way. For example, grilling is one of the best ways to add a lot of flavor without any extra ingredients of complicated prep procedures. And eggplant is probably one of the most grill-friendly vegetables out there!

But, before the eggplant hits the grill (or a pan) it is important to soften it and let some of the bitterness drain out. Very often that means salting the sliced eggplant and letting it sit in between paper towels to absorb the moister that the salted eggplant will release. Doing this removes some of the bitterness that eggplant can sometimes have as well as make the eggplant less like a sponge.

This recipe does have one important trick that really elevates the flavors – rubbing the grilled eggplant slices with a clove or garlic to add that great garlic flavor! This is a trick that you often see used for making garlic bread to infuse garlic aroma into toasted bread – it avoids having to deal with raw garlic pieces, and it is very effective.

Finally, what makes this simple side dish come together is the lemon juice and lemon zest. This small amount of acidity and the freshness that lemon zest contributes really bring the simplicity to a new level. You can serve this elegant vegetable dish warm, as a side, or cold as a salad. Either way, give this a try and see whether you are with me when I say that simple is the way to go!!!

db2b75ef-8095-4ae2-9901-ea9db20ba34e

Citrus Infused Pan-Seared Eggplant with Black Olives

What you’ll need:

2 large Italian eggplants, sliced into rounds

1 clove of garlic, peeled

1 lemon, juice and zest

1 cup black olives, sliced

2-3 teaspoons coarse salt

Cooking spray (or olive oil)

What you’ll do:

  1. Wash the eggplant, and slice into round slices (about 1/4 in (5 mm) in thickness). Place on the two layers of paper or kitchen towel, sprinkle with salt, then cover with another layer of towels, and let stand for 20-30 minutes. The salt will draw out some of the extra moisture out of the eggplant, and with it some of natural bitterness that eggplant sometimes has. Remove the paper towels, and pat dry the eggplant slices.
  2. Put a large grill pan over the high heat to make the pan really hot. Reduce the heat to medium, then spray with some cooking spray or brush with some olive oil. Place eggplant slices on and grill on both sides in batches until all the eggplant is grilled. You can also use an outdoor grill or a regular pan. The point is to blacken and cook the eggplant through, which will take 3-5 minutes per side.
  3. Use the garlic clove and rub the eggplant slices, so that they are infused with garlic aroma. Place the garlic rubbed eggplant into a large mixing bowl, add lemon juice, lemon zest, and sliced black olives. Mix well and you are done! If you like to add a bit more flavors to this simple side dish, you can drizzle some olive oil, sprinkle fresh parsley, or add a dash of crushed red pepper flakes if you are open to turning on the heat!

Copyright © Eat the Vegan Rainbow, 2019