New England “Clam” Chowder

Bowl of New England “Clam” Chowder, via Eat the Vegan Rainbow

A week ago New England was thrown into a March snow storm that dumped 1-2 feet (30 – 60 cm) of fresh powder all over the region. Schools were closed, businesses advised people to work from home if they can, and by the time late afternoon rolled around we were all outside digging ourselves out.

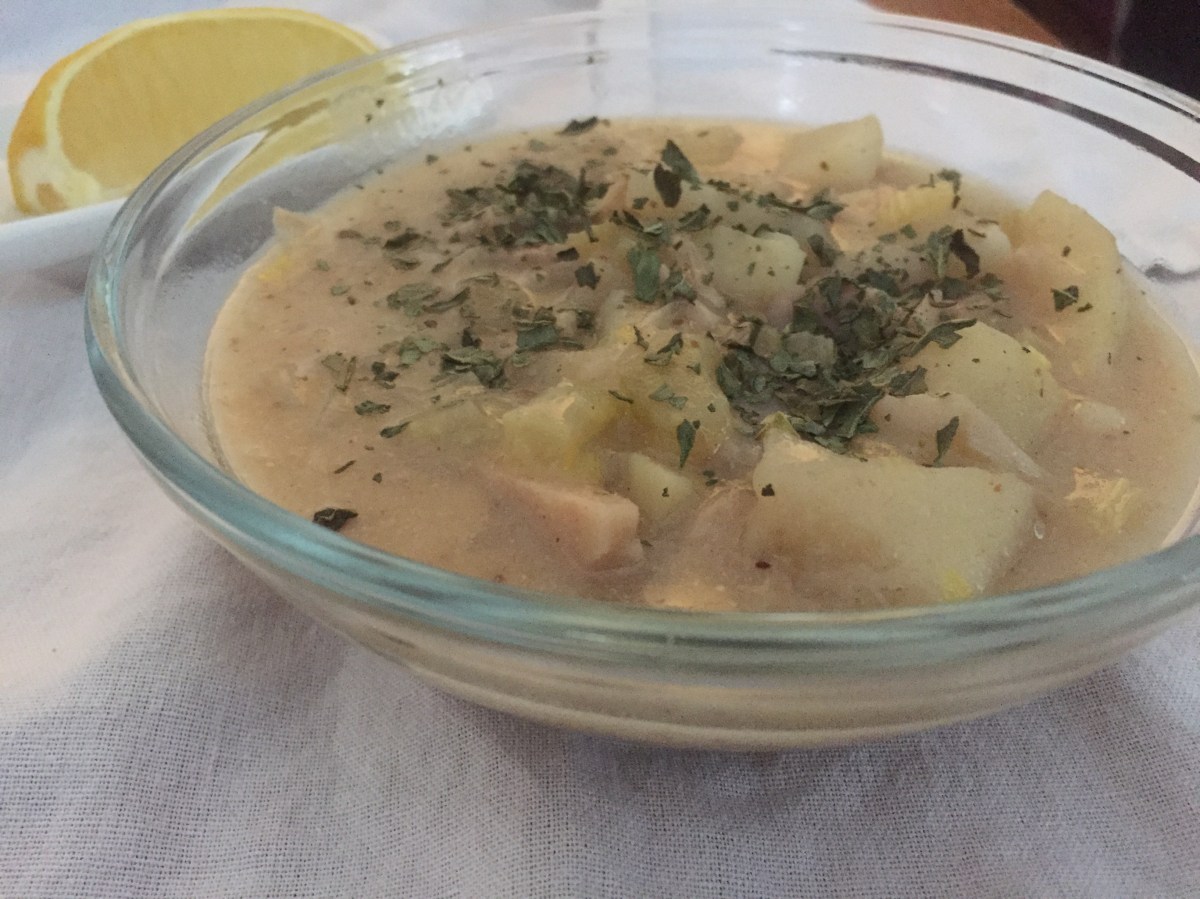
As we all know, when it comes to the cold weather and snow storms nothing works faster to melt the chills away than a bowl of hot soup, so given the success of my Jackfruit “Crab” Cakes I decided to veganize a seafood classic, the New England Clam Chowder and see if jackfruit would work in this recipe as well.

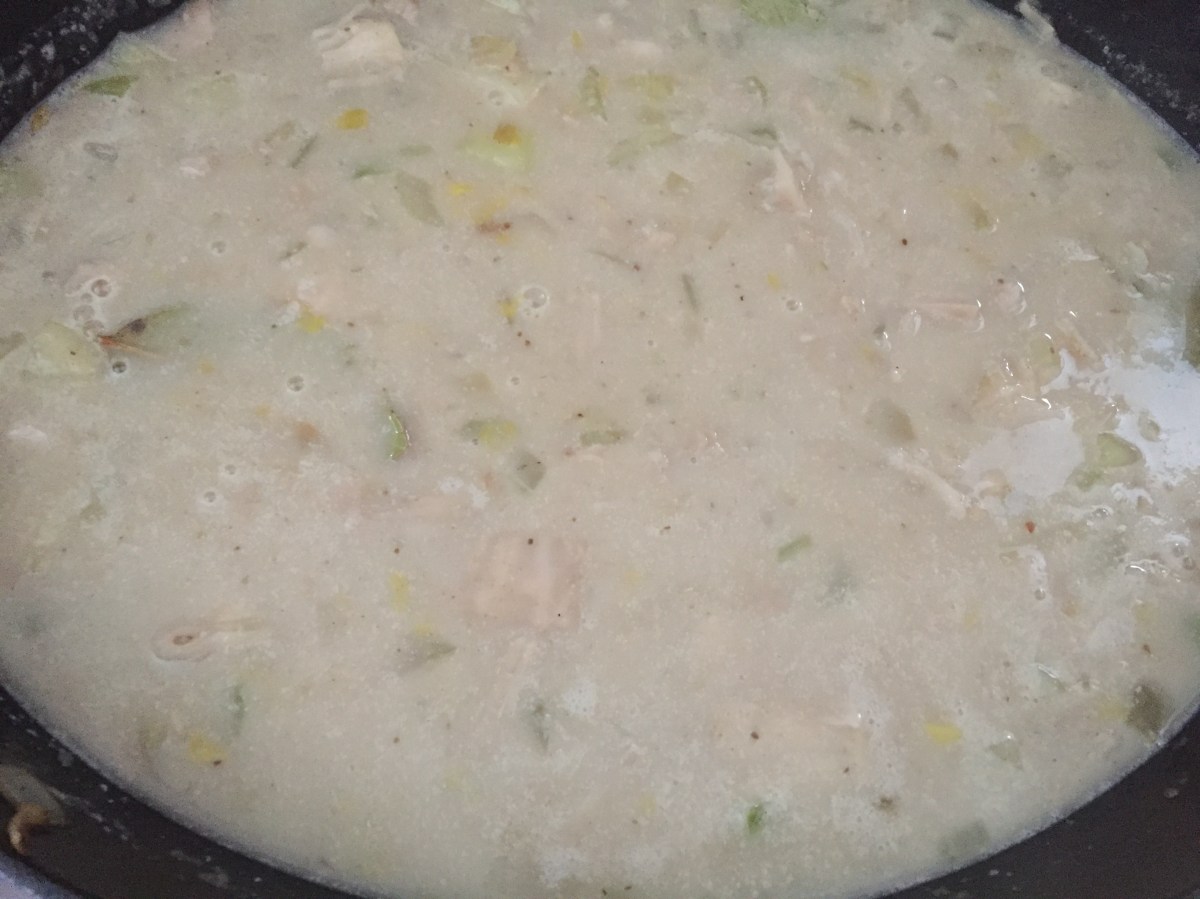
For those of you not familiar with the New England Clam Chowder it is a creamy soup built from butter, heavy cream, celery, onions, potatoes, clam juice and clam meat. I had past success in making creamy soups using potato or corn starch as gluten-free thickening agents, and I was pretty sure that they will work here as well. I was interested to see how jackfruit will do as a stand in for clams and felt confident that it will turn out OK.

But how to make vegan clam juice, which is clam broth and a key ingredient in this soup that adds unique flavor evocative of sea and shell fish posed and interesting challenge. I decided to use some Old Bay Seasoning because it worked so well in my “crab” cakes, and for some extra sea flavor I used some seaweed broth. What I did is to soak two sushi nori seaweed sheets in some warm water for 30 minutes, and then pass the mix through a strainer to remove the seaweed and keep just the liquid. That was my “clam juice”, and it worked!

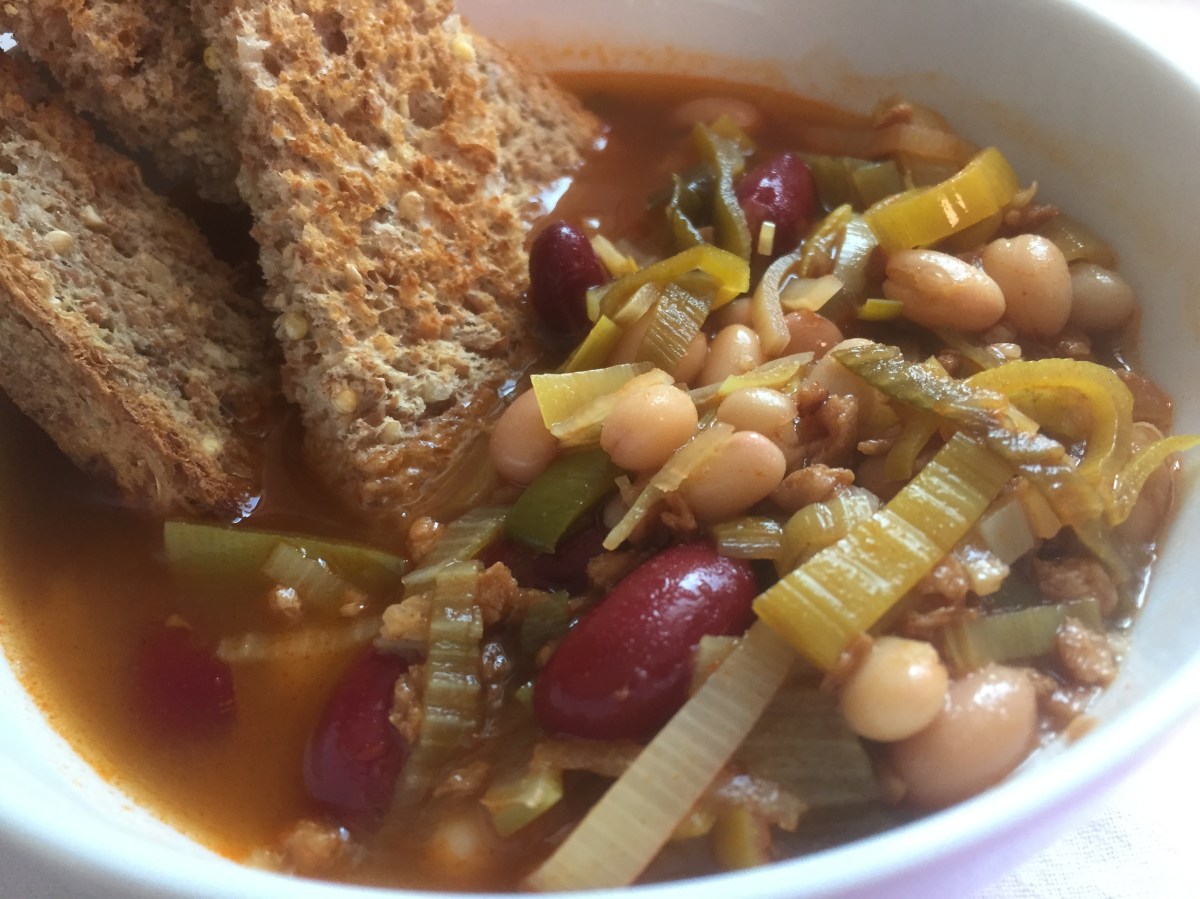
Beside that little neat trick, my one general recommendation is to use a Dutch oven or a similar heavy post with a lid, as the soup does need to simmer for a while. When the soup is done, it is best served fresh with a squeeze of lemon, coarsely ground (cracked) black pepper, a sprinkle of dry basil or fresh parsley, and a piece of bread. There’s nothing better to help you recover from all that snow shoveling!

New England “Clam” Chowder, Gently Simmering, via Eat the Vegan Rainbow

New England “Clam” Chowder

What you’ll need:

1.5 lbs (700 g) potatoes, peeled and diced

1 can (10 oz, 280 g) young green jackfruit in brine

6 stalks of celery

1 large yellow onion

2 tablespoons garlic, crushed

1 tablespoon Old Bay Seasoning

3 tablespoons corn starch

2 tablespoons lemon juice

3 bay leaves

2 sheets of sushi nori seaweed

2 cups hot water

3 cups almond milk

Cooking spray

What you’ll do:

  1. Soak seaweed sheets in 2 cups of hot water for 15-30 minutes.
  2. While seaweed is soaking rinse and drain the jackfruit and pull the pieces apart to create smaller chunks, roughly the size and shape of chopped clams. Set aside.
  3. Peel and dice potatoes, onions and celery.
  4. Spray the bottom of a large Dutch oven, or other heavy pot, with cooking spray and bring up to medium high heat.
  5. Add onions, garlic and celery and sauté for 3-5 minutes.
  6. Add potatoes and continue sautéing for another 3-5 minutes.
  7. Add jackfruit, sprinkle with Old Bay Seasoning, mix well and sauté for another 5-7 minutes.
  8. While the vegetables are sautéing, run the seaweed through a strainer to remove as much seaweed as possible. You should end up with 2 cups of water that is slightly brown and smells like seaweed. That’s your “clam” juice
  9. Mix in the starch into the vegetables, and add the “clam” juice, bay leaves, and lemon juice. Bring the soup to gentle boil, mixing occasionally.
  10. Add almond milk, and keep the soup on gentle simmer for 20-30 minutes. Serve hot, with a squeeze of lemon and a piece of bread.

Copyright © Eat the Vegan Rainbow, 2017

Bean & Leek Soup with Soy Chorizo

beanleeksoup
Bean & Leek Soup with Soy Chorizo, via Eat the Vegan Rainbow

One of my recent impulse buys was Trader Joe’s Soy Chorizo. This chorizo is vegan, as well as smokey and  very spicy so a little goes a long way. I enjoyed it as a topping for an otherwise simple tomato and lettuce sandwich, but I also wanted to experiment a bit and see what else I can use soy chorizo for.

Chorizo and beans usually make for an excellent combination, but I wanted something more adventures than a pot of chili. I decided to mix several types of beans, to diversify the texture of the soup I was building, and in addition to soy chorizo use leeks to expand the range of flavors. The three different types of beans I used are small white beans, black-eyed peas, and dark kidney beans, and I used a canned variety of all three because cooking beans from scratch is not my idea of fun. One thing to keep in mind when using canned vegetables is to rinse them well before use to remove excess salt.

The time I saved on beans, I used to deal with leeks. For those of you who are new to leek, it belongs to the onion family and shares a lot of similarities when it comes to flavor with spring onions (scallions) and spring garlic, which unfortunately is not often found in large supermarket chains. Although I do enjoy leek flavor, I don’t really cook with it often mostly because it does need extensive washing to ensure that all the traces of dirt are removed. The method I use to deal with this is something I’ve seen on Food Network, where you slice the leek and submerge the slices in water. You need to leave chopped leek in for few minutes to let the sediment and dirt fall to the bottom of the bowl, then scoop, rinse and dry the leek slices. They are now ready to go!

cleaningleeks
Cleaning Leeks, via Eat the Vegan Rainbow

Bean & Leek Soup with Soy Chorizo

What you’ll need:

2 leeks

1 15.5 oz (439g) can small white beans

1 15.5 oz (439g) can black-eyed peas

1 15.5 oz (439g) can dark kidney beans

1/2 soy chorizo

32 oz (907 g) vegetable cooking stock

3 bay leaves

Cooking spray

What you’ll do:

  1. Slice leeks across into thin rounds, then separate each round into individual circles. Fill a large bowl with water and submerge leek circles in it. Let them sit for 5-10 minutes. Using a skimmer spoon to remove the leek without disturbing the sediment that has collected at the bottom of the bowl. Give leek one more rinse, then pat dry with the cloth towel.
  2. Spray the bottom of a large pot with the cooking spray and turn the heat on to medium high. Add leek and let caramelize for 5 minutes or so.
  3. Add soy chorizo and stir to mix. If you are using Trader Joe’s brand please make sure that you remove the casing as this is not edible. Break the chorizo to small pieces and brown leek and chorizo mix for 3-5 minutes.
  4. Add well-rinsed beans to the pot and stir. Cook for another 5 minutes, mixing frequently.
  5. Add vegetable stock and bay leaves to the post. Bring the soup to boil, then decrease the heat to low and let the soup simmer for 15-20 minutes.
  6. Serve the soup with some toast, corn chips or freshly baked bread. If you are feeling very decadent, you can top this soup with some Cashew Cream, or vegan shredded cheese of your choice. Some lime juice would work well, too!

Note for those using Trader Joe’s Soy Chorizo: I used only half of Trader Joe’s Soy Chorizo, which added just enough flavor and spiciness to this soup as far as I am concerned. If you prefer more kick, go ahead and use the whole thing. If you are more on a cautious side, save the other half and transform it into my Vegan Mexican Lasagna. 

Copyright © Eat the Vegan Rainbow, 2017

Saffron Brown Basmati Rice

saffron_brownbasmatirice
Saffron Brown Basmati Rice, via Eat the Vegan Rainbow
Basmati rice is a staple of Indian cooking. It’s very long grained and comes with a special kind of nutty flavor. Brown basmati rice enhances that nuttiness so I prefer it to the white variety. Having said that, white basmati rice will work just as well as the brown kind and can me made using the same strategy.

What’s the secret to perfect basmati rice? In my view, the perfect basmati rice is fluffy, and not sticky, with individual rice grains that remain well defined and almost al dente. The best way to get there is to rinse your rice well under cold water, and add it to the boiling water. After you bring the water back to boiling, stir your rice, reduce the heat to low, and leave the lid off to let the water slowly evaporate and the rice gently cook. Rice will be done in about 25 to 30 minutes, and you will need to use the fork to fluff it up before serving.

For the Saffron Brown Basmati Rice I add saffron springs towards the very end, mix them in gently and let saffron release it’s characteristic flavor and intense orange color. This rice has distinct, yet subtle flavor which makes it a perfect accompaniment to any Indian dish, like Vegan Chicken Tikka Masala or Vegan Saag Paneer.

Saffron Brown Basmati Rice

What you’ll need:

1 cup brown basmati rice

2 cups water

5-6 saffron springs

What you’ll do:

  1. Bring water to boil.
  2. Rinse the rice under cold water and add it to the boiling water. Mix well.
  3. Bring the pot back to boil, then turn to low. Mix again. Keep the lid off and let rice cook until all the liquid is absorbed and gone without more mixing. This should take about 25-30 min.
  4. Just before you turn the heat off, add saffron and very gently mix in. Let rice sit for another 5-10 minutes. Fluff up with the fork and serve!

Copyright © Eat the Vegan Rainbow, 2017

Fat Free Roasted Potato Medallions

sweetwhitepotatomedallions
Fat Free Roasted Potato Medallions, via Eat the Vegan Rainbow
Although I came to sweet potatoes late in my life, I’ve been bringing them to my table more often these days. I do enjoy roasted potato medallions, sweet or white, but they usually require some fat to roast well and develop nice caramelization and flavor. So, I gave myself a challenge to develop a method that will produce perfect fat-free roasted potato medallions.

I recently read about par boiling potatoes before roasting them, and was keen to test the method out. It worked! And another thing that helped is using my mandoline slicer to make very uniform potato slices. I used flat cut edge at 1/4 inch (5 mm) setting, and I was happy with the ratio of crunch and soft that I like to see in a great potato medallion.

Russett and sweet potatoes worked well together and roasted at about the same rate, which was great to see. Taste wise, they also got along and worked exceptionally well with some Vegan Herb Mayo on the side.

Finally, I did take an exception to my “no added salt rule”, and used a spice mix that included some sea salt. It is the newly available Everything but a Bagel Sesame Seasoning Blend that Trader Joe’s crew concocted. I loved what this seasoning mix added to these potato medallions, with hints of garlic, sesame seeds, poppy seeds, and onions. But, quite honestly I did find salt to be overpowering and next time I plan to put together my own seasoning mix and see how it goes.

sweetpotatowhitepotato_nofatchips
Fat Free Roasted Potato Medallions before they hit the oven, via Eat the Vegan Rainbow

Fat Free Roasted Potato Medallions

What you’ll need:

2 large Russet potatoes

2 large sweet potatoes

1 teaspoon Everything but a Bagel Sesame Seasoning Blend

What you’ll do:

  1. Preheat oven to 425 F (220 C).
  2. Peel and slice potatoes to 1/4 inch (5 mm) thick slices.
  3. Bring a large pot of water to boil and par boil potatoes for 5-6 minutes.
  4. Drain and dry the potatoes.
  5. Line a baking sheet with some parchment paper and arrange the potato slices with a good amount of space between them. You will have enough potatoes for two baking sheets so depending on how large your oven is you may want to work with half the amount of potatoes at the time. If you have an oven with two levels do remember to rotate your baking sheets half way through.
  6. Roast the potatoes for 15-18 minutes, then flip the slices over and roast for another 15 minutes. Enjoy these potato medallions as an easy snack or a tasty side dish!

Copyright © Eat the Vegan Rainbow, 2017

Vegan Split Pea Soup

yellowsplitpeastew_done
Vegan Split Pea Soup, via Eat the Vegan Rainbow

It is mid-February in New England, and we have already endured three snow storms this month. This is not unusual, and makes February unbearable. Just when I think the winter is almost over, this short month rolls around and brings tons of snow, subfreezing temperatures, messy roads, no-school days… Of course, not everything is gloom and doom, as slopes are inviting and winter wonderland is all around me.

After few hours outside, braving the elements, enjoying the slopes, or just digging the car out of the pile snow, there is nothing better than coming into a warm kitchen and enjoying a bowl (or two) of a hearty soup. Most of us have grown up with some version of the chicken noodle soup. These days, though, what really warms my heart, my tummy and my wallet is split pea soup, and I have recently developed my take on this staple that doubles the amount of vegetables, and ends up with nice, rich consistency. Although my Vegan Split Pea Soup is remarkably hearty, it only takes a handful ingredients and just 30 min to make.

yellowsplitpeastew
Ingredients for the Vegan Split Pea Soup, via Eat the Vegan Rainbow

Please note that there’s nothing Consommé about this one, folks! I recommend serving Vegan Split Pea Soup with a slice or two of sprouted bread, toasted, and you have yourself a heart warming lunch that is sure to fill you up and keep you going well into the cold February winter eve. I hope this soup helps us you power through the last bit of winter!

Vegan Split Pea Soup

What you’ll need:

1 large onion, diced

5 stalks celery, diced

1/2 yellow pepper, diced

4 carrots, cut in rounds

1 pound (500 grams) split yellow peas

1 quart (1 liter) vegetable (vegan) stock, gluten free

3/4 to 1 quart (0.75 to 1 liter) water

cooking spray

What you’ll do:

  1. Spray the bottom of a large pot with cooking spray and turn the heat to medium to medium-high.
  2. Add the vegetables, except the split peas, and let them brown for about 5 min.
  3. Rinse split yellow peas under some cold water and shake the access off. Placing them in a strainer works well. Once rinsed add them to the pot and let split peas brown just for 2-3 min.
  4. Add the stock and water, mix everything together, increase the heat, and bring the soup to boil. Once the soup starts boiling, decrease the heat to low and let the soup simmer for about 30 minutes.
  5. Enjoy as the main dish or as a nice introduction to a more substantial feast.

Note: This recipe works with split yellow peas, split green peas, and lentils. I like to top my soup with some crushed red pepper flakes, black pepper, and some parsley, as you can see from the picture above. Parsley adds a nice, fresh note to the soup and the black pepper and red pepper flakes do give it a bit of a punch. But, if you prefer less heat you can also top this soup with some lemon juice and lemon rind. 

Copyright © Eat the Vegan Rainbow, 2017

Roasted Artichoke Hearts with Cashew Crumble

roastedartichokehearts
Roasted Artichoke Hearts with Cashew Crumble, via Eat the Vegan Rainbow
Valentine’s Day is upon us, and although not as exciting as it once was, I still make a point of preparing a special surprise treat for those I love best, my family. In the past the menu would usually include shellfish, an array of finger foods, and lots and lots of chocolate. This year I am doing something new – vegan and gluten free meal that is healthy and indulgent. Plus, I wanted to have fun and play around a symbol of Valentine’s Day, the heart!

So, I came up with the Roasted Artichoke Hearts with Cashew Crumble as a perfect recipe that has a lot of heart in it. But, there was a major problem with this idea: I don’t know how to cook artichoke. I remember trying to deal with artichokes and realizing that I don’t have the patience required to go from the luscious green bulb to the tasty heart that’s hidden inside it. All I can say it: thank goodness for the can!

artichoke-1305212431k3n
Luscious artichoke, unfriendly ingredient
Using canned artichokes works really well in many recipes, and not wanting to make this dish into a major project I decided to give canned artichokes an opportunity to shine in a roasted dish. I figured that if I can make tofu nice and crunchy, I can do that to canned artichoke hearts as well. The key trick here is to make sure artichoke hearts are fully drained and dried before putting them in the oven. To do that, I left my artichoke hearts in a strainer for couple of hours, and then patted them as dry as I could with a paper towel. I also decided to top them with a cashew crumble, and the result was a perfect combination of crunchy, slightly tart, and very inviting dish that perfectly graced our Valentine’s Day menu.

Roasted Artichoke Hearts with Cashew Crumble

What you’ll need:

2 cans (14 oz/400g) artichoke hearts in water

1/2 cup raw cashews

1 teaspoon dried oregano

1/2 teaspoon garlic powder

cooking oil spray

What you’ll do:

  1. Preheat oven to 425F(220C).
  2. Let artichoke hearts drain in a strainer for couple of hours, then pat dry them with a paper or cloth towel.
  3. Spray an oven proof 8 x 8 in  (20 x 20 cm) dish with cooking spray, lightly, add artichoke hearts, and sprinkle with oregano and garlic. Mix well.
  4. Using a food processor make a cashew crumble. Don’t ground the cashews to a fine meal and make sure that you have a good mix of finely ground and chunky cashew crumble.
  5. Top the artichoke hearts with cashew crumble and splash with another round of cooking spray.
  6. Roast for 20-25 min.

You can serve Roasted Artichoke Hearts with Cashew Crumble as an appetizer, or as a main dish. As a part of a main dish I paired them with Zucchini Spaghetti, but they would work well in any salad, and in a sandwich, with pickles and mustard, or with vegan ricotta and tomatoes.

Note: if you are looking for that special something to spice up your Valentine’s dinner I recommend you try this fabulous Chocolate Pudding I found in Whole Foods’ twitter stream. My tip: shave some orange peel on top to add a lovely citrus aroma and a touch of color. Also, don’t worry about making too much because this pudding will disappear in a blink of an eye. If not, it does store well for couple of days and makes a great kids’ (and grown up) snack.

avocadomousse_02
Vegan Chocolate Mousse, via Eat the Vegan Rainbow inspired by Whole Foods

Copyright © Eat the Vegan Rainbow, 2017

Zucchini is the New Spaghetti

zuchinni_spaghetti
Zucchini spaghetti, via Eat the Vegan Rainbow
Zucchini spaghetti are vegan, gluten free and guilt free pasta for the 21st century! Easy and quick to make, zucchini spaghetti are also versatile and friendly to many different toppings and sauces. I paired them with Roasted Artichoke Hearts with Cashew Crumble, sprinkled with crushed red pepper flakes, and walked away satisfied!

Cooking zucchini spaghetti takes almost no time at all, as the dish is done in less than 15 min. However, transforming zucchini into spaghetti does take some time and some specialized equipment. You’ve likely noticed the rise of spiralizers and spiralizing. My local grocery store chain even carries spiralized vegetables (zucchini, summer squash, carrots and butternut squash). My first attempt at zucchini spaghetti did start from the store bought spiralized zucchini. We absolutely loved the flavor and I wanted to make zucchini spaghetti part of our regular dinner menu. So I needed to find a more cost-effective way to enjoy zucchini spaghetti without paying inflated price at the store or buying a spiralizer.

Here, America’s Test Kitchen came to my rescue. ATK has an excellent post on how to spiralize and cook spiralized vegetables, and one of the suggestions they give is to use mandoline slicer to make spaghetti. Bingo! I resurrected my mandoline slicer from the basement bin of infrequently used kitchen implements, and bought two nice and long zucchini to test this method out. As you can see from the picture, this experiment was a success and two zucchini gave enough spaghetti for 3-4 servings.

All this makes me extremely excited because I finally found something I can use my mandoline slicer for, and I found a low calorie, healthy and satisfying substitute for one of my favorite foods on earth, spaghetti!

Zucchini Spaghetti

What you’ll need:

2 long zucchini

1 1/2 teaspoon minced garlic

cooking spray

What you’ll do:

  1. Spiralize zucchini using a spiralizer or a mandoline slicer.
  2. Heat the skillet with some cooking spray on medium heat.
  3. Add zucchini spaghetti and minced garlic to the skillet. Use tongs to gently move zucchini spaghetti around so it cooks evenly.
  4. Give yourself 5-10 minutes of cooking time and enjoy!

Note: The resulting spaghetti are a bit wet, and what I like to do is to pour excess liquid out once the cooking is done. You can decrease the amount of moisture if you roast the zucchini (this is the method ATK post recommends), or if you scoop put the middle. I think I may try to do that next and see what happens. In that case do remember that you can use what you scoop out in a soup, or a stew. 

Copyright © Eat the Vegan Rainbow, 2017