Hello! My name is Milka.
I like to think of myself as the Goddess of Fruit and Veg, and an Occasional Nut!
For me, one of the most important things is to have fun preparing the food, and sharing the joy with those who you are feeding. My blog's name was inspired by my daughter's love of rainbows, and serves as a daily reminder of the important things in life, like vegan rainbows and well-fed unicorns.
Quinoa with Roasted Cranberries and Pistachios, via Eat the Vegan Rainbow
Like a fabulous supporting actor in a movie, the perfect side dish for a rich, holiday meal is subtle and complementary to the lead actors laid out on the festive table, yet able to make a lasting impression of its own.
This Holiday Quinoa with Cranberries and Pistachios is just that – visually pleasing, with layers of complexity in terms of texture and flavors, yet not overwhelming. Additionally, for anyone putting together a vegan, fully plant-based feast this side dish will add lots of protein to your plate.
Quinoa, just in case you are not familiar with it, is a grain, not a cereal, like wheat, but more like rice, and you would cook it like rice as well. When cooked it actually looks like couscous, and you will need to fork it up the same way. Although quinoa is fine served by itself, given that we are in the midst of fall/winter holiday season I decided to add just a bit to it, by adding some chopped pistachios and some oven-roasted cranberries.
One note on cranberries: fresh cranberries are very tart, and almost impossible to eat without adding a huge amount of sugar to them. I decided to try roasting and that worked to a point. Roasted cranberries are still tart, but a bit of tartness in this dish is actually a nice thing. If you prefer something with less bite, toss your cranberries with some sugar or a sweetener of choice, or simply chop some dried cranberries up – those are most certainly sweet.
Quinoa with Roasted Cranberries and Pistachios, via Eat the Vegan Rainbow
Quinoa with Roasted Cranberries and Pistachios
What you’ll need:
1 cup quinoa
1 1/2 cup water or vegetable stock
1 shallot, finely diced
1 cup pistachios, chopped
1 1/2 cup fresh cranberries – this will yield about 3/4 cup roasted
Cooking spray
What you’ll do:
Preheat the oven to 425 F (220 C).
Wash and sort the cranberries. Place them on a baking sheet lined with foil and roast them for 20-25 minutes. Once soft and slightly browned, take the cranberries out the oven and set aside to cool for a bit.
While cranberries are roasting, cook your quinoa. Mix 1 cup quinoa with 1 1/2 cups water, bring to boil, decrease the heat to a gentle simmer and let quinoa cook for about 20 minutes. Turn the heat off and let quinoa stand for another 10 minutes. Use the fork to fluff up quinoa before using in the next step.
Spray the bottom of a skillet with some cooking spray and place over medium heat. Add finely chopped shallots and let them sauté for 5-8 minutes.
Once shallots are done, add chopped pistachios and let them toast just slightly, for 2-3 minutes.
Add the fluffed up quinoa, mix well, and sauté for 5 more minutes or so.
Turn the heat off and mix in the roasted cranberries. Go gently as they will be very soft and falling apart.
Pecan Apple Baklava with Orange Maple Syrup, via Eat the Vegan Rainbow
A bite of baklava is a shock to the system, but once you have recovered from that first bite you won’t be able to stop eating, usually until your teeth start feeling like they may just fall out from all the sugar. Baklava is a dessert from Middle East that has made its way to Greece and beyond. It is made with thin sheets of dough, the phyllo dough, and it is usually layered, although some recipes do ask that you roll up the sheets into a strudel.
The most commonly used filling for baklava are ground walnuts. And the signature feature of baklava is the super sweet syrup that is poured over the hot baklava immediately after it comes out the oven. The baklava is then allowed to soak up all the syrup, which usually takes a day or so. At the end of that process you end up with a super sweet and very rich piece of dessert on your plate that is very often an acquired taste.
I personally have a bit of love/hate relationship with baklava. It’s been on my mother’s holiday dessert list for as long as I can remember, and I was not a huge fan until she started using apples to break up the heaviness of walnuts and the syrup, and lighten things up.
In this recipe I wanted to combine that insight into what makes a perfect baklava with what makes a great pecan pie, the apple in the eye of every Southern cook, the amazing creaminess combined with the crunch of pecans.
Neither baklava nor pecan pie is actually good for you. They are both full of high amounts of sugar and fat, so my challenge for this Pecan Apple Baklava was to flip the dessert into something much healthier without sacrificing any flavor. I used lots of apples, some pecans, and to sweeten things up a good amount of maple syrup. But, instead of drowning your baklava in pure maple syrup I recommend combining maple syrup with some orange juice, cooking it down a bit, and pouring it over your baked baklava while both the syrup and the baklava are still hot.
There’s not much in putting baklava together. Traditionally, you would use melted butter on each sheet of phyllo dough but you can achieve the same thing with spreading just a bit of water or water mixed with a drop of lemon juice, or a a bit of oil. It’s up to you to decide how much oil you want to use. Here, I use only some cooking spray on my dish, to make sure the baklava slices come out smoothly at the end. For the rest I use plain water. So you will layer a sheet of phyllo dough, brush very lightly with water, layer another one, put your ground pecans on, layer a sheet of phyllo dough, brush lightly with water, lay another sheet, pour pecans, another layer of phyllo dough, then apples, and so on and so forth until you run out of things to layer. One trick for getting the perfect baklava is to slice before you bake. And don’t forget that a bit of oil mist will help brown the top!
Final touch? Make baklava one day ahead. It will be rich, delicious and ready to serve, and you can feel good about serving your friends and family a dessert that is actually full of good for them stuff!!!
Pecan Apple Baklava, via Eat the Vegan Rainbow
Pecan Apple Baklava with Orange Maple Syrup
What you’ll need:
8 oz (225 g) pecans, ground into a rough meal
4 apples, grated and drained of excess liquid
1 lbs (450 g) phyllo dough
1 teaspoon cinnamon
1/2 teaspoon allspice
1/4 teaspoon ground nutmeg
2/3 cup maple syrup
1 1/2 cup orange juice
Cooking spray or oil
Fresh orange slices, for decoration and presentation
What you’ll do:
Preheat the oven to 375 F (190 C).
Using a food processor grind the pecans into a rough meal. You want the pecans to be almost a meal but having few bigger pieces would add some interesting texture, so keep that in mind. Place pecans into a bowl, mix in cinnamon, allspice and ground nutmeg, and set aside.
Using the same food processor with a grater blade, grate the apples. You don’t need to peel them unless you really want to. But you to have to squeeze the excess moisture out using your hands, and set aside. (Keep the squeezed out juice – it’s delicious as a freshly pressed cider which you can enjoy as you are making you baklava!)
Spray the bottom of 9 x 13 in (22 x 33 cm) baking pan with cooking spray and start layering the baklava. Place one sheet of phyllo dough at the bottom, and brush couple of water drops across. Layer the next sheet, sprinkle pecans, layer another two sheets one at a time spreading a drop or two of water in between, sprinkle pecans, then repeat with two more phyllo sheets, spread a batch of apples, 1/2 cup or so, then continue layering following the same pattern until you use up all the ingredients.
Cut the baklava into pieces, spray the top with a bit of oil, and put in the oven for about 20 minutes. You want the baklava to be nicely golden brown.
While the baklava is baking, prepare the syrup by combining maple syrup and orange juice into a saucepan and reducing the volume down to about 1 1/2 cup or so.
Once the syrup and baklava are ready and still hot, pour the syrup over the pastry one 1/2 cup at the time, starting with pouring along the cut sites so that the syrup can penetrate to the bottom of the baklava, and then what ever you have leftover you can pour right over the top. Place the cut orange pieces over the top, cover with foil and let the baklava sit for at least 6 hours, preferably overnight, before serving.
Serve with a cup of strong coffee – and get ready to dance the night away!
Pumpkin Truffles, Traditional and Dark Chocolate, via Eat the Vegan Rainbow
Thanksgiving desserts are all about pies, most often pumpkin, apple, sweet potato, or pecan. Those are the big four, with pumpkin pie being the gold standard. I am not a baker – I mean I do bake, and I have made pies, including the pumpkin variety, in the past, but these pies are a bit too much for me to handle if I am making a big holiday feast.
So, this year I am trying out a no-bake route to a dessert offering that captures the spirit of winter holidays but does not require any oven real estate or lengthy prep work. With this in mind I developed these Spicy Pumpkin Truffles and I did them two ways – Dark Chocolate Covered and the Traditional, which means rolled in cocoa powder.
No baking, a handful of simple ingredients, and your holidays feast will be complete! The only trick, which by the way I am yet to master, is getting an even coat of chocolate. This batch turned out just a bit too irregular but that did not make them any less irresistible – the treats disappeared in a blink of an eye.
The truffles themselves are very easy to mix together and they are inspired by the pumpkin pie recipes. I used some canned pumpkin and mixed it with almond meal, almost flour, and coconut flour. I added some maple syrup to sweeten things up because the pumpkin I was using was not sweet at all. But before you add the sweetener of your choice do try your mix and adjust to taste. Keep in mind that your chocolate is sweet as well, unless you are using bitter kind, so you may need to play around a bit to achieve the right level of sweetness for your taste.
What pulls these truffles over the top are actually the spices. I used ground cinnamon, ground nutmeg and ground cloves. Those three spices blended well with the pumpkin, maple syrup and the almond/coconut flour mix and gave these yummy treats a real winter holidays flair. Bite in, and you’ll forget all about baking and enjoy the no-bake holiday desserts!!!
Pumpkin Truffles
What you’ll need:
1 15 oz. (425 g) can pumpkin
1 1/2 cup almond meal
1 1/2 cup almond flour
1/2 cup coconut flour
2 tablespoons maple syrup
1 teaspoon ground cinnamon
1/2 teaspoon ground nutmeg
1/4 teaspoon ground cloves
12 oz (g) vegan dark chocolate (chunks, chips, or blocks)
3 tablespoons cocoa powder
What you’ll do:
In a large mixing ball combine all your ingredients except cocoa powder and the chocolate – those will come later.
Mix everything well and using your hands for the dough into balls that are approximately 2 in (5 cm) in diameter. Place the preformed truffle balls on a platter and set aside.
Melt the chocolate using either a microwave oven or a double boiler.
Dip half of your truffles into the melted chocolate and place on the platter or a plate that’s lined up with wax paper.
Put your chocolate covered pumpkin truffles in a refrigerator so that the chocolate coating hardens.
Pour the cocoa powder in a flat dish and roll the rest of the pumpkin truffles in cocoa powder.
Arrange the two kinds of Pumpkin Truffles any way you like. You may want to place couple of pieces of cloves in the bottom of your serving dish, or line your serving dish with some finely pulled orange peel. None of this will change the fantastic flavor of the truffles but it will make your dessert tray more festive! Enjoy!!!
Creamy Cauliflower Winter Soup, via Eat the Vegan Rainbow
This soup is pure gold, and by gold I mean absolutely a light delight, and by light delight I mean that it uses none of the usual suspects you can find in a creamy soup. So, on the side of ingredients that this soup does not use you will find cream, butter, and flour, and on the side of ingredients that this soup does use you will find cauliflower, green peas, yellow corn, vegetable bouillon cube, fresh thyme and almond yogurt. Yes, you read that right – six ingredients and you will be done!
The soup comes together in less than an hour and serves four to six people, and if you include on your holiday menu where lots of other goodies are being served as well, this recipe can easily be served to eight people! So, one head of cauliflower with couple of extras can really go a very long way.
All you need to do is wash and chop one large head of cauliflower, put the pieces into a large pot, pour in 3 cups of water, add the bouillon cube, cover, bring to boil and cook the cauliflower for fifteen minutes or so, until cooked through. Let the soup cool a bit – it does not need to be completely cold but you do need to be able to handle cauliflower and the broth safely. Purée the broth and the cooked cauliflower until completely smooth, with either an immersion blender or using a standing blender. I highly recommend getting an immersion (stick) blender, if you don’t already have one. This is a kitchen gadget I use all the time for soups, burgers, even cookies, so I am getting a lot of mileage out of mine.
Place the soup back on the stove top, add green peas and corn, and bring to gentle simmer. You can use either fresh or frozen peas and corn, or even canned. If using the canned vegetables do check the salt content and buy “no salt added” variety. The soup should simmer for about twenty minutes. Turn it off, and then stir in fresh thyme and plain, unsweetened almond yogurt. Serve warm, with a squeeze of lemon if you like (I do!!!), and a handful of oyster crackers or freshly toasted bread.
Creamy Cauliflower Winter Soup, via Eat the Vegan Rainbow
Creamy Cauliflower Winter Soup
What you’ll need:
1 large head of cauliflower
3 cups water
1 vegetable bouillon cube
1 1/2 cup green peas, frozen
1 1/2 cup yellow corn, frozen
1/2 cup almond yogurt, plain and unsweetened
10 springs of fresh thyme
What you’ll do:
Cut the cauliflower florets out, wash them and chop roughly into bits. Place in a large pot, add water and the bouillon cube, cover with a lid, and bring to boil.
Boil the cauliflower for 15 minutes or until fully cooked – cauliflower should be soft and falling apart.
Purée the cauliflower together with the broth it cooked in with a stick (immersion) blender until smooth.
Add frozen (fresh, or canned) peas and corn. If you are using canned vegetables make sure you use “no salt added” and make sure you drain the veggies well before adding them in.
Bring the soup to gentle simmer, and leave it for 20 minutes or so. If you are using canned vegetables you can simmer for less, and 10 to 15 minutes should be plenty.
Turn the heat off, then add thyme and yogurt, mix well and serve. This soup can be a meal on its own, with some freshly toasted bread, or a nice start for your next three course, festive winter holiday dinner!!!
From time to time it’s good to do things just for fun, with no hidden agendas or pretense of deeper meaning attached. This recipe is my example of doing something just for fun and just because.
Few months ago I acquired a spiralizer, one of those machines you hook your vegetables or fruit to and get long, lovely and elegant noodles of various width. I’ve been using it to make great zucchini noodles, and I love it! But, there’s a limit to how much zucchini noodles a person can eat and still remain excited about seeing them on the plate, so I’ve been trying to pace myself and find other things to spiralize. I tried apples – that worked! I tried sweet potatoes and beets – ditto! I tried jicama – thumbs down, and the same goes for celeriac.
One vegetable that did work – meaning it produced a pile of lovely noodles – were baking (Russet) potatoes. So, I decided to have a bit of fun with them and bake them into little piles of potato yarn which we can call Spiralized Oven Fries. All you need to make this recipe happen is a muffin pan, some seasoning of your choice, and a hot oven. What you’ll get is a fun take on oven fries – the fries that look like spaghetti. And that is exactly what I said this post is all about – pure fun!
Spiralized Oven Fries
What you’ll need:
4 medium baking potatoes
Freshly ground black pepper
Freshly ground crushed red pepper flakes
Salt (optional)
Cooking spray, or olive oil
What you’ll do:
Preheat oven to 425 F (220 C).
Wash the potatoes well, and pat them dry.
Spiralize the potatoes without peeling using a fine gauge spiralizer, the same you would use for making zucchini spaghetti.
Season the potato “noodles” with any seasoning you like. I suggested freshly ground black pepper and ground crushed red pepper flakes, making this quite spicy, but you can use any seasoning you like. Let stand for couple of minutes.
Oil the muffin pan with cooking spray or oil.
Take a handful of potato noodles and gently place them into the individual muffin holes. Don’t press them too hard – let the noodles fall where they may, more or less, and try to arrange them so they fit neatly into the space.
Place the muffin pan into the oven and roast for 30 minutes or so, until the tops start to brown. You don’t want them to burn but a bit of browning is nice.
Take the fries out and let them cool for a bit. Then using a fork gently lift them out and plate them. The sort of “muffins” are not really held together by anything so they will fall apart if you are not careful. But if you are you will end up with a serving of fried that had never looked funkier. And that’s worth it!
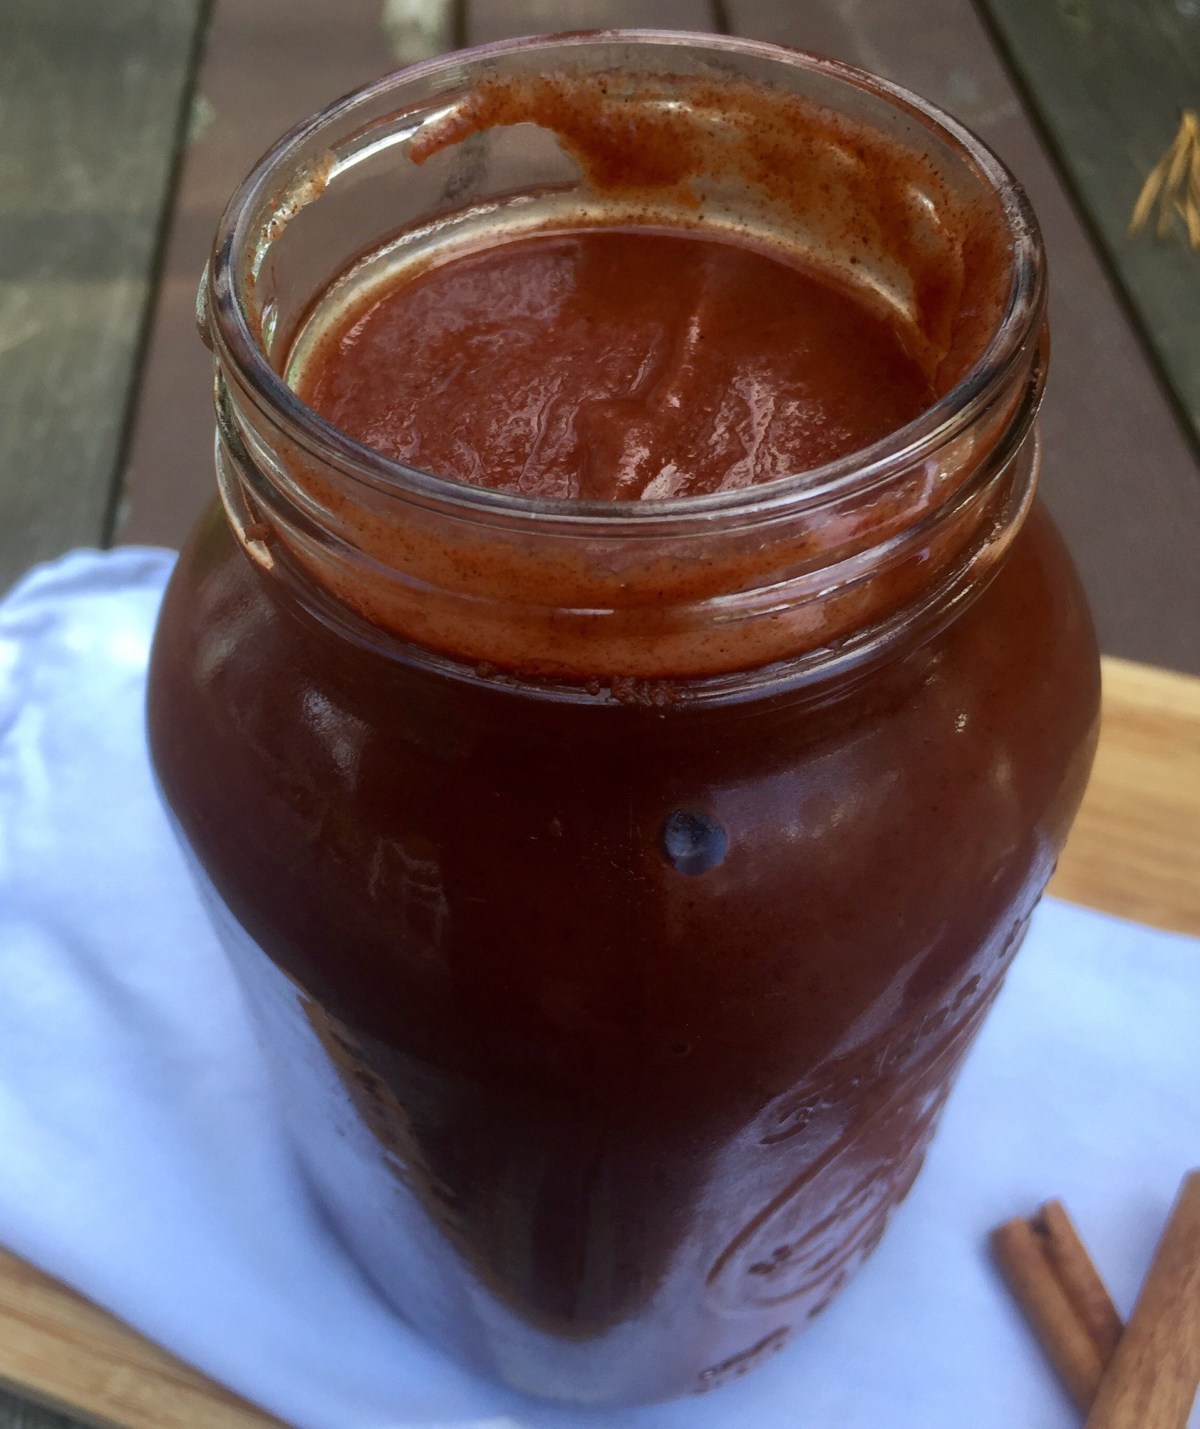
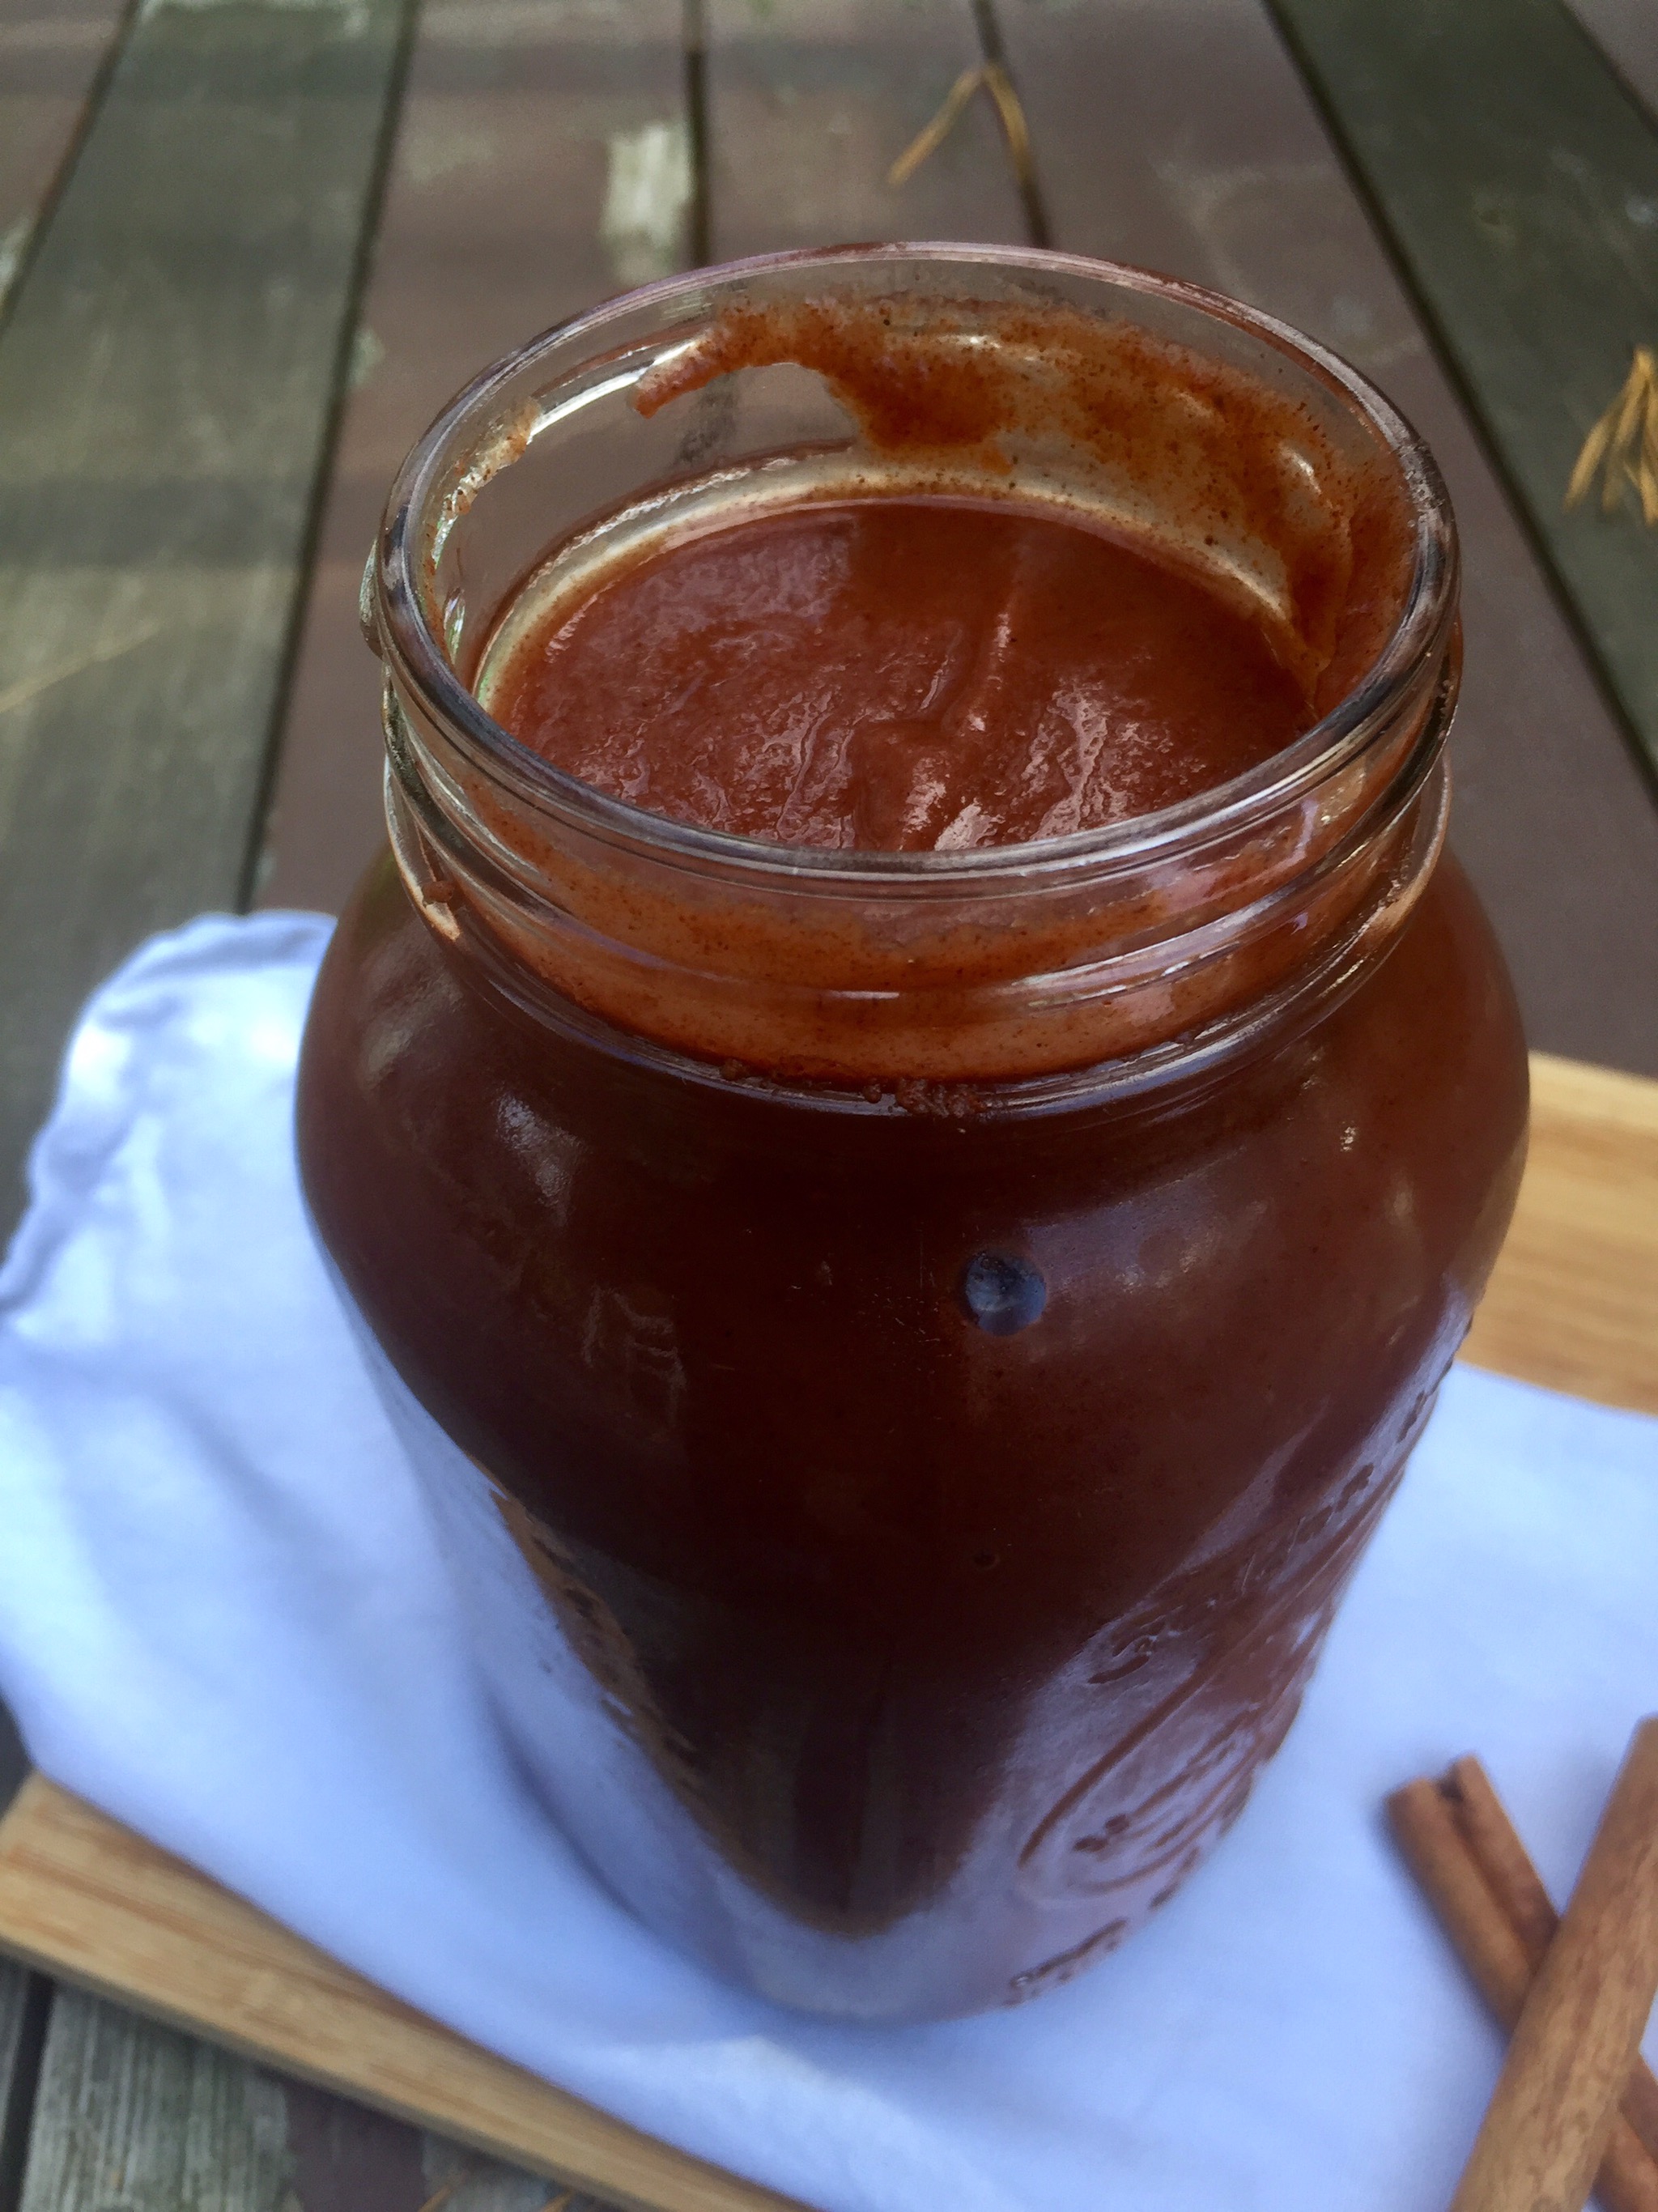
Spice Infused Apple Butter, via Eat the Vegan Rainbow
There is nothing better than freshly picked fruit. I love PYO – Pick Your Own – events at our local farms. They are a perfect activity for friends and family that gets everyone outside and into the nature. These PYO activities support local farms, and provide a cheaper access to perfectly ripe fresh fruit. I also love them for one selfish reason – I am shameless when it comes to taste tasting as I pick and can’t resist biting into an amazing piece of fruit I just picked. Honestly, who could?
The last PYO days are slowly unfolding around me, and I grabbed an opportunity to go pick some apples. The loot included six different varieties, Granny Smith, Jonagold, McIntosh, Pink Lady, Fuji and Empire, and was destined for couple of different things, including a huge batch of apple butter. For the apple butter I used couple of Granny Smith’s, Fuji’s, and Jonagolds. I used my slowcooker (crockpot) to cook the butter since it is really totally hands of – you plug it and forget it for about 10-12 hours. The best time to start cooking is the evening, because your butter can cook overnight and you will wake up to a house that is full of rich aromas.
Those aromas are mostly due to a nice mix of spices that’s make the flavor of this butter. I combined lots of ground cinnamon, some allspice and a bit of nutmeg. There are a lot of apples in this recipe so they drop need lots of spice to make the flavors rich and deep. You could change the spice makeup if you like. Alternative spices to try would be ground ginger, ground cloves, vanilla beans, and/or orange peel.
If you are reading this and wondering to yourself “What is apple butter?”, first of all thank you for being patient, and second, apple butter is sort of apple marmalade or apple jam. It’s thick – thicker than apple sauce – and smooth. It is a perfect breakfast item, for toast, pancakes or waffles, and although I have not tried it I bet it can work great as an ice cream topping! It can be made much sweeter depending on the variety of apples you use, and by adding sugar to it. This recipe does not use any sugar and adding Granny Smith to the mix of apples I used makes the final product just slightly tart.
Spice Infused Apple Butter
What you’ll need:
(If using a 6 QT (5.7 L) crockpot – adjust the amount depending on the size of your crock!!!)
6 lbs (2.5-3 kg) apples
2 tablespoons ground cinnamon
2 teaspoon allspice
1 teaspoon ground nutmeg
What you’ll do:
Wash, dry, peel and core your apples. This will be quite a project so arm yourself with patience, enlist help of your friends and family, or get a peeler/corer/slicer device. I can recommend the KitchenAid standing mixer attachment that does all this for you, but it comes with a high price tag. It’s not essential, but it does help a great deal. Whether you peel the apples it is actually up to you. I wanted a really smooth butter texture so decided to peel them this time around.
Slice the apples and put them a really large mixing bowl. Add the spices and mix well, so that the spices are evenly distributed all over your apples.
Line the crockpot with the crockpot liner (if using – I use it becasue it make cleanup a breeze, but it is not essential). Arrange the apples, put the lid on and turn your slow cooker to 10 to 12 hours. If you have a slow cooker that allows you to select the level of heat, I recommend cooking the apple butter on high.
Let the apples cool before handling further. Transfer the cooked apples into a large bowl and use a stick (immersion) blender to purée the apples into a smooth apple butter. If you don’t have an immersion blender, your regular blender will work but you will have to blend in batches.
Since I am not an expert in canning, I packed my apple butter in two nice big jars, one to give away one to keep. I store my apple butter in the fridge but if you do know how to can things I bet you can make the apple butter, can it and keep it for months.
Miso Soup with Scallions and Rice Noodles, via Eat the Vegan Rainbow
The colder weather is definitely here, and everywhere you look around here you can find picture perfect foliage spanning all shades from deep green, to intensely and furiously red, and everything in between. Autumn… or is it fall? Whatever it is, the warm, fuzzy sweaters are in, and the shorts are out – I like fuzzy sweaters and can’t stand shorts so this is the right season for me! With the new season comes a new menu, the one that is full of roasted root vegetables, pumpkins and winter squash, apples and pies, cinnamon and nutmeg. There will be more of those types of recipes later, but today it will be all about the soup, my take on miso soup that is amazingly easy to make, and definitely rich enough to qualify as a warm and comforting cold weather favorite.
The key ingredient in a miso soup is miso. What is miso, I hear you ask? It’s a fermented soybean paste with salt and koji – a filamentous fungus not unlike the yeast we use in baking. Miso comes in few different versions – I’ve seen white and red miso into stores I go to, but there are others out there so keep your eyes open and read the labels carefully because what you need for this miso soup is the white miso. However, miso soups that you may enjoy in your local Japanese restaurants may be made with different kinds of miso and their flavor will definitely vary.
The recipe here is super fast and super easy. All you need is a pot, some scallions, white miso, and a bunch of thin rice noodles. Scallions will brown in a minute or two, and the thin rice noodles, sometimes called rice vermicelli, will cook in five minutes so, taken all together, from an empty pot to the full bowl, this soup will be ready in under half an hour.
When serving, I also added some Sriracha sauce to my bowl, but that is a condiment that you can definitely skip. Some other types of condiments that would work with this soup are a squeeze of lime juice or a dash of lime zest, freshly ground black pepper, a slice or two of pickled ginger, or some toasted panko. Your choice, your delicious bowl of filling and satisfying soup!!!
Not fan of miso? There are more soup recipes for you to try here.
Miso Soup with Rice Noodles and Scallions
What you’ll need:
6 scallions
1/2 cup white miso
7 oz (200 g) thin rice noodles (rice vermicelli)
4 cups water
Cooking spray
What you’ll do:
Wash the scallions, trim the tops, and some of the green bits that need trimming but definitely use both the white and the green parts. Chop finely.
Spray the bottom of a large pot with cooking spray and place over medium heat. Add the scallions and brown for 1-2 minutes. Keep an eye on the scallions since they can burn quickly.
Add the miso and mix well. Let the miso brown for 1-2 minutes. Stir frequently.
Pour in the water and use a whisk to make sure the soup is smooth and there are no miso clumps.
Bring soup to boil, and once it’s boiling add the rice noodles. Depending on the size of your pot and the water level, the noodles may or may not be completely submerged when you put them in. Don’t force them in, as they’ll break. Wait for the bottoms to soften then gently ease the rest of them in. The noodles need about five minutes and they will be ready.
Let the soup cool just a bit before serving and then enjoy as is or with any number of toppings, like Sriracha, vegan bacon bits, fresh cilantro, squeeze of lime, toasted panko… Options and flavor variations are endless!
Dark Chocolate Almond Butter Cups, via Eat the Vegan RainbowHalloween is almost upon us, which means that piles and piles of candy are everywhere!!! Most of the store bought stuff is, of course, not very good for you. Don’t get me wrong – sweets and candy have their time and place, and a little bit of chocolate at the right moment can go a long way towards restoring harmony in the universe. But finding a vegan-friendly treat that’s rich in flavor yet light in calories, that’s healthy yet decadent, is not easy.
Since transitioning into plant-based, low fat, salt and sugar eating and cooking, I’ve been satisfying my sweet tooth with lots of fruit and lots of smoothies, cookies, apple crumbles, muffins, and even chocolate cake that use tons of fruits and sweet veggies (like carrots, bananas, apples, raisins…) to build sweetness without extra sugar. But, there comes a point in everyone’s life when chocolate becomes a necessity, and here’s my answer for those cravings – Dark Chocolate Almond Butter Cups.
These treats are no-bake and super easy to make. You will need some specialized equipment, like a mini muffin pan, the one with 24 muffin holes, and some mini muffin liners, the same kind you would use to line the pan if you were baking muffins. The liners help hold the cups as well as give them the traditional shapes edges.
When it comes to chocolate, you can use any kind you like. My recipe does not use any additional sweeteners, so all the sweetness comes from the chocolate and from the natural sweetness of the almond butter. That’s why I recommend using semi-sweet dark chocolate that does have some sugar added to it. Alternatively, you can add some maple syrup to the almond butter filling and that will elevate the sweetness level. Having said that, I hope you give my original recipe a try before making adjustments because I thought these Dark Chocolate Almond Butter cups turned out just right!
The recipe could not be simpler. You will need to line the mini muffin pan with liners, melt the chocolate using either a double boiler, which you can make yourself, or a microwave, soften the almond butter and mix it with almond meal and maple syrup extract and then work fast to place a tablespoon of melted chocolate in each mini muffin cup, then place a half tablespoon of almond butter filling, which you will need to shape with your fingers into a tiny patty, on top of each chocolate layer, and finally top the almond butter filling with more melted chocolate.
Assembling these Dark Chocolate Almond Butter Cups is a bit of a mad dash but it’s also a lot of fun, with melted chocolate dripping and the aroma of almond butter filling. If you are wondering why I decided to add artificial maple syrup flavor instead of the real thing the answer is simple: calories! The flavoring agent adds just enough warmth to the filling and contributes no calories to the final treat. If you bothered by the idea of an artificial ingredient, skip it or replace it with a dash of cinnamon and/or splash of vanilla extract.
Once filled, Dark Chocolate Almond Butter Cups go into a refrigerator for 30 minutes or so, which will help them firm up. You should leave them out at room temperature for about the same amount of time before serving and you’ll have melt-in-your-mouth, rich and decadent, yet good for you, treat to share (or not!).
Dark Chocolate Almond Butter Cups
What you’ll need:
2 cups dark chocolate chips or baking dark chocolate chip chunks
1 cup almond butter (unsalted, smooth)
3/4 cup almond meal
1 teaspoon imitation maple syrup (or cinnamon, and/or vanilla extract)
What you’ll do:
Line the 24-hole mini muffin pan with baking liners.
Put your chocolate chunks, pieces or chips, into either a double boiler or a microwave safe dish. If you are using a double boiler make sure you start mixing the chocolate continusouly until melted and smooth. If you are using a microwave I recommend going at 50% power and letting the chocolate go for 1-2 minutes at first and then check it at 30 second intervals. It is usually a good idea to pull the chocolate out when it is about 80% melted and then mix for a minute or two and use the heat of the chocolate to melt the rest.
Place the almond butter in a different bowl and microwave for about 30 seconds. The almond butter should be soft but not runny. Add the almond meal and the flavoring agent of choice. Mix well.
Pour a tablespoon of melted chocolate in each muffin hole.
Use half a tablespoon of the almond butter filling and make a small patty with your fingers. Place the patty on top of the chocolate.
Pour another half a tablespoon to a tablespoon of melted chocolate on top of the almond butter filling.
Place the Dark Chocolate Almond Butter Cups into a refrigerator for 30 minutes or until firm and solid.
Take the cups out of the mini muffin pan, and let them come to room temperature before enjoying. You can leave the paper liner on, or remove it – it’s up to you. Those liners come in many different designs so you can have lots of fun with those as well.
Chicken-less Tikka Masala, via Eat the Vegan Rainbow
Several months ago I shared the recipe for a Vegan Chicken Tikka Masala that used jackfruit instead of the chicken and came together in a slow cooker. I still think that that’s a great, flavorful and aromatic dish and if you are looking for new ways of making and enjoying jackfruit it is definitely something you should try. Having said that, someone did ask about what the source of protein was in a dish like that, and although jackfruit, as well as all the other fruits and vegetables on the planet, has some protein it is not a protein-rich food.
So, I went looking for ways to increase the protein content in the plant-based Tikka Masala and found soya chunks. Soya chunks are not something that’s easy to find in US grocery stores. I was able to find them in Serbia easily enough and I have now also found them on Amazon and in my local Indian grocery store. If you have an Indian grocery store relatively nearby, it’s absolutely worth the trip. I find that the prices in the Indian grocery store I go to are on average three to four times cheaper than online, and things like rice, soy and chickpea flour, and spices are a fraction of the price when compared to my regular grocery store or health food store. Most Indian stores have a freshly made food section as well, so although not many items on the traditional Indian menu are vegan, I’m sure you will find a couple worth trying out.
Back to soya chunks now. Soya chunks are made from fat-free soy meal, a by-product of soybean oil extraction. The meal is molded into different shapes and textures (soya chunks of different shape and size) and dried out to create a shelf-stable, long lasting products. I use several different size of soya chunks, depending on what I am making. For example, the size of soya chunks I chose for a dish like chicken-less tikka masala matches the size of chicken chunks, which are usually about 1 inch (2.5 cm) cubes. An essential step for almost all soya chunk dishes involves boiling soya chunks in water for five minutes or so to rehydrate them. If you are using very fine soya chunks, like TVP (textured vegetable protein), boiling is usually not required but some soaking will be needed. The only TVP application where I advise against soaking is when making burgers, and you can find out why and how come in my recipe.
For this Chicken-less Tikka Masala to work, you will have to marinade soya chunks in a spice-and-yogurt sauce. Basically, you are following all the same steps as you would if you were making the chicken version of this dish, and by the time you are finished all the marinating and simmering nobody will be able to tell that what they are eating is not the real thing. I recommend marinating soya chunks overnight, but if you are in the hurry starting the marinate in the morning and finishing the dish later the same day will work.
The Chicken-less Tikka Masala is best served with some Basamati Rice, and topped with fresh cilantro. For a full restaurant experience you can add some Naan bread and Cucumber Raita, which you can make easily with some finely sliced cucumber, some yogurt, and a squeeze of lemon juice!
Chicken-less Tikka Masala
What you’ll need:
7 oz (200 g) medium soya chunks
2 tablespoon coriander powder
1 tablespoon paprika
1 tablespoon cayenne
1 tablespoon ground cumin
1 tablespoon garam masala
1/2 tablespoon cardamom powder
1 cup cashew yogurt
1 large onion, diced
6 oz (170 g) tomato paste
1 14.5 oz (411 g) can petite diced tomatoes
2 tablespoon vegetable oil (divided)
Fresh cilantro
What you’ll do:
In a large pot cover soya chunks with water, bring to boil, and let cook for 5 minutes. Remove from the heat and let stand for 30 minutes. Transfer soya chunks into a large strainer, rinse with cold water and gently press any access water out. You want your soya chunks to be soft and moist but not dripping with water.
Place one tablespoon of vegetable oil in a pan and heat until the oil is hot. Reduce the heat to medium and add the spices (coriander, paprika, cayenne, cumin, garam masala, and cardamom). Toast the spices for 1-2 minutes, until fragrant. Place the toasted spices into a large mixing bowl and let cool for few minutes.
Once spices have cooled just a bit, add the yogurt and mix well. Next, add the soya chunks, make sure they are well covered with the marinade, and refrigerate for at least 12 hours. If you are in a rush you can cut down the marinating time to couple of hours – in that case leave everything on the kitchen counter.
In a large and heavy pot, like a Dutch oven, heat 1 tablespoon of oil over the medium high heat. When oil is heated, add the diced onion and let it brown for 5 to 7 minutes.
Once the onion is browned, add the tomato paste, mix well and let the tomato paste brown slightly. This will take 3 to 4 minutes.
Next, add the marinated soy chunks together with all the yogurt marinade. Mix well, and let the soy chunks brown just slightly. You will need to give it an occasional stir, but the idea is to let the soy chunks get a chance to caramelize on the edges just slightly. This will take about 10 minutes.
Add diced tomatoes, mix well, decrease the heat to medium low, and let the Chicken-less Tikka Masala simmer for 15 minutes or so. This simmering will allow all the flavors to come together more completely, and the sauce to thicken slightly. If you discover that your sauce is not as thick as you like it, keep simmering until you reach the consistency you like.
Hearty Vegetable Soup with Kale, via Eat the Vegan Rainbow
There’s always room for soup, and in some cases the soup is so rich that there’s room only for the soup. I definitely like making hearty soups that are rich and filling. I’ve already shared with you my split pea soup, which is on the left lighter side, and “clam” chowder and bean and leek soup with soy chorizo, which are both really more a meal in a bowl than a light intro to a main course.
Today’s soup is somewhere in between: not quite hearty enough to qualify as a meal yet not light by any means. It is full with vegetables and resembles Minestrone Soup. The soup builds on the classic mirepoix, a classic base of many soups and stews. Practically speaking mirepoix is a mix of diced carrots, onions and celery that is sautéed until caramelization starts to take place. This what I would normally do when making a soup like this but this time around I had to take a shortcut and I used a lot of frozen and canned veggies, including the frozen peas and carrots mix so my mirepoix started with only onions and celery.
At the end the soup came together well, with frozen corn and canned tomatoes and beans, and a whole bunch of kale. The main trick here was to let the soup simmer for a long time which helps soften kale, which has quite a sturdy leaf structure.
Hearty Vegetable Soup with Kale
What you’ll need:
6 stalks celery, diced
1 yellow onion, diced
16 oz (454 g) kale, roughly chopped
15.5 oz (439 g) can red kidney beans
2 cups yellow corn kernels, frozen
16 oz (454 g) peas and diced carrots mix, frozen
28 oz. (794 g) can crushed tomatoes
32 oz (907 g; 4 cups) vegetable stock
3 cups water
Cooking spray
What you’ll do:
Dice celery and onions to a medium dice. It does not have to be very fine or precise because the whole soup is a bit rustic.
Spray the bottom of a large soup pot with cooking spray and place over medium high heat. Add celery and onions and sauté for 5 to 10 minutes, with occasional stirring.
While onions and celery are cooking, wash the kale and remove any parts of stalk that look particularly tough. Chop the kale roughly into smaller bits. If you are wondering how small should you make them, it’s really up to you. My preference is to keep them at about 2 in (5 cm). Set aside.
Add the frozen veggies in all at once and cook with stirring for 5 to 10 minutes. They will not be completely thawed but they will start to soften.
Add the beans – I usually drain and rinse mine but if you are a fan of keeping all the flavors of canned beans intact (including extra salt they use when canning) go ahead ad just dump the whole thing right in. Stir to combine and cook for 5 minutes.
Add the crushed tomatoes, stir again and cook for another 5 minutes.
At this point you are ready to add the kale. As with all other green leafy vegetables, the raw leaves occupy a significantly larger space than cooked, so don’t panic if adding the kale pushes your pot to its size limits. The kale will settle down. Gently fold the kale into the soup and cook for another 5 to 10 minutes. By the end of this process your pot should look like it can fit the stock and water.
Add the stock and as much water as you like really. What I do is dump the stock into the pot and then use water to rinse the carton out. But if you would like to keep this Soup really dense and almost like a stew you can skip adding water.
Bring everything to boil, lower the heat to low and simmer for another 30 to 45 minutes or until the kale is done to your liking.
Enjoy this soup with some fresh bread, top with some fresh parsley, with a squeeze of lemon or top with a bit of Cashew Sour Cream.
Zucchini Lasagna with Walnut and Brown Lentil Ragù, via Eat the Vegan Rainbow
Let’s cut to the chase and be honest here – although we can pretend otherwise, we are all as obsessed with lasagnas as Garfield is! The layers of soft noodles, amazing sauce, fresh herbs, and most commonly lots and lots of ground meat and soft cheese. All this means that lasagnas are not the healthiest thing on the menu. Having said that, there is no reason to ban lasagnas from your plate; you just need to learn how to keep it healthy and plant-based, and I think I can help you to troubleshoot both of those problems.
Keeping lasagnas meat-free seems to be the problem many have tackled, usually by overloading lasagna with cheese, cheese and eggs, or cheese and a selection of vegetables, like mushrooms, and increasing the amount of tomato sauce and making it chunkier. But, really the most prominent ingredient in majority of meatless lasagna recipes is the cheese. When I was developing this lasagna recipe I did not want to give up on idea of “meat”, so what I came up with is a hearty, meaty, and flavorful walnut and brown lentil “meat” ragù base. My thinking was inspired by my previous, wildly successful Meatless Shepherd’s Pie, which I served for Easter this year as a substitute for a more traditional, lamb-based dish. In that recipe, lentils, mixed with ground mushrooms and cooked with rosemary and thyme, made for an amazing feast.
Here, I wanted to recreate the traditional meat ragù and went for a combination of chopped walnuts and dark lentils. The trick is too cook the lentils separately and add them to the rest of the ragù when they are fully cooked. Also, chop your walnuts into pieces that are about the size of what ground meat pieces may look like. I chopped the walnuts by hand, just by going over walnut pieces with a knife few times, back and forth. You can buy whole walnuts, or walnut halves in store and start from there, but for this a bag of walnut pieces will make your life easier and make the dish cheaper. Walnuts work really well in this lasagna, because they add some of their natural crunchy texture, protein, and a bit of fattiness to the otherwise very lean recipe. Worried about this extra fat? Walnuts are known for having a lot of unsaturated fat, which is the good kind, so don’t skip it! The meatiness of the ragù is further enhanced by a good amount of tomato paste and crushed tomatoes and letting the ragù simmer for a while.
Walnut and Brown Lentil Ragù, via Eat the Vegan Rainbow
The preparation of any lasagna happens in several stages and this one is no different. In order to make the process more efficient I recommend that you start roasting the zucchini at the same time you start making the ragù, and then start boiling the lasagna noodles when zucchini is just about done. In that way you don’t even need to turn the oven off, you can just lower the temperature from roasting to baking and be ready for lasagna to go in immediately. Please note that I don’t use zucchini as a complete lasagna noodle replacement. I suppose you could, but then you’ll end up in a more of a Zucchini Mousaka territory than lasagna paradise. If you are concerned about gluten, there are now many gluten-free lasagna noodle options for you to choose from and most of them work perfectly.
The final touch on this lasagna is the Béchamel sauce (besciamella), which is a white sauce traditionally made with milk, butter and flour. In this case, the quick white sauce I put together requires only a blender, some soft, silken tofu, a squeeze of a lemon, and a bit of nutritional yeast. It is very much the blend-and-pour type of sauce, so you can do it a in a blink of an eye. The sauce adds a nice, slightly cheesy flavor to this very rich lasagna, and makes for a nice, almost golden glaze.
Zucchini Lasagna with Walnut and Brown Lentil Ragù
What you’ll need (for 9 x 13 in (23 x 33 cm) baking dish):
8-10 lasagna noodles, gluten-free if preferred
1 lbs (450 g) brown lentils
3 zucchinis, cut lengthwise into long strips
2 large carrots, diced
3 stalks celery, diced
1 cup raw walnut pieces, chopped
1/2 yellow onion, diced
1 can (28 oz, 800 g) crushed tomatoes
2 tablespoon tomato paste
1 tablespoon crushed garlic
1 teaspoon dried oregano
1 teaspoon dried basil
3 tablespoons fresh Italian (flat leaf) parsley
1 lbs (450 g) silken tofu
2 tablespoons lemon juice, freshly squeezed
1 tablespoon nutritional yeast
Cooking oil spray
What you’ll do:
Preheat oven to 425 F (220 C).
Prepare the lentils according to the instructions on the bag. Basically, bring 4 cups of water to boil and add the lentils that have been washed and picked over to remove any impurities that may have made their way to the lentils. Bring the lentils back to boil than lower the heat to a gentle simmer, and cook for 20 minutes or so, until lentils are completely cooked. Drain the lentils from excess water and set aside to cool.
While the oven is preheating, and lentils are cooking, prep your veggies. Peel, wash, and dice the onions and carrots, and wash and dice the celery. Wash the zucchini well, remove the ends, then cut into long, thin strips. You can use a mandolin slicer for this, but cutting by hand also works. The zucchini slices should be as close to the thickness of the lasagna noodles as possible, but you don’t need to go crazy here – just keep in mind that a bit thinner is better.
Line a baking sheet with parchment paper, place the zucchini slices on and spray with cooking spray. You may need to use two baking sheets, since you may discover that you can’t manage to have all your zucchini slices arranged in a single layer. Don’t pile the zucchini on top of each other and do roast in batches if needed. Place the zucchini “lasagna noodles” into the oven to roast. The roasting will take anywhere between 15 and 25 minutes and will depend on the thickness of your zucchini. Keep an eye on the oven and if you are roasting two pans of the zucchini at the same time do rotate the pans mid way through the roasting. You will know that the zucchini is done when the edges are slightly brown and the middle is golden. Once you take the zucchini out, decrease the oven temperature to 350 F (175 C).
While the zucchini is roasting, start your the ragù. Spray the bottom of a Dutch oven, or another type of heavy pan, with cooking spray and heat up over the medium to medium high heat. Add carrots, onions and celery and let them brown for 10 minutes. Add chopped walnuts and let them pan roast for about 2 to 3 minutes. Add garlic, oregano, and basil, and let the flavors develop for a minute. Next comes tomato paste – add it to the pan, mix well and let brown just slightly. This takes about 2 minutes or so. Add the cooked lentils and the crushed tomatoes, and mix well. Let the ragù simmer for 10 to 15 minutes. Turn the heat off, add the fresh parsley and mix well to combine.
Once the ragù is simmering, it’s time to start cooking your lasagna noodles. Most varieties ask for a large pot of boiling water and about 10 minutes of boiling time. The noodles don’t need to be cooked all the way through as they will continue to cook in the oven but they do need to soften quite a bit, so 8 to 10 minutes should be enough to achieve that. Drain the noodles and use immediately.
Combine tofu, lemon juice and nutritional yeast in a blender and blend until smooth. Set the besciamella to the side.
Spray the bottom and sides of your 9 x 13 in (23 x 33 cm) pan with some cooking spray. Cover the bottom liberally with the ragù (use about a half of the amount you made), layer the first set of noodles (for me that came to about 5 noodles per layer), then layer the zucchini in a single layer, pour the rest of the ragù, and top with the remaining noodles. Pour the besciamella over and cover with foil.
Place the covered lasagna into the 350 F (175 C) oven and let bake for 30 minutes covered and then about 10 minutes uncovered. Let the lasagna sit for about 10 minutes before serving. I like to add some freshly ground black pepper or a mix of black pepper and red pepper flakes to my lasagna just before enjoying, but you can also sprinkle some fresh parsley, or fresh basil. Have fun!
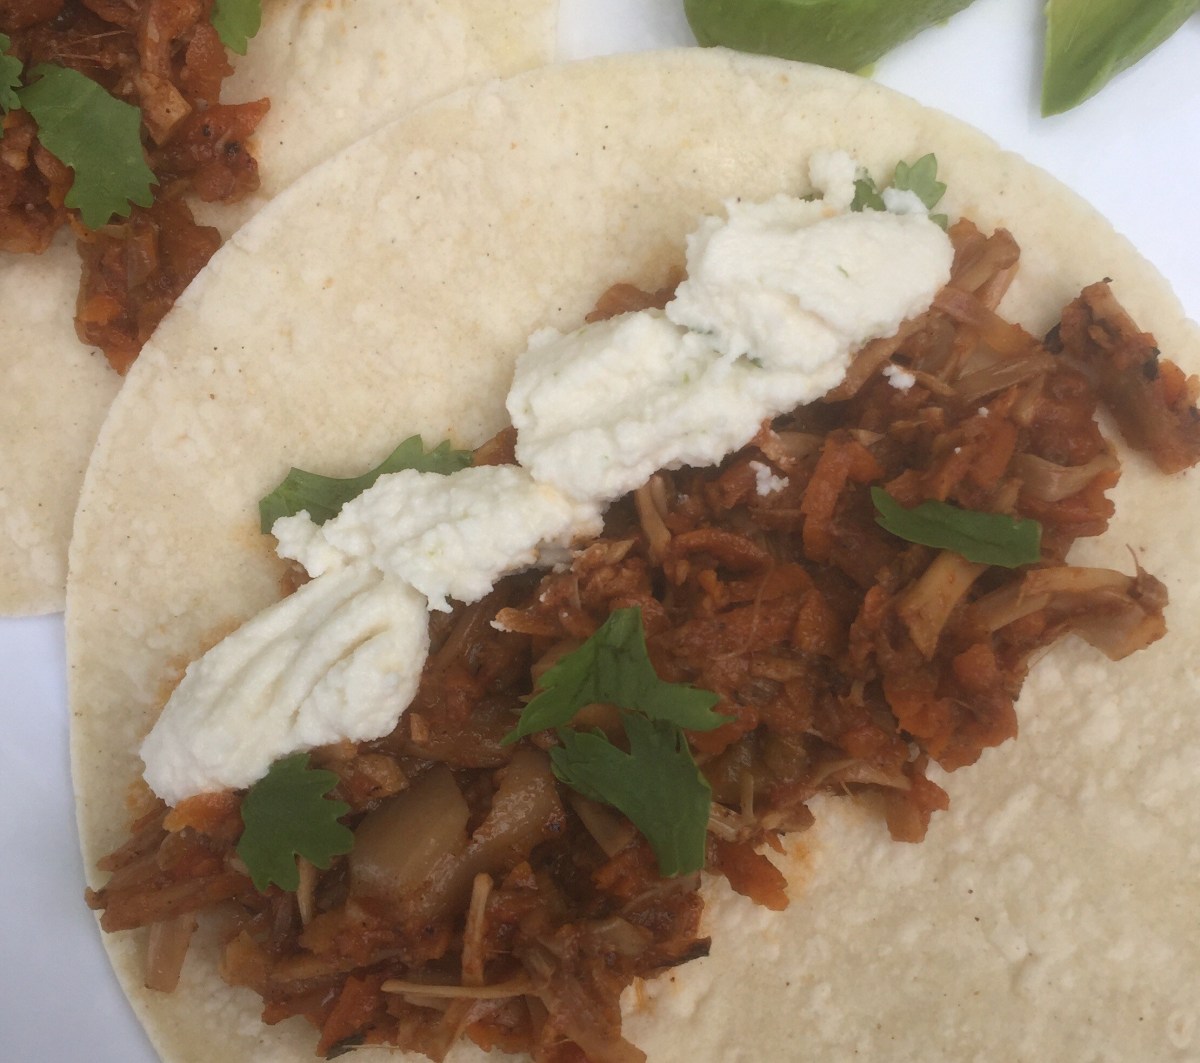
Jackfruit Barbacoa Tacos with Queso Fresco, via Eat the Vegan Rainbow
One of the most amazing discoveries I made when I transitioned into plant-based, vegan, eating and cooking was the jackfruit. I had never heard of jackfruit before but once I read, and then made few recipes I was completely sold on it! The jackfruit recipes I made so far varied from very simple, like tacos, to a couple that replaced seafood and shellfish with jackfruit, like the New England Clam-free “Clam” Chowder and Crab-less “Crab” Cakes, to some that take a bit of time to come together, like the Jackfruit Tikka Masala.
If you are not familiar with jackfruit, it is a beast of a fruit. It is actually the largest fruit produced by a tree, since one jackfruit can weigh as much as 80 pounds (35 kg). Not to worry, most home cooks will not have to carve this beast themselves, because the jackfruit comes chopped up in a can. I recently saw a real fresh jackfruit and was tempted to buy it, but it is just too expensive plus I am not even sure I would be able to handle all the prep work. When it comes to jackfruit in a can, for savory dishes you need to pick young, green jackfruit in water or brine. I drain and rinse the jackfruit well to remove excess salt, and use my fingers to pull it apart and remove any seeds that may be in there and the bits of the hard core. At the end of all that I have a pile of jackfruit shreds that are ready to go.
For this barbacoa I start with a pile of onions and grated carrots to give the dish a lot of sweetness, and by caramelizing the onions and carrots I add smoked flavors as well. There are no tricks here, other than taking it slowly and adding layers off flavor one by one. I start by letting the onions caramelize over the medium heat. Then I add carrots and let them cook through, before adding garlic and a nice mix of spices (dried oregano, cumin, allspice, and paprika) leading the way.
My secret ingredient for this barbacoa is roasted red pepper purée, which is super simple to make. All you need is couple of roasted red peppers, homemade or store bought, a can of fire roasted green chili peppers, and a food processor or a blender. You need to give your peppers a buzz for ten to fifteen seconds, and they will be ready to pour over the barbacoa. Finally, I add the shredded jackfruit and let everything simmer for a while, with couple of additions of water to deglaze the bottom of the pan and get all those flavorful brown bits incorporated into the barbacoa.
You can serve this barbacoa any way you like, but it works really well in tacos. If you are into making your tacos exciting, you can try pairing the jackfruit barbacoa with Macademia Nut Queso Fresco and some fresh cilantro. Yummy!
Jackfruit Barbacoa
What you’ll need:
3 large white onions
6 large carrots
3 20 oz. (570 g) cans of young (green) jackfruit in brine
4 cloves garlic
1 7 oz (200 g) can fire roasted green chili peppers
Peel and slice the onions lengthwise into thin strips.
Spray the bottom of a large Dutch oven with cooking spray and place over the medium to medium high heat. Add the onions and let them caramelize for 10 to 15 minutes, stirring occasionally.
Peel and grate the carrots using a grater or a food processor. You want the carrots to be about the same width as the onions. Add them to the caramelized onions and continue to cook for another 10 minutes.
Peel the garlic and mince by hand or use a garlic press. Make a bit of room in your Dutch oven by pushing the onion and carrot mix to one side. Add the garlic and let it brown for a minute or two.
Push the garlic to the side and add the rest of the spices. Let the spices brown for a minute, until the aromas start to develop. Mix everything together and simmer for couple of minutes.
Put roasted green chili peppers and roasted red peppers in a blender or a food processor. Blend until a smooth purée forms.
Add to the rest of your barbacoa and mix together. Let simmer for couple of minutes.
Add jackfruit to the post, mix everything together and increase the heat to medium high to high. Stir occasionally, but do let your bottom brown a bit before stirring. This will help your jackfruit and the rest of your barbacoa get browned, and look almost as if they came from a grill or a roasting pan. You are going for a bit of burned ends look and feel here, but keep an eye on things and from time to time add a bit of water to deglazed the bottom. This step takes about 15 minutes.
Lower the heat to medium low, put the lid on and let barbacoa cook for another 15 to 20 minutes. Serve hot in a taco, burrito, with rice or beans. Top with sour cream or queso fresco.


